As a manager, one of your key responsibilities is overseeing employee work hours. This includes reviewing, approving, and, when necessary, editing time entries to ensure accuracy and compliance with company policies. To do this effectively, it's important to properly configure the Time Clock settings within your system so that your team can log their time accurately and consistently.
Before employees can begin clocking in and out, you’ll need to enable the Time Clock feature for your team and assign Paid and Unpaid Activities. This setup not only streamlines payroll and reporting but also helps foster accountability and transparency across your workforce.
For more information about how employees use the Time Clock, please see Time Tracking for Employees.
Table of Contents
Navigate to Settings / Workflow / Time Clock Settings.

Options Tab
1. Select the Options tab.
a. This ellipsis allows you to access a Reset if you would like to return to the default at any time.
2. Toggle this switch on to allow your employees to access the Time Clock function.
3. Check this if you would like to give employees the option to select Paid Activities when using the Time Clock. These can be either, or both, the Item Statuses or Custom Activities you create in the Paid Activities tab.
4. When this is checked it will be required for your employees to include an Activity when clocking in.
5. Enabling Unpaid Activities will allow users to select unpaid activities using the Time Clock functionality. These activities can include things like breaks or lunch and can be created in the Unpaid Activities tab.
Note: Any changes made will be automatically saved.

Paid Activities
The Paid Activities tab allows you to review, add, and manage the list of activities employees can select when logging their time.
Adding a Paid Activity
1. Select the Paid Activities tab.
2. Click the Green Plus button.
3. Type a Name into the field.
4. Click the Check to save your Paid Activity.
Note: The X is available if you decide not to save the Paid Activity.

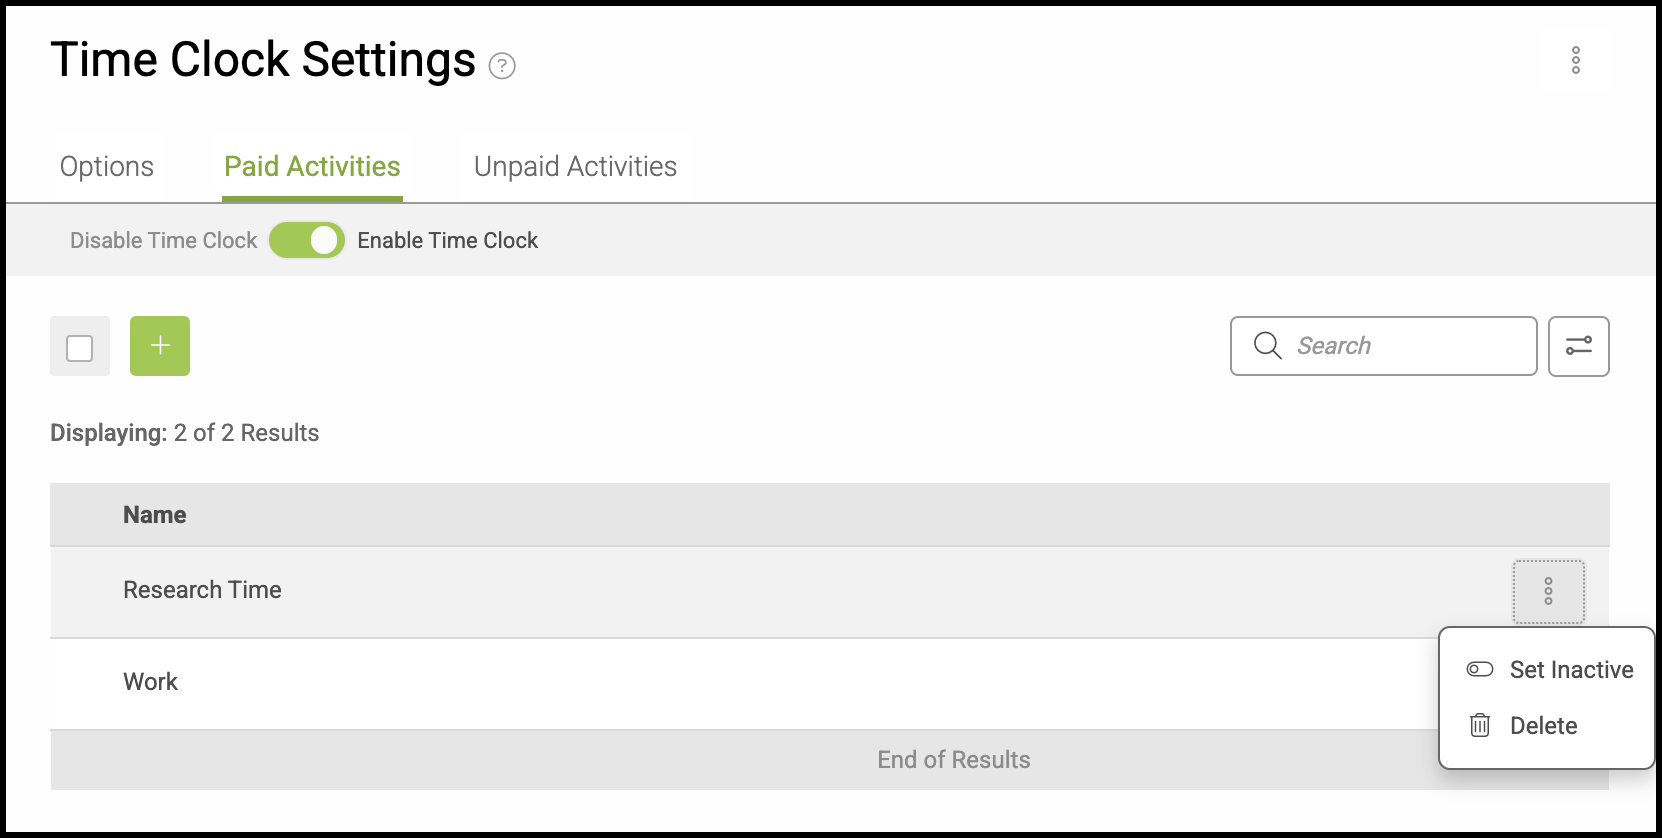
Managing Paid Activities
1. Select the Paid Activities tab.
2. Check the box next to the Activity.
3. Use the dropdown to select Set Inactive / Active or Delete.
Note: Checking more than one Activity at a time will allow you to set multiple activities to Active or Inactive. Bulk deletion is not supported.
Note: This menu is also accessible for single Activity items another way. Please see example below.

Unpaid Activities
The Unpaid Activities tab allows you to review, add, and manage the list of activities employees can select when logging their time.
Adding an Unpaid Activity
1. Select the Unpaid Activities tab.
2. Click the Green Plus button.
3. Type a Name into the field.
4. Click the Check to save your Unpaid Activity.
Note: The X is available if you decide not to save the Unpaid Activity.

Managing Unpaid Activities
1. Select the Unpaid Activities tab.
2. Check the box next to the Activity.
3. Use the dropdown to select Set Inactive / Active or Delete.
Note: Checking more than one Activity at a time will allow you to set multiple activities to Active or Inactive. Bulk deletion is not supported.
Note: This menu is also accessible for single Activity items another way. Please see example below.

Example:

Editing Time Clock Entries
Editing timecards is a permission reserved for managers and owners. This keeps time records accurate and ensures that only authorized team members can adjust work hours or correct errors.
Navigate to Management / My Business / Time Tracking.

1. Select the entry that needs to be adjusted.

a. The Employee field shows which employee's time card you are reviewing. To change this you must go back to the previous screen and select a different entry.
b. To adjust Clock In or Clock Out times, use the dropdown menus shown here.
Note: More information is provided below.
c. This checkbox gives you the option to split recorded Activities into smaller sections, or delete.
Note: More information is provided below.
d. The Activity for the time period can be changed here.
Note: More information is provided below.
e. This ellipsis gives you the option to delete this time card entry.

Adjusting Clock In or Out Times
Once you select the time entry that needs adjustment from the Time Tracking menu, you can modify the Clock In and Clock Out times.
1. Select the appropriate dropdown menu for either the Clock In or Clock Out time.
a. The month bar allows you to scroll forward or back in time by month.
b. Another day may be selected for this time card punch by clicking on the desired day.
c. The up or down arrows allow you to change the hour, minute, or AM/PM.
d. Clicking Done or clicking outside this box will close the dropdown.
2. Click Save to retain changes.

Splitting Activities
After selecting a specific time entry, you have the option to split the Activity listed on the time card.
1. Select the Activity entry you would like to edit using the checkmark.
2. Use the dropdown to select either Split or Delete.
Note: The option to Delete is only present if there are multiple activities listed.
3. Click Save.

Changing Activity Selection
Once inside a specific time card entry, you have the ability to change the Activity selected.
1. Click into the Activity field. This will open the dropdown menu, allowing you to select another Activity.
Note: Additional Activities can be created and managed in Settings / Workflow / Time Clock Settings.
2. Click Save.
