Once an order has been created, you can make changes by going to Sales/Orders and then clicking the Order Number you want to review.

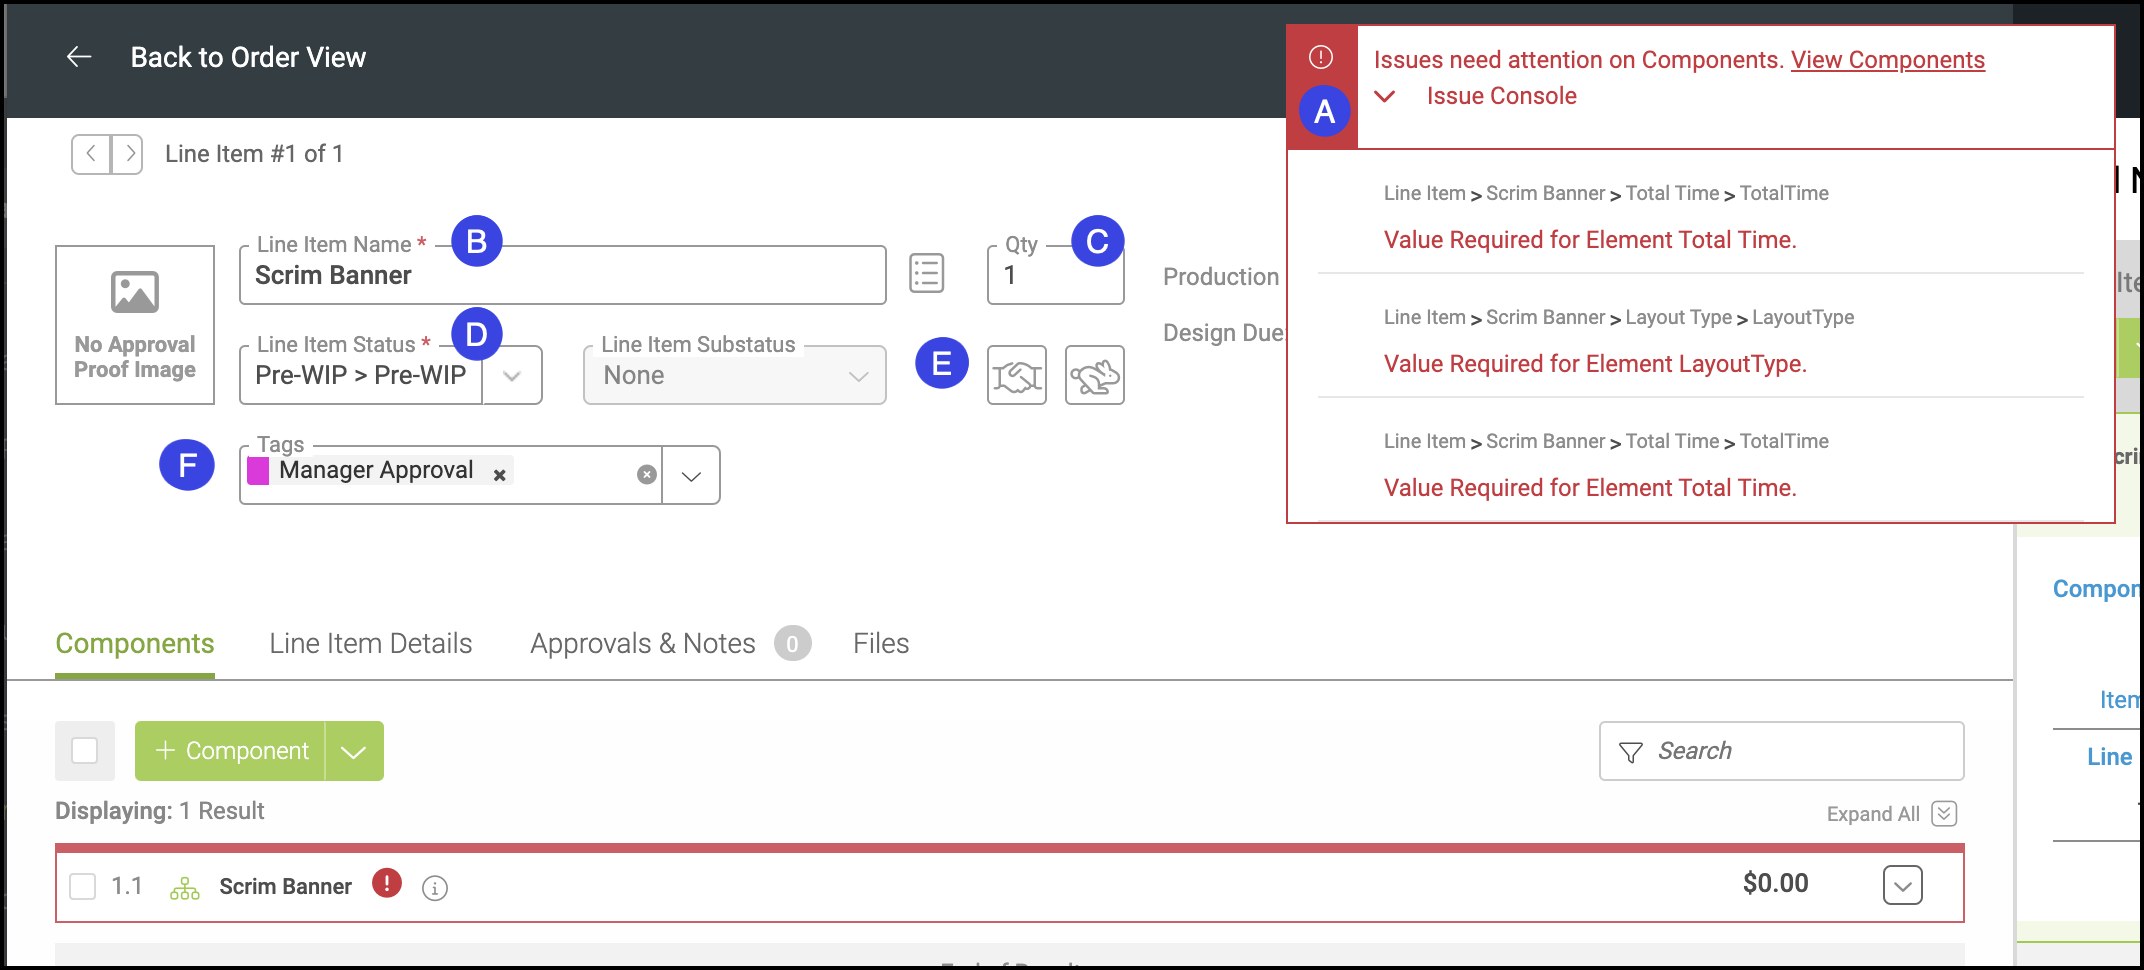
A. If you need to revise more details than those seen on the Line Item’s quick view here, click on the Line Item to open the Line Item Detail View.
Note: If an alert appears when you add your new line item, review the issues and make the necessary changes, then click on the exclamation mark to minimize the alert window.


B. From the Components tab you can change the Line Item Name.
Note: This name will appear on customer-facing documents.
C. Enter the Quantity that you need for this line item.
Note: This may include multiple components and/or assemblies.
D. You can change the Line Item Status from the default you’ve selected in your workflow settings.
Note: This can change the order status if it’s moved backward. It can also move the order status forward if it was initially the last one in an earlier status.
E. Click the handshake icon (Vended orders) and the rabbit icon (Rushed orders) if needed.
F. Tags can be added to help you organize your orders.
Note: These color-coded labels can help you manage your workflow and can be seen on cards and boards.

G. If you have multiple Line Items, you can review them by clicking on these arrows.
H. You can add another Component to this line item if needed.
I. An error seen here can be reviewed by clicking the red exclamation mark discussed previously on point A.
J. Here you can see the Line Item Price.
Note: The price is calculated from the information you entered into your component.
K. This section gives you a quick view of your running total for this line item and also allows you to add/edit Line Item Setup Fees and Discounts.
L. You can add or edit the Material along with its dimensions.
M. Note: Fields like this do not come standard with your system but are customized by you to fit your needs.
N. Enter how many Sides this item has.
O. You can select which Resolution this item has.
P. Check this box if you want to review the Print Details.
Note: This will open the Layout Manager.
Q. Add any modifications you need here.
R. Specify your selected Finishing Options here.
S. You can add a Linked Component here if needed.
T. Click on the Bill of Materials to review the unit cost, component pricing, machine details, time, materials, etc., that are going into producing this item.
U. You can click on the arrow here to review a chart of costs, prices, margins, components, fees, and discounts.

V. Click the Line Item Details tab.
W. You can add a description that the customer will see and one that is only seen internally.
X. Review and edit any Category or Location details here as needed.
Y. Edit the Production and Design Due dates here.

Z. Update or add any Roles or Employees as needed depending on how you have set up your Application of Employee Roles under Settings/My Business/Application of Employee Roles.
Note: The Entered By Role and Employee fields are standard and cannot be edited.
When you’re finished, click Back to Order View at the top or bottom of the module.
Note: The changes you make will autosave as you go.
