Your list of Companies can be found under Sales/Customers/Companies. From here you can review, edit, or add new Companies.
1. To create a company, click the Add button.

2. Enter Company Details such as a logo, the Company Name, and the primary Company Phone number.
3. Select the Default Location that will handle this account.
Note: If you have only one location it will be selected automatically but won’t be visible here. If you would like to add another location, contact supportdesk@corebridge.net to discuss upgrade options.
|  |
4. Enter the Primary Contact or select one from a list of existing contacts. If this contact is also the Billing Contact, check the box below.
Note: A contact can be the primary contact for more than one company, e.g., if there are a number of franchises that this person manages or does the billing for. You can also add more contacts to the company or make another contact the default once the account has been created.
| 
|
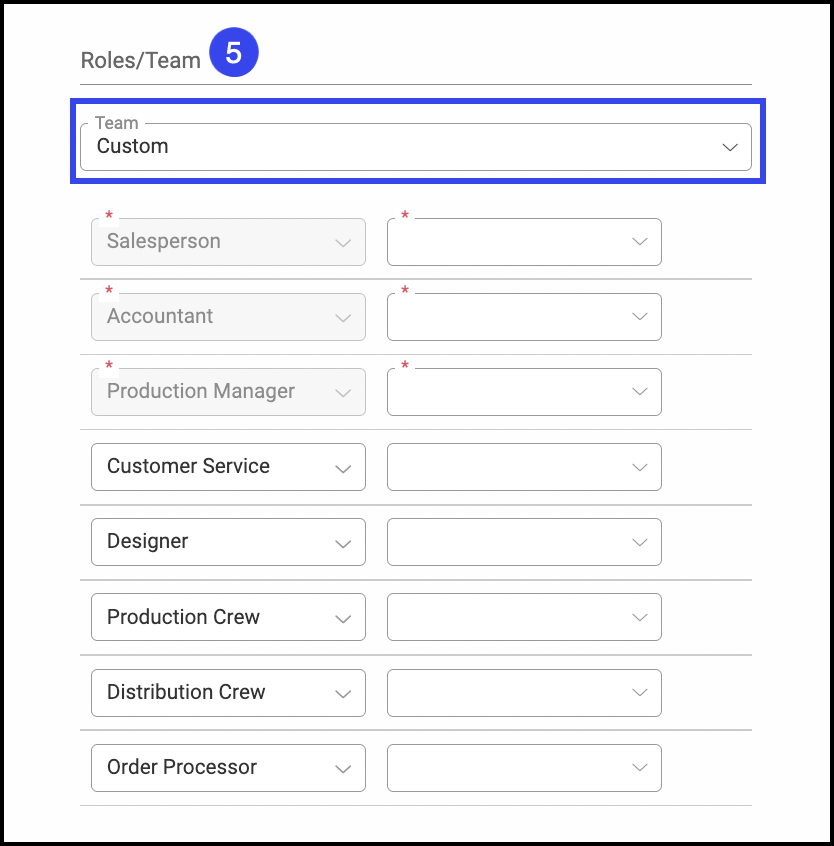
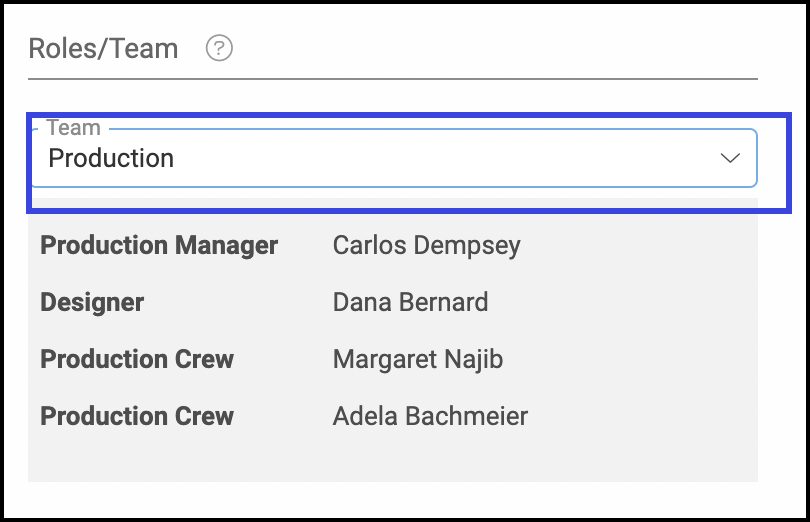
5. You previously set up Roles under Settings/My Business. You can now select which of your employees or Teams will fill the default Roles every time this company places an order or estimate.
Note: If you select Custom Teams, you can add employees to Roles from this screen. If you choose a preselected Team, the Roles and employees will be auto-filled which cannot be edited at the company level.
Roles/Teams to Enter
 | Preselected Roles/Teams
|
6. Select the company’s CRM Information. - The default Status (Lead, Prospect, or Customer) will auto-populate but it can be changed here.
- The Company Origination (how the company heard about you).
- The Industry this company is affiliated with.
Note: You can choose to make Origin and Industry required under Settings/Sales/Company Options.
| 
|
7. Select the Accounting Details for this company including the Pricing Tier, Payment Terms, Tax Group, and Tax ID if needed.
- Pricing Tiers allow you to set prices based on your negotiated rates with this company.
Note: Pricing Tiers will be discussed more in a future training.
- Payment Terms define the deposit and early payment credit rules for this company.
- Tax Group allows you to charge a combined, single rate by grouping agencies—typically local, county, and state/province, national, etc.
- Enter the Tax ID for this company here.
Note: You can make this field required from Settings/Sales/Estimate Options or Order Options.
- Choose whether or not you want this company’s estimates/orders to always be Tax Exempt by default, and if so, add a Tax Exempt Reason.
Note: The Tax Exempt Status and Reasons can be changed at the estimate/order level. Tax-Exempt Reasons are created in the Settings Module/Sales/Reasons Lists.
- Decide if you want to Require PO numbers to be entered on All Orders in WIP status or later before an order can be saved.
Note: You can also make this setting a default from Settings/Sales/Company Options.
| 
|
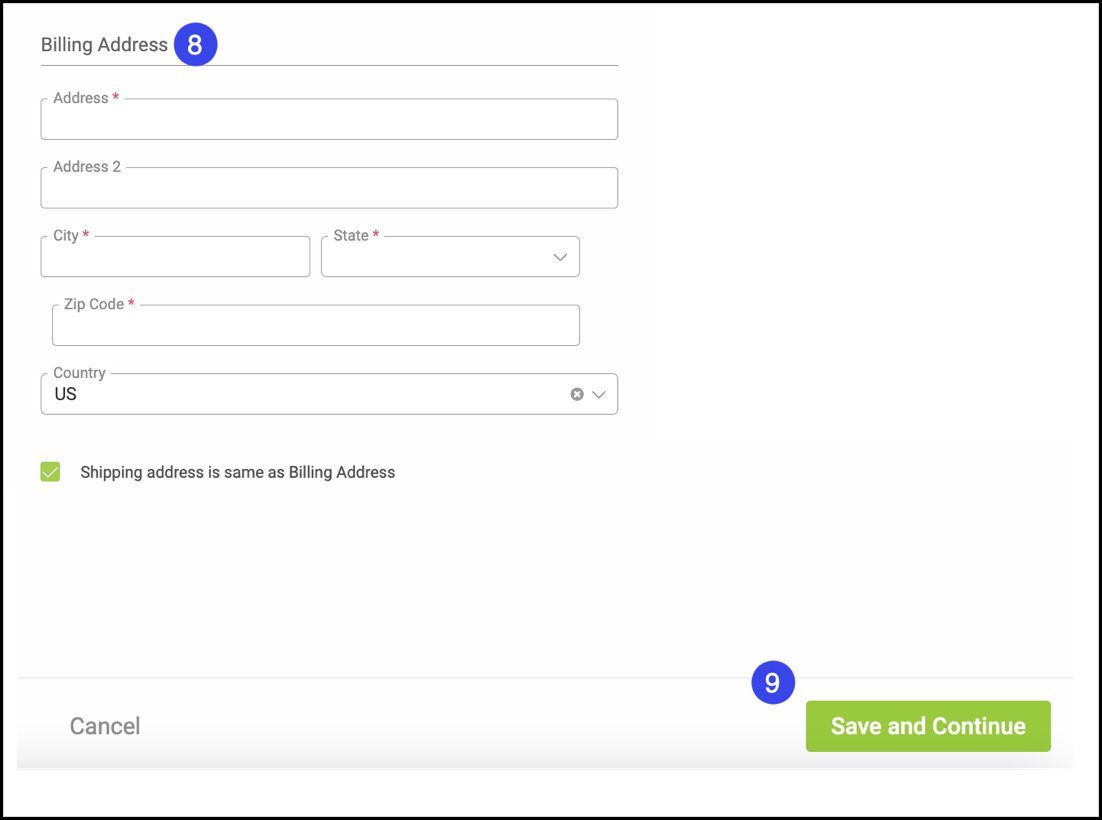
8. Enter the company’s Billing Address and check the box below if this address will also be their shipping address.
Note: At least one address is required when creating an order. You can add other addresses once the company has been created.
9. Click Save and Continue once you’re done.


