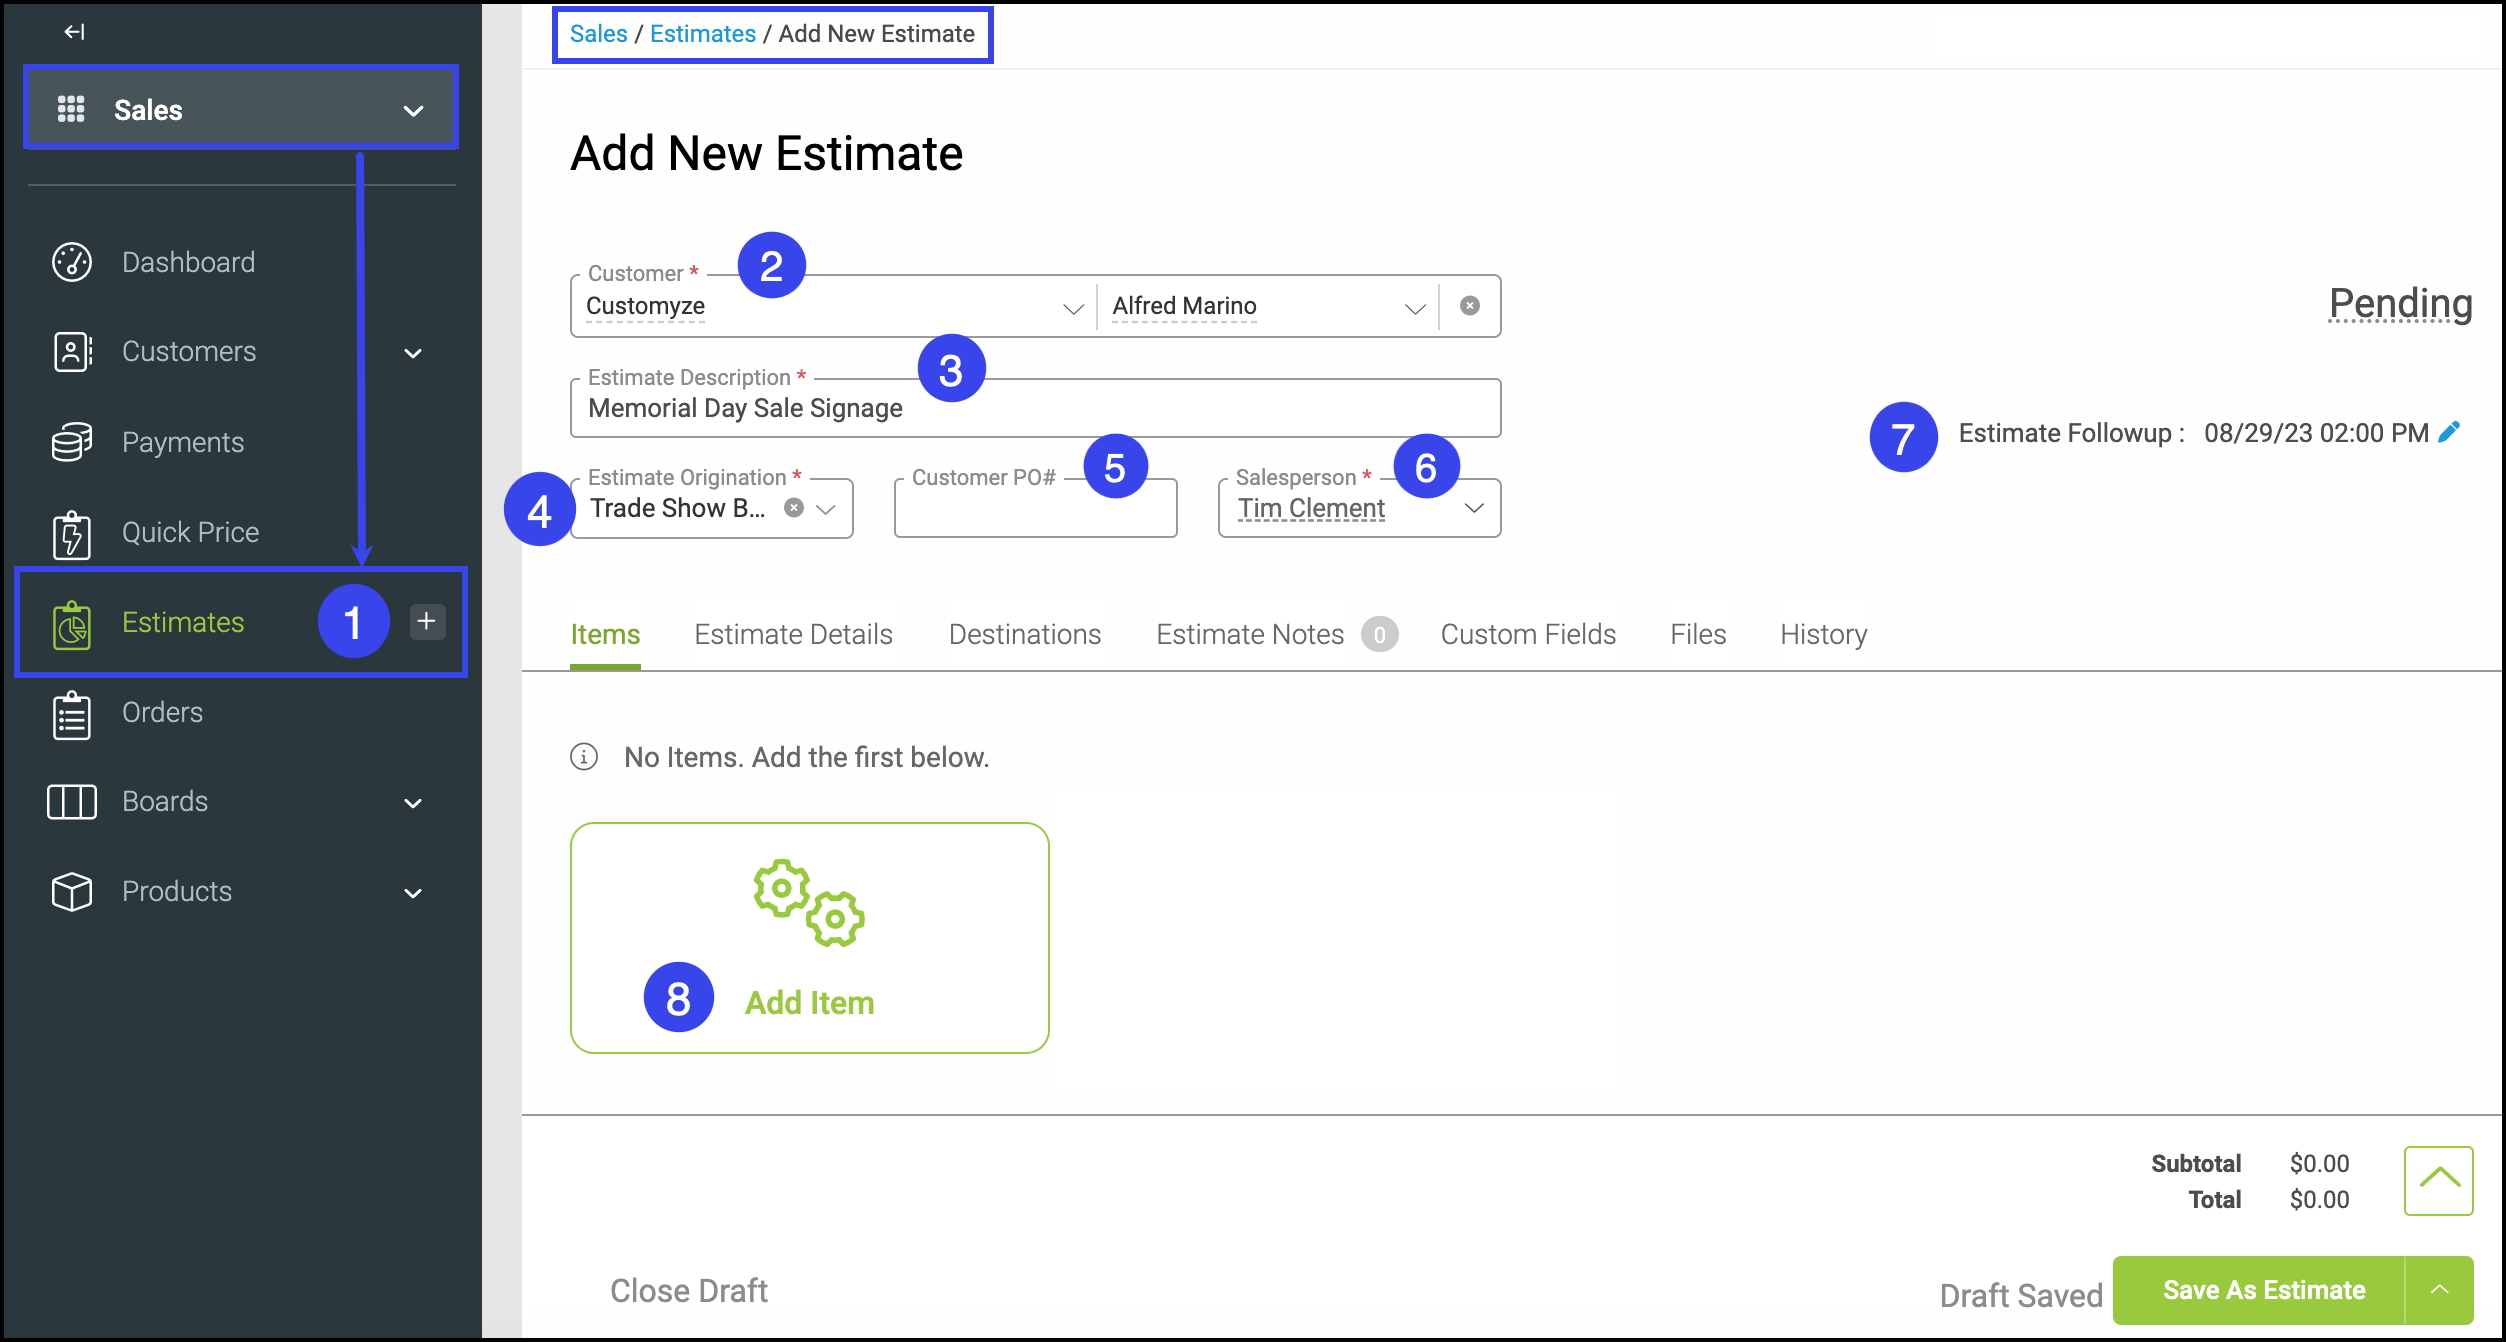
Estimates, a customer’s initial project cost and scope, can be entered from Sales/Estimates.
Note: As you’re building your estimate, a draft will be auto-saved so that you can come back to finish it later. Estimates can also be converted to an order.
1. To create a New Estimate, click the plus sign found under Sales/Estimates.
2. Select the Customer from your dropdown menu or enter a new customer.
3. Give a short Description of the estimate to easily identify it.
4. Enter the Origination that led to this estimate creation, such as advertising, networking events, etc., to help maximize your marketing plan.
Note: You can choose to make this field required or not under Settings/Sales/Estimate Options.
5. Fill in the Customer Purchase Order number here if needed.
Note: You can choose to make this field required or not under Settings/Sales/Estimate Options.
6. Select the Salesperson, if any, that you want for this estimate.
Note: If you’ve set up options in Settings/My Business/Application of Employee Roles to require a salesperson on estimate entry, you will have to select a salesperson before saving the estimate.
7. Review the Estimate Followup Date and time and make edits if needed.
Note: These will default to the estimate options you selected in the settings module.
8. Click Add Item to select items to add to this estimate.

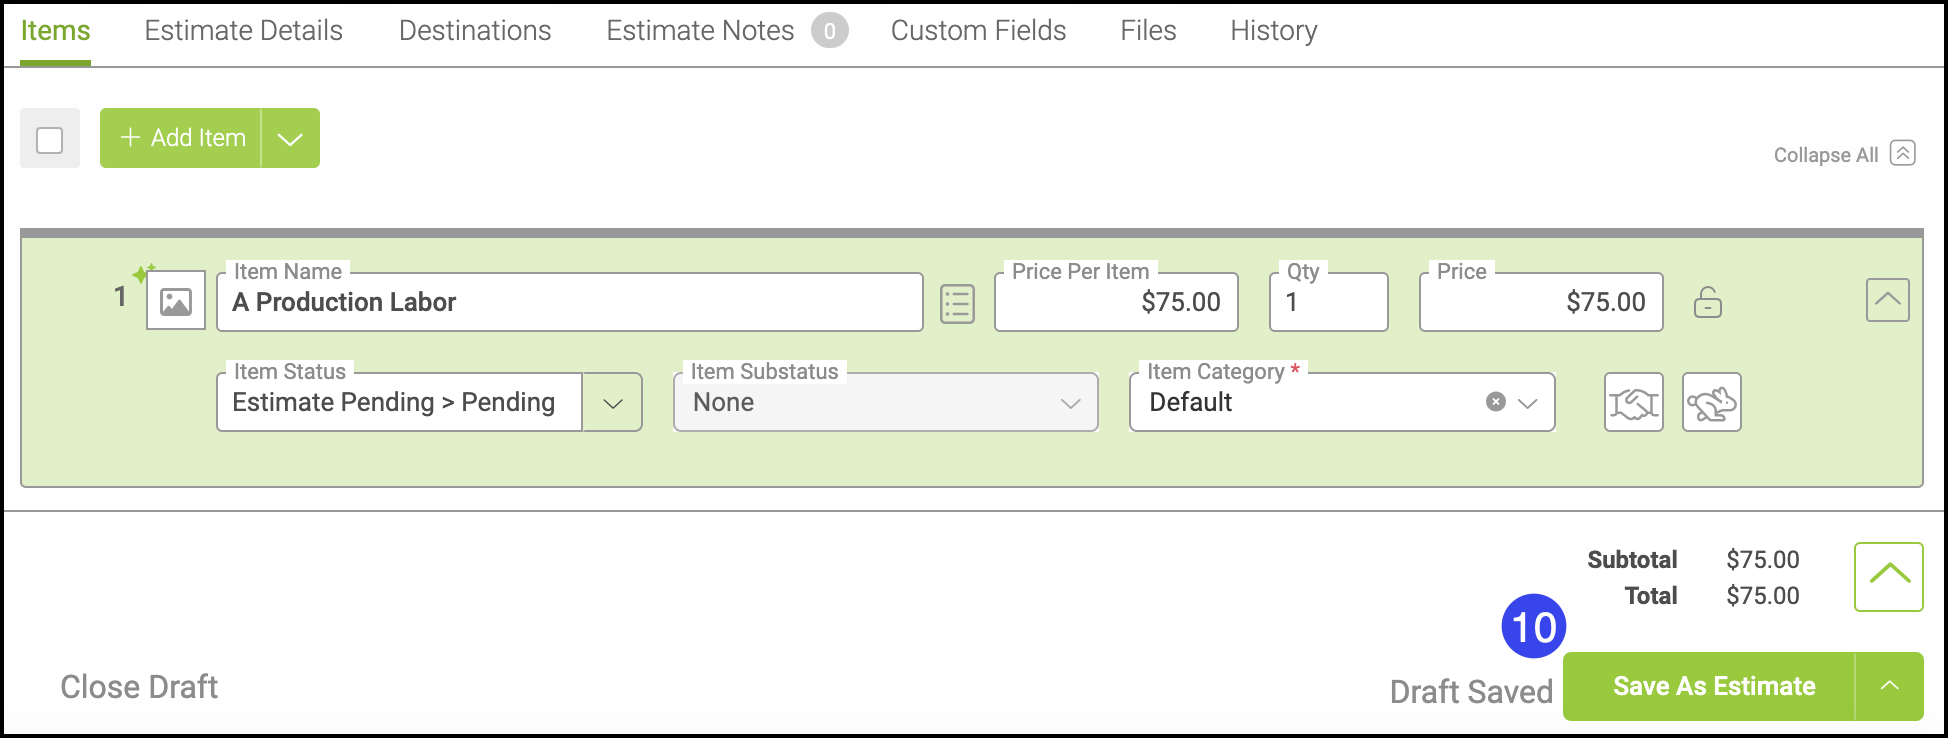
9. Select an item from the list of Assemblies, Labor, Materials, and/or Quick Products, and click Add.
Note: These components can be customized and will be covered in future trainings. The numbers above the component tabs indicate how many items you’ve selected.

10. Click Save As Estimate now or update additional options on the estimate before saving. Once you've saved a new estimate, any changes you make will autosave as you go.
Note: If you add an Assembly or a Quick Product, the Line Item Detail Modal will appear for you to review and edit information if necessary.

