Filters control which data appears in a report. They allow you to narrow results, compare specific segments, and focus on the information that matters most - without changing the underlying report.
The updated reporting experience provides flexible, interactive filters that can be applied directly from the report, including from charts.
Important Information
Results update in real time as filters are added, changed, or removed.
Filters can be applied directly from the report, including from charts.
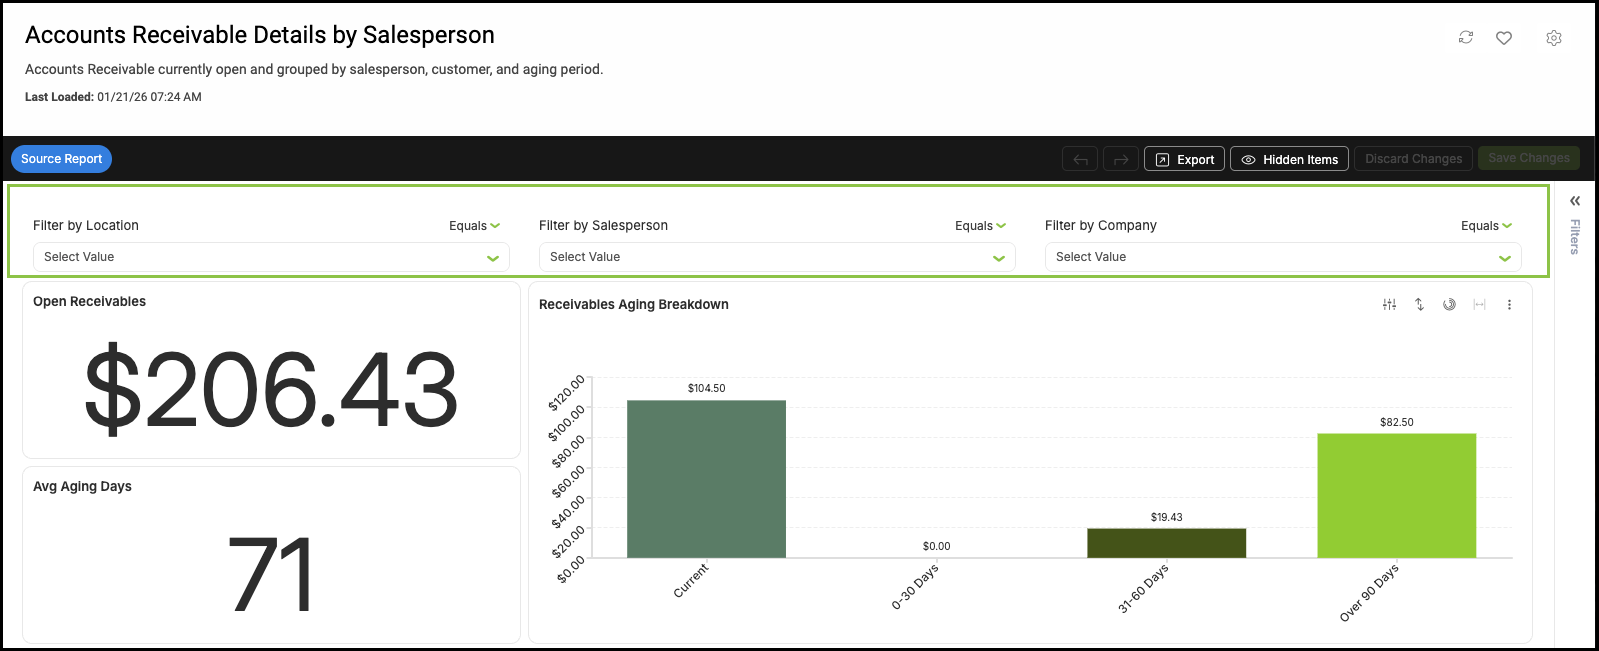
Filter behavior is consistent across all reports. This article uses Accounts Receivable Details by Salesperson as the example.
Table of Contents
- Where Filters Appear
- How Filters Work
- Using Charts as Filters
- Understanding the Filters Side Panel
- Adding Filters
- Related Articles
Where Filters Appear
- Most reports display a small set of primary filters across the top of the page.
- These are the most commonly used filters and apply to the entire report.
- Common examples include Location, Salesperson, Company, or Employee.
How Filters Work
- Leaving a filter blank includes all available values.
- If only one value exists, no selection is required.
- If multiple values exist, leaving the filter blank shows data for all values.
- Selecting one or more values limits the report to only matching data.
- Filters can be changed or cleared at any time.
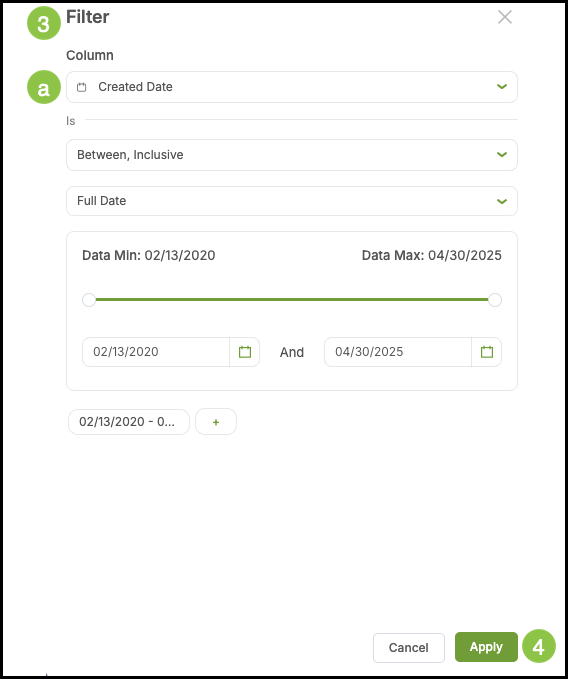
a. This allows you to select how the filter is set.
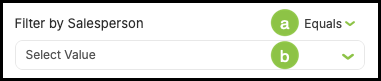
- Equals / Does Not Equal is used on text.
- Date filters include the following options:
- Equals - Select a single date. The resulting data is equal to that date.
- Before - Select a singe date. Results include data up to, but not including, the selected date.
- Before or on - Select a single date. Results include the data up to and including the selected date.
- After - Select a single date. Results include data after the selected date, not the selected date itself.
- After or on - Select a single date. Results include data after and including the selected date.
- Between, Inclusive - Select a date range. Results include data on and between the selected start and end dates.
b. This dropdown allows you to select the filters.
- Date selections include six presets to chose from.
- Use the calendar to click and drag across dates to create a custom selection.
Using Charts as Filters
- Some reports include interactive charts that can act as filters.
- Selecting a bar, column, or segment in a chart automatically filters the rest of the report to show only the data related to that selection.
- For example, selecting an Aging Group in a chart updates:
- Summary metrics
- Related charts
- Tables and detailed rows
- This behavior applies across the report when widgets are built from the same dataset.
- When a filter is added from a chart, the selection also appears in the filter side panel.
1. Click on the item in the chart.
2. Select the filter.

Understanding the Filters Side Panel
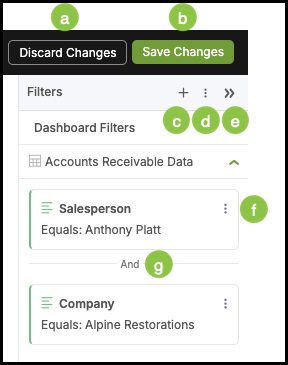
- All active filters can be managed from the filter panel, where you can:
- Temporarily disable a filter.
- Re-enable a disabled filter.
- Remove a filter entirely.
- If a filter is part of the main report layout, it may also appear in the top filter row for quick removal.
a. Clicking this reverts the filter to the last saved changes.
b. Clicking Save Changes keeps your current filters so you can return to them later or use them when downloading or exporting.
Note: Discard Changes and Save Changes are always available as part of the preference toolbar.
c. This opens a pop-up allowing you to select and add additional filters.
Note: For more detailed instructions on adding filters, see below.
d. This ellipsis contains options to disable or delete all filters.
e. The Expand button opens or closes the filter side panel.
f. This ellipsis opens additional options.
- Edit - This opens a pop-up allowing you to make changes in the filter.
- Disable - This turns the filter off without removing it, so it can be quickly turned back on.
- Delete - Removes filter from the configuration.
g. Each filter you add further refines the results, showing only data that matches all selected filters.
Adding Filters
1. Click the Plus button in the Filter Side Panel.
2. Select the Filter.
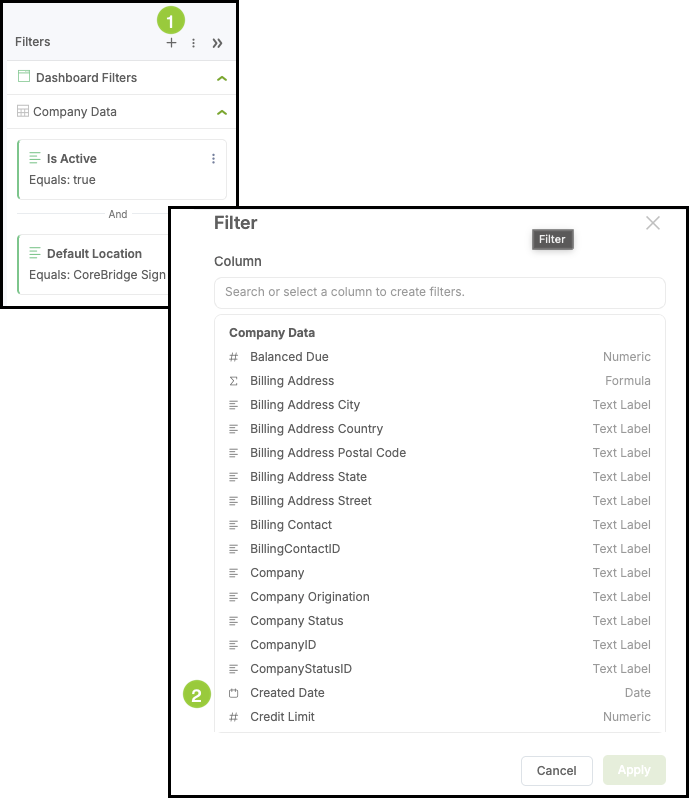
3. Fill in the appropriate details.
Note: Each Filter will have unique fields and dropdowns to fill out or select from.
a. This dropdown allows you to select a different Filter, if desired.
4. Click Apply.