Machines represent the equipment used throughout your production environment. This area allows you to configure and manage Machine records, including the information used for estimating, scheduling, and production planning.
Table of Contents
Accessing Machines
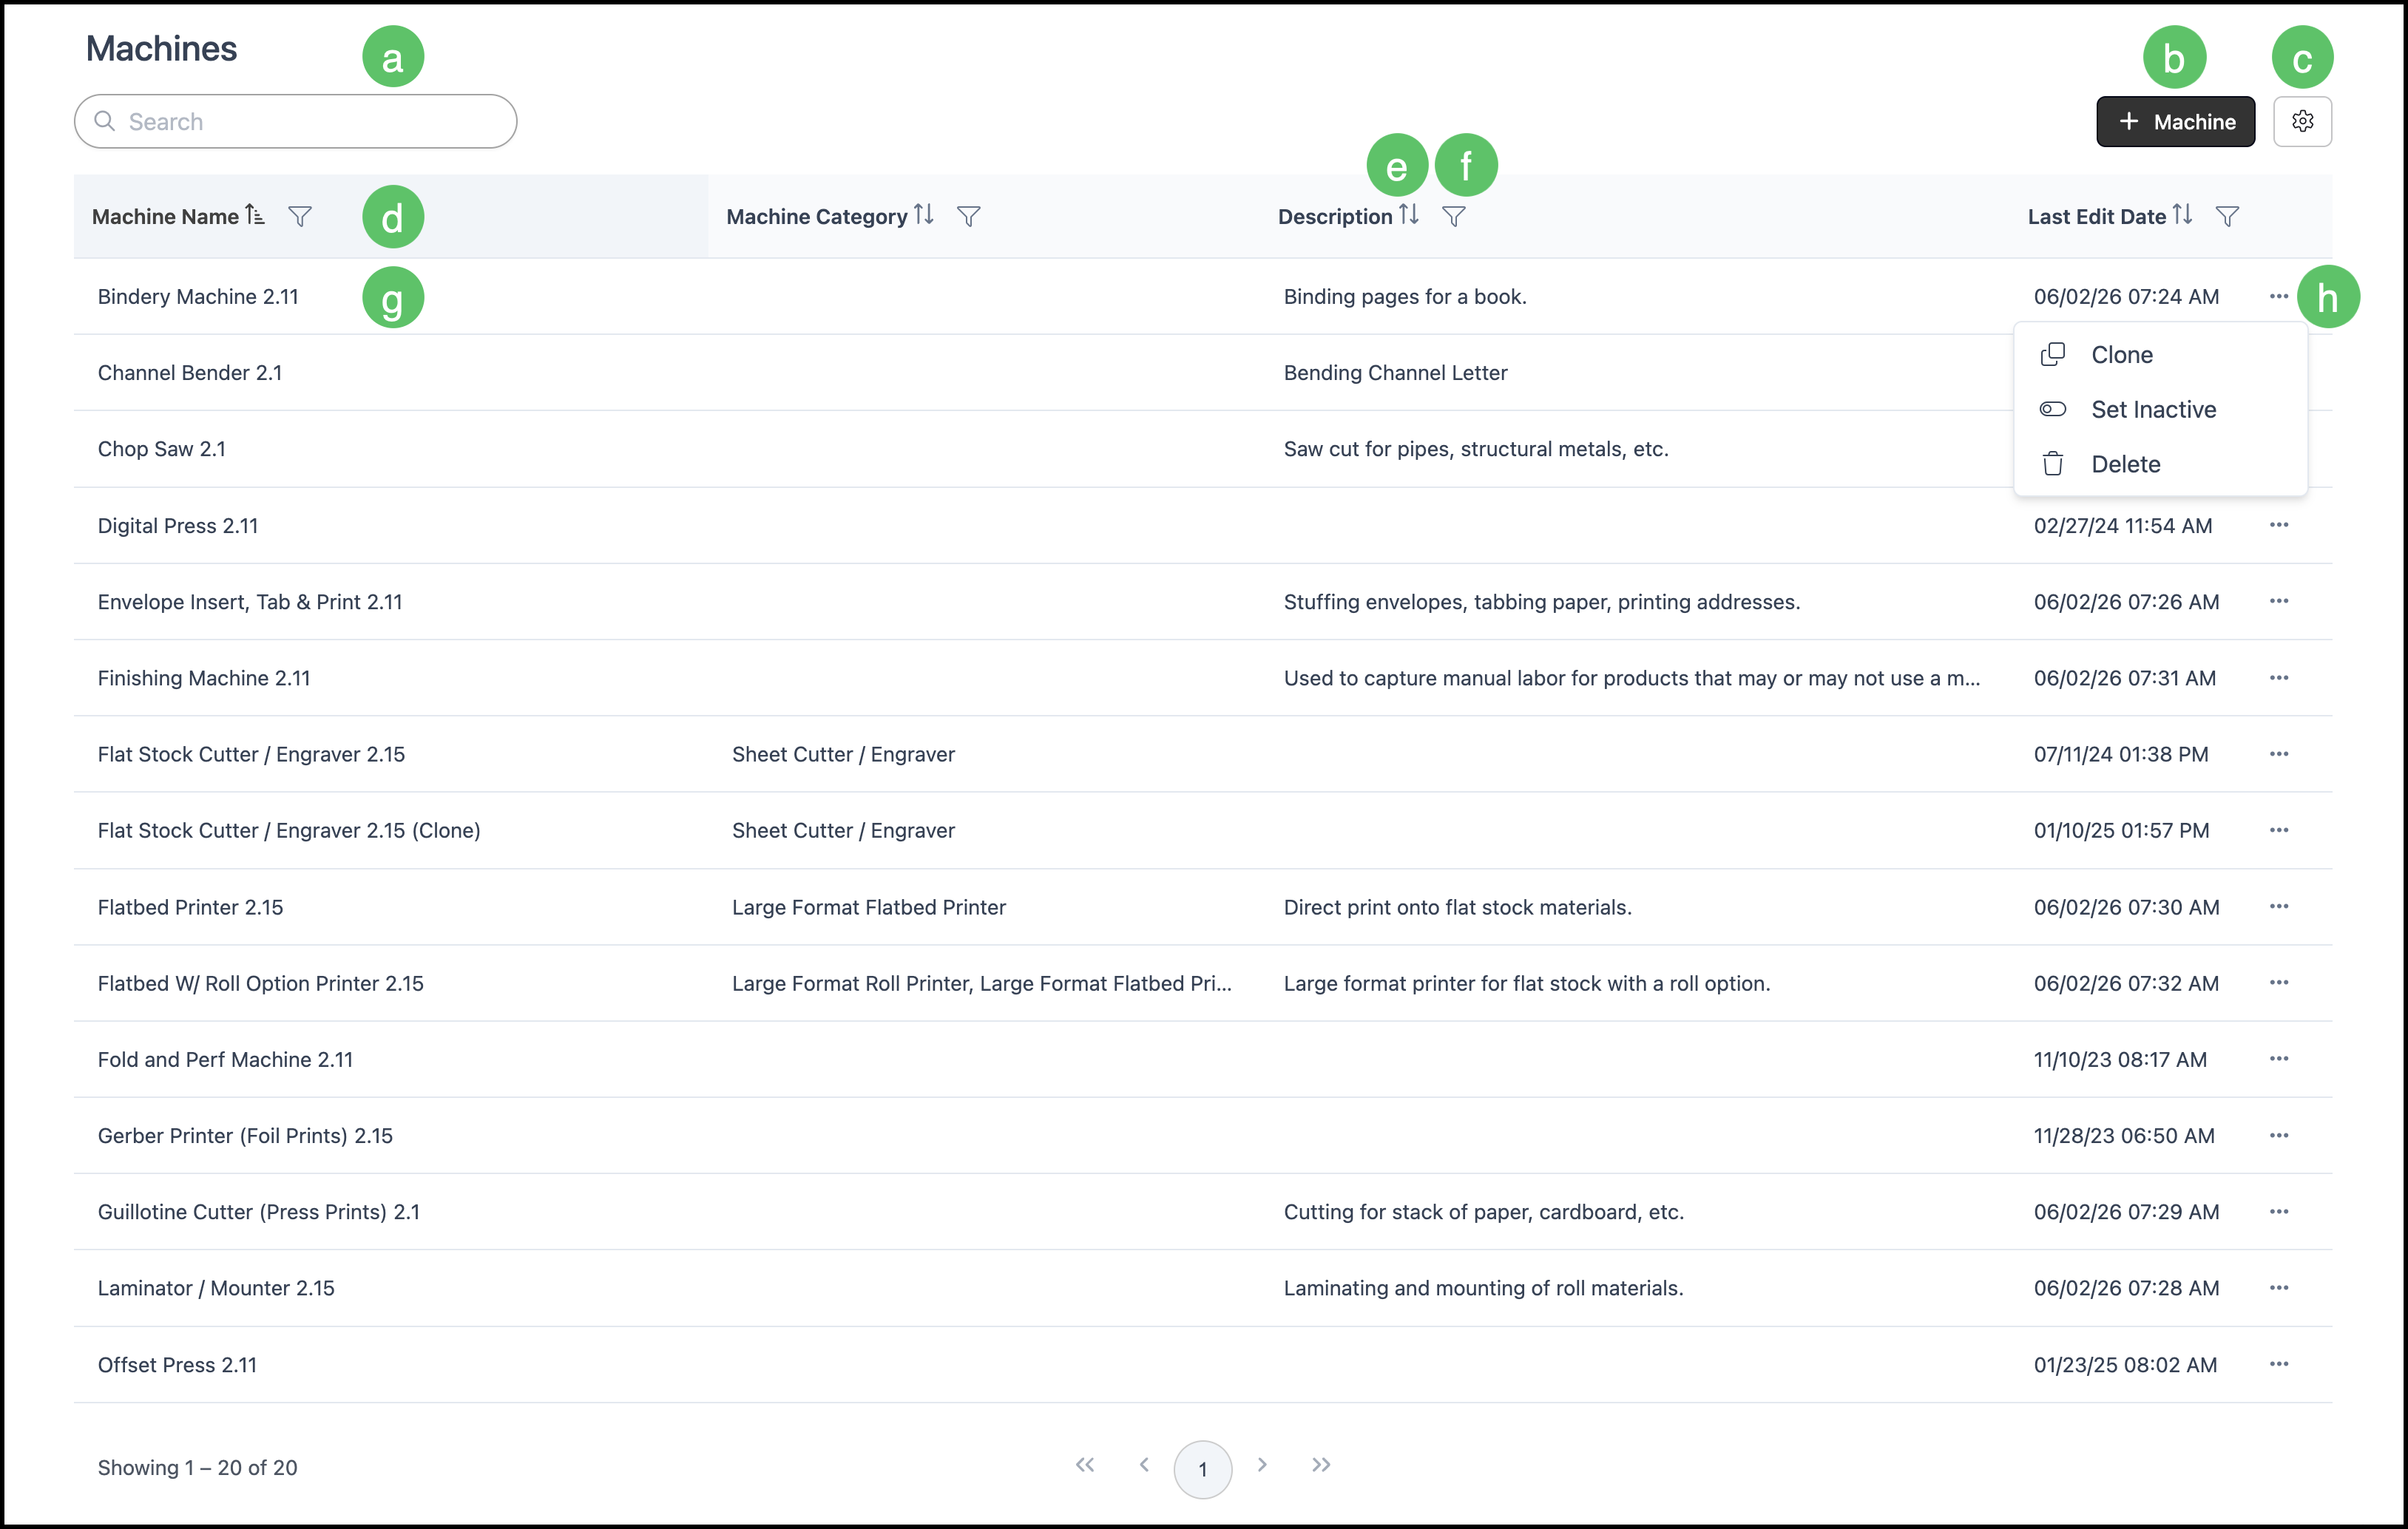
Navigate to System Settings / Components / Machines.
a. The Search box allows you to find a specific Machine.
b. The Add Machine button allows you to add a new Machine.
Note: Your CoreBridge system comes with an example Machine for every type of Machine in the sign industry. The recommended best practice is to clone an existing Machine that is similar to the Machine you are adding, then updating necessary details.
c. The Search Settings icon allows you to choose which columns are displayed and whether inactive records are included in the display.
Note: We recommend including the Description column in the view to quickly distinguish between Machines.
d. Columns can be reordered and resized as needed.
e. Each column header has an Order icon that allows you to sort ascending or descending.
f. Each column header has a Filter icon allowing you to customize the display by setting rules. See example below.
g. Clicking a Machine row opens the Machine Details page allowing you to view and edit this Machine.
h. Each row includes an ellipsis that opens a menu with Clone, Set Inactive and Delete options.
Note: The Delete option is unavailable for Machines that are currently in use.
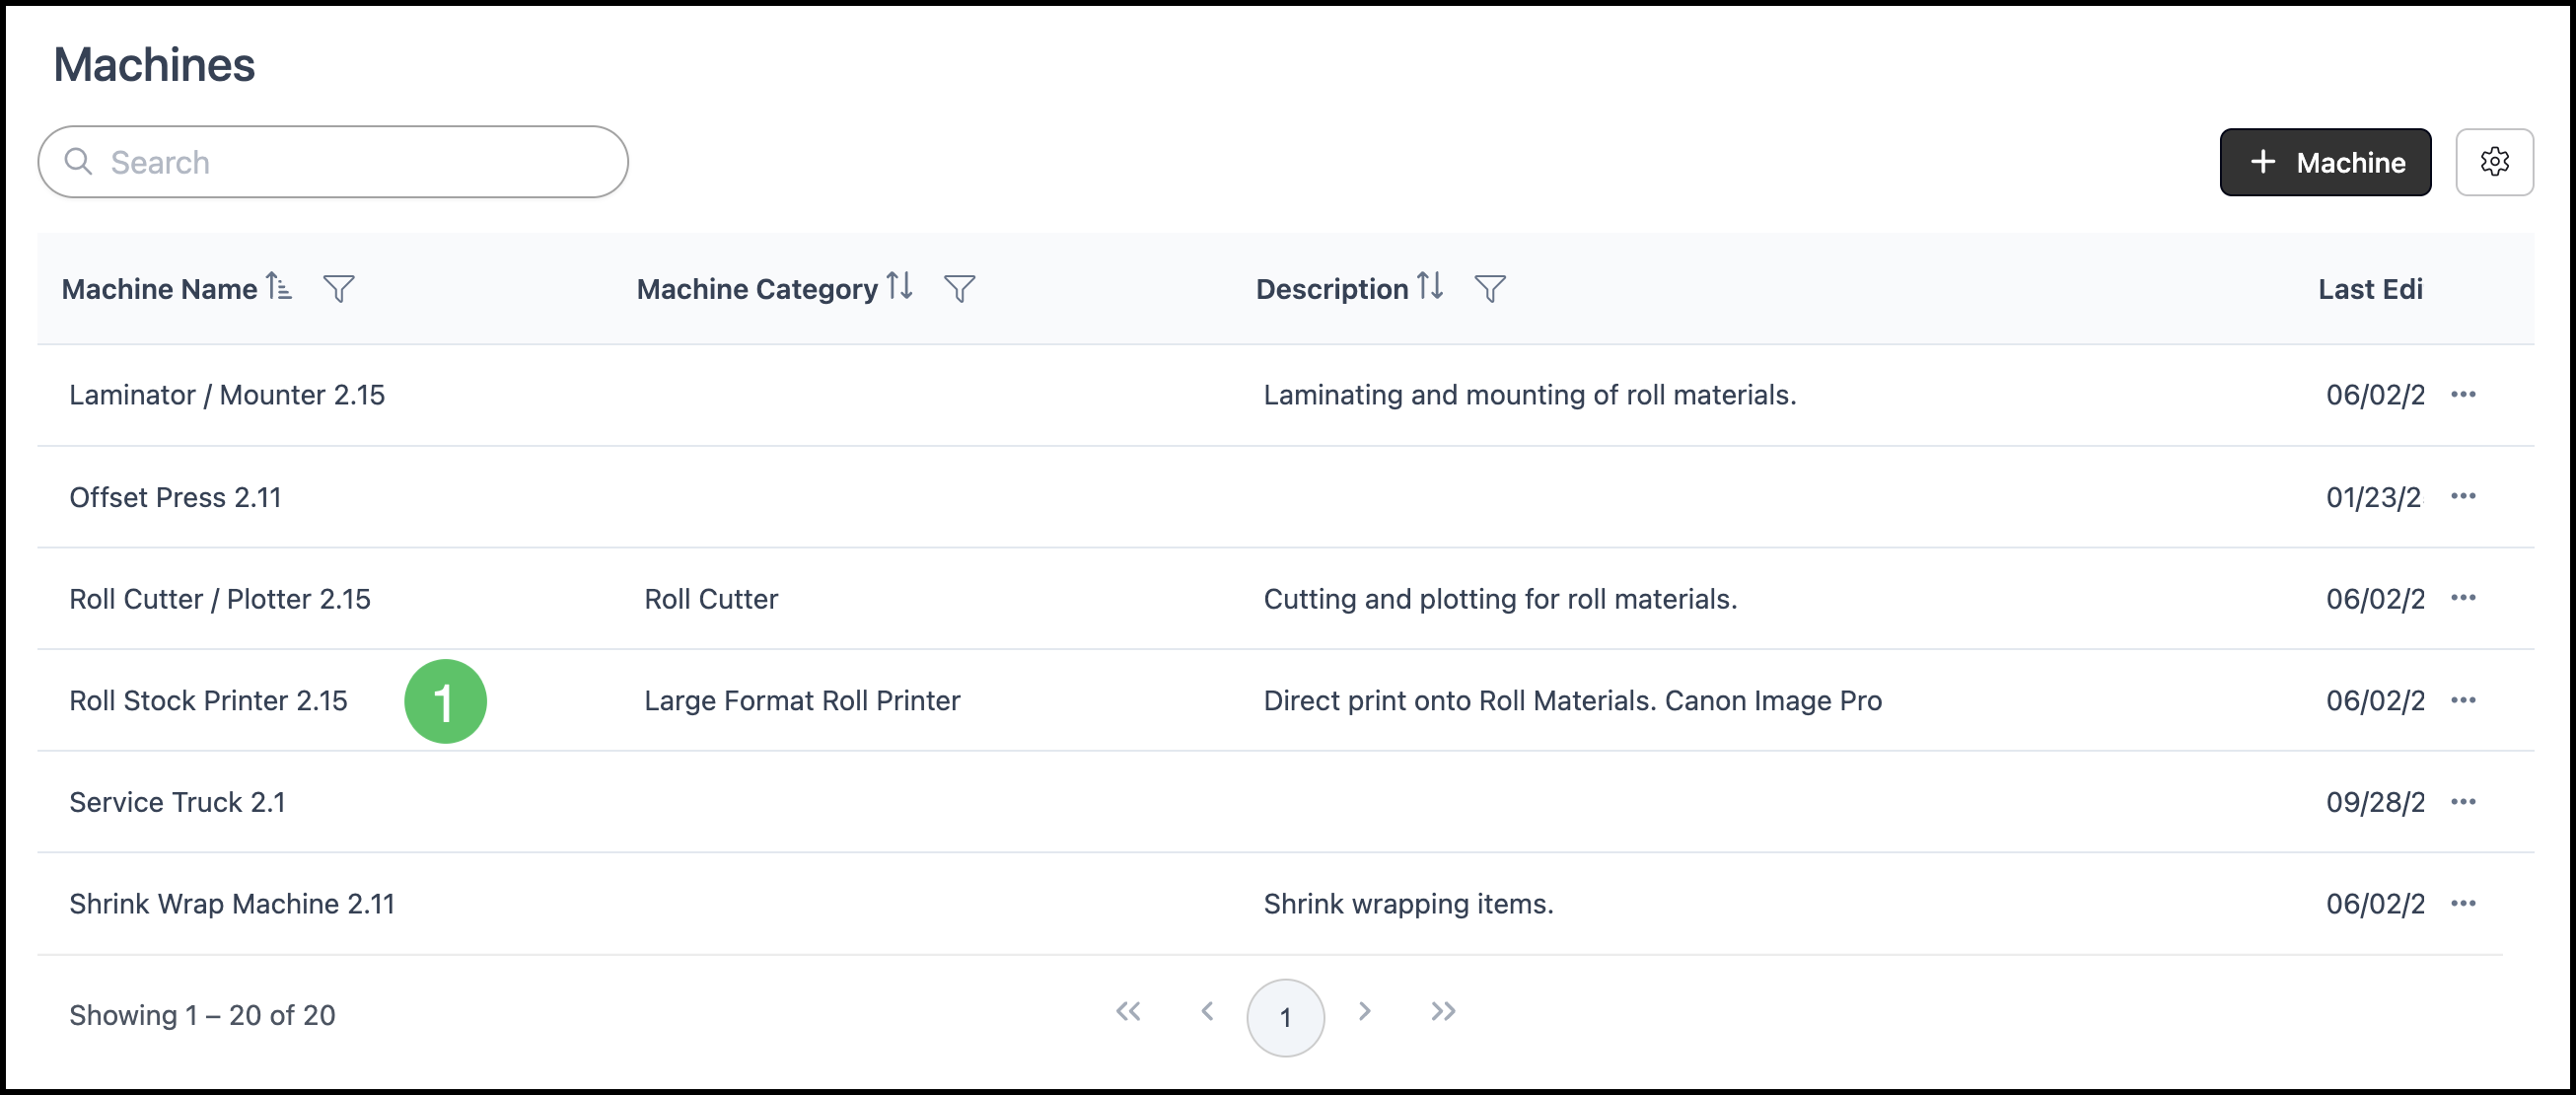
Example:

1. Select a Machine to open the Machine Screen.
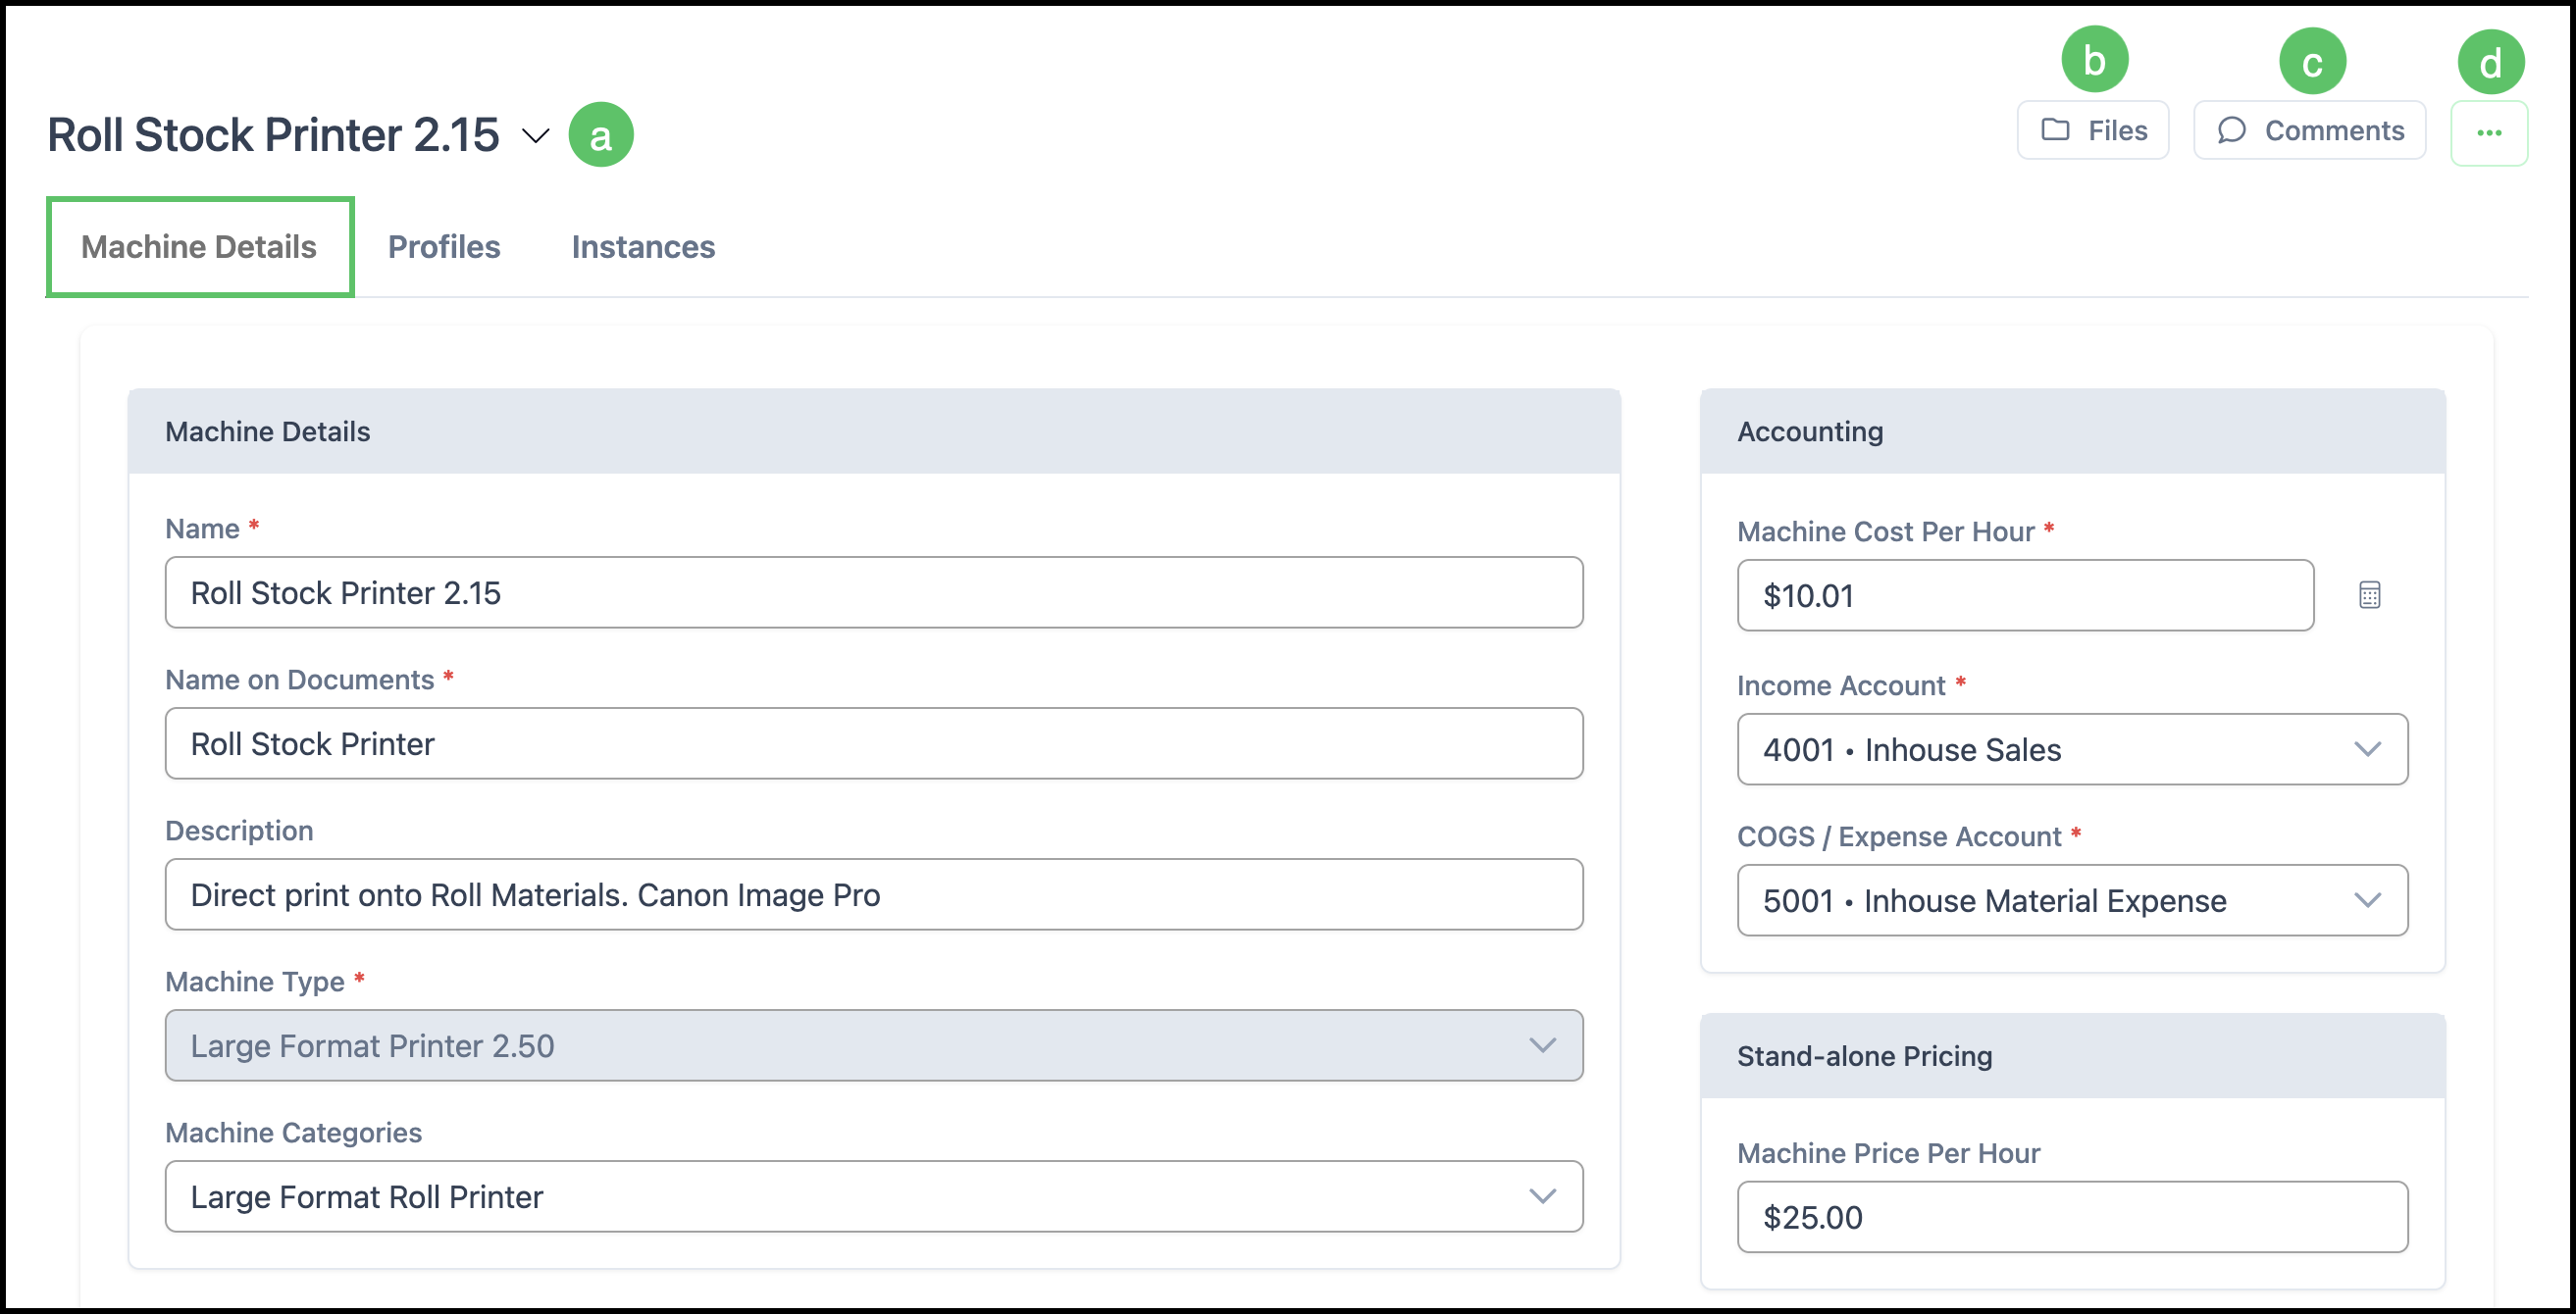
Machine Details Tab
This tab contains general information about the Machine, such as Name, Description, Machine Type, Machine Category, and associated Income and Expense Accounts. Changes can be made at any time and will need to be saved by clicking the Save button at the bottom of the page. All fields marked with a red asterisk are required.
a. Machine Name - Clicking here displays the date it was most recently updated.
b. Files allow you to View, upload, or manage documents attached to the Material.
c. Comments allow you to communicate about this specific Machine.
d. More actions include the options to Clone and Delete.
Note: Machines currently in use can not be deleted.
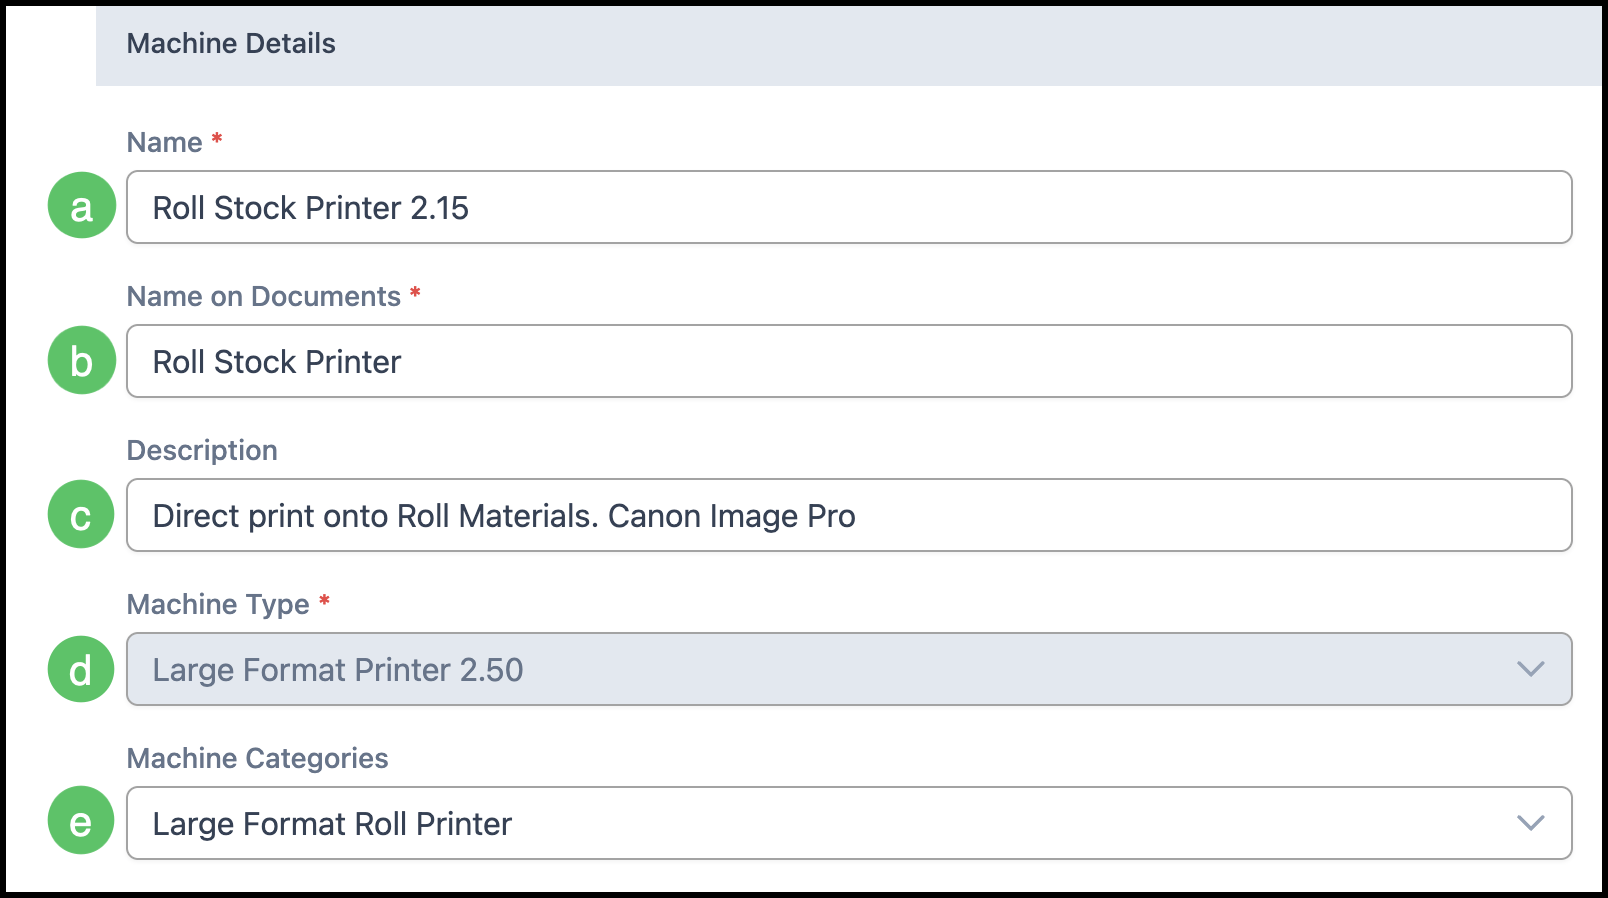
Machine Details
a. Name - This is the internal name of the Machine.
b. Name on Documents - This is the visible name to your Customers and can be more general.
c. Description - Add more detailed information about the Machine. This will be used internally.
d. Machine Type - A library of preset examples that hold all the calculation needed to run this type of Machine. This is selected when adding a new Machine in the system.
e. Machine Categories - Used for internal organization for sorting your Machines for ease during Product creation and Order entry. You may add a category by selecting the Manage Machine Categories link at the bottom of the dropdown.
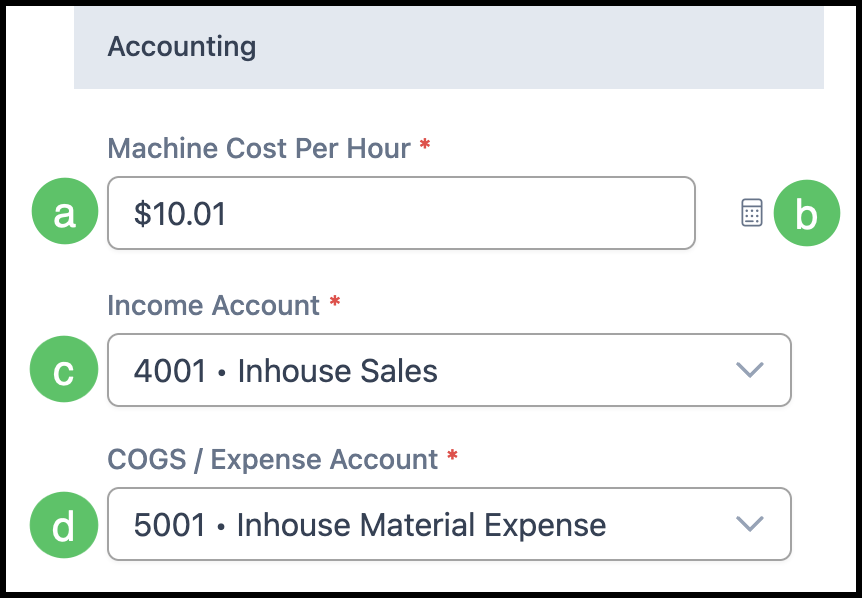
Accounting
a. Machine Cost Per Hour - This is the cost of the Machine to operate excluding Labor or disposable costs.
b. Click on the link to Calculate Cost Per Hour. For more information, please see Machine Cost Worksheet.
c. Income Account - Use the dropdown to specify the income account for this Machine.
d. COGS / Expense Account - Use the dropdown to specify the Cost of Goods Sold or Expense Account for this Machine.
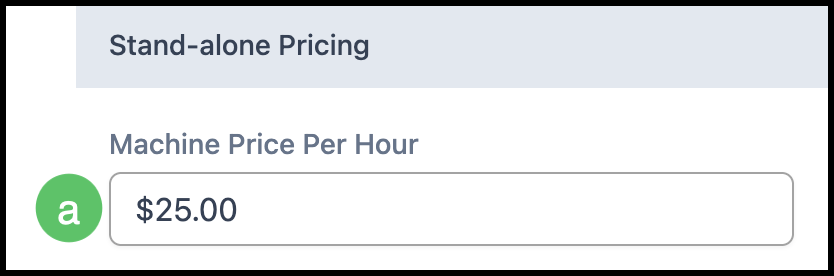
Stand-alone Pricing
a. Machine Price Per Hour - This is the price for stand-alone projects.
Example: If a Customer only needs a project to be cut or laminated this is the base price to be charged.
Note: The price will only change when using Market Based Pricing.
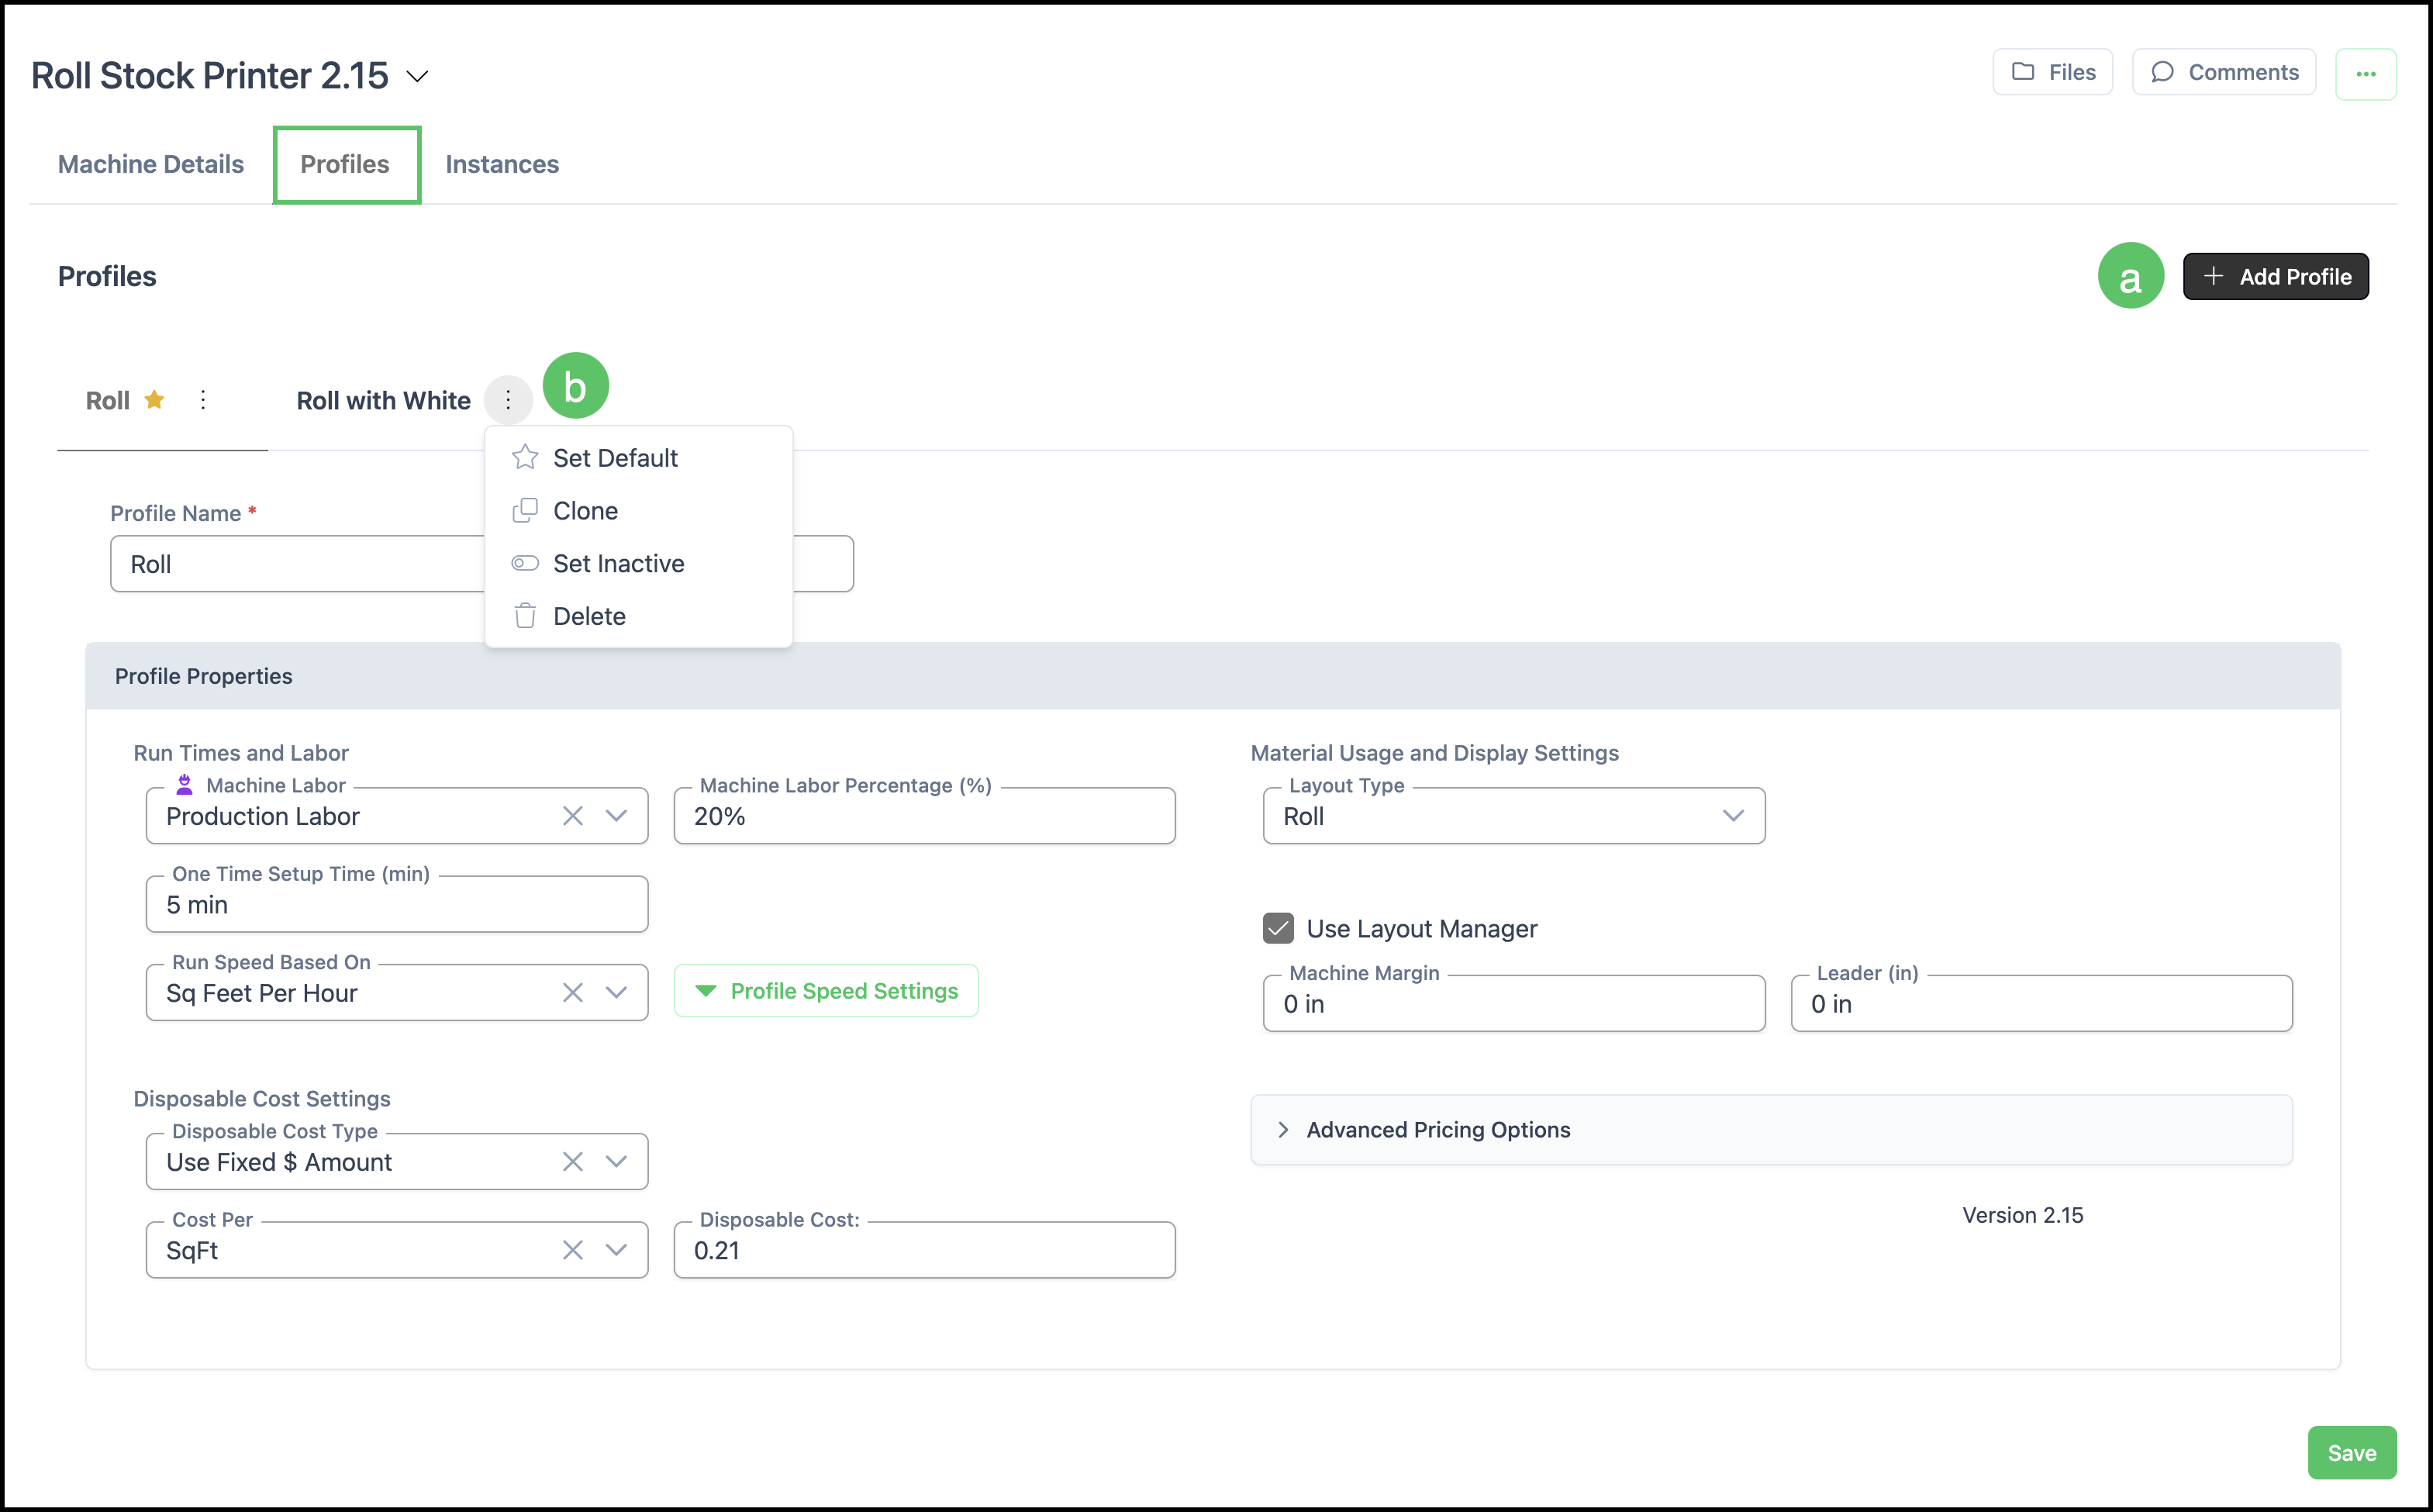
Profiles
The Profiles tab allows for setting different run times, Labor, and Material options per profile for this Machine. There is no limit to the number of Profiles that can be set up for a Machine. A Profile is selected when creating a Product.
For more information on Profiles, please see Machine Profiles.
Note: Initial settings are dictated by the Machine Type selected when the Machine was added in the system. These settings can be updated for each Profile.
Note: The default Profile is marked with a star. This is managed under the More Actions menu.
a. The Add Profile icon allows you to add settings for a new Profile. Any changes will need to be saved.
b. The More Actions button allows you to Set Default, Clone, Set Inactive, and Delete.
Note: As a best practice, when a new Profile is needed, clone an existing Profile and then update the necessary settings before saving.
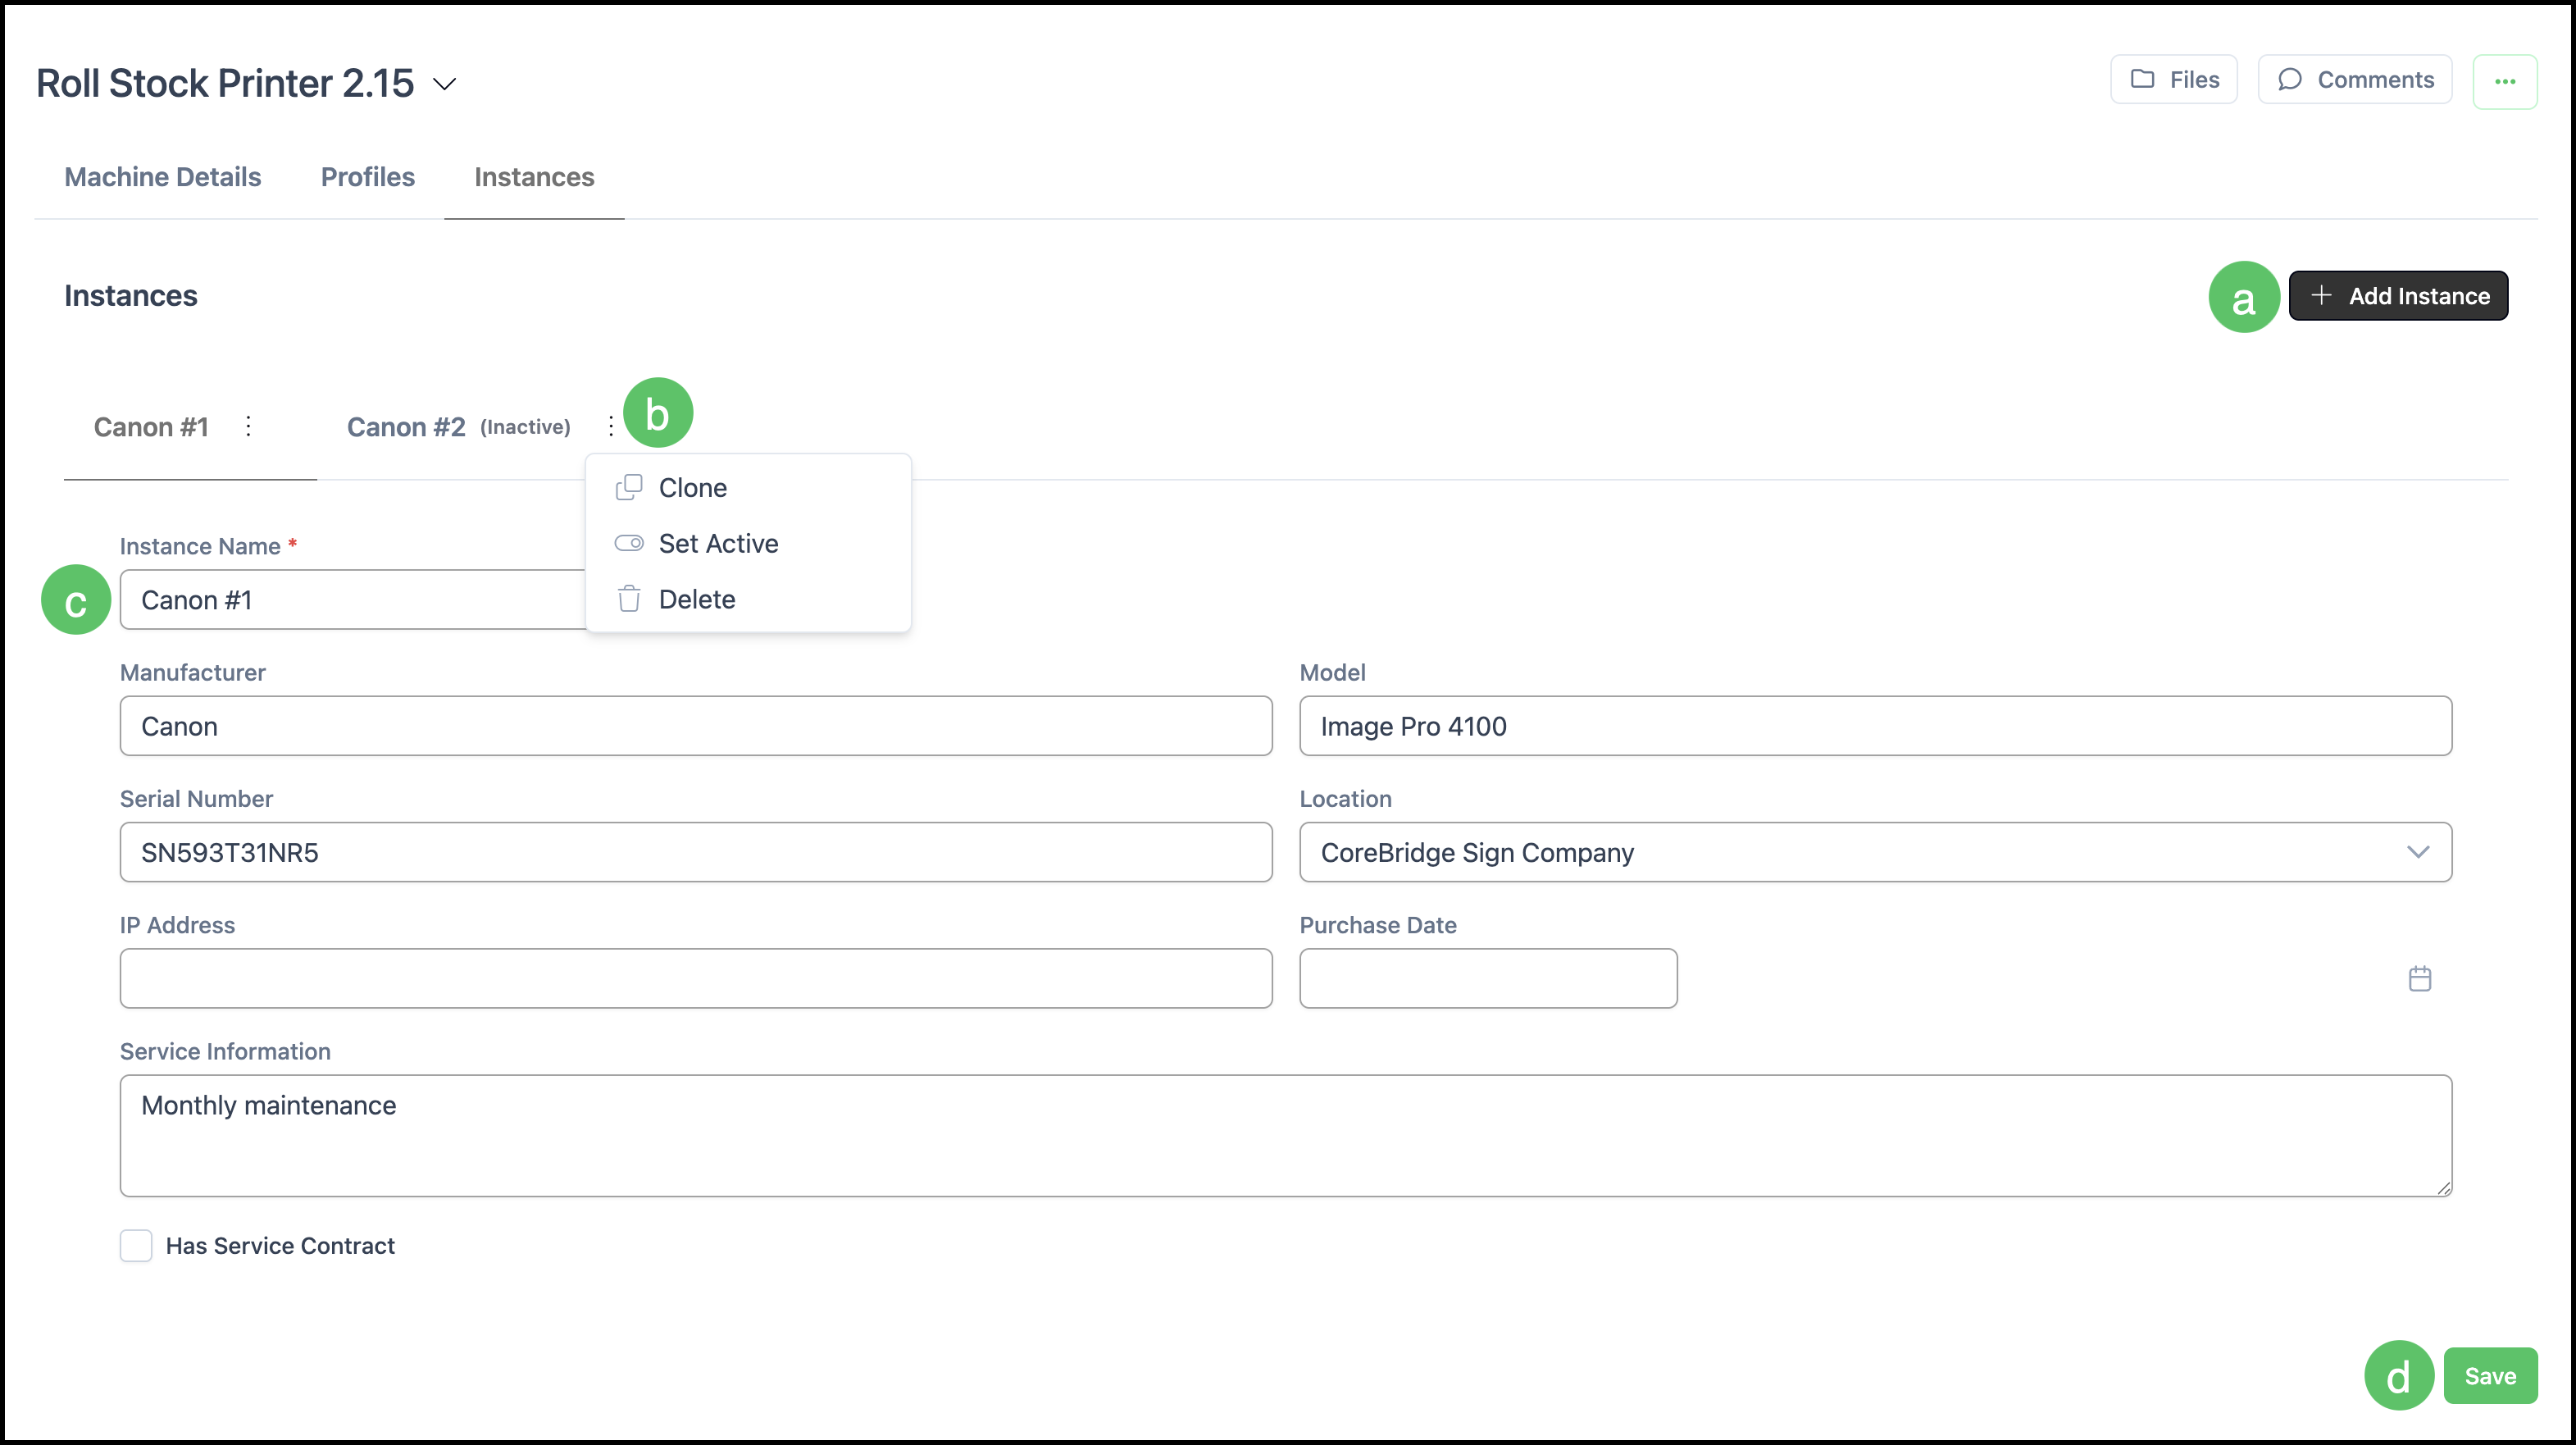
Instances
Instances refer to a useful place to store specific details about this equipment. If you have multiples of this same equipment you can store details for each Machine on this tab.
a. The Add Instance icon allows you to add information for a new Instance. Any changes will need to be saved.
Note: As a best practice, when a new Instance is needed, clone an existing Instance and then update the necessary settings before saving.
b. Click on the Ellipsis for options for an instance, such as Rename or Clone. Any changes will need to be saved.
c. Instance Details - Enter information such as Manufacturer, Model, Serial Number, Location, Network/IP Address, Purchase Date, Service Information, and Has Service Contract.
d. Any changes made will need to be saved.