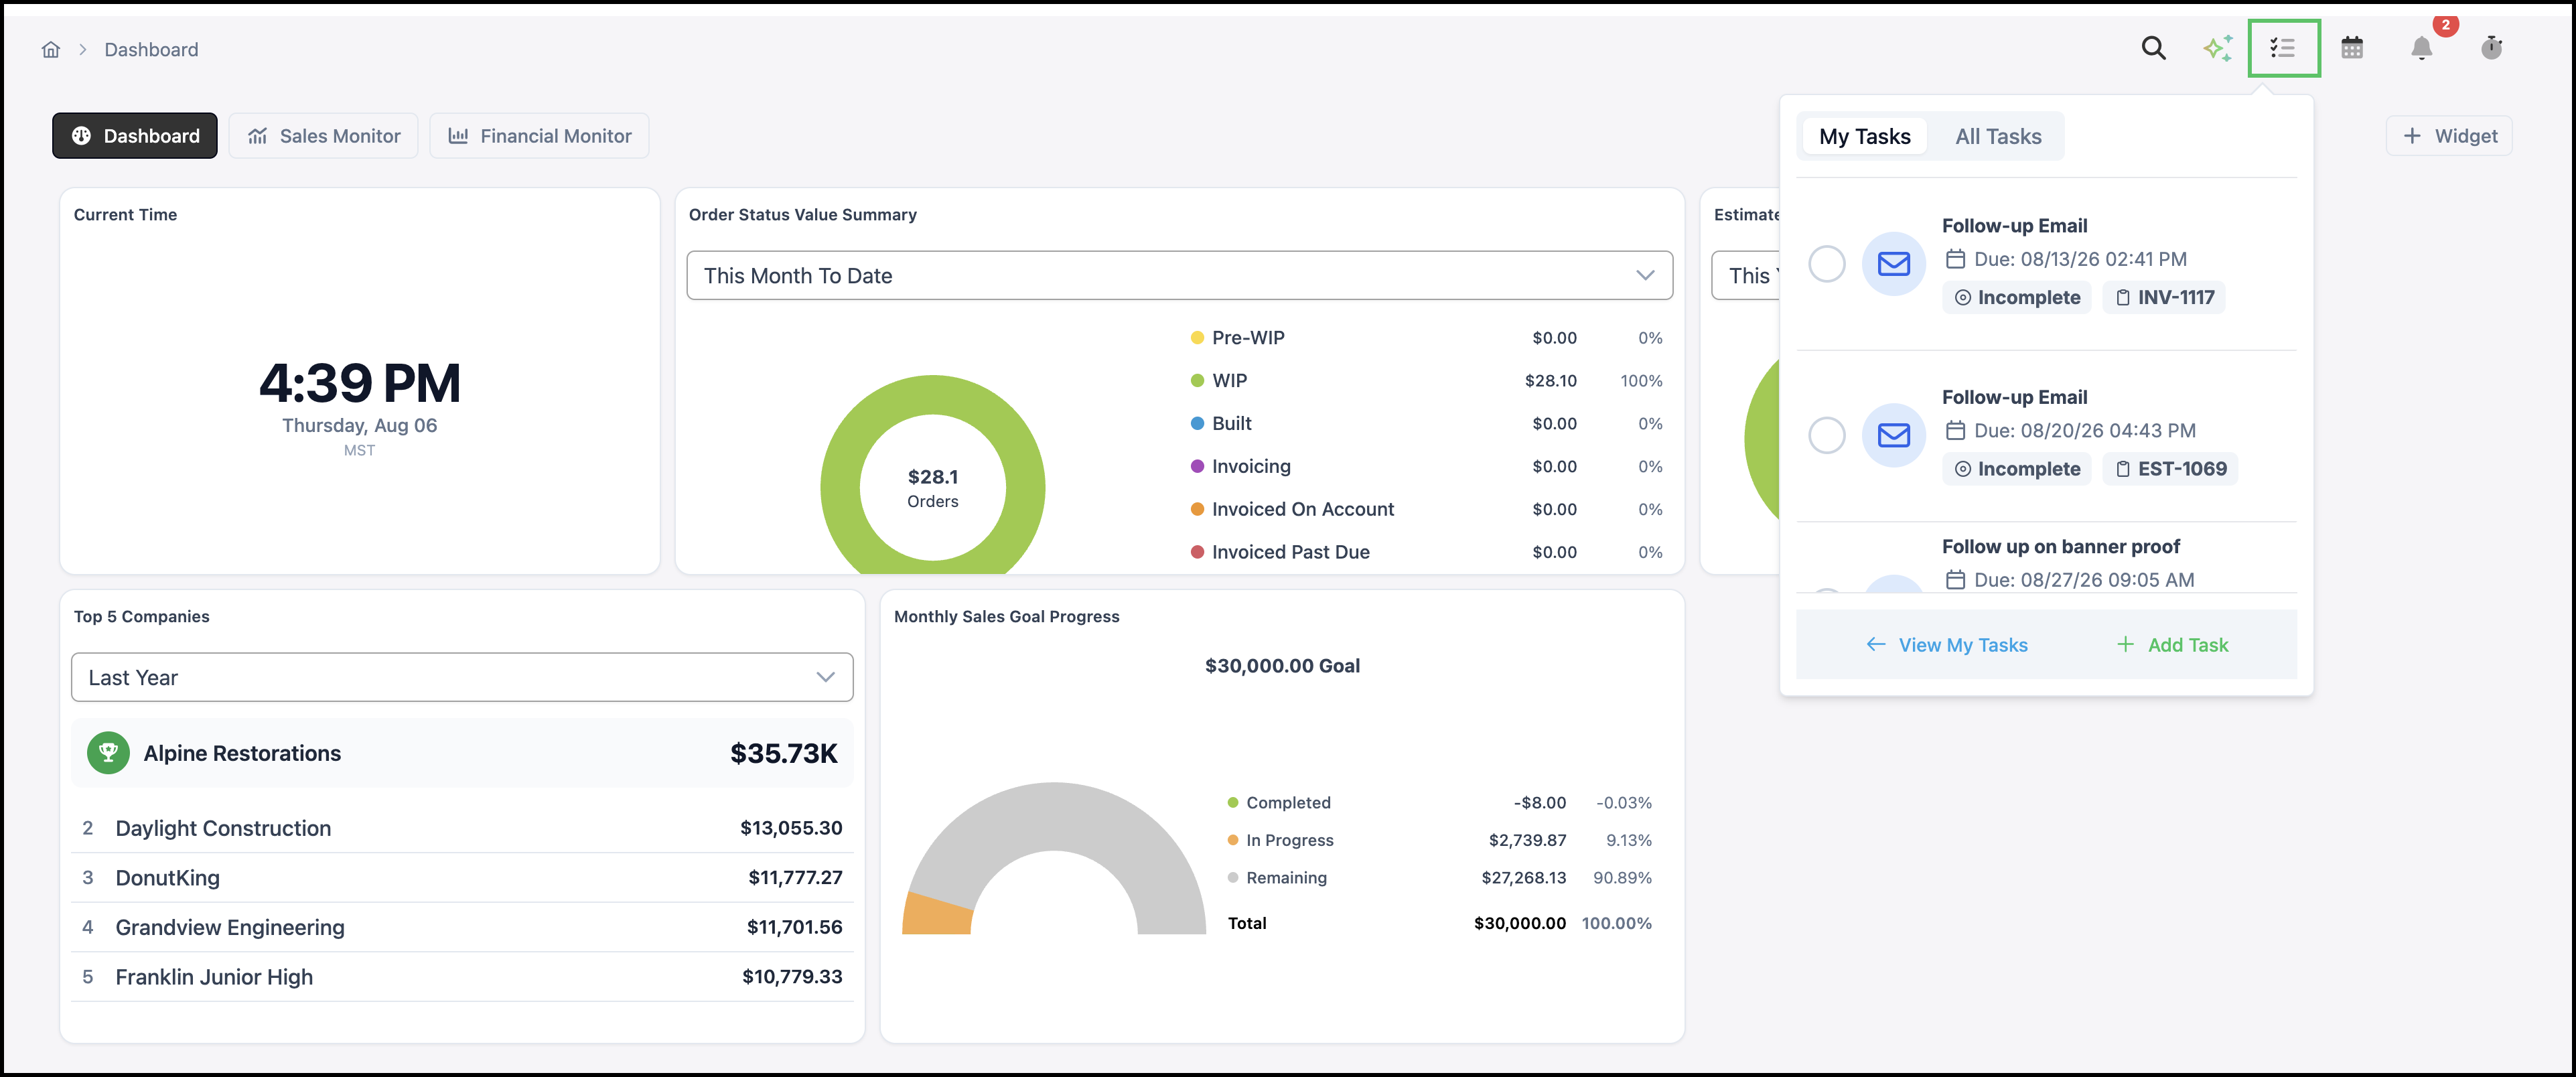
The Tasks list provides a centralized location for managing work assignments. Quickly view your personal Tasks alongside company-wide Tasks to stay organized and keep track of items that require your attention.
Table of Contents
Accessing Tasks
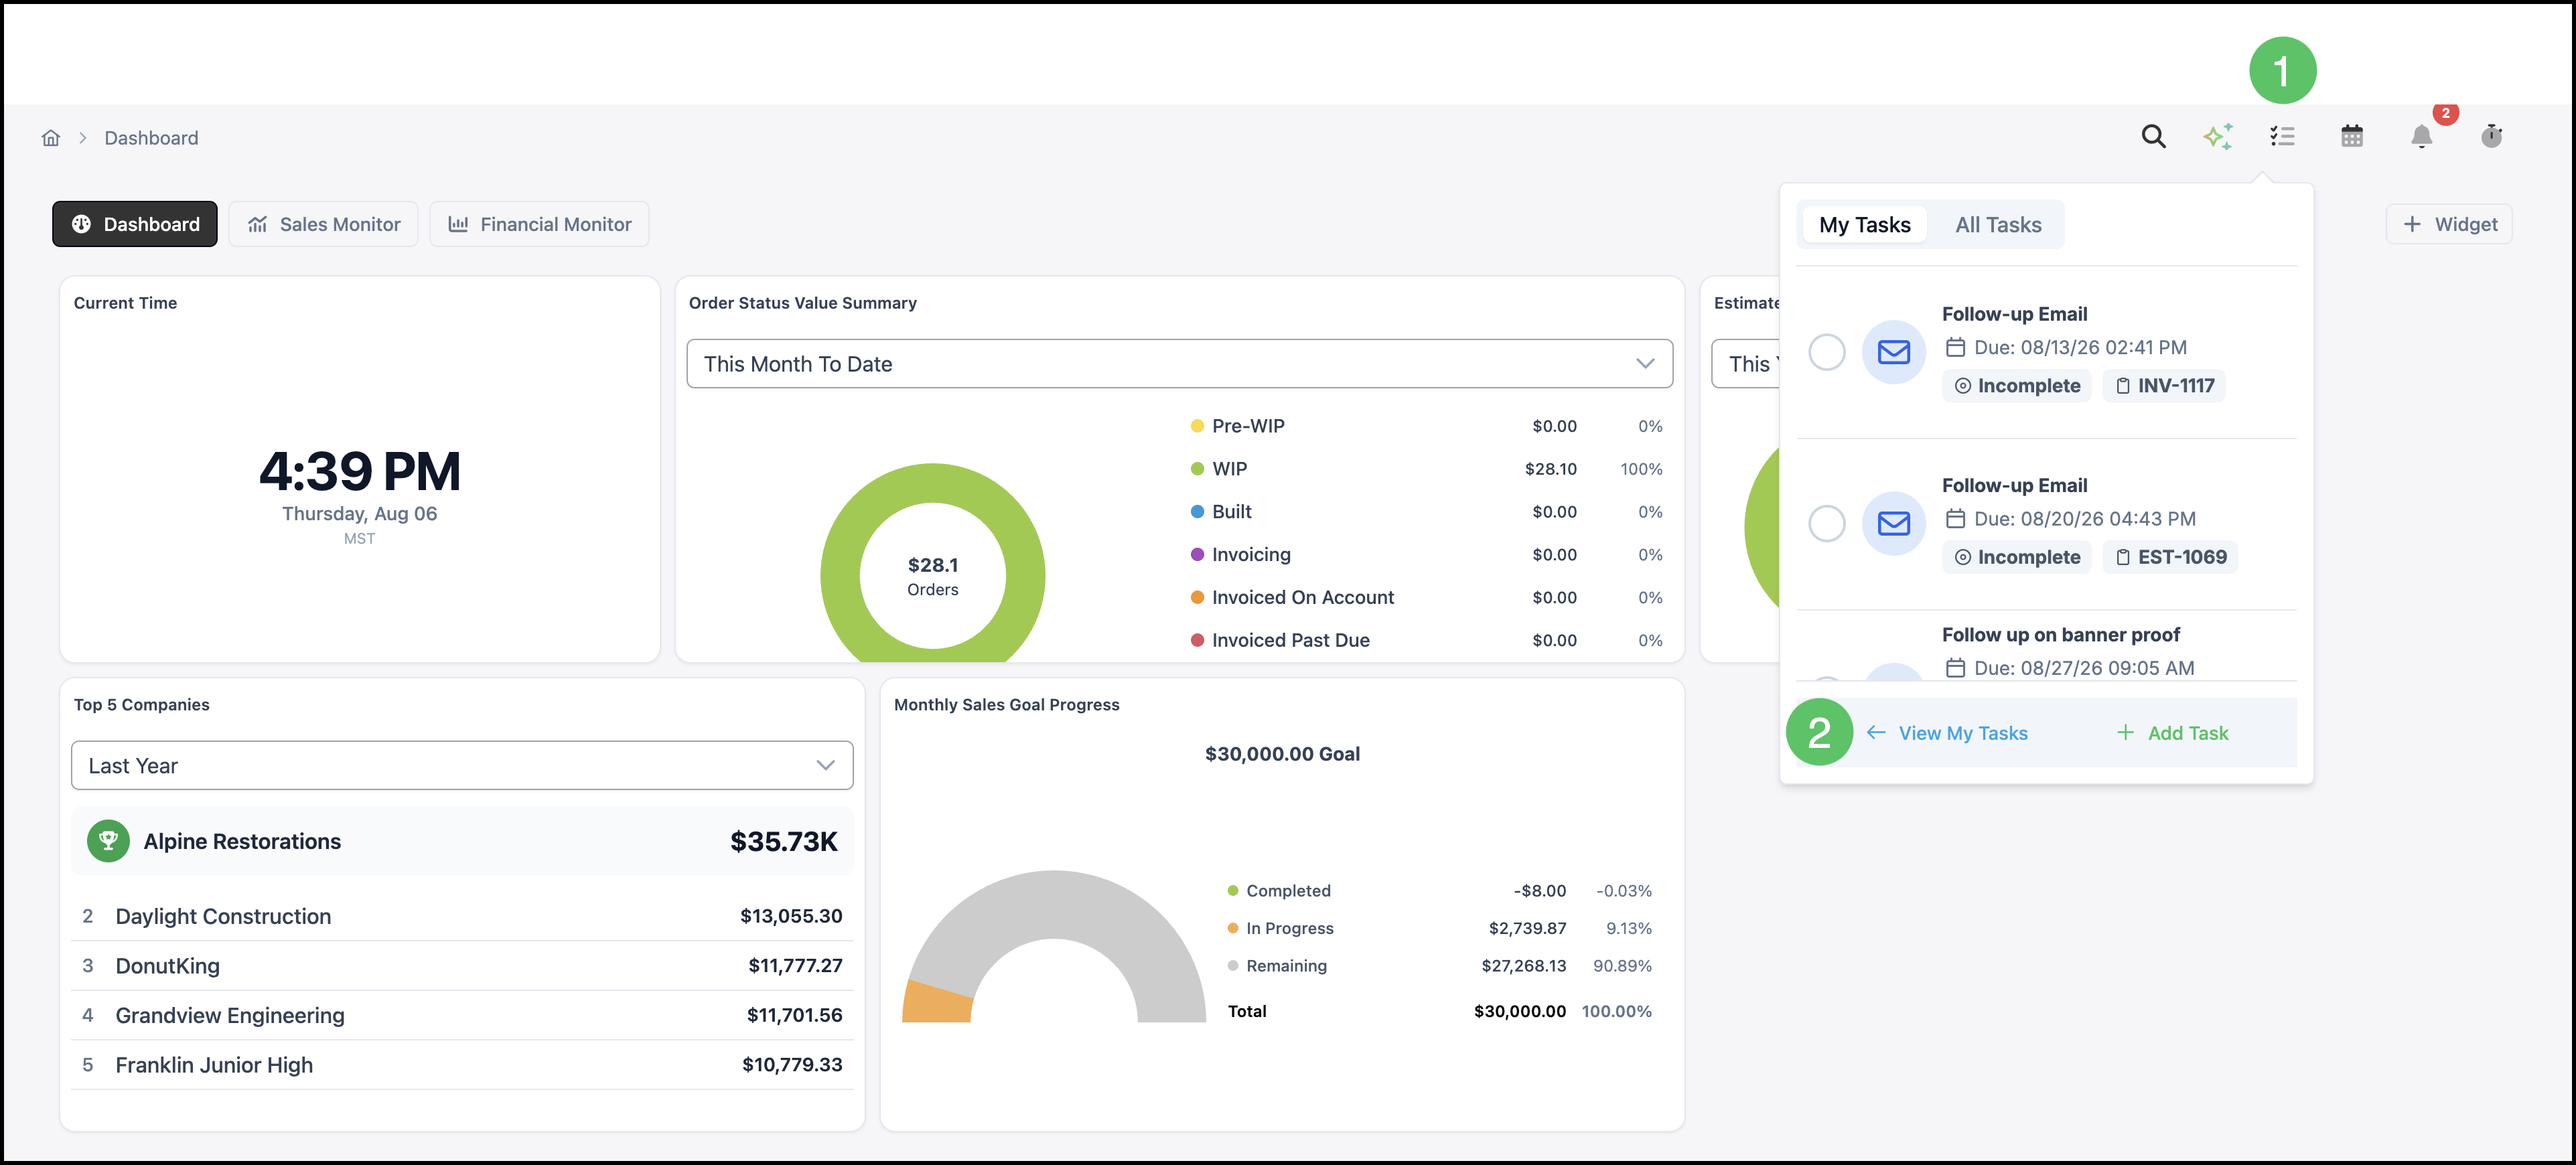
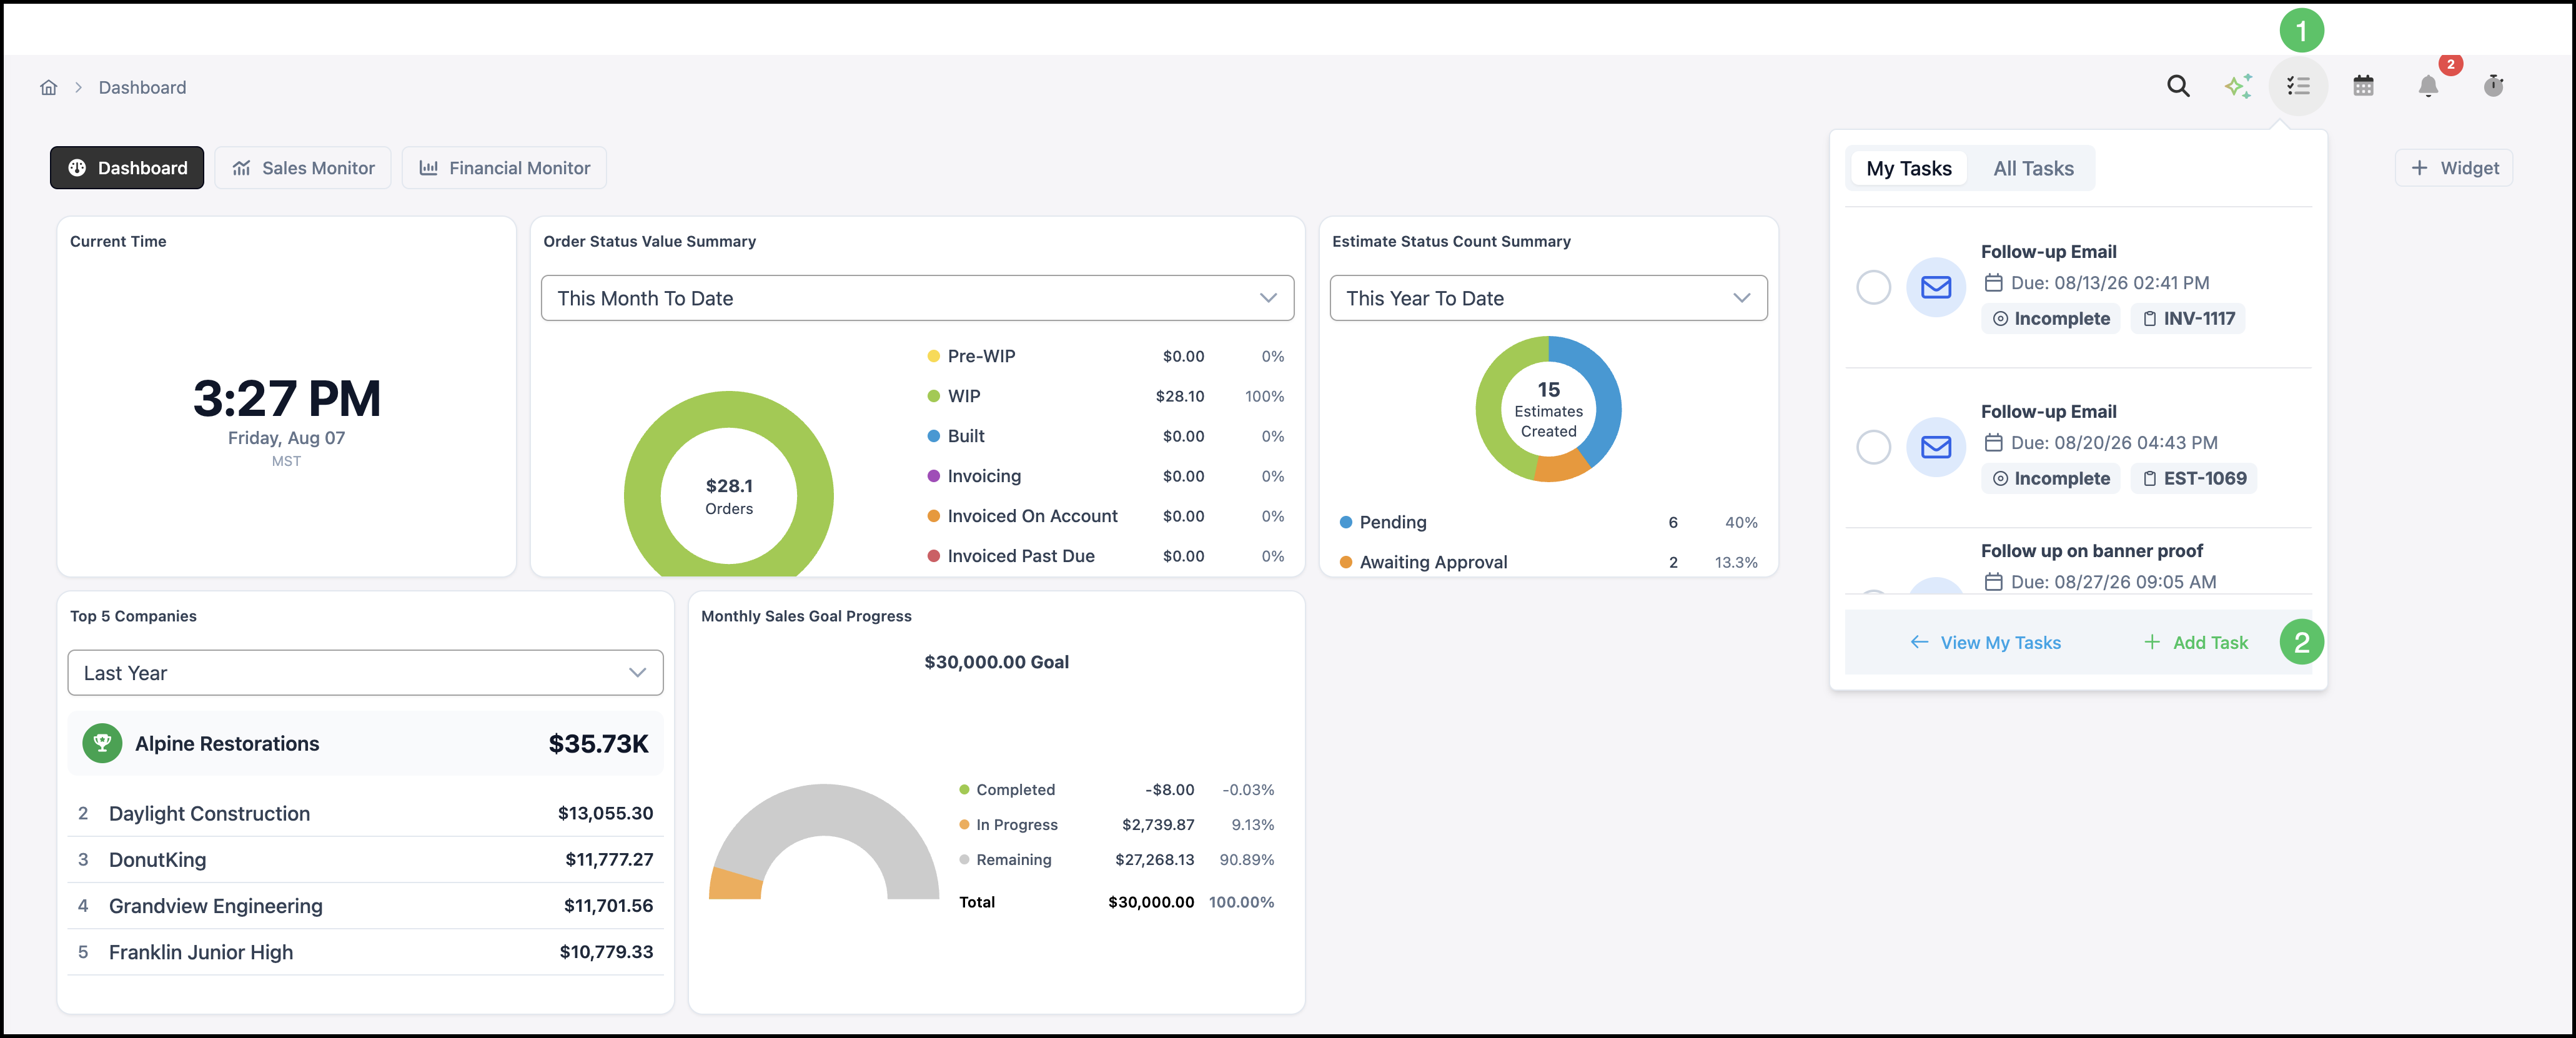
Tasks can be managed in the quick menu or on the Tasks screen by clicking the View My Tasks hyperlink.
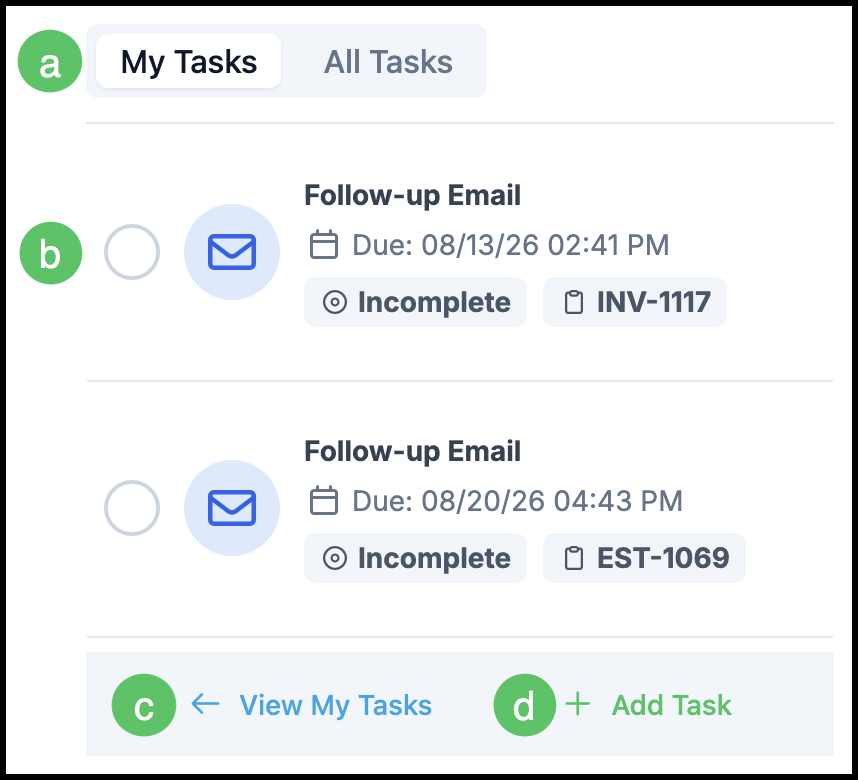
a. My Tasks and All Tasks - Switch between Tasks assigned to you and a broader Tasks list.
b. Selecting the Task will mark it as Complete.
c. View My Tasks - This takes you to the Tasks screen.
d. Add Task - Opens the dialog to create a new Task.
Note: Clicking anywhere on the Task information will open the Task dialog, allowing you to make edits.
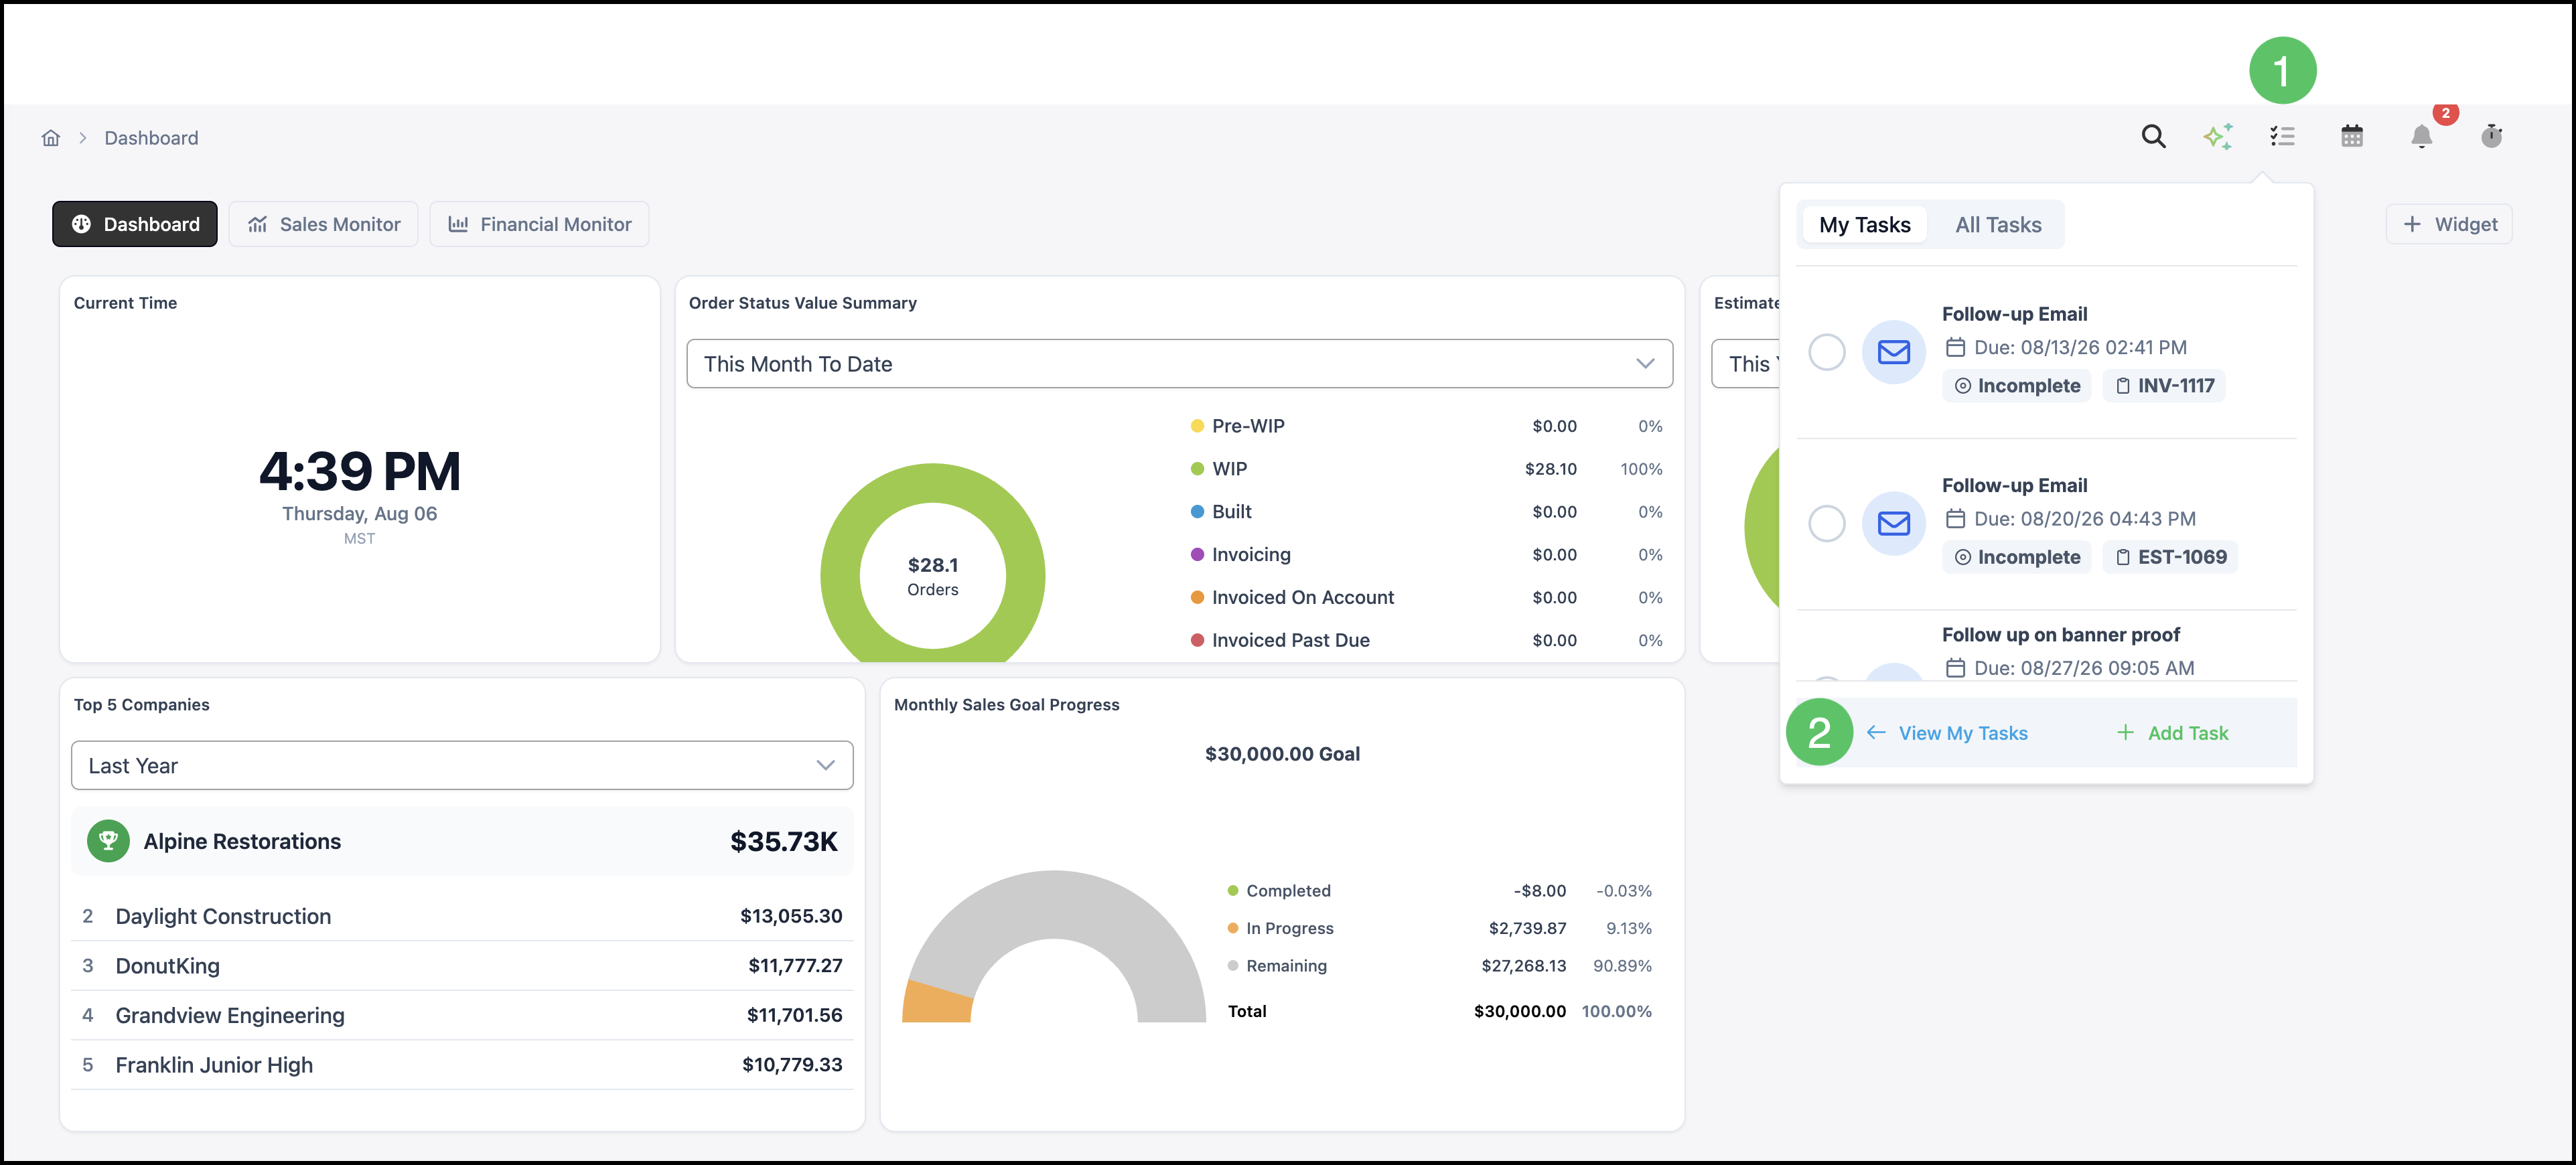
Tasks
1. Click on the Tasks icon.
2. Select View My Tasks.
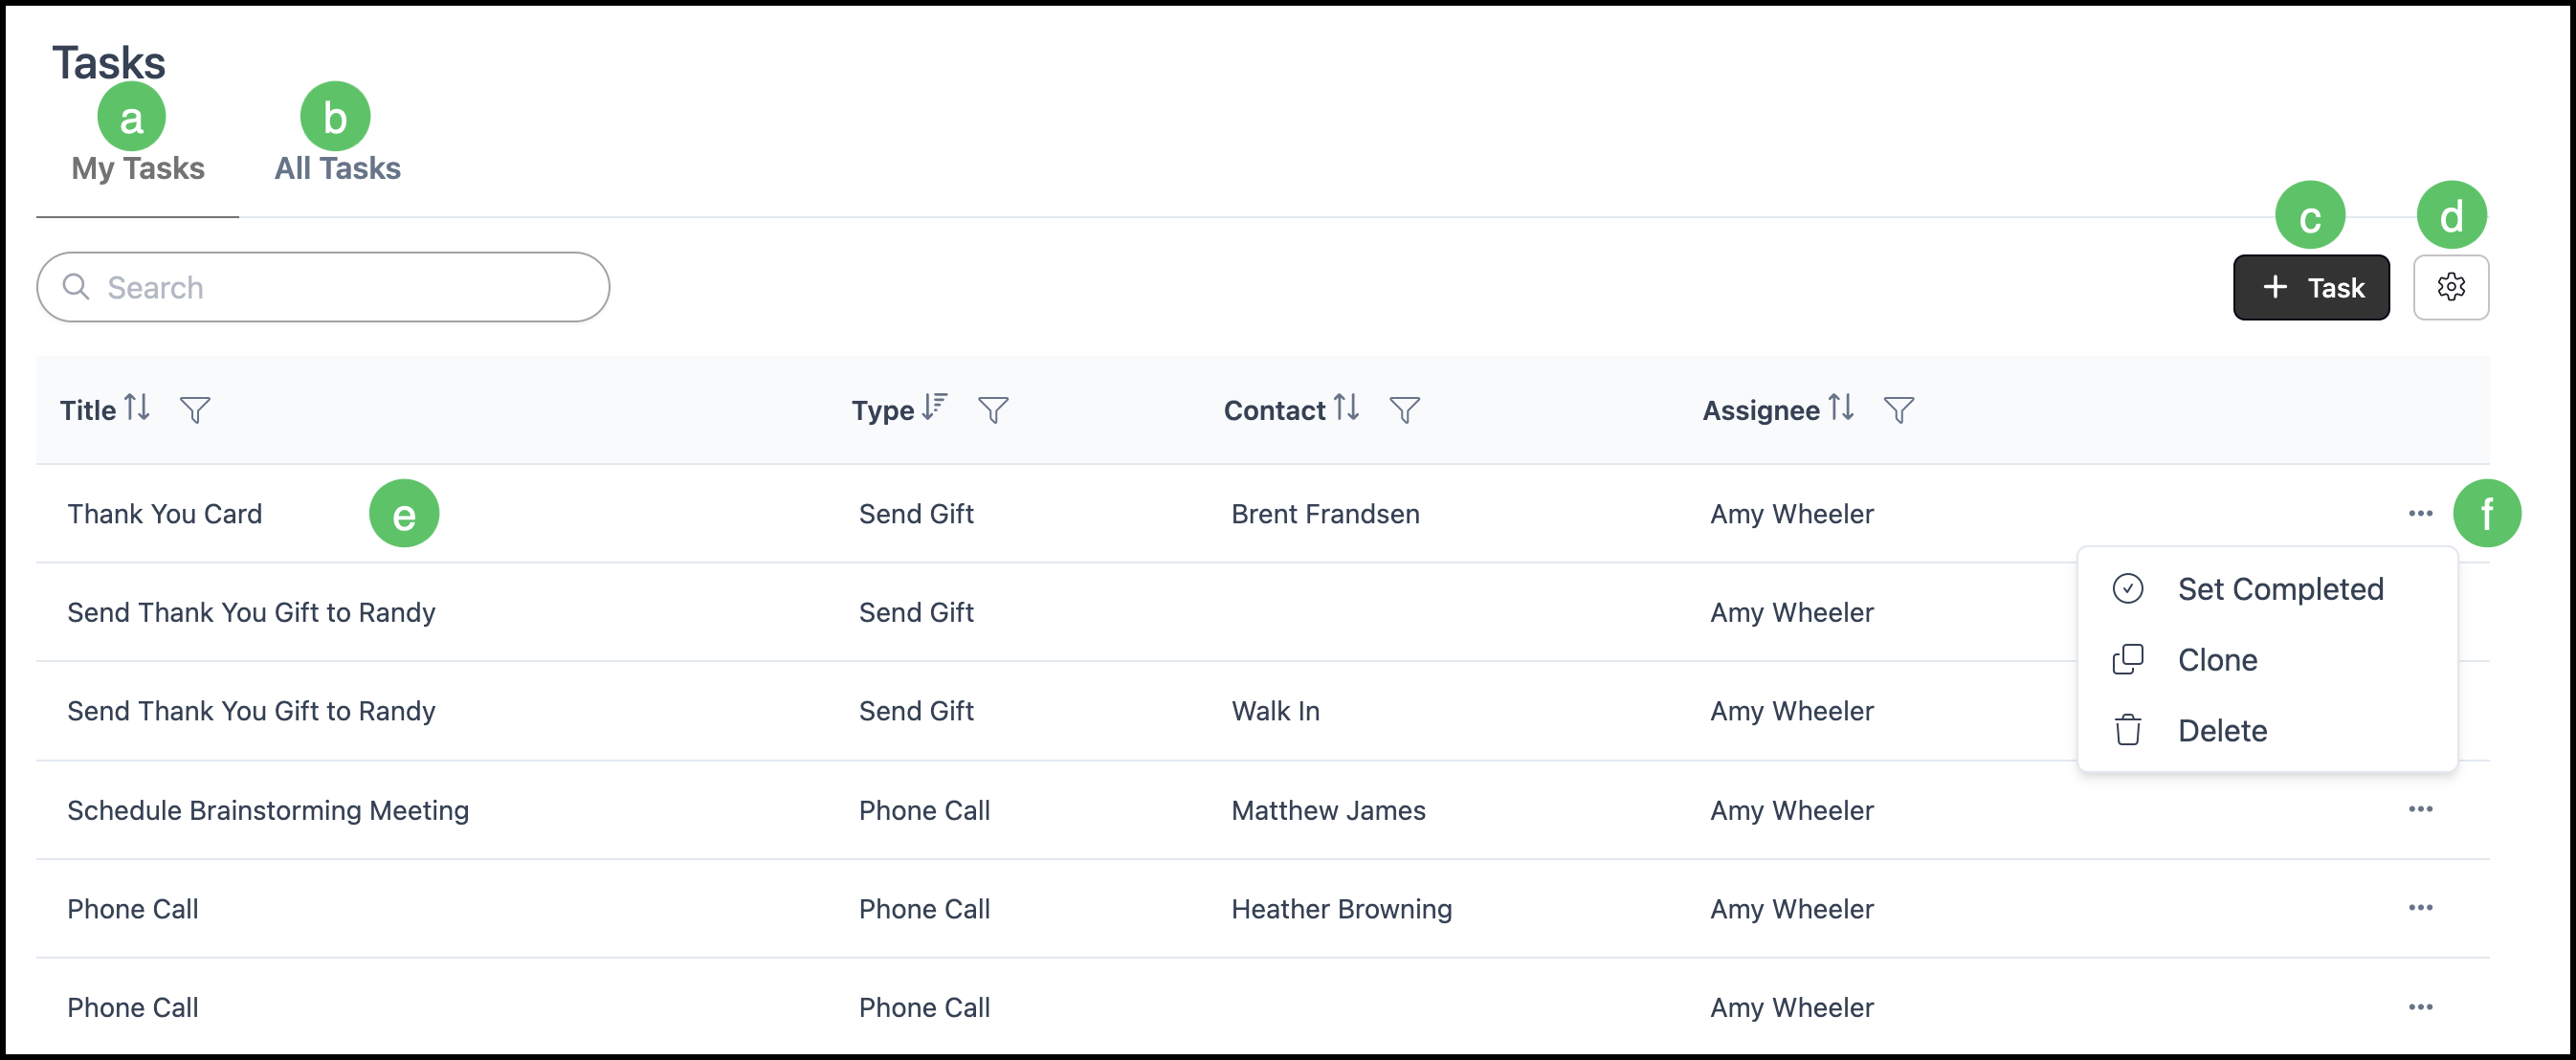
a. My Tasks - shows only tasks assigned to the signed-in user.
b. All Tasks - shows tasks across the business (based on your permissions).
c. Add Task - Opens the dialog to begin Task creation.
d. Search Settings - Allows you to select which columns are shown.
e. Task Row - Clicking this opens the Task screen allowing you to make edits or add comments.
f. More Actions menu contains options to Set Completed, Clone, or Delete the Task.
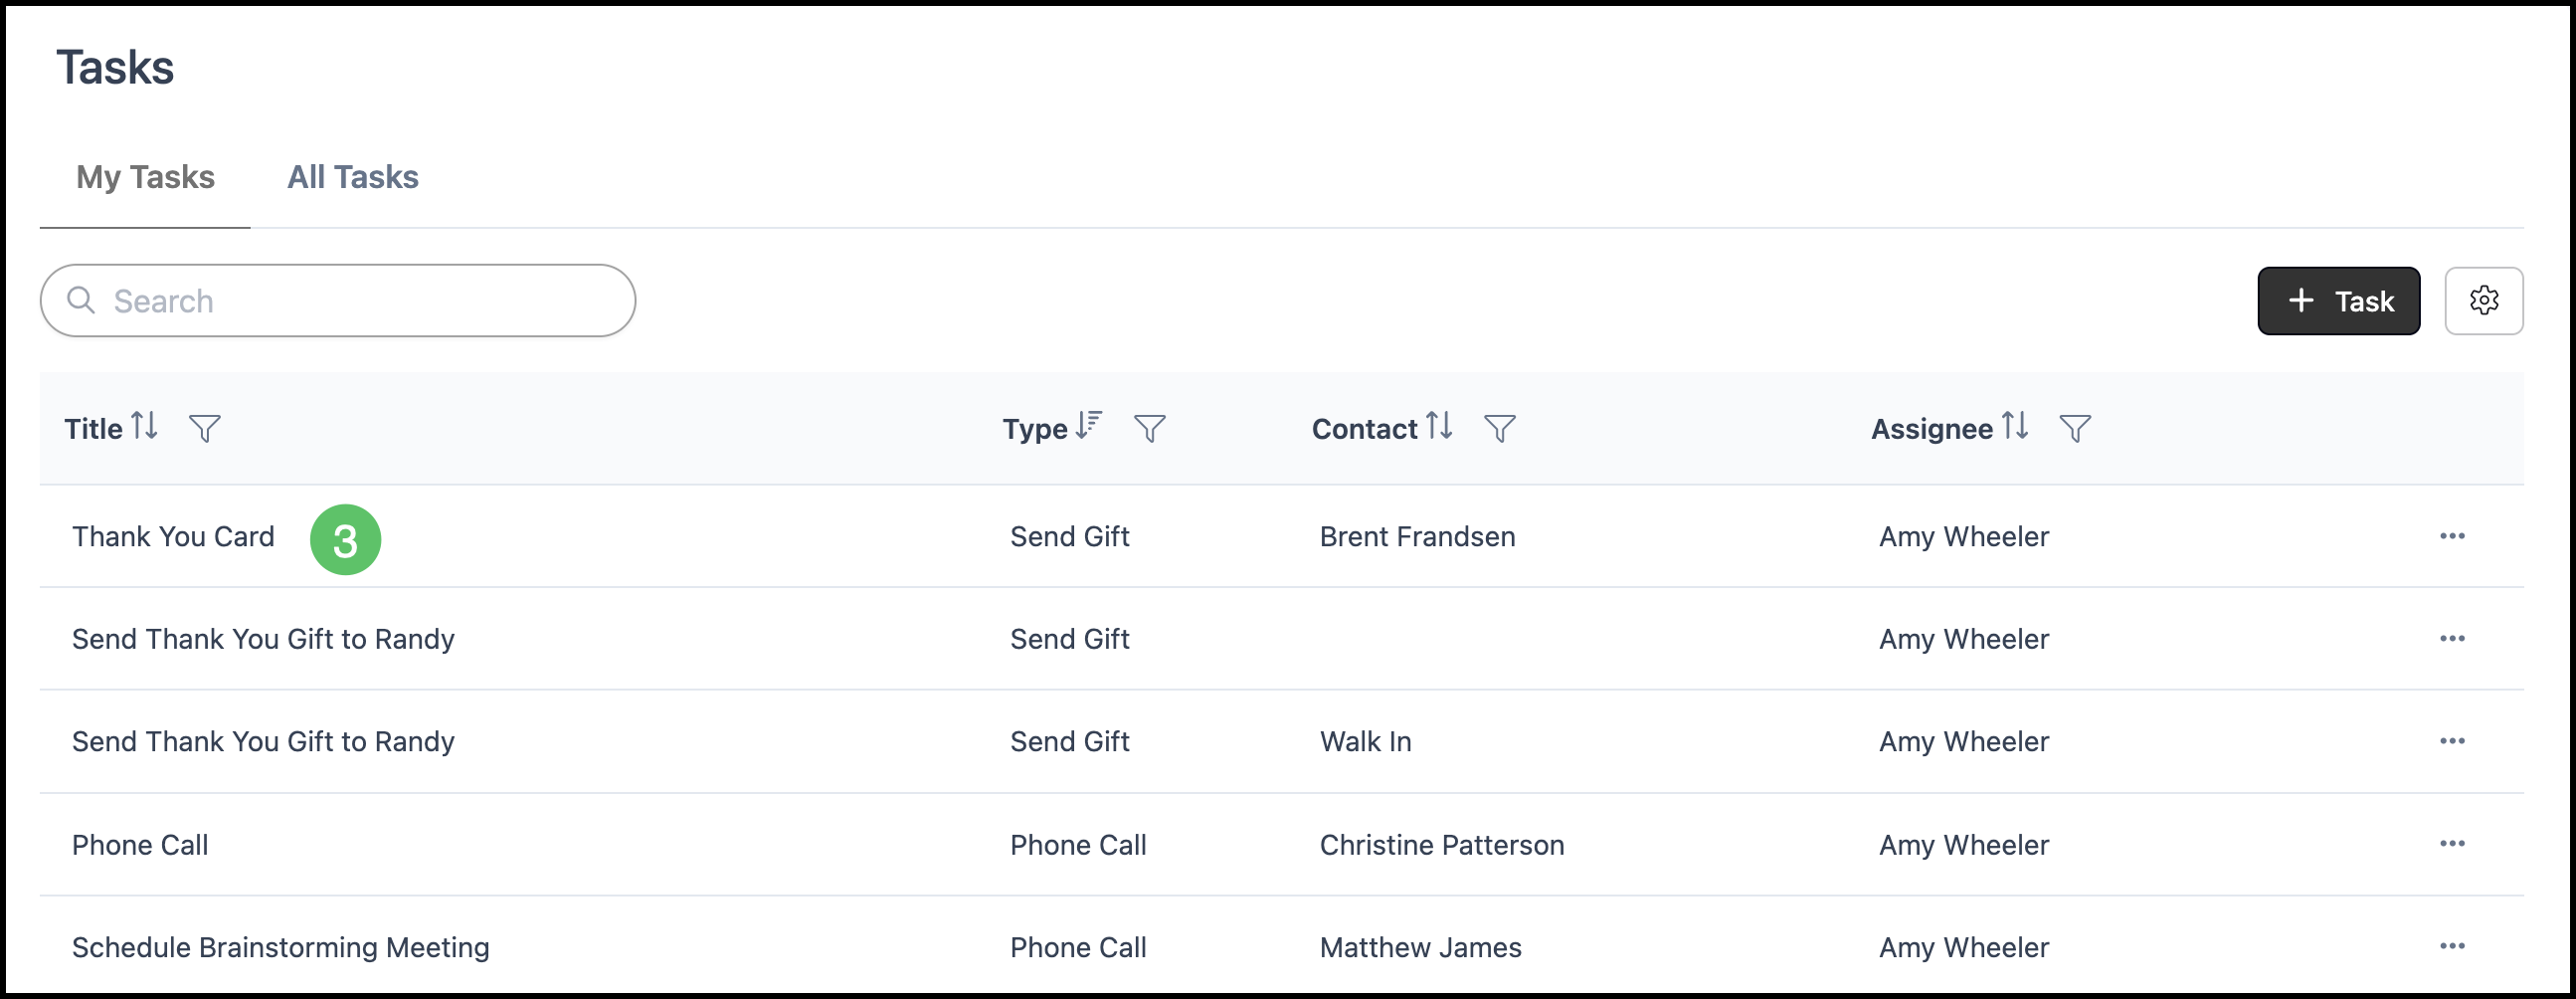
3. Click on a Task Row to open the Task Screen.
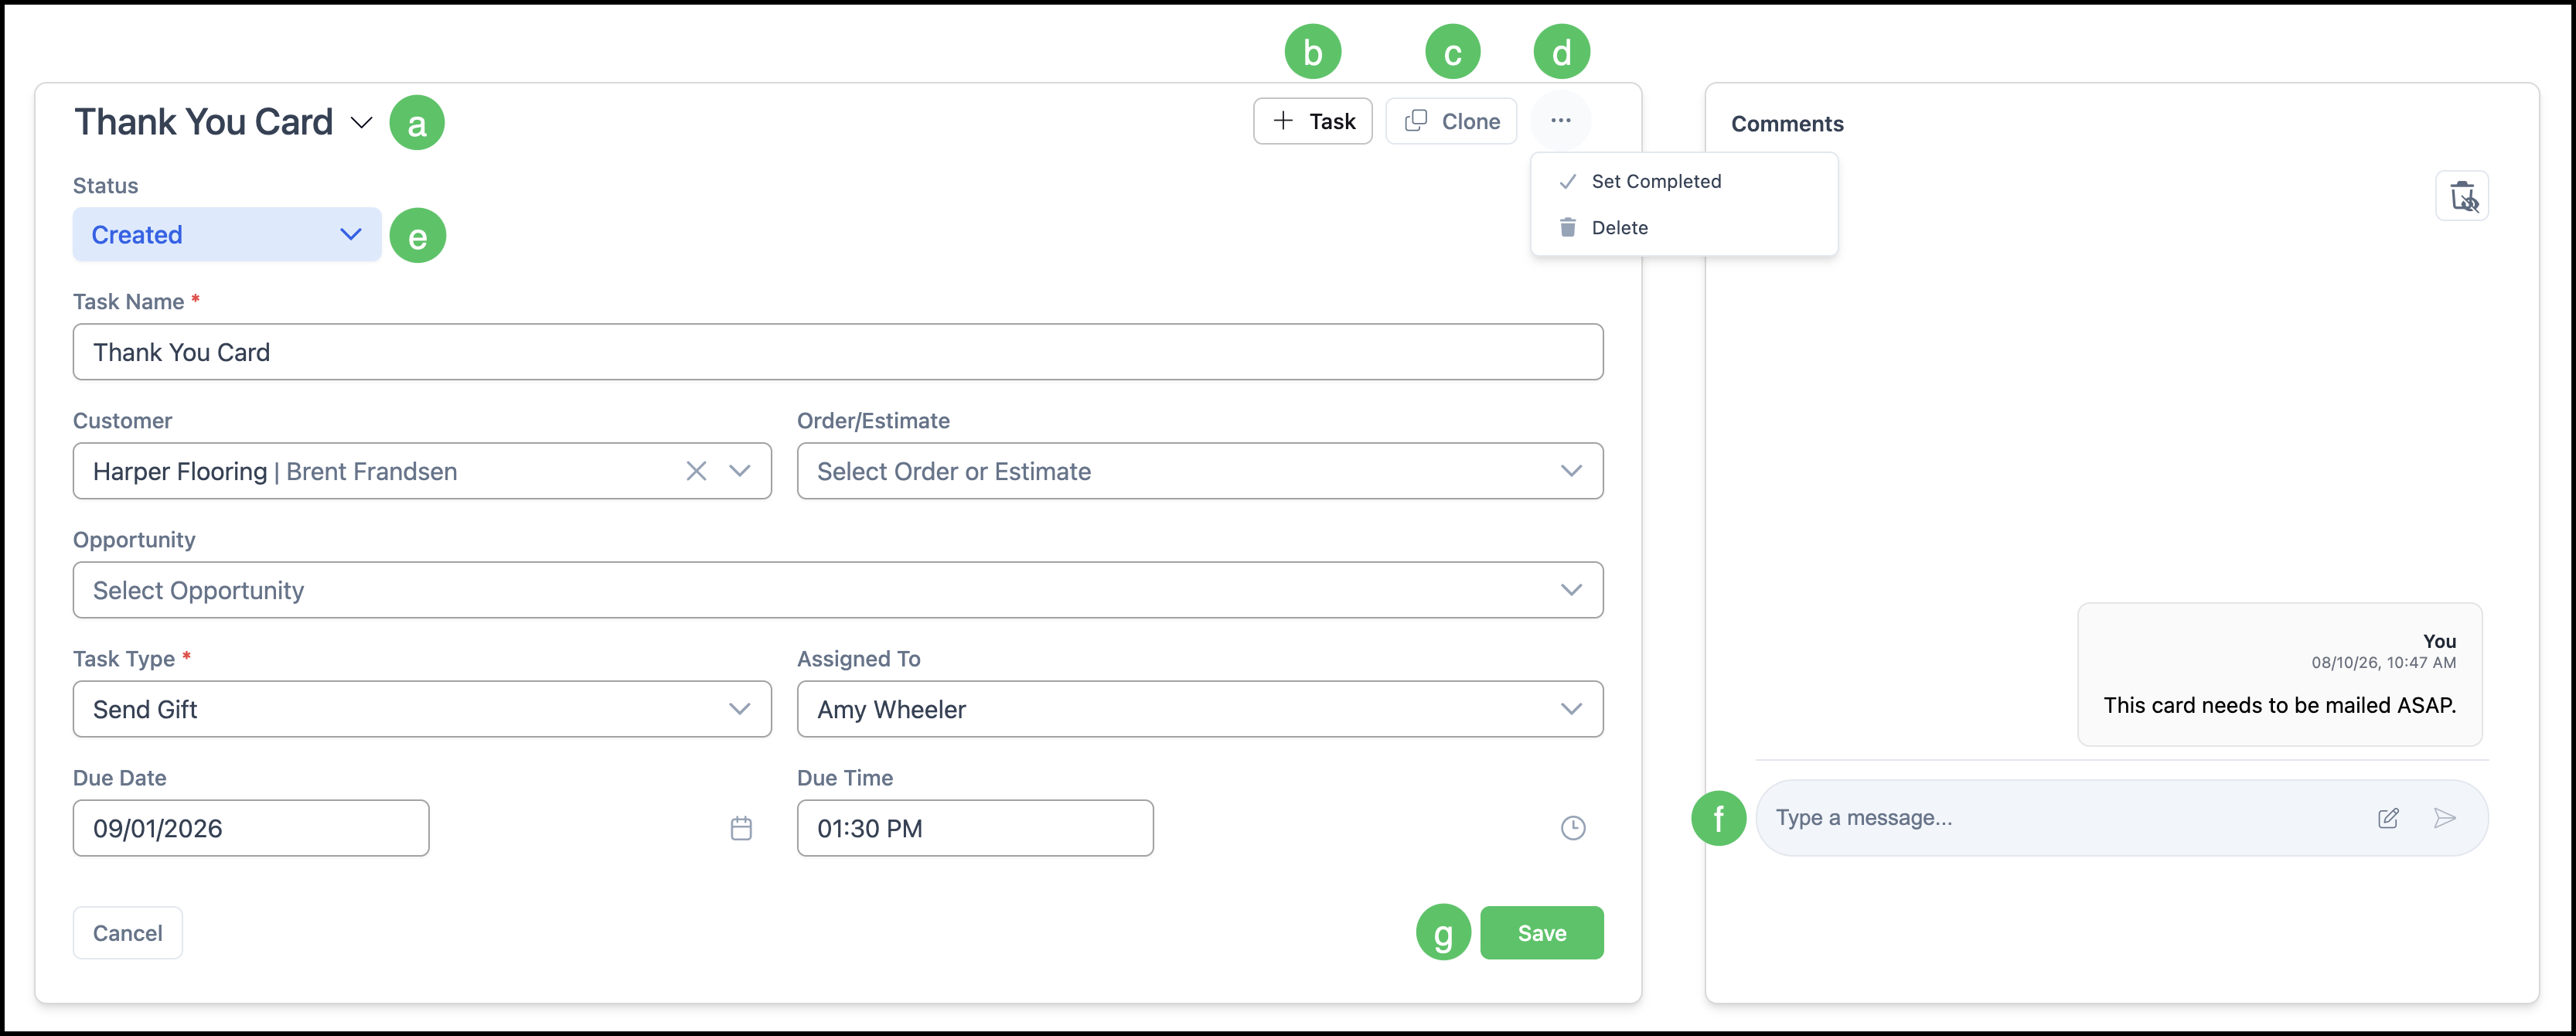
a. Task Title - Select the Task title to expand the Task details, including when the Task was created.
b. Add Task - Opens the Add Task dialog, where you can create a new Task.
c. Clone - Creates a copy of the current Task, allowing you to quickly create a similar Task.
d. More Actions - Opens a menu with additional options, including Set Completed and Delete.
e. Status - Allows you to update the Task status.
f. Comments - Provides an internal comments section for adding notes related to the Task.
g. Save - Saves any changes made to the Task. Changes are not saved automatically.
Creating a Task
Creating a Task can be done from the Task screen or from the Tasks quick menu.
Task Screen:
1. Click on the Tasks icon.
2. Select View My Tasks.
3. Click + Task.
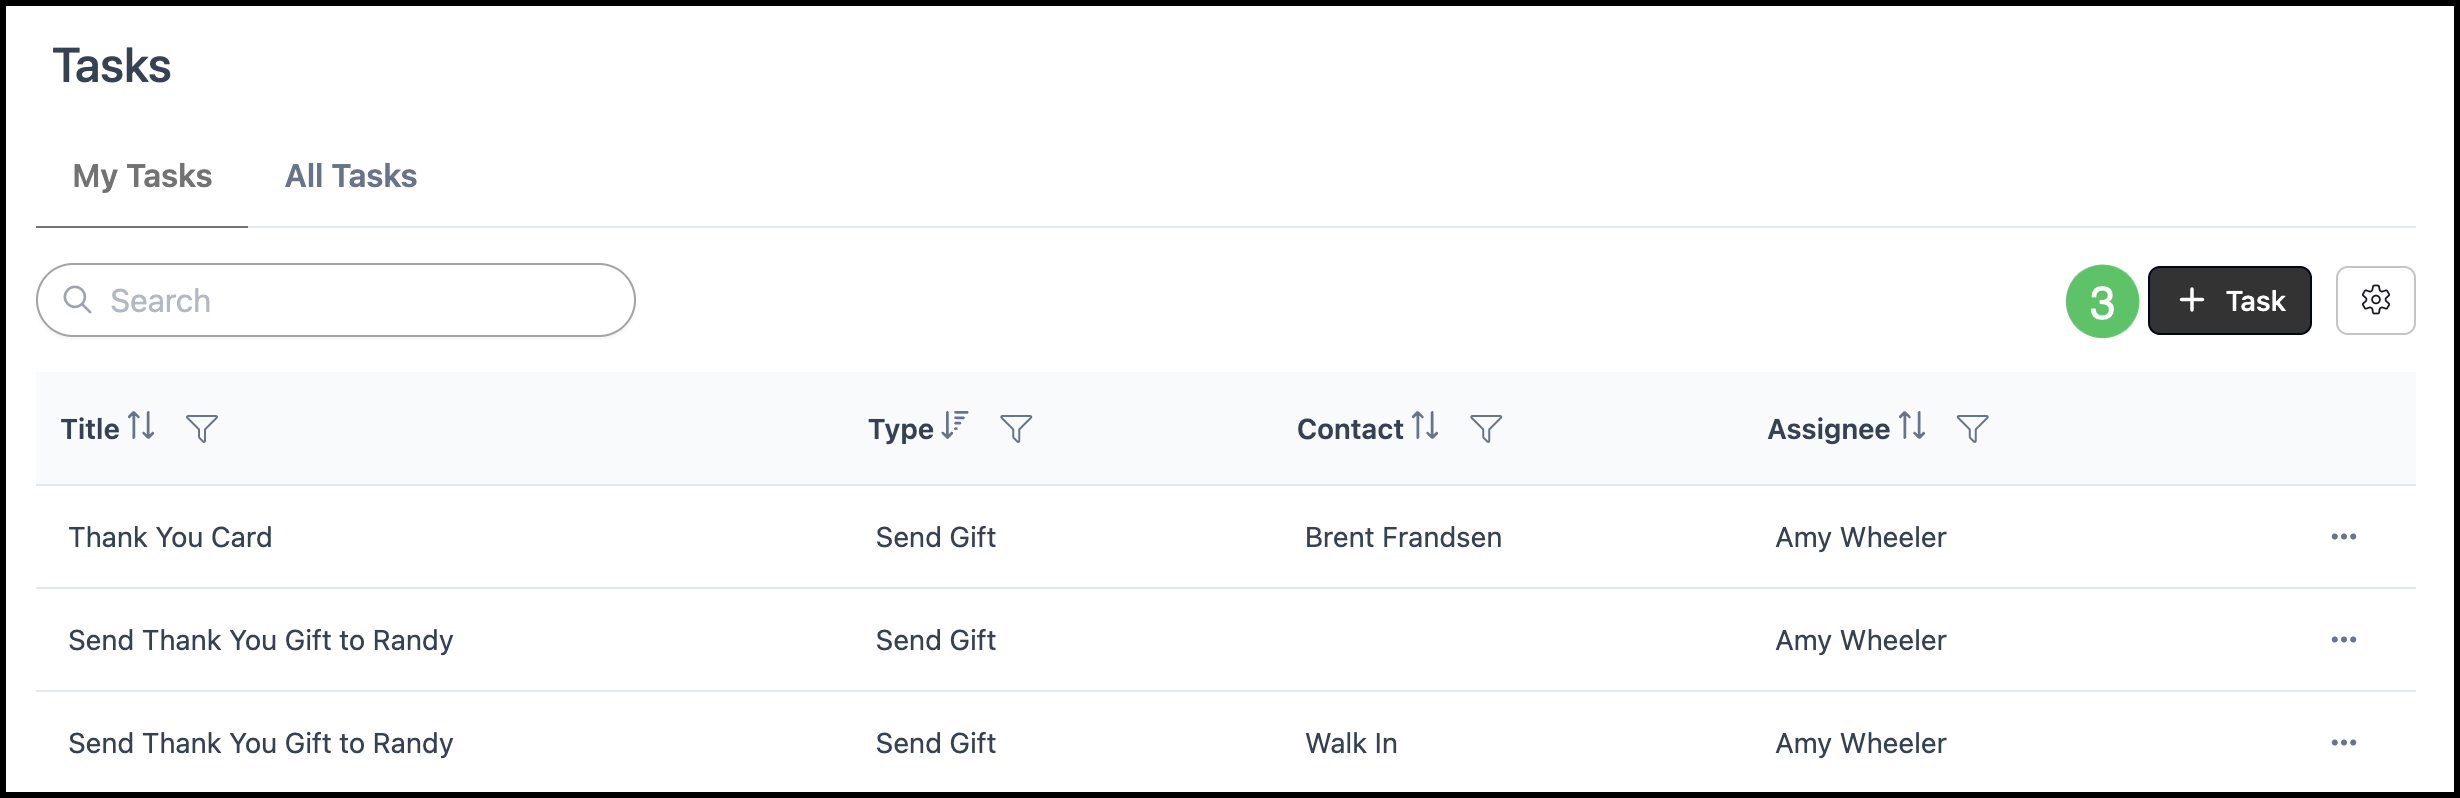
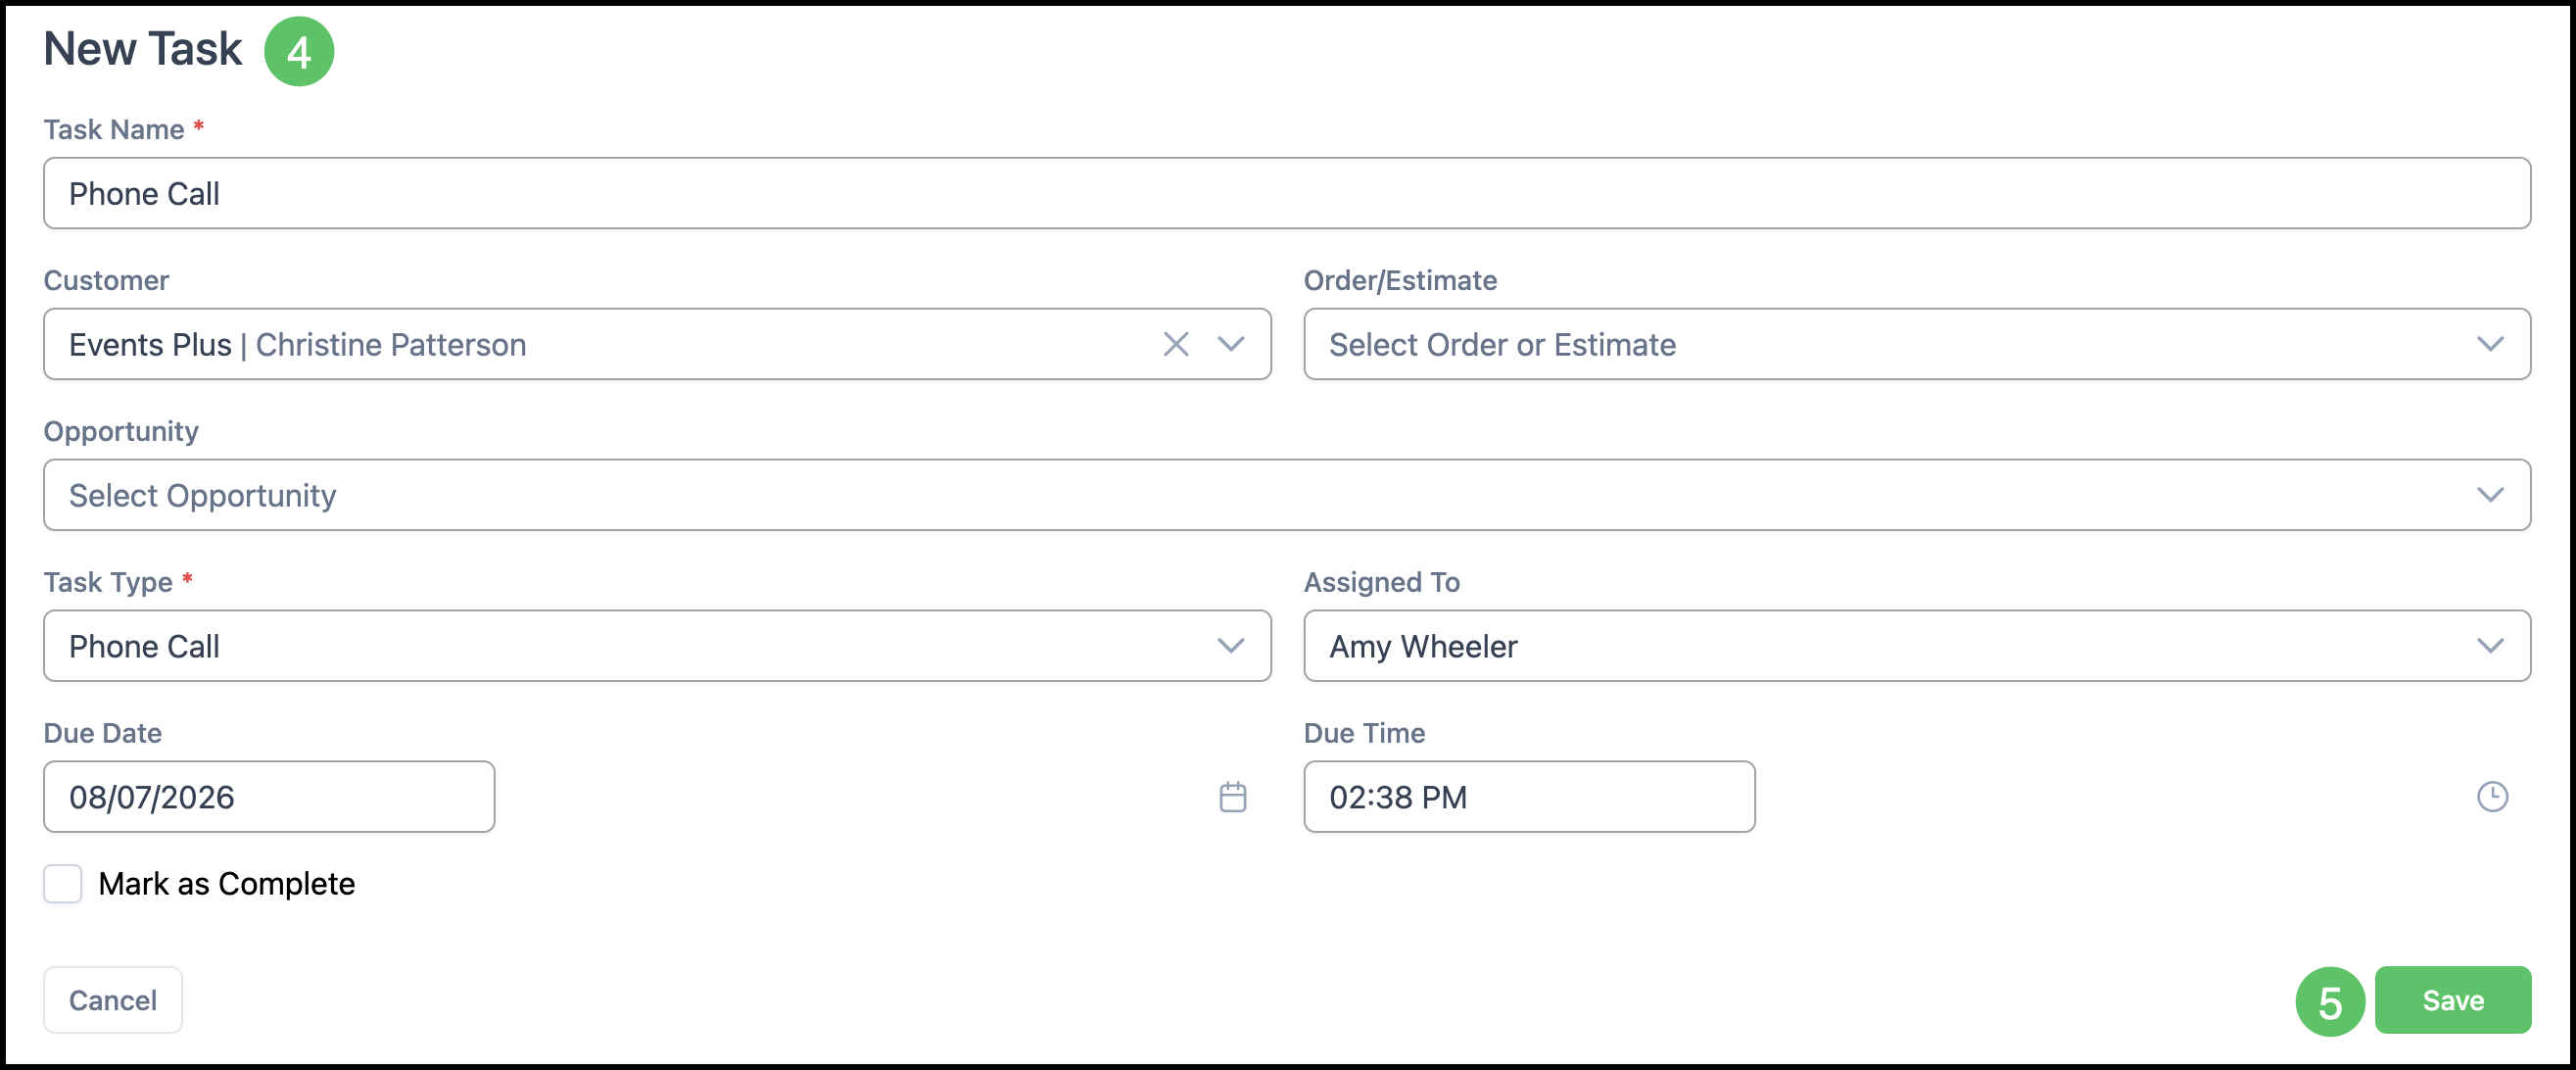
4. Complete the Task form. Required fields include Task Name and Task Type (marked with a red asterisk).
Note: Assigning this Task to yourself will file it under My Tasks. Assigning it to someone else will file it under All Tasks.
5. Click Save.
Tasks Quick Menu:
1. Click on the Tasks icon.
2. Select Add Task.
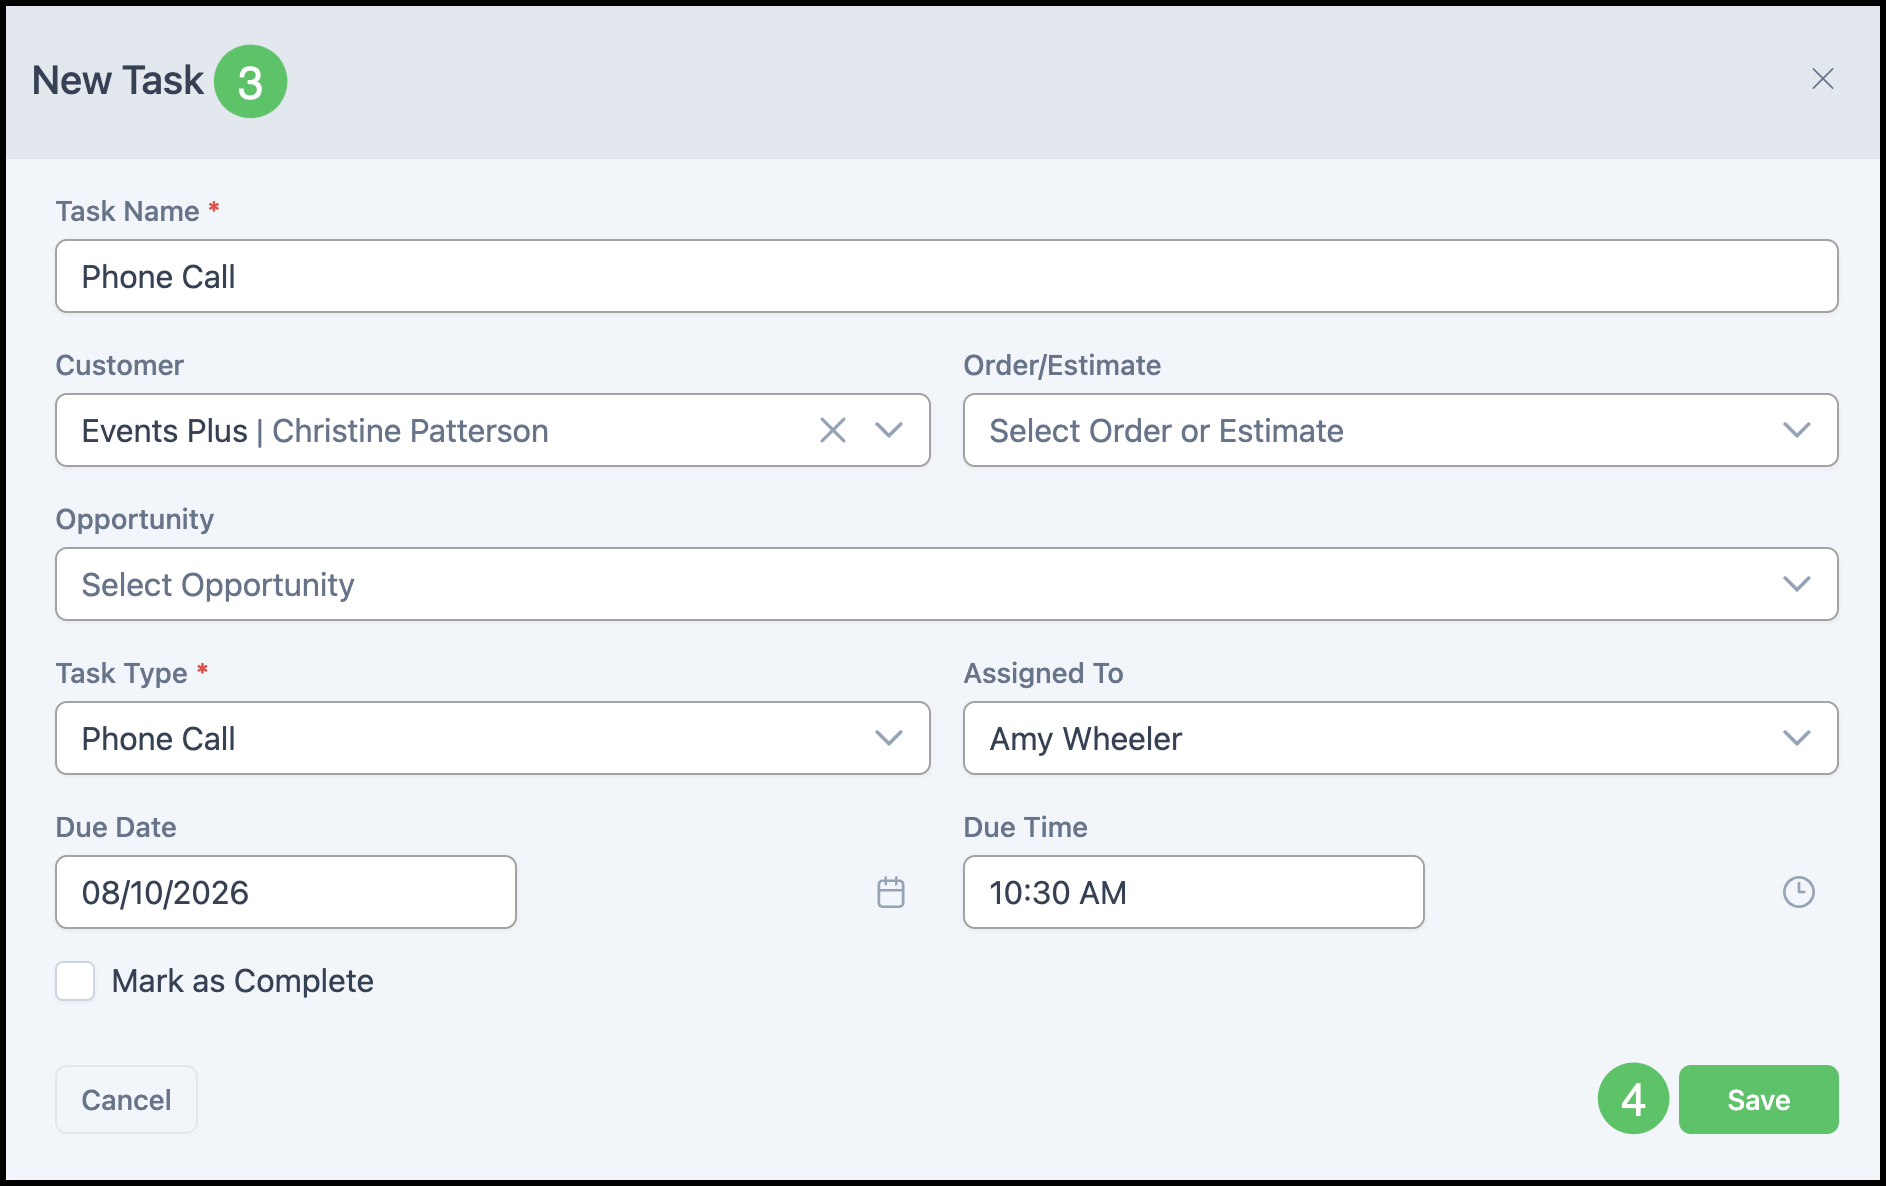
3. Complete the Task form. Required fields include Task Name and Task Type (marked with a red asterisk).
Note: Assigning this Task to yourself will file it under My Tasks. Assigning it to someone else will file it under All Tasks.
4. Click Save.
Completing and Reopening Tasks
- Mark a task complete from the task detail view, list row actions, or the Mark as Complete checkbox when creating a task.
- When completed, the completion date is recorded on the task.
- To reopen a completed task, use Mark as Incomplete from the row actions menu or detail view.
Task Types in Settings
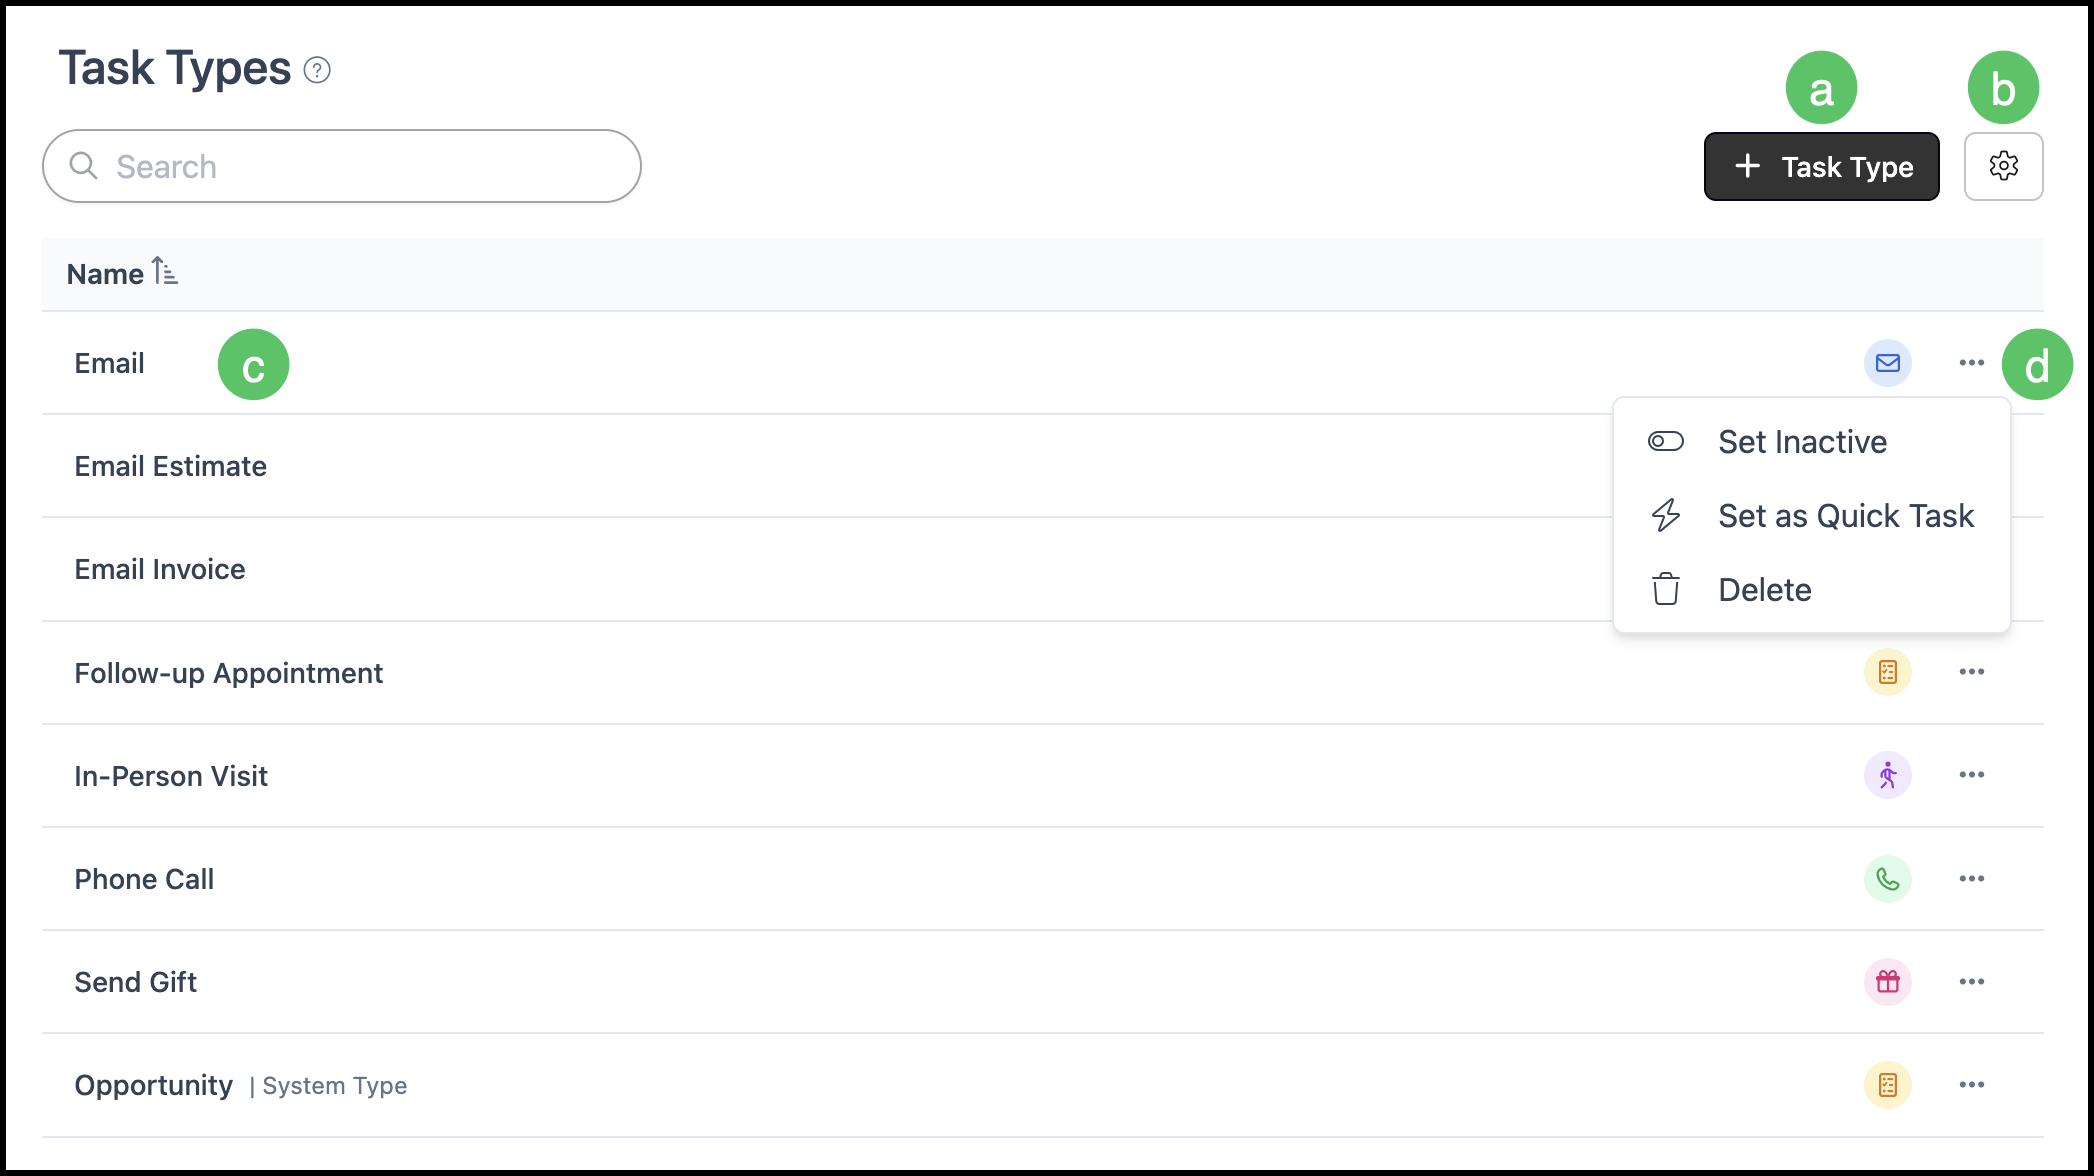
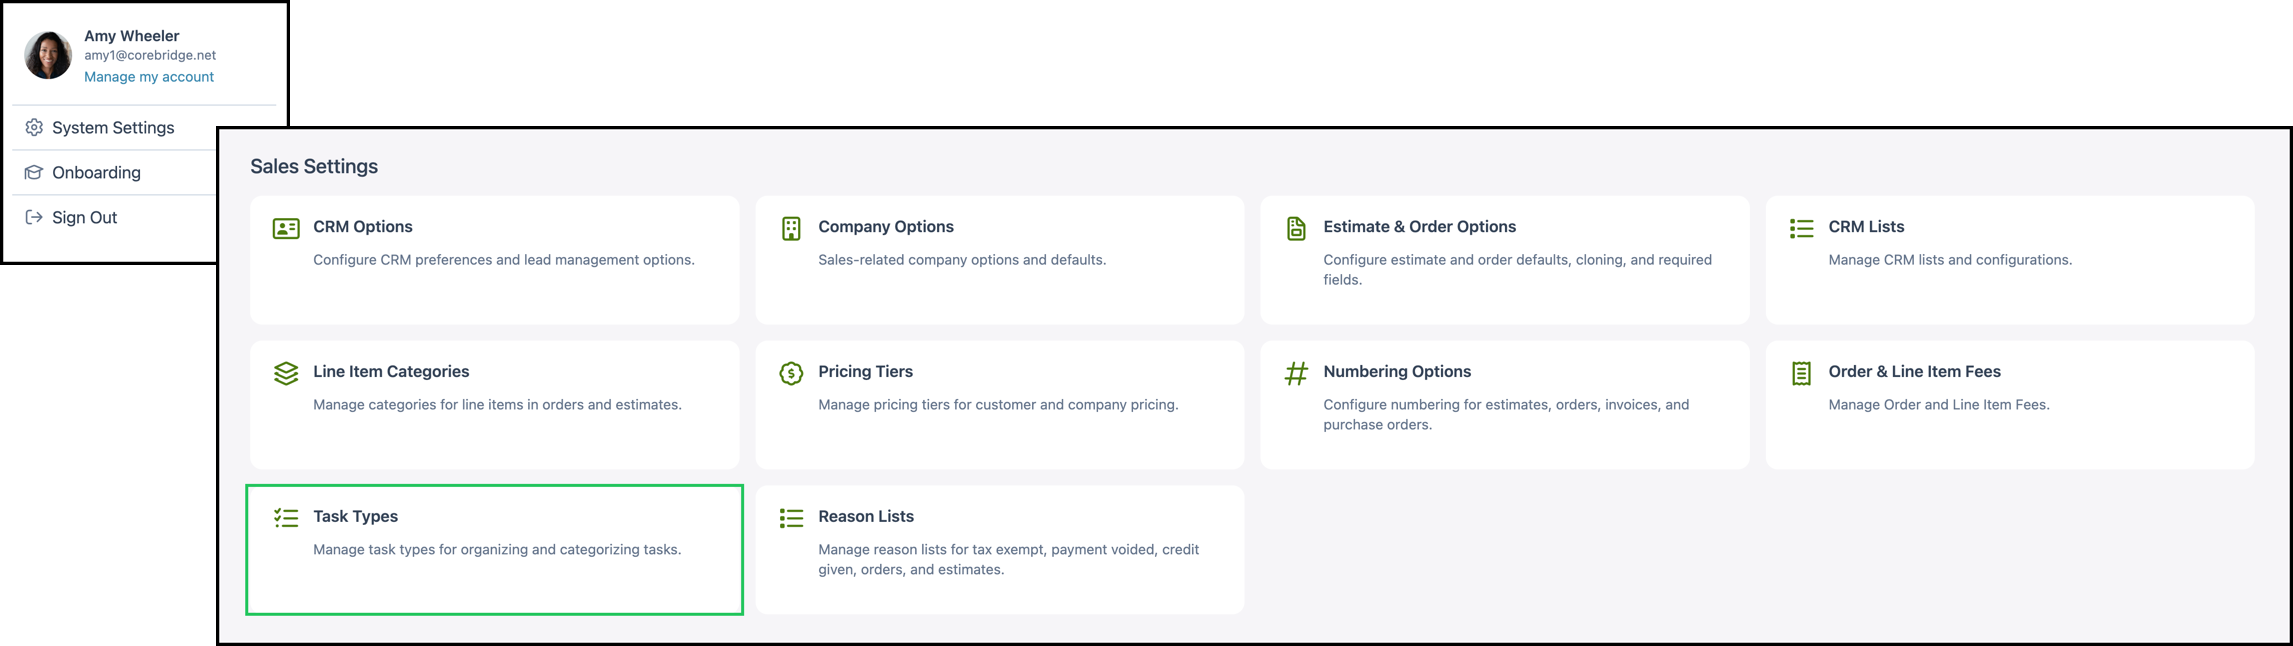
Navigate to System Settings / Sales Settings / Task Types.
a. Add Task Type - Opens the Add Task Type dialog, where you can create custom Task Types to meet your company's needs.
b. System Settings - Displays additional options, including the ability to view inactive Task Types.
c. Task Type - Select a Task Type to view or edit its details.
d. More Actions - Opens a menu with additional options, including Set Inactive, Set as a Quick Task, and Delete.
Note: System Task Types cannot be deleted.