
The Google Gmail integration lets your team send email from CoreBridge using Google Gmail mailboxes. After you install the integration, you add an email domain and authorize each email from address so estimates, invoices, and messages go out from your business email.
Note: CoreBridge can help with integration setup and how the integration works within the system. Questions related to Google or Google Workspace should be directed to Google.
Table of Contents
- Before You Begin
- Benefits of Integrating with Google Gmail
- How to Integrate CoreBridge with Google Gmail
- Create an Email Domain for Google Gmail
- Authorize a Google Gmail Email From Address
- Related Articles
Before You Begin
Google Gmail is a free integration in the Integrations Marketplace. Your business must have the Google Gmail integration enabled before the card appears or can be installed.
You need access to System Settings and permission to install integrations, manage email domains, and manage email from addresses. Install the Google Gmail integration before Google Gmail appears as an option in the Email Provider dropdown on email domains.
Each email from address must be authorized separately through Google sign-in. You may need to re-authorize after extended inactivity. Uninstalling the integration deactivates email domains and email from addresses that use Google Gmail as the provider.
Benefits of Integrating with Google Gmail
Connecting Google Gmail keeps customer communication in your business email accounts while you work in CoreBridge.
- Send from your Gmail address. Send estimates, invoices, and messages using your Google Gmail email directly from CoreBridge.
- Secure authorization. Connect each mailbox through Google sign-in so CoreBridge can send on behalf of authorized users.
- Flexible permissions. Control which employees and locations can use each email domain and email from address.
How to Integrate CoreBridge with Google Gmail
This section explains how to install the Google Gmail integration from the Integrations Marketplace.
Navigate to System Settings / My Business / Integrations Marketplace.
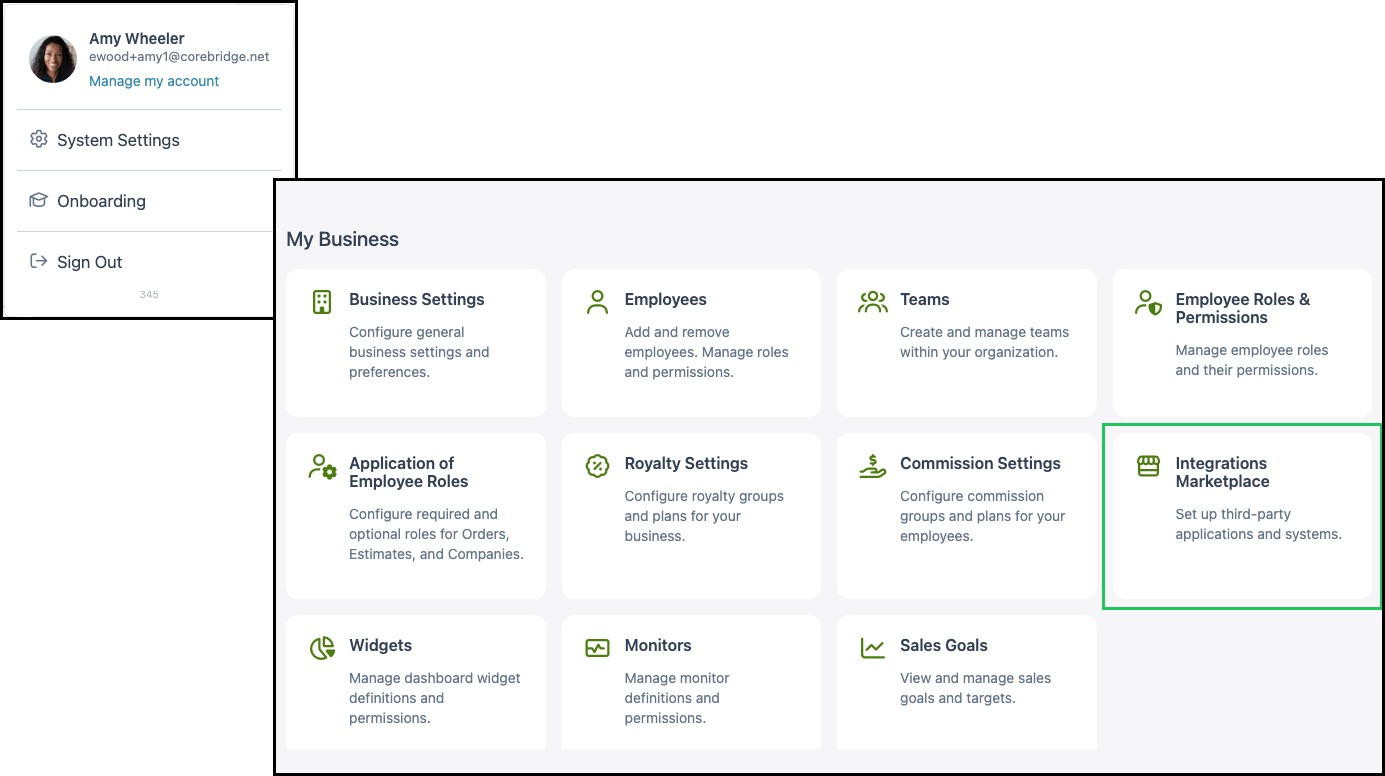
1. Click the Communication category, or type Google Gmail in Search marketplace.
Note: You can also find Google Gmail using Search marketplace or by browsing All Categories.

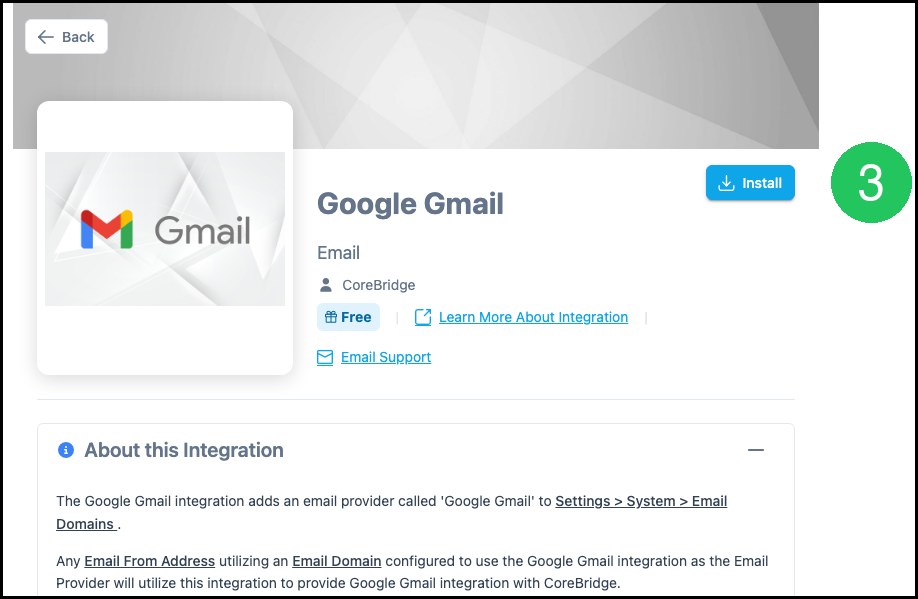
2. Click the Google Gmail card.

3. Click Install.
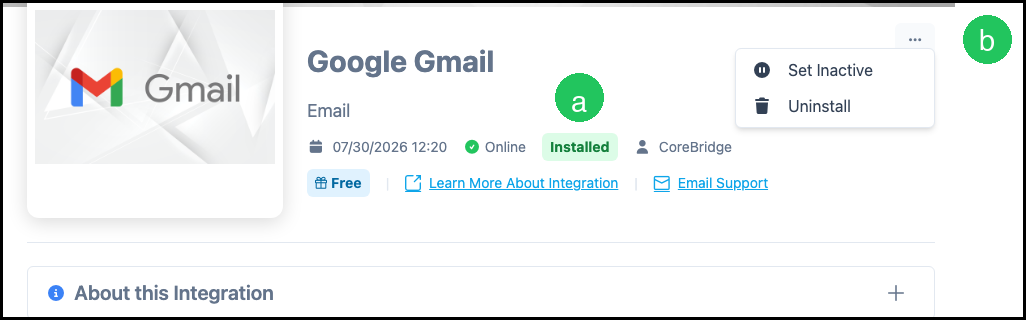
a. After installation, the integration detail screen shows Installed when the integration is active.
b. The More Actions menu has options to Set Inactive or Uninstall.
Create an Email Domain for Google Gmail
After Google Gmail is installed, add the email domain your team sends from.
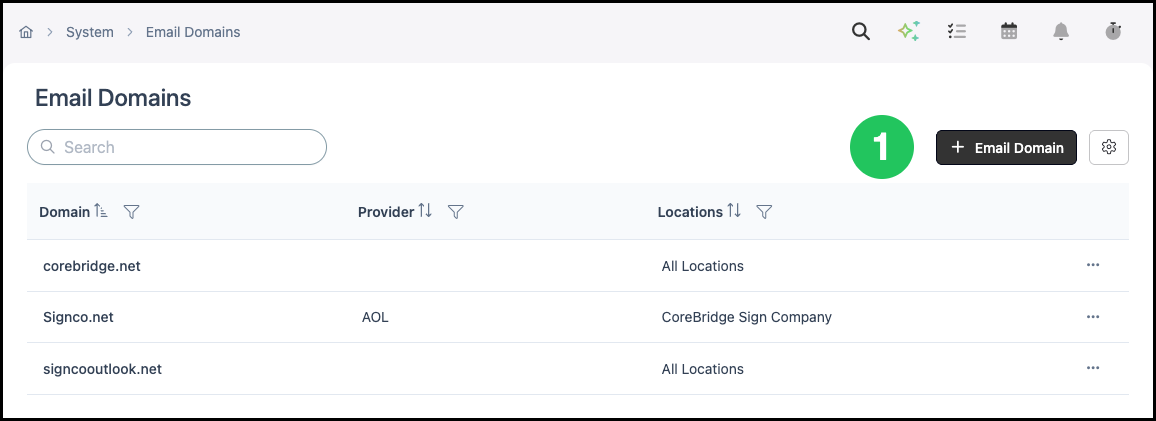
Navigate to System Settings / System / Email Domains.
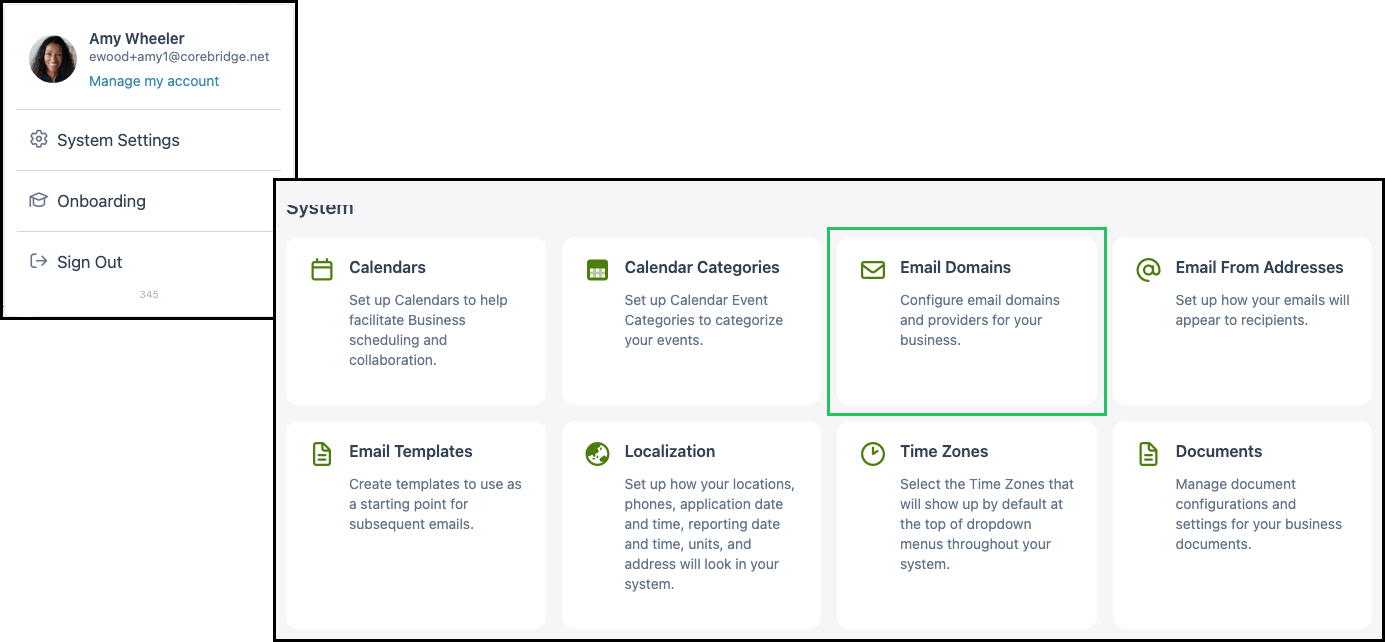
1. Click the Email Domain button.
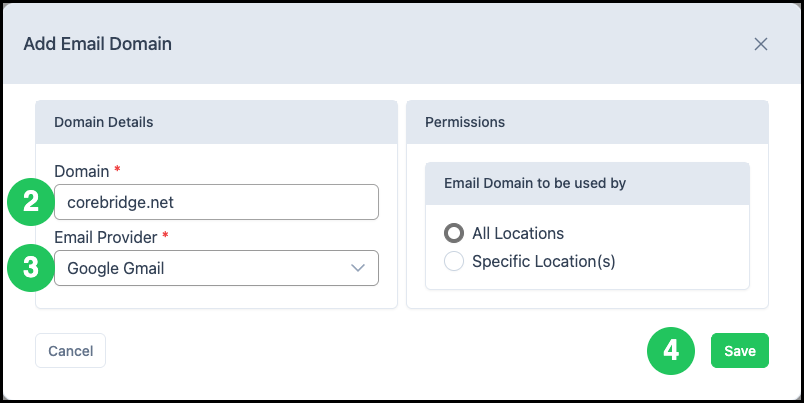
2. In the Domain Details section, enter your domain using the website.com format.
Example: gmail.com or yourcompany.com.
3. Select Google Gmail from the Email Provider dropdown.
Note: If you have multiple locations, set Permissions for which locations can use this email domain. If you do not have multiple locations, the Permissions section may not apply. To add additional locations to your system, contact sales@corebridge.net.
4. Click Save.
Note: For more detail on email domains, see Creating Email Domains.
Authorize a Google Gmail Email From Address
Create and authorize an email from address for each Google mailbox that will send from CoreBridge.
Navigate to System Settings / System / Email From Addresses.
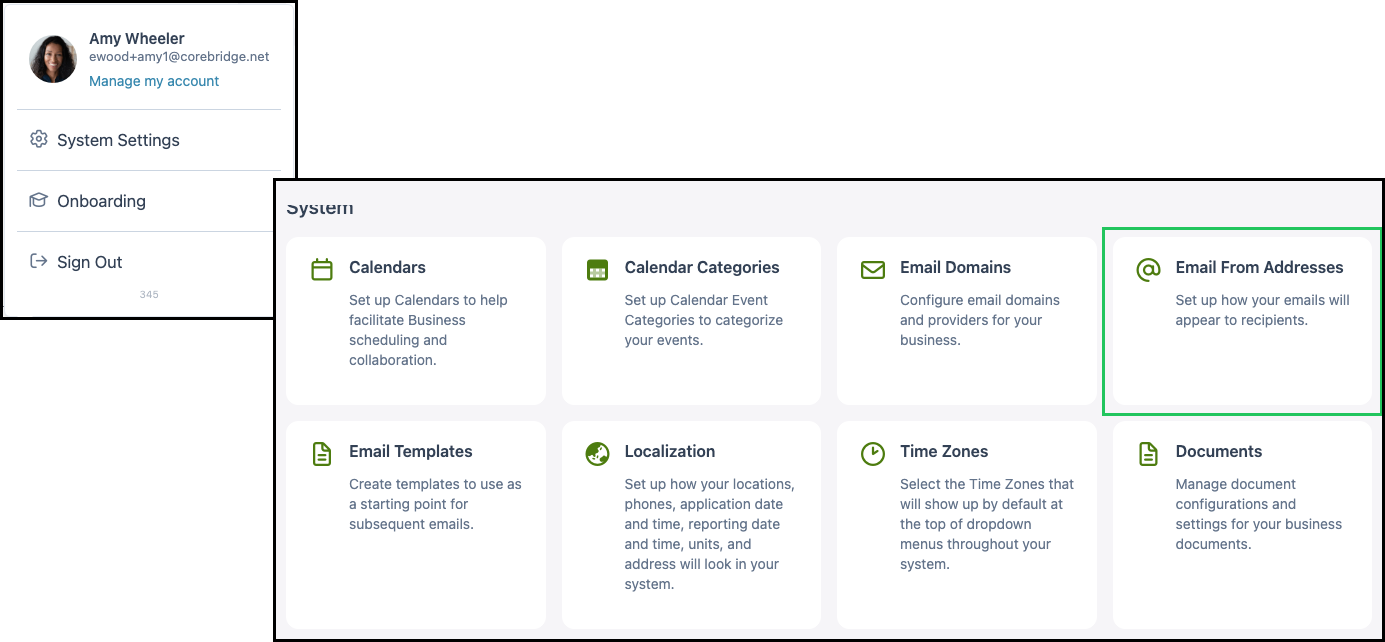
Click the Email From Address button.
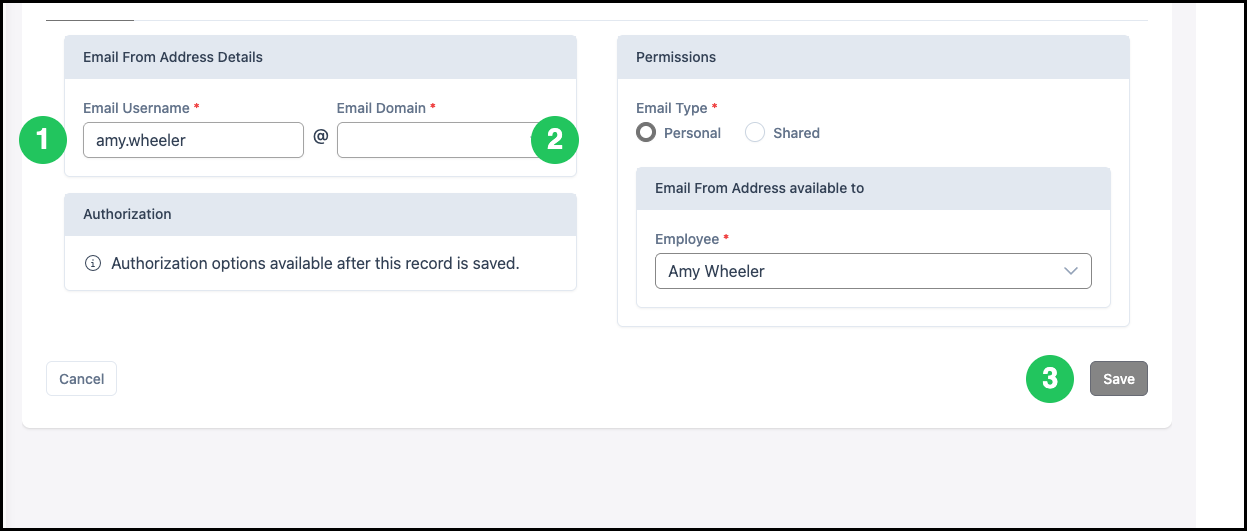
1. On the Details tab, enter the Email Username.
Example: For sales@yourcompany.com, enter sales in Email Username.
2. Select the Google Gmail Email Domain from the dropdown.
Note: In the Permissions section, choose Personal or Shared, then set which employees and locations can use this address.
3. Click Save.
4. Select the Email From Address you created.
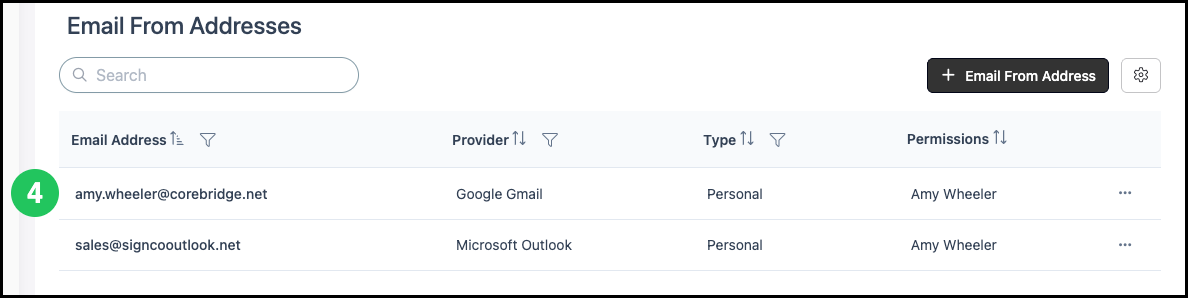
5. Click Sign in with Google and complete Google sign-in in the browser window.
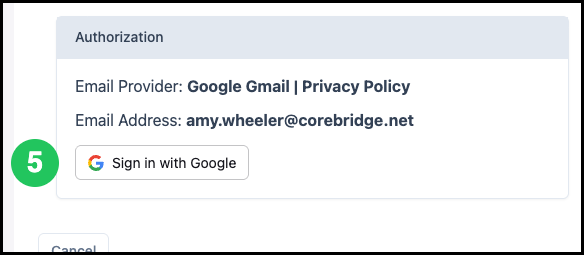
Note: Authorization must be completed before the address can send email. Addresses with a pending or unauthorized status must be authorized before use. You may need to re-authorize after extended inactivity.
Note: For more detail on email from addresses, see Adding Email From Addresses.