
NetSuite Summary Sync allows you to sync your financial data in journal entry format directly with NetSuite. NetSuite Summary Sync provides a high-level overview of financial performance with faster data transfer and reduced storage needs. The integration is the most commonly used and recommended NetSuite option for CoreBridge. Only general ledger accounts need to be maintained in NetSuite; individual customers and transactions do not appear in your accounting software.
Note: CoreBridge can help with integration setup and how the integration works within the system. Questions related to NetSuite itself should be directed to NetSuite.
Table of Contents
- Benefits of Integrating with NetSuite Summary Sync
- How to Integrate with NetSuite Summary Sync
- NetSuite Configurations
- Activating NetSuite Summary Sync
- Using NetSuite Summary Sync After Setup
- Related Articles
Benefits of Integrating with NetSuite Summary Sync
- High-Level Overview: Provides a consolidated view of financial data as summary journal entries, offering a snapshot of overall performance without individual transaction details.
- Fast Data Transfer: Summary sync reduces the volume of data sent to NetSuite, which can speed up processing.
- Reduced Storage Needs: Combining data into summary entries can reduce storage requirements in NetSuite compared with syncing every transaction.
- Sync Flexibility: Configure reconciliation sync as manual or automatic, and set notification preferences when sync failures occur.
- Customizable Sync Options: Options include syncing balances for pre-invoiced orders, component consumption costs, and mapping CoreBridge locations to NetSuite classes when supported.
How to Integrate with NetSuite Summary Sync
To integrate NetSuite Summary Sync with your CoreBridge system, navigate to System Settings / My Business / Integrations Marketplace.
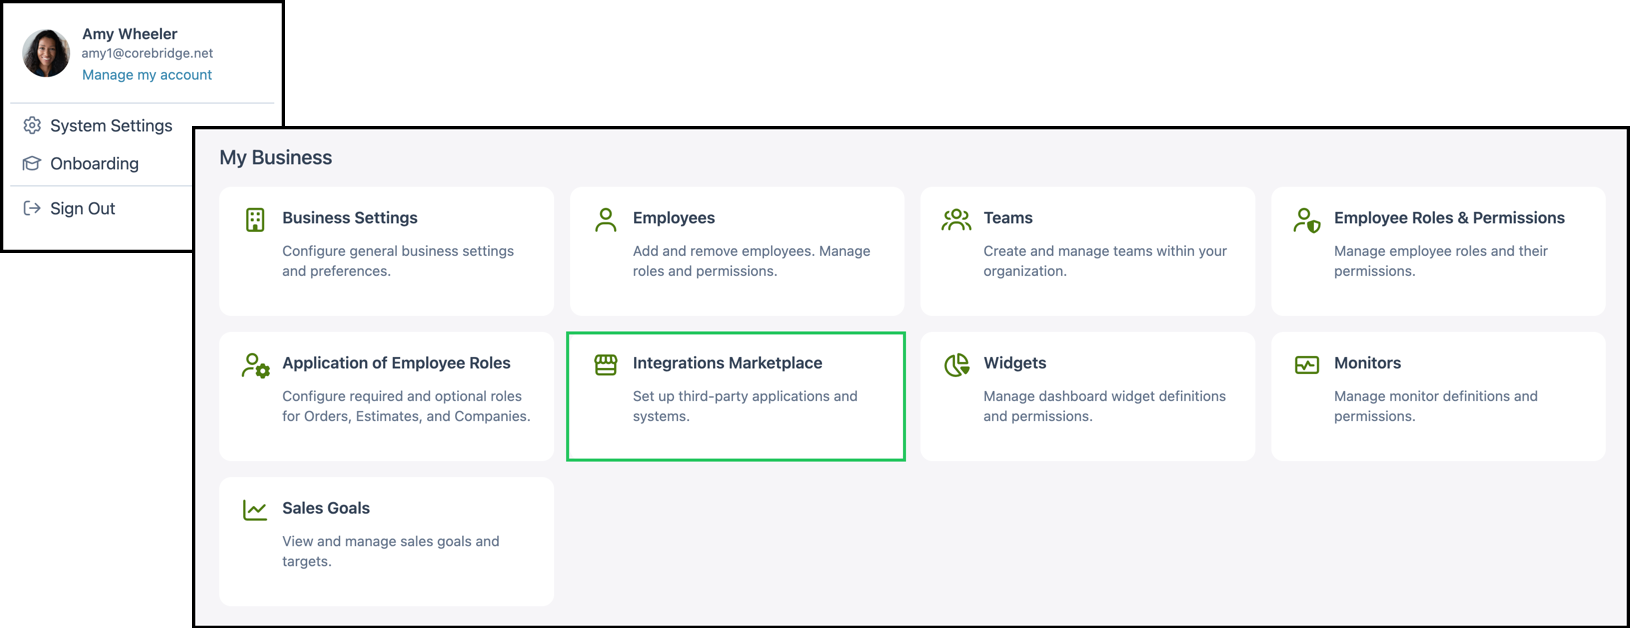
1. Select the Finance category.
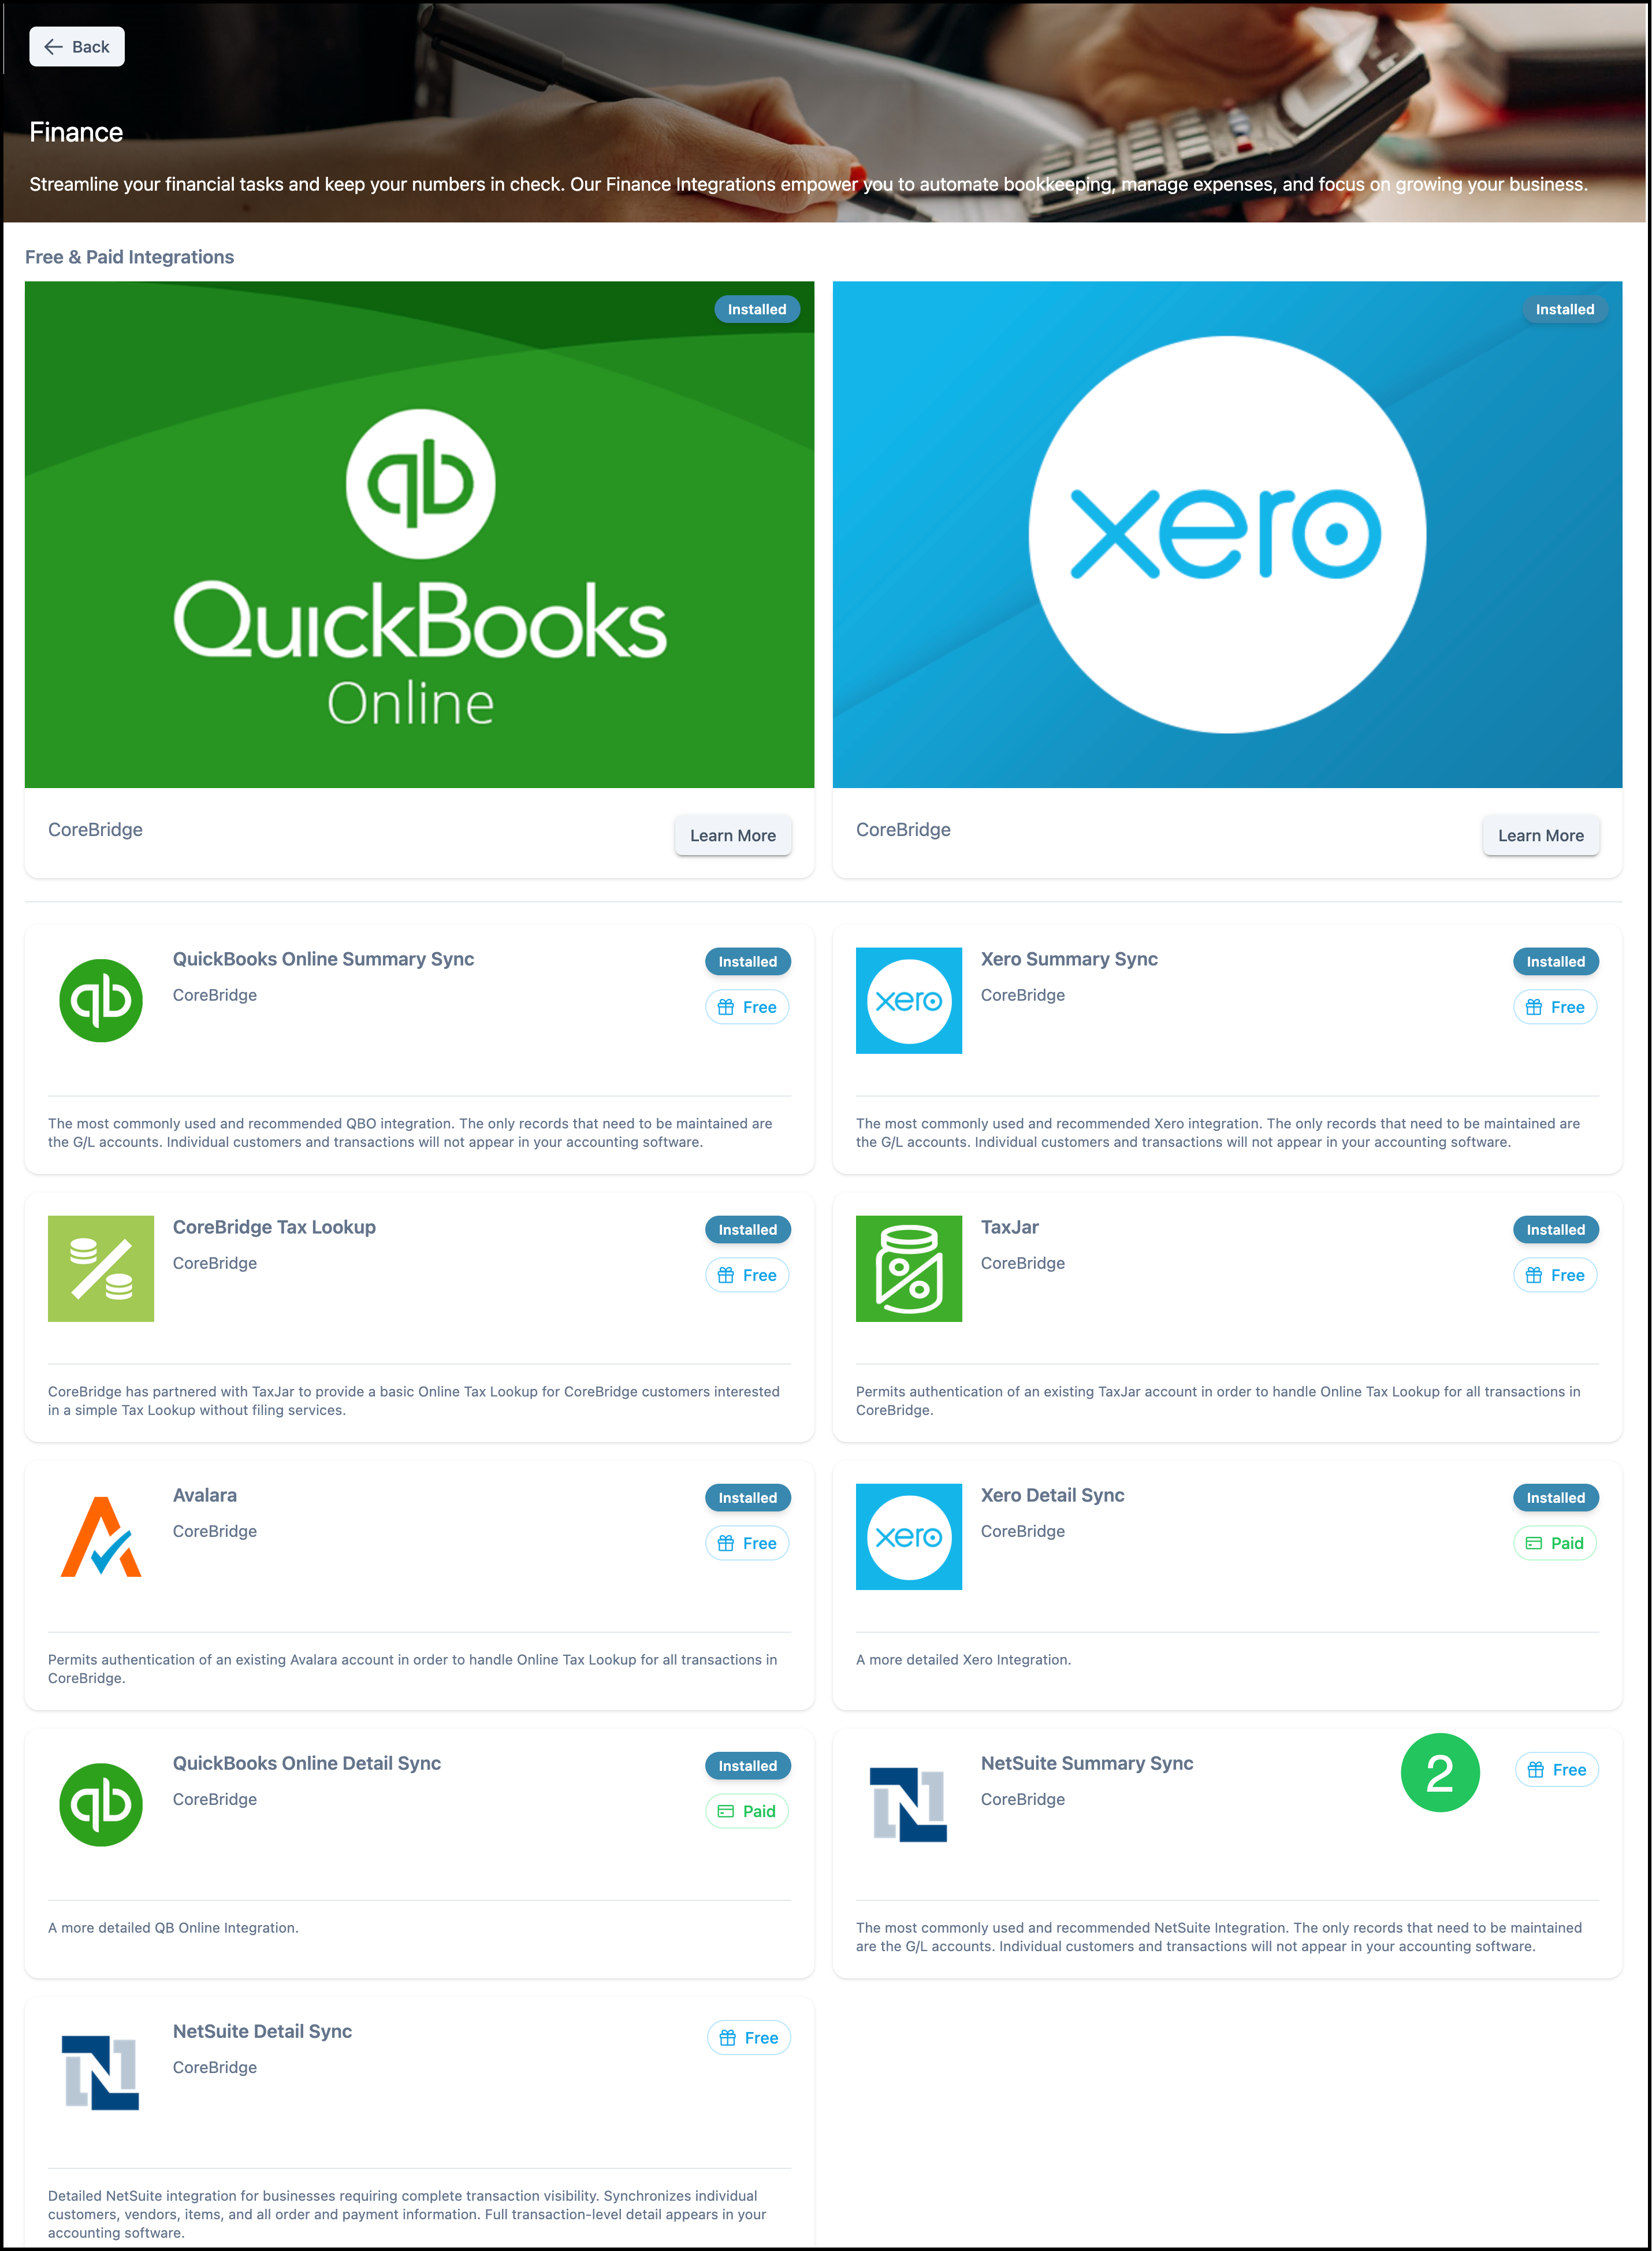
Note: You can also find NetSuite Summary Sync using All Categories or the search box on the marketplace.

2. Select the NetSuite Summary Sync integration.
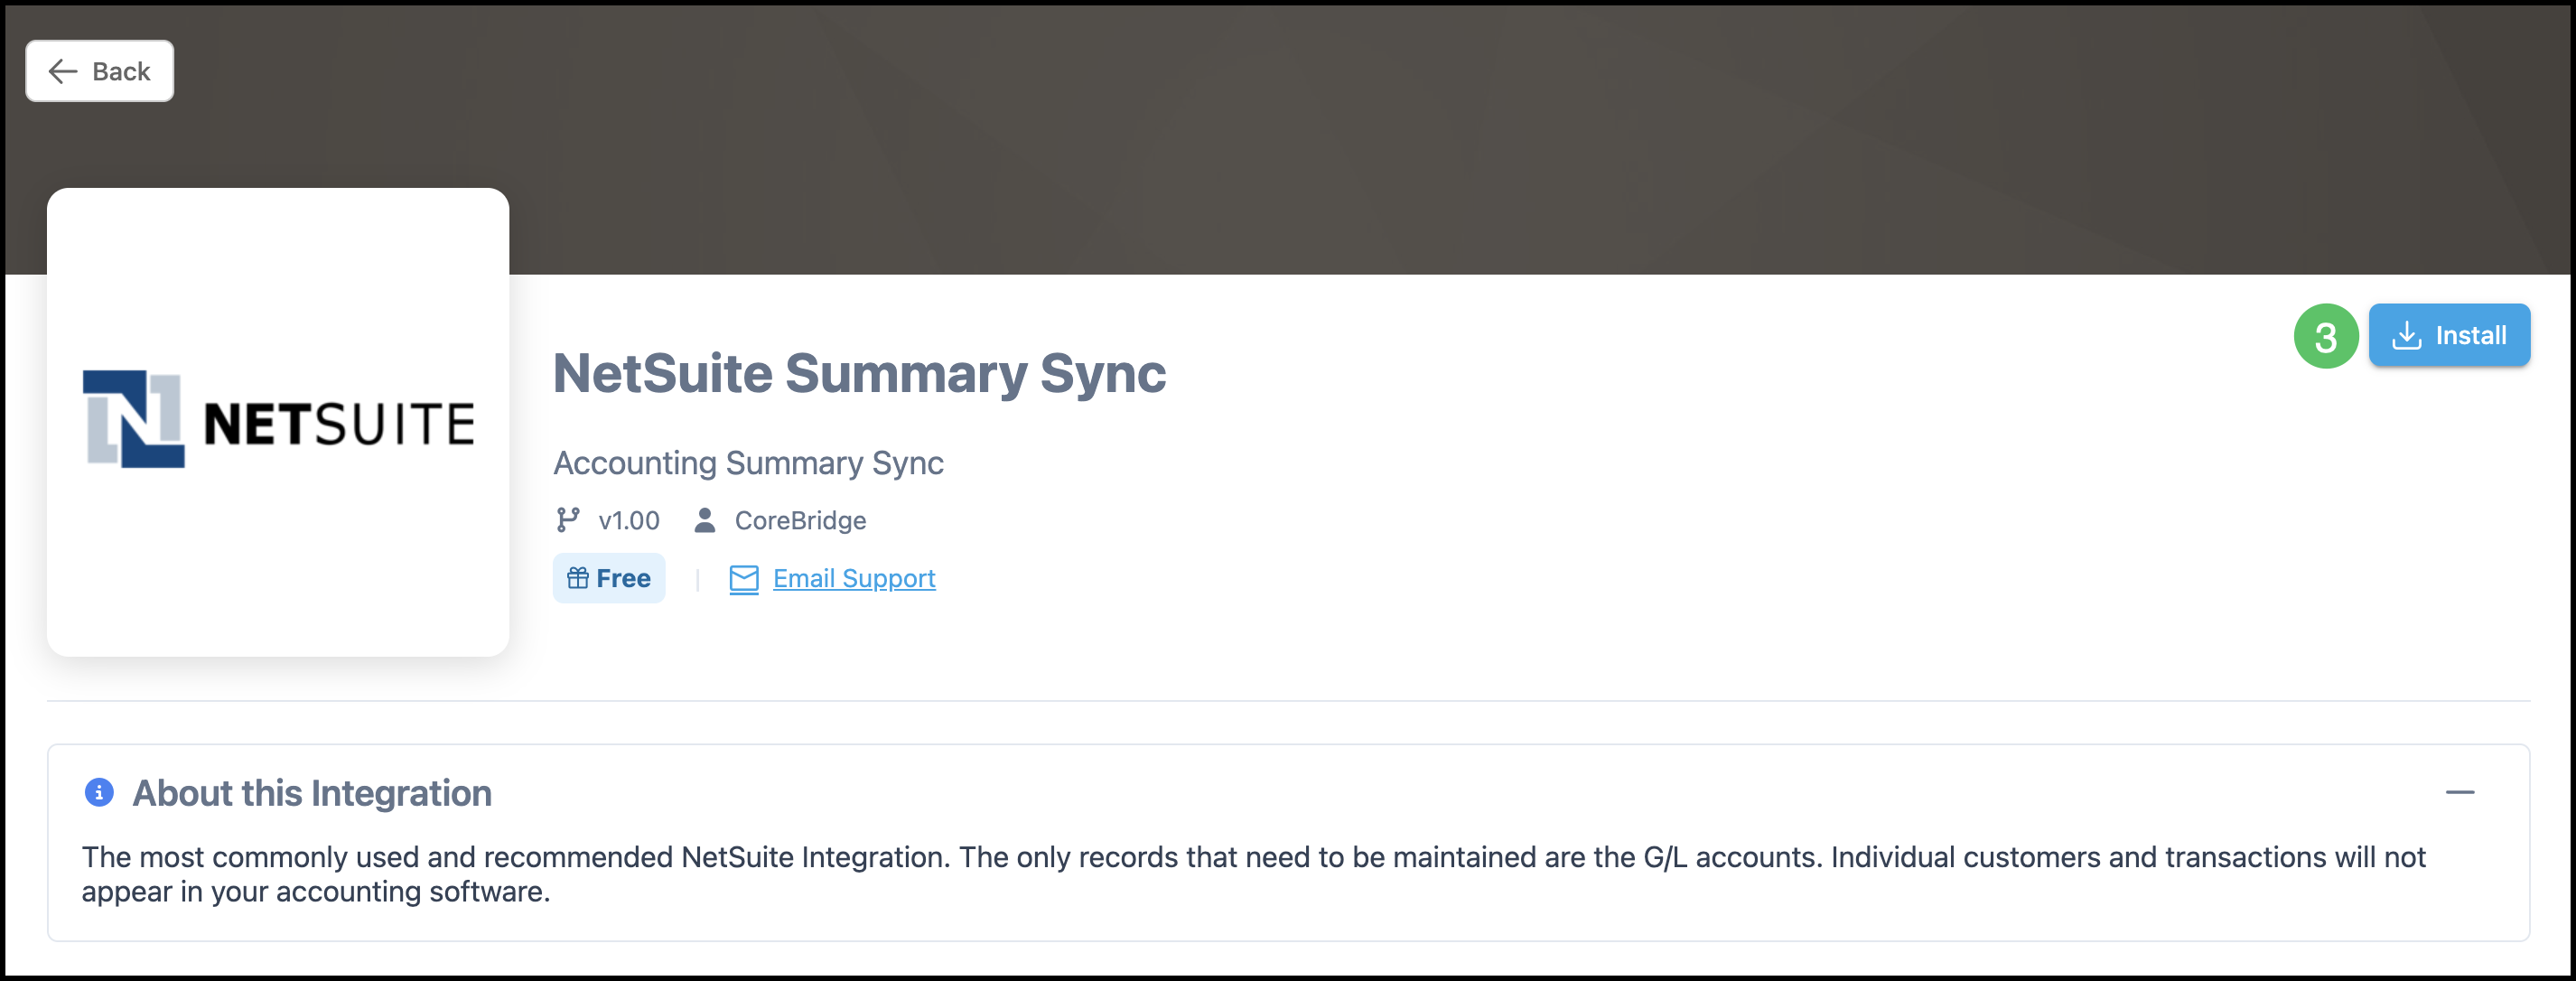
3. Click Install.
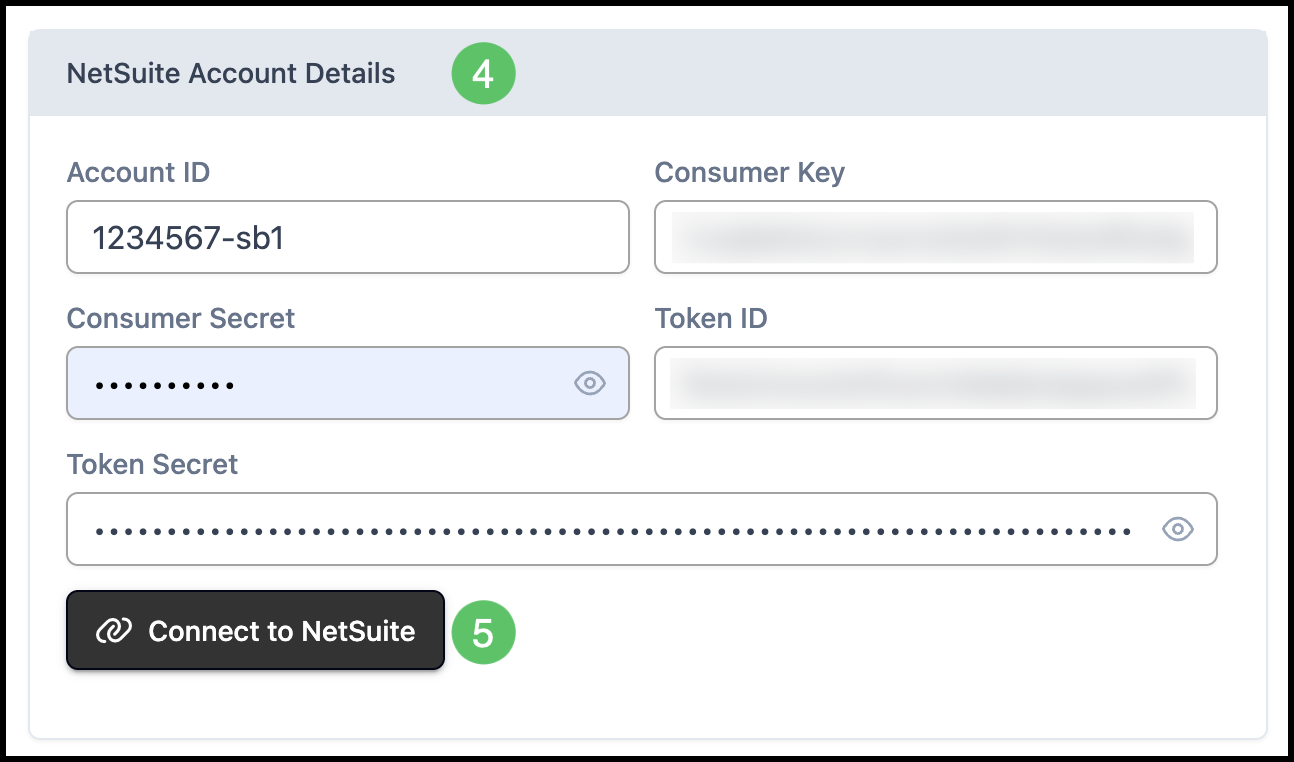
4. Fill in Account Details.
Note: These details are located within your NetSuite account. Please contact NetSuite with any questions.
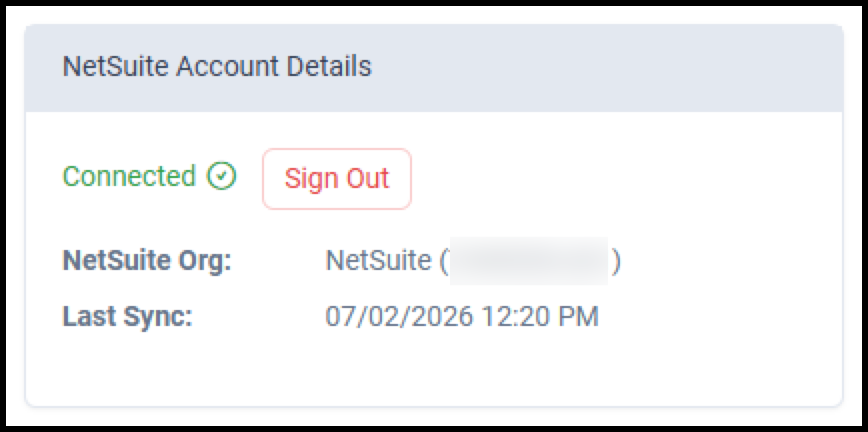
5. Select Connect to NetSuite.
Note: You will see a confirmation here once connected.
NetSuite Configurations
After connecting to NetSuite, configure the Summary Sync settings to control how information is synchronized between the two systems. These settings can be updated at any time by opening NetSuite Summary Sync from System Settings / Integrations Marketplace.
Note: Some options may appear differently depending on the number of locations you have and the sync settings you chose.
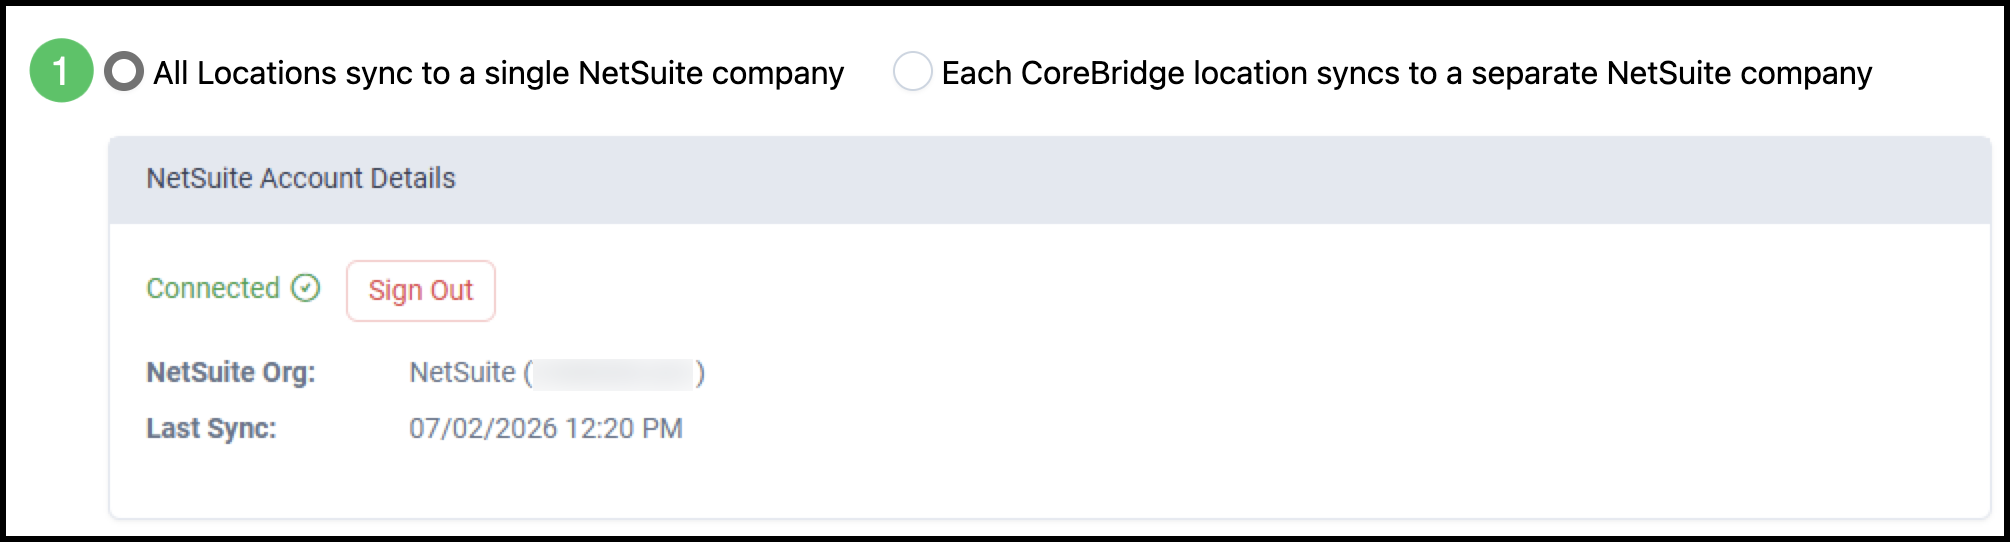
1. If you have multiple locations, choose whether all locations sync to one NetSuite company or to individual companies within NetSuite.
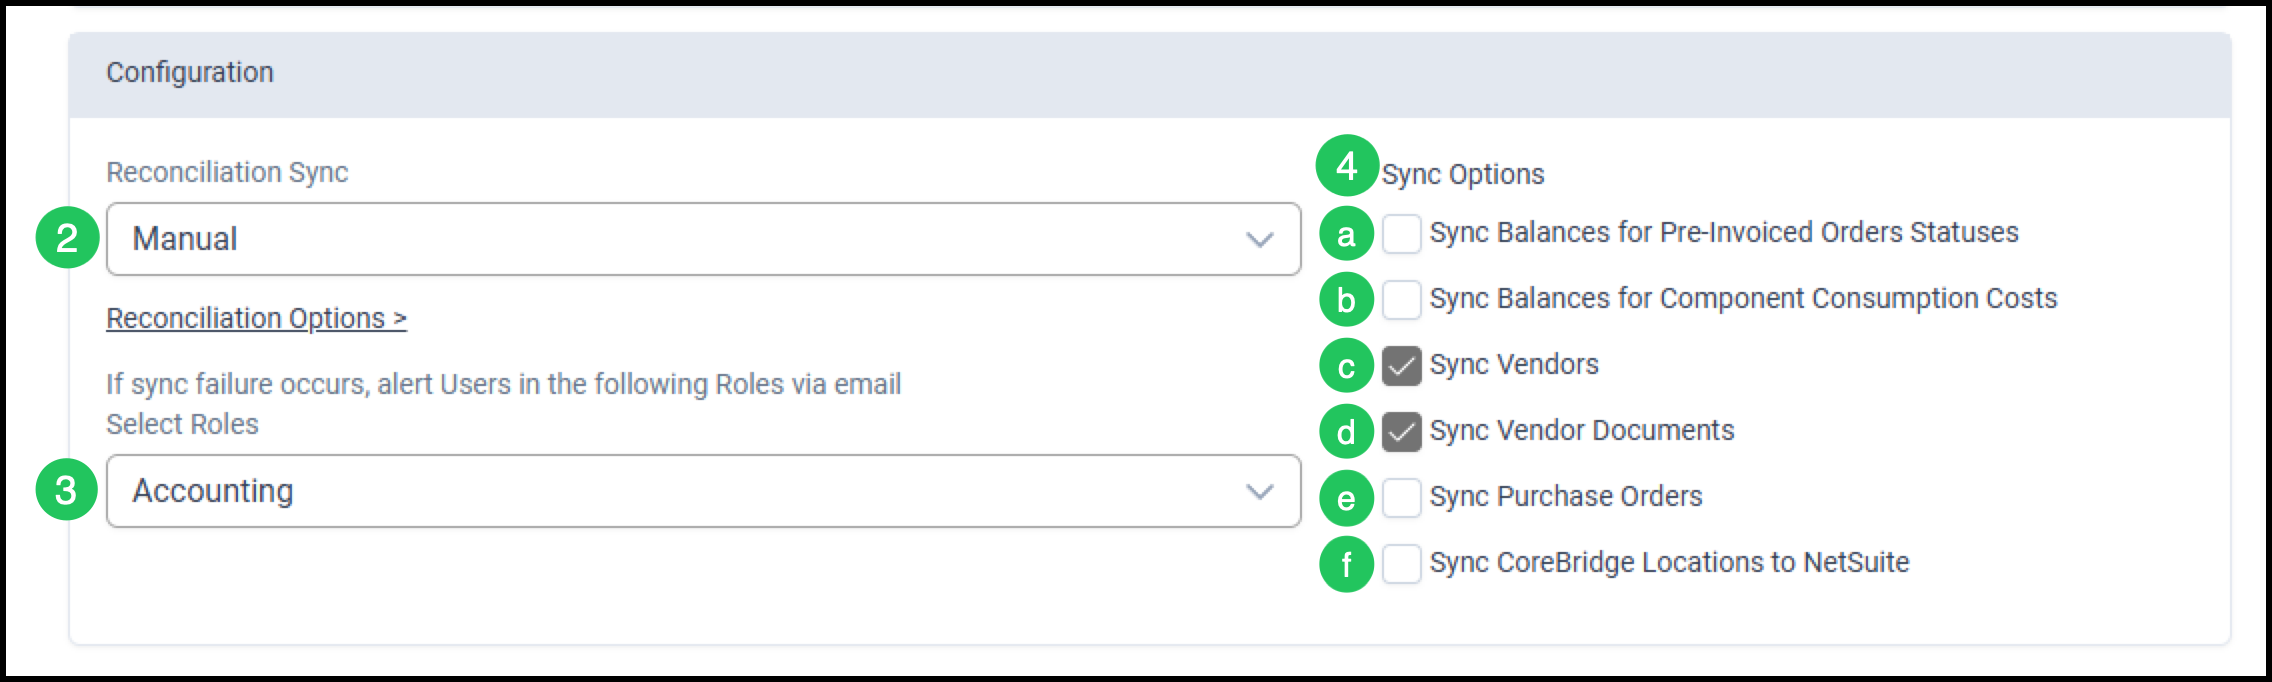
2. Use the dropdown to choose whether reconciliation sync should be Automatic or Manual. For more information, please see Automatic Reconciliation and Sync.
Note: It is recommended to complete the first sync manually so you can verify account and location mapping. After the first successful sync, you may switch to Automatic.
Note: When Automatic is selected, you will see an option to select your start date.
3. Use the dropdown to select which Employee Roles should receive email notifications if a sync failure occurs.
4. Set Sync Options.
a. Sync Balances for Pre-Invoiced Orders Statuses - Pre-invoiced order statuses include Pre-WIP, WIP, Built, Invoicing, and Production Deliverables.
b. Sync Balances for Component Consumption Costs - Component consumption costs represent the value of individual parts used to produce a finished product. Enabling this option synchronizes the related cost, expense, and inventory account balances with the General Ledger.
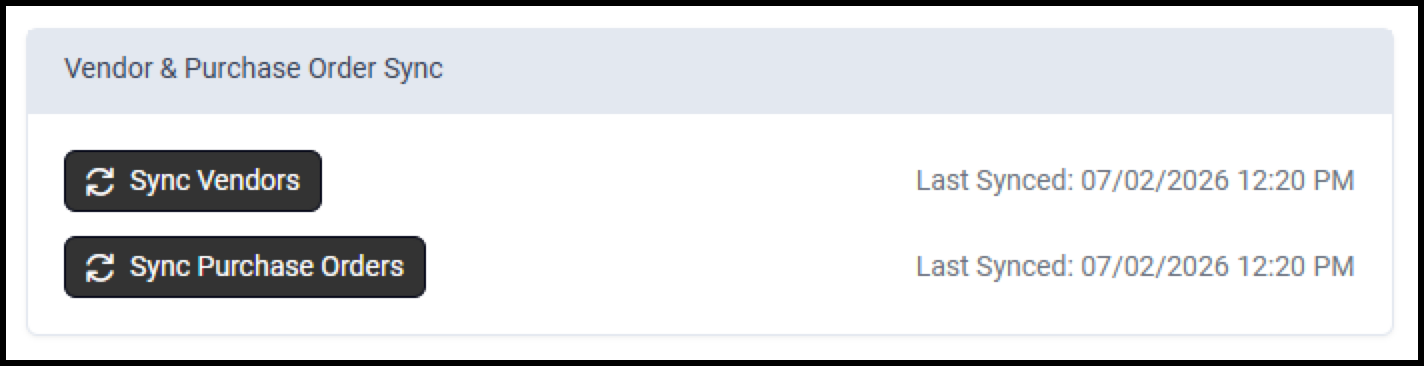
c. Sync Vendors - Vendor records are synchronized from CoreBridge to NetSuite, allowing vendor information to remain consistent across both systems. When this option is selected a matching sync button will appear in the section below. See Example.
d. Sync Vendor Documents - Vendor documents, such as W9 and other required documents, are synchronized from CoreBridge to NetSuite. For more information on Vendor documents, please see Managing Vendors. When this option is selected a matching sync button will appear in the section below. See Example.
e. Sync Purchase Orders - Purchase Orders created in CoreBridge are synchronized with NetSuite to keep purchasing information aligned. When this option is selected a matching sync button will appear in the section below. See Example.
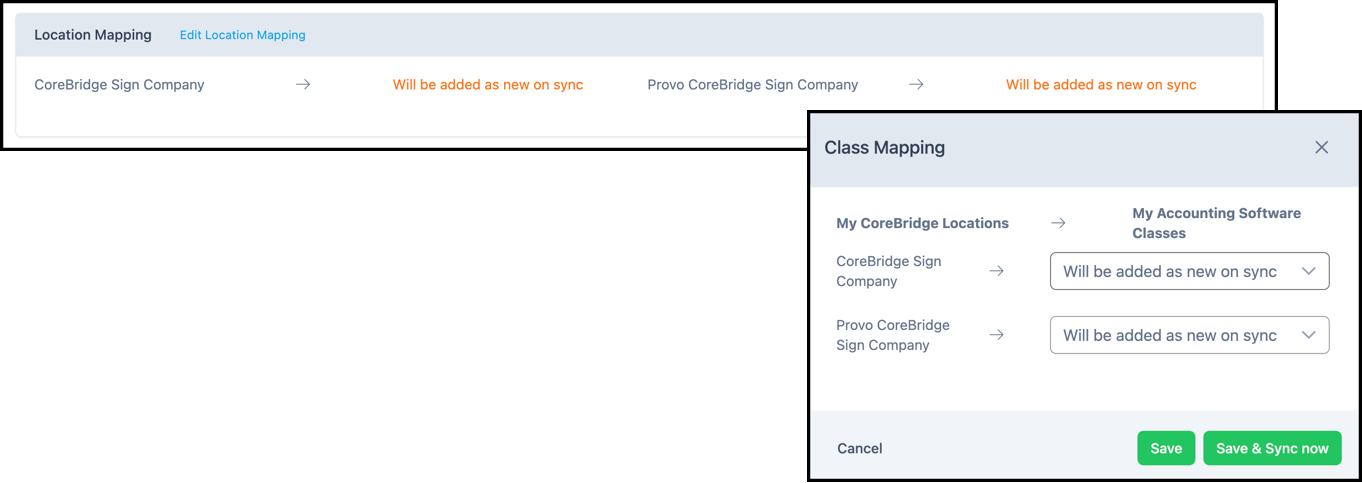
f. Sync CoreBridge Locations to NetSuite - Classes in NetSuite group data for more detailed reporting. Checking this option enables location mapping below. See Location Example below.
Note: This box must be checked to see location mapping.
Example:
Location Example:
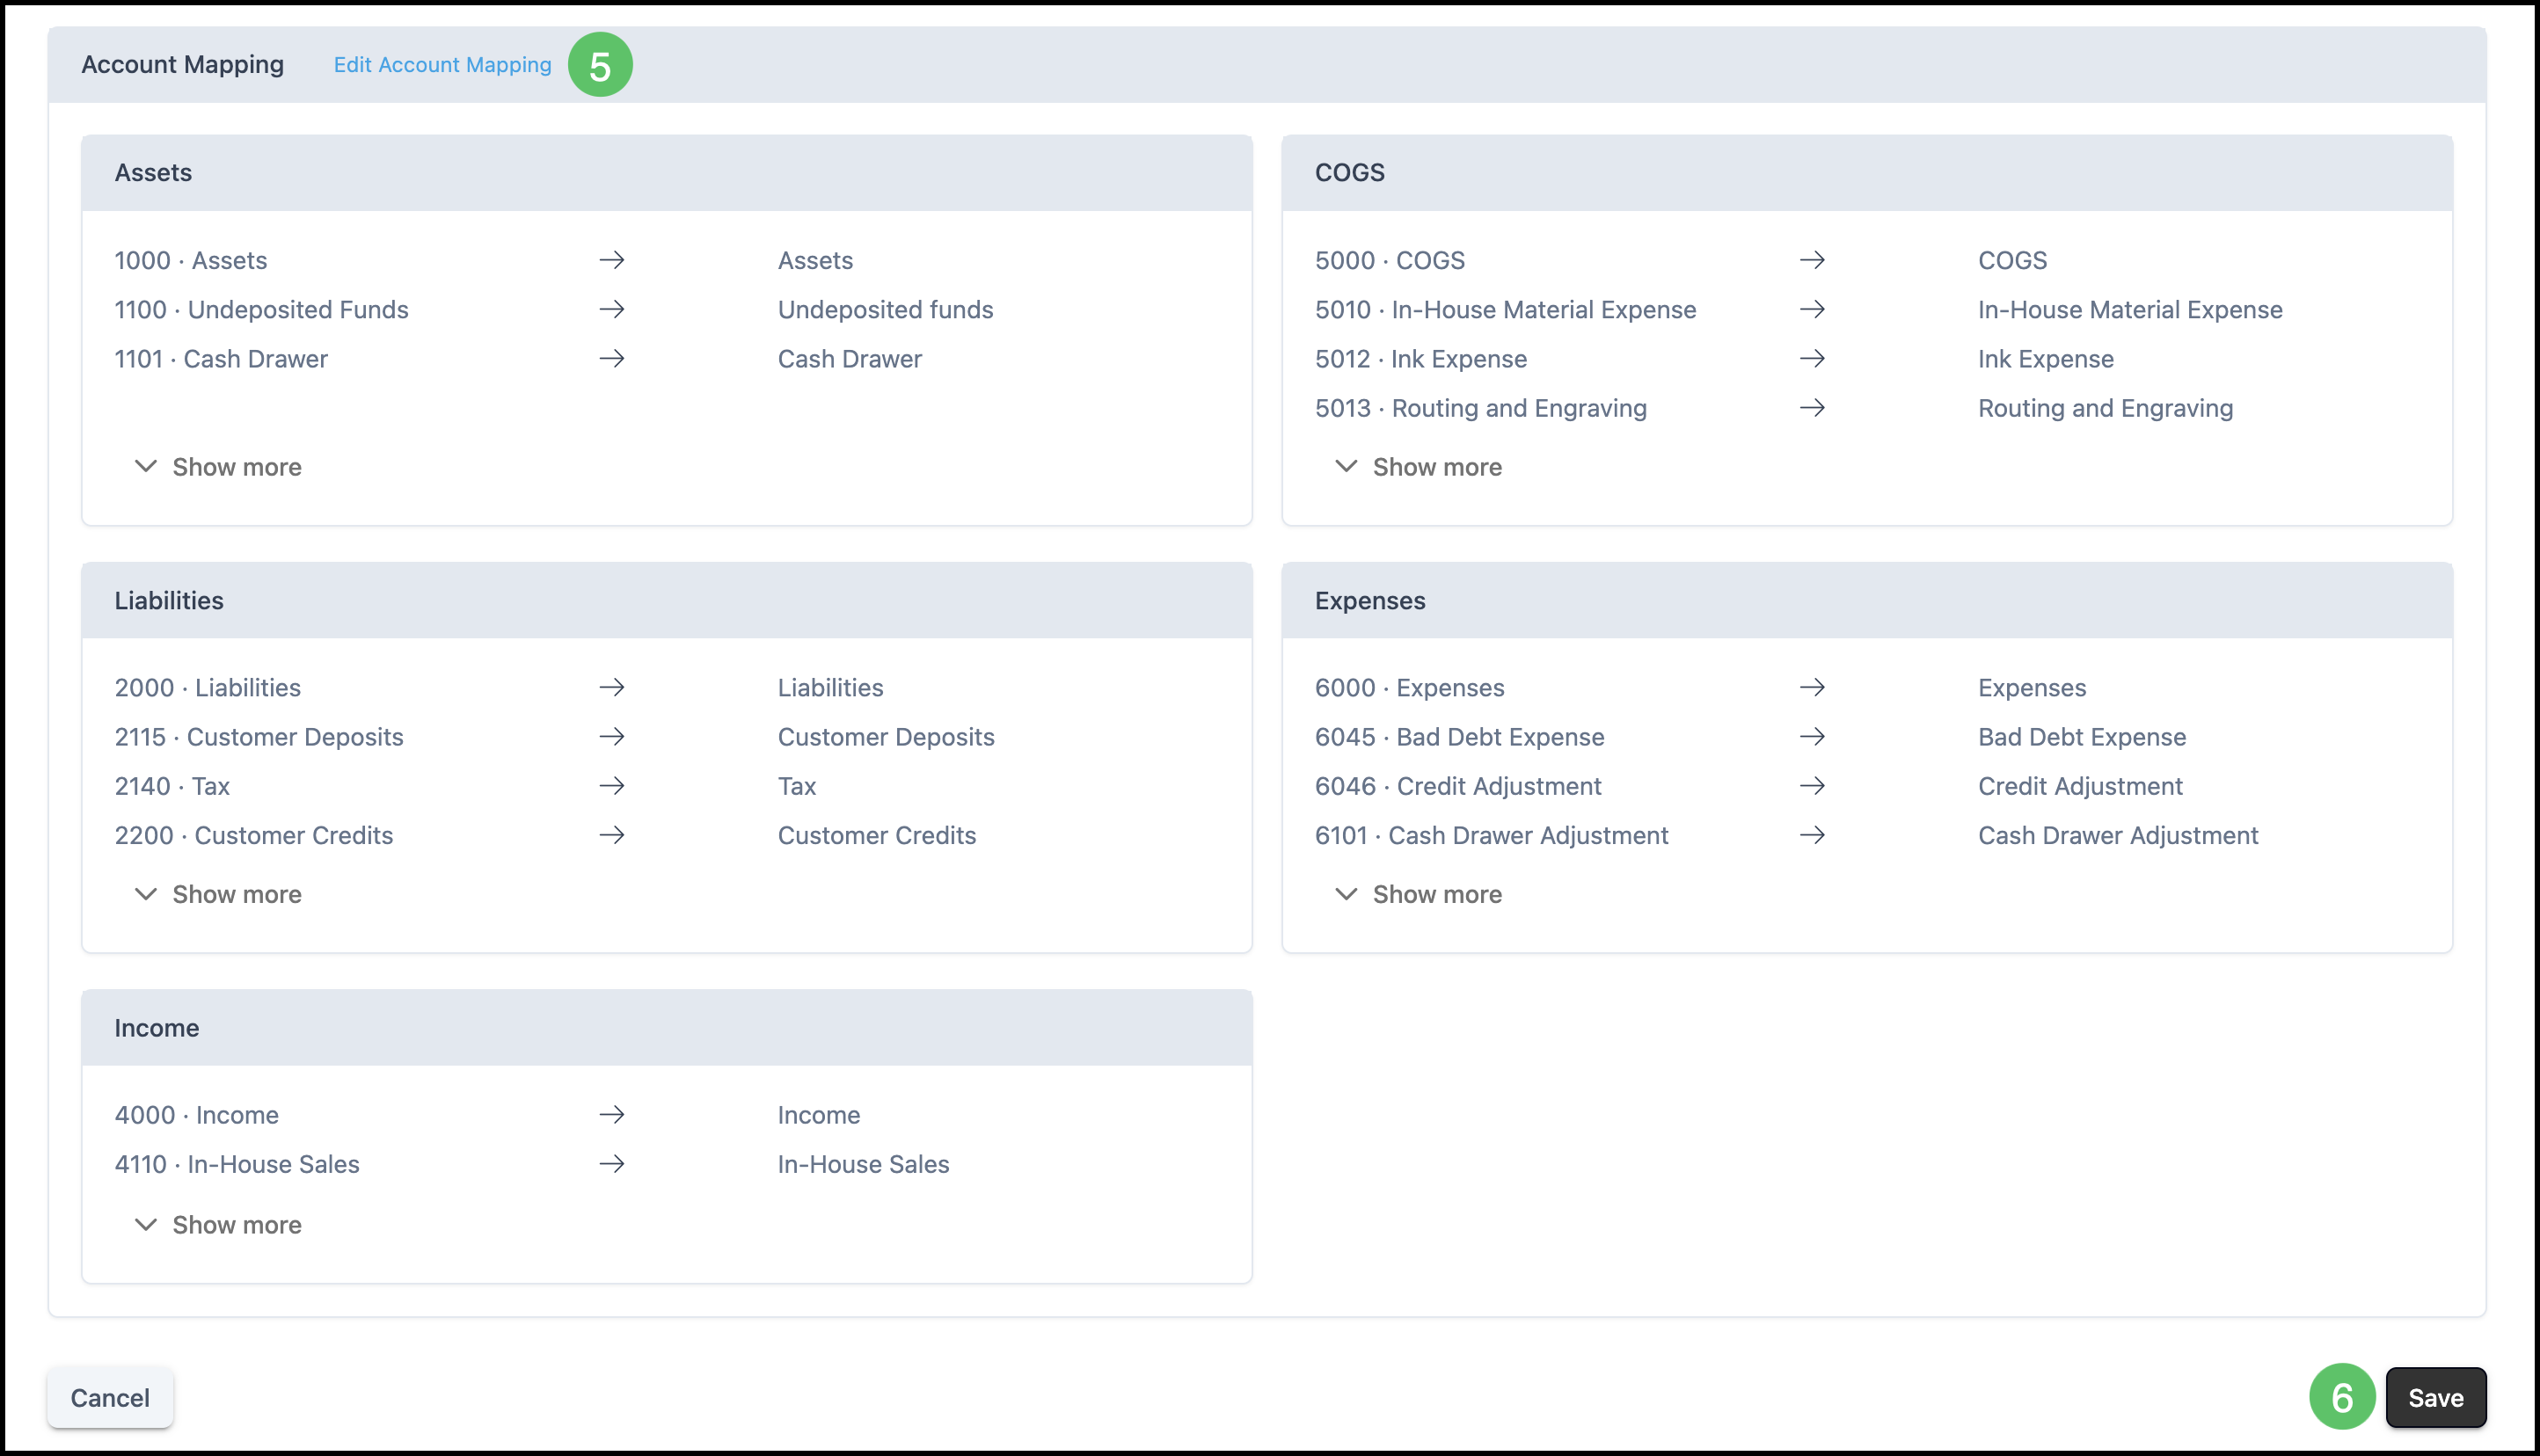
5. Click Edit Account Mapping. Map each CoreBridge account to the corresponding NetSuite account.
Note: We recommend selecting accounts from your accounting software manually to ensure correct mapping. Use Add as new on sync only for accounts that are specific to CoreBridge, such as Orders in Pre-WIP.
6. Click Save.
Note: Only one accounting software integration may be active at a time in CoreBridge.
Activating NetSuite Summary Sync
NetSuite must be activated before it can be used.
Note: Only one accounting software integration can be active at a time in CoreBridge.
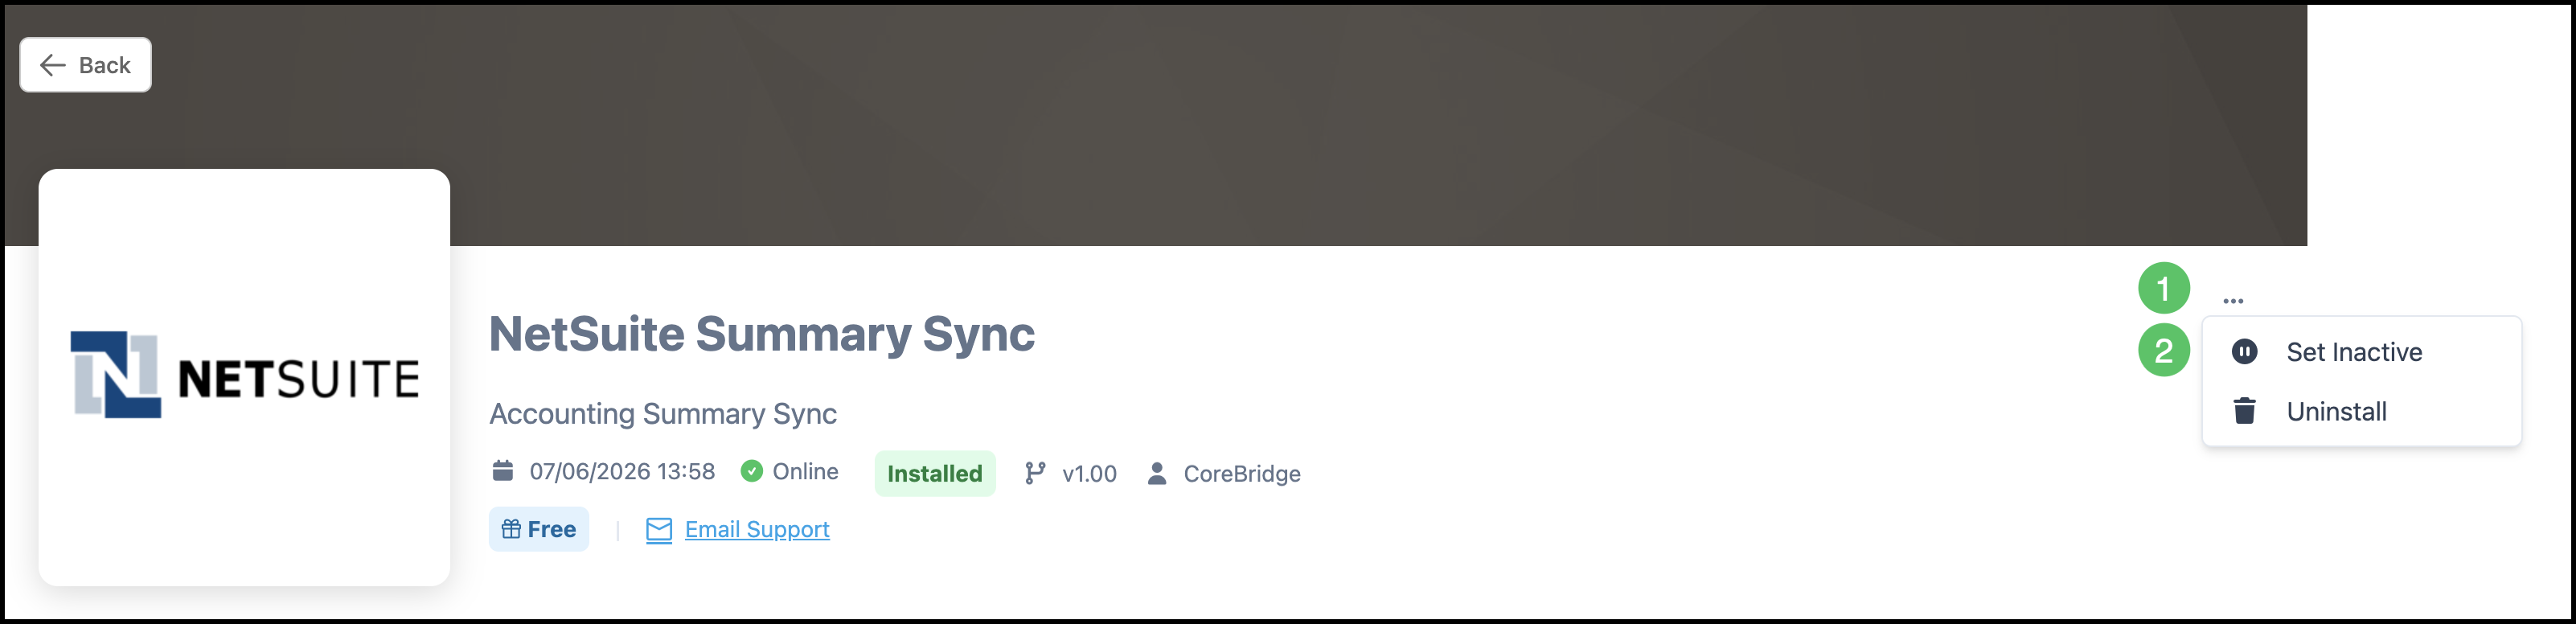
1. From the NetSuite screen, click the More Actions menu.
2. Select Set Active.
Using NetSuite Summary Sync After Setup
After you connect NetSuite and configure sync preferences, use NetSuite Summary Sync from the reconciliation area in CoreBridge.
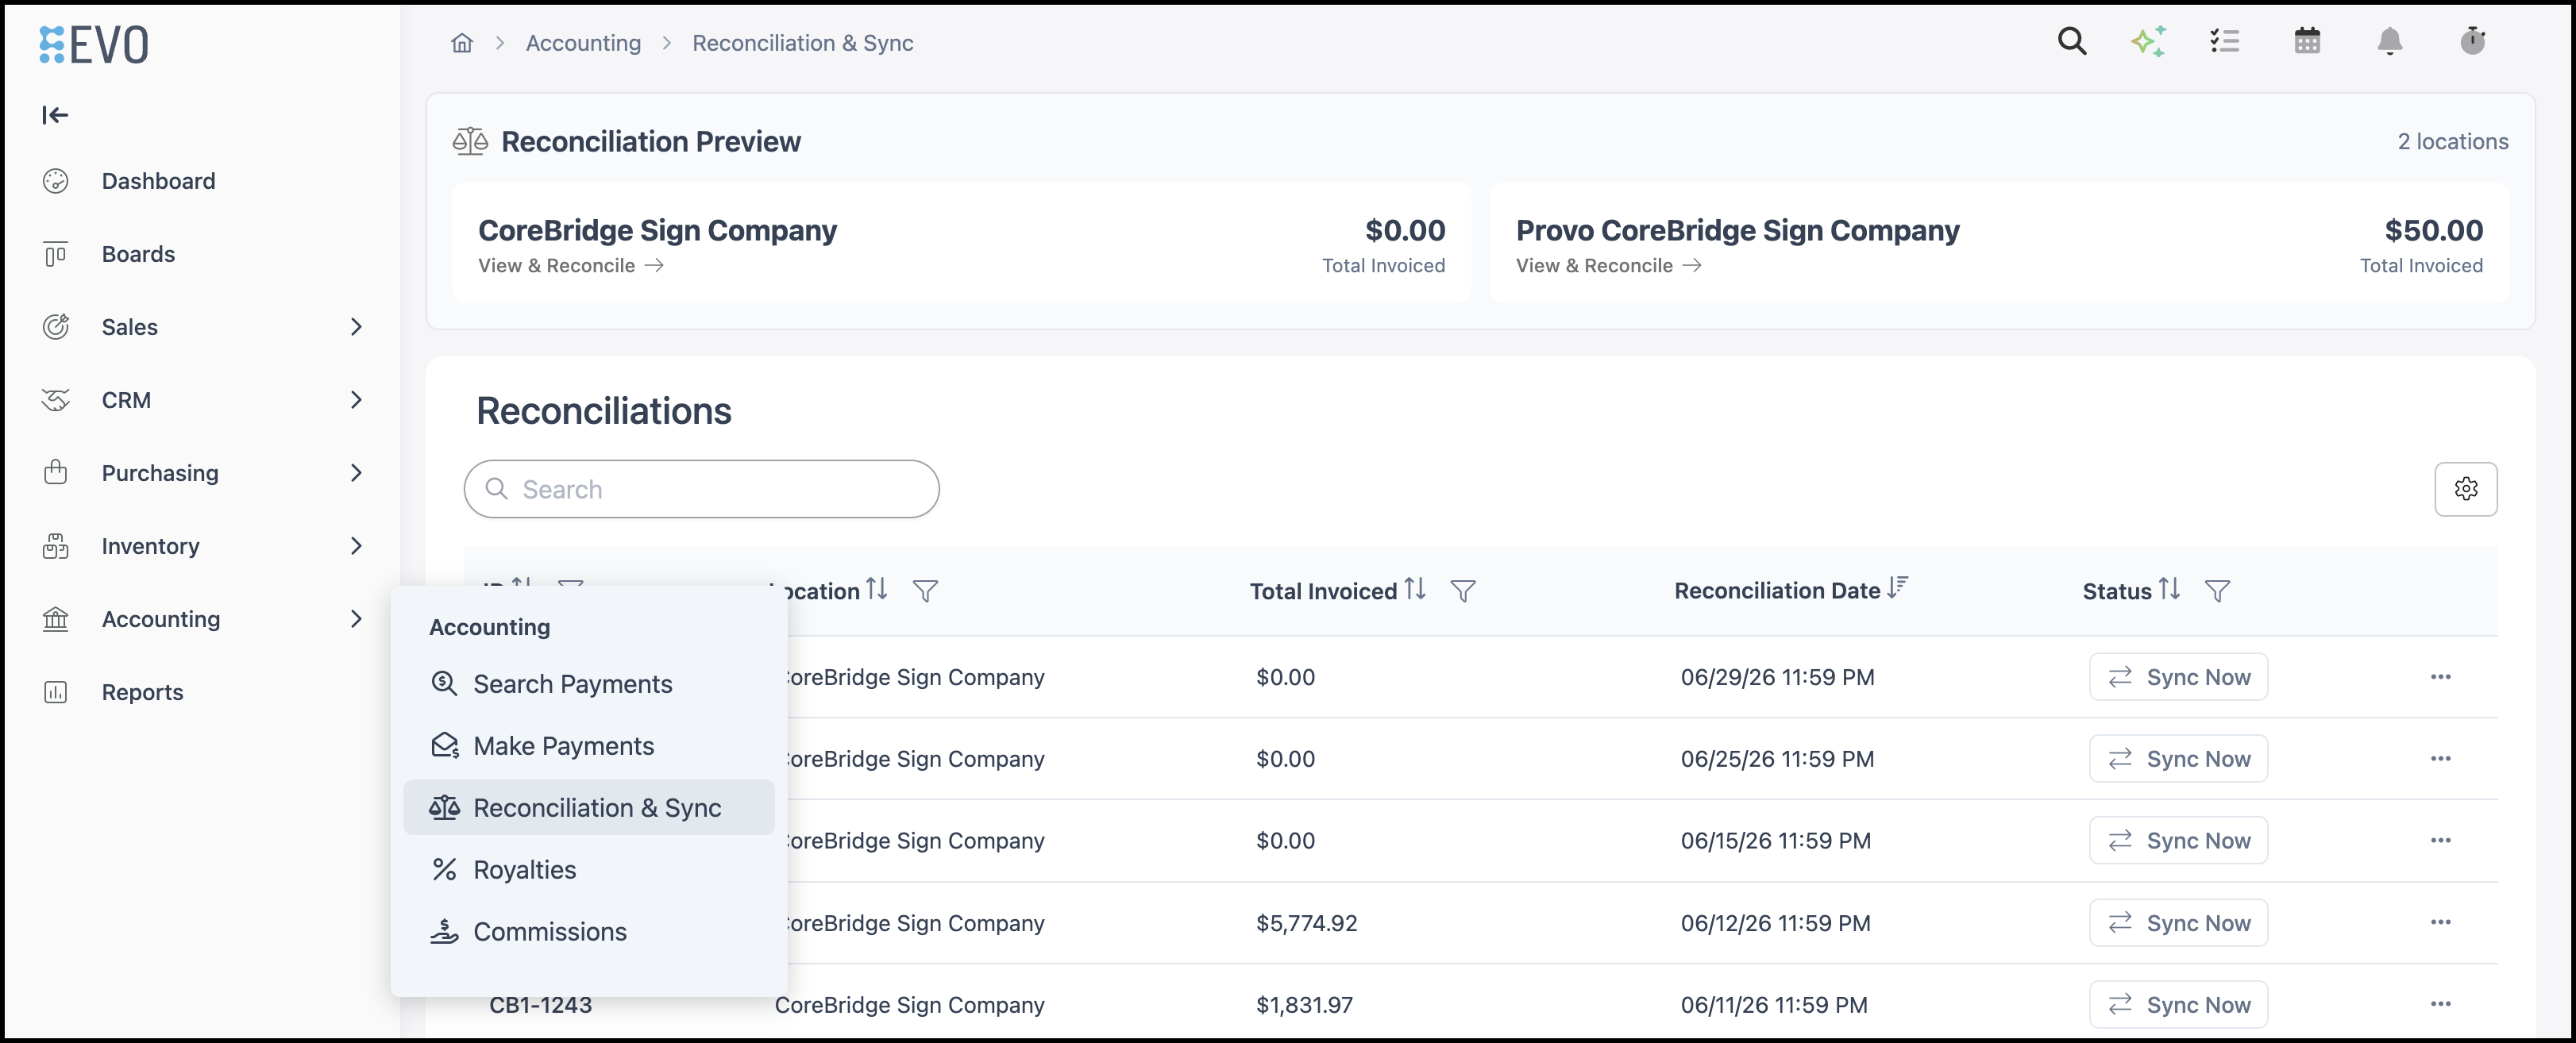
Navigate to Accounting / Reconciliation & Sync.
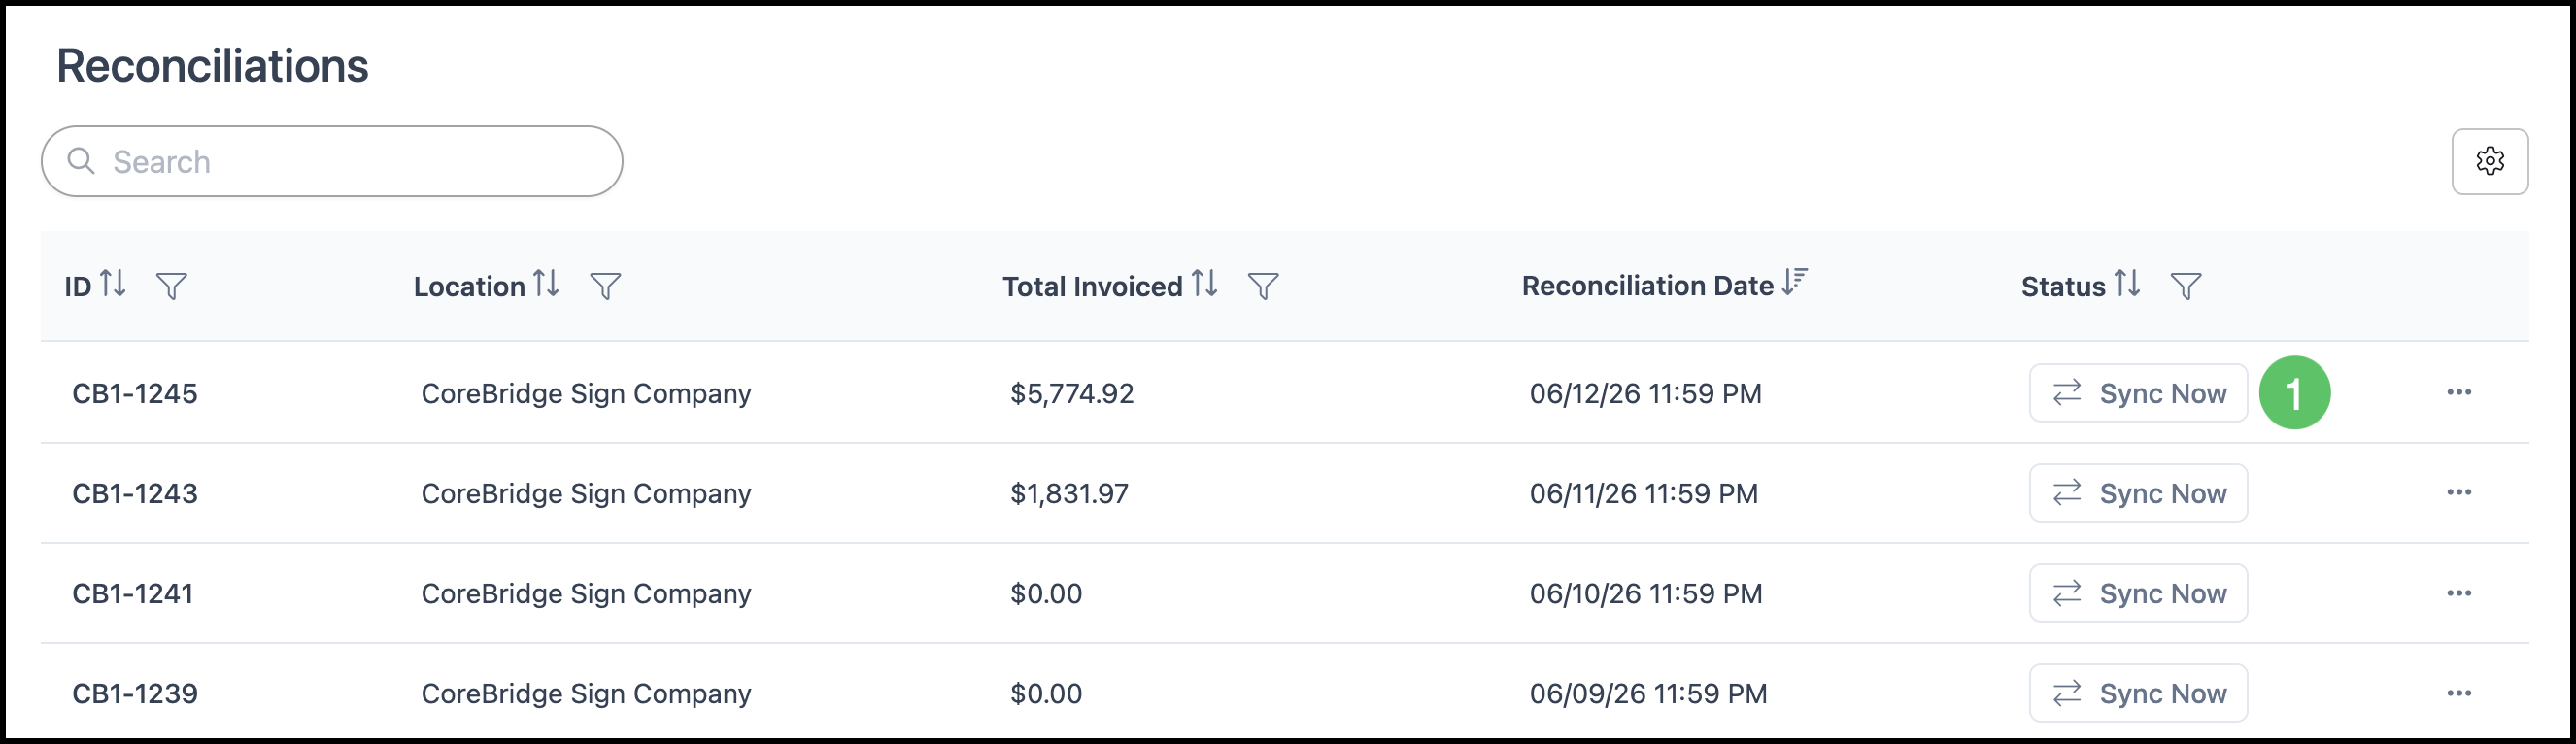
Manually Sync from the Reconciliation List
Note: In order to manually sync, you must have Manual selected in your integration settings. See step two in NetSuite Configurations.
1. Click Sync Now in the Status column for the reconciliation you want to sync.
Manually Sync from the Reconciliation Detail View
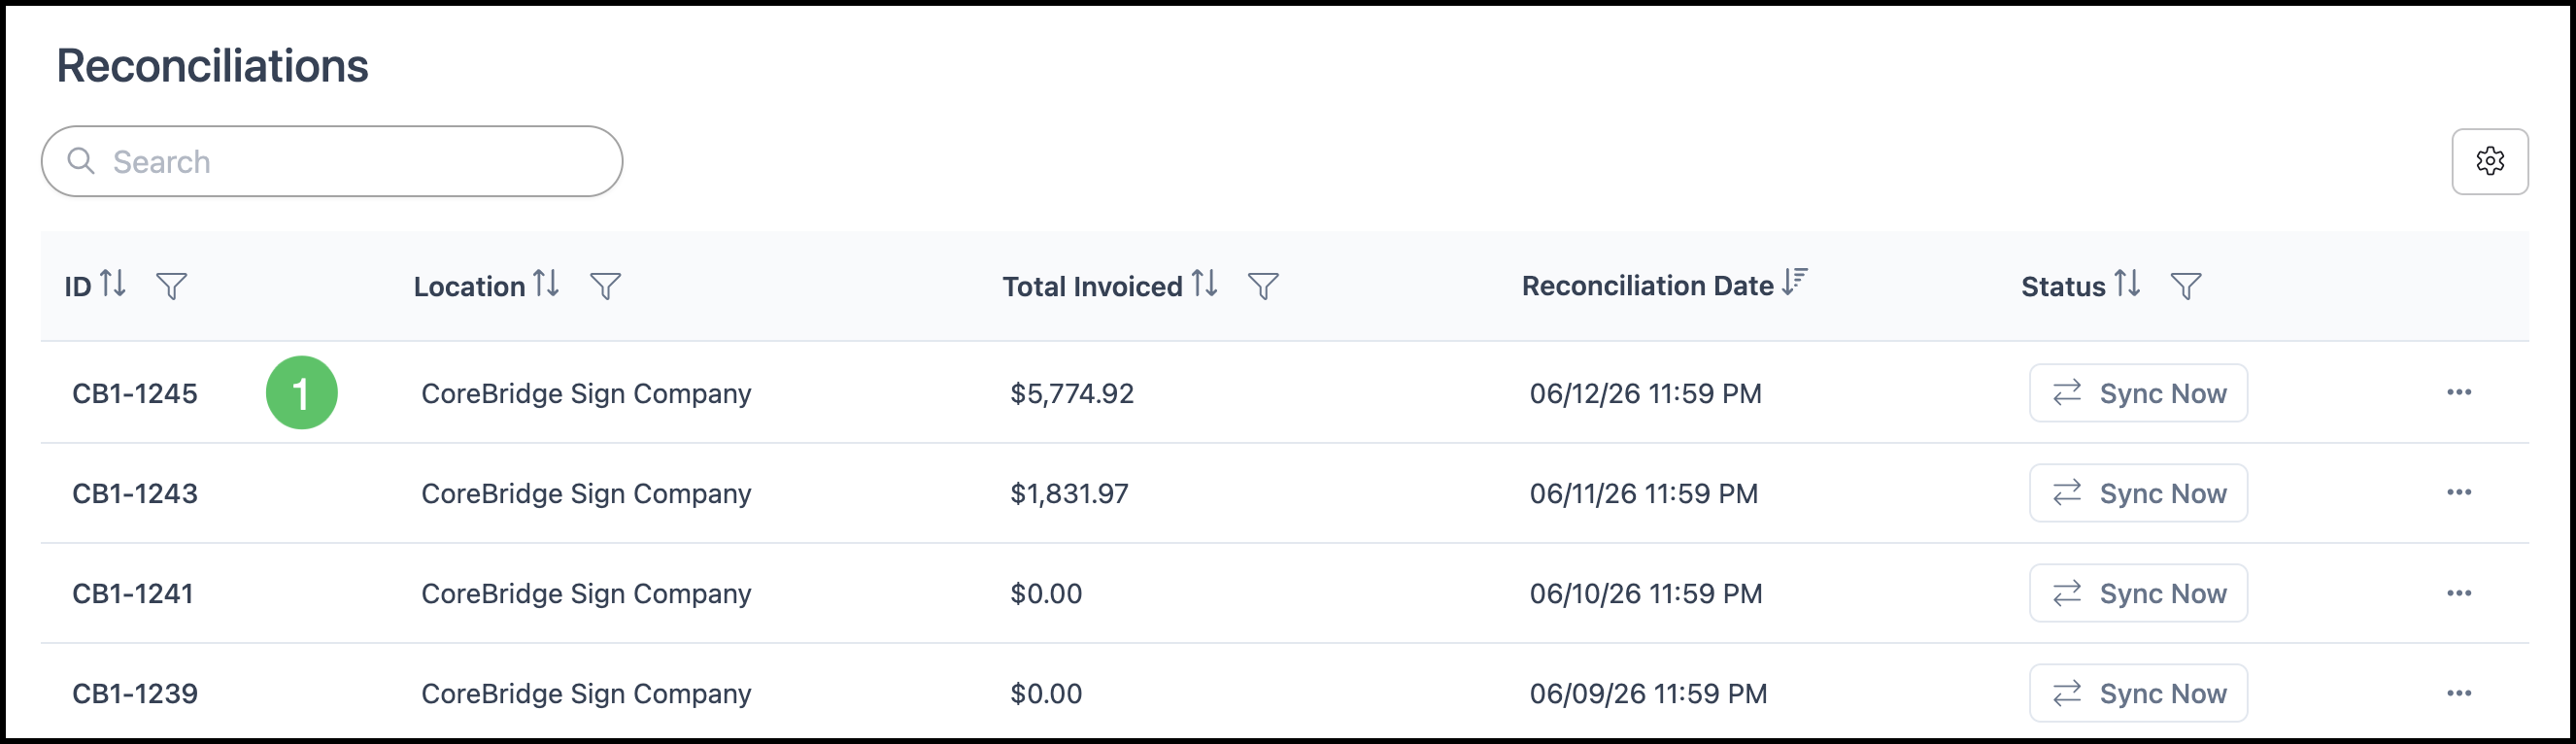
1. Click the reconciliation row to open the detail view.
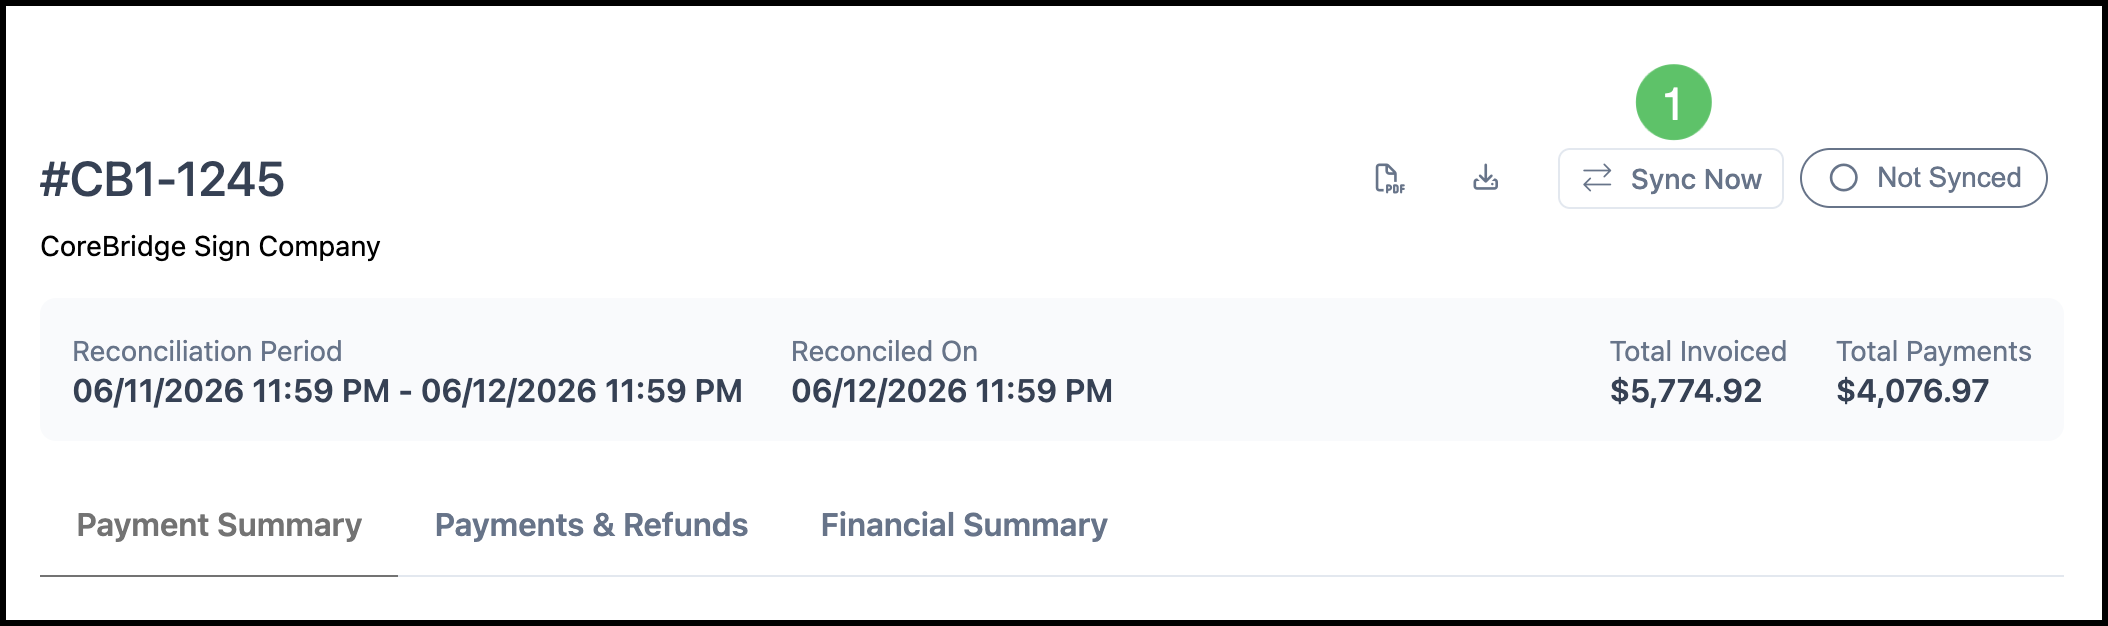
2. Click Sync Now.
Note: The sync option is available on any tab in the reconciliation detail view when manual sync is enabled.
Reconciliation Detail Tabs
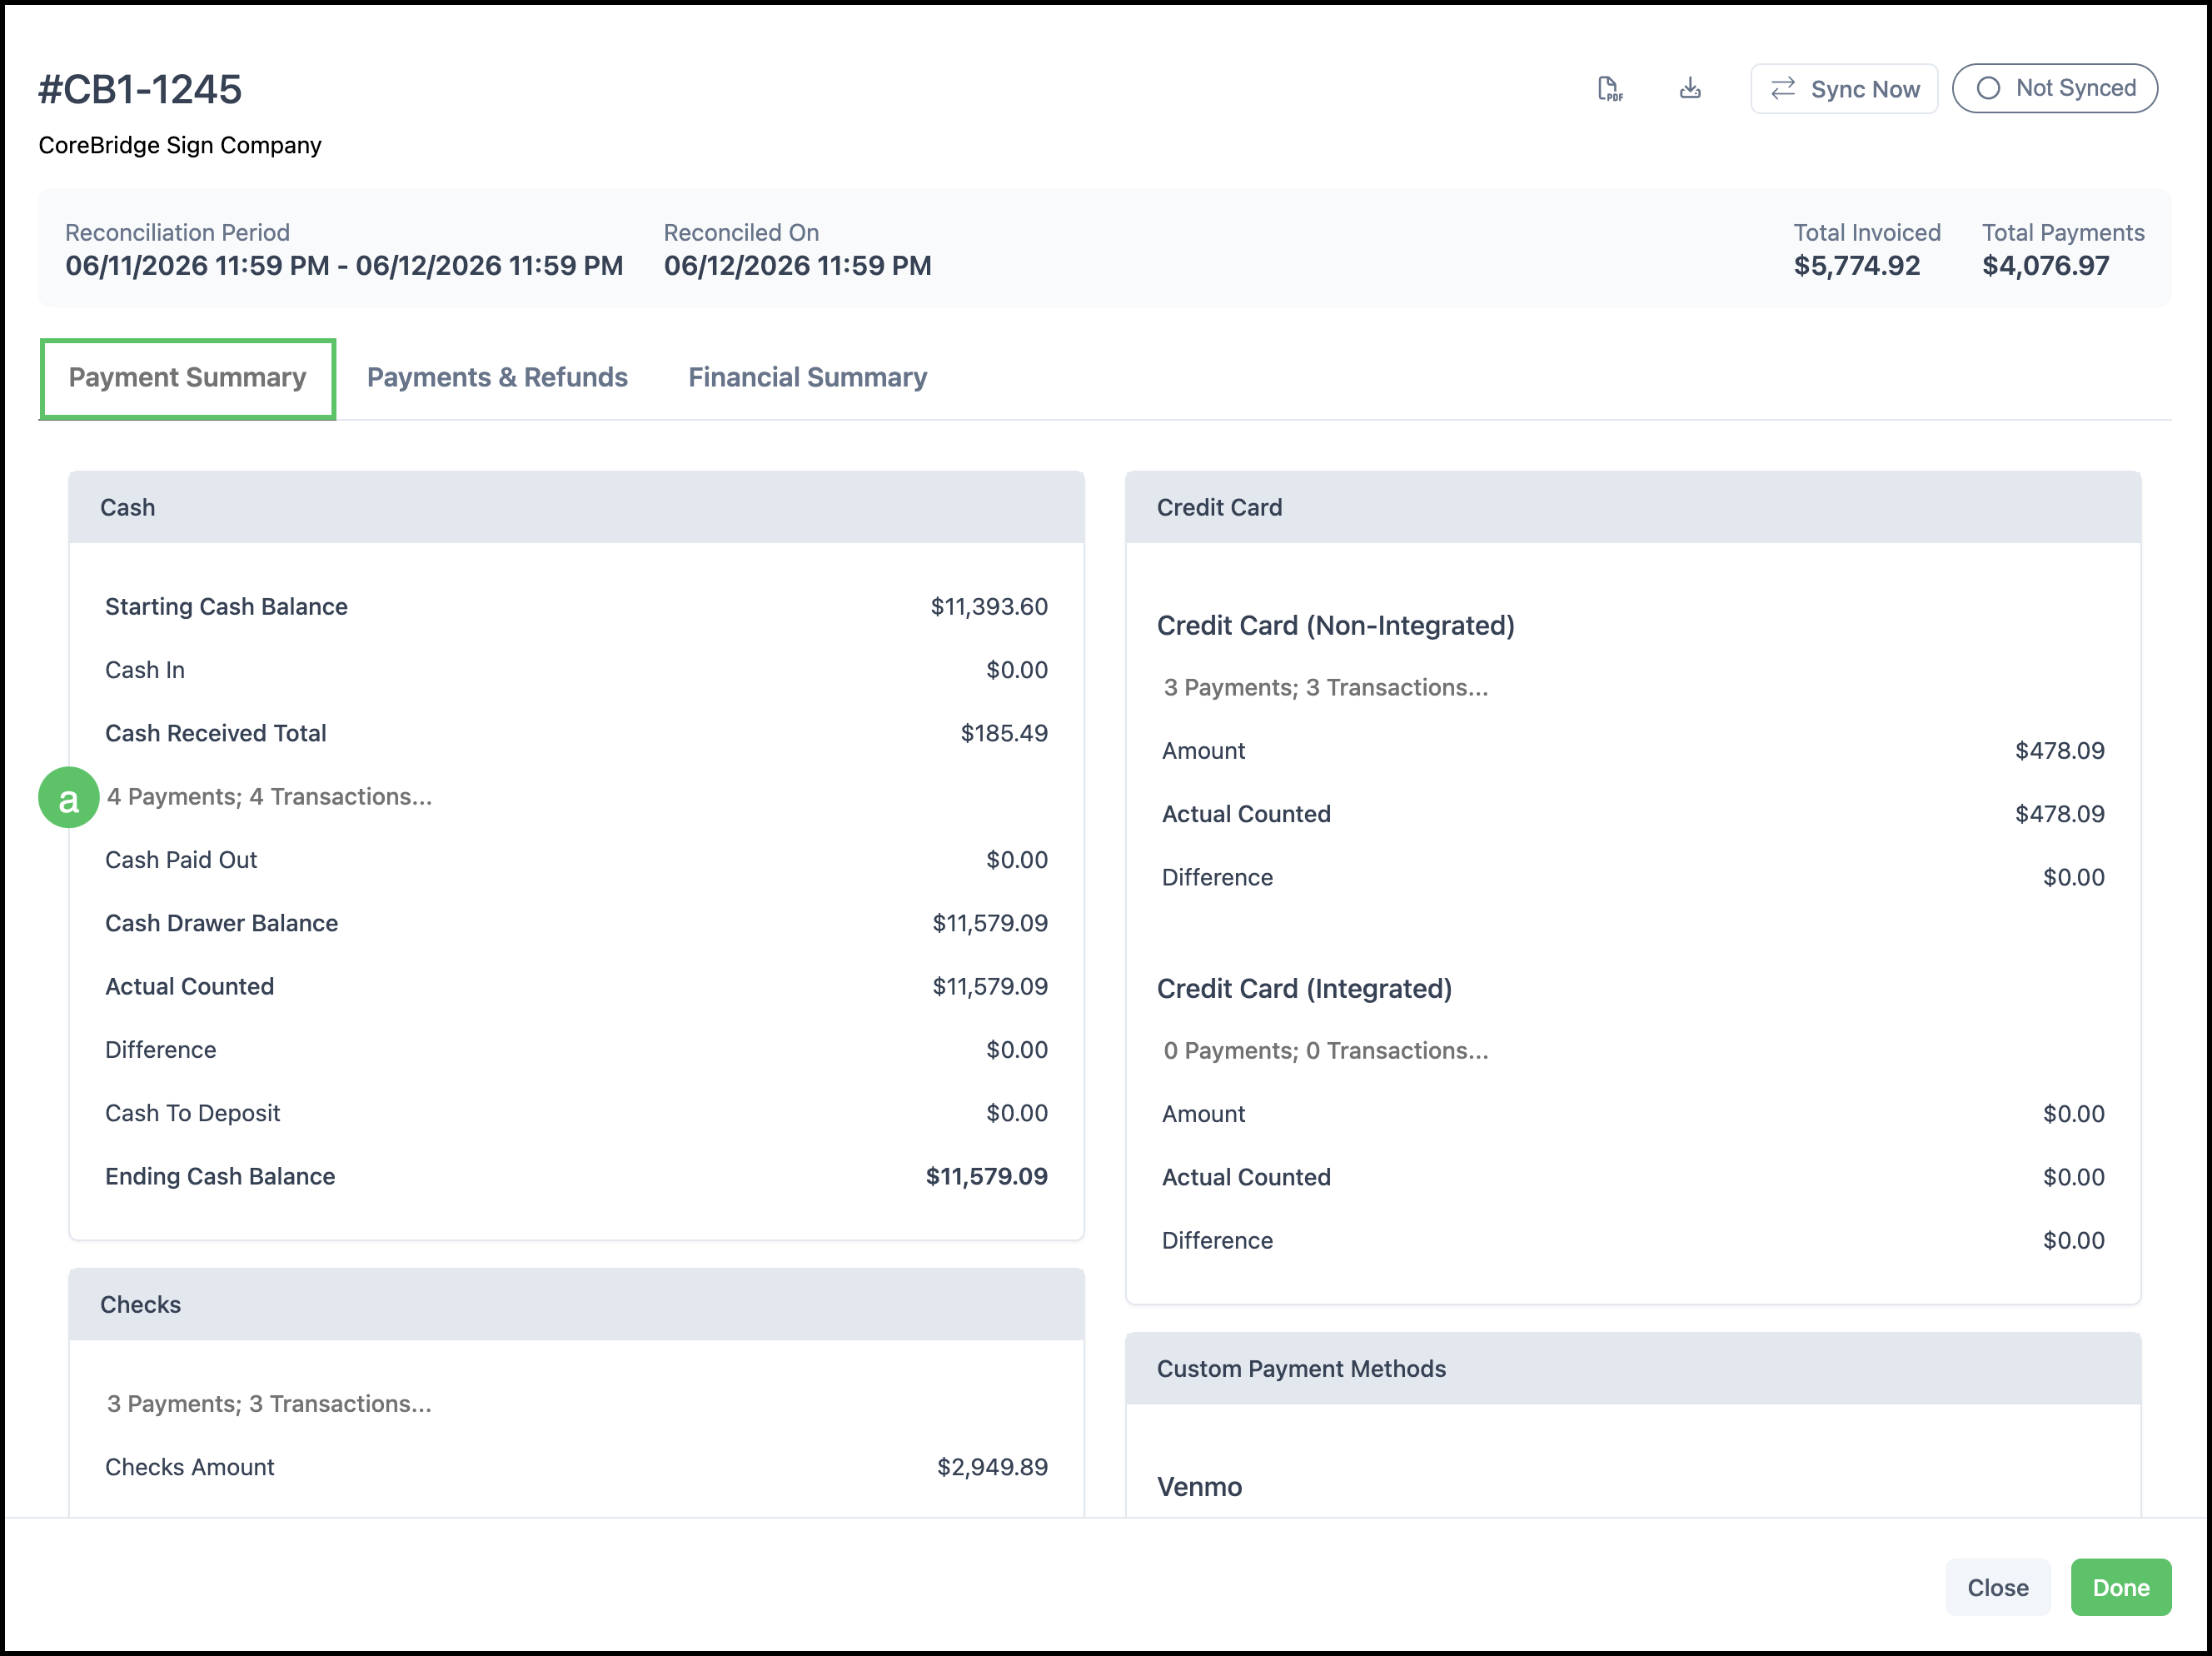
In the reconciliation detail view, use these tabs to review information before or after syncing:
Payment Summary tab:
a. Clicking on any of the Payment;Transactions or View Details hyperlinks will open a new modal with more detailed information.
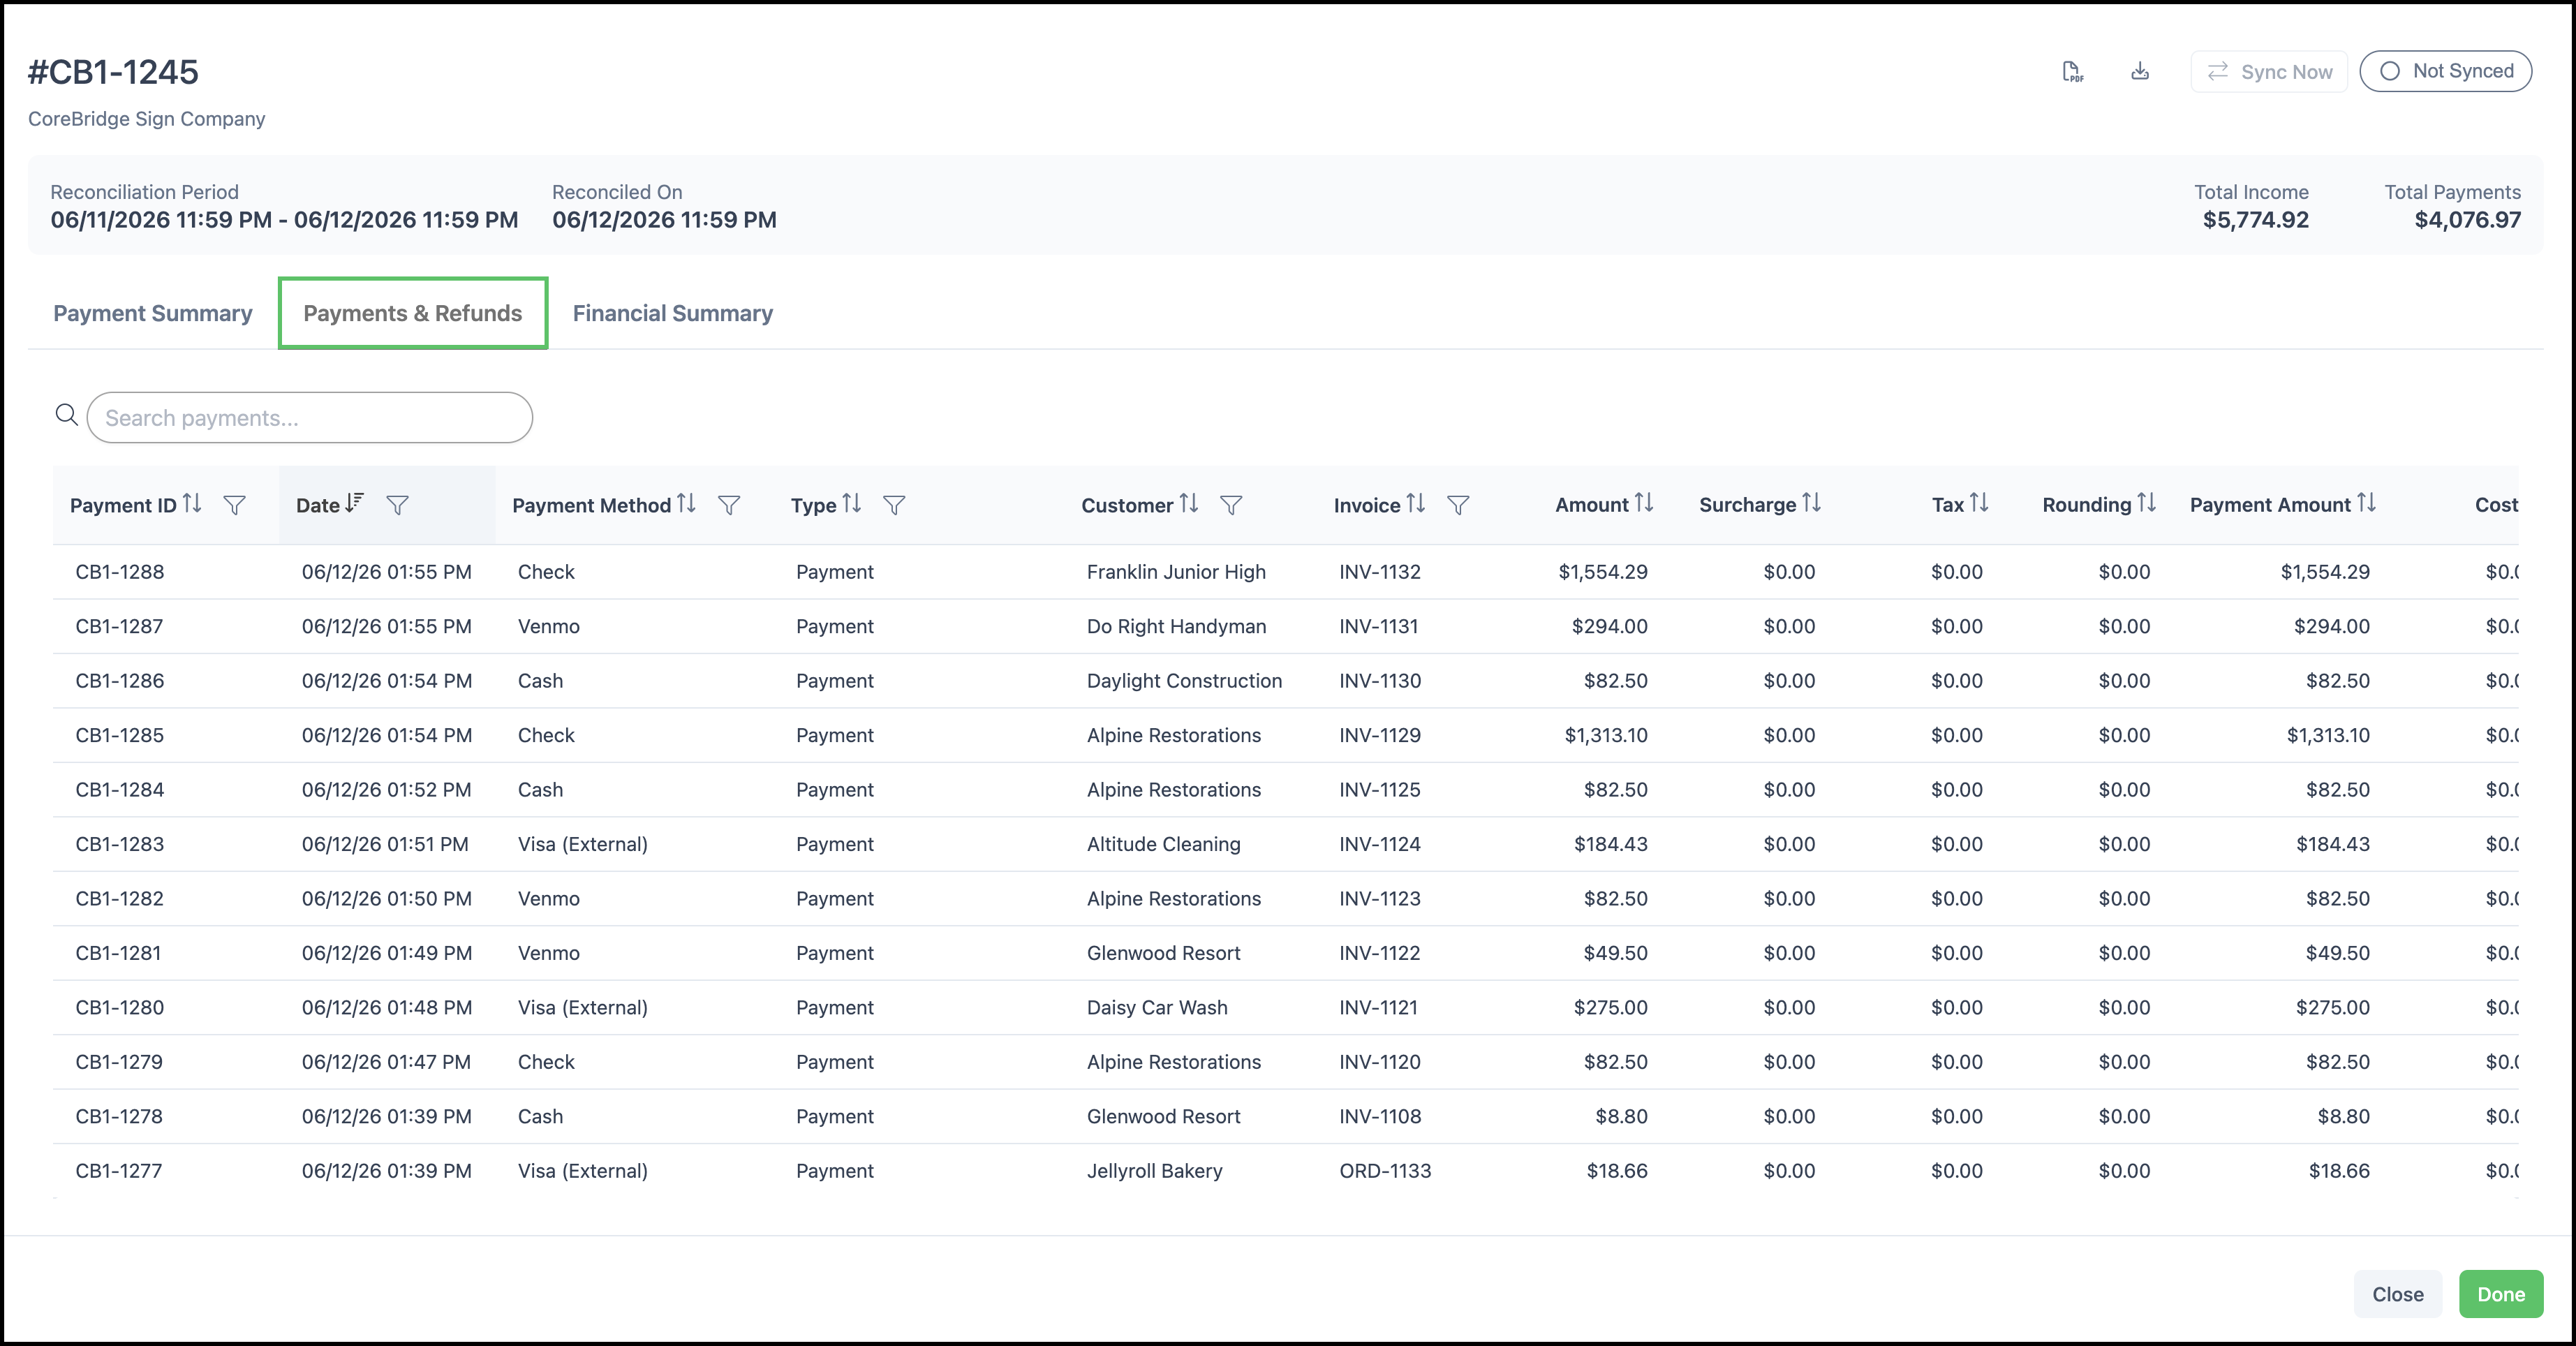
Payment and Refunds tab:
Overview of all Payments and Refunds during the reconciliation period.
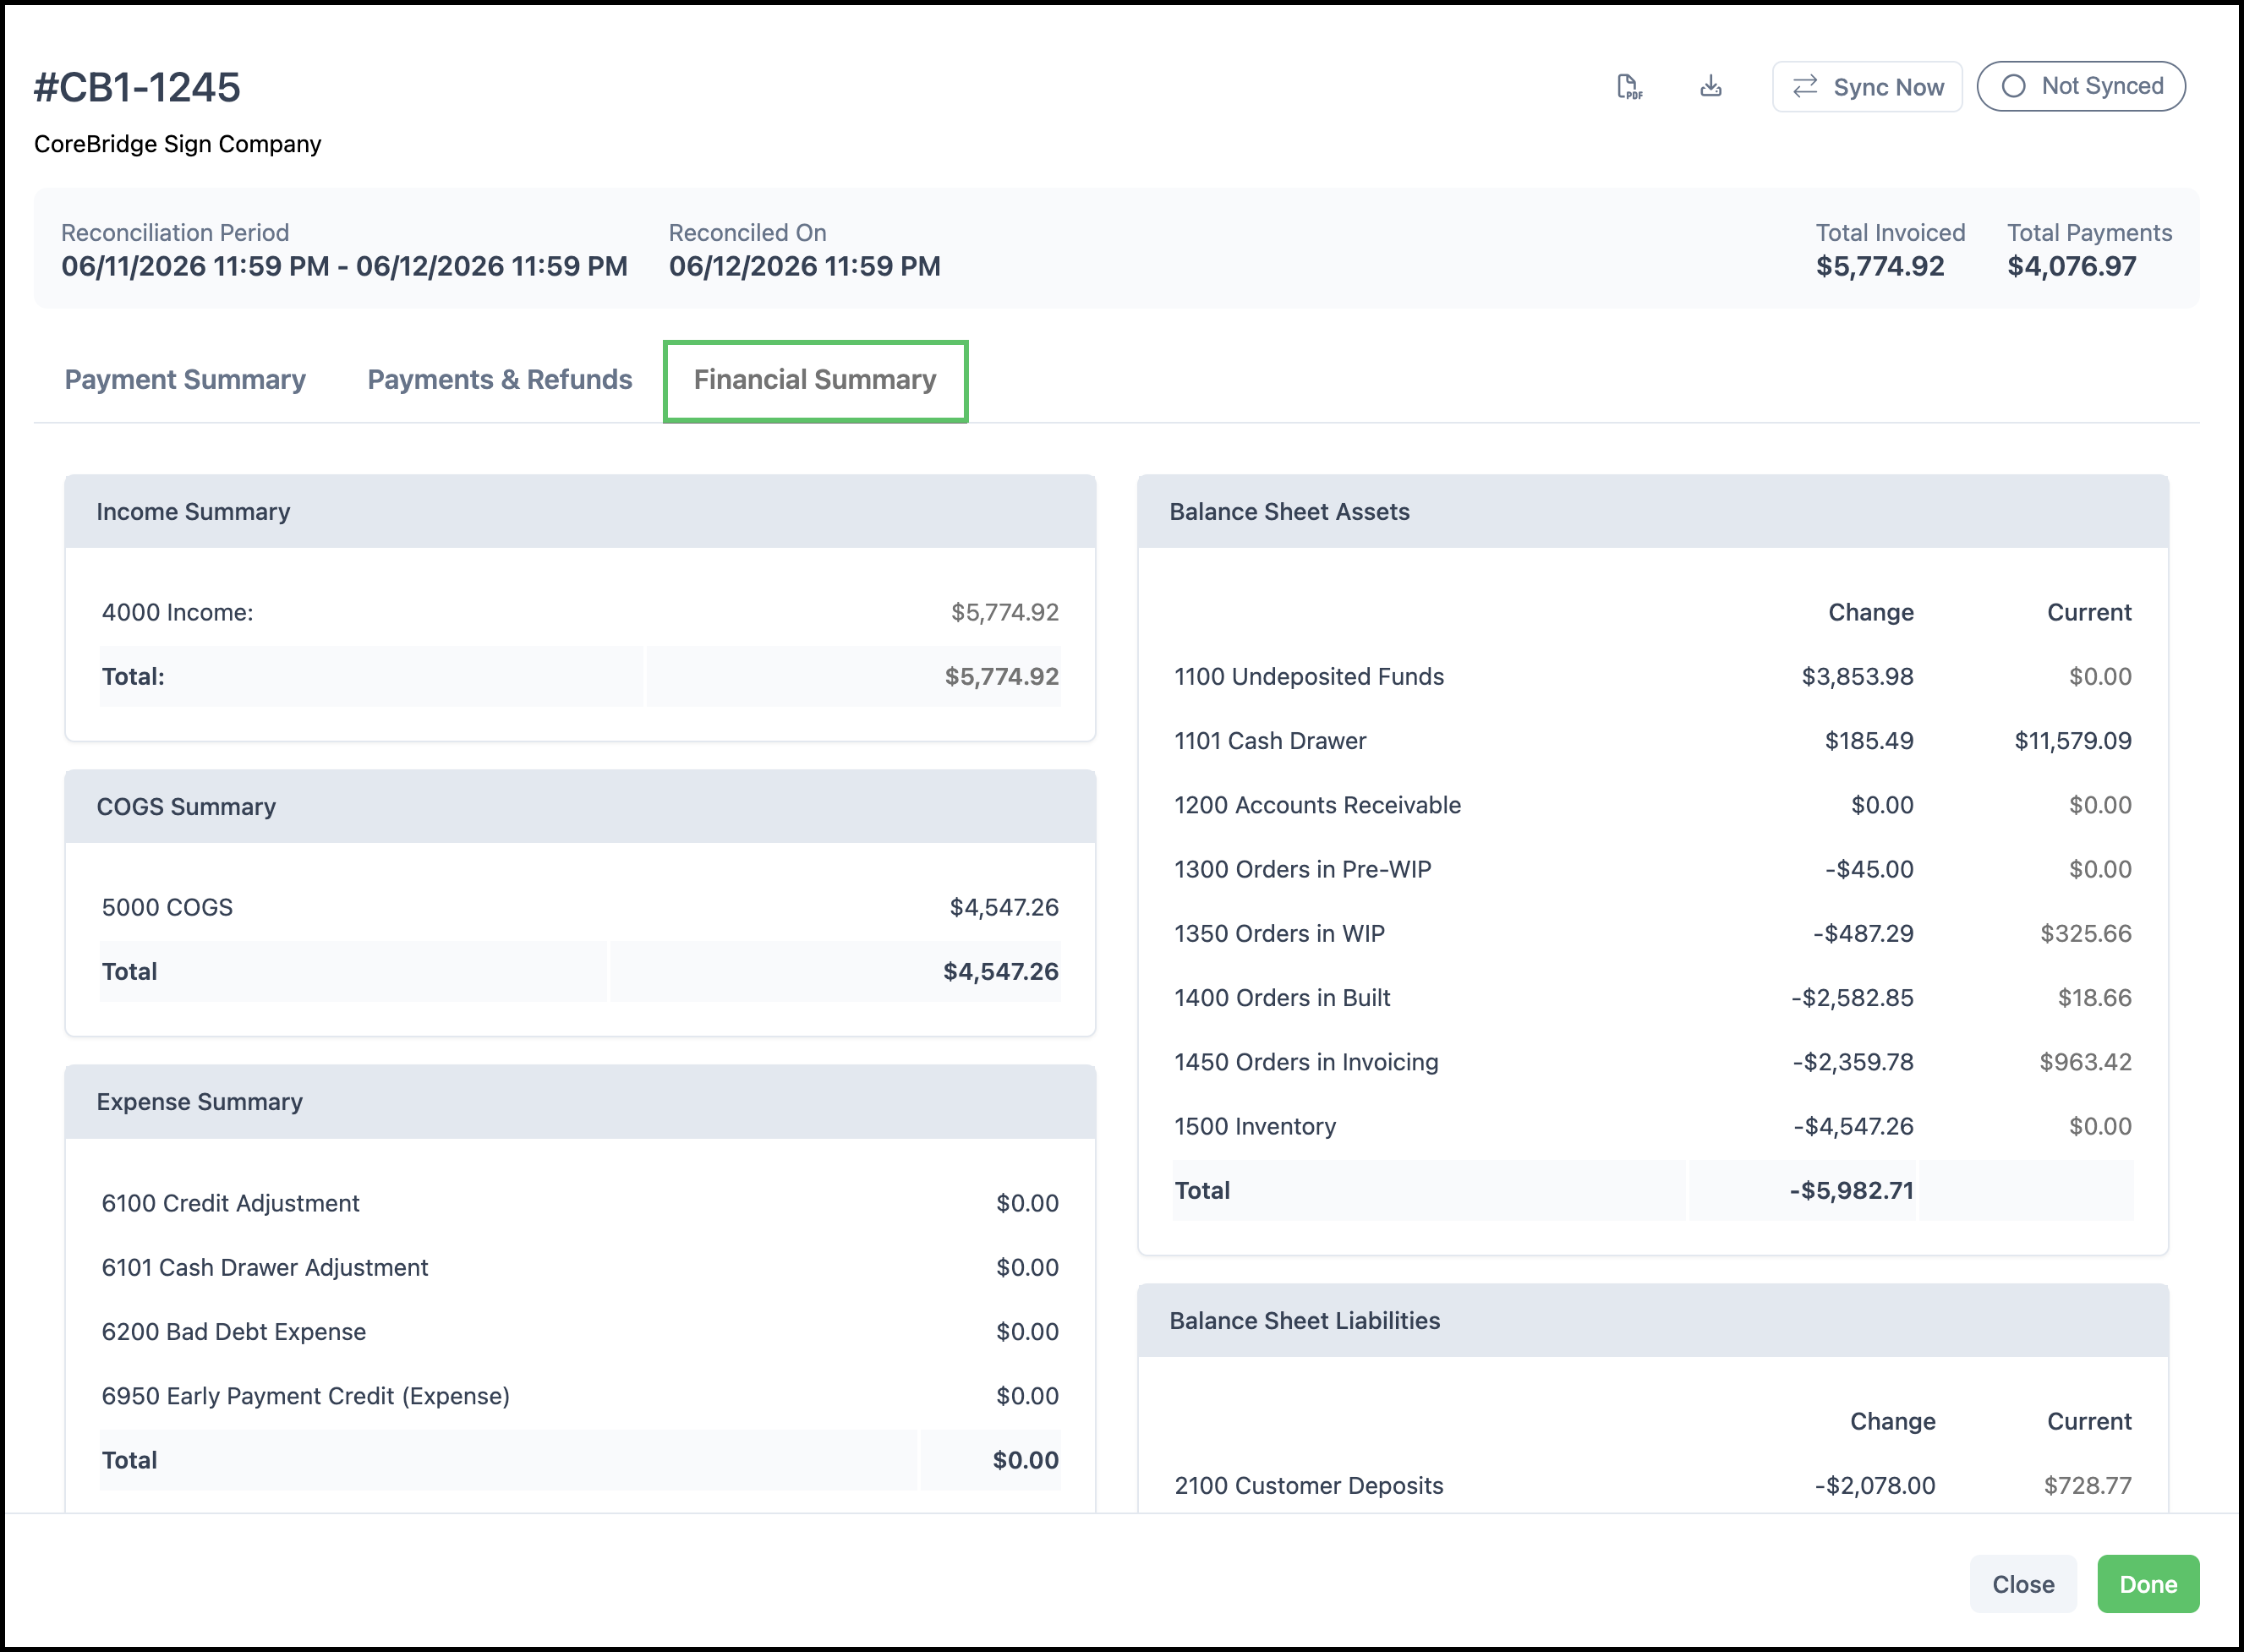
Financial Summary tab:
Overview of all financial activity for the reconciliation period.
Note: When a reconciliation has synced successfully to NetSuite Summary Sync, payment information in the reconciliation detail view heading reflects a successful sync. If there is a sync issue, the heading indicates the problem so you can correct mapping or connection settings and retry.
Note: The final result in your NetSuite Summary Sync software is a journal entry. If the total amount is too large for a single entry, you can divide it into smaller amounts that correspond with the entries in the Payments and Refunds tab.
Related Articles
Automatic Reconciliation and Sync