Reconciliations are needed to keep your financial information in synchronization with your accounting transactions. Whether you have an accounting software such as QuickBooks or Xero, or if you manually keep your financial records, you need to reconcile your financial transactions. Reconciliations verify your physical cash, checks, credit cards, or other financial transactions with data processed and posted within CoreBridge. Access to financial data within CoreBridge is determined by Employee Roles and/or Individual Employee Access. The Reconciliation & Sync screen will list all reconciliation periods that have been synced and those periods that have not been synced ready for preview.
Table of Contents
- Preview to Reconcile
- Viewing Previous Reconciliations
- Reconciliation Options
- Helpful Tips
- Related Articles
Preview to Reconcile
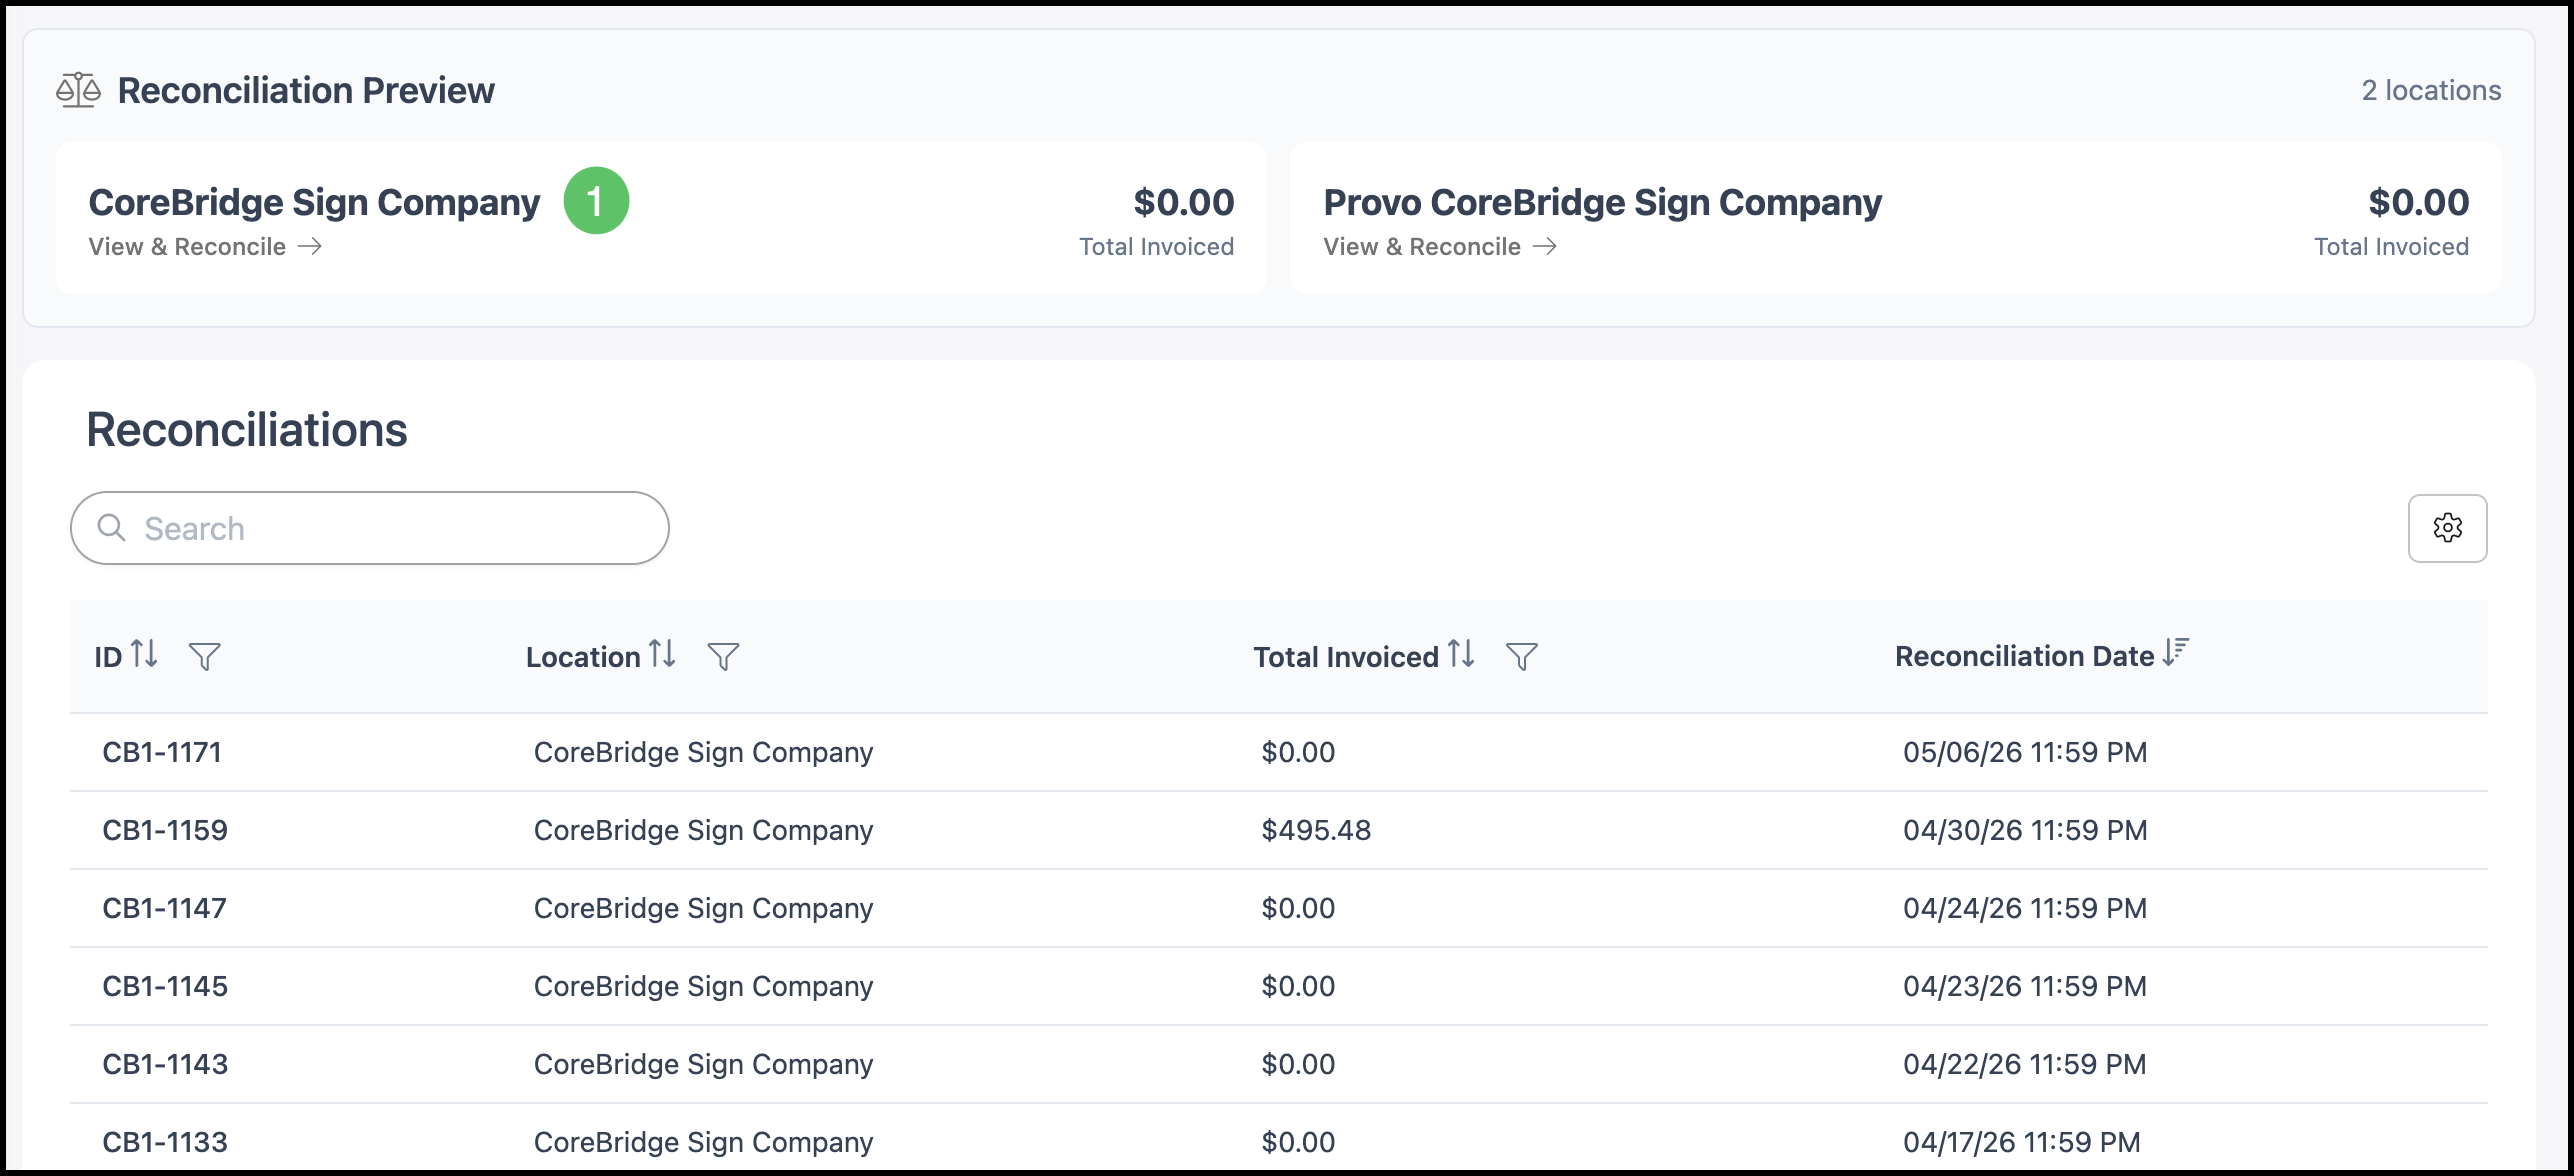
Navigate to Accounting / Reconciliation & Sync.
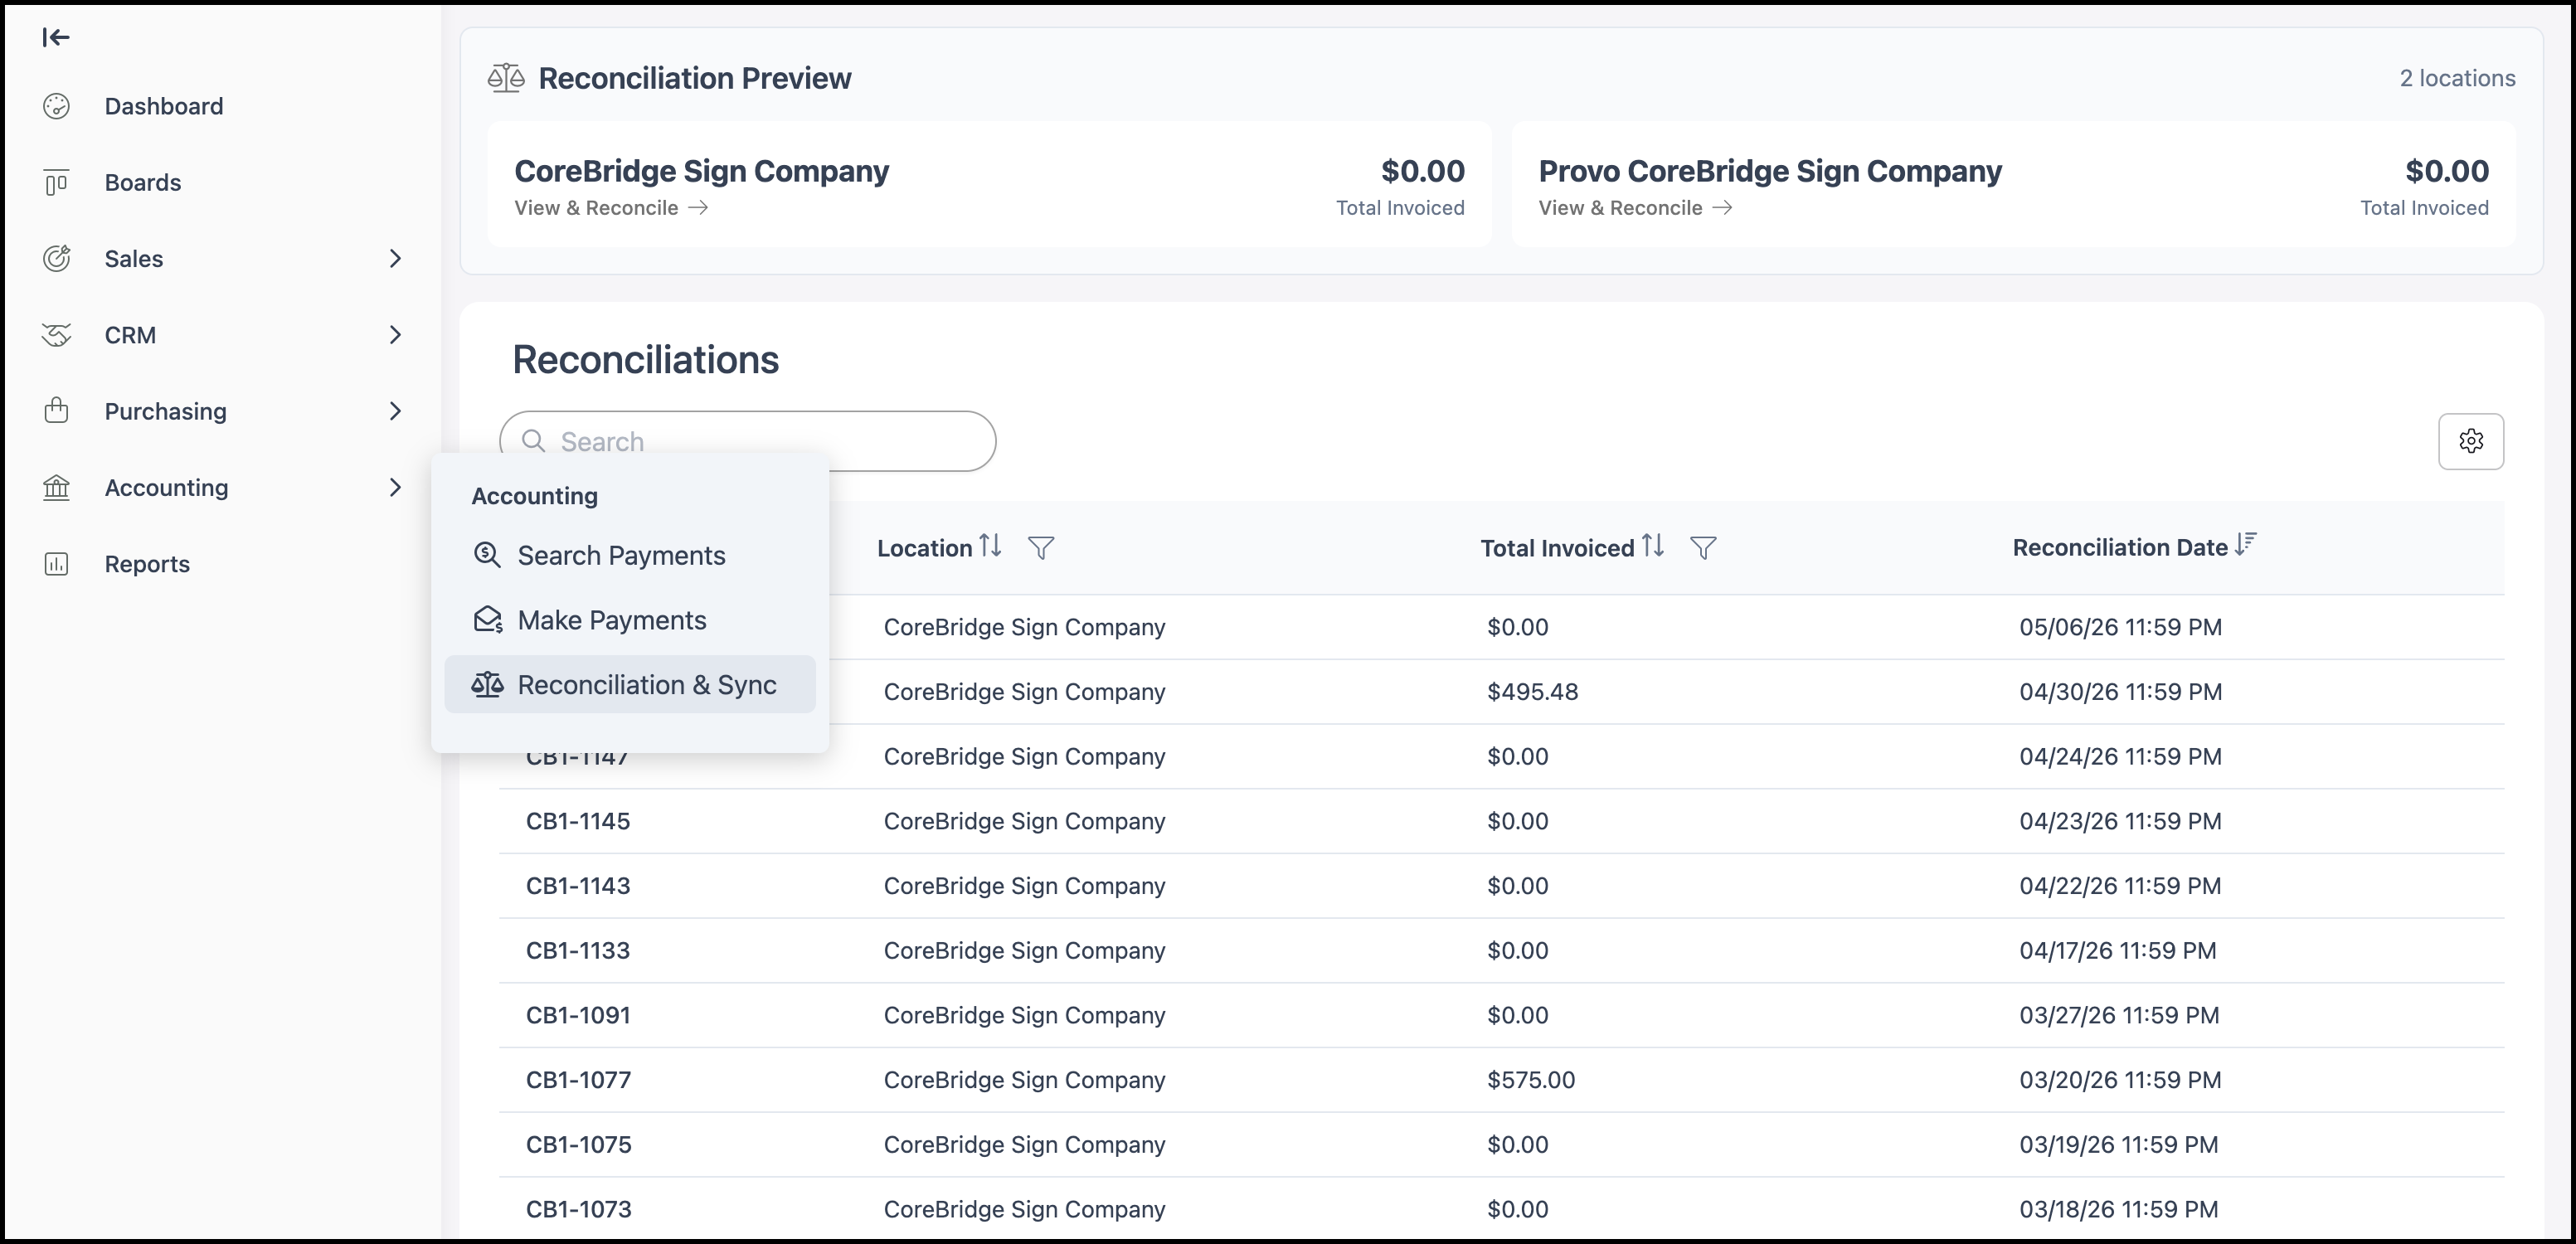
1. Click Preview to open the reconciliation preview. This shows all unreconciled financial transactions posted for the selected location.
Note: It is recommended to reconcile at the end of each day.
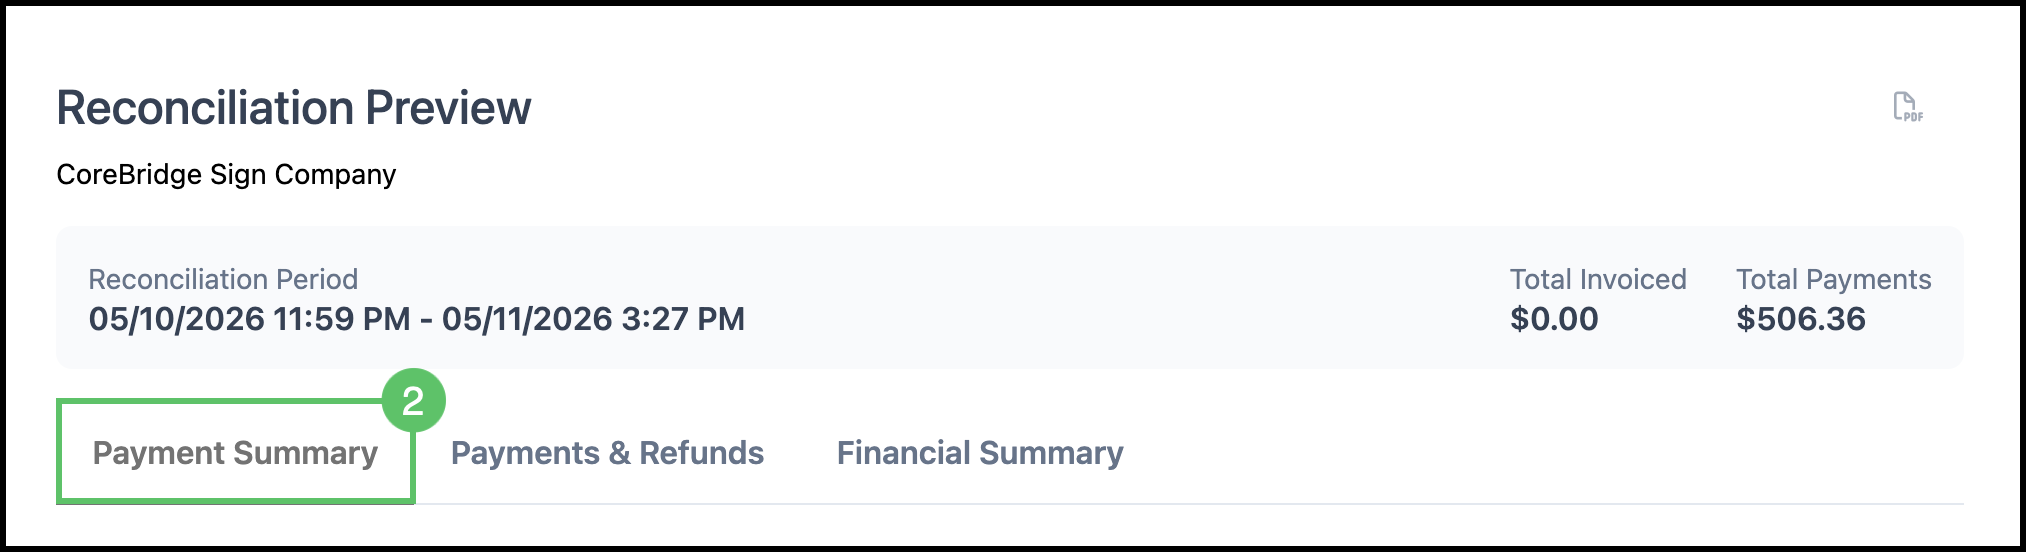
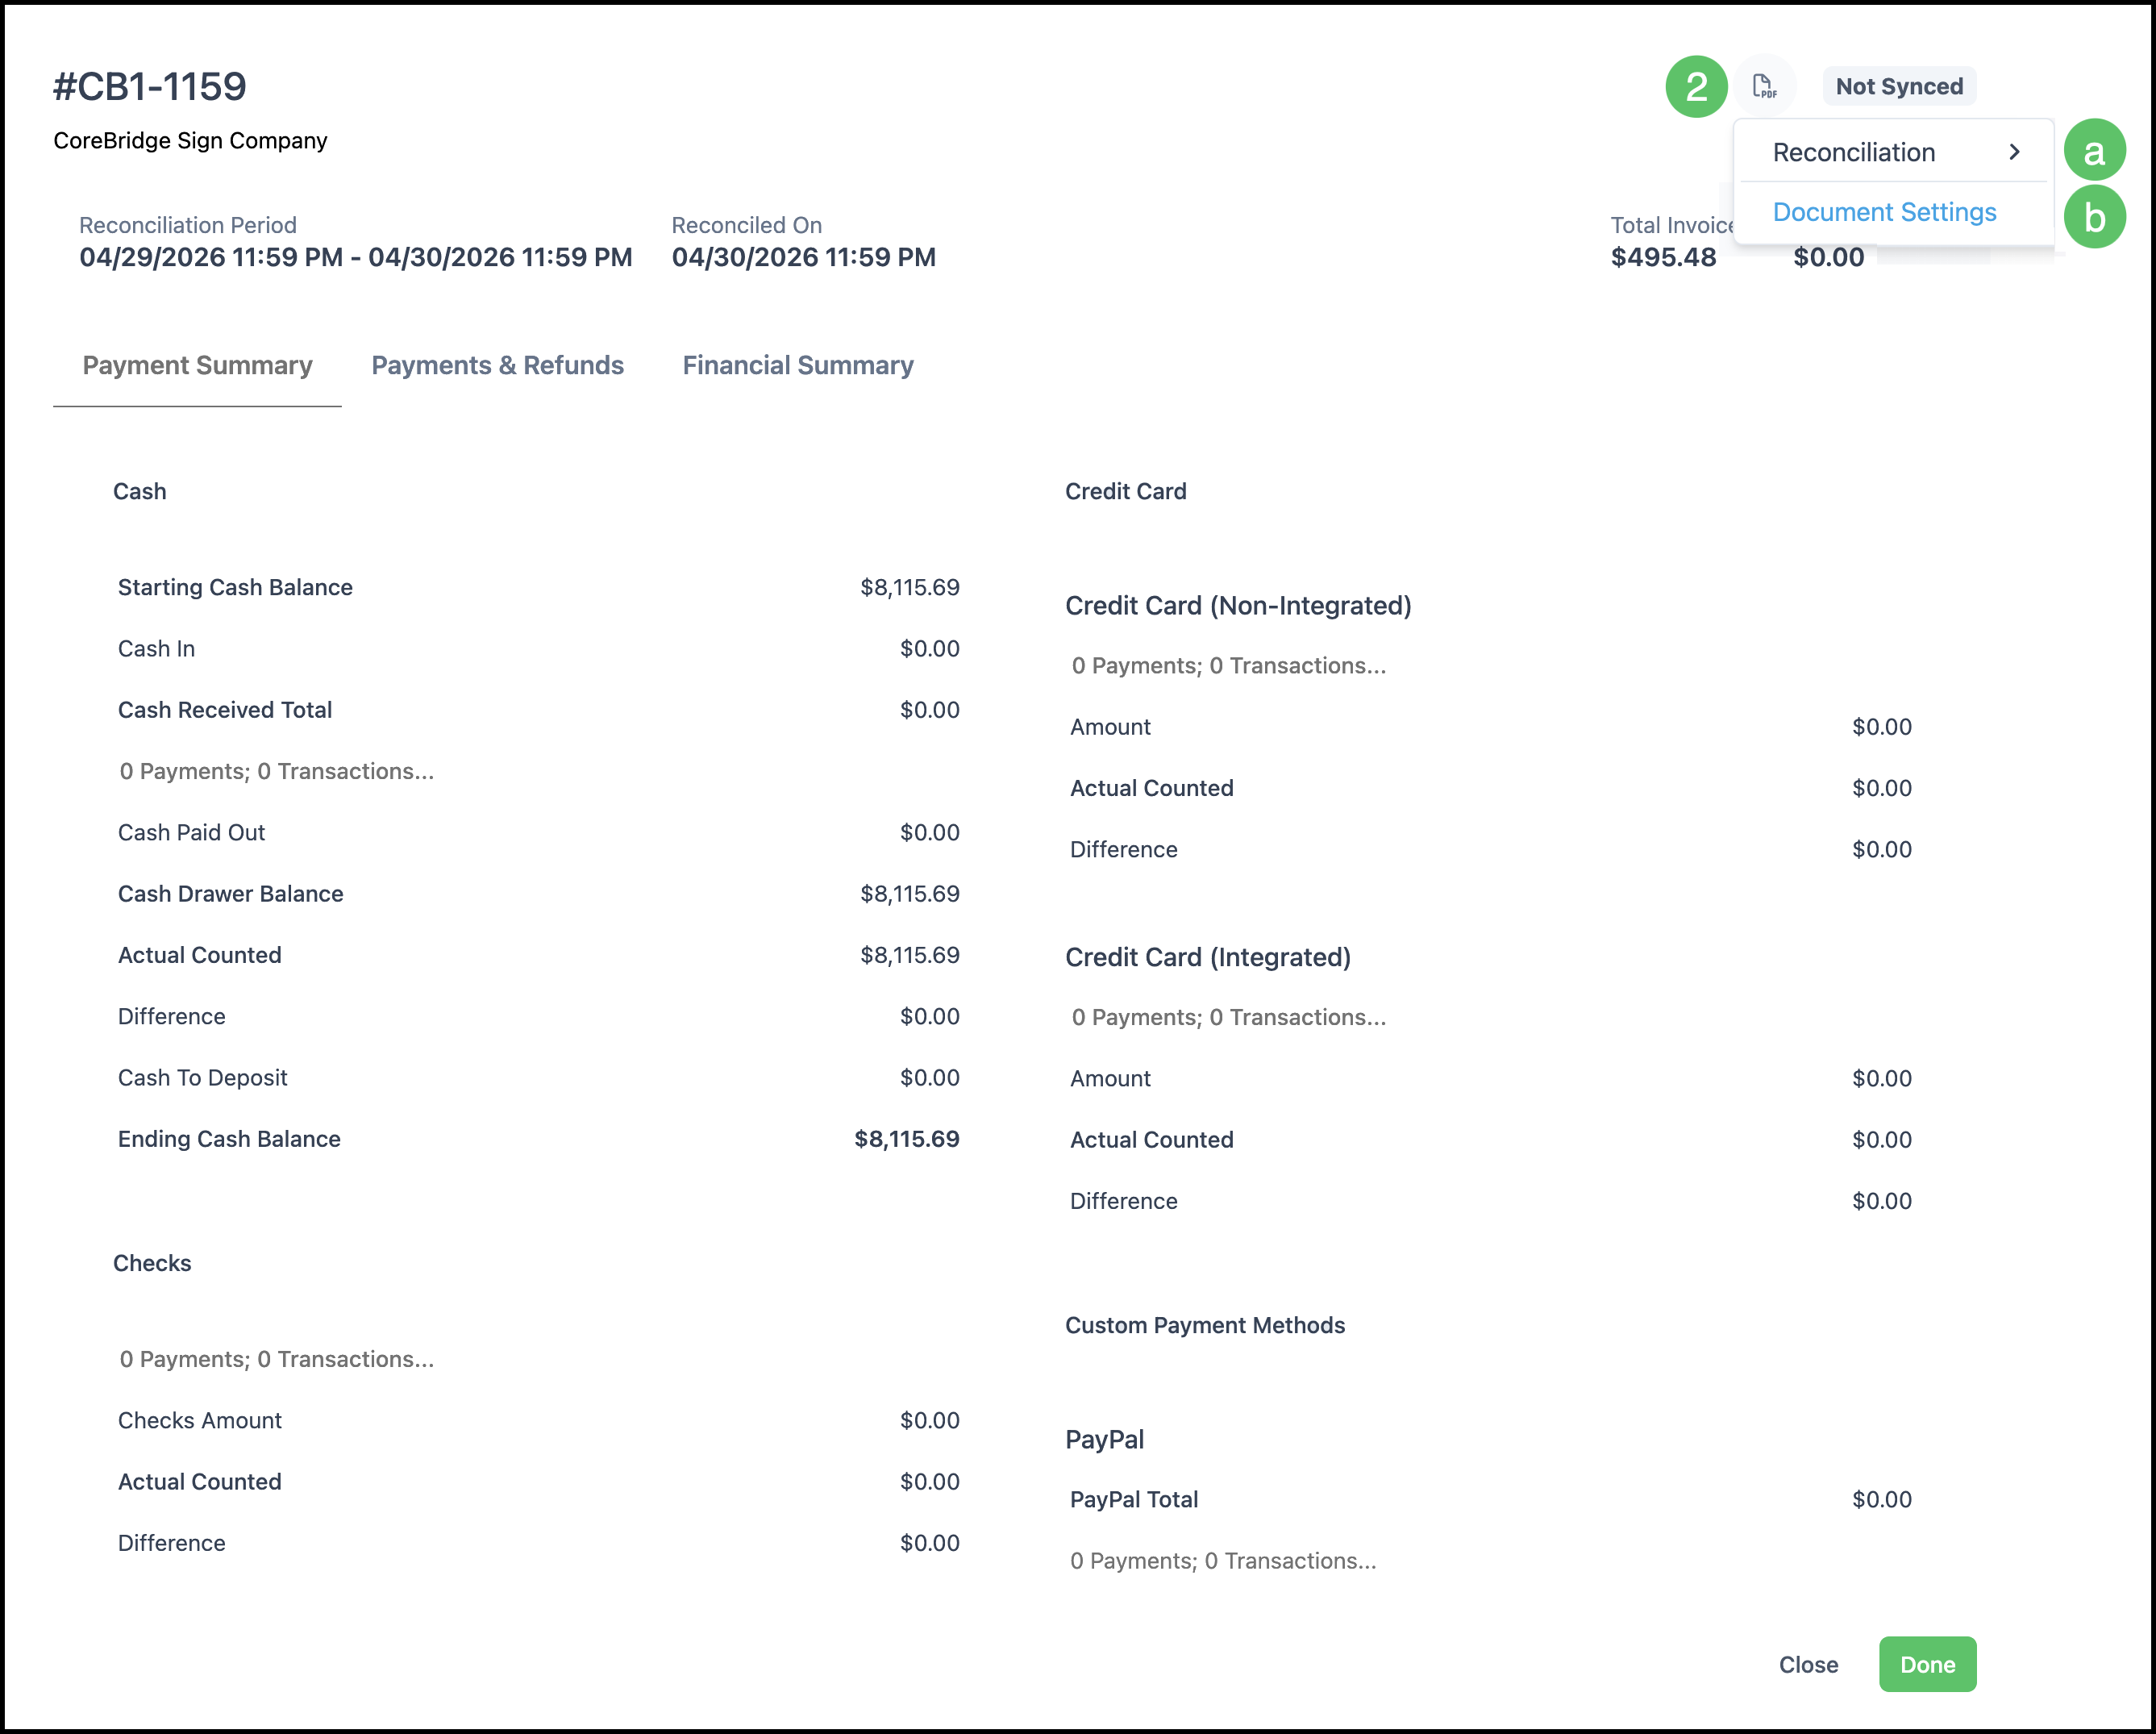
2. Go to the Payment Summary tab.
3. Enter and verify Cash amounts.
a. Starting Cash Balance - The ending cash balance from the last reconciliation.
b. Cash In - All cash added to the cash drawer since the last reconciliation (e.g., ATM replenishment), not including customer cash payments.
c. Cash Received Total - Total payments received with cash as the payment method since the last reconciliation.
Note: Click the link for details.
d. Cash Paid Out - Cash taken out of the drawer (e.g., petty cash, supplies), not change given to a customer.
e. Cash Drawer Balance - The sum of cash recorded in CoreBridge.
f. Actual Counted - Enter the physical count of money in the cash drawer. You can use the down icon to populate this with the system-calculated amount after verifying.
g. Difference - The difference between the system-calculated amount and the physical count. This must be 0.00 to proceed. If not 0.00, recount and review transactions.
h. Cash To Deposit - The amount of cash to remove from the drawer and deposit.
i. The remainder becomes the Ending Cash Balance for this period and the Starting Cash Balance for the next.

4. Enter and verify Check payments.
Note: Click the link for details.
a. Checks Amount - This is the total amount of payments received with check as a payment method in the system since the last reconciliation period.
Note: Click on the link above for check details.
b. Actual Counted - Enter the total value of the checks received.
Note: The check total must equal the system calculated check balance. You can click on the down icon to populate this field with the system calculated amount as a shortcut after verifying the check total.
c. Difference - This is the difference between the system calculated check balance and the counted check total. This amount must be 0.00 to proceed.
Note: If the difference is not 0.00, recount the checks and review all transactions.

5. Enter and verify Wire Transfer payments.
a. Wire Transfer (External Amount) - This is the total amount of payments received with wire transfer as a payment method in the system since the last reconciliation period.
Note: Click on the link above for wire transfer details.
b. Actual Counted - Enter the total value of wire transfers received.
Note: The wire transfer total must equal the system calculated wire transfer balance. You can click on the down icon to populate this field with the system calculated amount as a shortcut after verifying the wire transfer balance.
c. Difference - This is the difference between the system calculated wire transfer balance and the counted balance. This amount must be 0.00 to proceed.
Note: If the difference is not 0.00, recount the wire transfers and review all transactions.

6. Verify In-Store Credit Payments.
a. This amount represents in store credits applied as payments for invoices in this reconciliation period.
Note: Click on the link above for details.

7. Verify Bad Debt amount.
a. This amount represents receivables marked Bad Debt to be written off as a business loss in this reconciliation period.
Note: Click on the link above for details.

8. Verify Early Payment Credit.
a. This represents a credit given to a customer for making a payment early in this reconciliation period.
Note: Click on the link above for details.

9. Enter and verify Credit Card payments.
Credit Card (Non-Integrated) are payments entered manually and processed outside CoreBridge. Credit Card (Integrated) are payments processed within CoreBridge via a merchant service provider (including Customer Portal payments). For more information, please see CoreBridge's Integrated Merchant Service Providers.
a. Credit Card (Non-Integrated) Amount - This is the total amount of credit card non integrated as a payment method in the system since last reconciliation period.
Note: Click the link above for credit card non-integrated details.
b. Actual Counted - Enter the total value of credit card non-integrated processed. You can click on the down icon to populate this field with the system calculated amount as a shortcut after verifying the amount.
Note: The credit card non-integrated total must equal the system calculated amount.
c. Difference - This is the difference between the system calculated credit card non-integrated and the counted amount. This amount must be 0.00 to proceed.
Note: If the difference is not 0.00, review all transactions.
d. Credit Card (Integrated) Amount - This is the total amount of credit card integrated as a payment method in the system since last reconciliation period.
Note: Any payments processed through the Customer Portal will display here. Click the link above for credit card integrated details.
e. Actual Counted - Enter the total value of credit card integrated processed. You can click on the down icon to populate this field with the system calculated amount as a shortcut after the amount has been verified.
Note: The credit card integrated total must equal the system calculated amount.
f. Difference - This is the difference between the system calculated credit card integrated and the counted amount. This amount must be 0.00 to proceed.
Note: If the difference is not 0.00, review all transactions.

10. Enter and verify Custom Payment Methods.
Payment methods such as Zelle, Venmo, or other 3rd party payment systems can be entered in your system as Custom Payment Methods. For more information on Custom Payment Methods, please see Payment Methods.
a. Custom Payment Amount - This is the total amount of payments received with custom as a payment method in the system since the last reconciliation period.
Note: Click on the link above for custom details.
b. Actual Counted - Enter the total value of the custom payments received.
Note: The custom total must equal the system calculated custom balance. You can click on the down icon to populate this field with the system calculated amount as a shortcut after verifying this amount.
c. Difference - This is the difference between the system calculated custom payment balance and the amount counted. This amount must be 0.00 to proceed.
Note: If the difference is not 0.00, recount the custom payments and review all transactions.

11. Verify Refunded Payments.
Note: This amount represents all refunds issued to customers during this reconciliation period.
12. Verify Voided Orders.
Note: This amount represents all voided orders that have been invoiced with full or partial payment received.

13. Go to the Payments and Refunds tab (or Payments & Refund) to review all system-posted transactions since the last reconciliation.

14. Go to the Financial Summary tab to review financial reports for this reconciliation period.
15. Click Reconcile when all differences are 0.00 and you are ready to complete the reconciliation.

Viewing Previous Reconciliations
Navigate to Accounting / Reconciliation & Sync.

1. Select the Reconciliation.

2. Click the PDF icon.
a. Clicking Reconciliation opens the Reconciliation in a new tab with options to Print, Download, and Customize the document.
b. Document Settings opens a new tab allowing you to edit the Reconciliation Template Default.
Reconciliation Options
Navigate to System Settings / Accounting Options.

1. For each business location, you can toggle to enable or disable daily automatic closing at the end of each day.
2. Click Save.
Note: For more information, please see Automatic Reconciliation and Sync.

Helpful Tips
- Error messages may appear during reconciliation. The system will not allow you to proceed if any Difference exceeds 0.00.
- If the difference is not 0.00, review all transactions for that payment type, recount cash or checks as needed, and correct any data entry errors.
- Verify your account mapping with your external accounting software in SystemSettings / Integrations under your accounting package or integration.
- CoreBridge rounds to two decimal places to be compatible with many accounting software packages.
Related Articles
Automatic Reconciliation and Sync