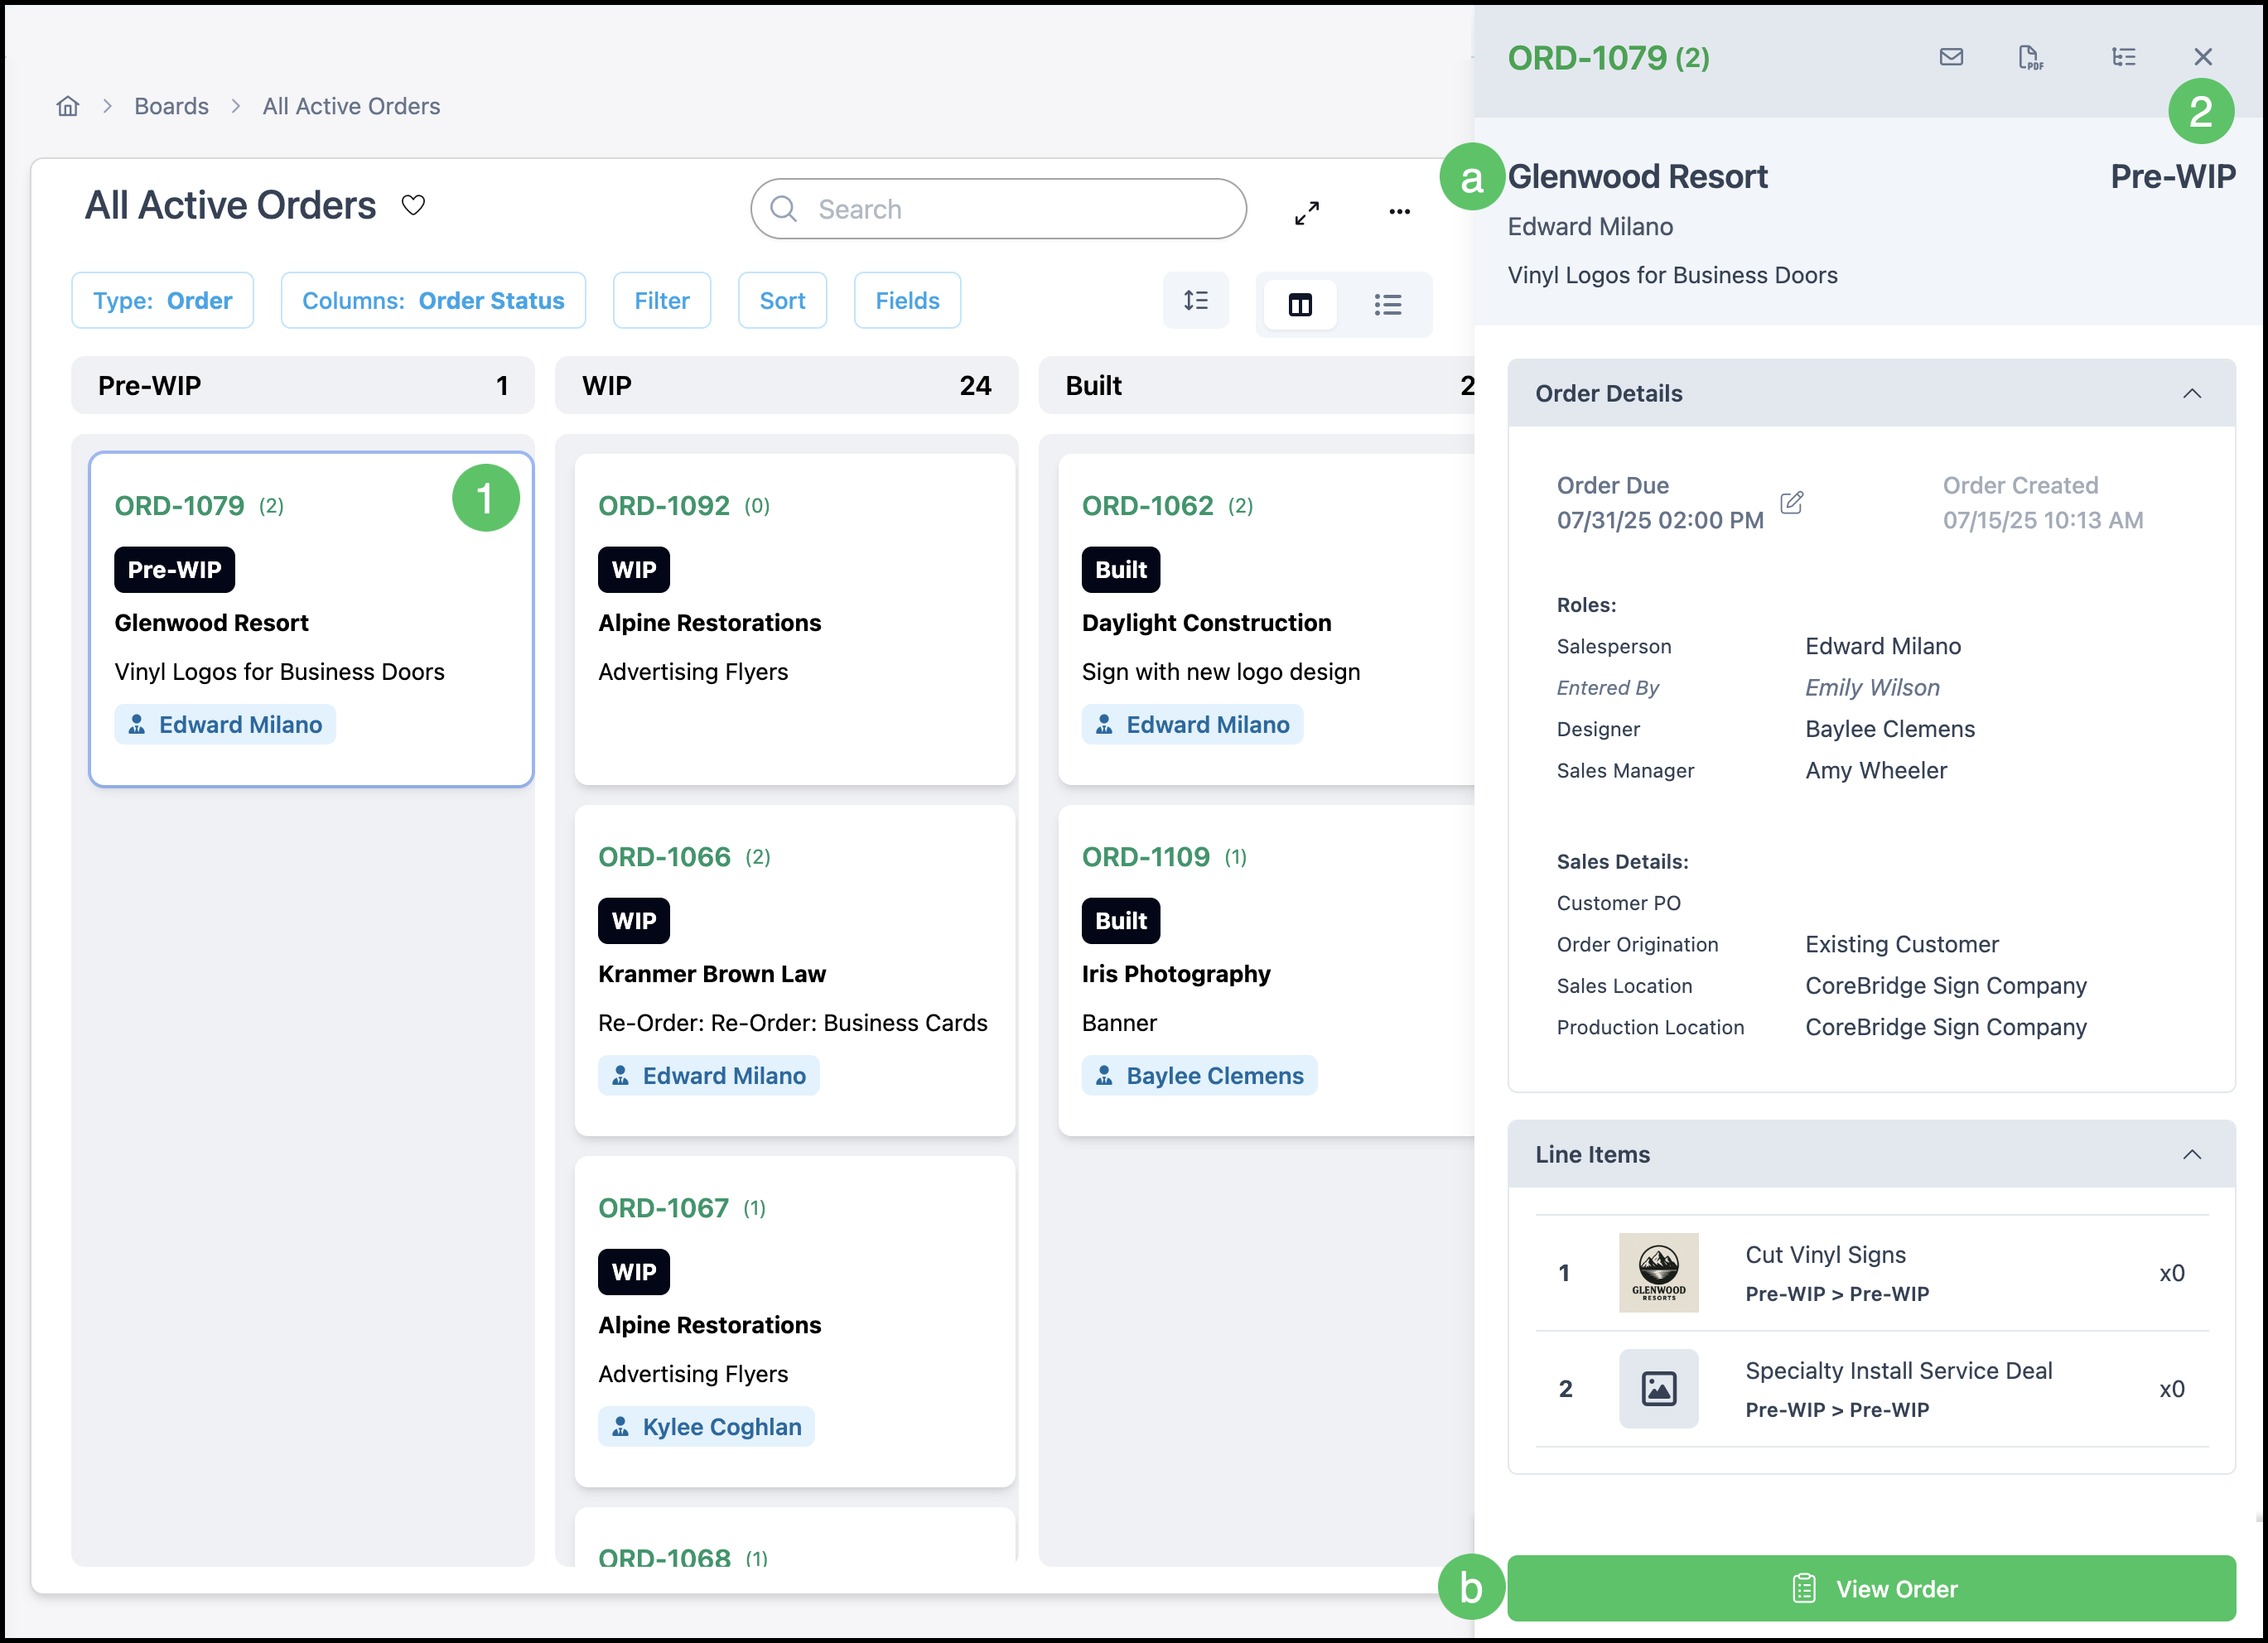
Boards provide a visual representation of Order, Estimate, and Item-level workflow and are accessible from their own module.
Table of Contents
- Boards Overview
- Filtering Boards
- Using Boards
- Moving Items, Estimates, and Orders
- Editing a Board
- Filtering Within a Board
- Sorting Within Boards
- Fields Within a Board
- Side Panel Details
- Related Articles
Boards Overview
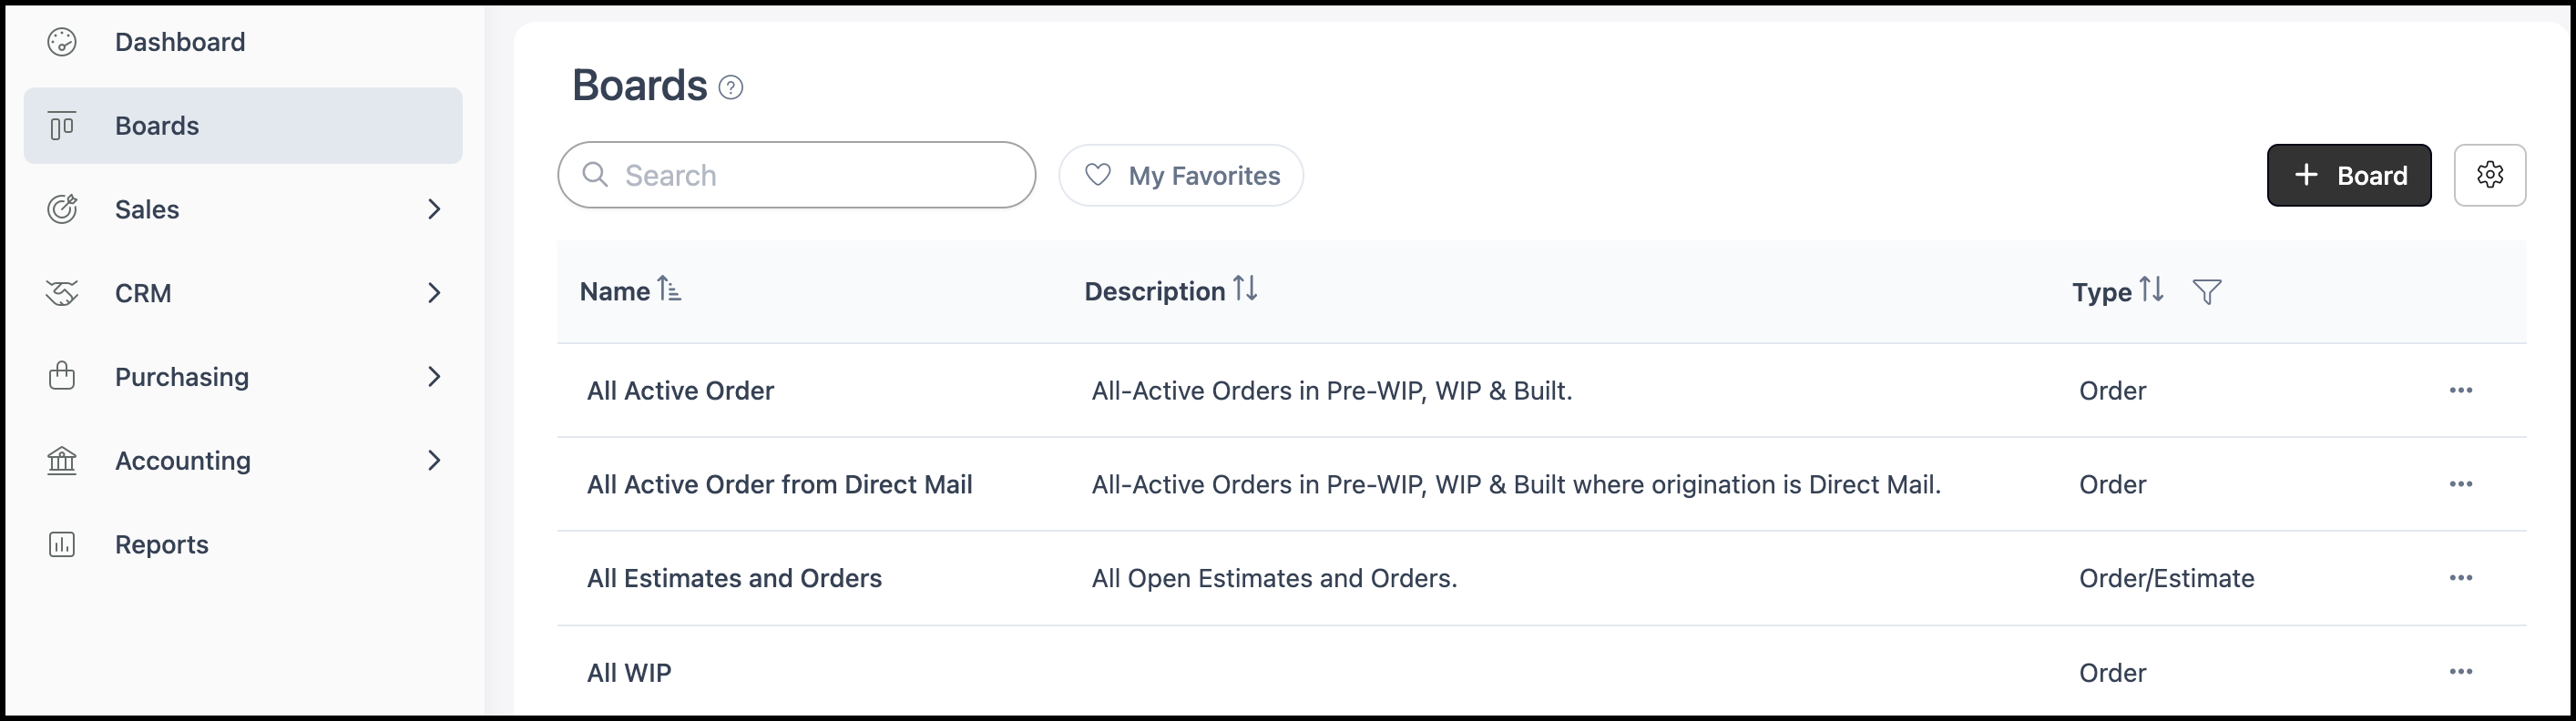
Navigate to the Boards module.
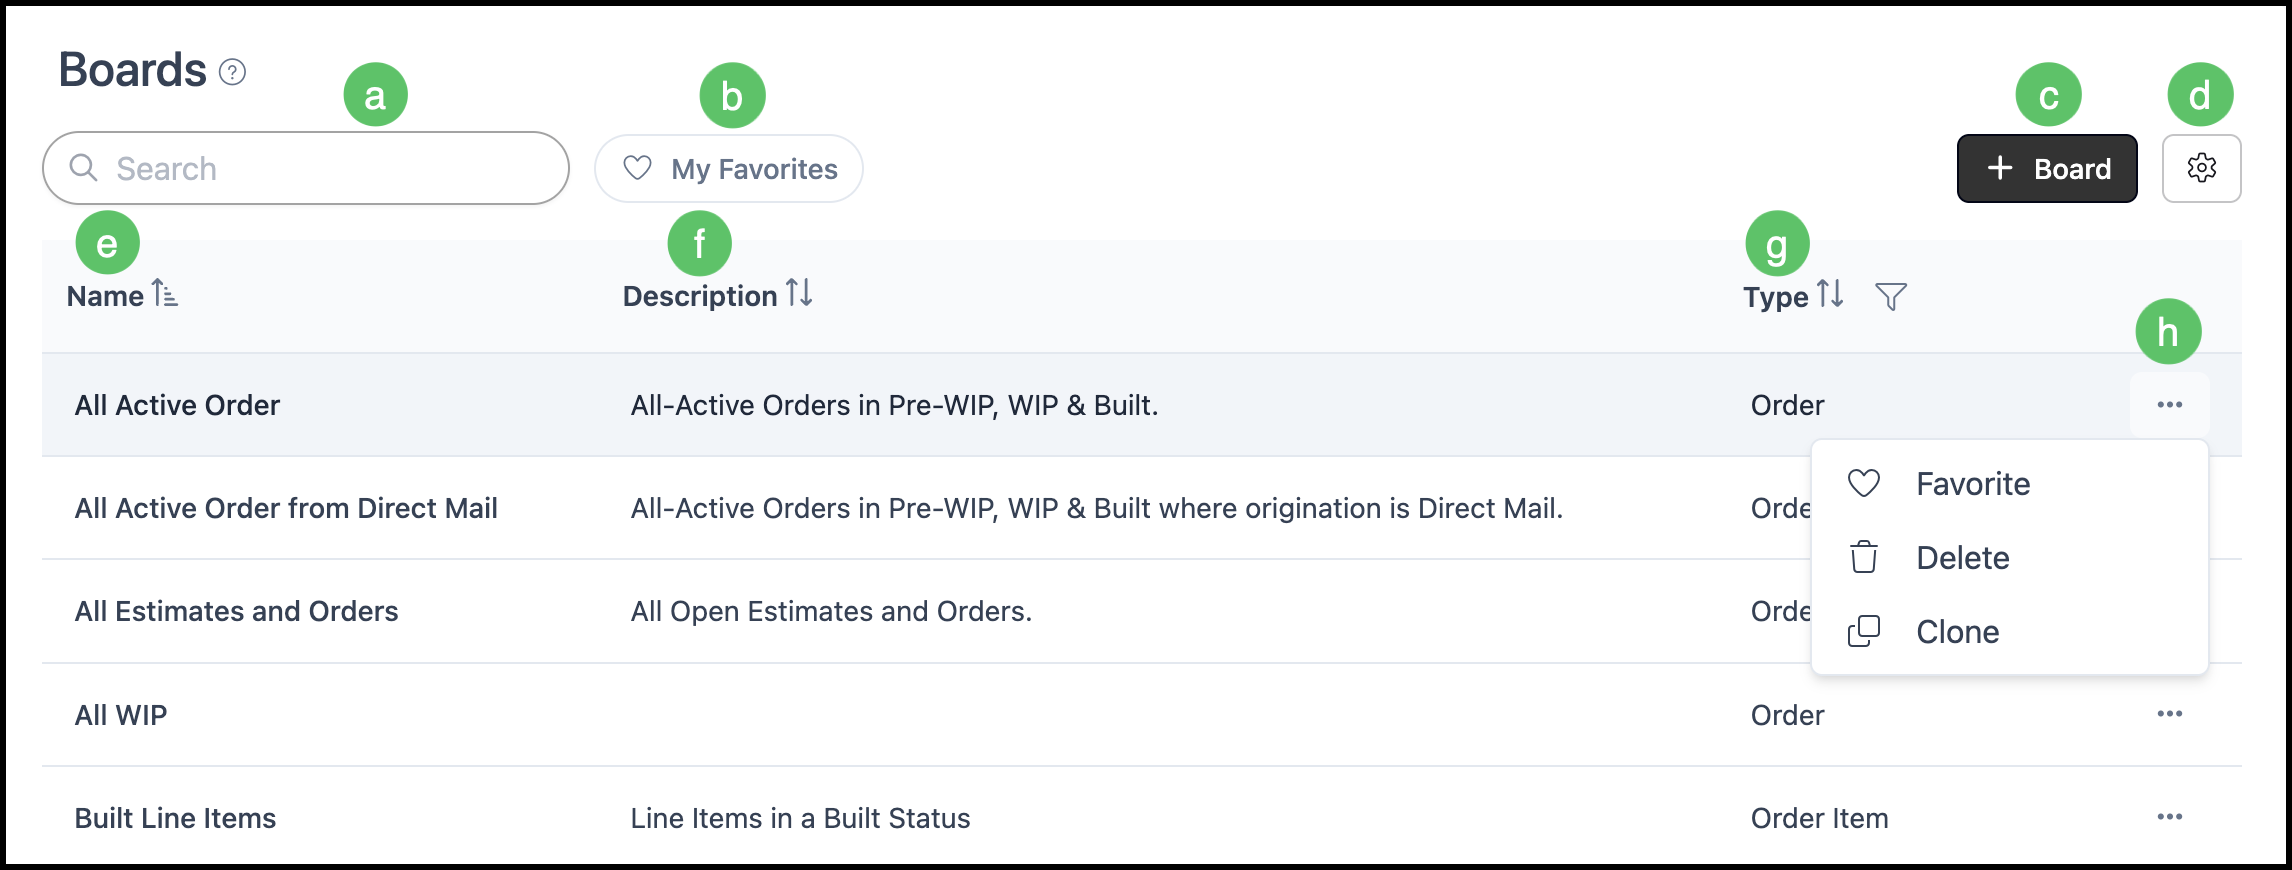
a. Search field to quickly find the right Board.
b. The Favorites icon provides quick access to a view that displays only Boards marked as favorites. Selecting the icon again returns the view to the main Board list.
c. The Add Board button starts the new Board flow.
d. Search Settings allow you to view inactive Boards.
e. Name - the Board name. Includes an option to adjust sorting.
f. Description - optional summary text. Includes an option to adjust sorting.
g. Type - The Board type, such as Order, Order Item, Estimate, Estimate Item, Order/Estimate Item, or Order Destination, depending on configuration. Includes options to Sort and Filter by Type.
h. Opens options to Favorite, Delete, or Clone the Board.
Filtering Boards
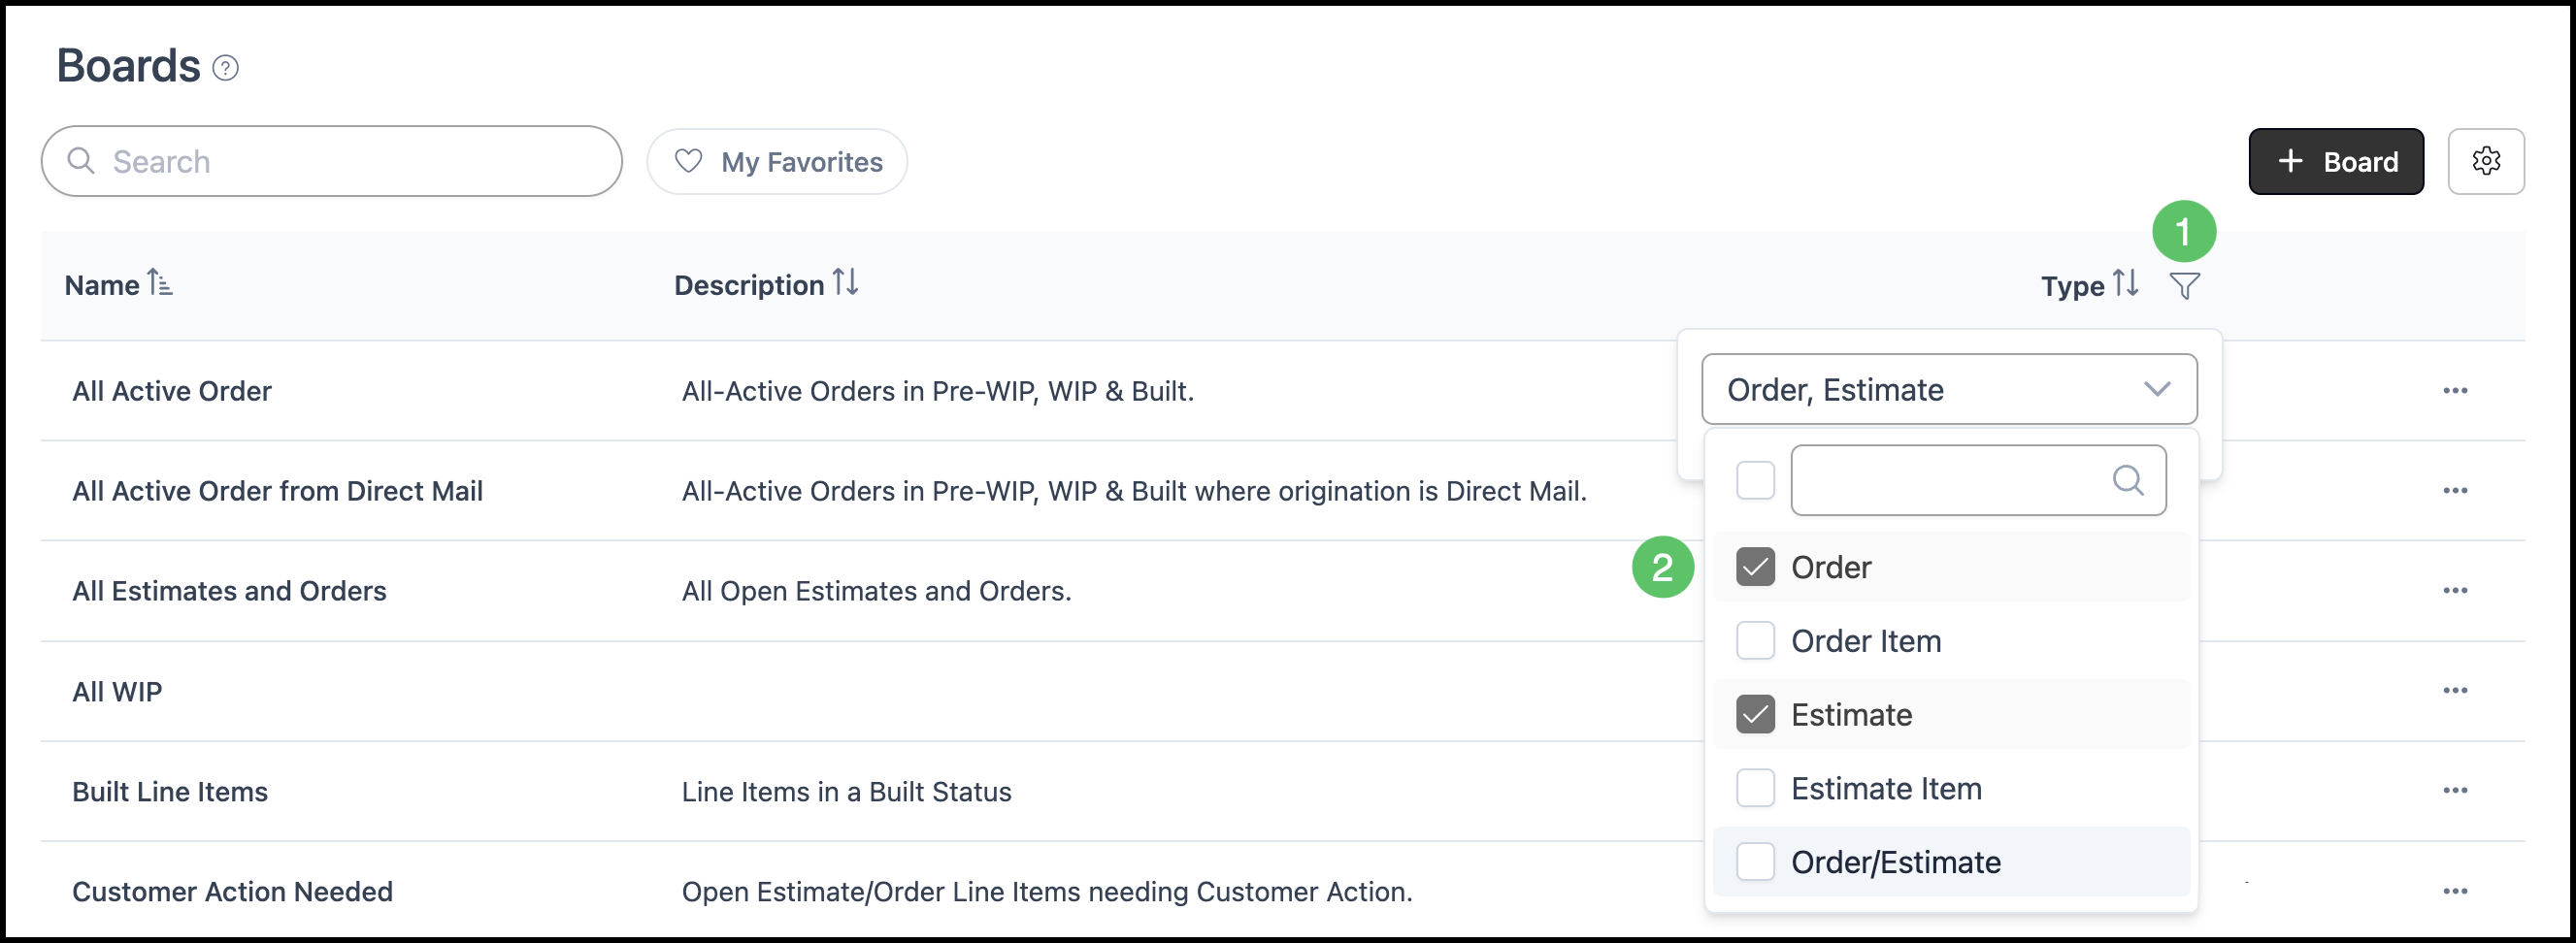
1. Click the Filter icon on the Type header.
2. Select one or more Types from the list.
3. Click Apply.
Using Boards
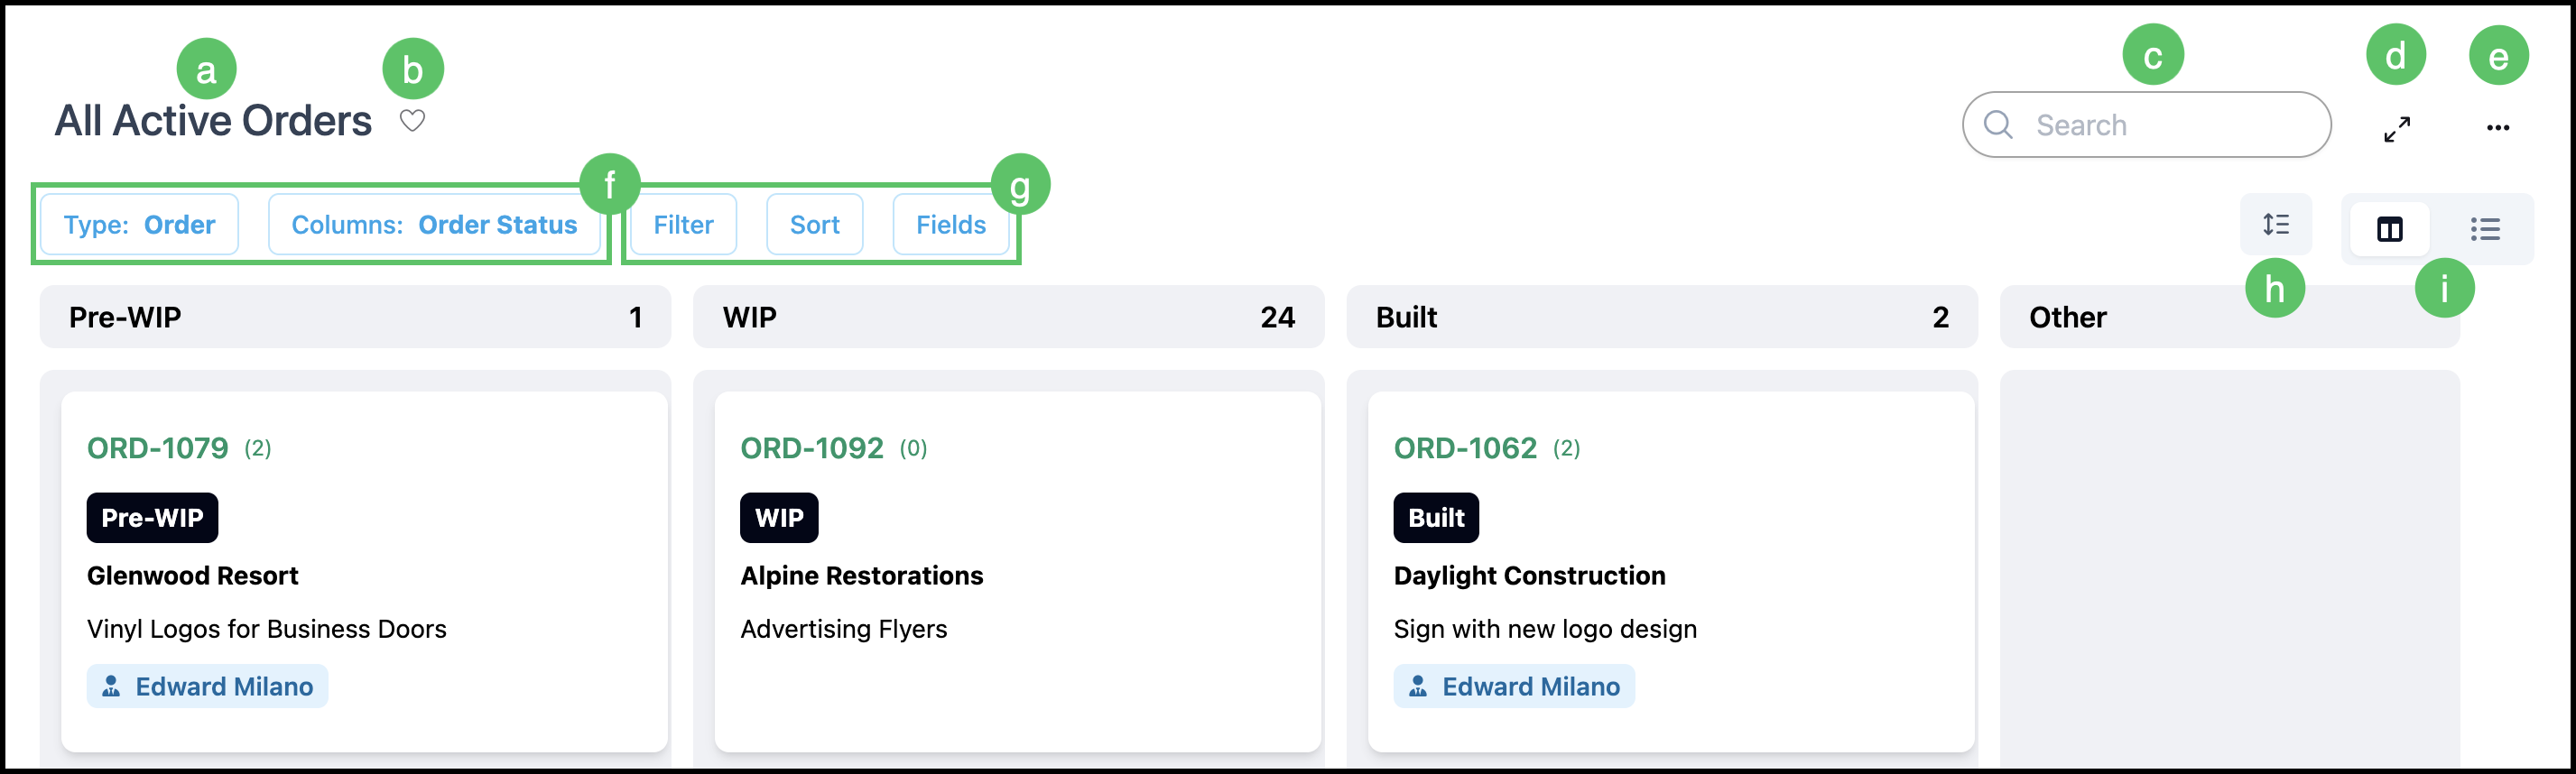
Once within a Board, the following information and features will appear.
Card View:
a. Board name - Displays at the top of the Board.
b. Favorites this Board for quick access.
c. Search - quickly locate Cards on this Board.
d. Toggles between minimized and maximized screen view.
e. Menu includes Edit Board, Manage Access, Favorite, and Clone. Access to this menu is permission based.
f. Type and Columns icons describe the active configuration and are only changeable when in Edit mode for this Board. For more information, see Editing a Board below.
g. Filter, Sort, and Fields adjust what you see.
Note: Updates made in this view apply only to the currently signed-in user. Changes intended for all users are managed through the Board’s Edit mode, available in the More Actions menu.
h. Card display toggle - Alternates between compact and expanded Cards. Only visible in Card view.
Note: This icon is only visible when in Card view.
i. The paired icons switch between Card view and List view.
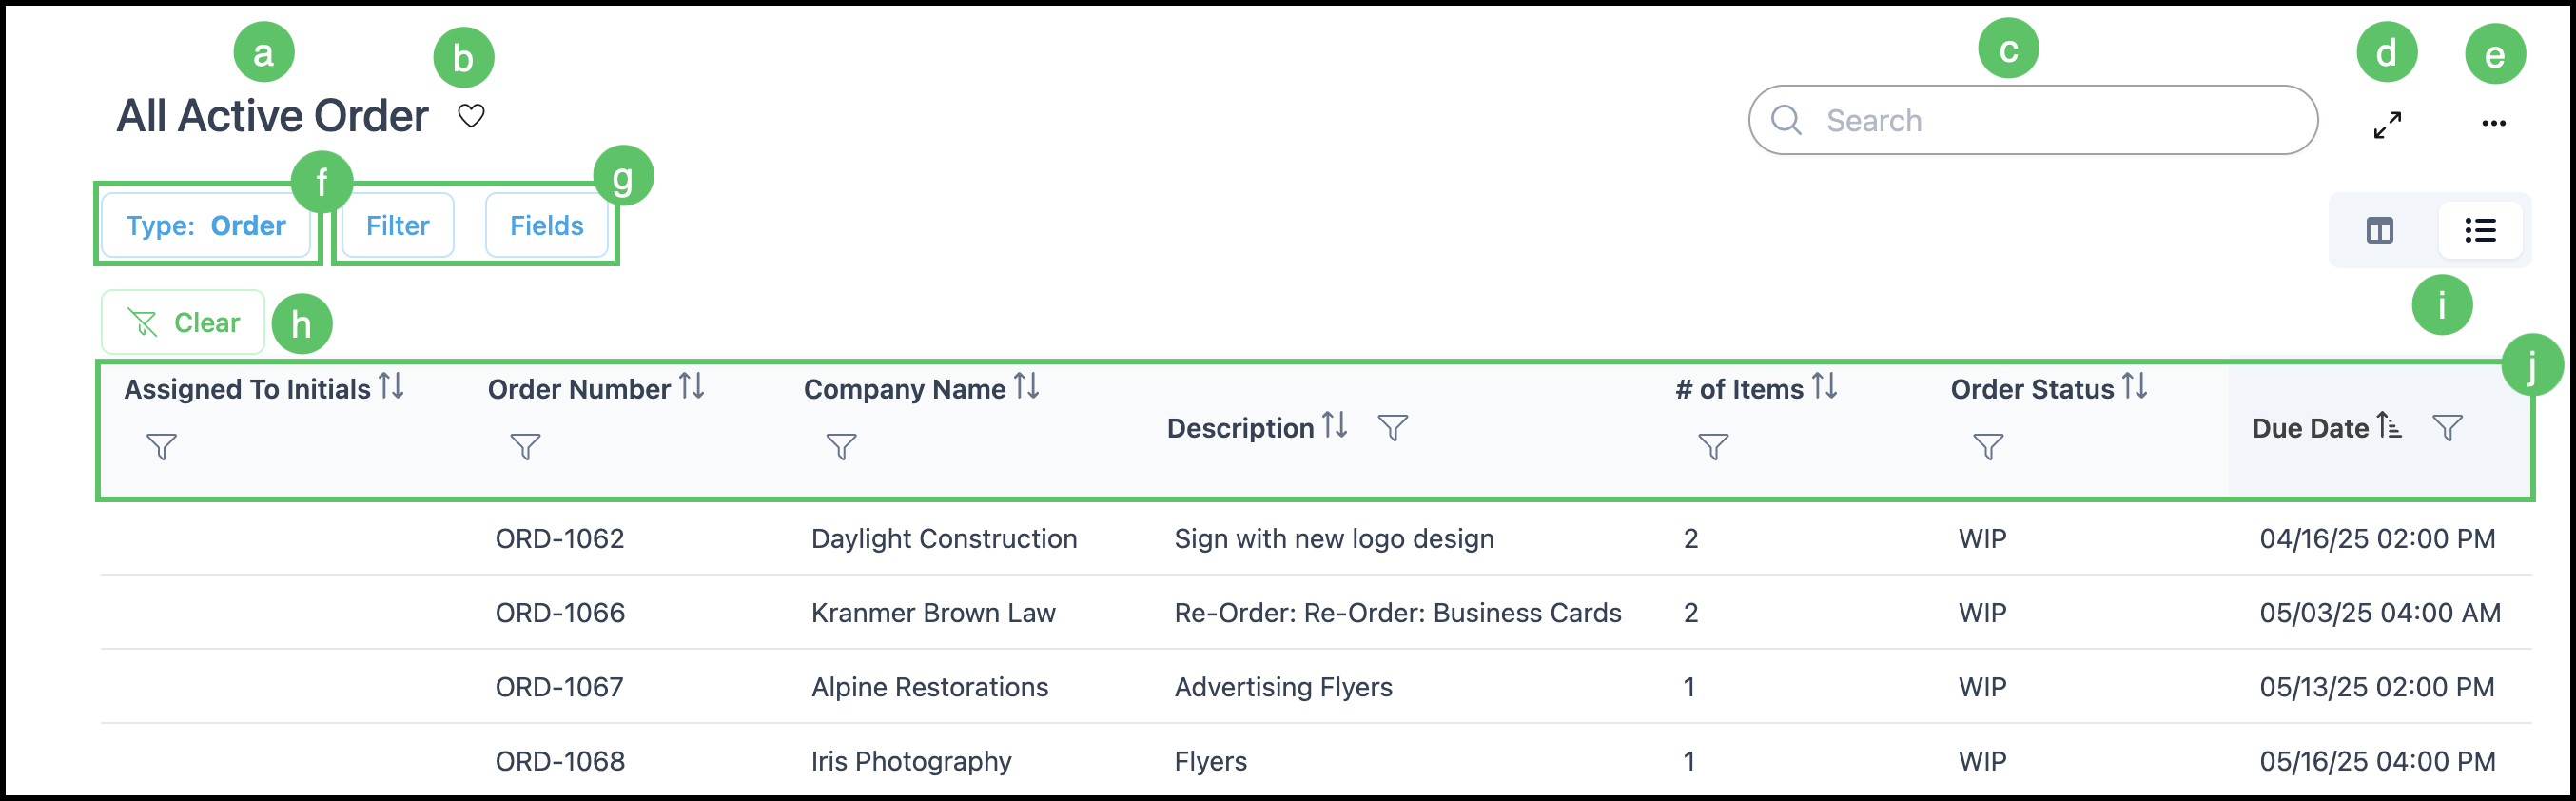
List View:
a. The header shows the Board name.
b. Favorites this Board for quick access.
c. Search - quickly locate rows on this Board.
d. Toggles between minimized and maximized screen view.
e. Menu includes Edit Board, Manage Access, Favorite, and Clone. Access to this menu is permission based.
f. Type describes the active configuration and is only changeable when in edit mode for this Board. For more information, see Editing a Board below.
g. Filter and Fields adjust what you see.
Note: Updates made in this view apply only to the currently signed-in user. Changes intended for all users are managed through the Board’s Edit mode, available in the More Actions menu.
h. Clear Filters - Clears all applied filters.
i. The paired icons switch between Card view and List view.
j. Informational columns with options to Filter and Sort.
Moving Items, Estimates, and Orders
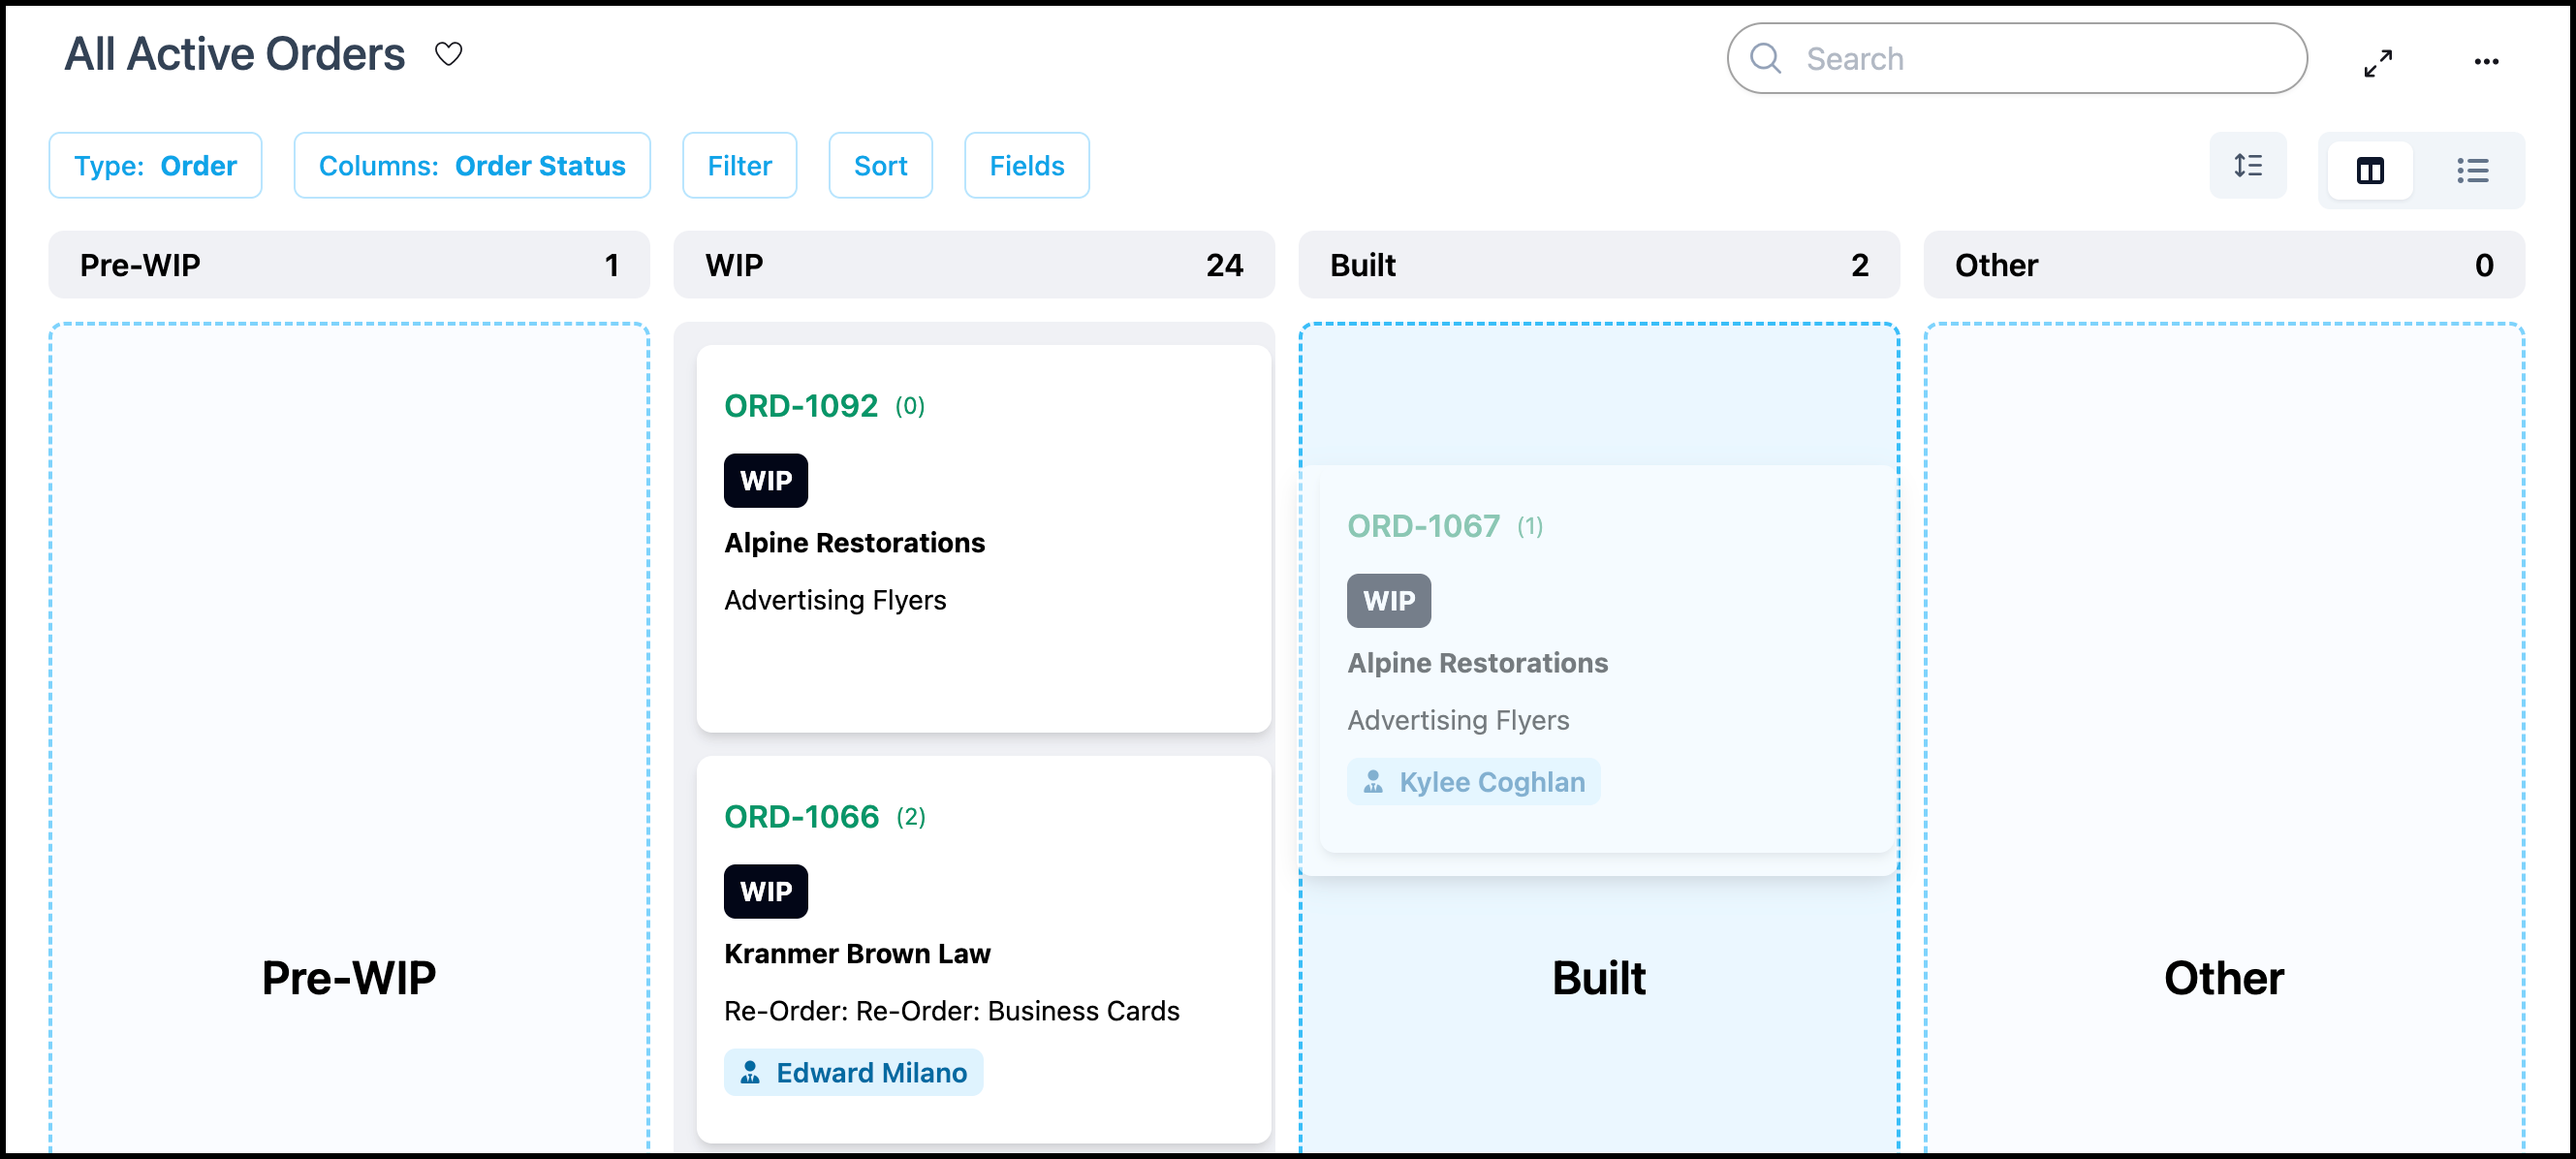
Card View:
In card view, drag and drop one card into another column to move it in the workflow.
List View:
Status can be updated in List View by clicking on one of the rows.
1. Click on the appropriate row.
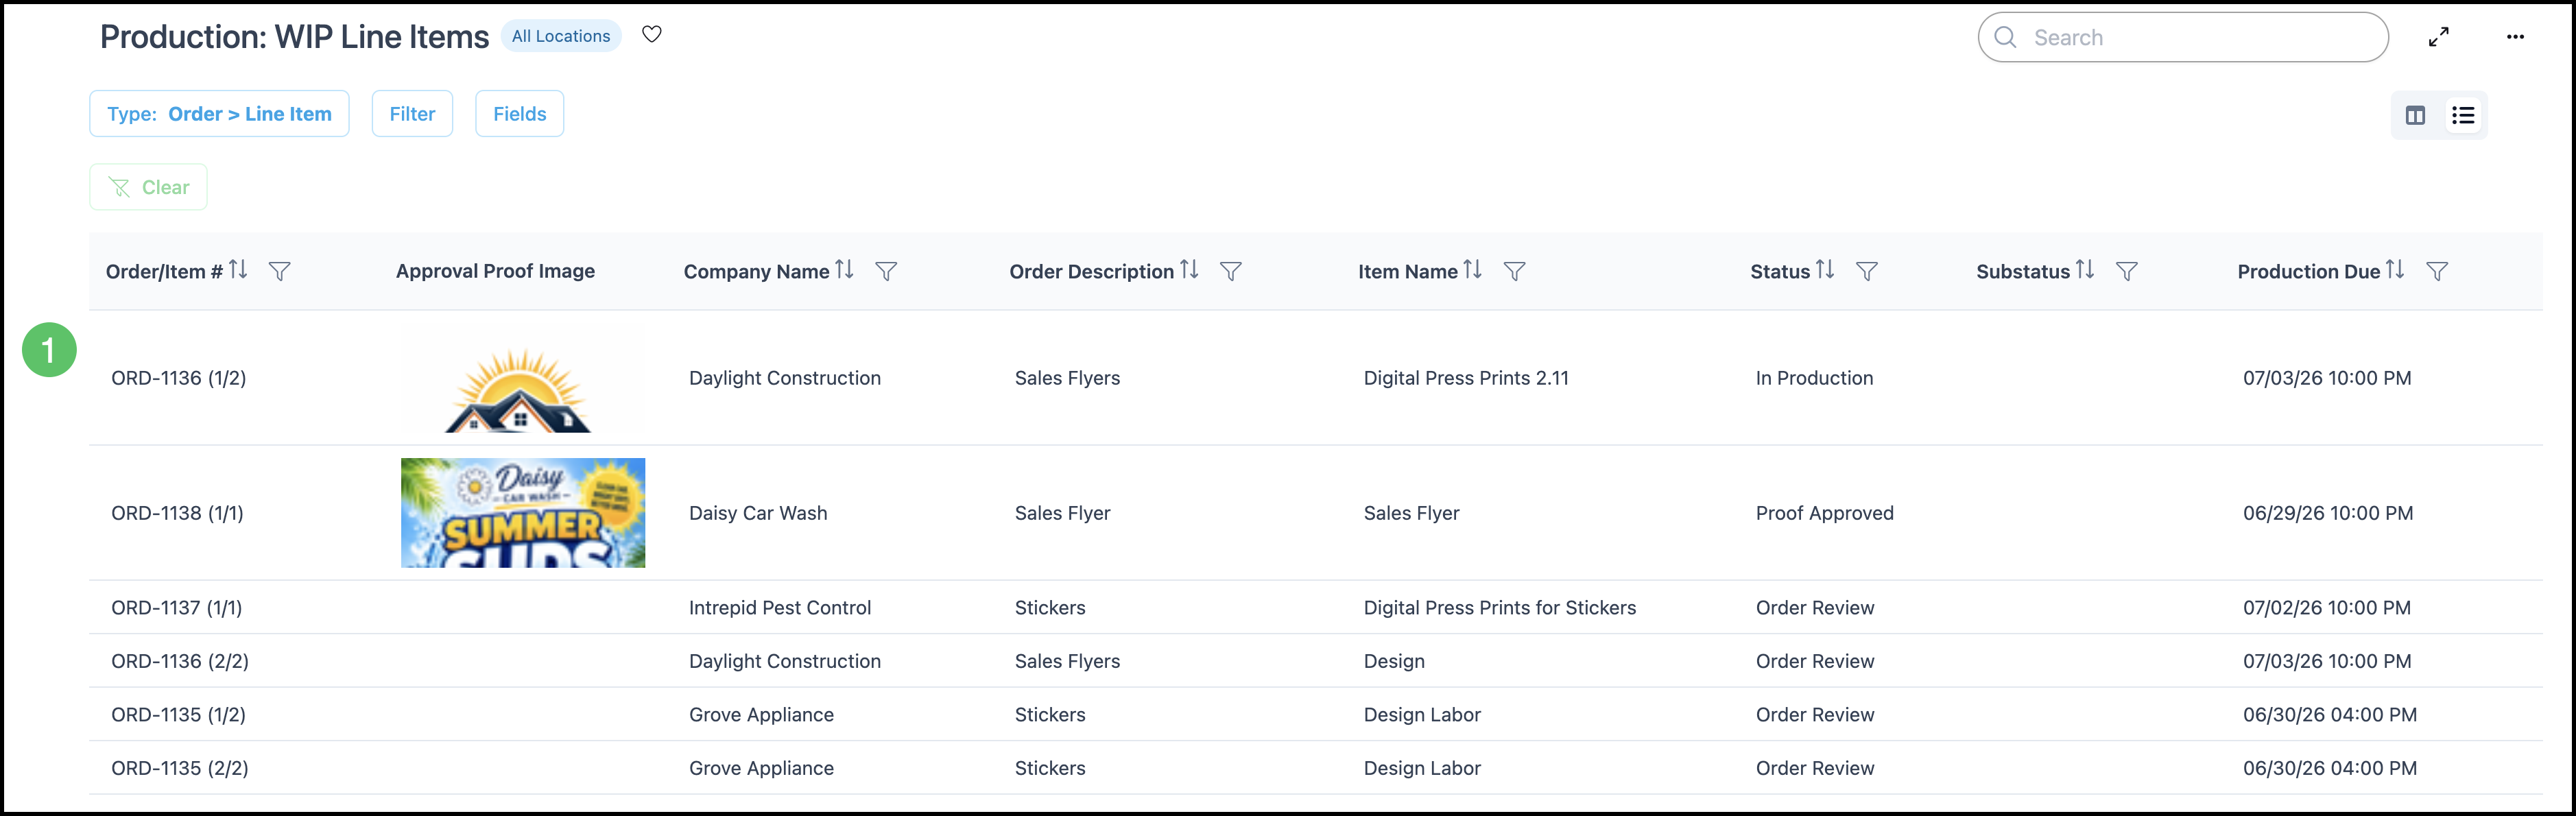
a. Status can be updated by clicking on the Edit icon that appears on hover.
b. This link opens up the associated record in a new tab, allowing you to update the status there.
Editing a Board
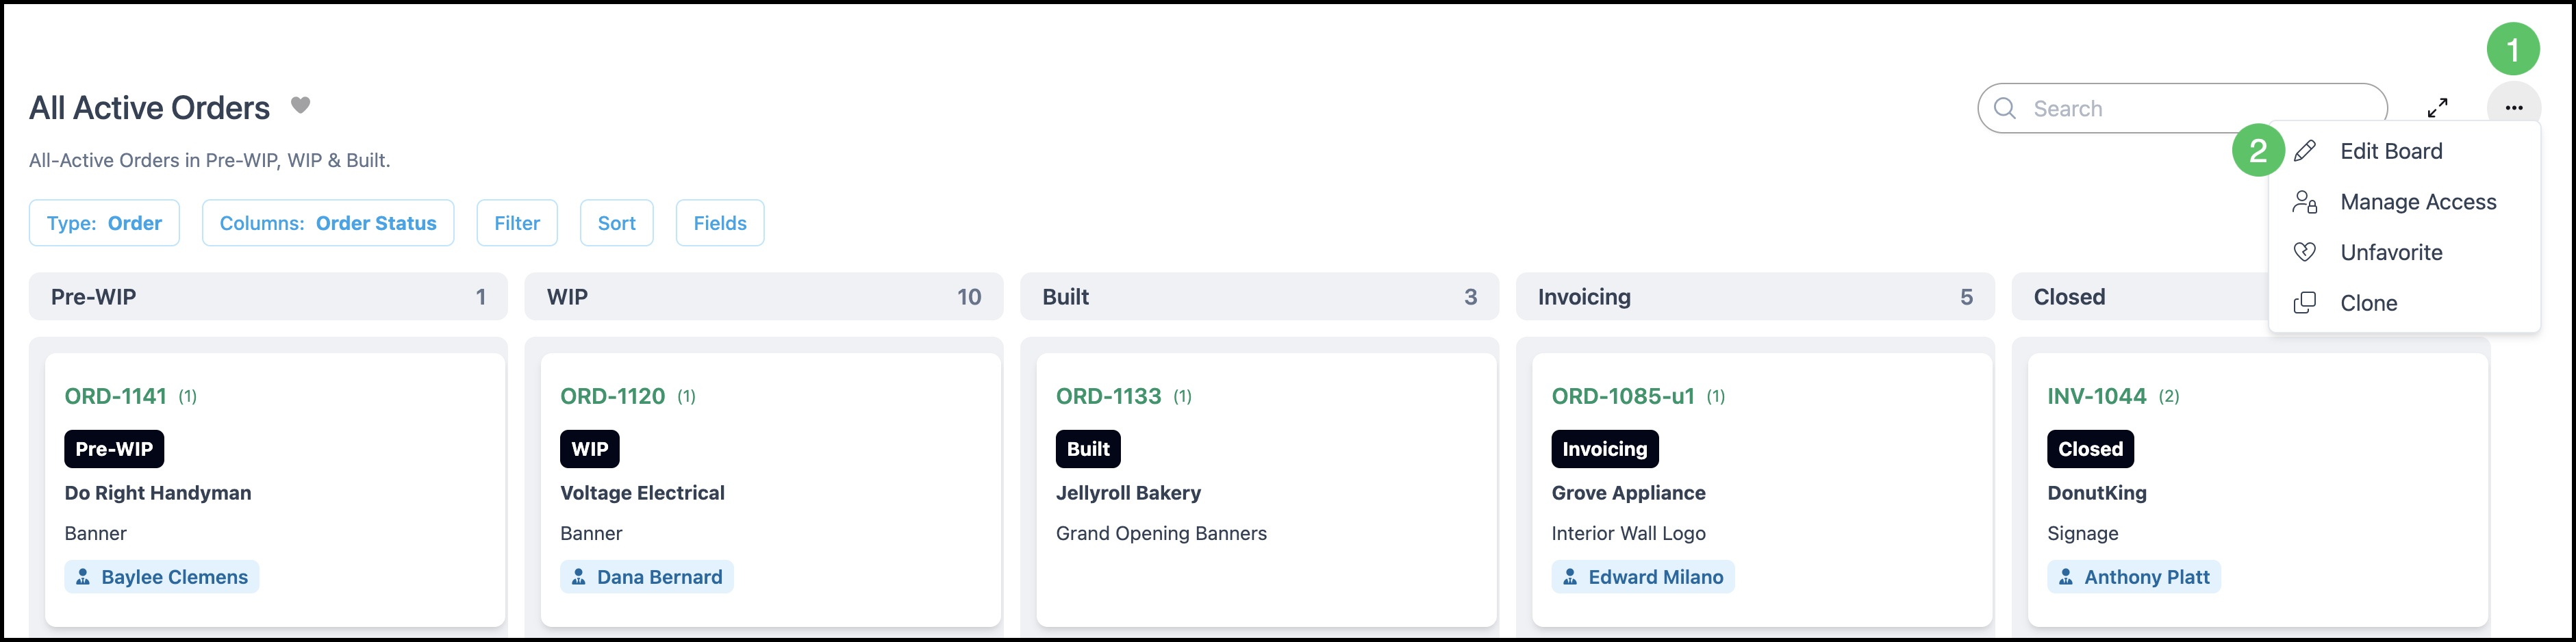
Availability of the Actions menu depends on user permissions, as changes made here apply at a Company wide level.
1. Click the Actions menu.
2. Click Edit Board.
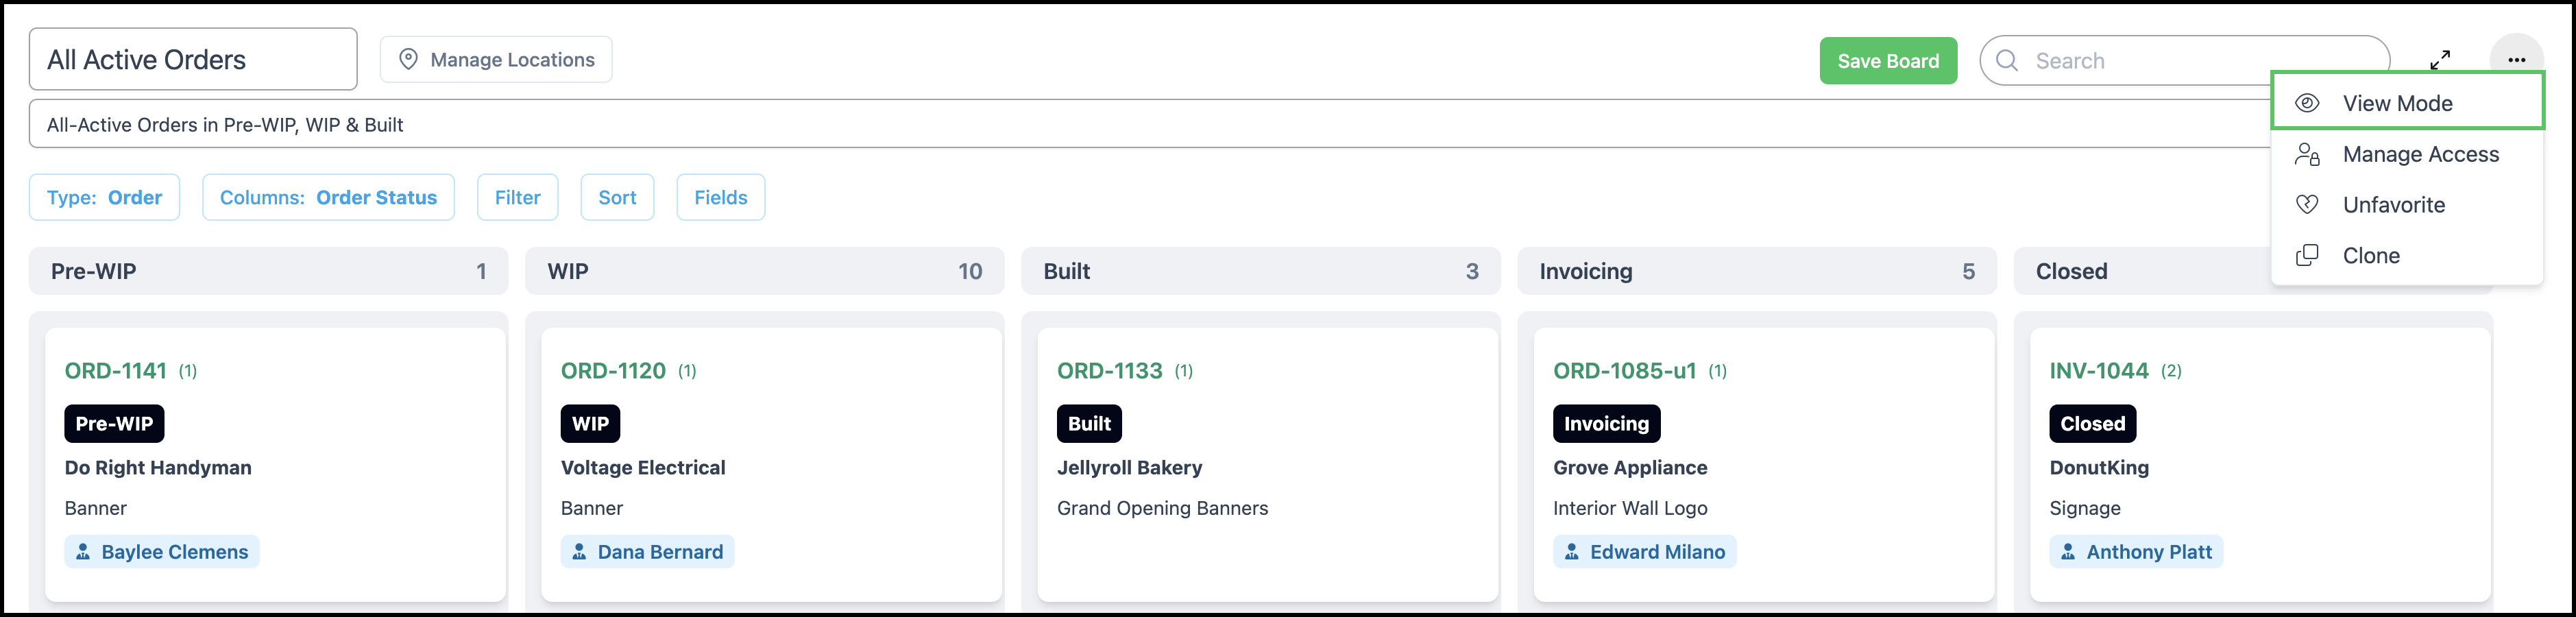
3. Make any necessary edits. This can include the Board name, Description, Locations, Type, Columns, Filter, Sort, or Fields.
Note: Clicking on Type, Columns, Filter, Sort, or Fields will open a side panel allowing you to make changes.
4. Click Save Board.

Note: To exit out of editing without making changes, select View Mode found under the Actions menu.
Filtering Within a Board
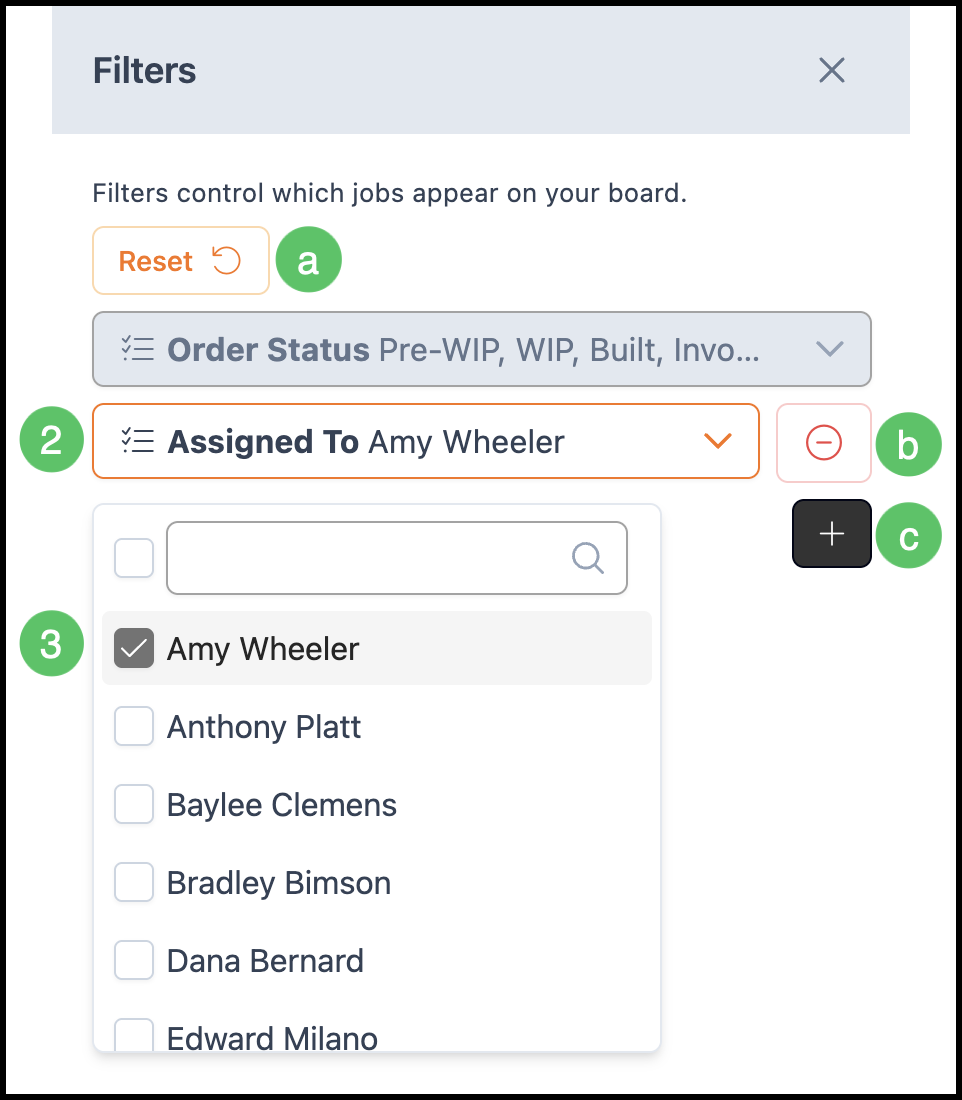
Filters control which jobs appear; set values (such as status) and apply so only matching records stay visible. Changes made here apply to the currently signed-in user and remain active even after navigating away from the Board.
For more information on Filters, please see Board Filters.
1. Select Filter to open the Filters panel on the right.
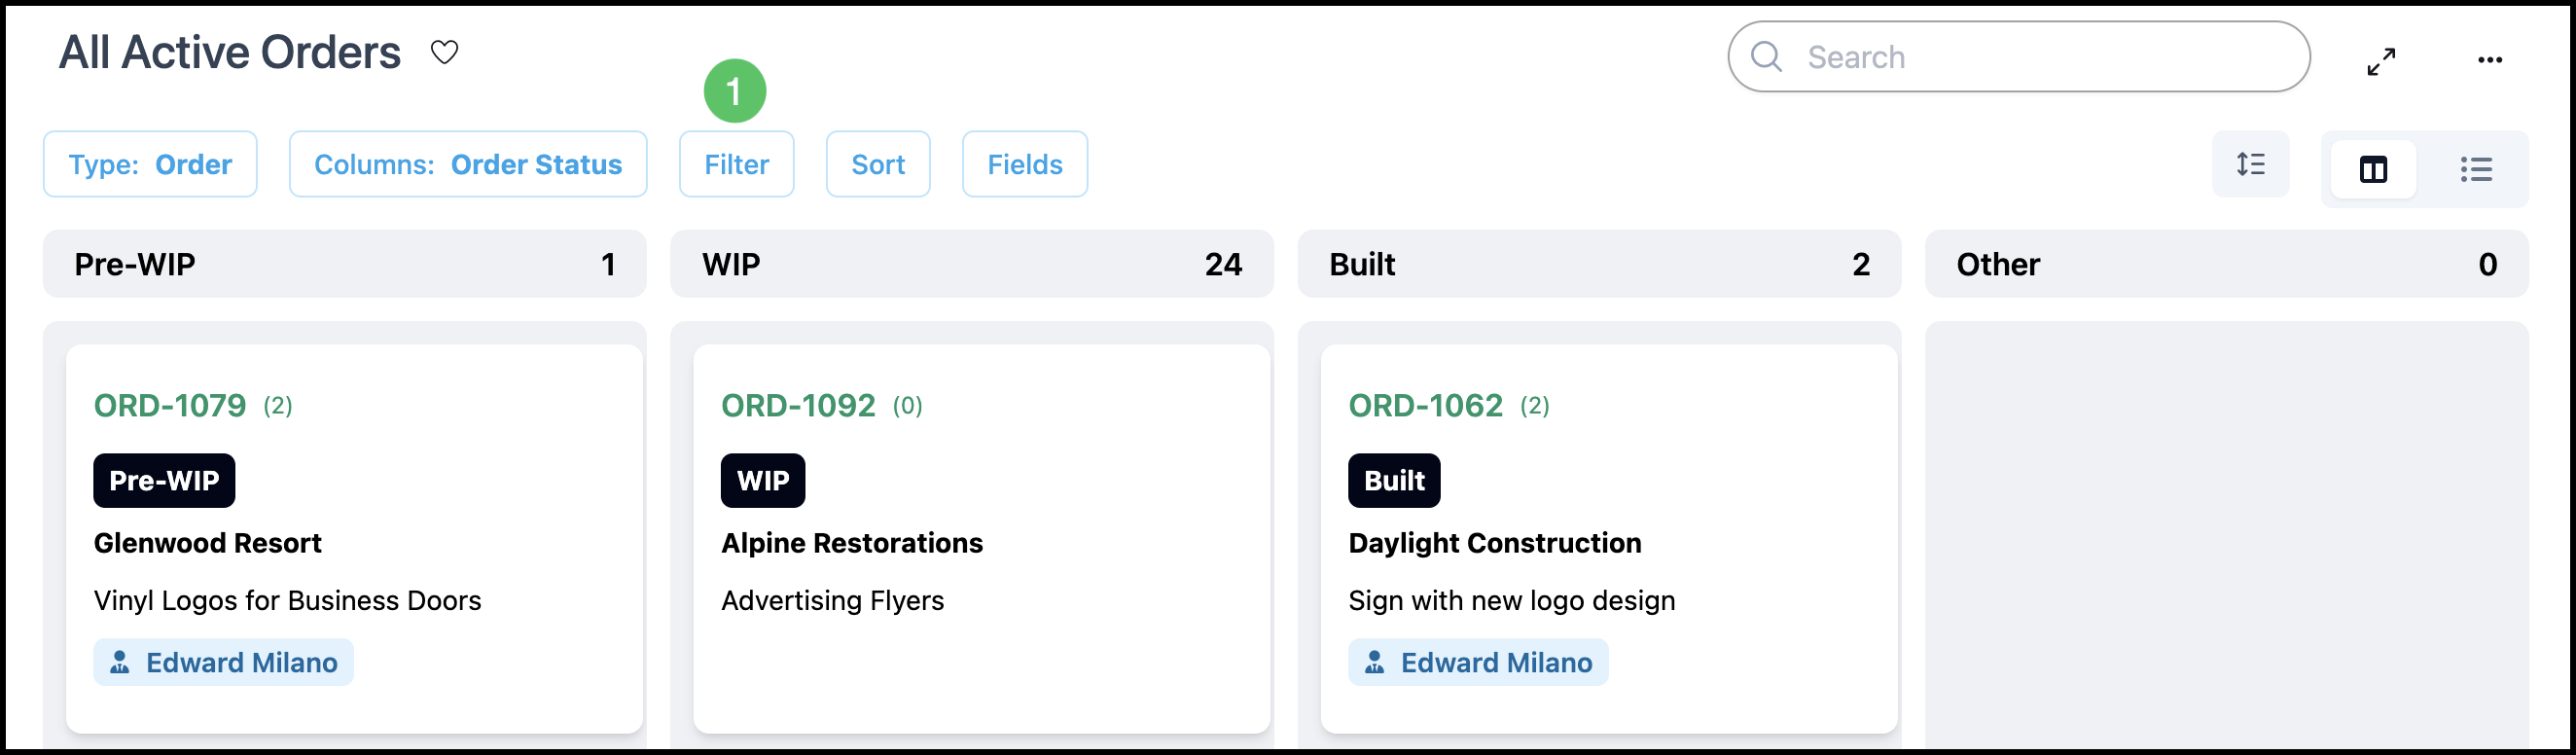
2. Select the desired Filter.
3. Make any associated selections. Filters will be applied immediately.
a. The Reset button will undo your selections at any time.
Note: Another Reset button is available outside of the filter side menu. See example below.
b. Use the subtract button if you want to remove a single Filter.
c. Use the add button if you would like to add an additional Filter.
Example:

Sorting Within Boards
Sorting organizes how jobs will be displayed on your Board. Changes made here apply to the currently signed-in user and remain active even after navigating away from the Board.
1. Click Sort.
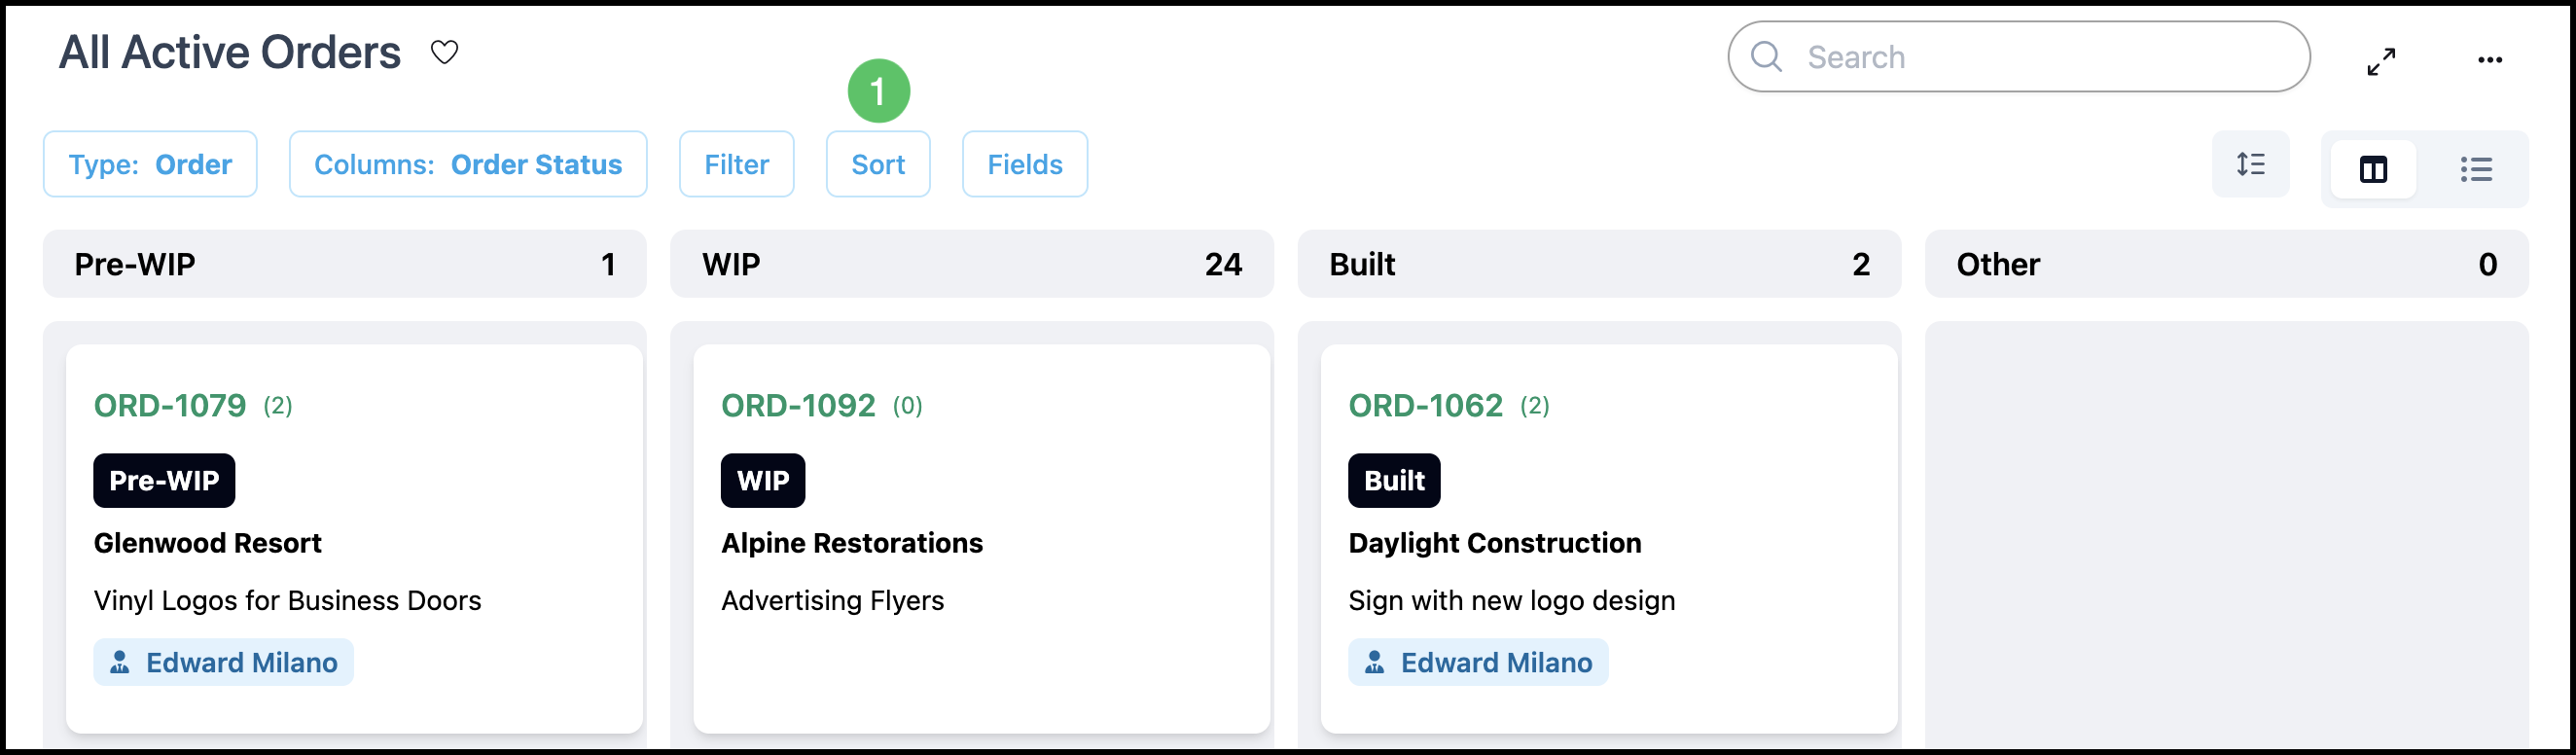
2. Select how you would like the Board sorted. The new sorting will be applied immediately.
3. Select ascending or descending order.
a. The Reset button will undo your selections at any time.
Note: Another Reset button is available outside of the Sort panel. See example below.
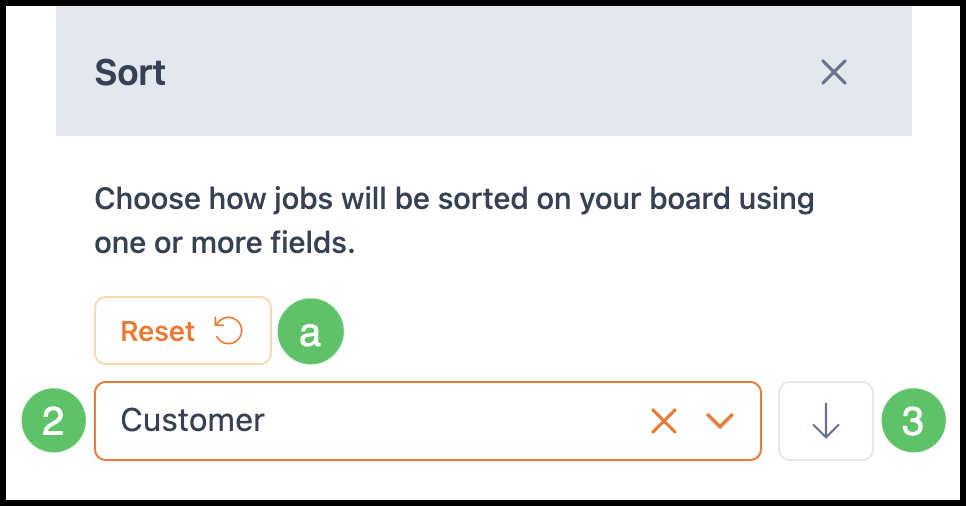
Example:

Fields Within a Board
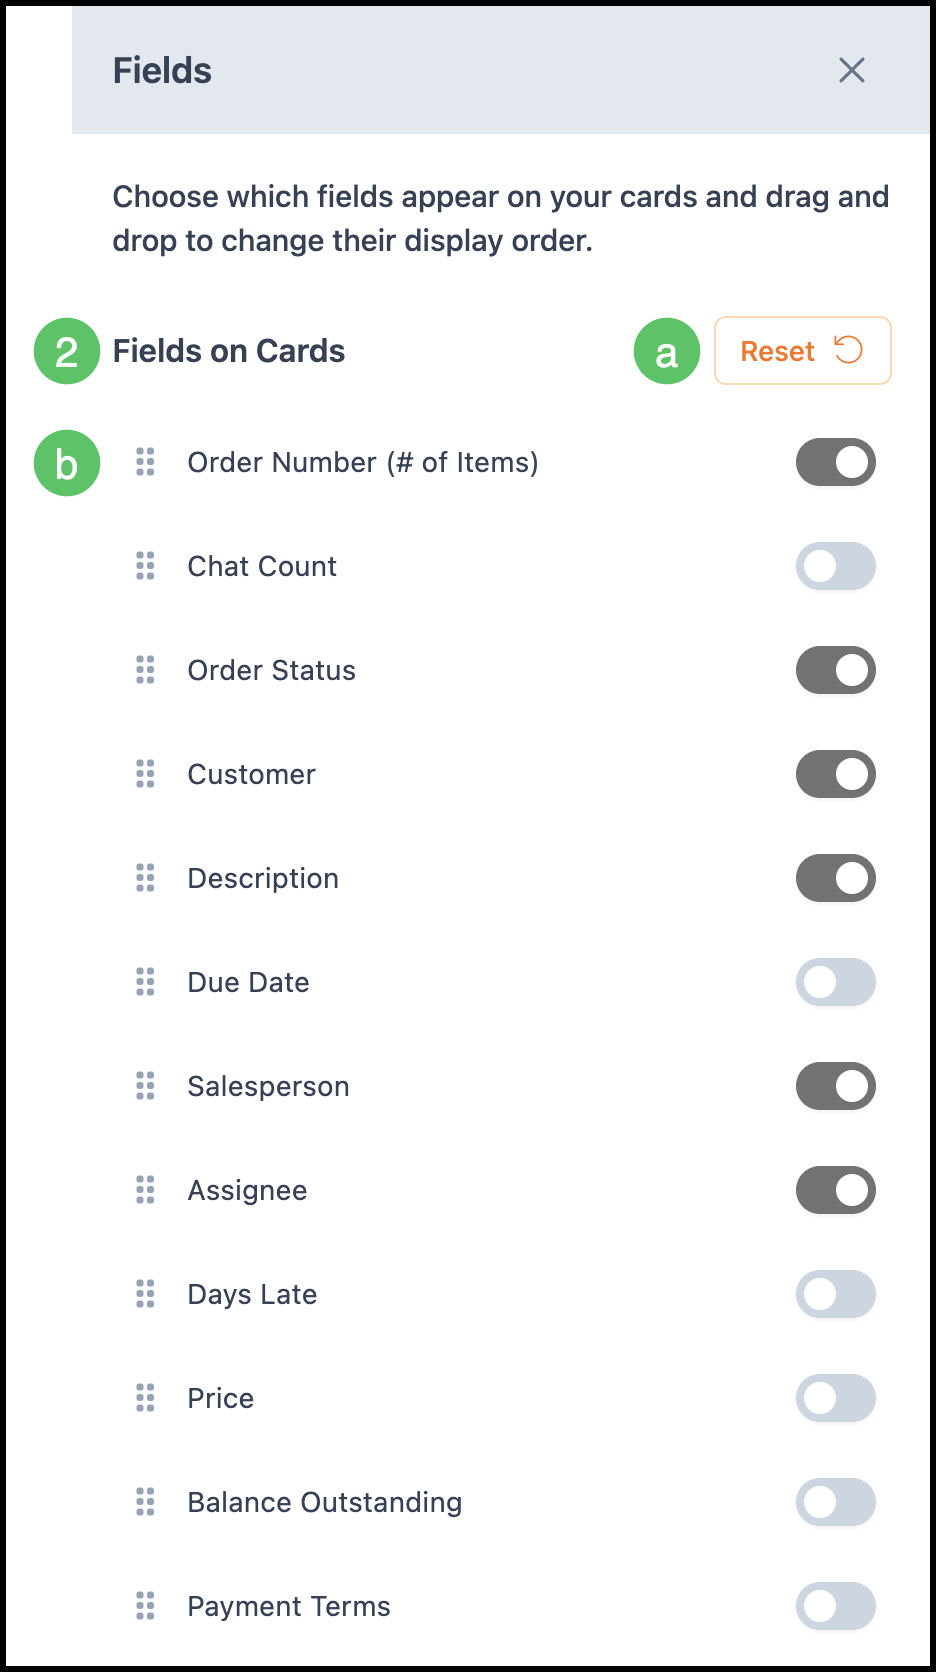
Fields represent the information displayed on Boards. In Card view, fields appear within each Card, while in List view, the same fields are organized as columns for a structured overview. Changes made here apply to the currently signed-in user and remain active even after navigating away from the Board.
1. Click Fields.
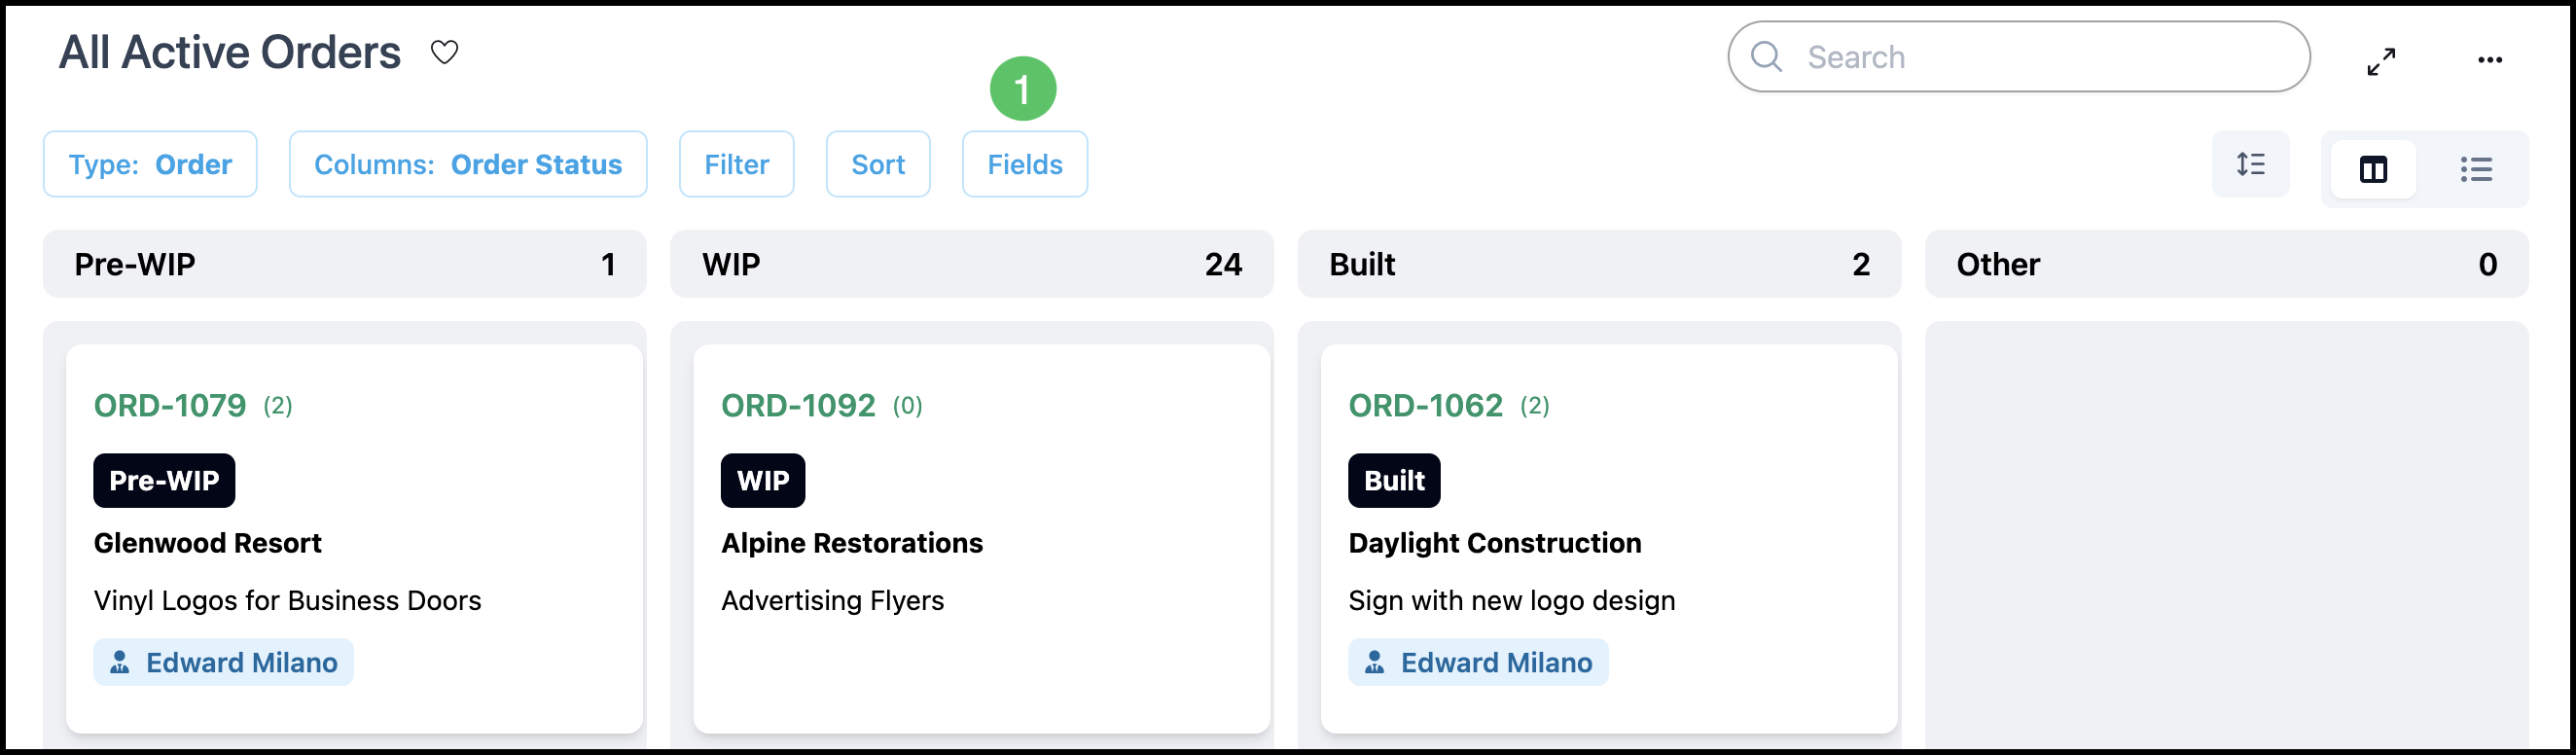
2. Use the toggles to select which fields will be displayed.
a. The Reset button restores the previous state by undoing any recent changes.
Note: Another Reset button is available outside of the Fields menu. See example below.
b. Fields can be rearranged using drag-and-drop.
Note: In list view, the Fields side panel is arranged by Fields already on the List and those that are still available. All functionality is the same.
Example:

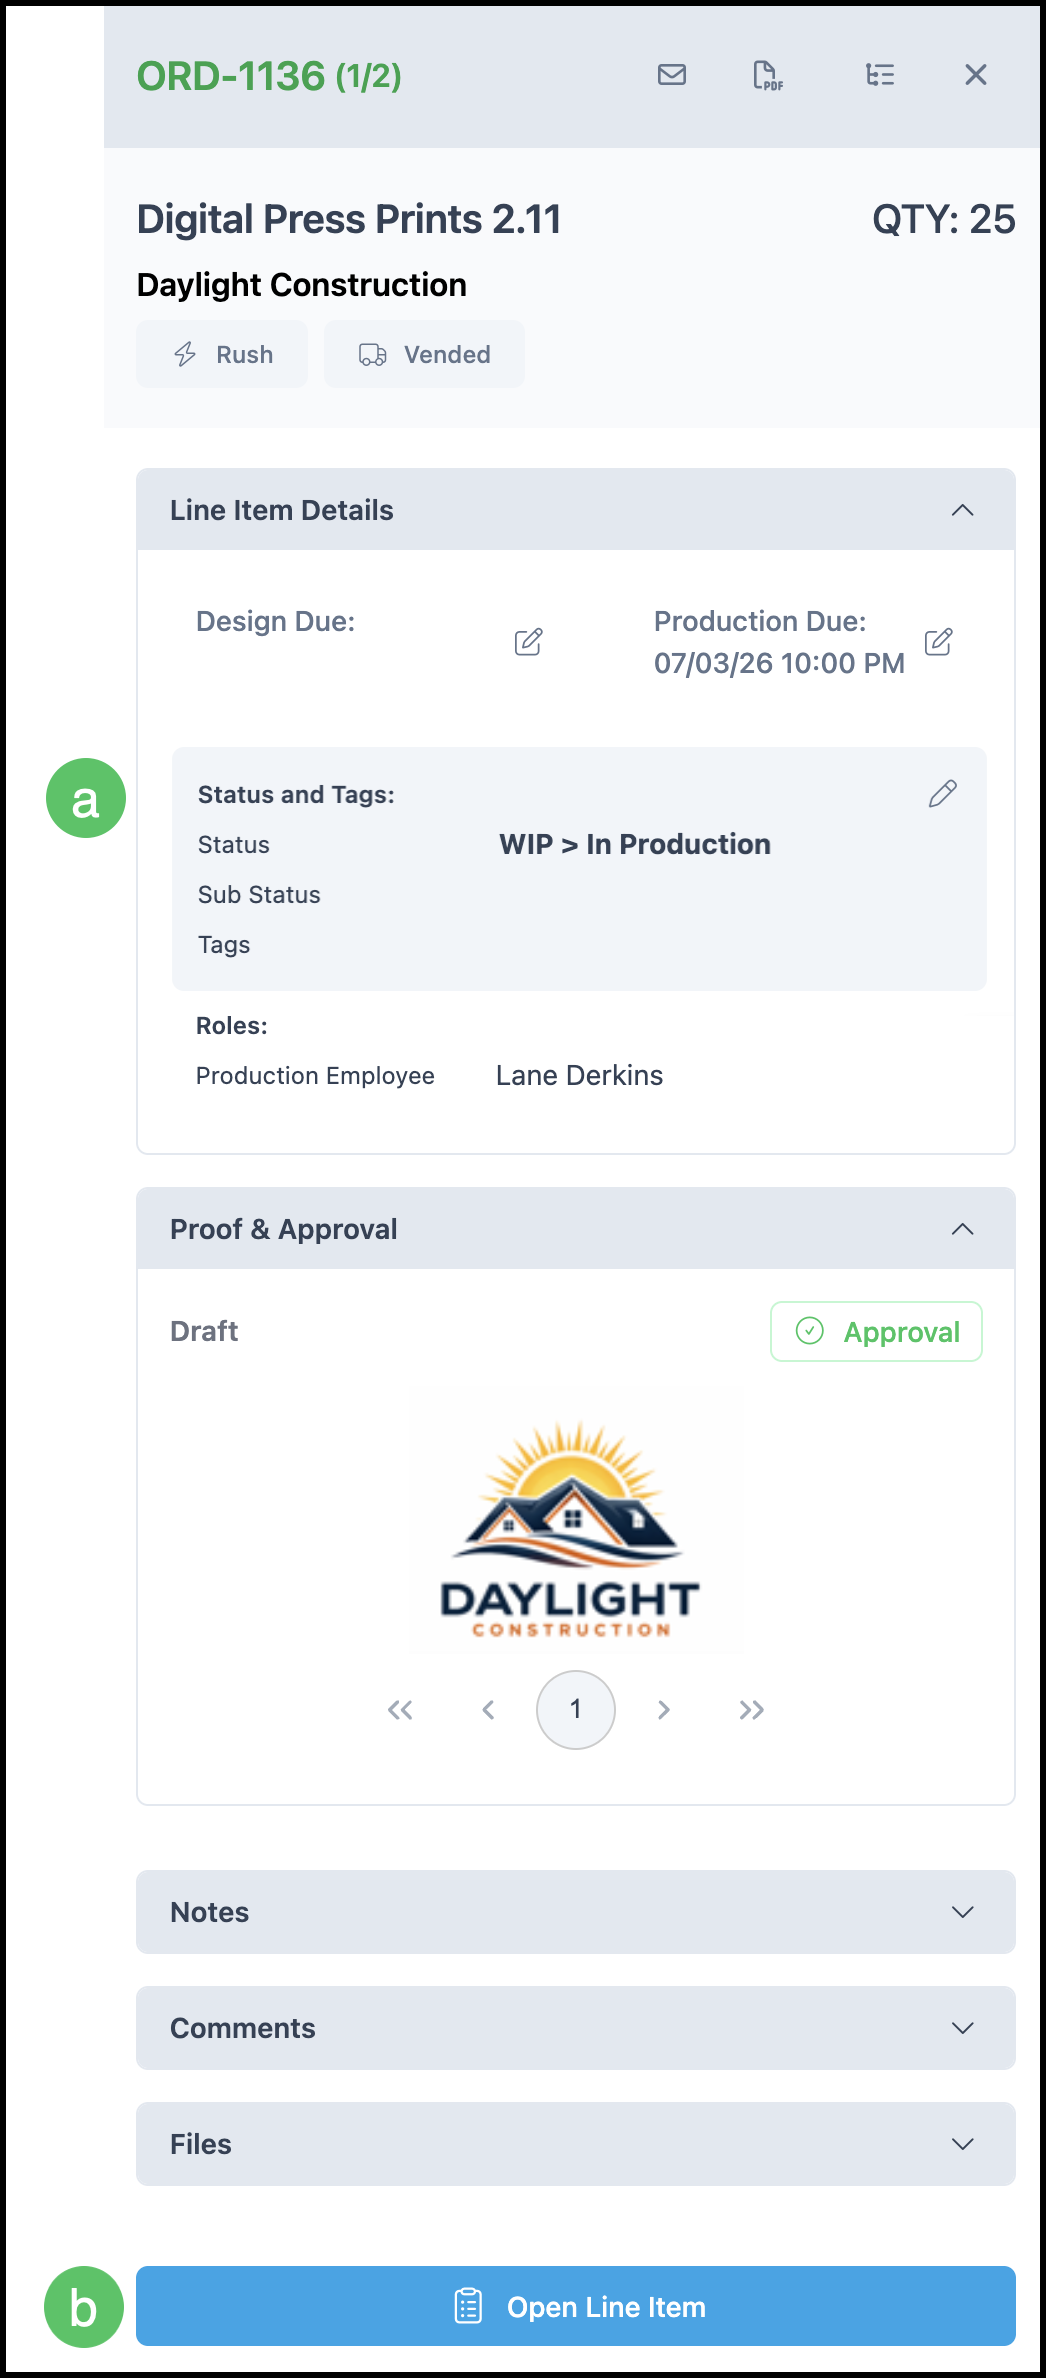
Side Panel Details
For more information on the Side Panel, please see Boards Side Panel Overview.
1. Select a Card or row to open the Details panel on the right.
a. Record details are shown in the side panel.
b. Link to the record.
2. Close the panel to return the workspace to full width.