Tax Groups are used to group together one or more Tax Items, such as state, county, and city taxes into one group. Each Customer will be assigned to a single Tax Group during Customer creation based on their location. The Tax Group total will be the combined tax that is visible on a Customer's Estimates and Invoices.
Note: Set up your Tax Groups before creating Estimates or Orders for a Company. Tax Groups edited or added after Estimates or Orders already exist may not apply to those existing records.
Table of Contents
- Creating a New Tax Group
- Editing a Tax Group
- Cloning a Tax Group
- Setting a Tax Group Inactive
- Deleting a Tax Group
- Filtering the Tax Group List
- Assigning a Tax Group
- Related Articles
Navigate to Settings / Accounting / Tax Groups.

Creating a New Tax Group
1. Click the Add Tax Group button to add a new Tax Group.
2. The Add Tax Group dialog will open. Enter the Tax Group details. Fields marked with a red asterisk are required.
a. Name - The name that identifies the group of Tax Items.
b. Associated Tax Items - The Tax Item(s) that apply to this Tax Group. The Tax Group total will be the combined tax visible on a Customer's Estimates and Invoices.
c. Associated Locations - If applicable, the selling location(s) for this Tax Group (i.e., your business location(s) assigned to this group).
3. Click Save.

Editing a Tax Group
1. Find the Tax Group in the list and click on that row.

2. The Tax Group dialog will open. Update any Tax Group details. Fields marked with a red asterisk are required.
3. Click Save.
Note: If a Tax Group is already assigned to Estimates or Orders and you update its Tax Items or rate, CoreBridge will not overwrite the existing Tax Group. Instead, the original Tax Group is automatically set to inactive, and a new Tax Group is created with the updated details. This keeps tax history accurate on existing Estimates and Orders while applying the new rate going forward. Any Company that should use the updated rate will need to be reassigned to the new Tax Group.

Cloning a Tax Group
1. Find the Tax Group in the list and click the Actions button for that row.
2. Click Clone. An exact copy of the Tax Group will open in an Add Tax Group (or edit) dialog.

3. Change the Tax Group details as needed (Name, Associated Tax Items, and Associated Locations if available). Ensure required fields are completed.
4. Click Save.

Setting a Tax Group Inactive
1. Find the Tax Group in the list and click the Actions button for that row.
2. Click Set Inactive.
Note: A Tax Group that is associated with Tax Items or is associated with a Location may not be eligible to be set inactive. The Set Inactive option may be disabled in those cases.
Note: CoreBridge may also set a Tax Group to inactive automatically when it's edited while already in use. See Editing a Tax Group above for details.

Deleting a Tax Group
1. Find the Tax Group in the list and click the Actions button for that row.
2. Click Delete.
Note: Delete is only available for Tax Groups that are not currently in use. Deleting a Tax Group is permanent. To use it again, you will need to re-enter it manually.

Filtering the Tax Group List
You can control which columns appear on the Tax Groups list and whether inactive Tax Groups are included by using the settings for the list.
1. Click the Search Settings icon.
a. Column selection - Use the column selector to choose which columns are displayed in the list (for example, Name, Total Rate, Tax Items). Select or clear columns to show or hide them in the list.
b. Show Inactive Records - Enable this option to include inactive Tax Groups in the list. When disabled, only active Tax Groups are shown. Use this when you need to view, reactivate, or manage inactive Tax Groups.

Assigning a Tax Group
The Tax Group determines the combined tax that is visible on a Customer's Estimates and Invoices and must be applied to each Customer. A Tax Group can be assigned when creating a Company, or updated at any time from the Company screen. This article explains how to update the Tax Group on an existing Company. For more information on Company creation, please see Creating Companies.
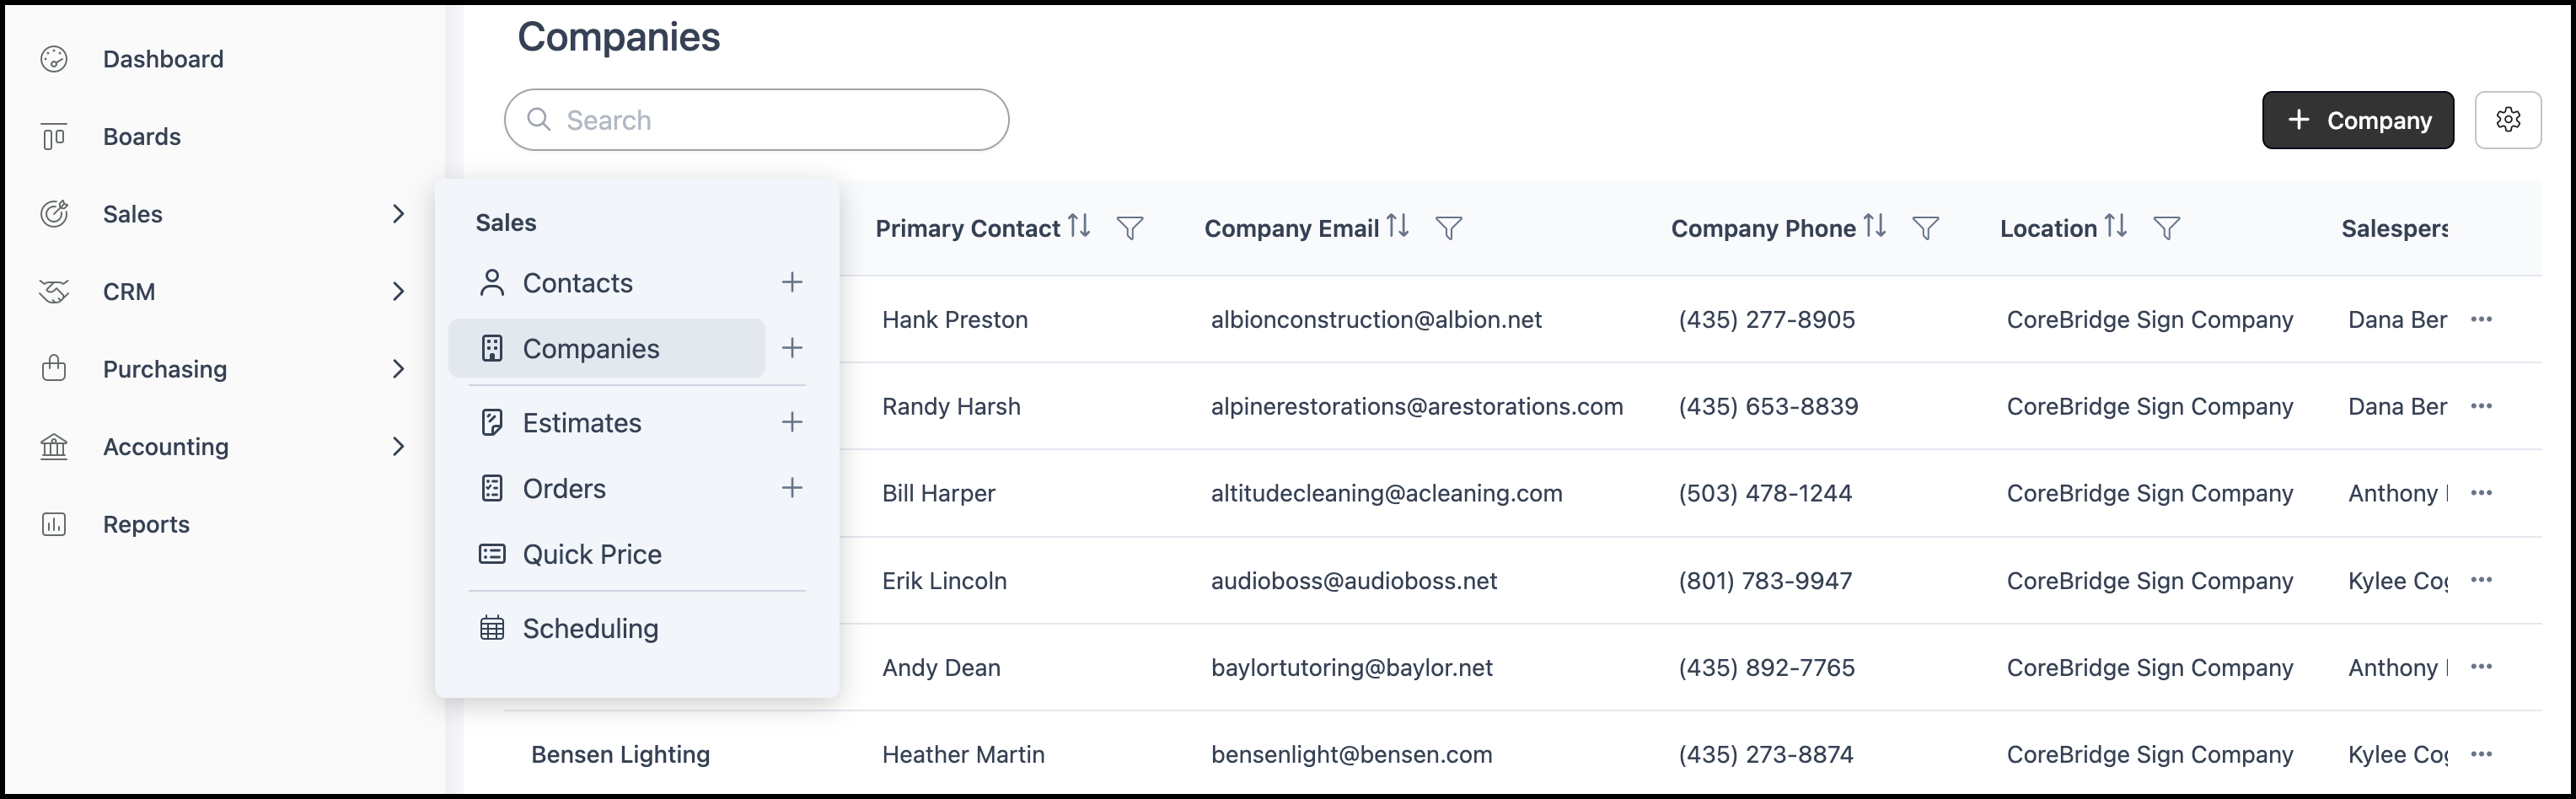
Navigate to Sales / Companies and select the appropriate Company.
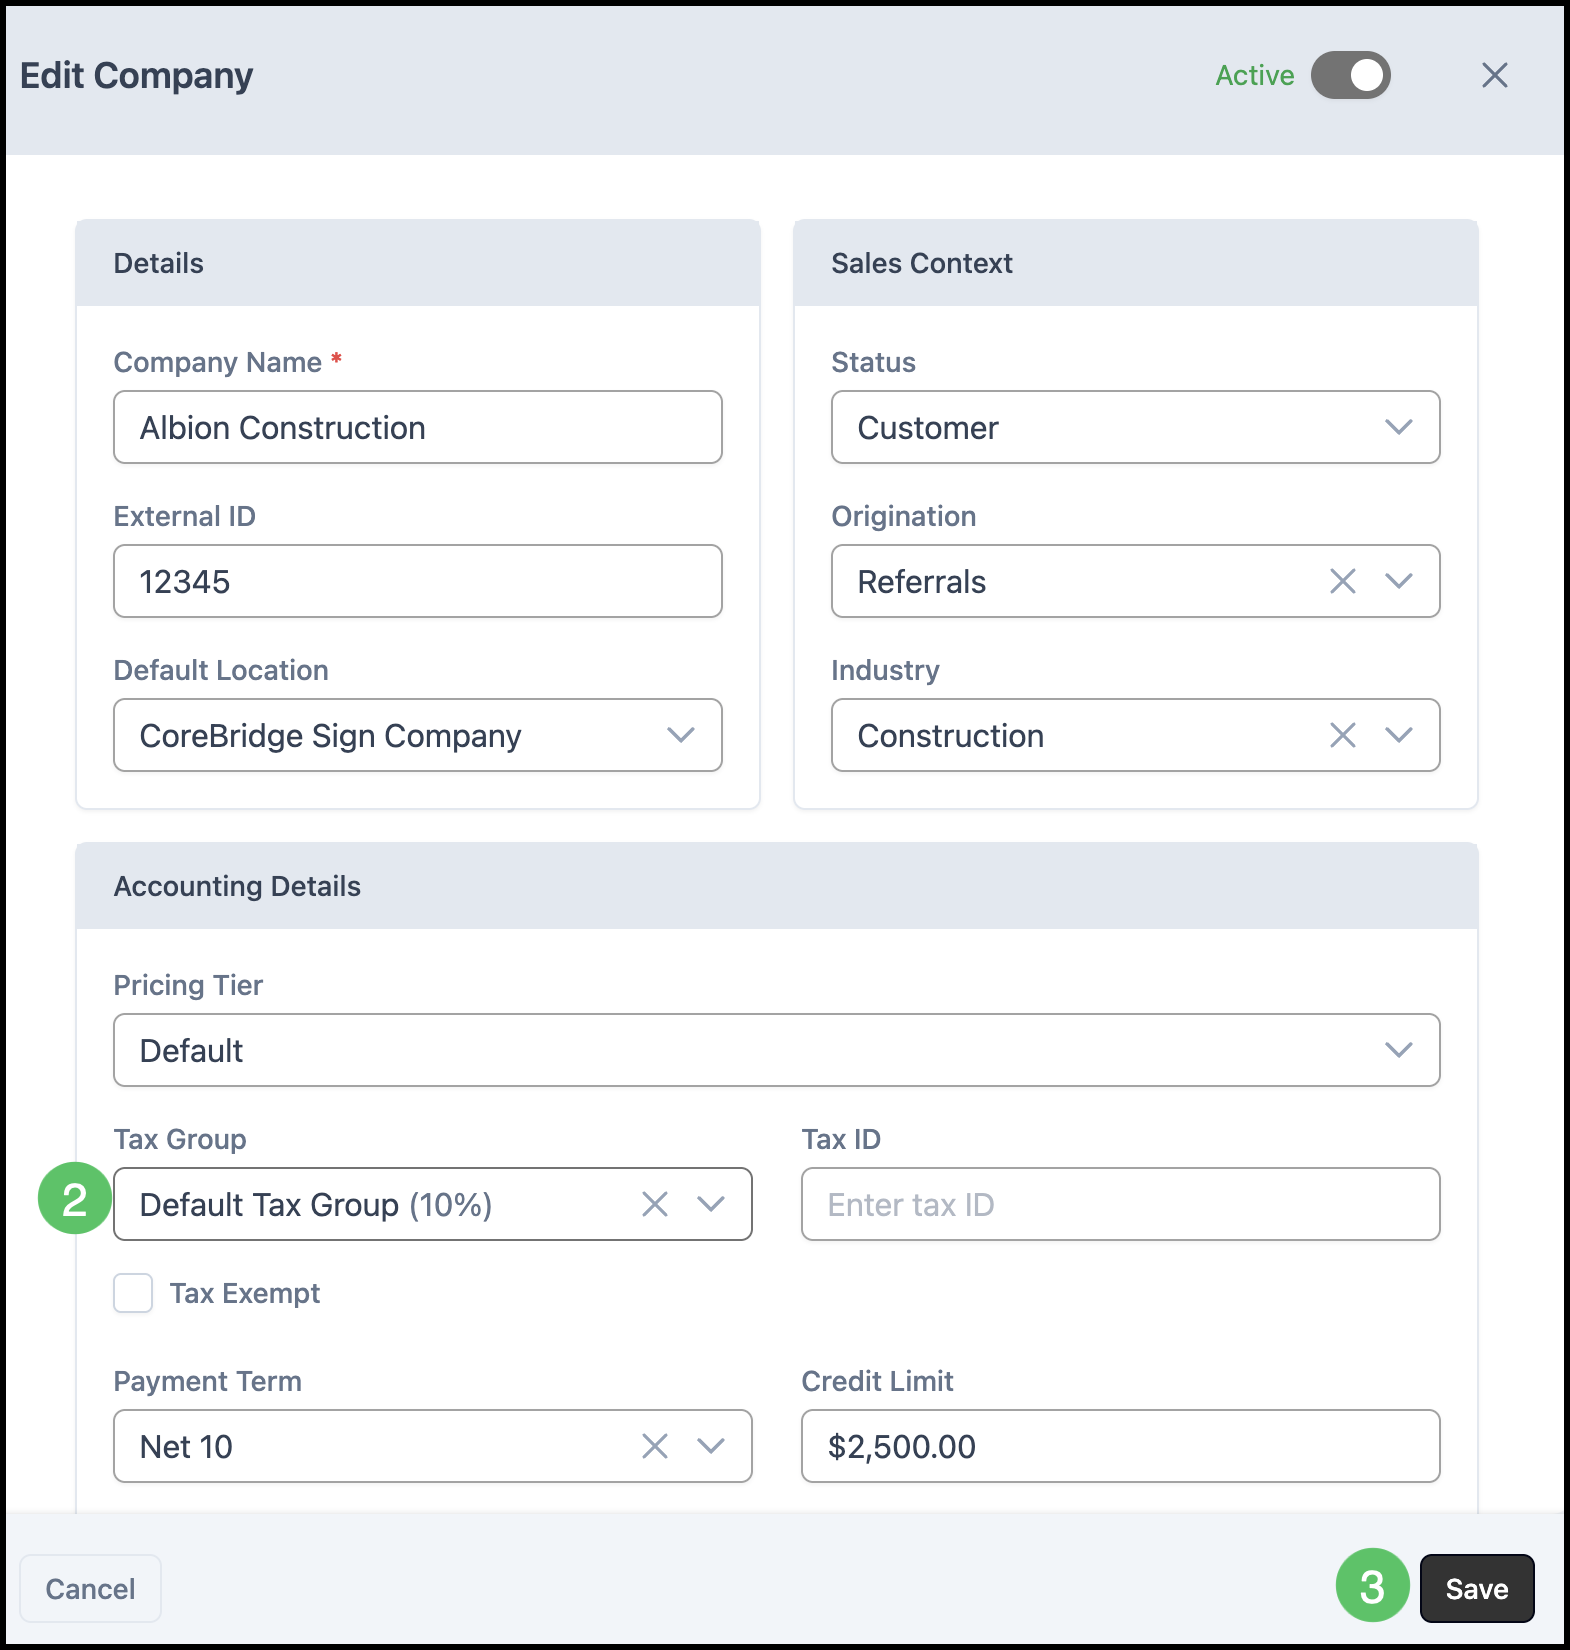
1. Click Edit.

2. Select the Tax Group from the dropdown.
3. Click Save.