Adding MachinesAdding MachinesProfiles define how a Machine runs a job, including Labor, timing, speed, and layout settings. Each Machine can have one or more Profiles, and you can clone an existing Profile to create variations for different run modes (for example, a flatbed Profile and a roll Profile for the same printer).
Table of Contents
- Accessing a Machine Profile
- Profile Speed Settings
- Layout Manager
- Adding Additional Profiles
- Related Articles
Accessing a Machine Profile
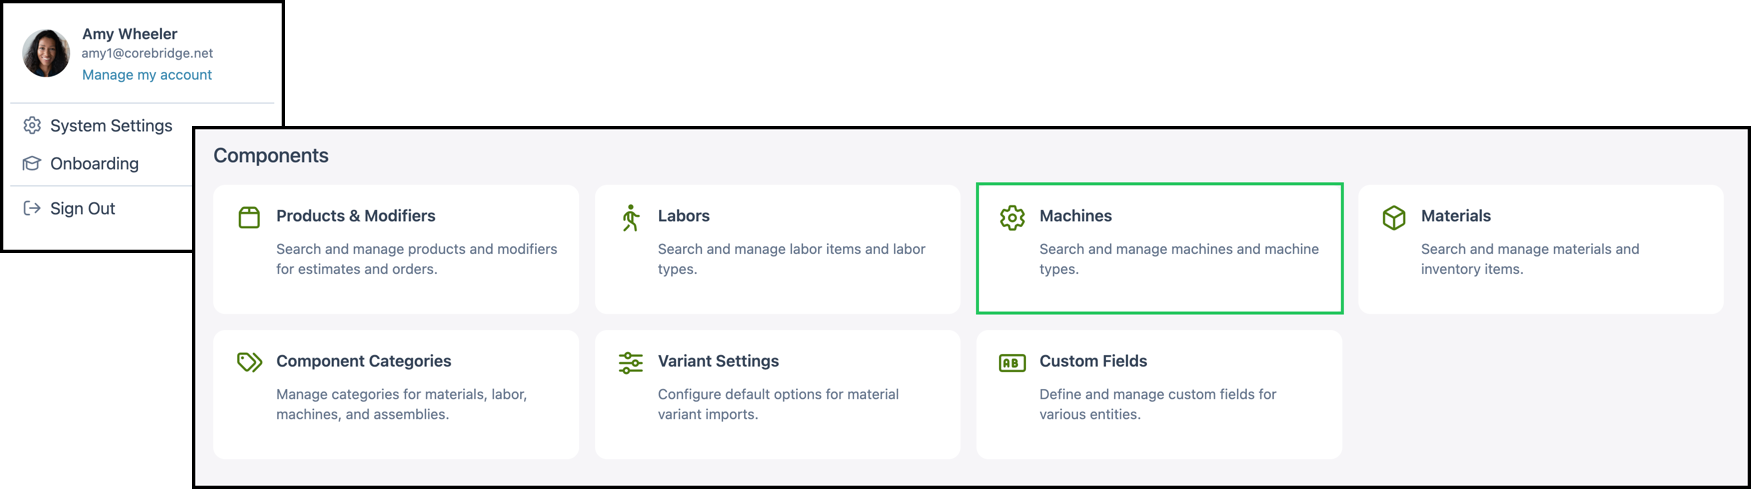
Navigate to System Settings / Components / Machines and select the appropriate Machine.
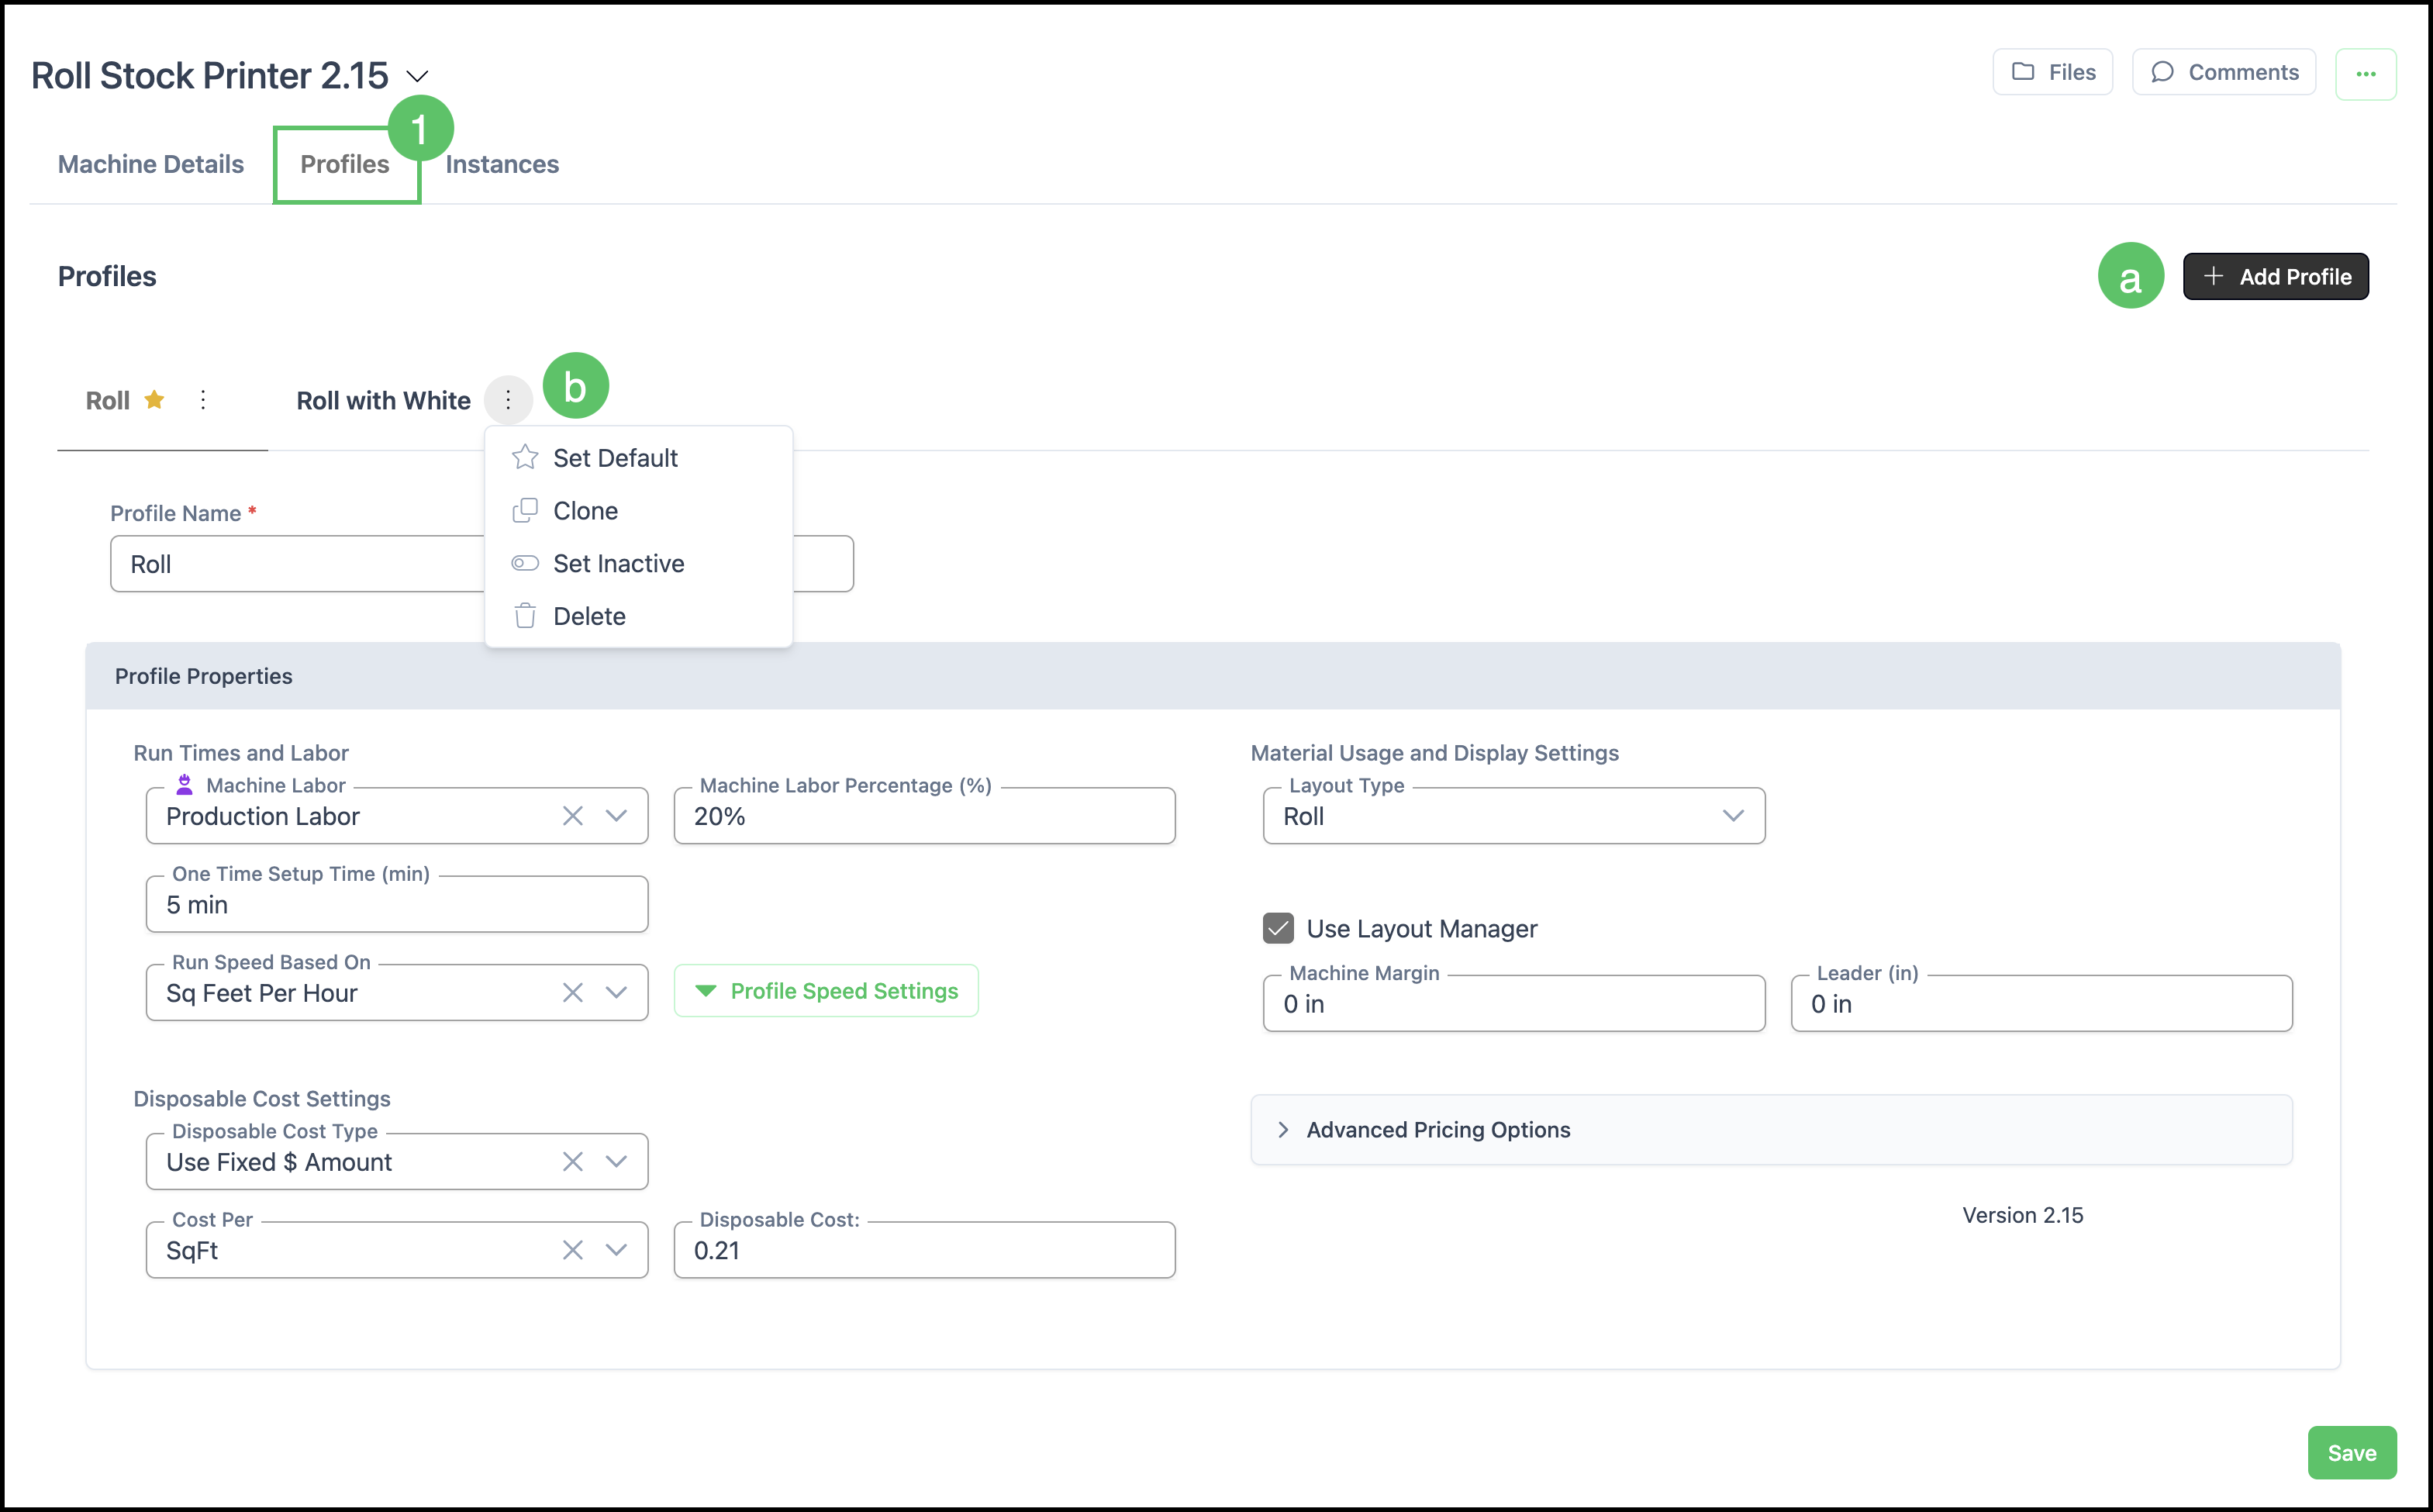
1. Select the Profiles tab.
a. The Add Profile icon allows you to add settings for a new Profile. Any changes will need to be saved.
b. The More Actions button allows you to Set Default, Clone, Set Inactive, and Delete.
Note: As a best practice, when a new Profile is needed, clone an existing Profile and then update the necessary settings before saving.
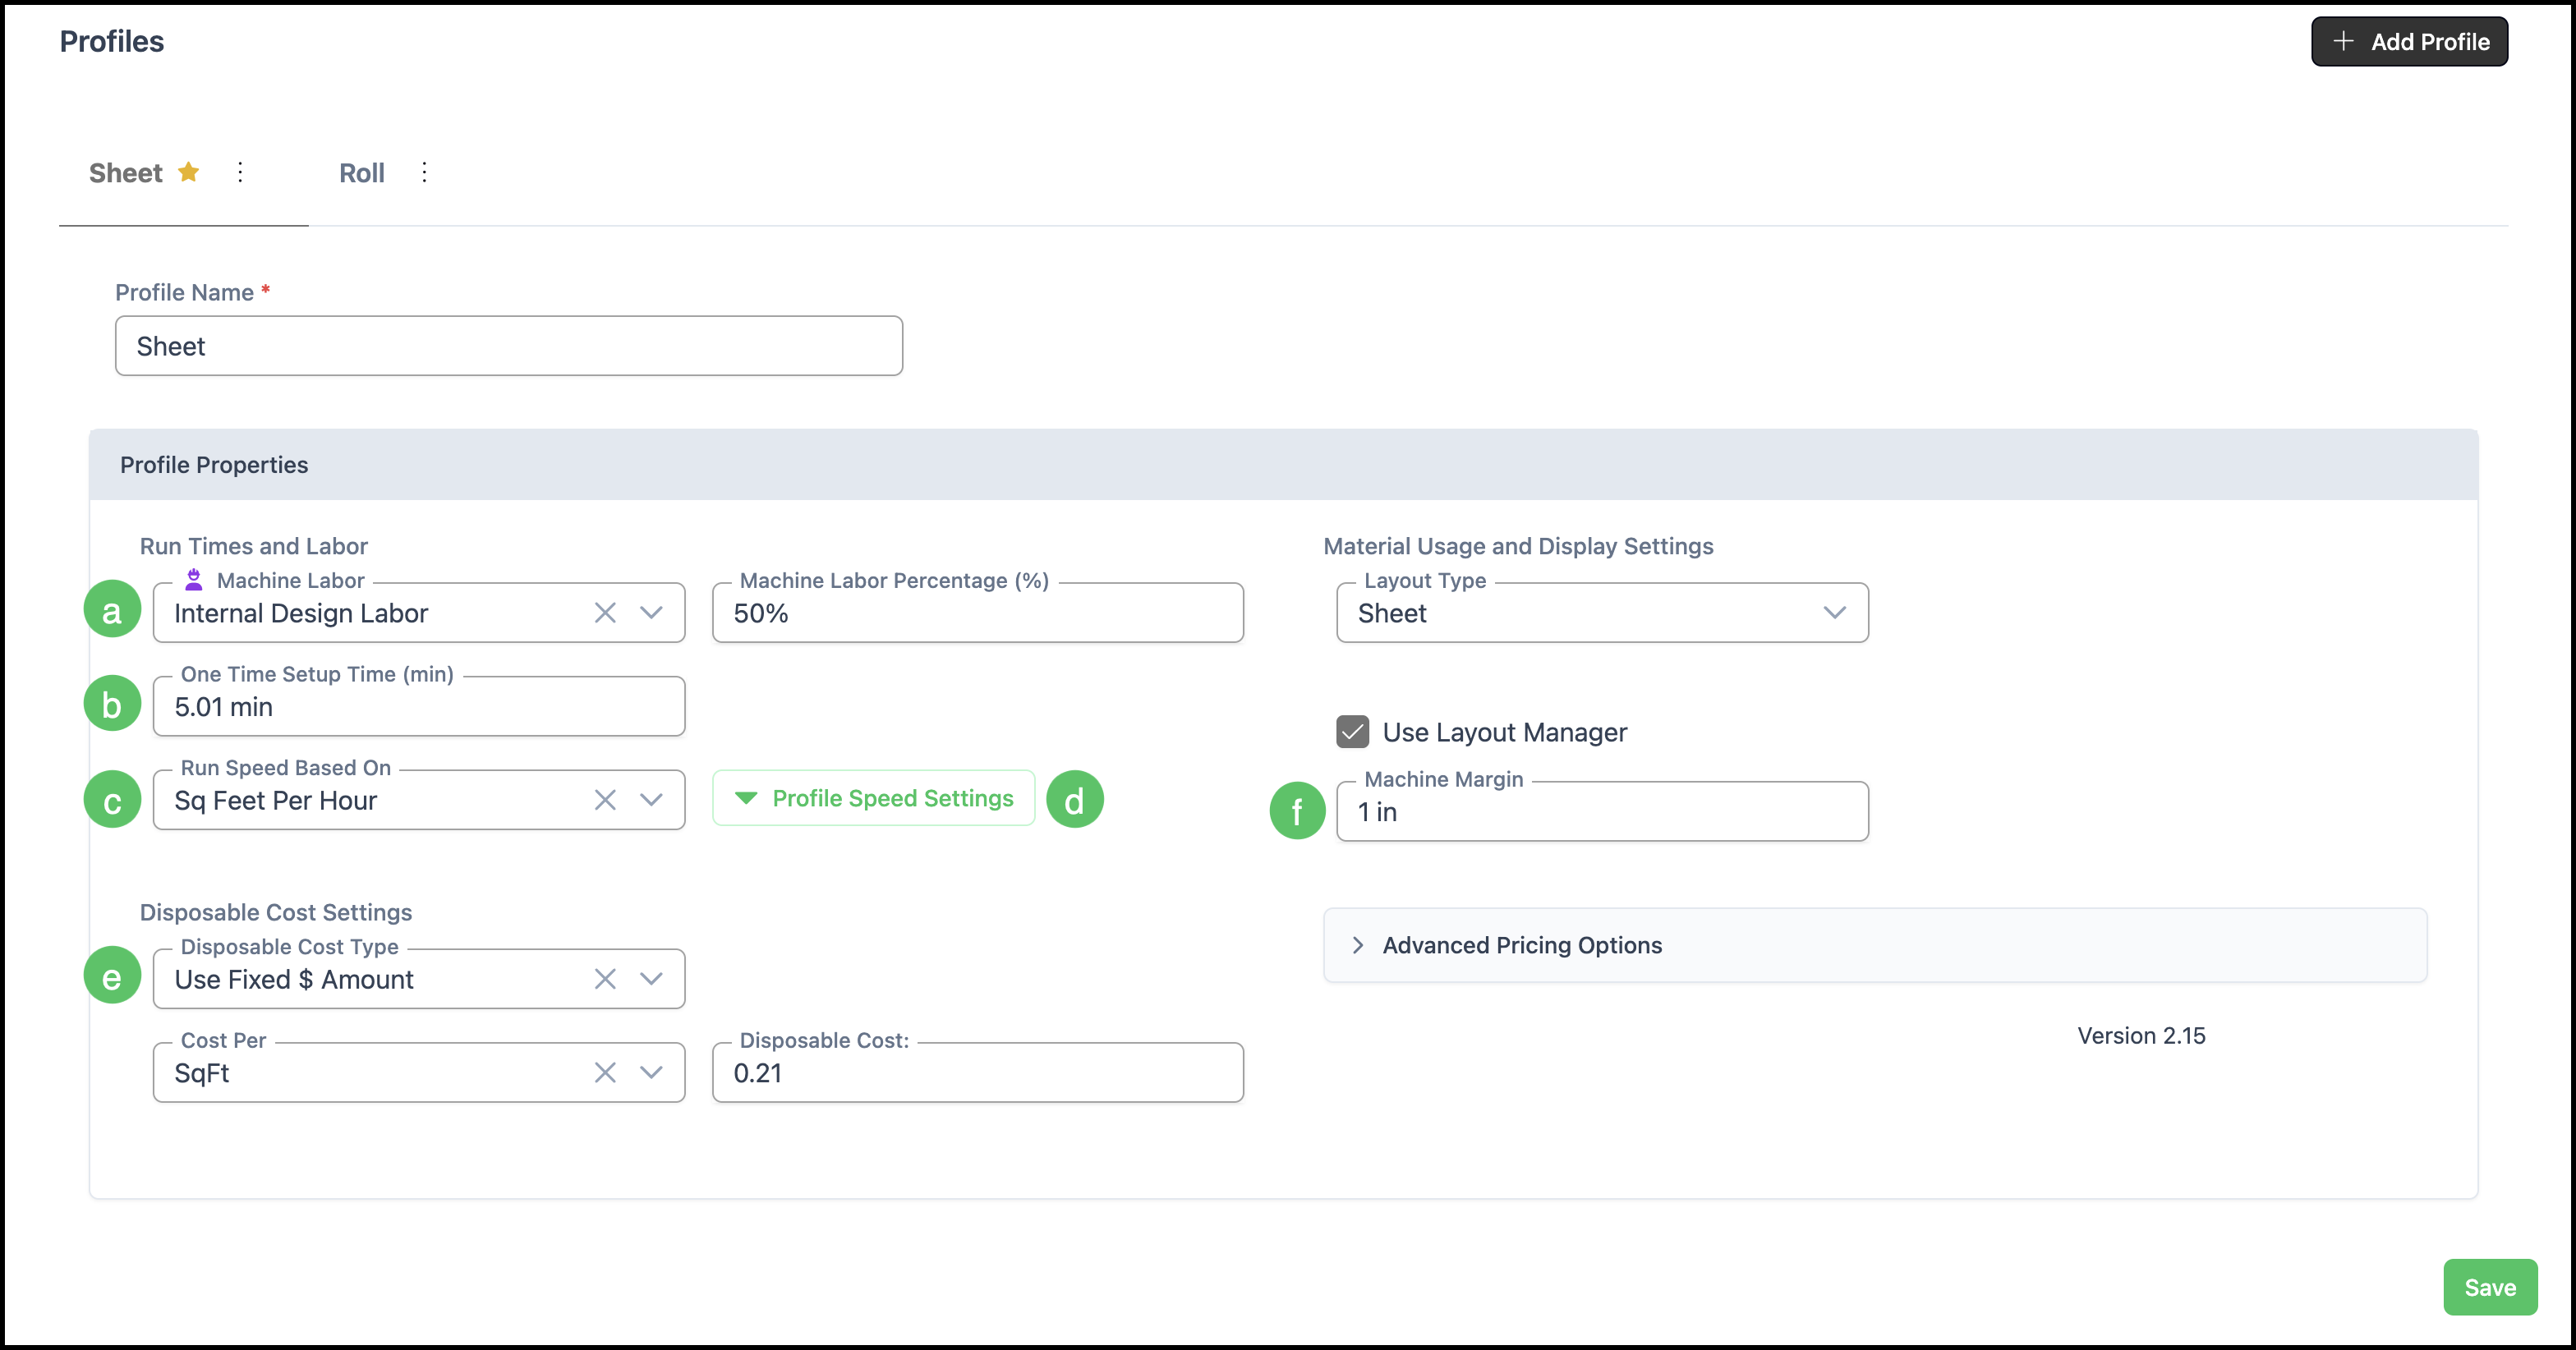
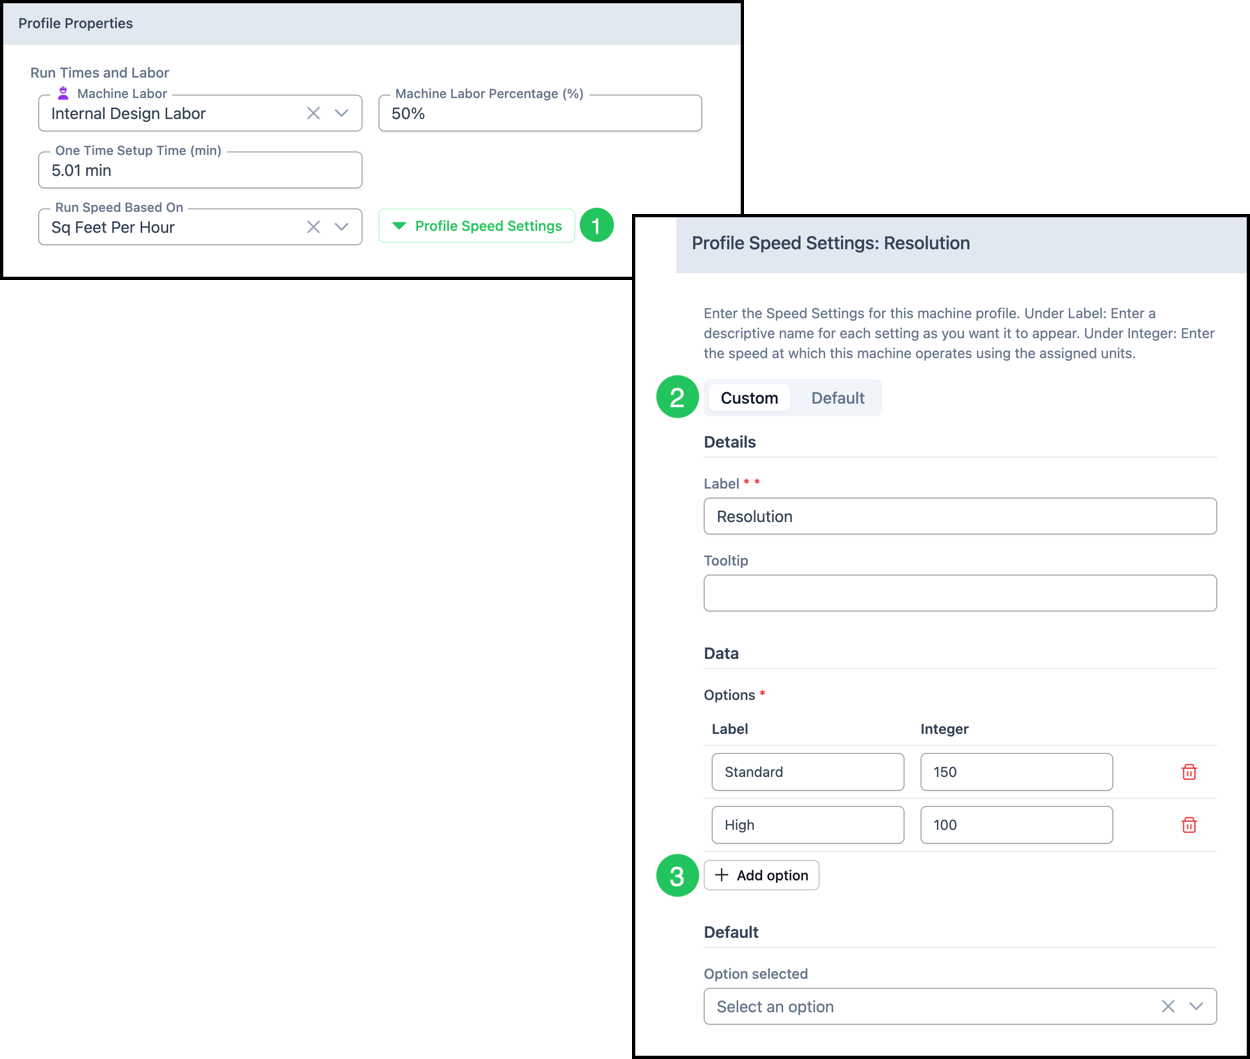
a. Production Labor - Production Labor represents the percentage of time an operator is actively monitoring the Machine while it runs. Because the operator does not need to stand at the Machine for the entire duration of a job, this field captures only the portion of time they are present.
For example, if a printer runs for one hour and the operator monitors it 50% of the time, the production labor charged is 30 minutes.
- Roll printers: approximately 20% is typical, as they require minimal monitoring.
- Flatbed printers: slightly higher, since the operator needs to watch for registration marks, overbleeds, and similar issues.
Note: Use real-life observation to set this number accurately. If a job runs for one hour and the operator is present for 15 minutes, enter 15%.
b. Setup Time - Setup time is the amount of time it takes to prepare the Machine before a job begins. This value is distributed across multiple jobs, so it should not reflect the full machine startup time for the day.
Note: The recommended range is 5 to 10 minutes. Entering the full morning startup time (for example, 20 minutes) will skew your estimates and is not accurate as a per-job cost.
c. Run Speed - Run speed determines how fast the Machine produces output. Square feet or square meter per hour is the recommendation depending on your region.
The value you enter is a numeric integer. For example, entering 150 would mean 150 square feet per hour if the Run Speed Based On was set to square feet per hour. Once you enter a run speed, CoreBridge uses it to calculate job duration.
Note: Printer manufacturer websites often publish high run speed numbers. CoreBridge recommends against using those figures directly. Instead, run real-life tests and use those results as your baseline. Manufacturer numbers can serve as a starting point, but actual production speed is what matters for accurate estimates.
d. Profile Speed Settings - Profile speed settings allow you to define multiple speed tiers within a single profile, each corresponding to a print resolution. Higher resolutions generally produce slower output. See Profile Speed Settings below for more information.
e. Disposable Cost Settings - Disposable cost settings allow you to assign a material cost to consumables used during printing, such as ink. The default approach is to enter a square foot cost.
Note: If your shop uses specialty inks - for example, white ink flood followed by CMYK - you can assign specific Materials to each ink type. This is useful when white ink costs more than standard ink, and you want each to carry its own cost per unit.
f. Layout Manager - Layout Manager calculates scrap Material, which is the portion of a substrate that cannot be used due to Machine margins and job nesting. This is a capability many other systems do not offer. See Layout Manager below for more information.
Profile Speed Settings
Machine Tiers define how a Machine performs at different resolution settings. By configuring tiers, CoreBridge can calculate more accurate production times based on the resolution selected during Estimate creation, helping ensure job schedules and Machine capacity reflect expected output.
1. Click Profile Speed Settings.
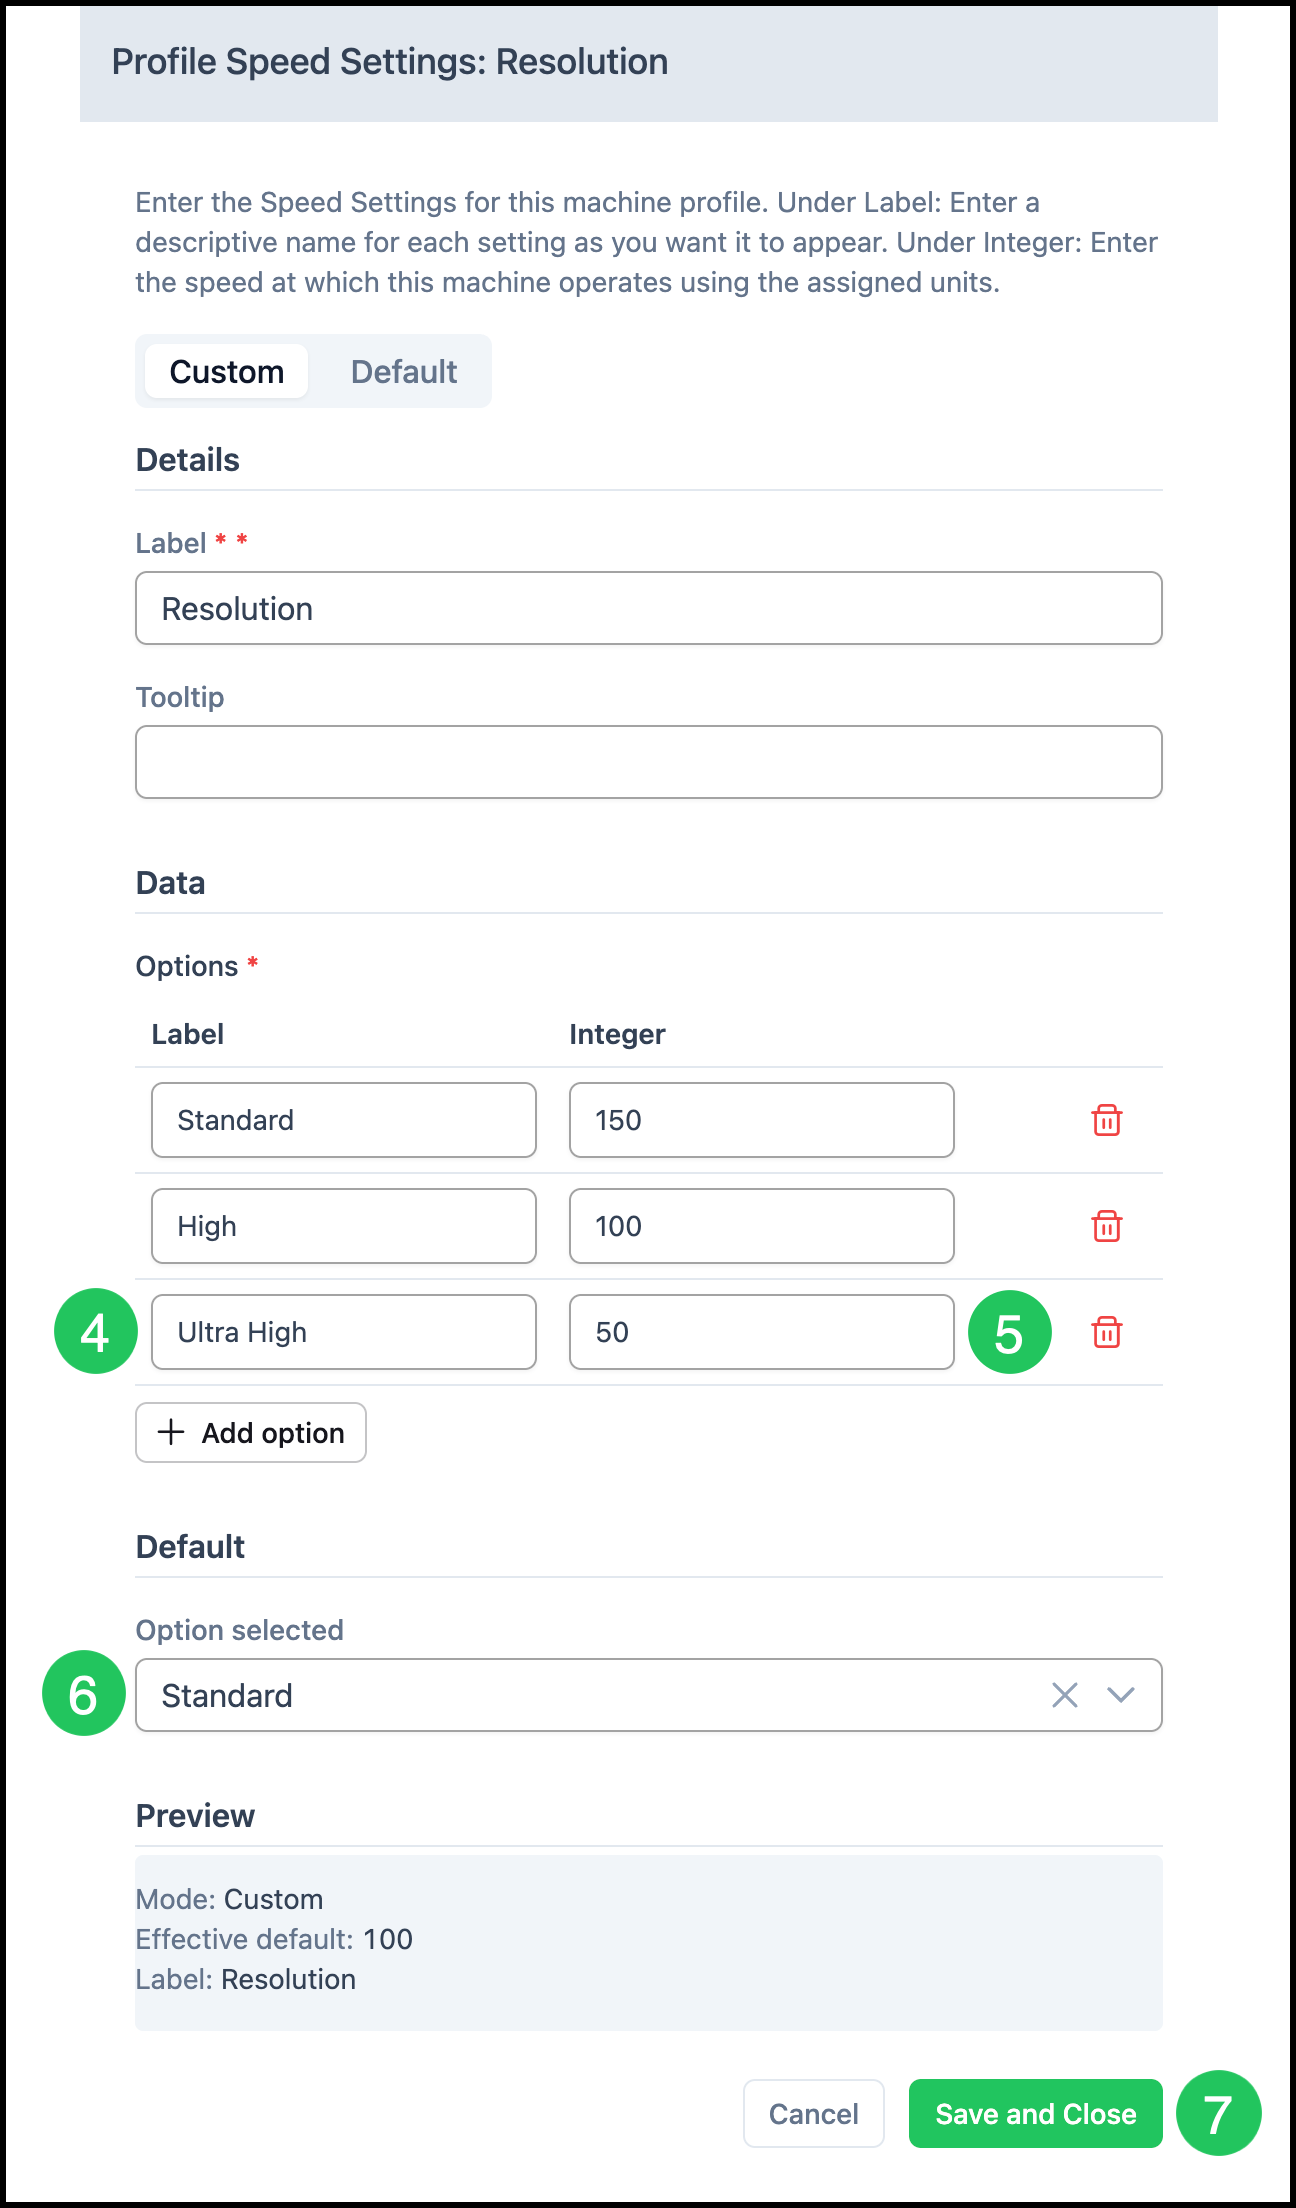
2. Select Custom.
3. Click Add Option.
4. Enter a Label for the speed tier (for example, Standard or Ultra High).
5. Enter the corresponding run speed as a numeric value (for example, 150 for 150 square feet per hour).
6. Set one tier as the Default. Standard resolution is the typical go-to setting.
7. Click Save and Close.
Note: The Integer value can be updated at any time.
Layout Manager
When Layout Manager is enabled, CoreBridge reduces the printable area of the Material based on the Machine margin you set. For example, if a Material is 48 by 96 inches and the Machine margin is an inch, the effective printable area is slightly smaller. Any Material outside the printable area is counted as scrap.
CoreBridge strongly recommends keeping Layout Manager enabled. Most Customers benefit from having scrap factored into their estimates.
If you do not want scrap calculated:
1. Uncheck Layout Manager.
2. Set the Default Waste Percentage to zero.
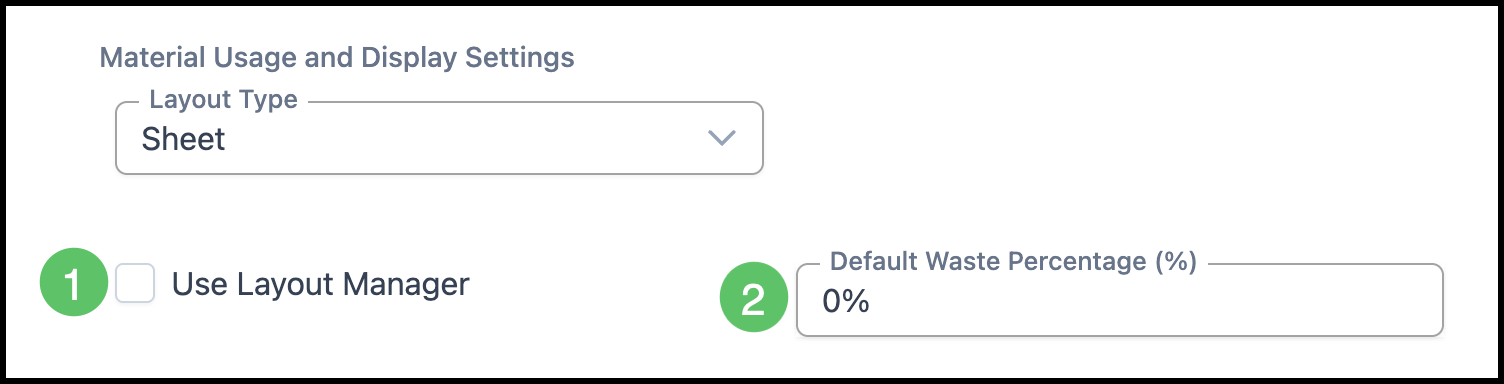
Alternatively, you can enter a manual scrap factor. For example, if the print area is 32 square feet and you enter 15% under Default Waste Percentage, CoreBridge calculates 32 square feet plus 15% scrap as the total area of consumption.
Note: When Layout Manager is enabled, additional options become available, including gutters and bleeds, which further affect scrap calculations. Enabling the bleed/gutter checkbox causes those details to appear on the Work Order.
Adding Additional Profiles
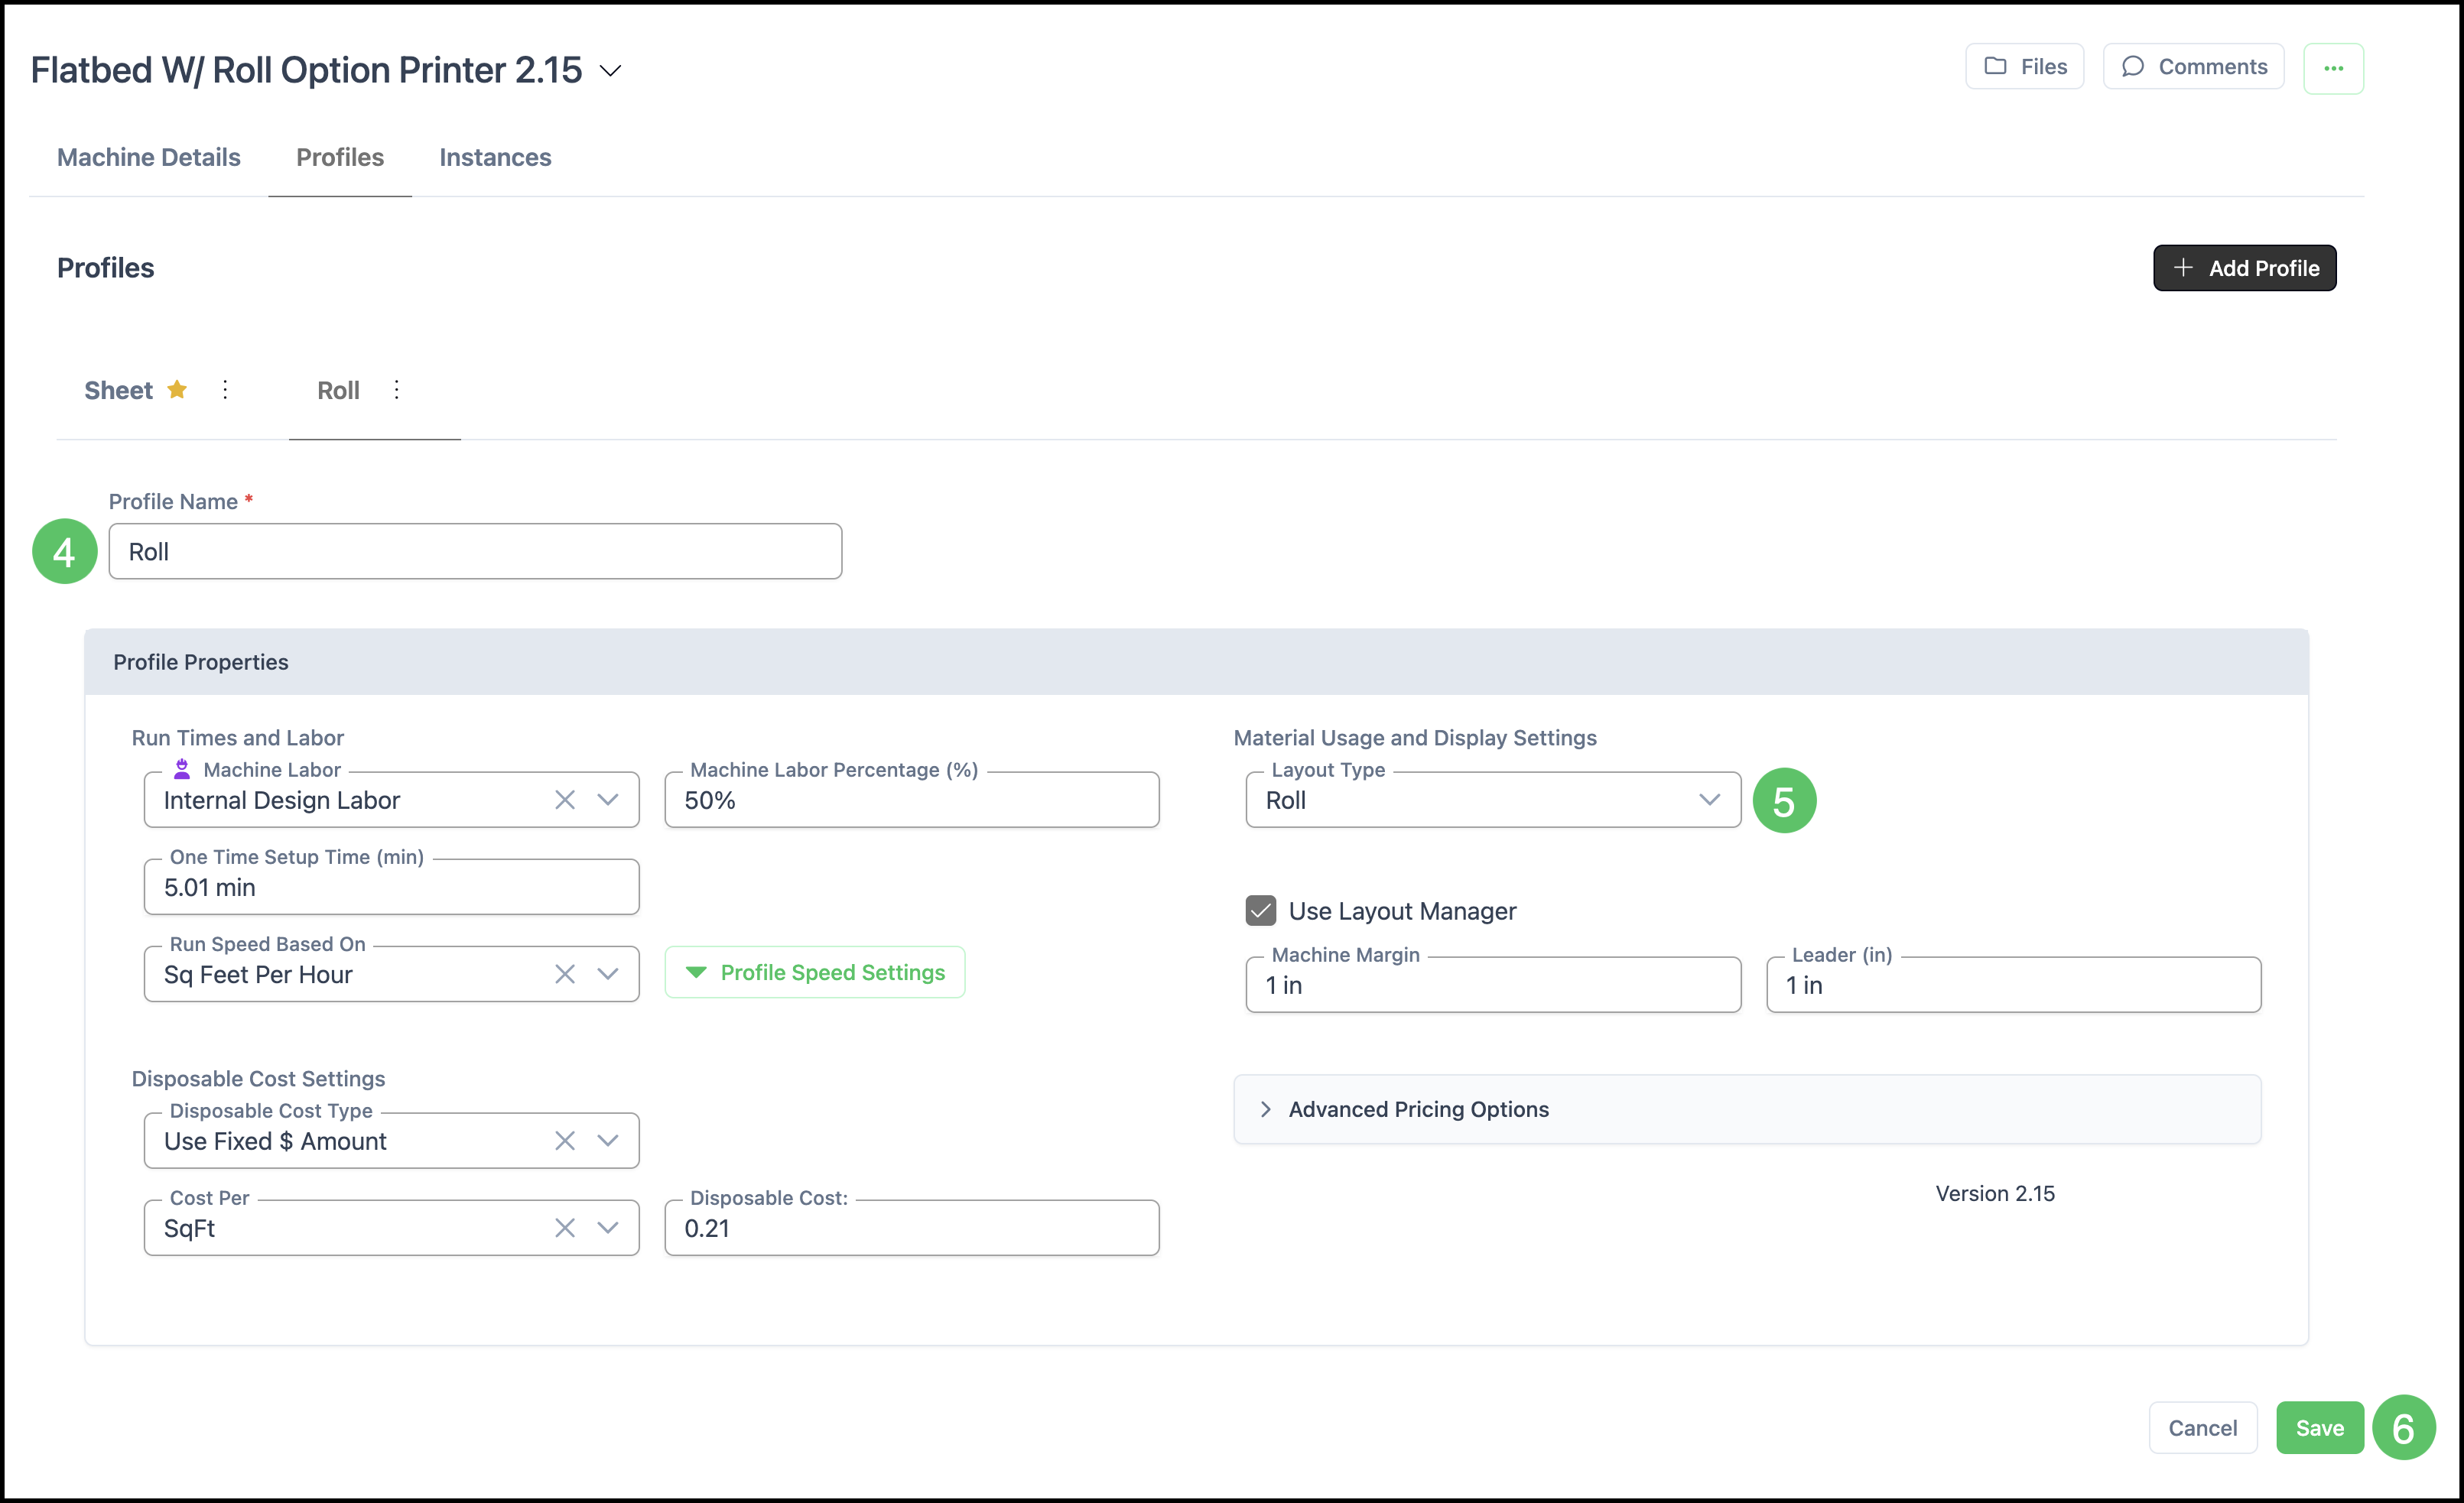
A Machine can have more than one profile to account for different run modes. For example, a flatbed printer that can also run roll media may need separate profiles for each mode, since the layout type and speed settings will differ.
1. Select the Profile tab.
2. Click the More Actions on the existing Profile.
3. Select Clone.
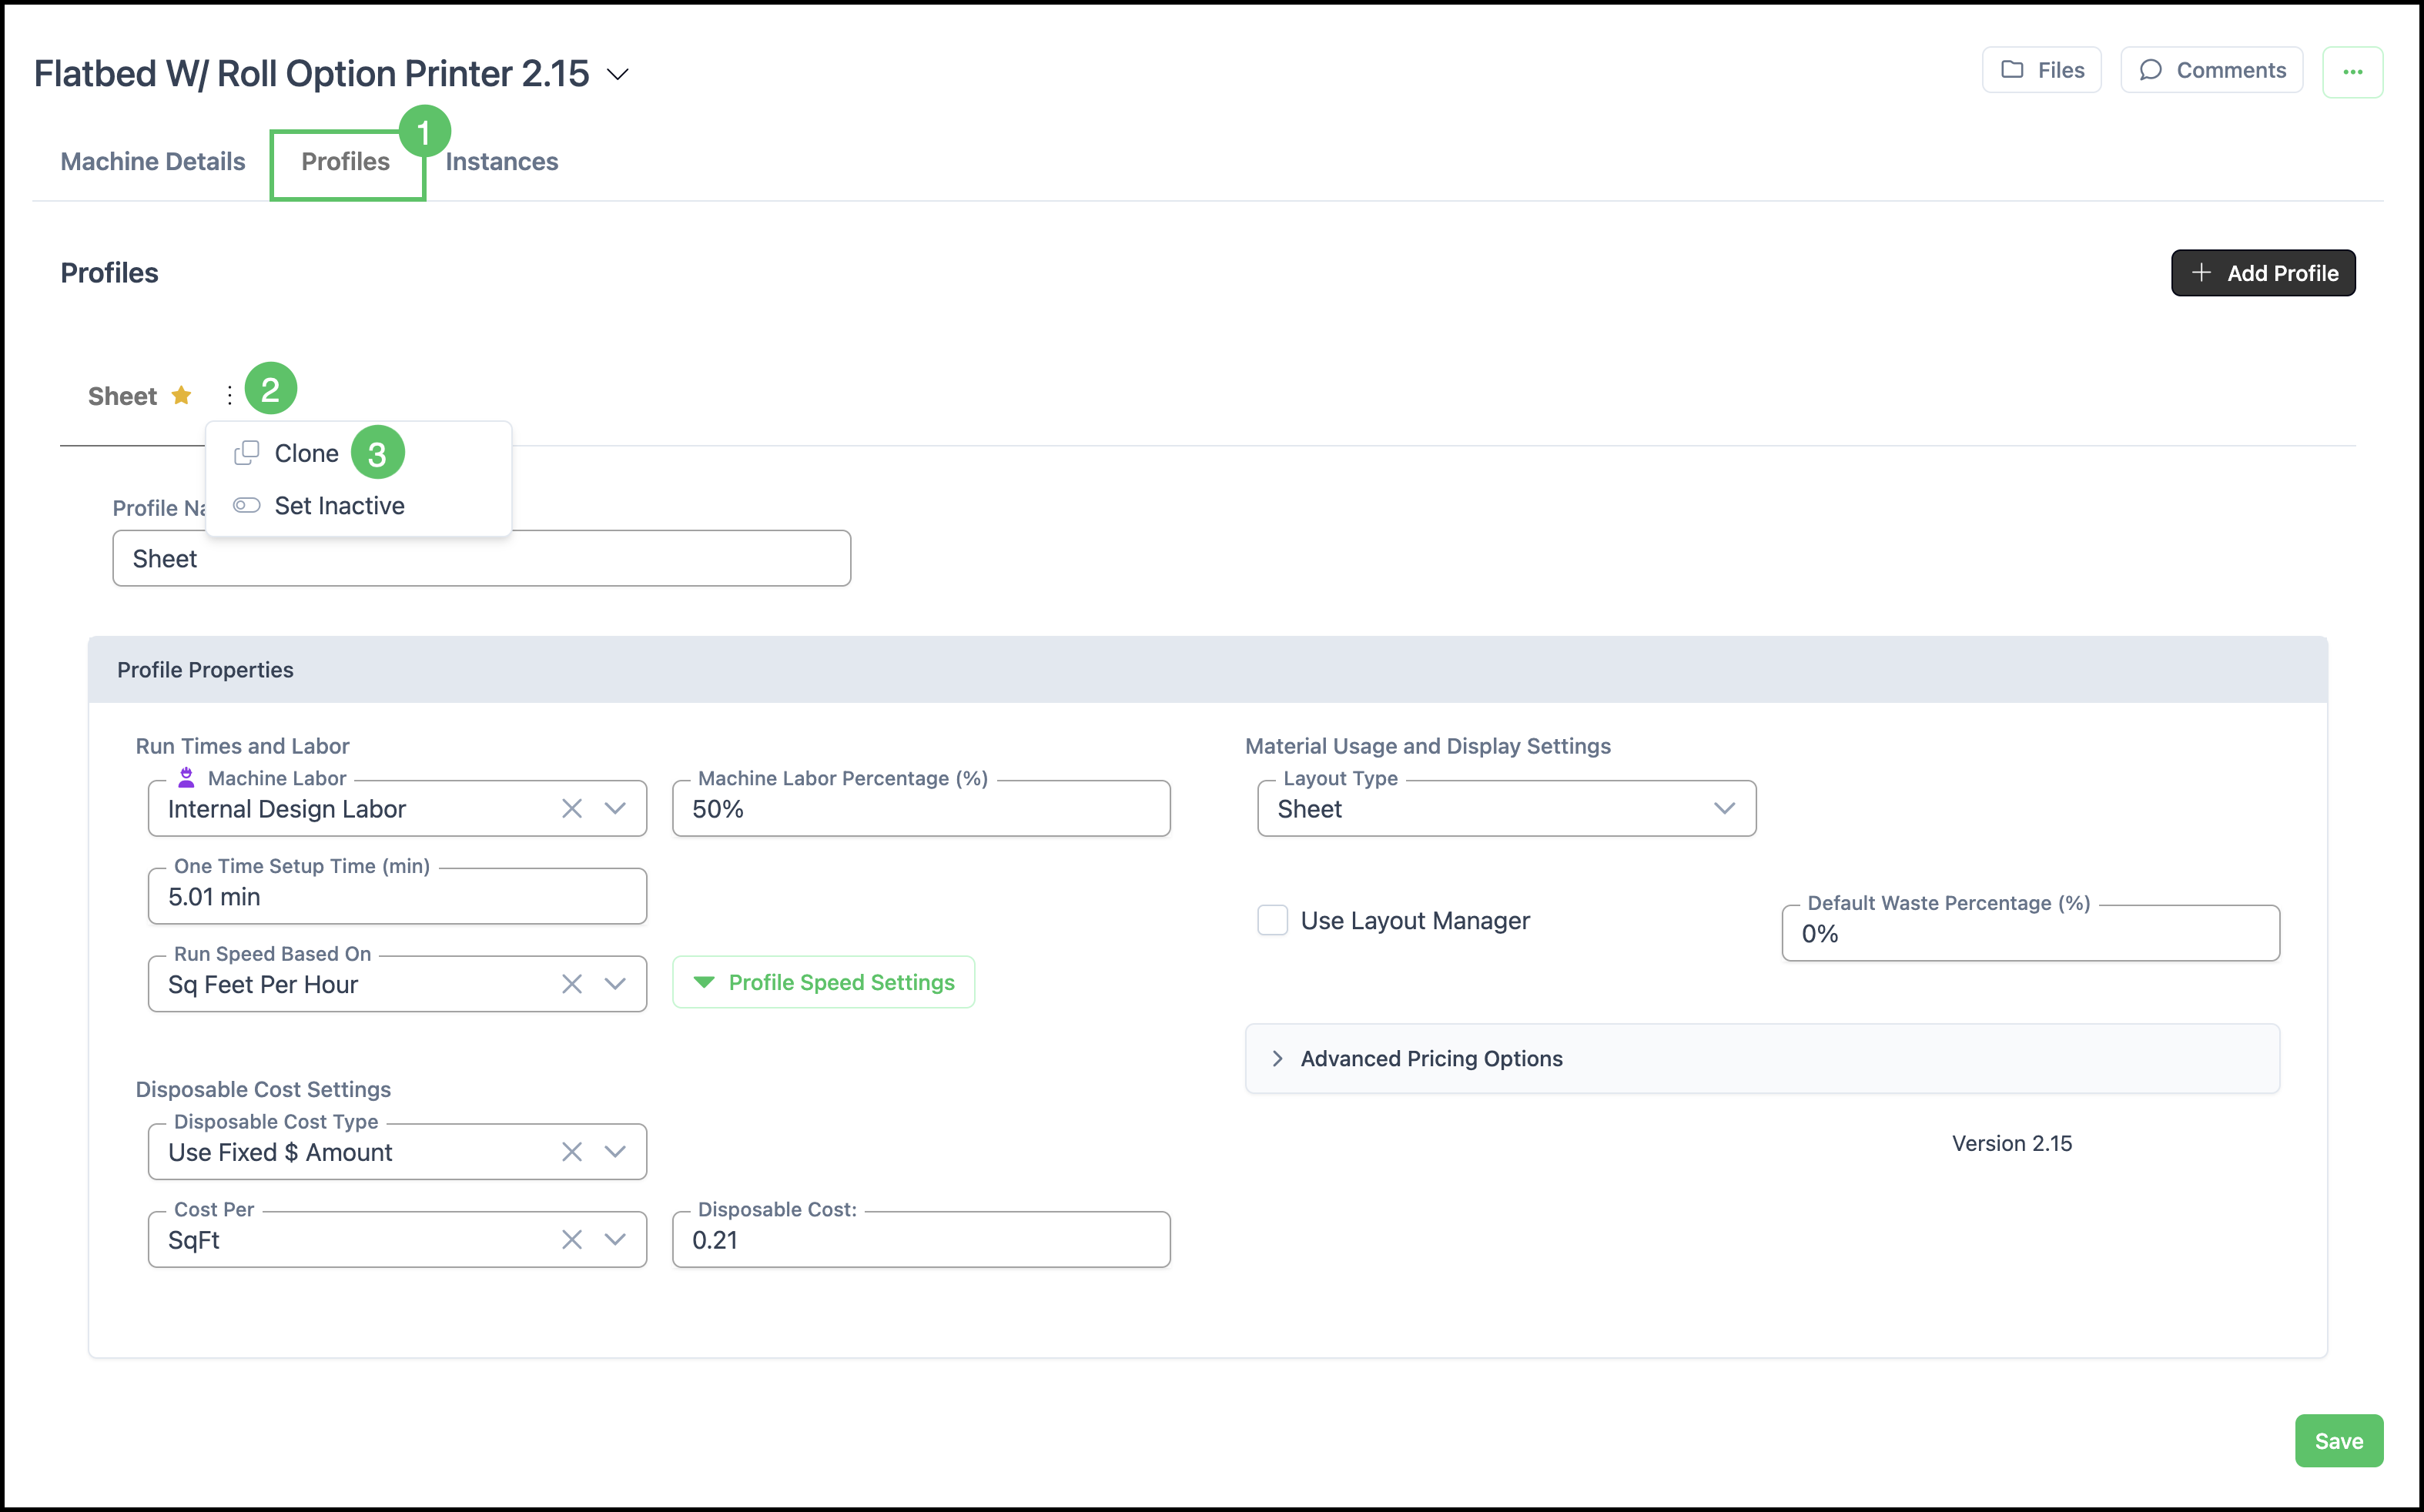
4. Rename the new Profile to reflect its purpose (for example, Roll).
5. Update the layout type and any relevant speed or cost settings for that mode.
6. Click Save.
Note: This allows CoreBridge to use the correct settings depending on how the Machine is being used for a given job.