
The Xero Detail Sync integration allows users to seamlessly sync detailed financial data, including individual transactions and customer records, directly with Xero. This integration is perfect for those who require comprehensive tracking of financial activities within their accounting software. Unlike summary syncs, Xero Detail Sync ensures that every transaction and customer entry is accurately reflected in Xero, providing full visibility and control over your financial data.
Note: CoreBridge can help with integration setup and how the integration works within the system. Questions related to the third-party service itself should be directed to that provider.
Table of Contents
- Benefits of Integrating with Xero Detail Sync
- What is the difference between the Summary Sync and the Detail Sync integrations?
- How to Integrate With Xero Detail Sync
- Activating Xero Detail Sync
- Using Xero Detail Sync After Setup
- Related Articles
Benefits of Integrating with Xero Detail Sync
- Comprehensive Tracking: Syncs detailed financial data, including each transaction and customer record, for a complete view of financial activities.
- Detailed Reporting: Provides full visibility into financial transactions, supporting detailed reporting and auditing need
- Sync Flexibility: Options to choose between manual or automatic reconciliation sync, accommodating various workflow preferences.
- Customizable Sync Options: Includes settings for syncing all customers or syncing only as necessary, and options to sync purchase orders.
- Automated Notifications: Configure roles to receive email notifications in case of sync failures.
What is the difference between the Summary Sync and the Detail Sync integrations?
The difference between Summary Sync and Detail Sync in Xero integrations lies in the level of data gathered and the way it is used.
Summary Sync consolidates transactions into data groups, providing a high-level overview of financial performance with faster data transfer and reduced storage needs. This makes it ideal for businesses that require an overall financial snapshot without delving into individual transactions.
In contrast, Detailed Sync offers a comprehensive, transaction-level view, capturing every individual sale, expense, and tax detail. This method is suited for businesses needing detailed reporting, auditing, and compliance support. However, because of the amount of data gathered, it involves slower data transfer, higher storage requirements, and more complex bookkeeping.
By understanding these differences, you can choose the appropriate sync method for your business needs and ensure that the Xero integration you choose will meet your financial tracking and reporting requirements.
How to Integrate With Xero Detail Sync
Connect Xero Detail Sync to your CoreBridge system from the Integrations Marketplace, then configure your sync preferences directly on the integration page.
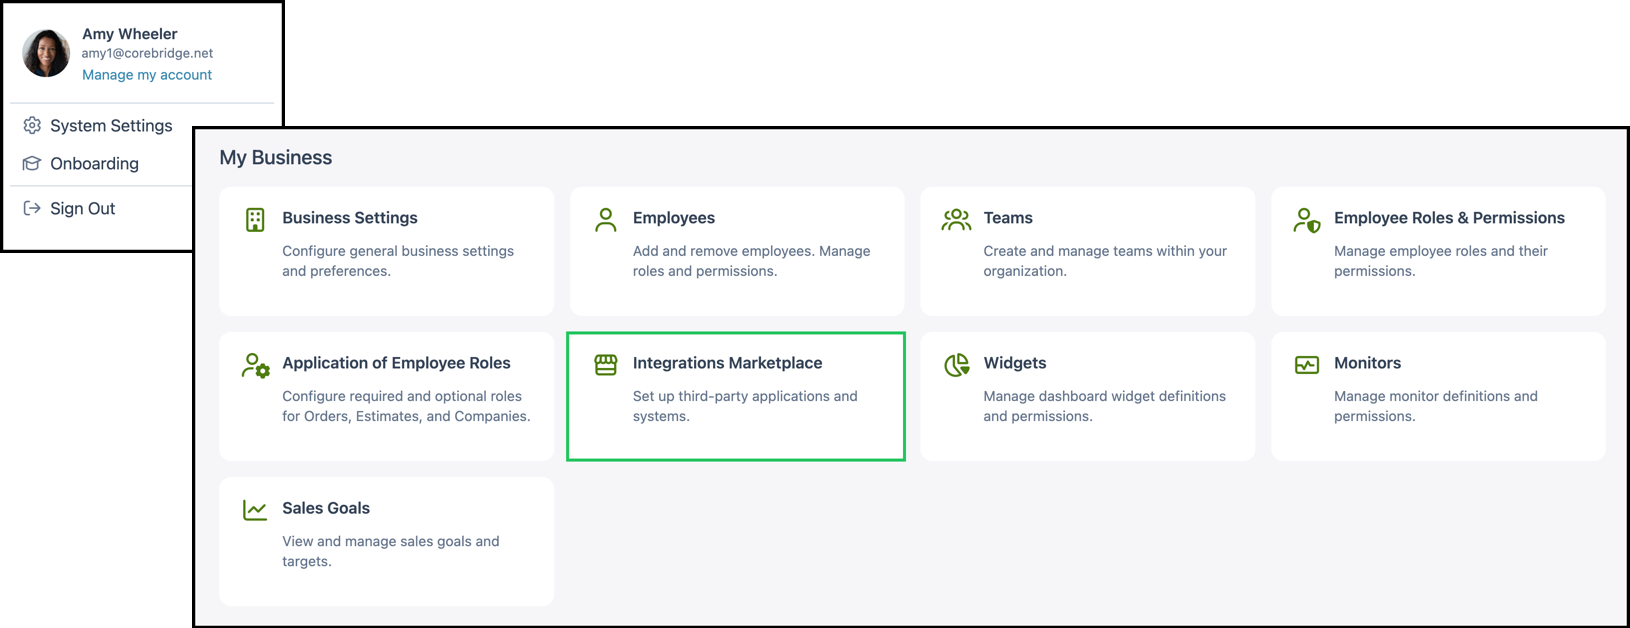
Navigate to Settings / My Business / Integrations Marketplace.
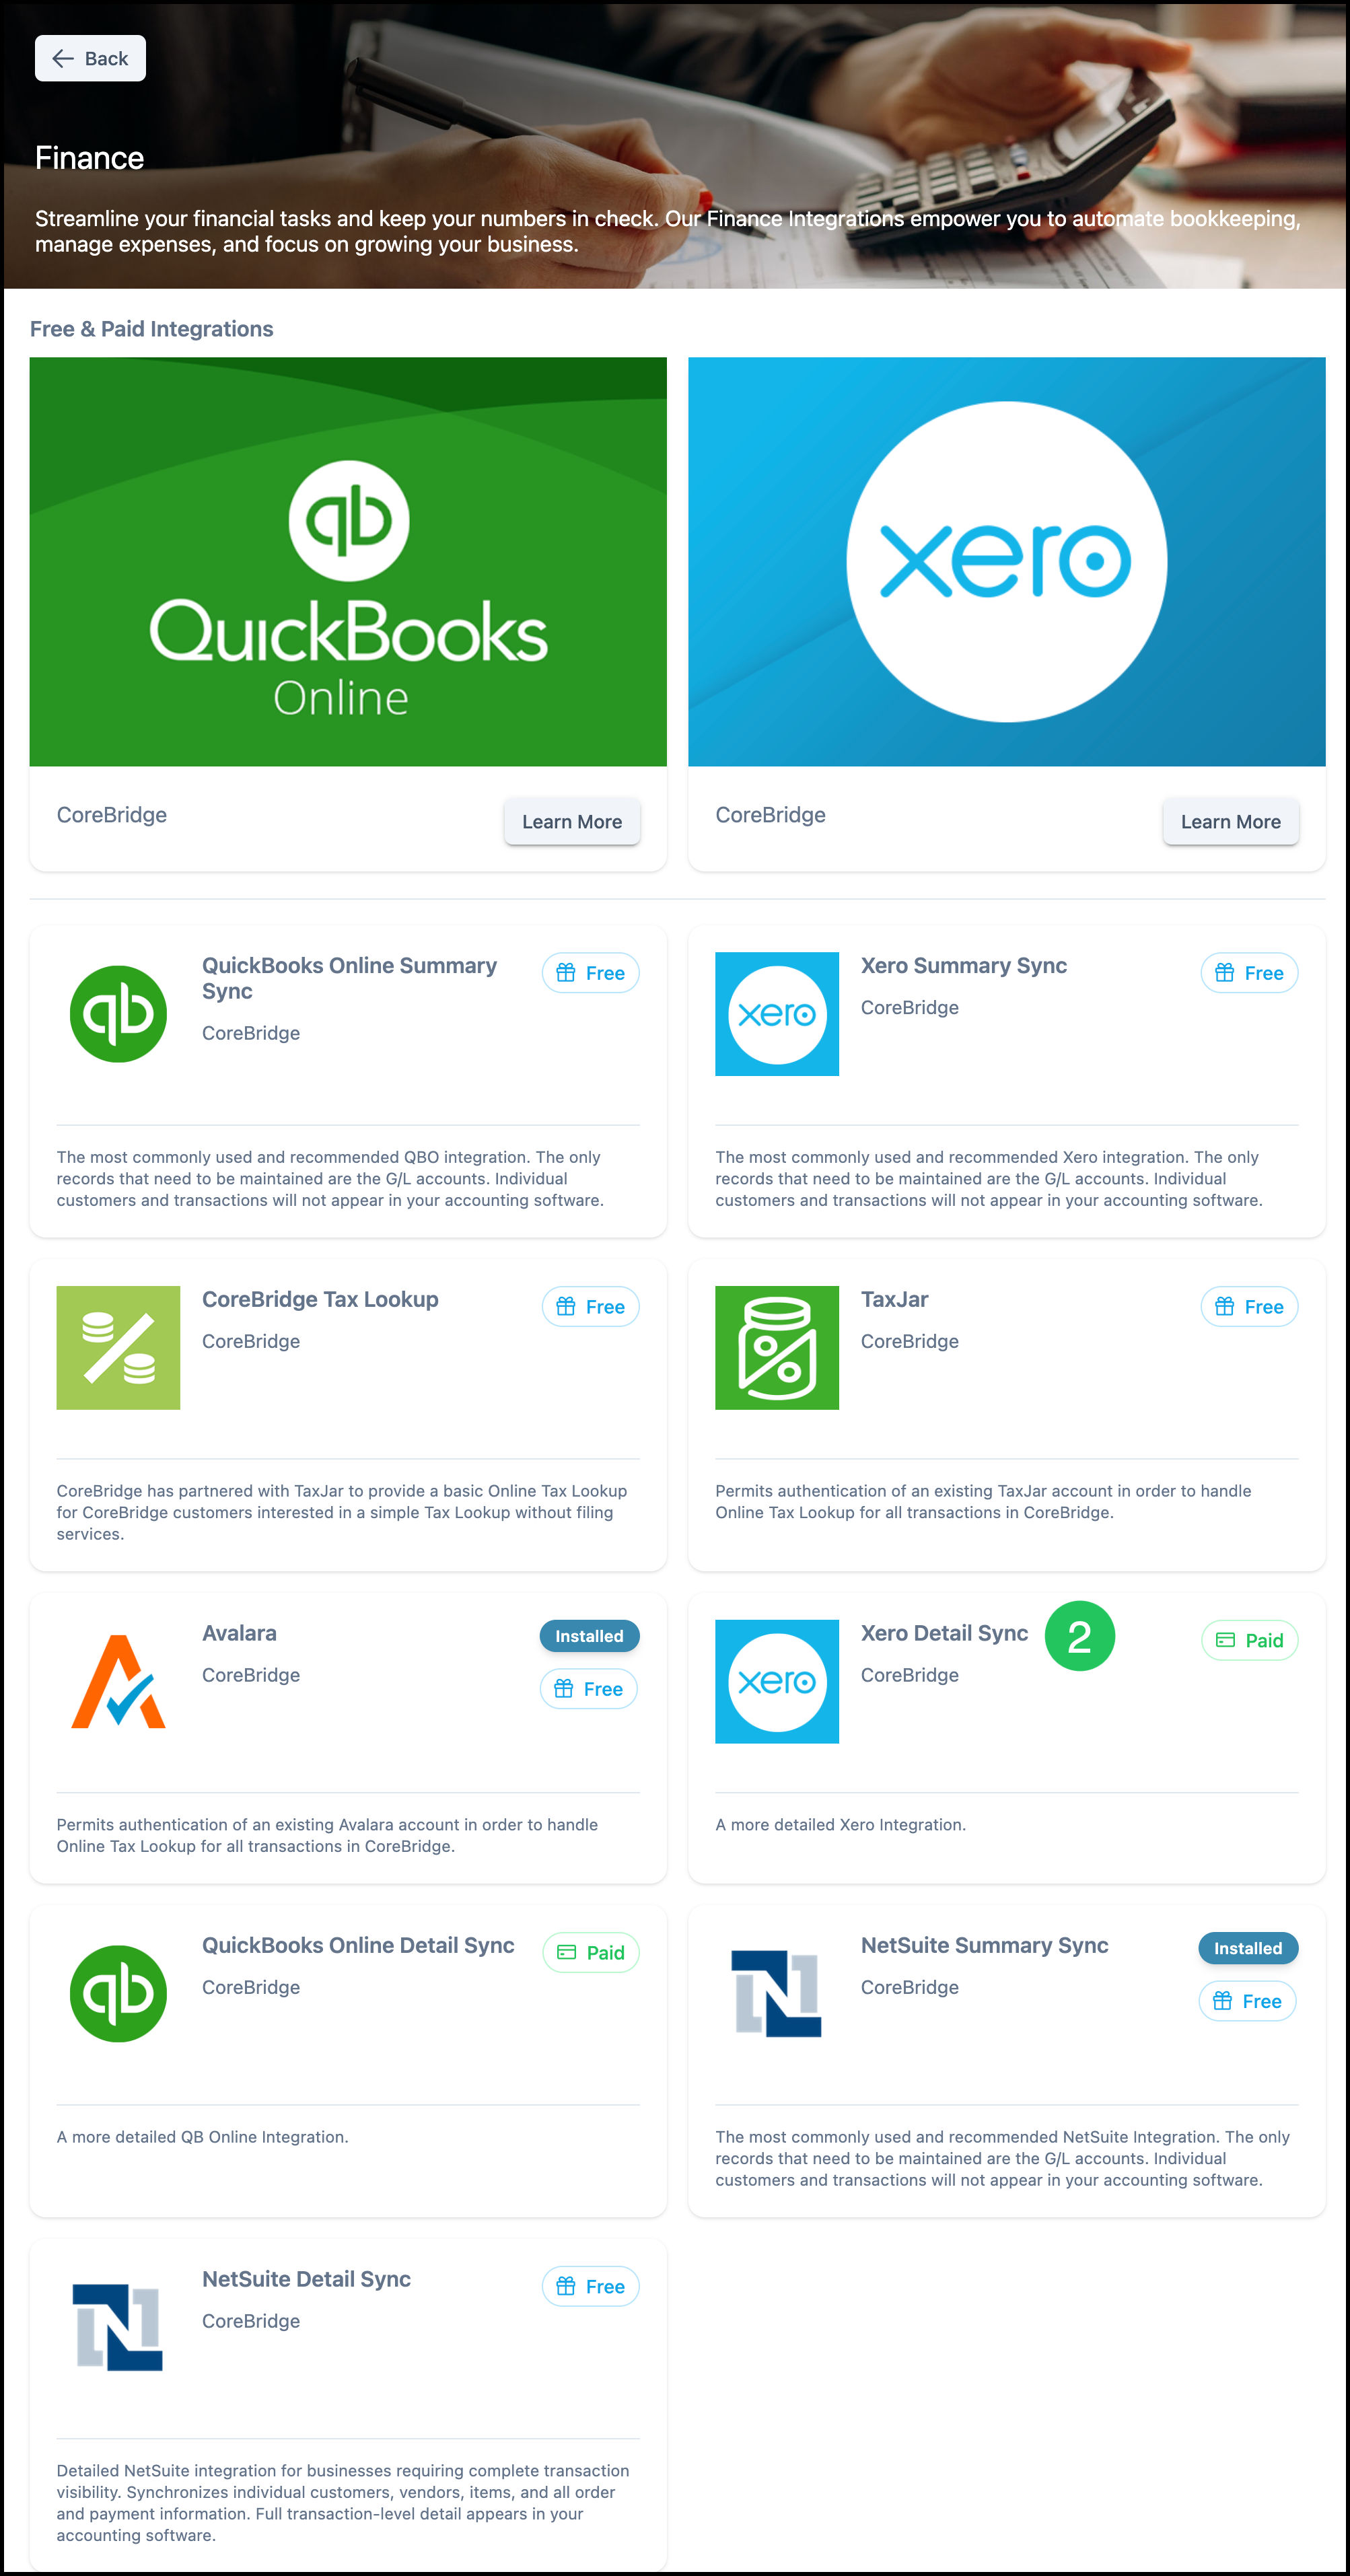
1. Select the Finance category.
Note: You can also find Xero Detail Sync using All Categories or the search bar.

2. Select the Xero Detail Sync integration.
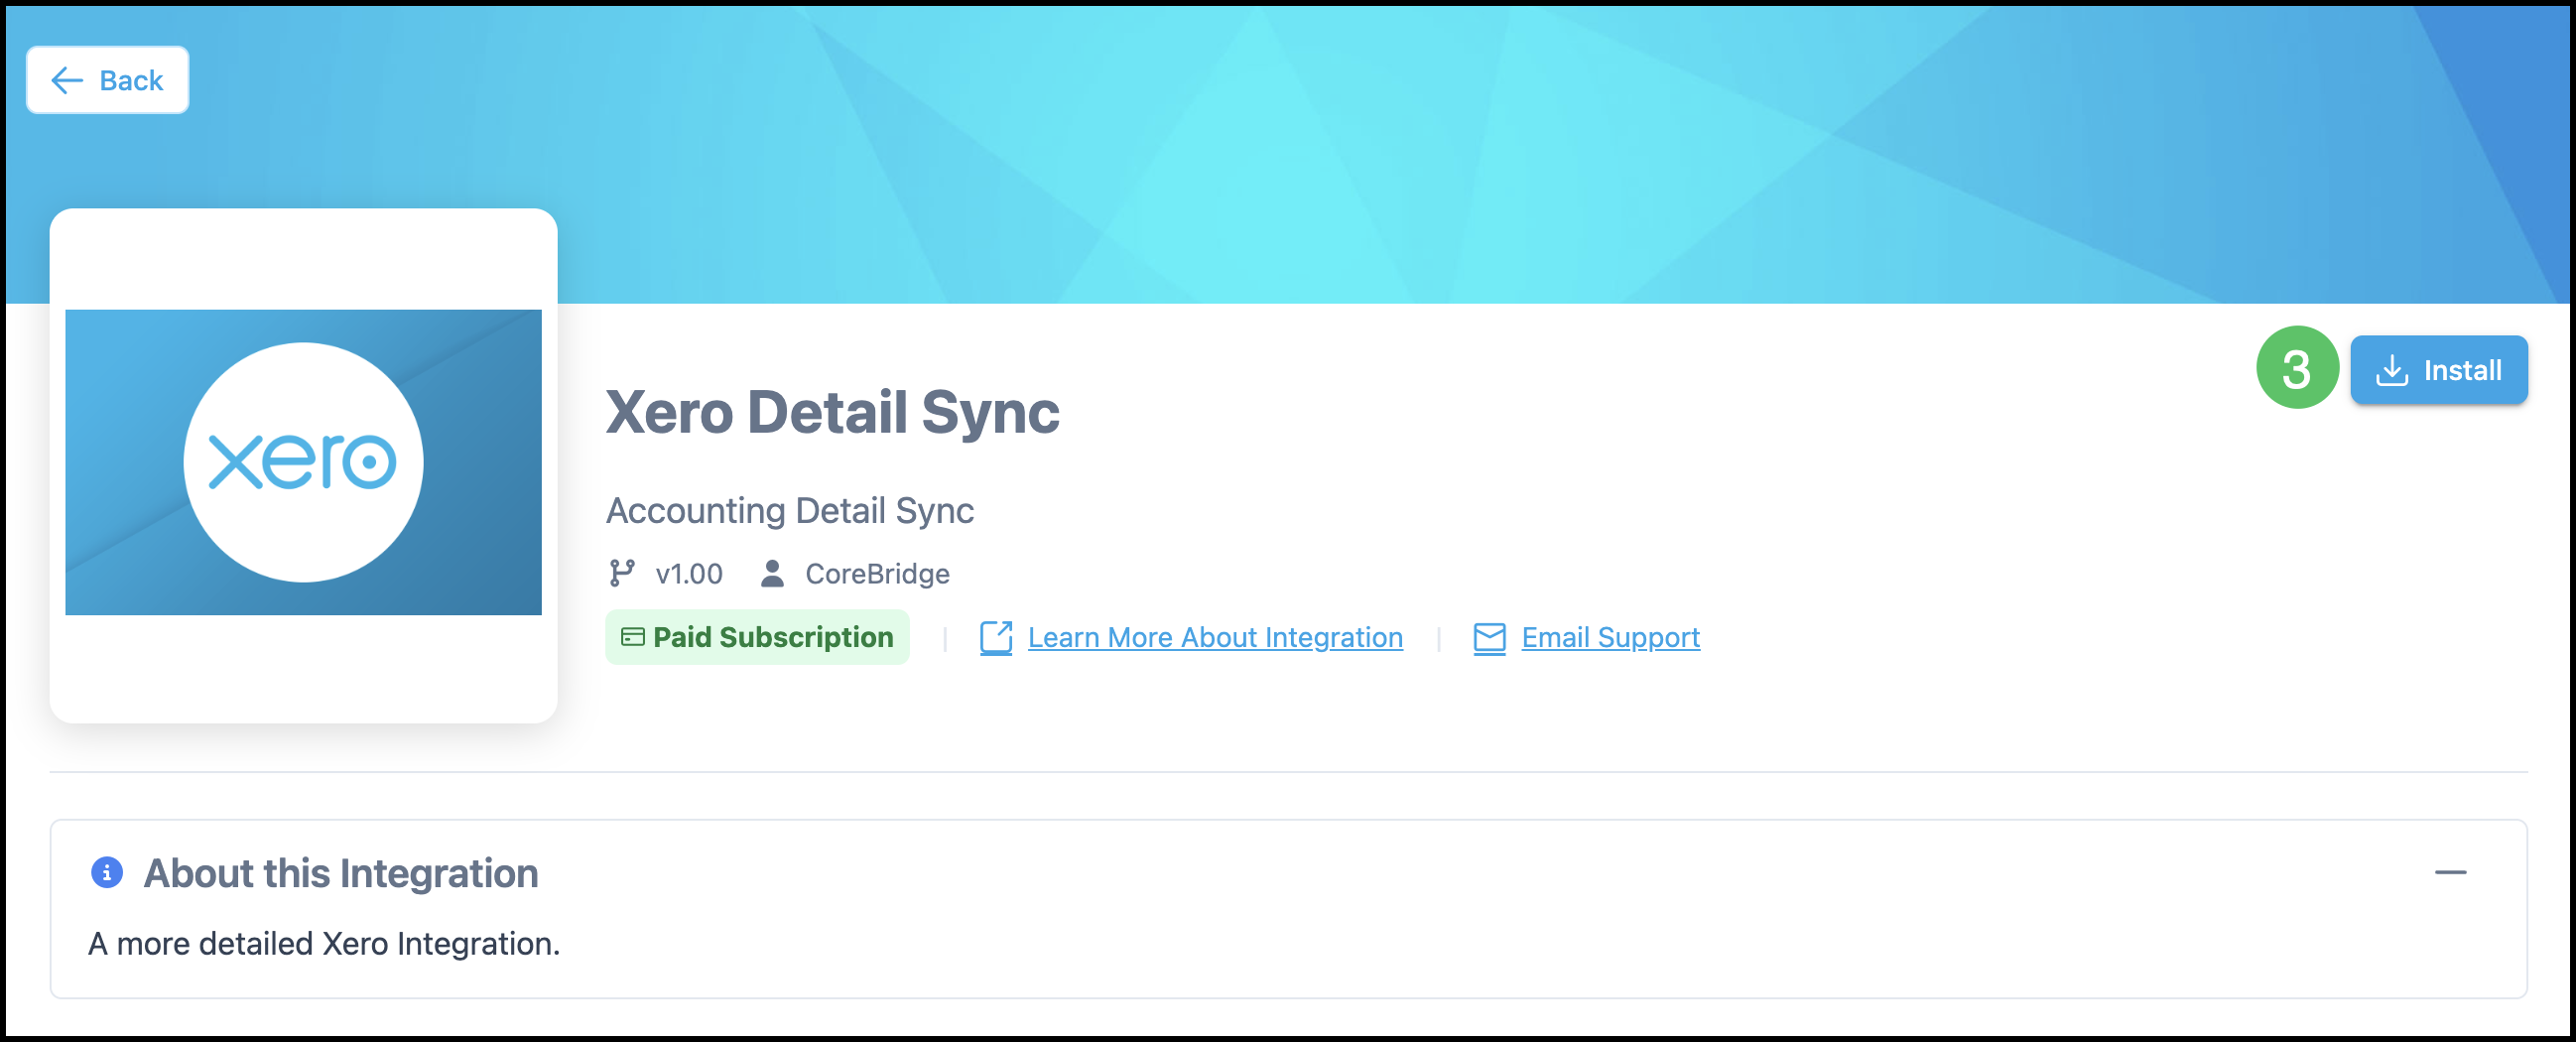
3. Select Install.
4. Choose whether all of your Locations sync to a single Xero organization, or whether each CoreBridge Location syncs to its own organization in Xero.
5. Under Xero Account Details, select Connect to Xero.
Note: This opens a window that prompts you to sign in to your Xero account. Follow the prompts to finish connecting.
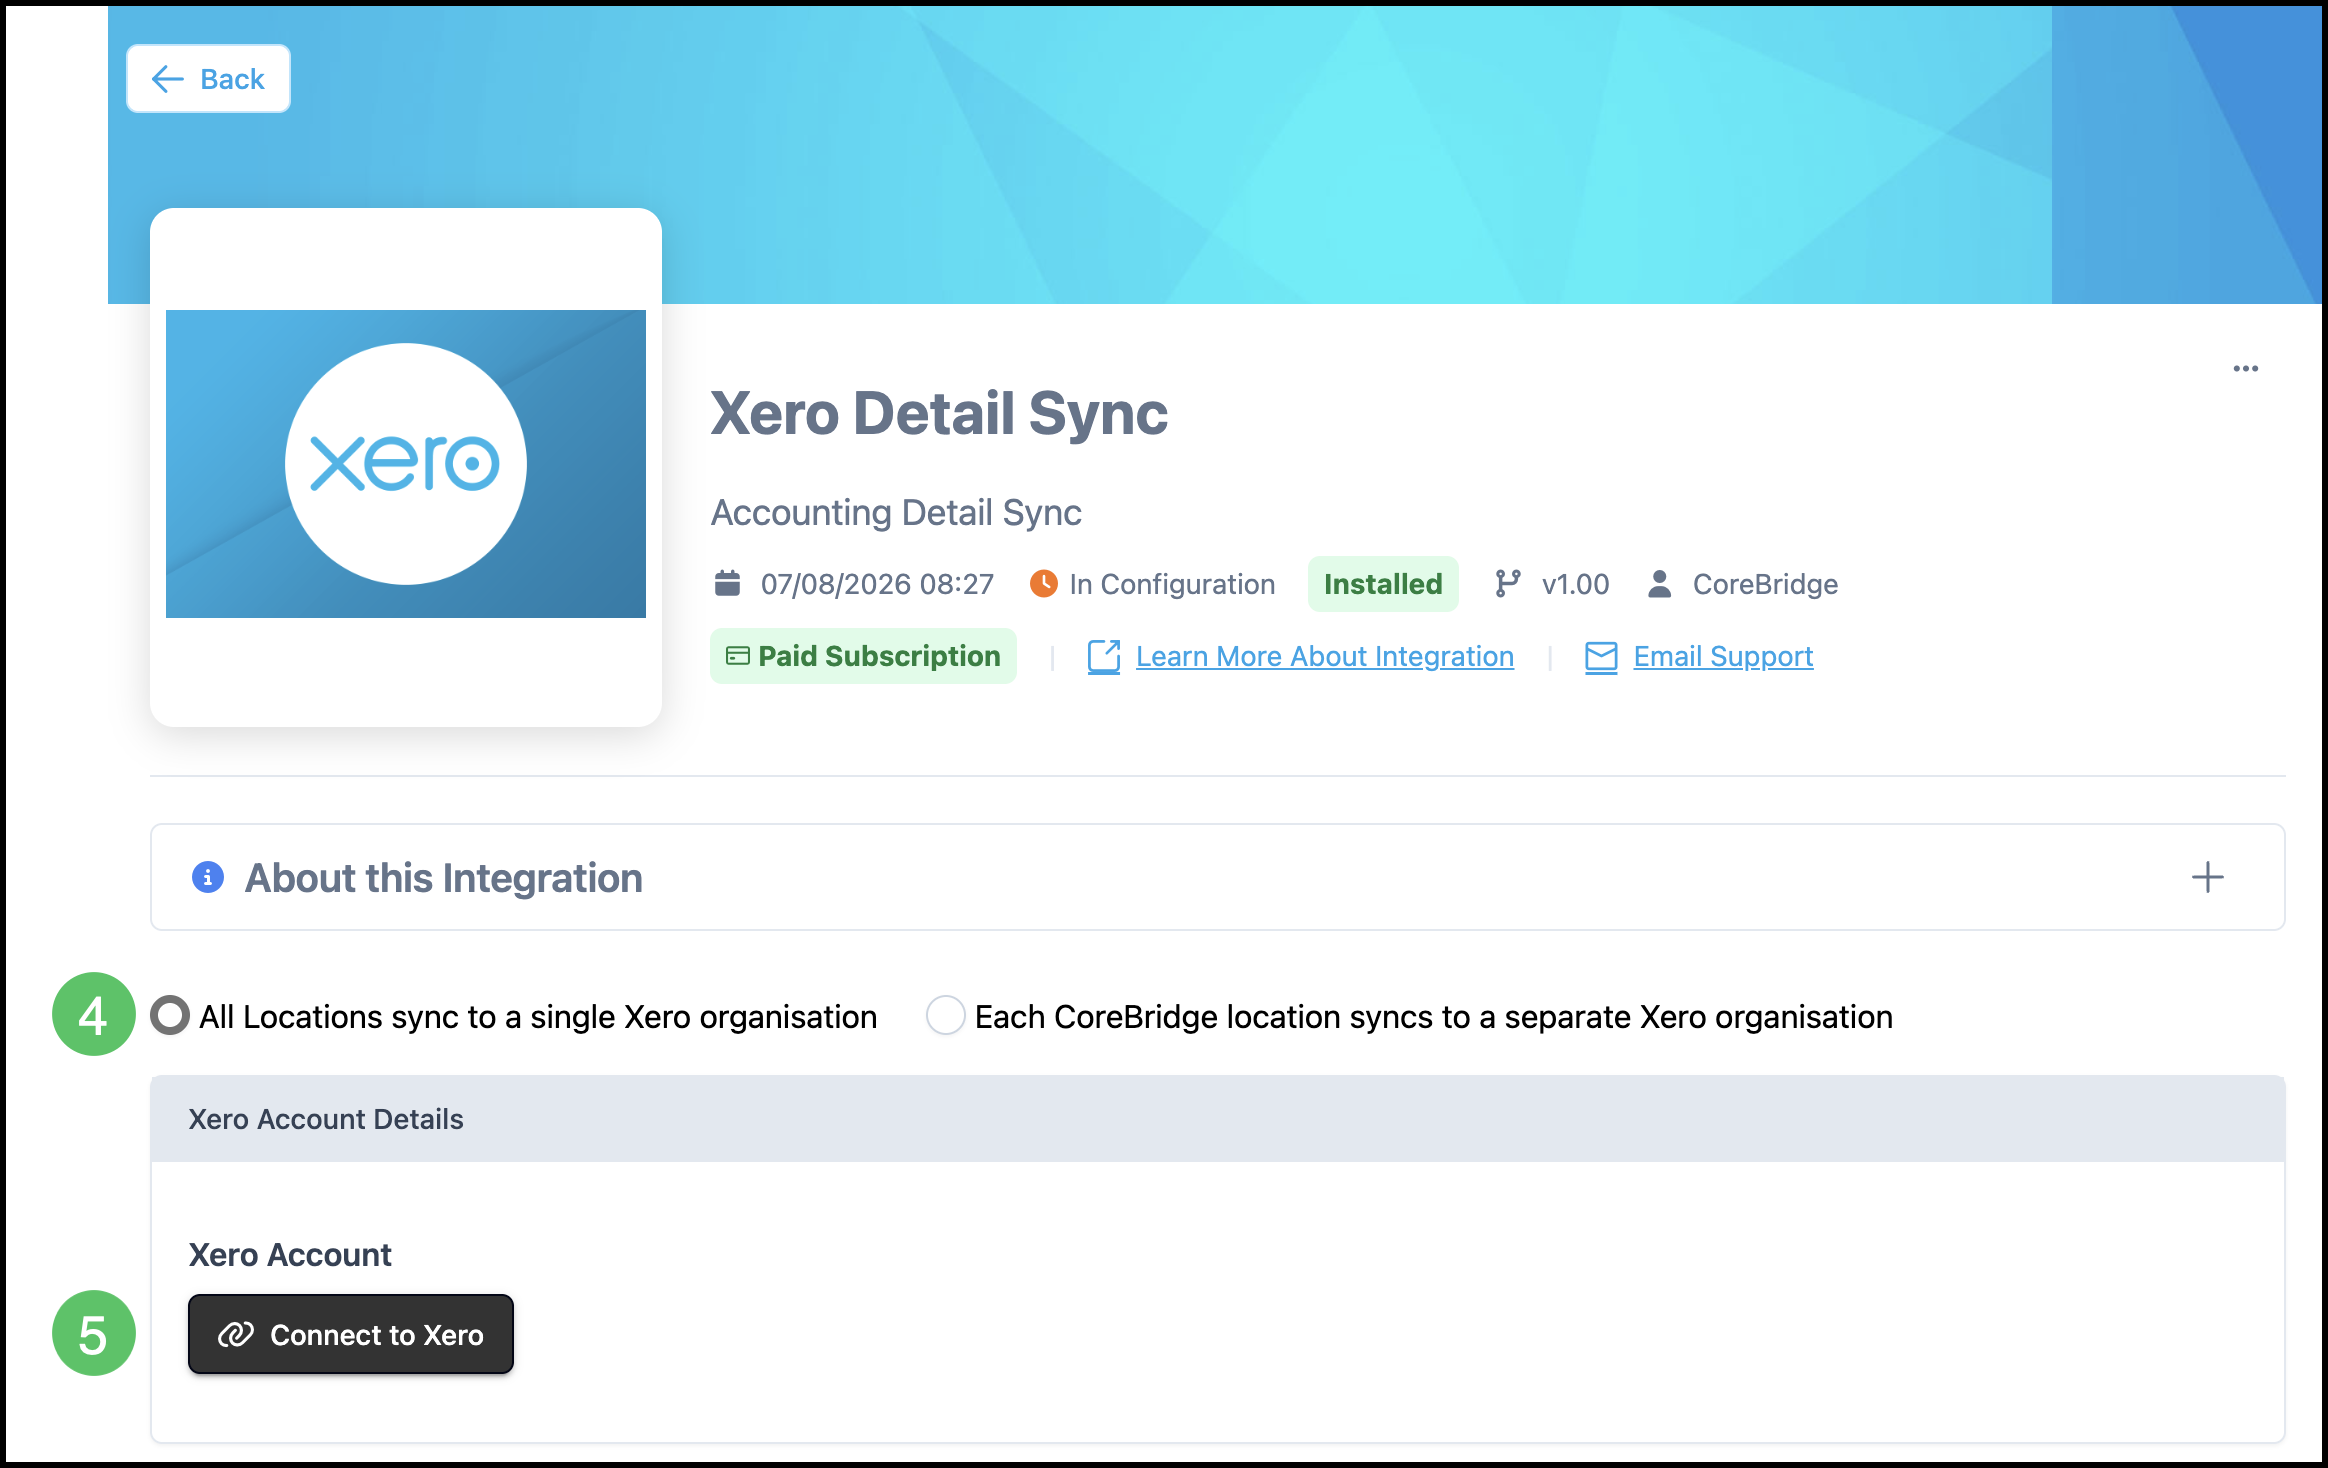
Once connected, you can set your Xero options at any time directly on this same integration page.
6. Select your Default Bank Account.
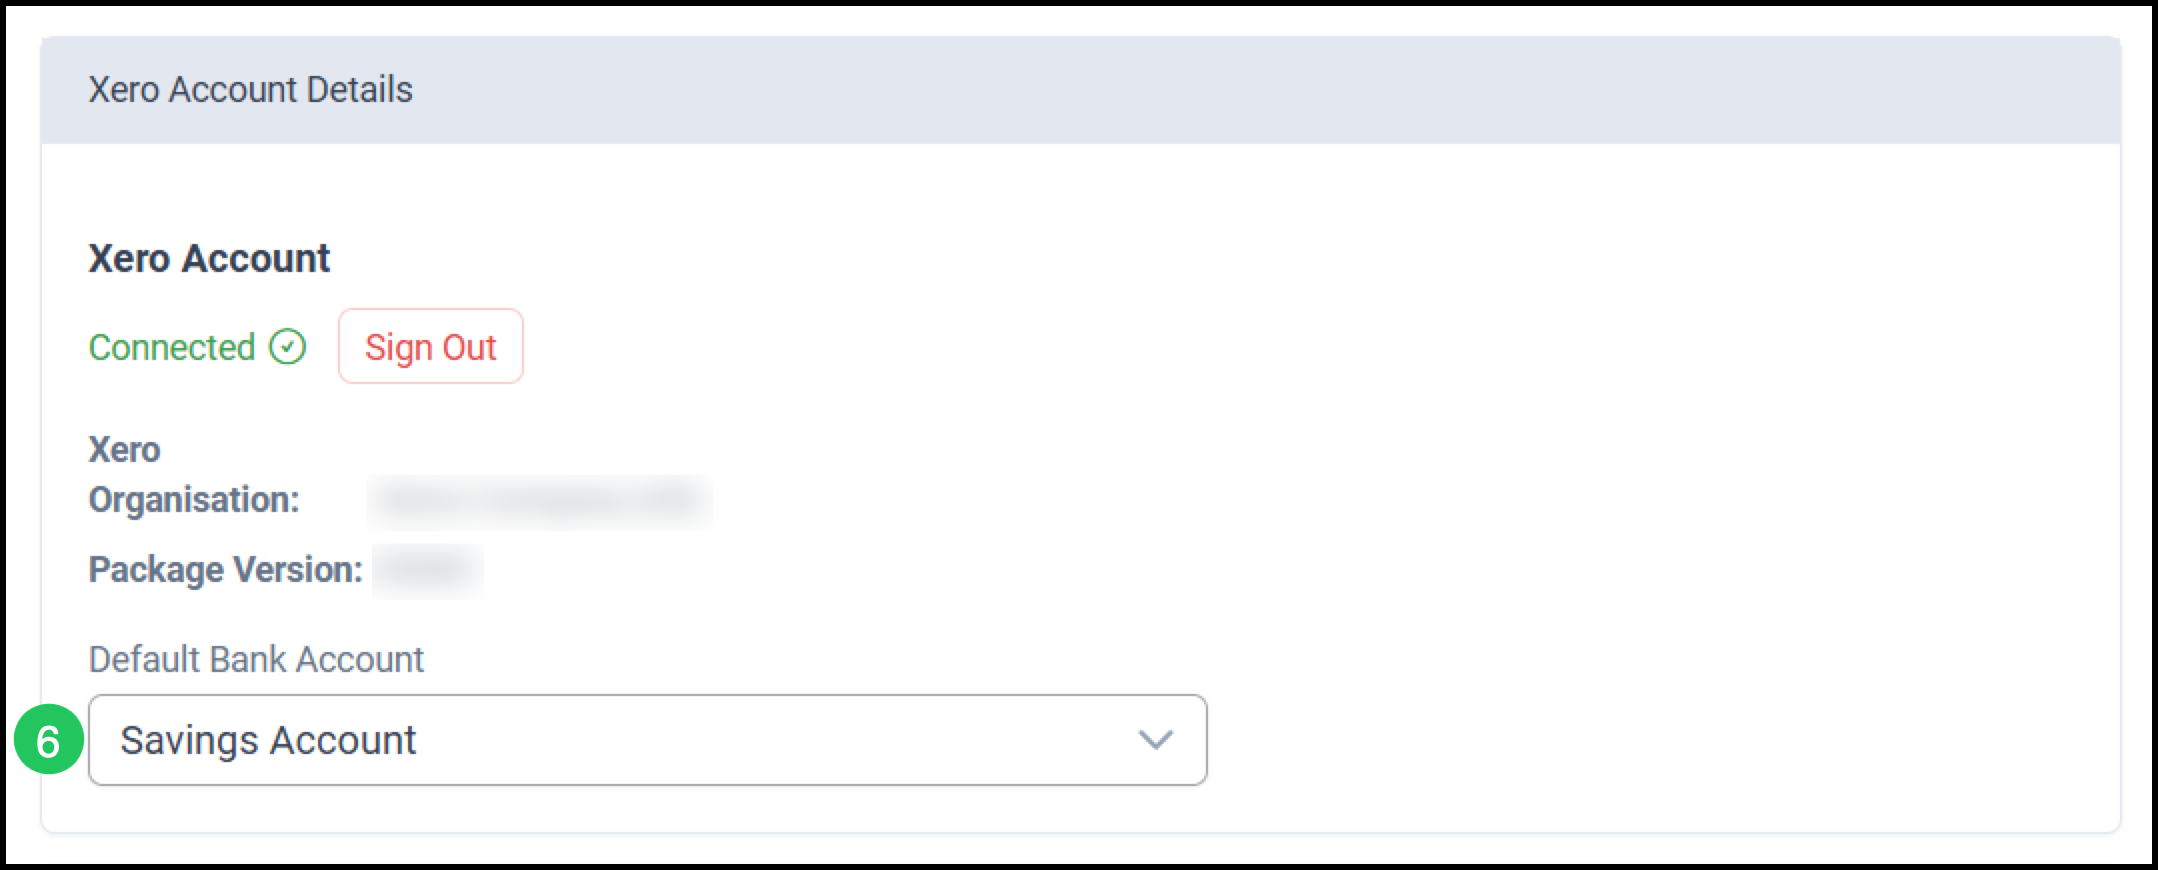
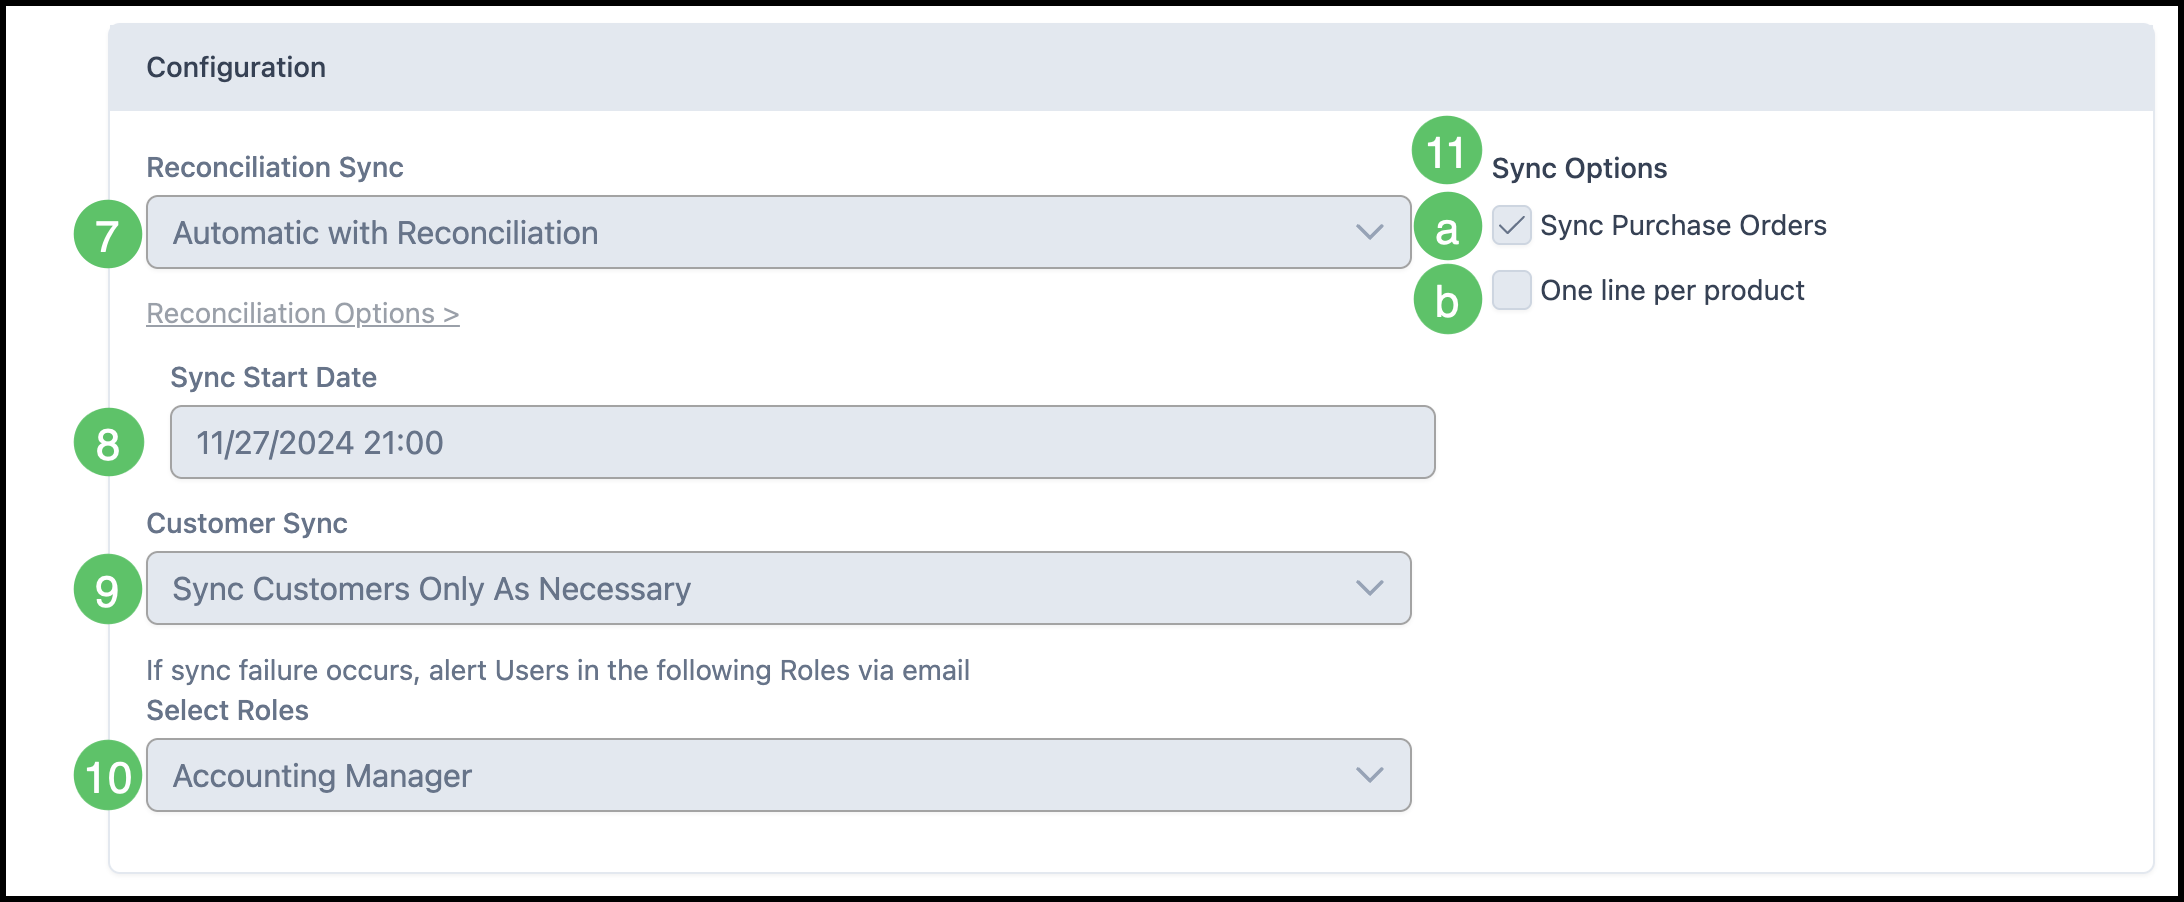
7. Reconciliation Sync - Use the dropdown to choose if you would like your reconciliation sync to be Automatic or Manual.
Note: It is recommended to complete the first sync Manually to check that the mapping has been done correctly. After the first sync has completed, you may select Automatic with Reconciliation.
8. Sync Start Date - Choose the Date you would like your sync to begin.
Note: This option only appears if you have selected the Automatic option above.
9. Customer Sync - This dropdown allows you to choose between syncing all customers or only as necessary.
Note: It is recommended to select Sync Customers Only As Necessary. This will sync only those customers that have had activity.
10. Select Roles - Use the dropdown to select which employee role you would like to have notified via email if a failure occurs.
11. Set Sync Options.
a. Sync Purchase Orders - Check this box if you would like to Sync Purchase Orders.
b. One line per product - This option is to sync each order product as a single invoice line instead of one line per part. The line uses the product name, the income account and tax from the first part on the product, and the full product retail. This option is off by default.
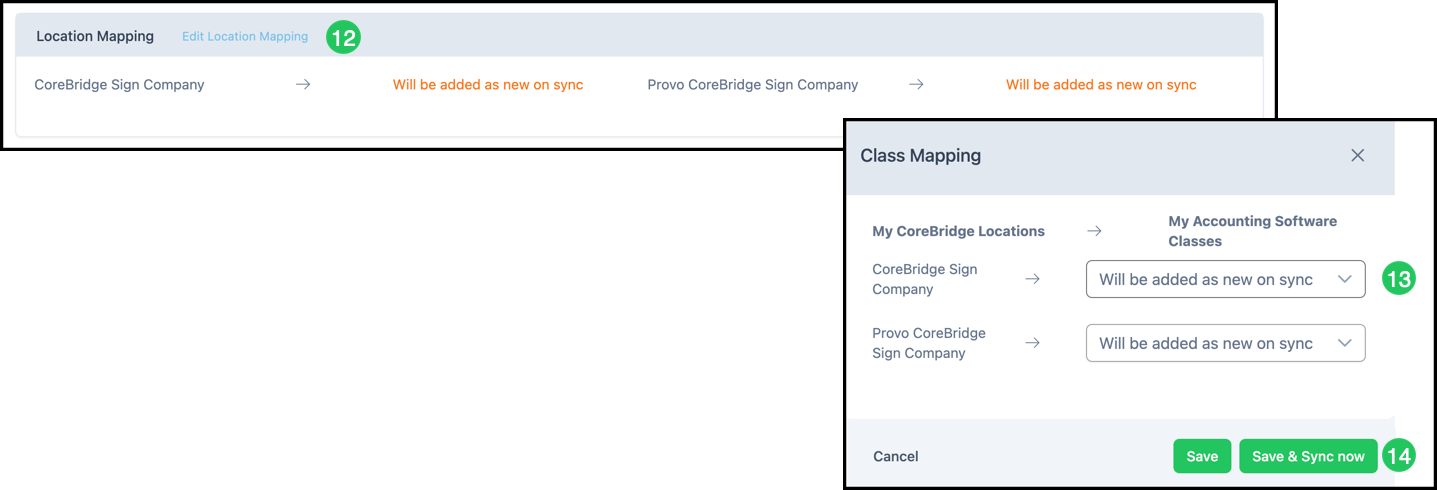
To ensure the Location Mapping works properly, you will need to add a Tracking Category on the Xero website. To do this, you will need to visit the Xero website and navigate to the Settings menu. Click on Looking for advanced settings?. This will open up a new page with the option to select Tracking Categories. Click Add Tracking Category and enter in the name CB Location.
12. Select Edit Location Mapping to open the mapping window.
13. Use the dropdown to select the Xero Tracking Category option for each Location.
Note: If you select Add as new on sync, Xero adds your Location after the next sync. If the CB Location Tracking Category doesn't exist yet in Xero, you'll see an error message.
14. Select Save & Sync Now.
Note: Syncing immediately lets you know right away if there are any issues.
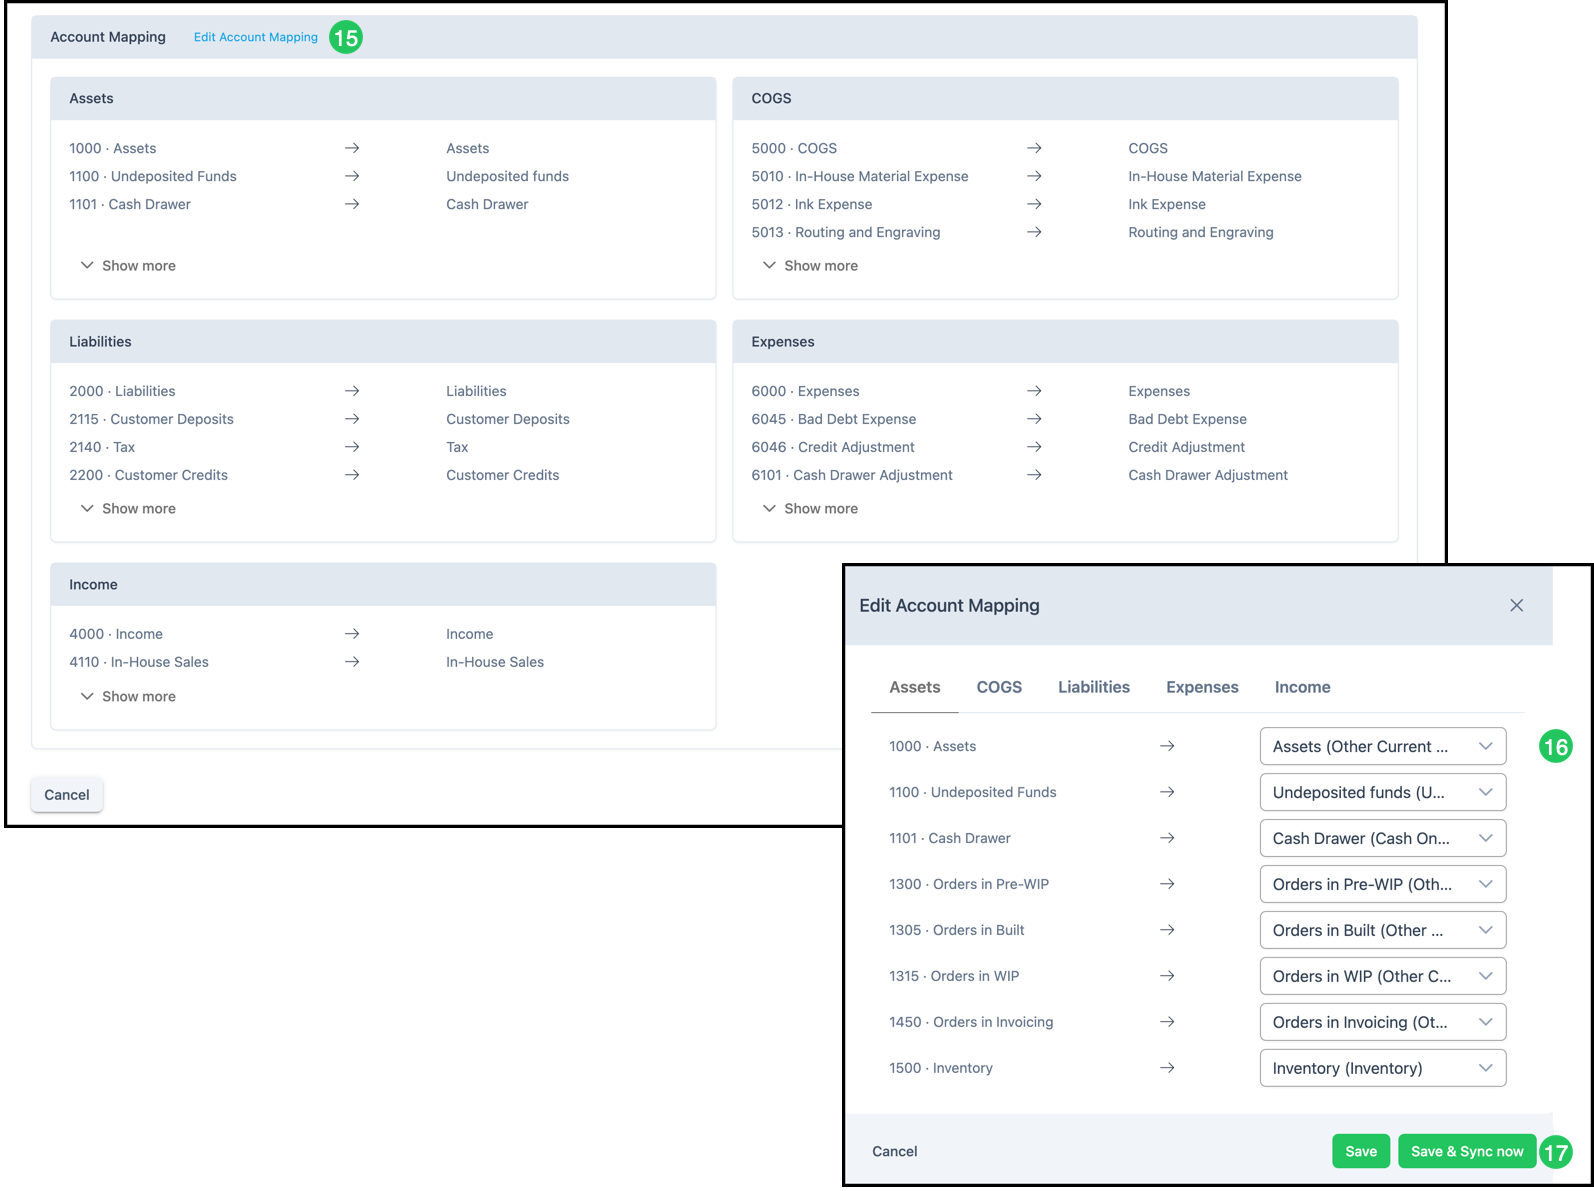
15. Select Edit Account Mapping to choose which Xero accounts correspond to your CoreBridge accounts. Account Mapping is critical for accurate syncs and reconciliations.
Note: It's recommended to manually select all of your accounts from your accounting software to ensure correct mapping. Reserve Add as new on sync for accounts that are specific to CoreBridge, such as Orders in Pre-WIP.
16. Use the dropdown to select your Xero Accounts.
17. Select Save & Sync now.
Note: Syncing immediately lets you know right away if there are any issues.
Note: Changes must be saved manually by selecting Save at the bottom of the screen.
Integration Status After Setup
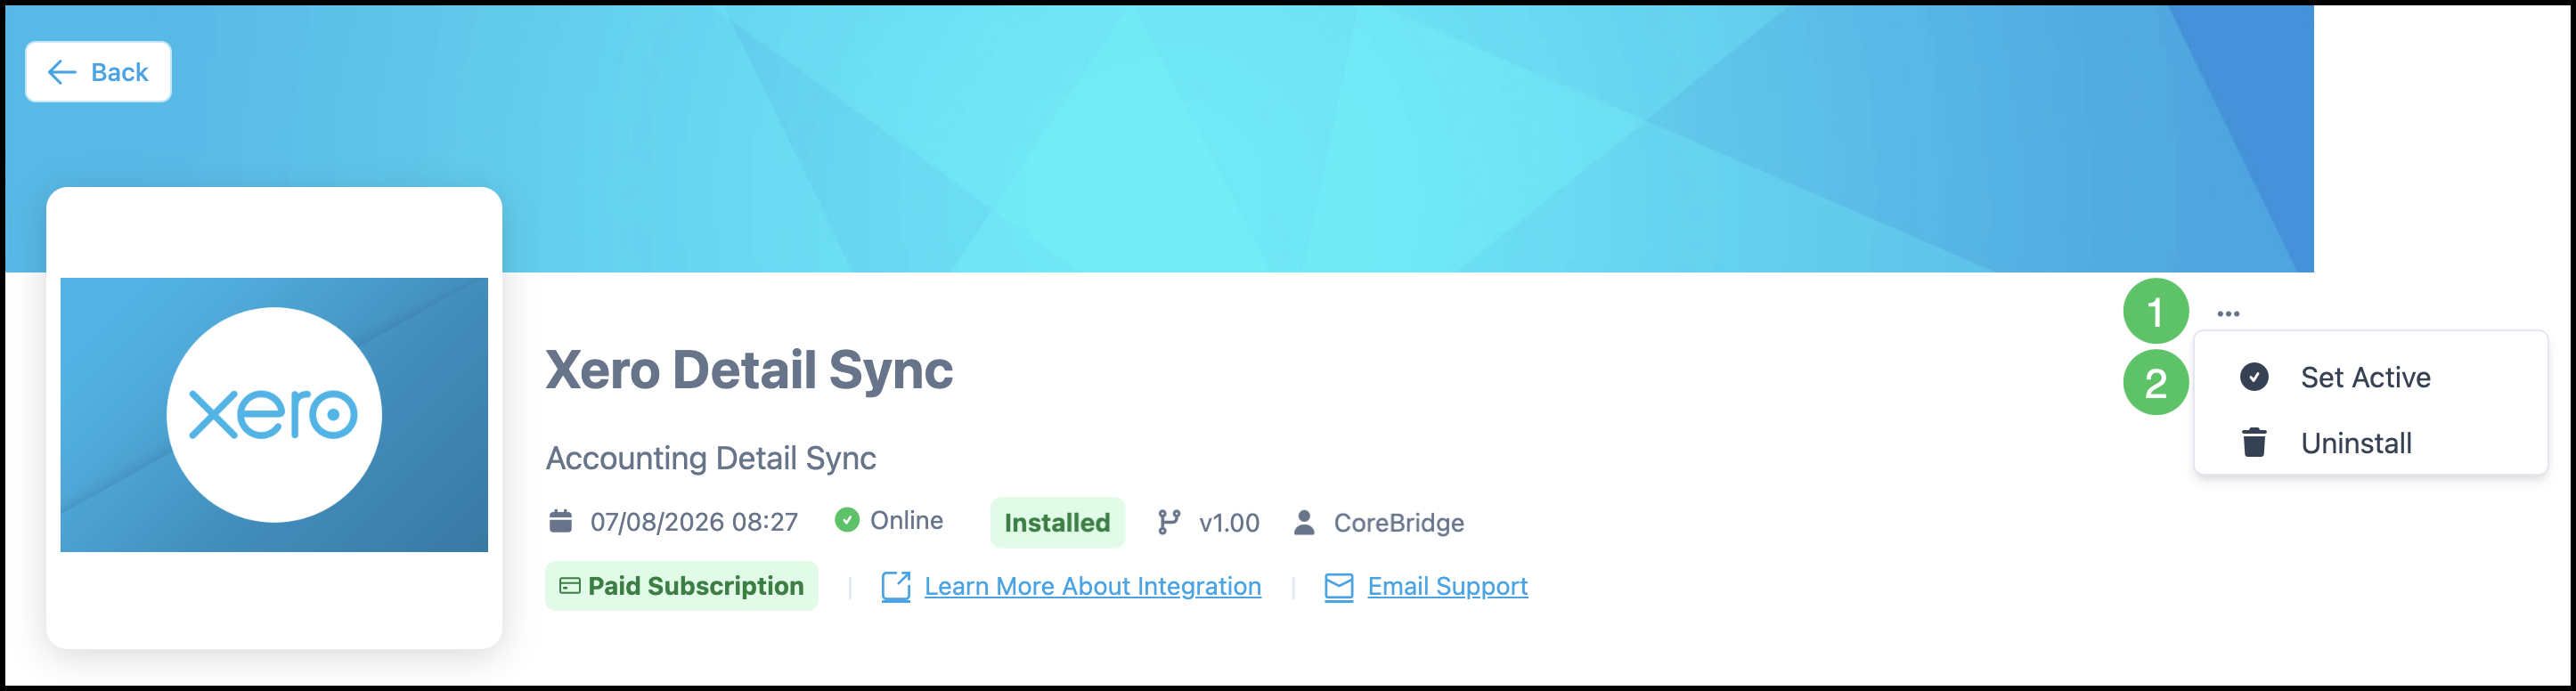
After you select Install and complete Connect to Xero, Xero Detail Sync typically displays as Installed and Online. Configuration is available from this same screen.
Note: Until Connect to Xero is complete, the integration may display as In Configuration, and the Configuration fields remain unavailable.
Note: Only one accounting software integration can be active at a time in CoreBridge.
Set Active is not required as part of a normal first-time setup. After Install and Connect to Xero are complete, the integration should already display as Online.
If the Xero integration later displays as Not Enabled, Set Active can be used to make Xero the active accounting integration.
1. From the Xero Detail Sync screen, click the More Actions menu.
2. Select Set Active.
Note: When the integration is already Online, More Actions includes Set Inactive and Uninstall instead of Set Active.
Using Xero Detail Sync After Setup
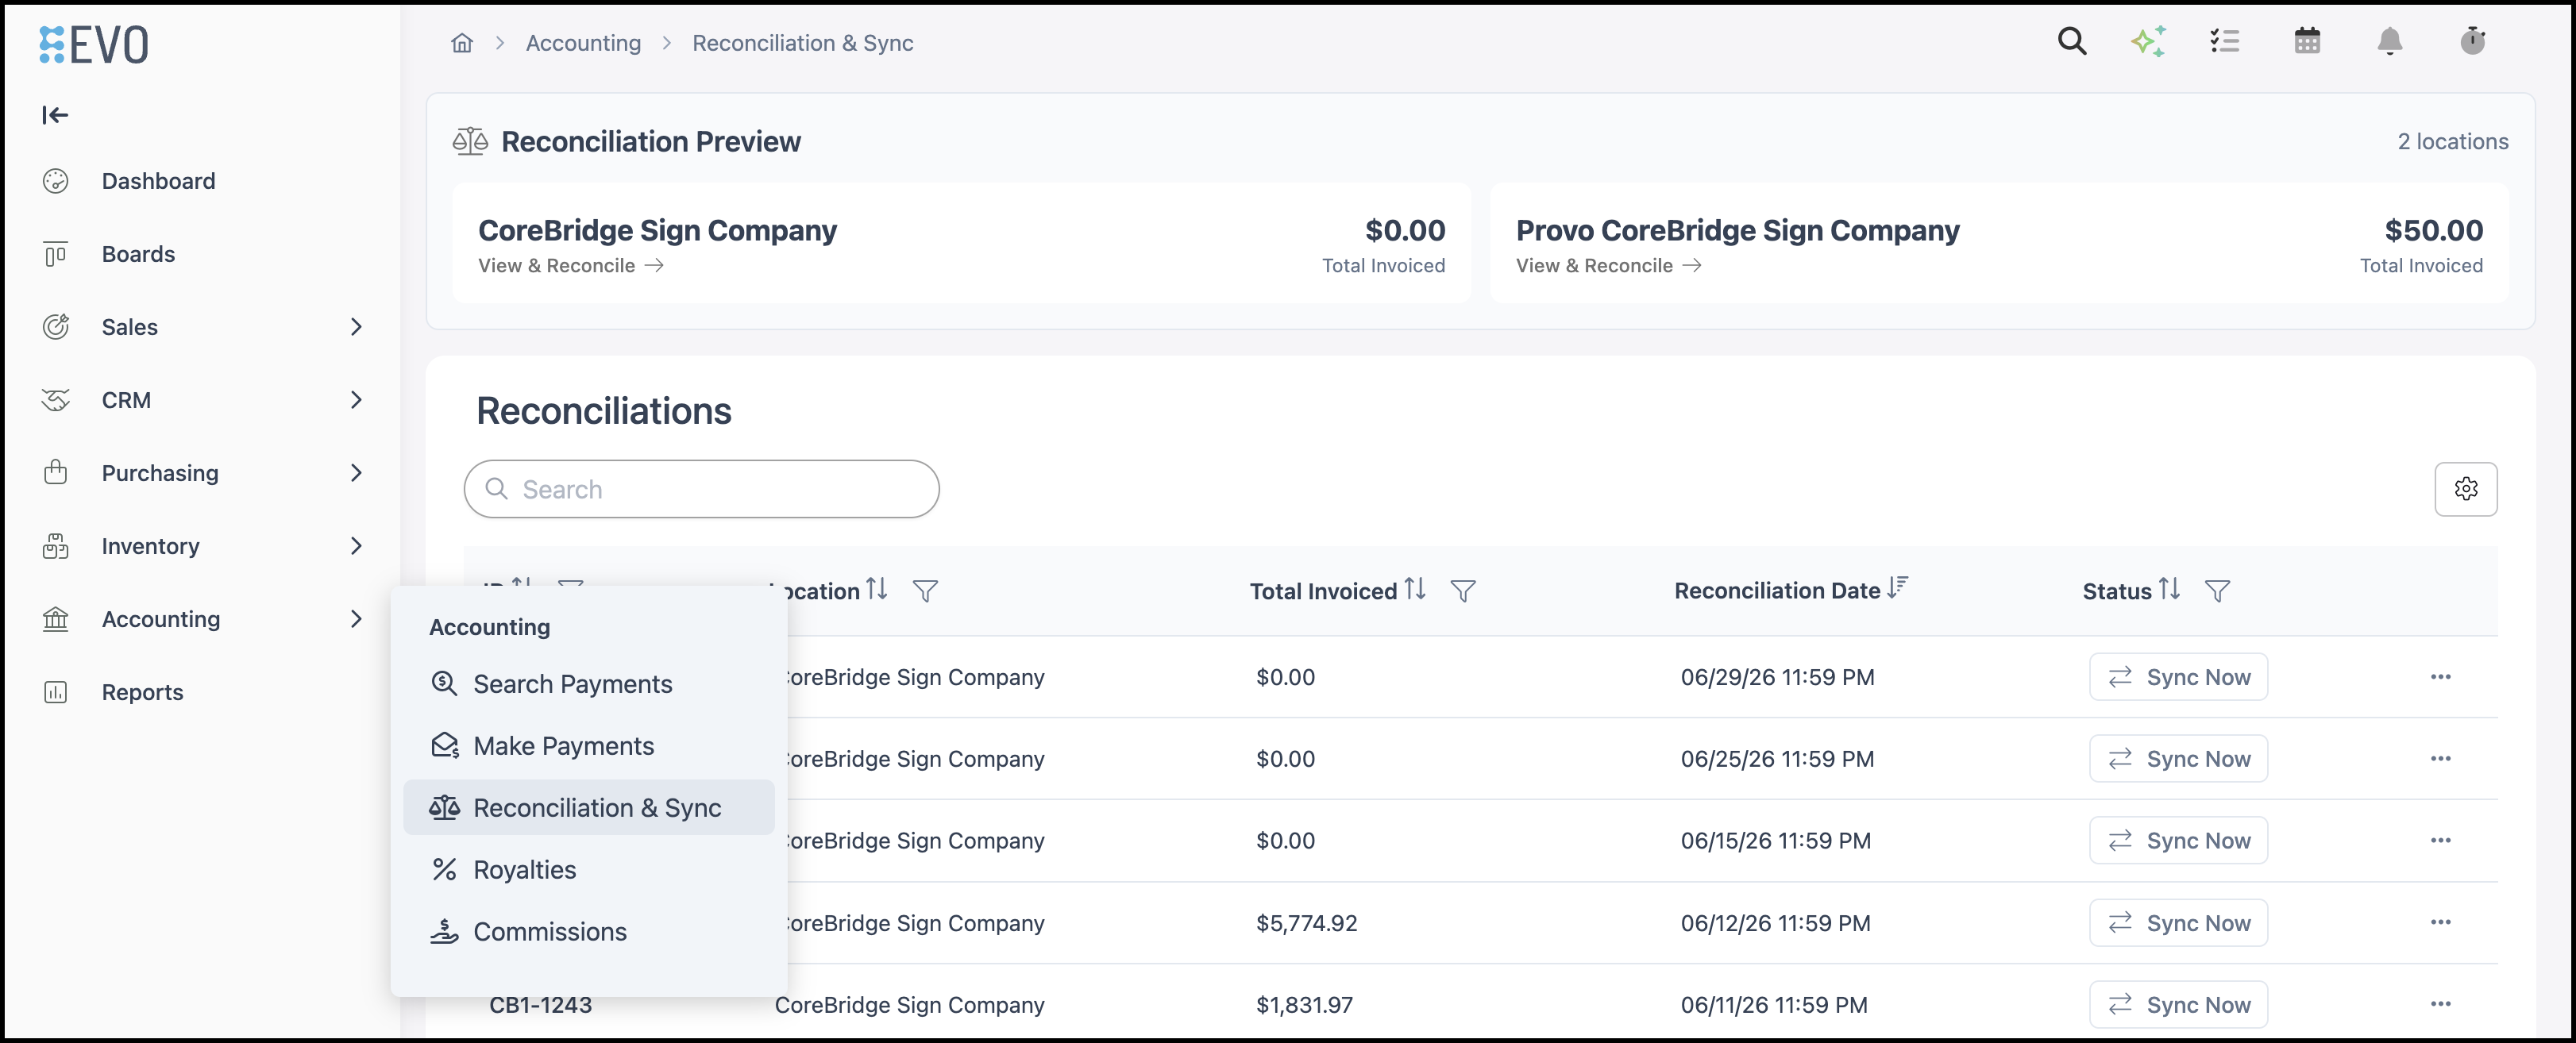
After you connect Xero and configure your sync preferences, use Xero Detail Sync from the reconciliation area in CoreBridge.
Navigate to Accounting / Reconciliation & Sync.
Manually Sync from the Reconciliation List
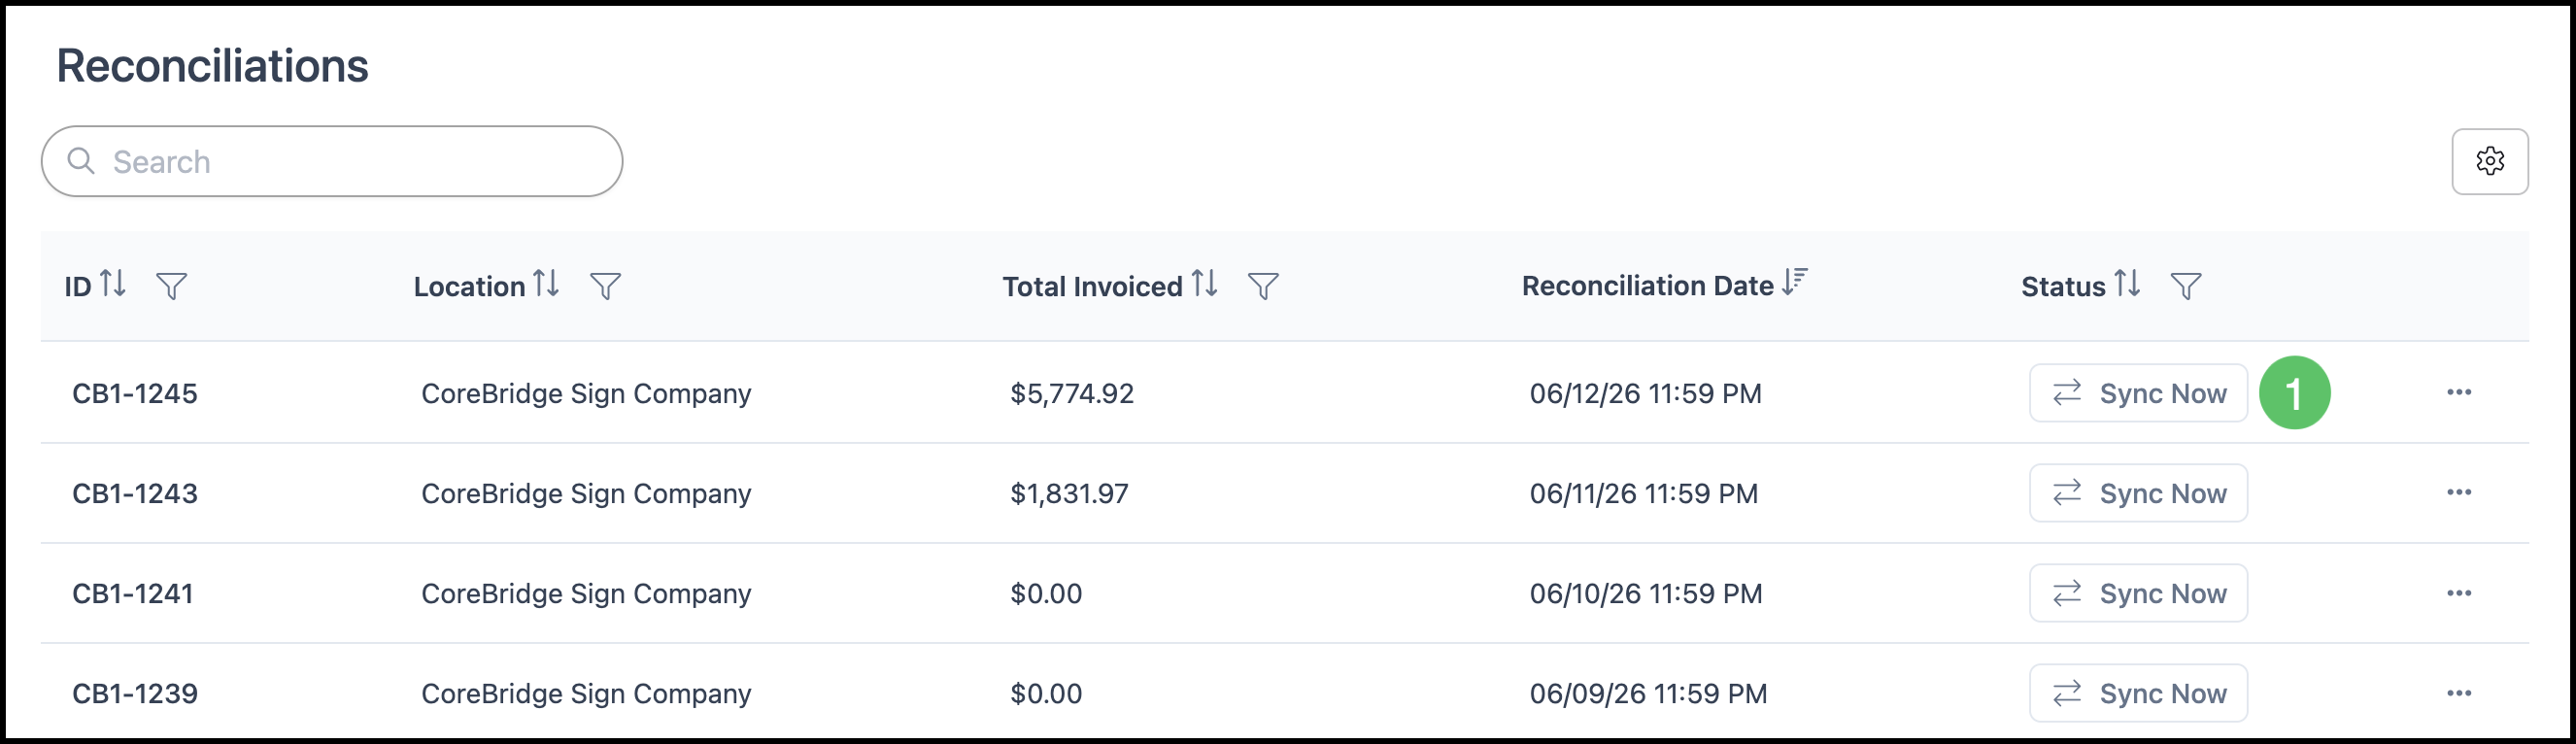
You can sync a reconciliation directly from the Reconciliations list without opening the detail view.
Note: To sync manually, Manual must be selected in your integration settings. See step 6 in How to Integrate with Xero Detail Sync.
1. Select Sync Now in the Status column for the reconciliation you want to sync.
Manually Sync from the Reconciliation Detail View
You can also review a reconciliation in detail before syncing it to Xero.
1. Select the row of the reconciliation you want to view.
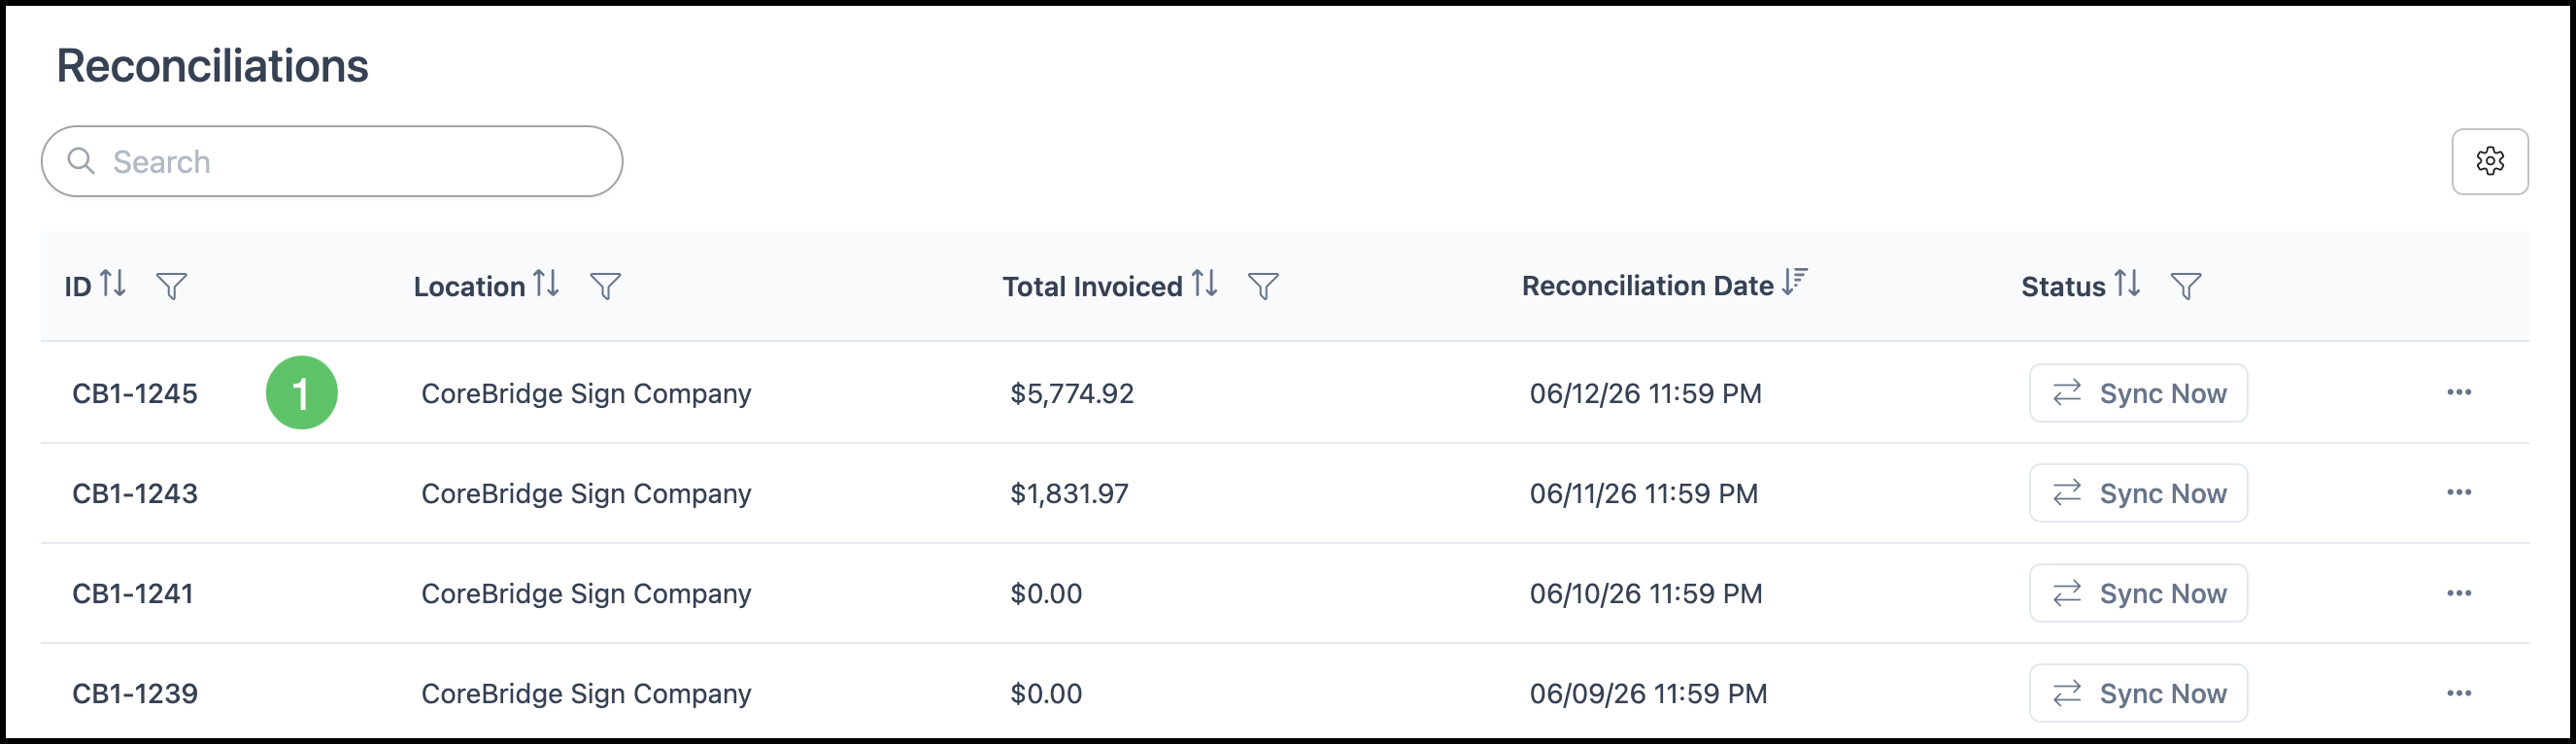
2. Select Sync Now in the top right corner of the detail view.
Note: The Sync Now option is available regardless of which tab you're viewing in the detail view.
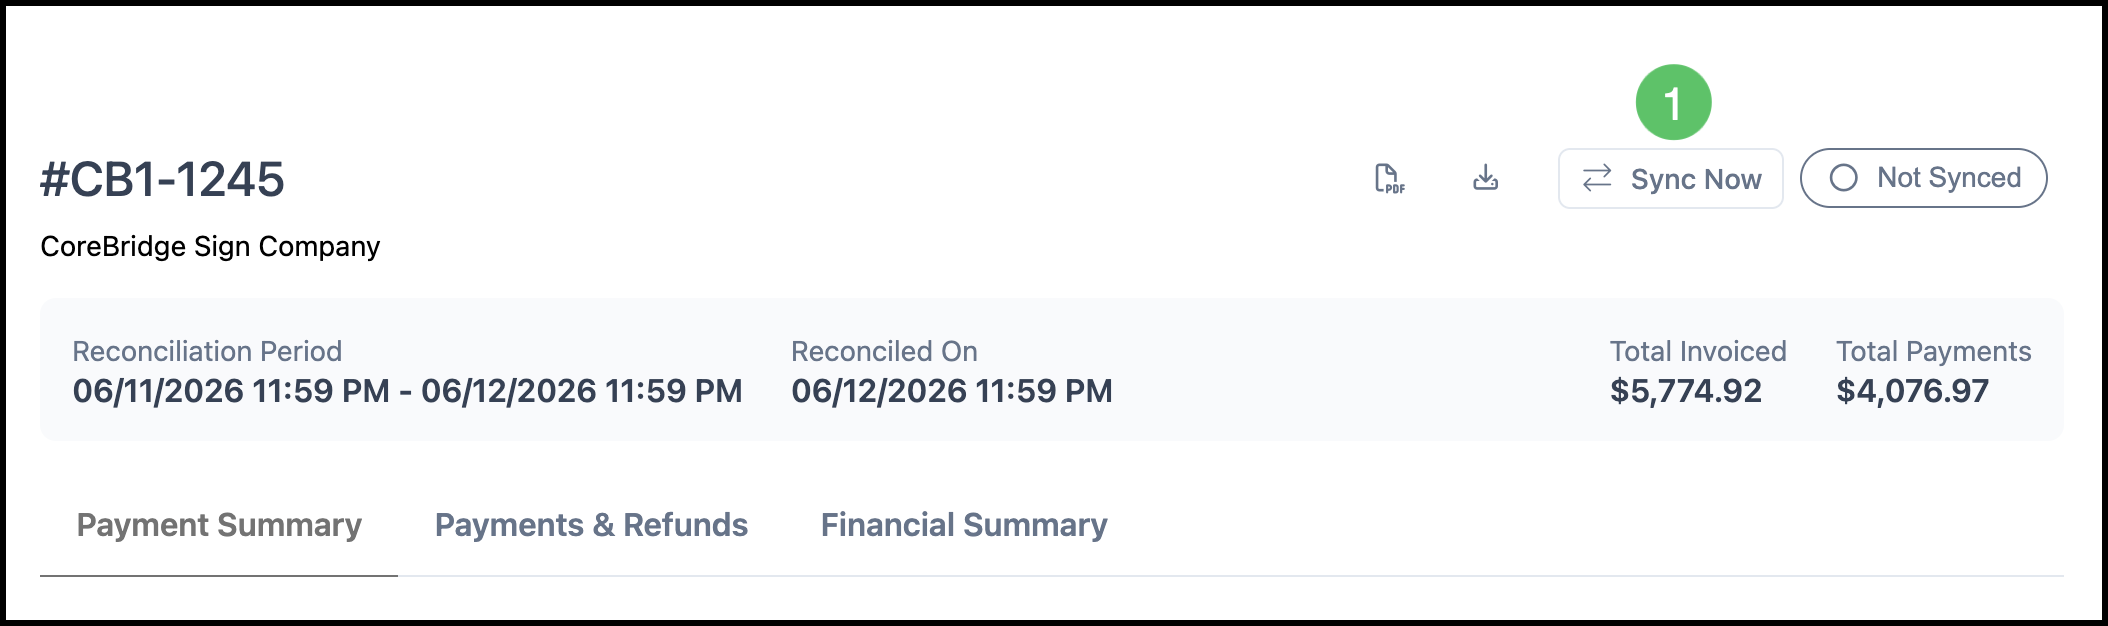
Reconciliation Detail Tabs
Use these tabs in the reconciliation detail view to review information before or after syncing.
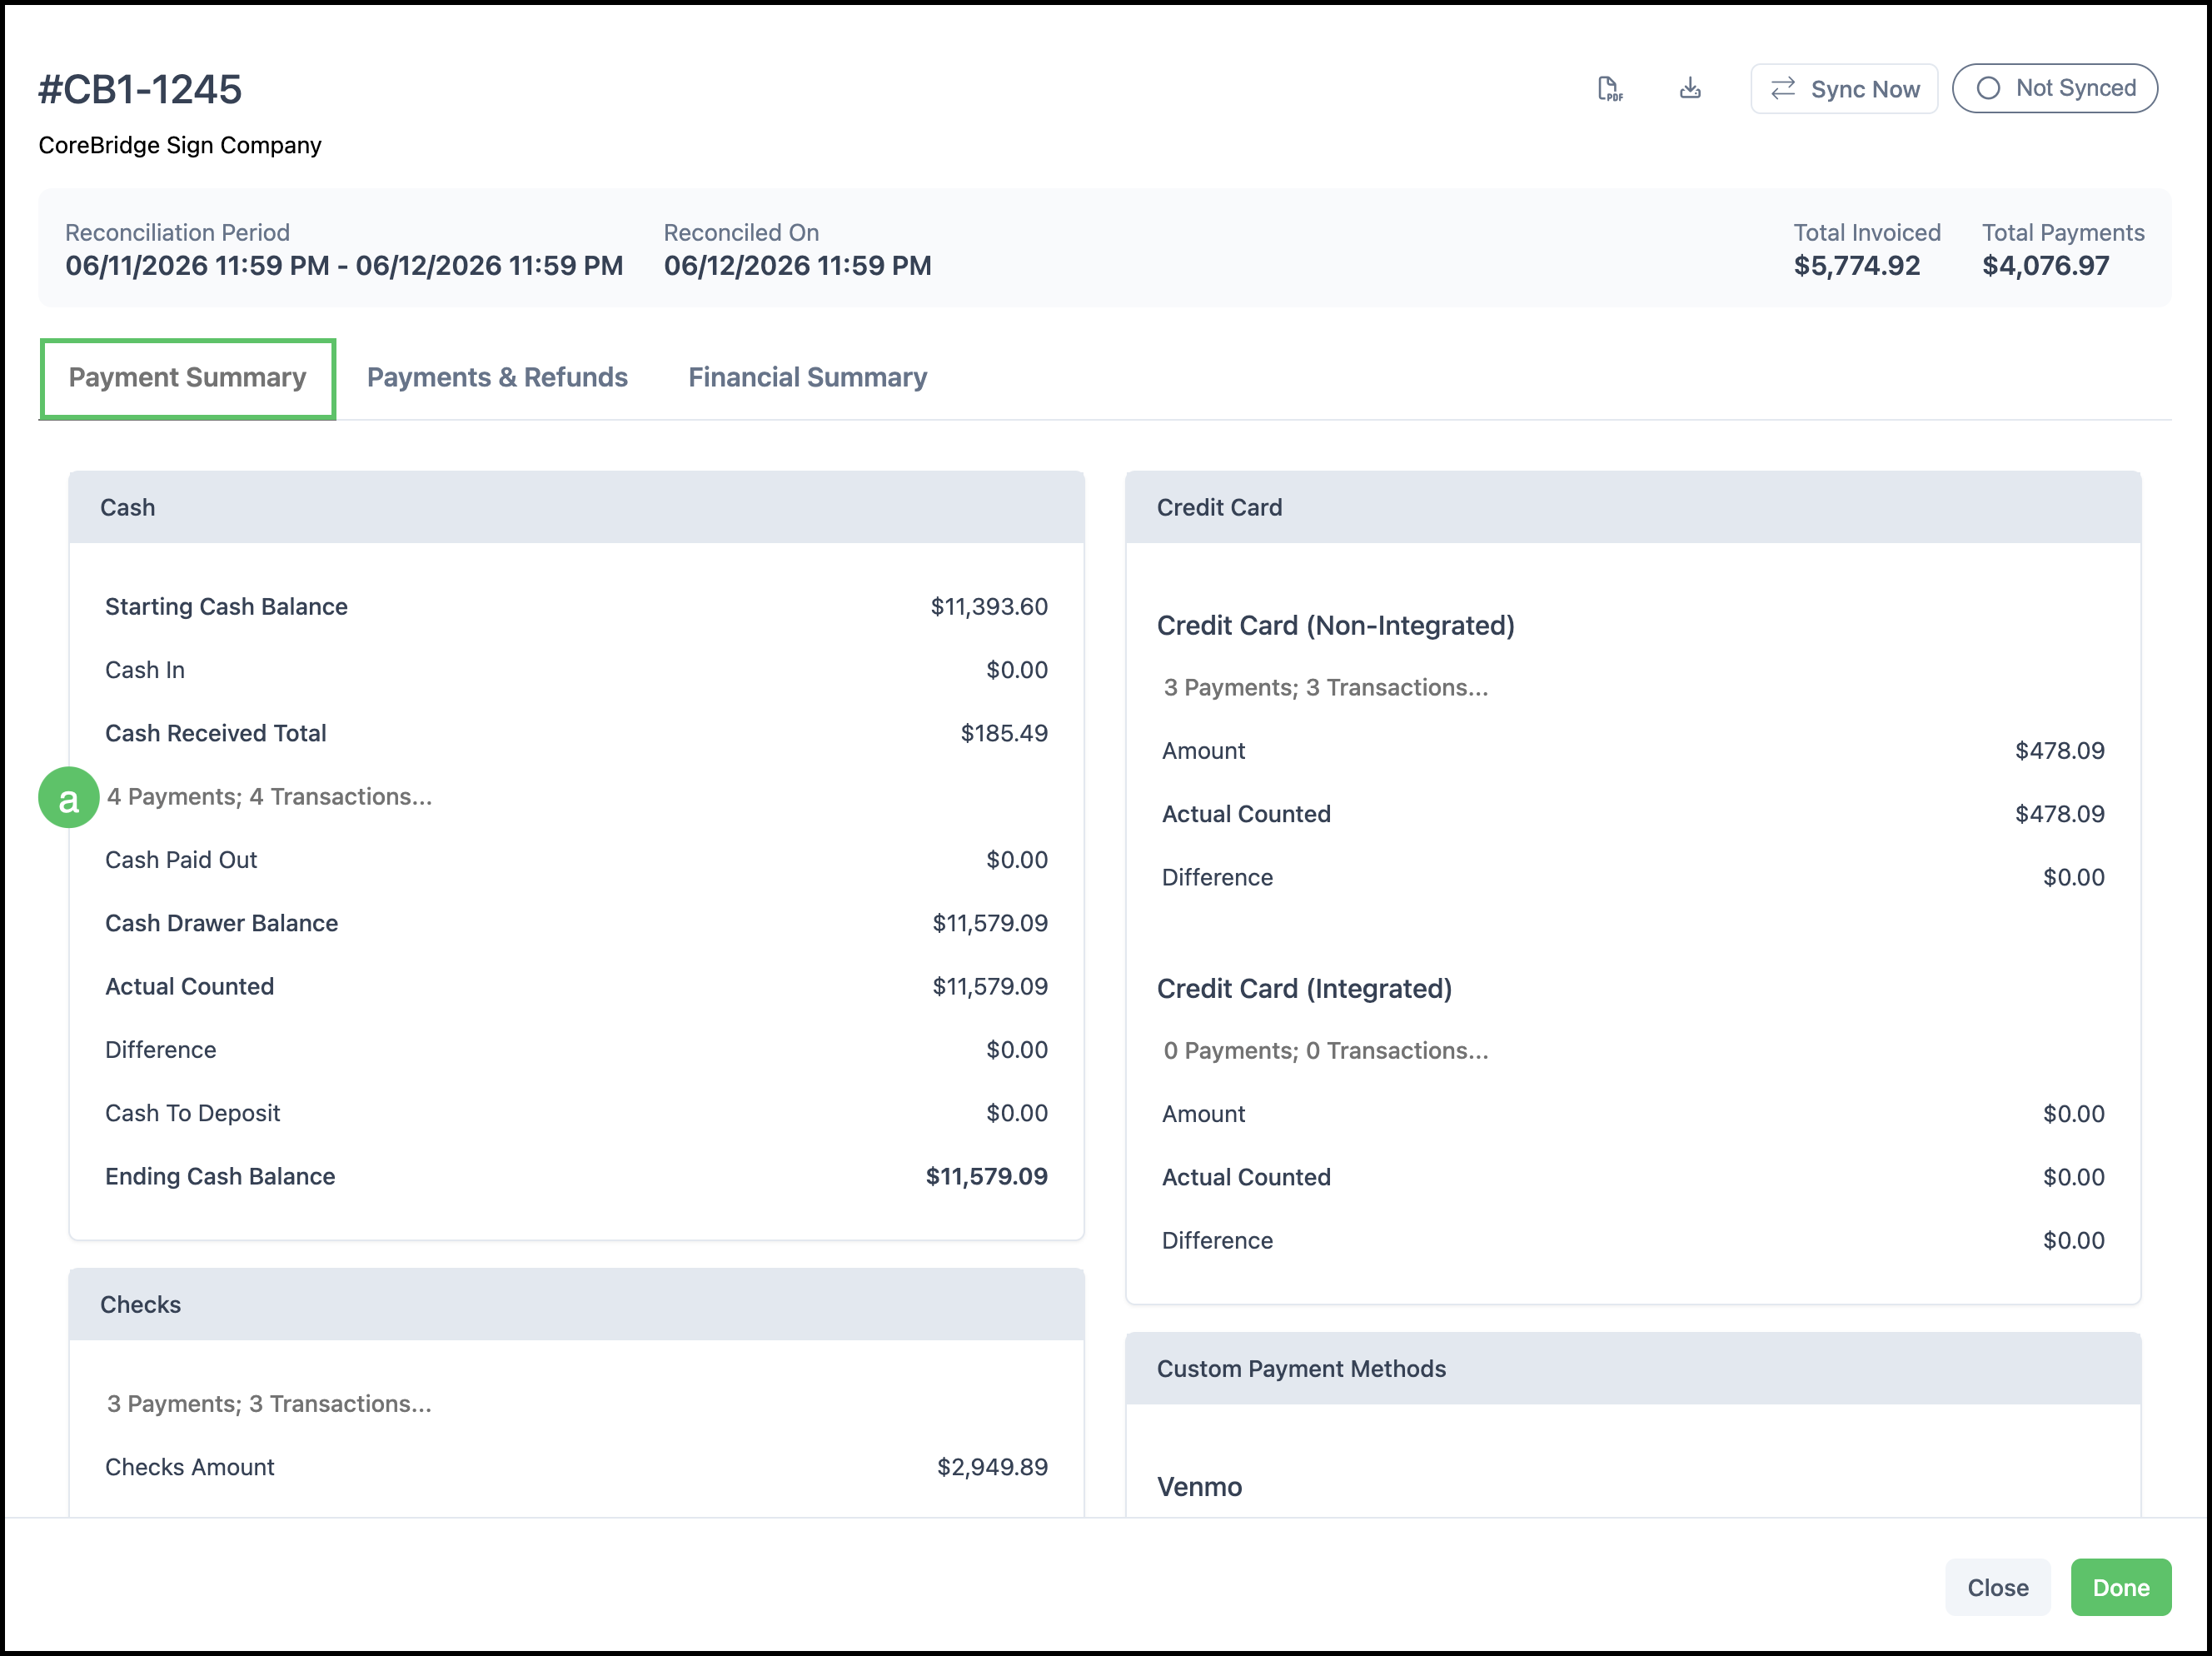
Payment Summary tab:
a. Clicking on any of the Payment;Transactions hyperlinks will open a new modal with more detailed information.
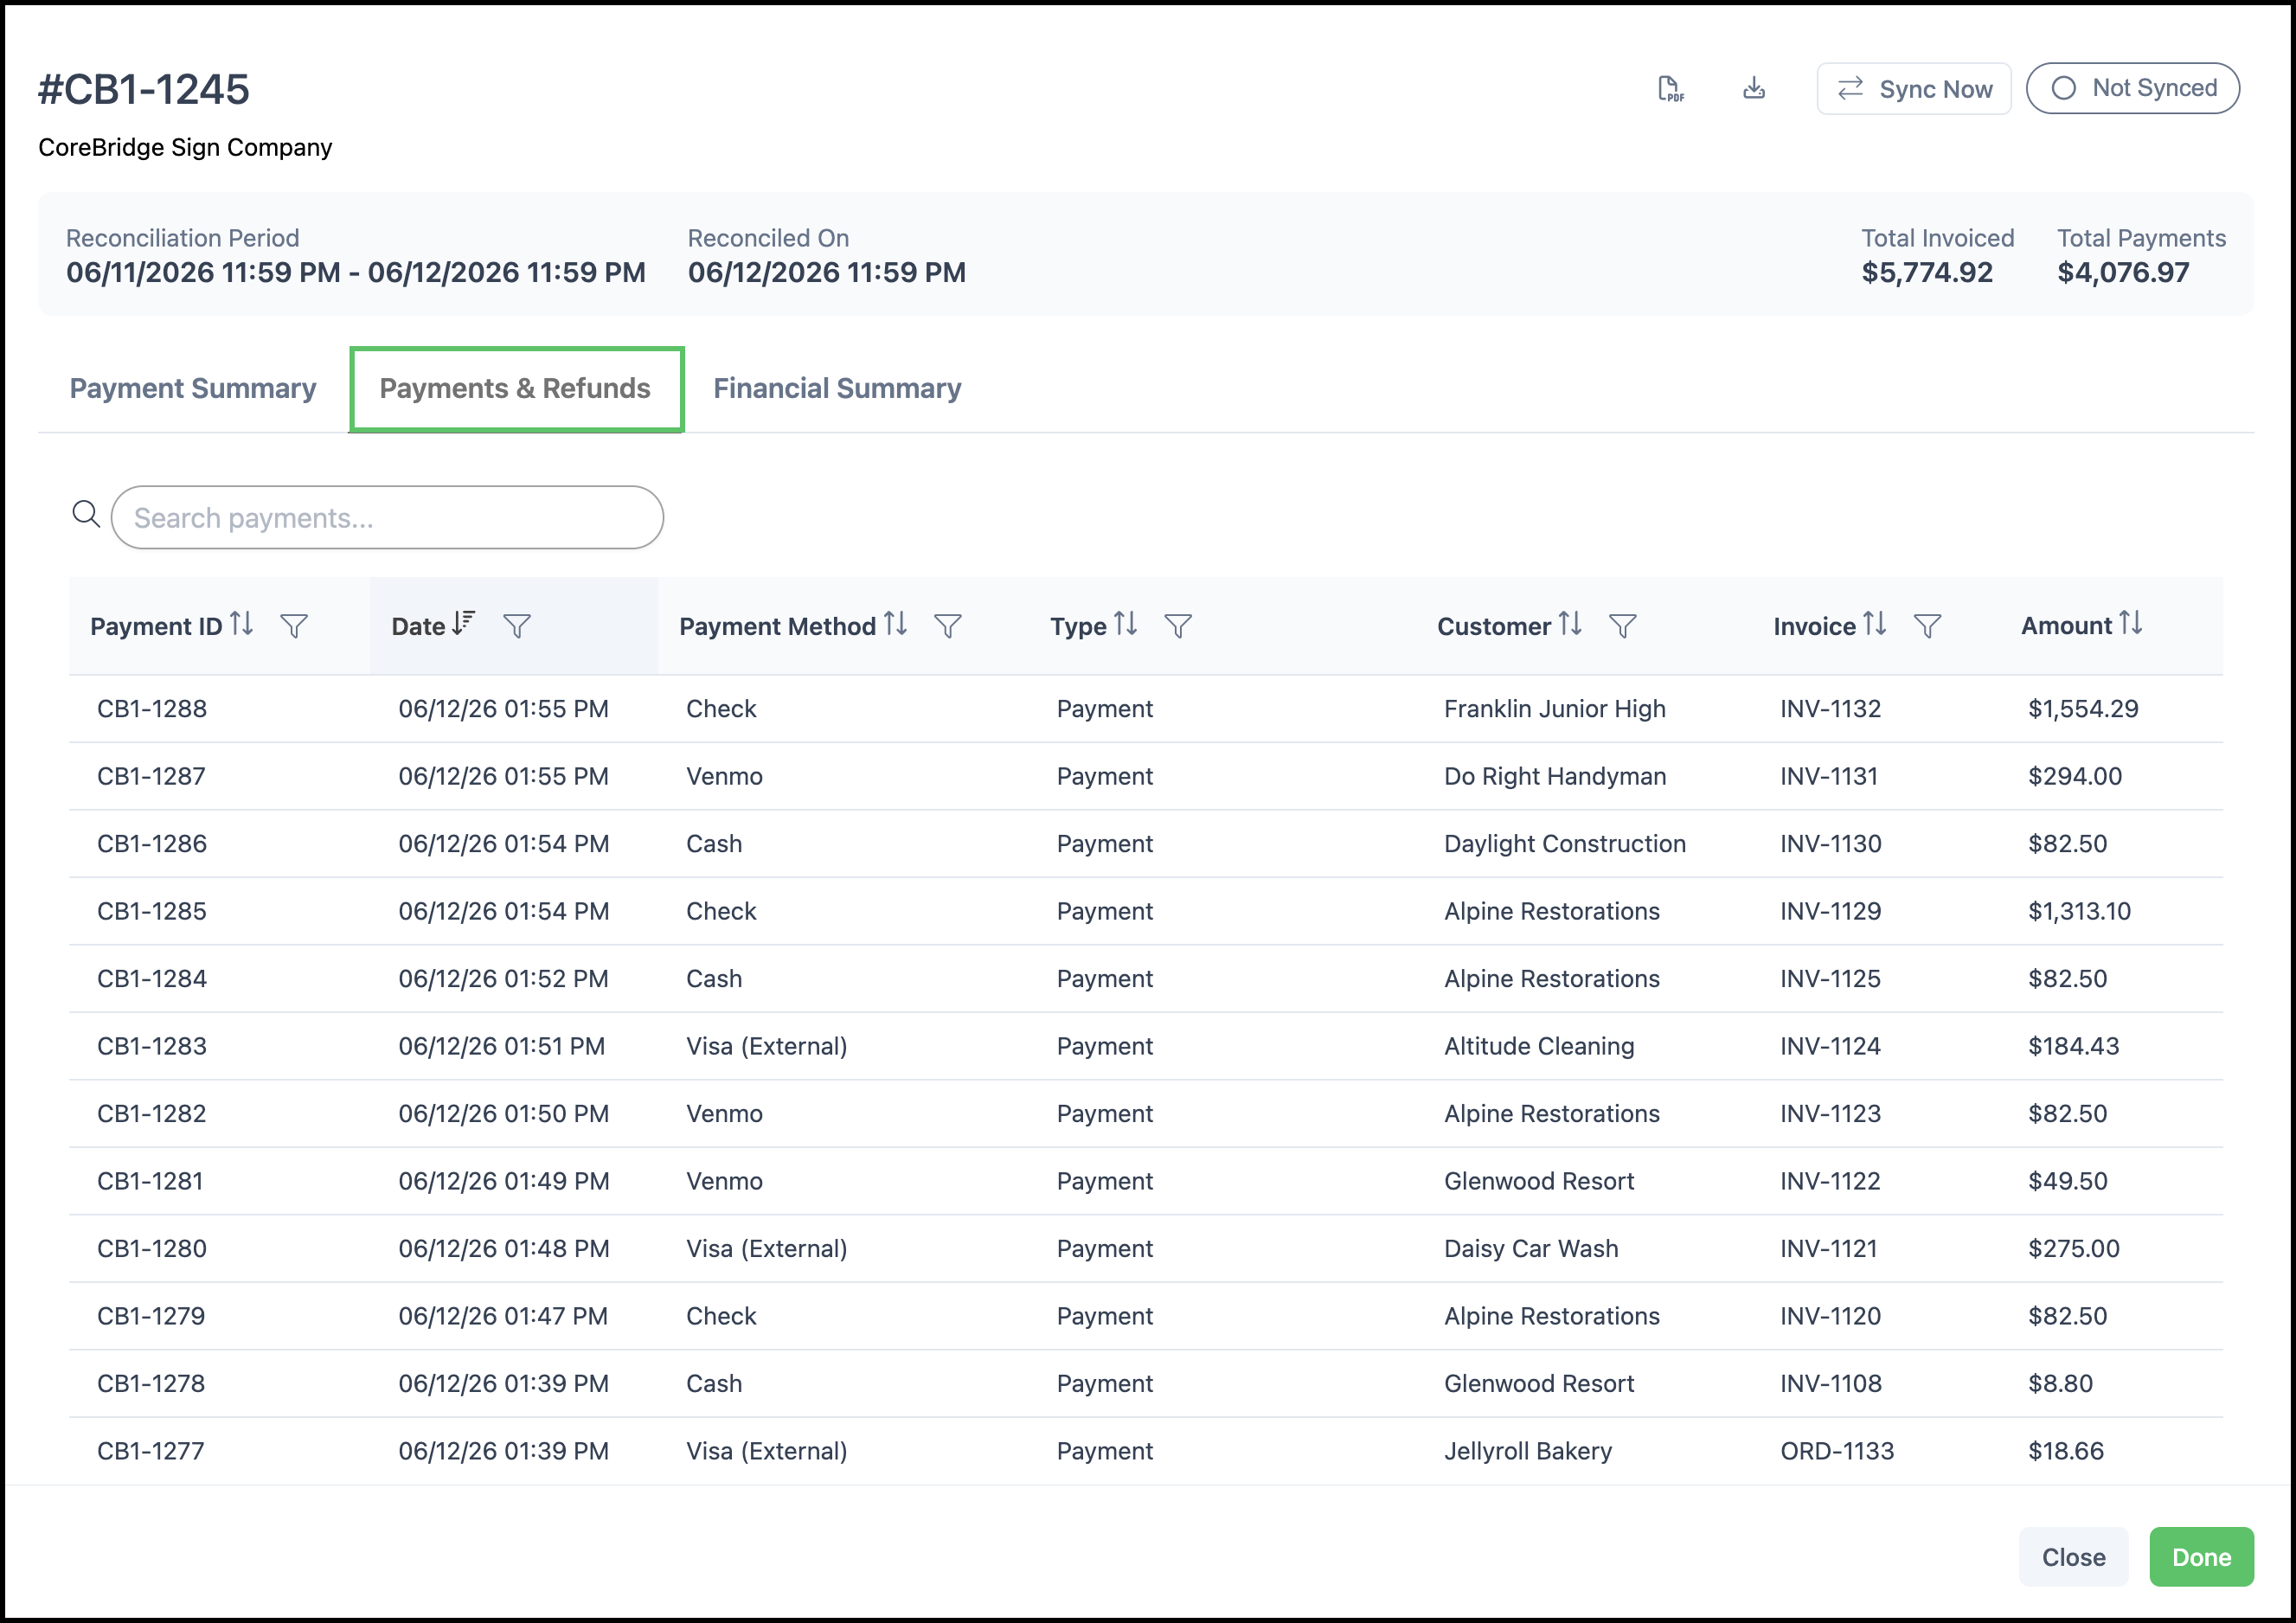
Payment and Refunds tab:
Overview of all Payments and Refunds during the reconciliation period.
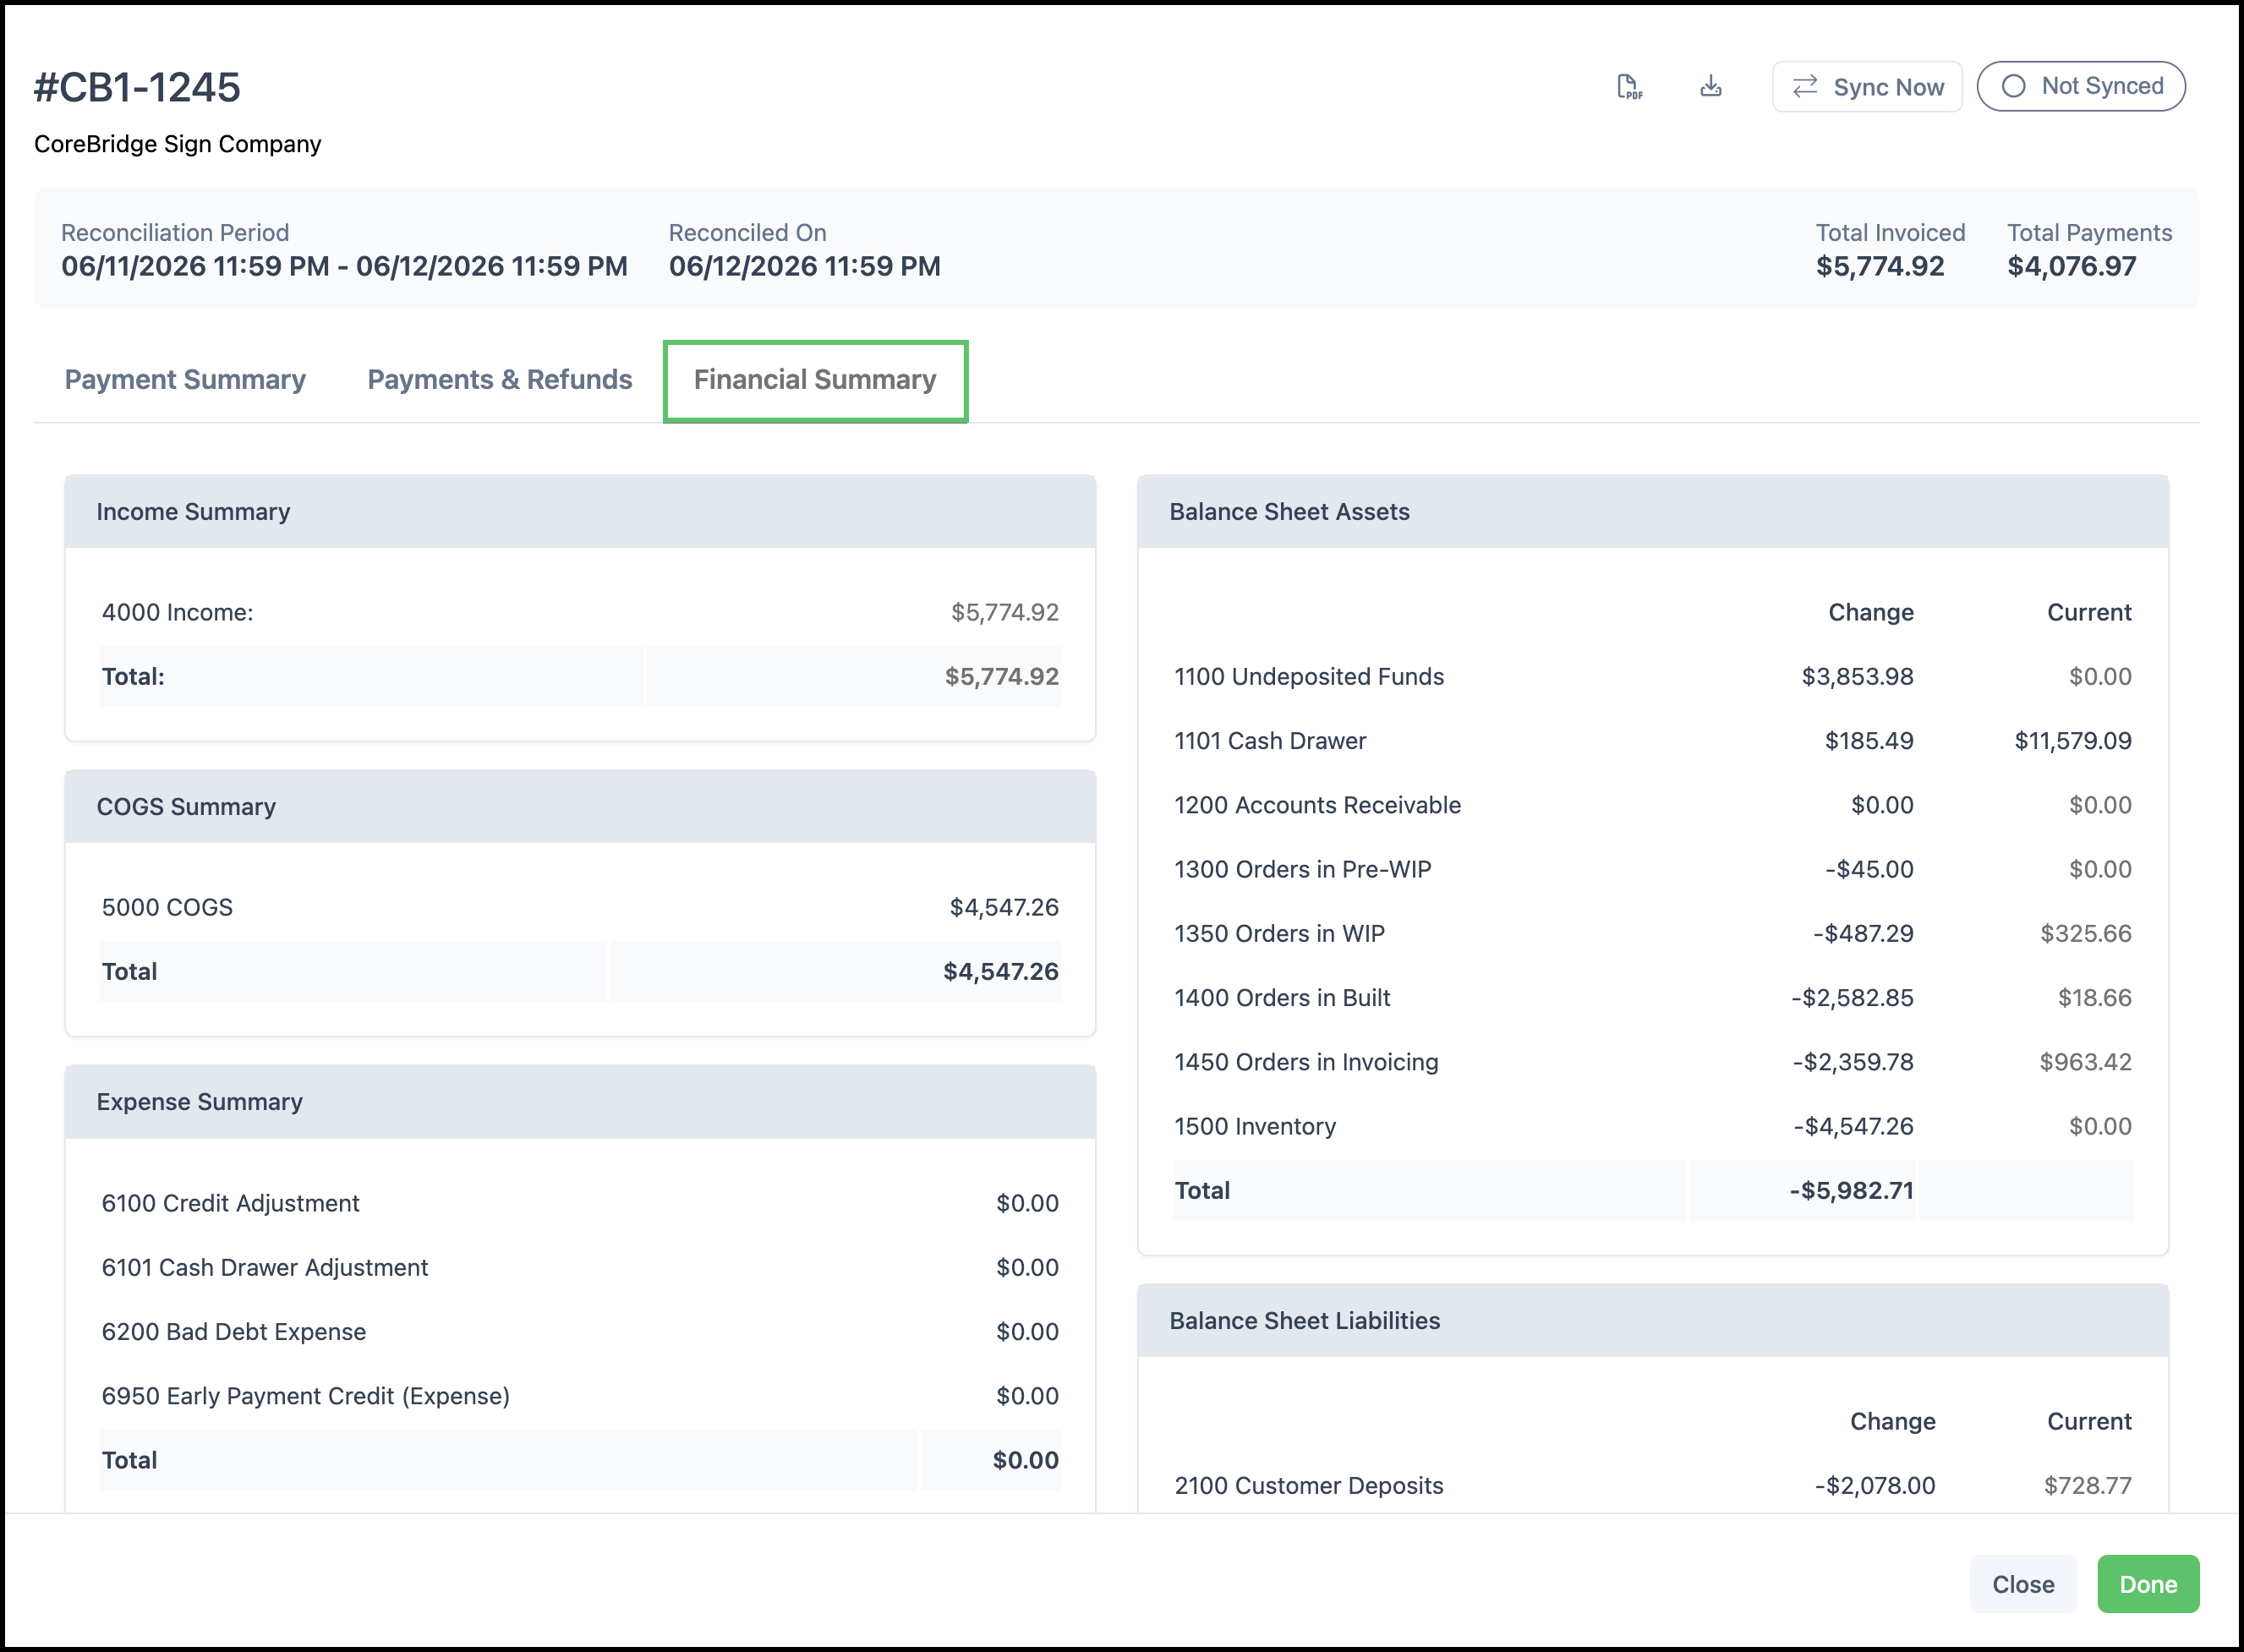
Financial Summary tab:
Overview of money coming in and going out for the reconciliation period.
Note: When a reconciliation syncs successfully with Xero Summary Sync, the Status shows as Synced. If there's an issue with the sync, the Status shows as Not Synced so you can review and resync.
Related Articles
Automatic Reconciliation and Sync
CoreBridge's Supported Accounting Integrations