
Document Settings control the defaults for each printed and emailed document type, including Estimates, Invoices, Work Orders, and Purchase Orders. Each document type has three areas: Page, Layout, and Content. Changes apply to every document of that type this business prints.
Table of Contents
- Important Information
- Opening Document Settings
- Page
- Layout
- Content
- Frequently Asked Questions
- Related Articles
Important Information
- Document Settings are separate from the individual document templates you manage in Documents. Changes here apply to every document of that type. To create or edit an individual template, use Documents. For more information, see Document Options.
- Each document type has three areas: Page (paper size, orientation, and text size), Layout (what appears on email, portal, and print), and Content (title, opening salutation, footer text, and other text).
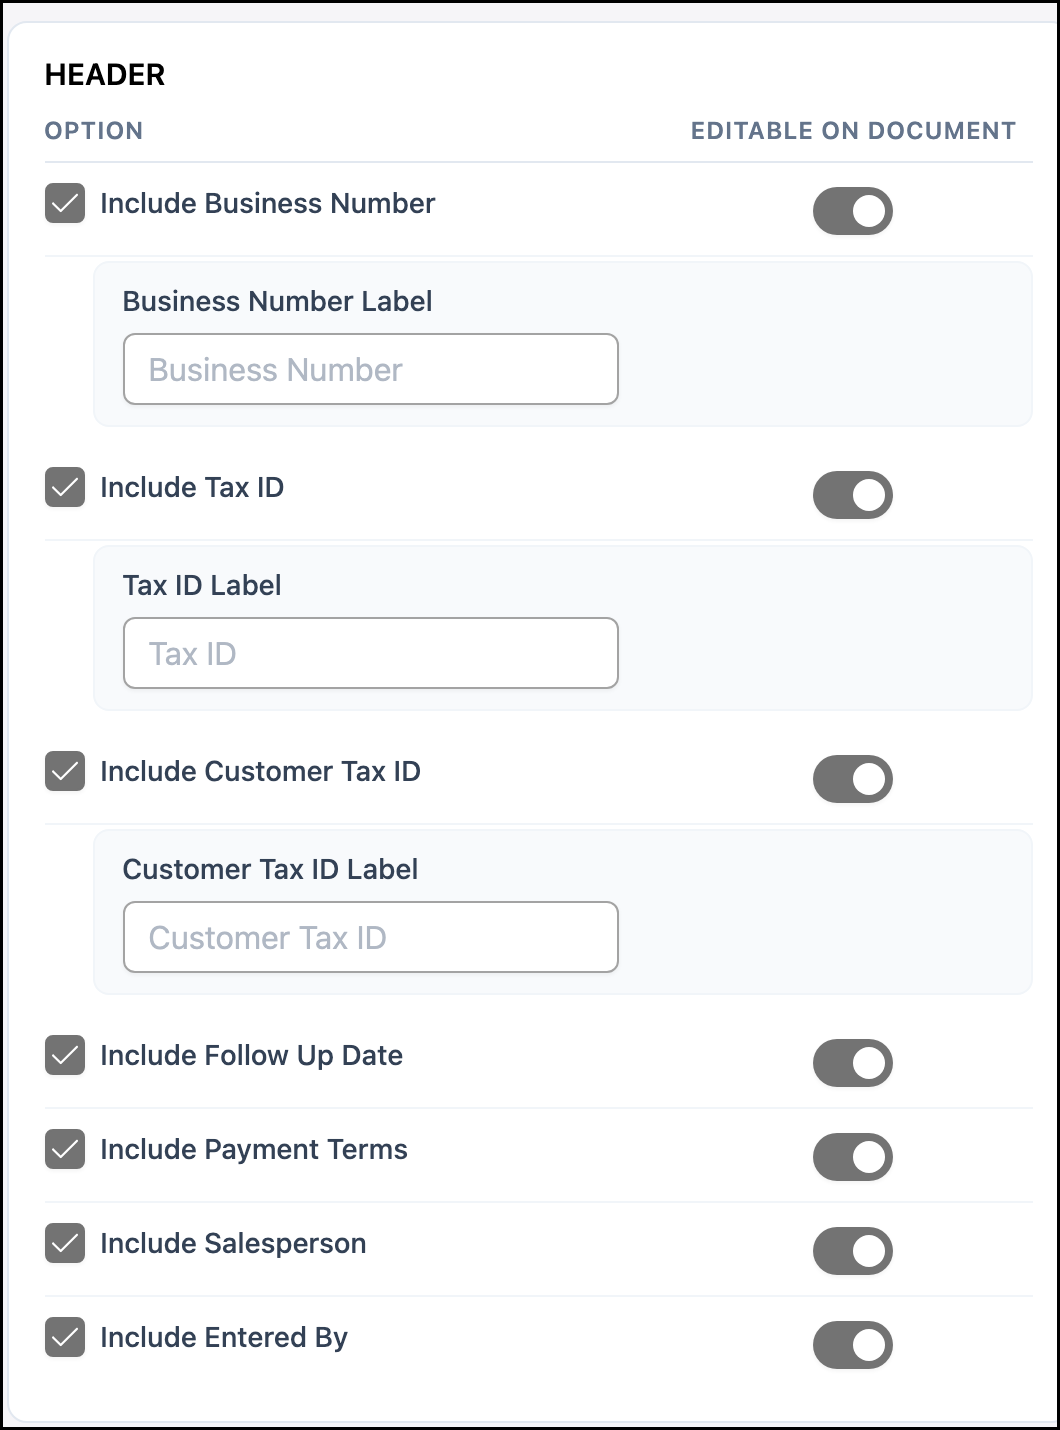
- Option - Check Include to turn an option on for this document type. Unchecking Include hides it everywhere and turns Editable on Document off.
- Editable on Document - When on, people can change this setting while preparing the document. When off, the value you set here is always used. This control is unavailable while Include is unchecked.
- Default - The value set here for this document type, used as the starting value on the document.
Opening Document Settings
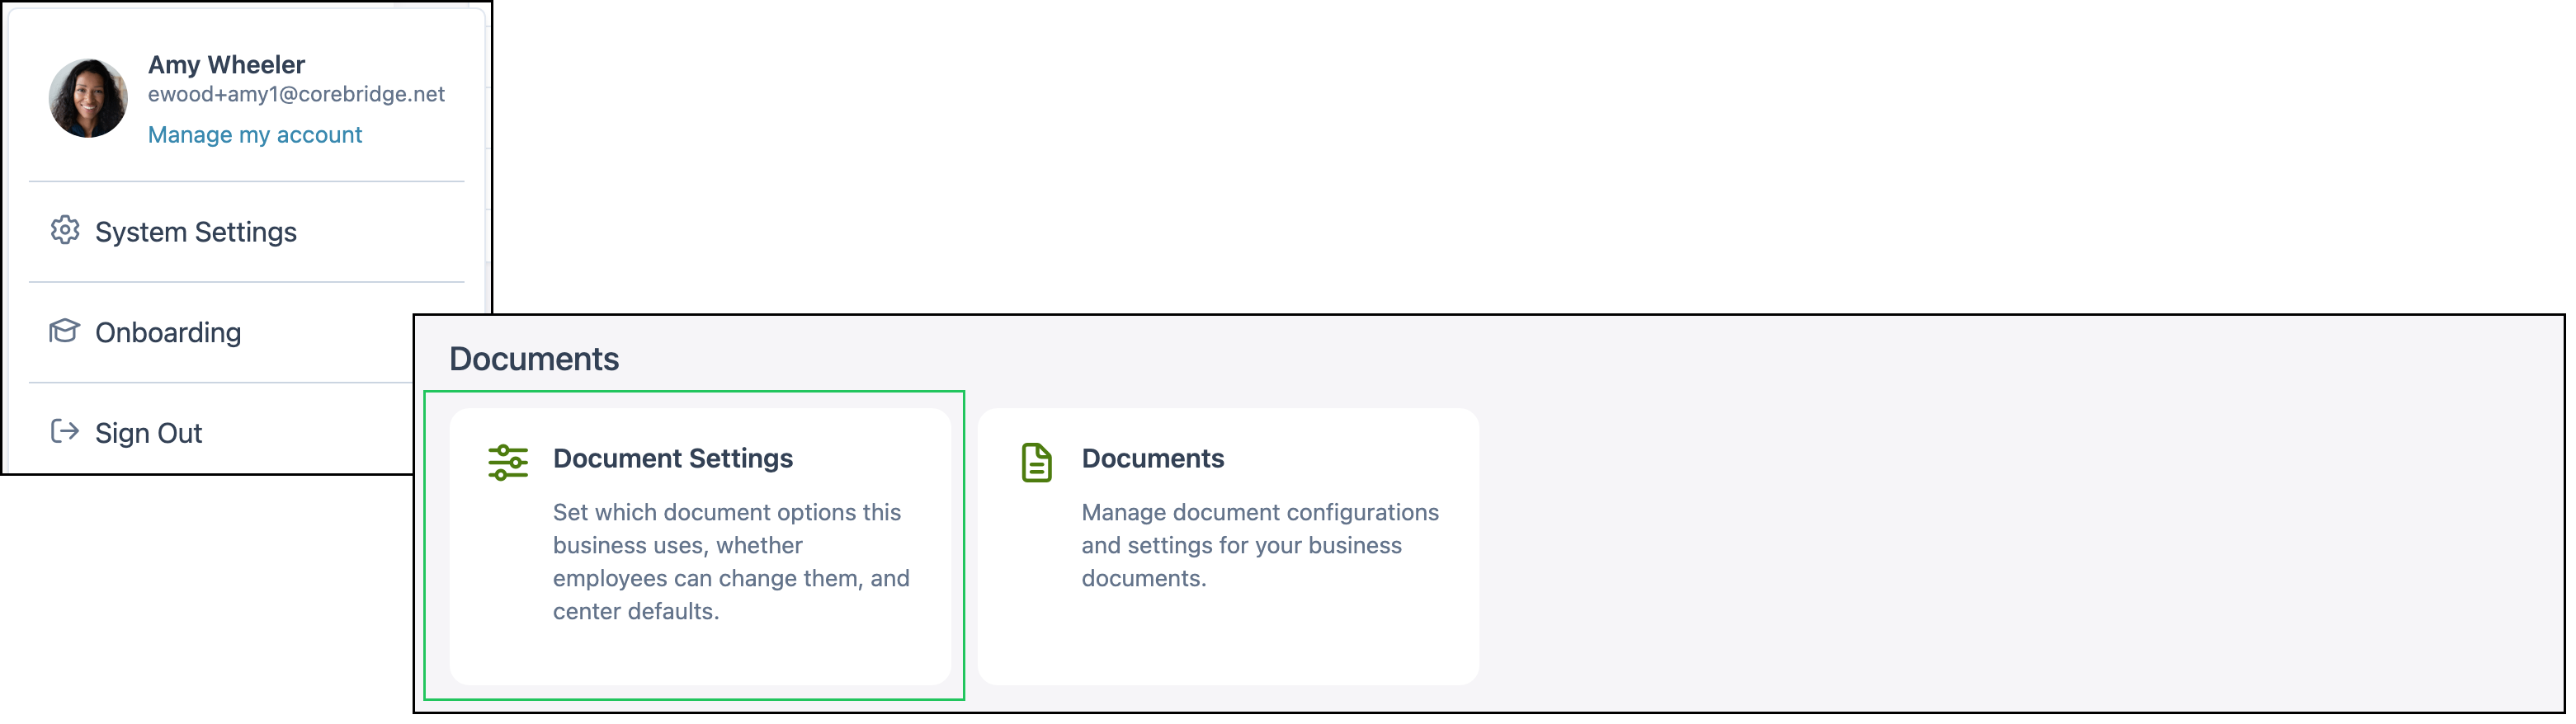
Navigate to System Settings / Document Settings.
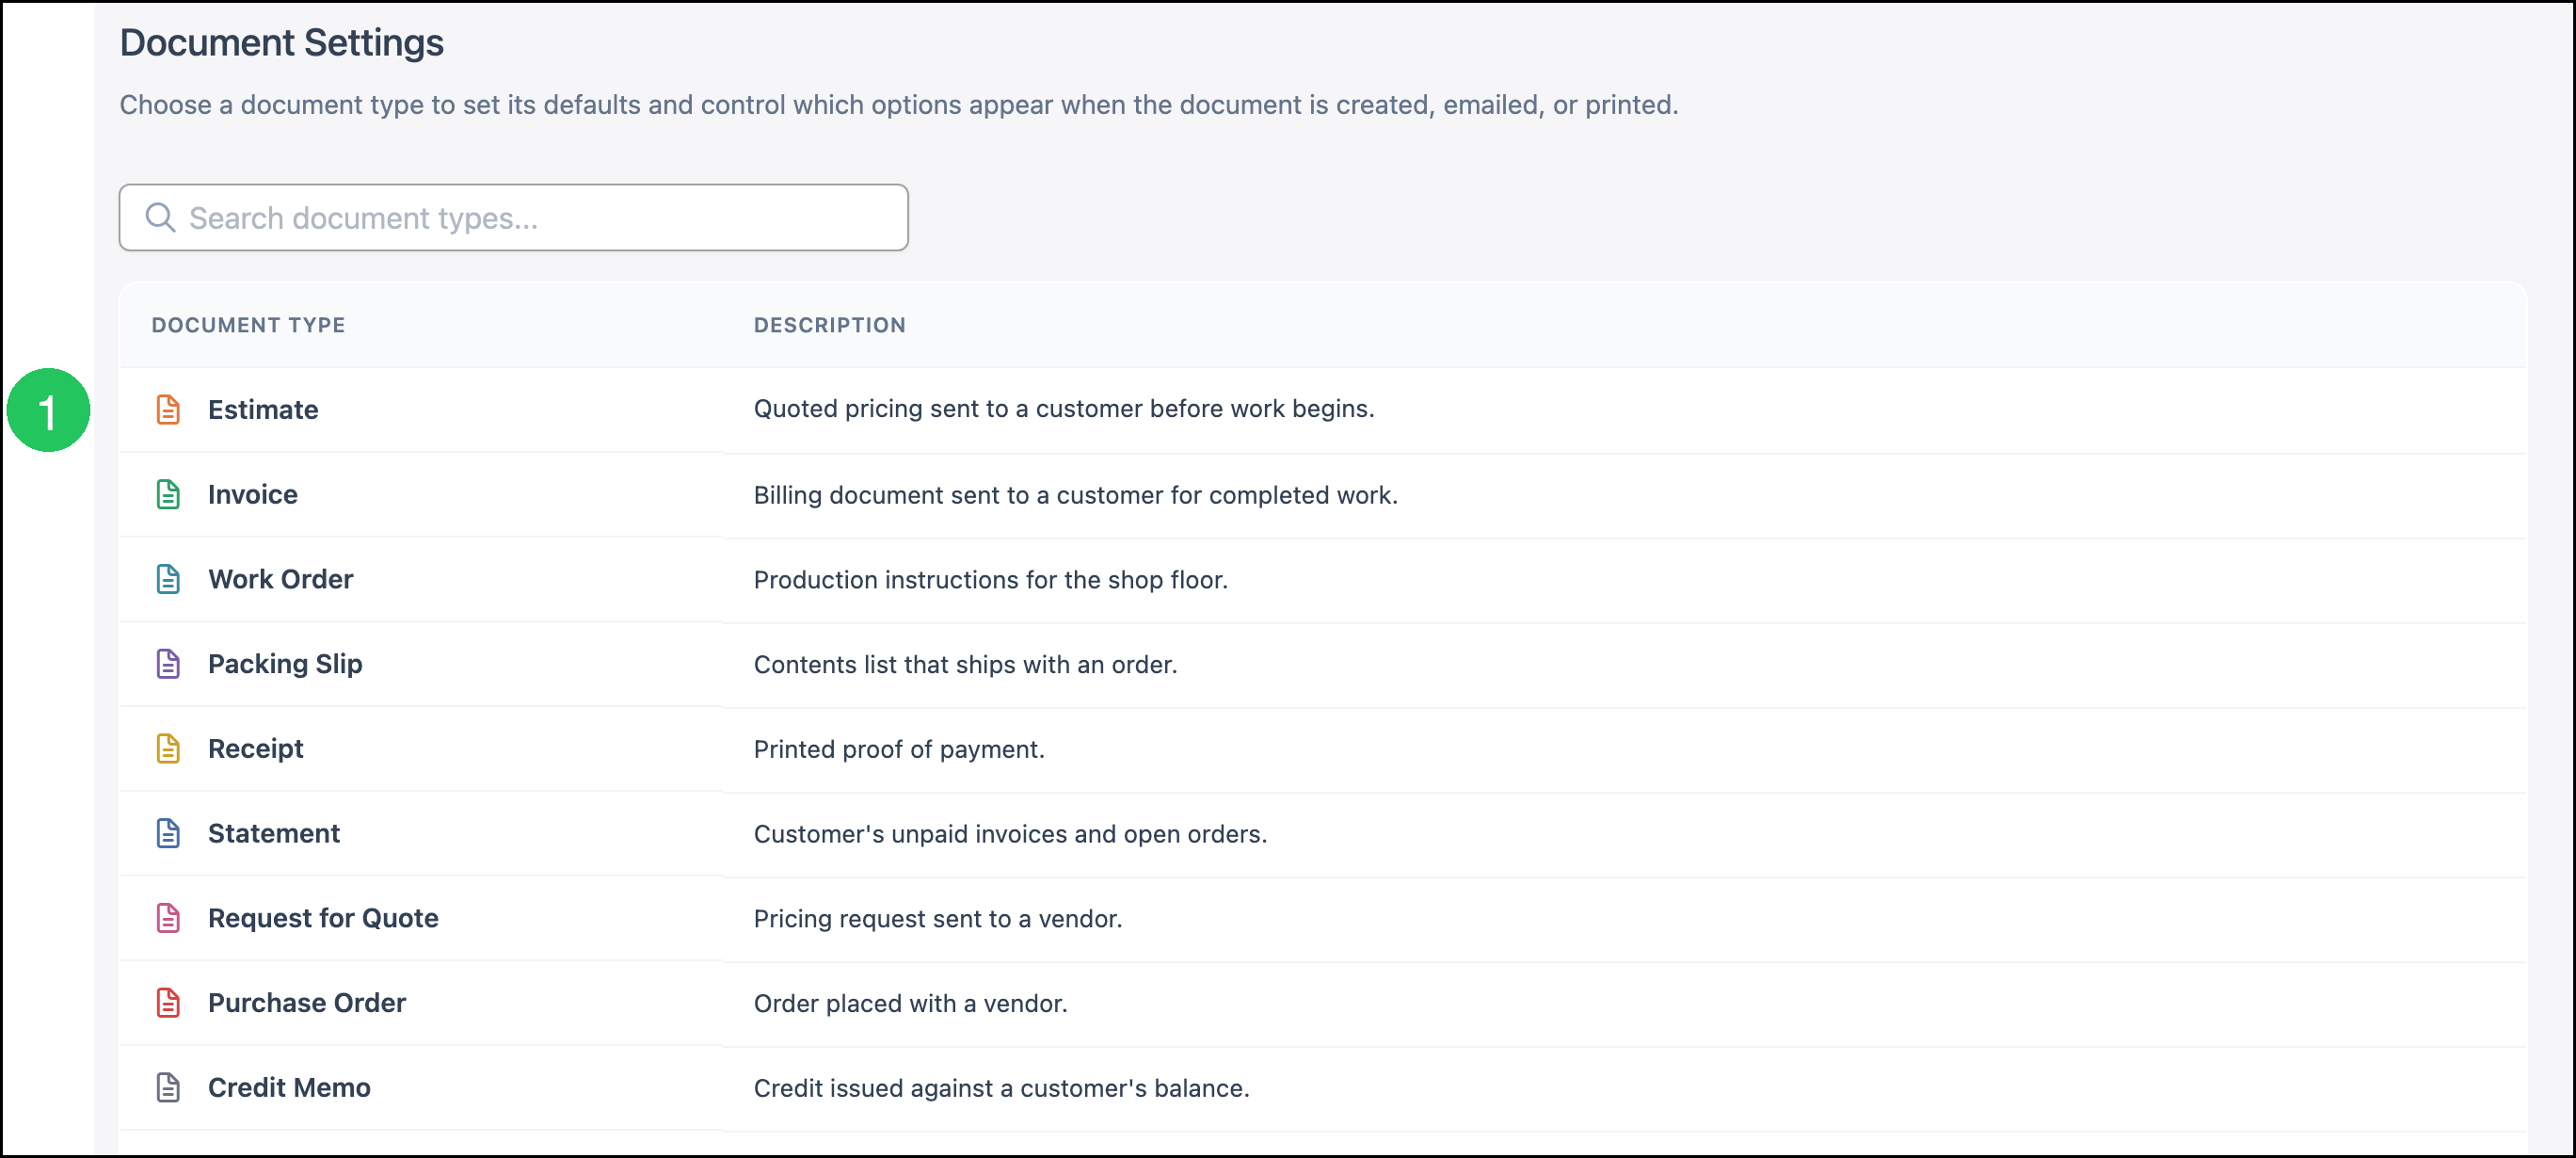
1. Click the document type you want to configure (for example, Estimate).
Note: Click Save to apply changes. Click Discard to revert unsaved changes.
Page
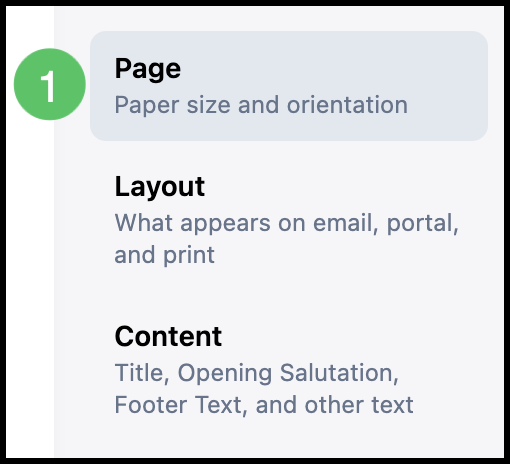
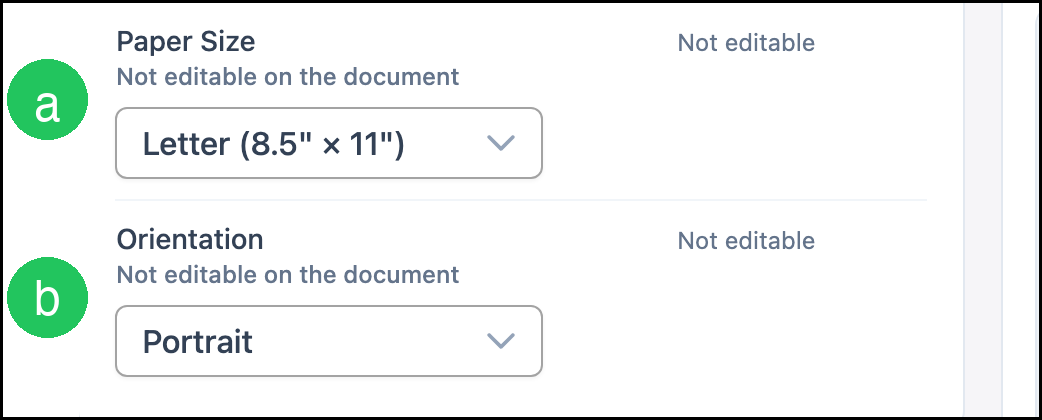
The Page tab sets the paper size, orientation, and text size for this document type. Paper size and orientation are not editable on the document.
1. Click the Page.
Note: This screen will automatically load onto the Page tab.
a. Paper Size - The paper size used when this document type is printed, such as Letter (8.5" × 11").
b. Orientation - Portrait or Landscape.
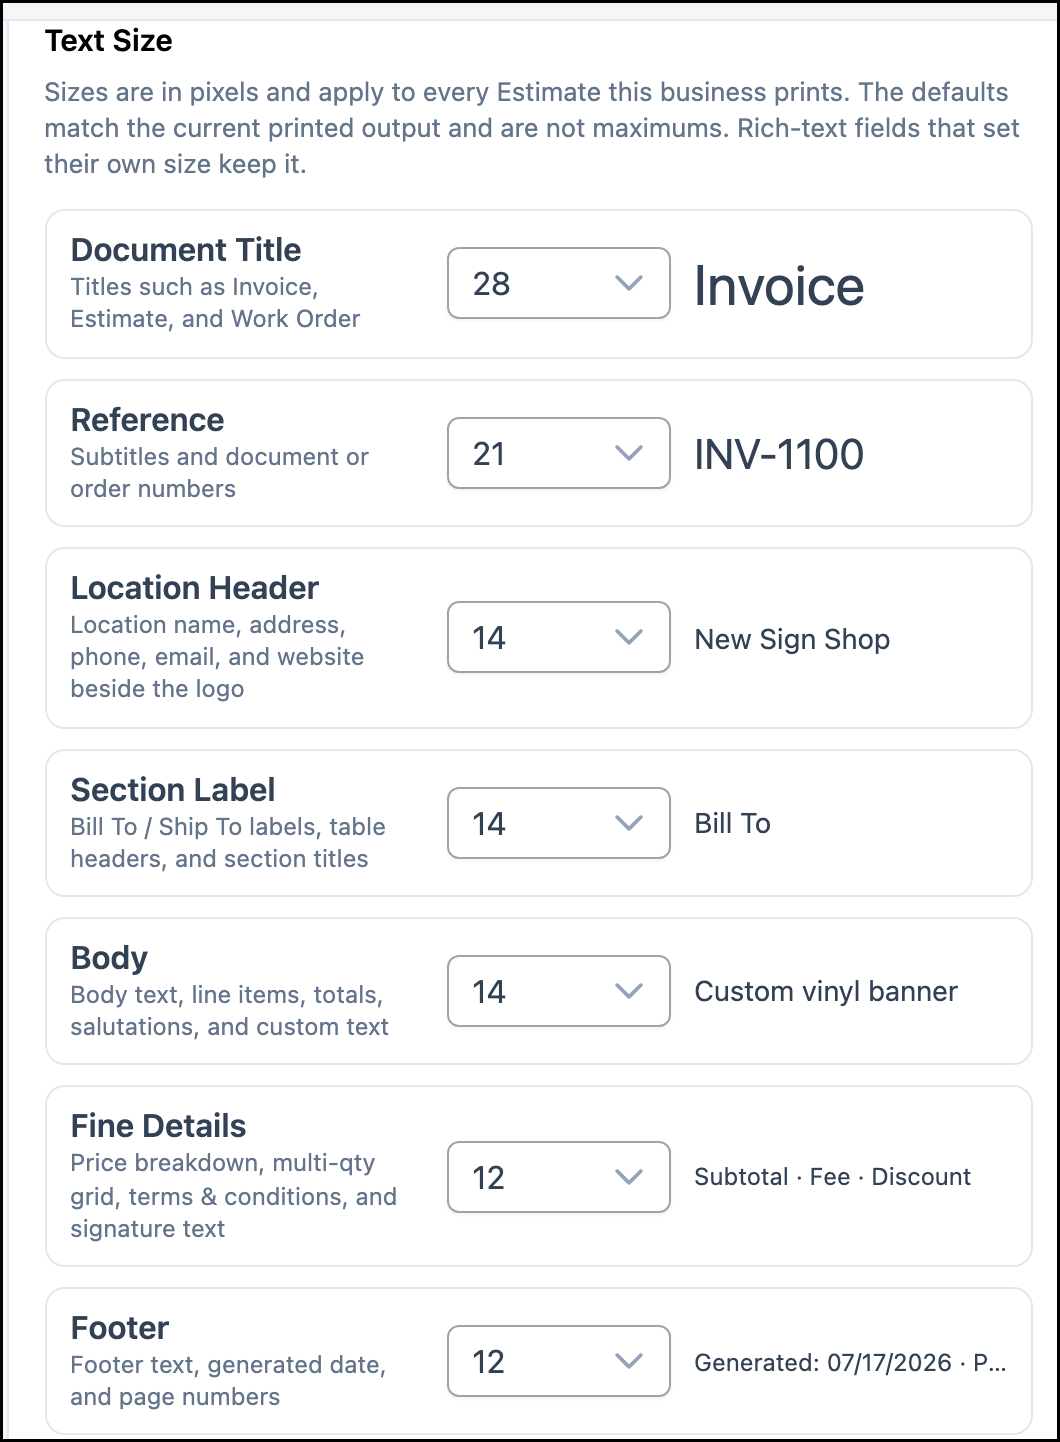
Text Size sets the pixel size for each role on the document, such as Document Title, Body, and Footer. Sizes apply to every document of this type this business prints. The defaults match the current printed output and are not maximums. Rich-text fields that set their own size keep it.
Layout
The Layout tab controls which information appears on email, portal, and print for this document type. Available groups and options vary by document type.
1. Click Layout.
On Estimates, Layout options are grouped under Header, Line Items, Payments & Totals, and End of Document. Use Include to show an option and Editable on Document when people may change it while preparing the document. This example shows the Header group.
Content
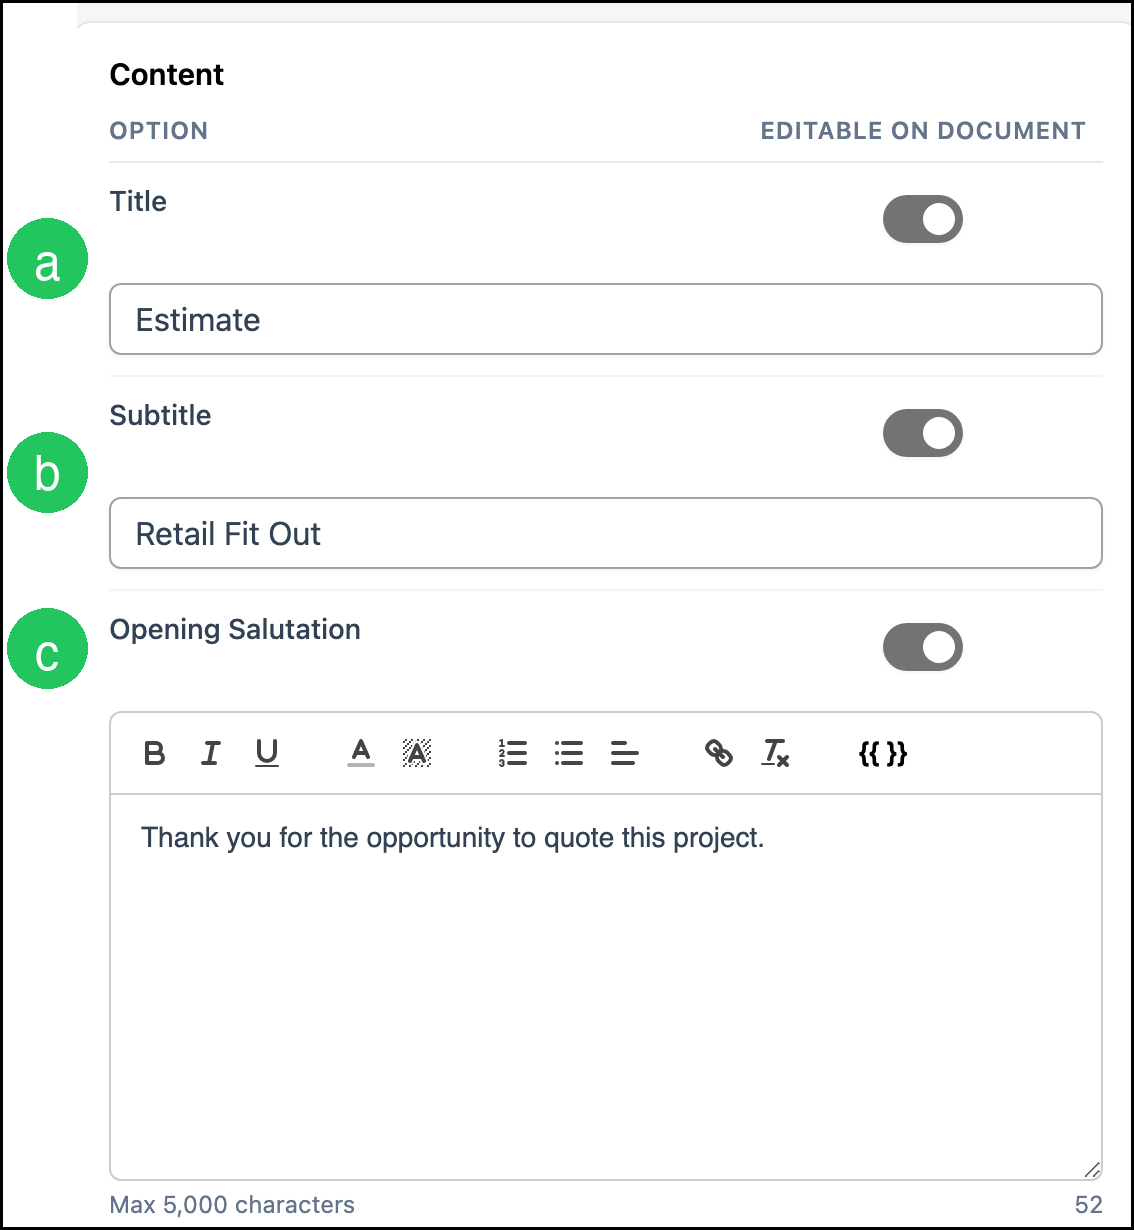
The Content tab sets title and other text that prints on documents of this type. Each field can also be marked Editable on Document.
1. Click Content.
a. Title
b. Subtitle
c. Opening Salutation - Up to 5,000 characters.
Note: The same tab also includes Custom Text 1, Custom Text 2, and Footer Text (up to 100 characters).
Frequently Asked Questions
1. How do I print line descriptions on Purchase Orders?
Answer: Open Purchase Order in Document Settings. On the Layout tab, select Include Description so each line's Description prints under the Item Name. Click Save.
2. Do Text Size changes apply to one printed document or every document of that type?
Answer: They apply to every document of that type this business prints.
3. What happens to rich-text fields that set their own size?
Answer: Those fields keep the size set in the rich-text editor.
4. Where do I change an individual document template?
Answer: Open the template from Documents. For more information, see Document Options.