
After a Vendor is created, the Vendor screen is where you review contacts, files, purchase orders, and vendor items, and keep accounting details current. This article explains the areas of the Vendor screen and how to use them.
Note: For creating a Vendor, preferred Vendors, ratings, and required documents, see Creating Vendors and Managing Vendors.
Table of Contents
- Accessing a Vendor
- Vendor Heading
- Vendor Details
- Vendor Overview and Activity
- Purchase Orders
- Frequently Asked Questions
- Related Articles
Accessing a Vendor
Navigate to Purchasing / Vendors.
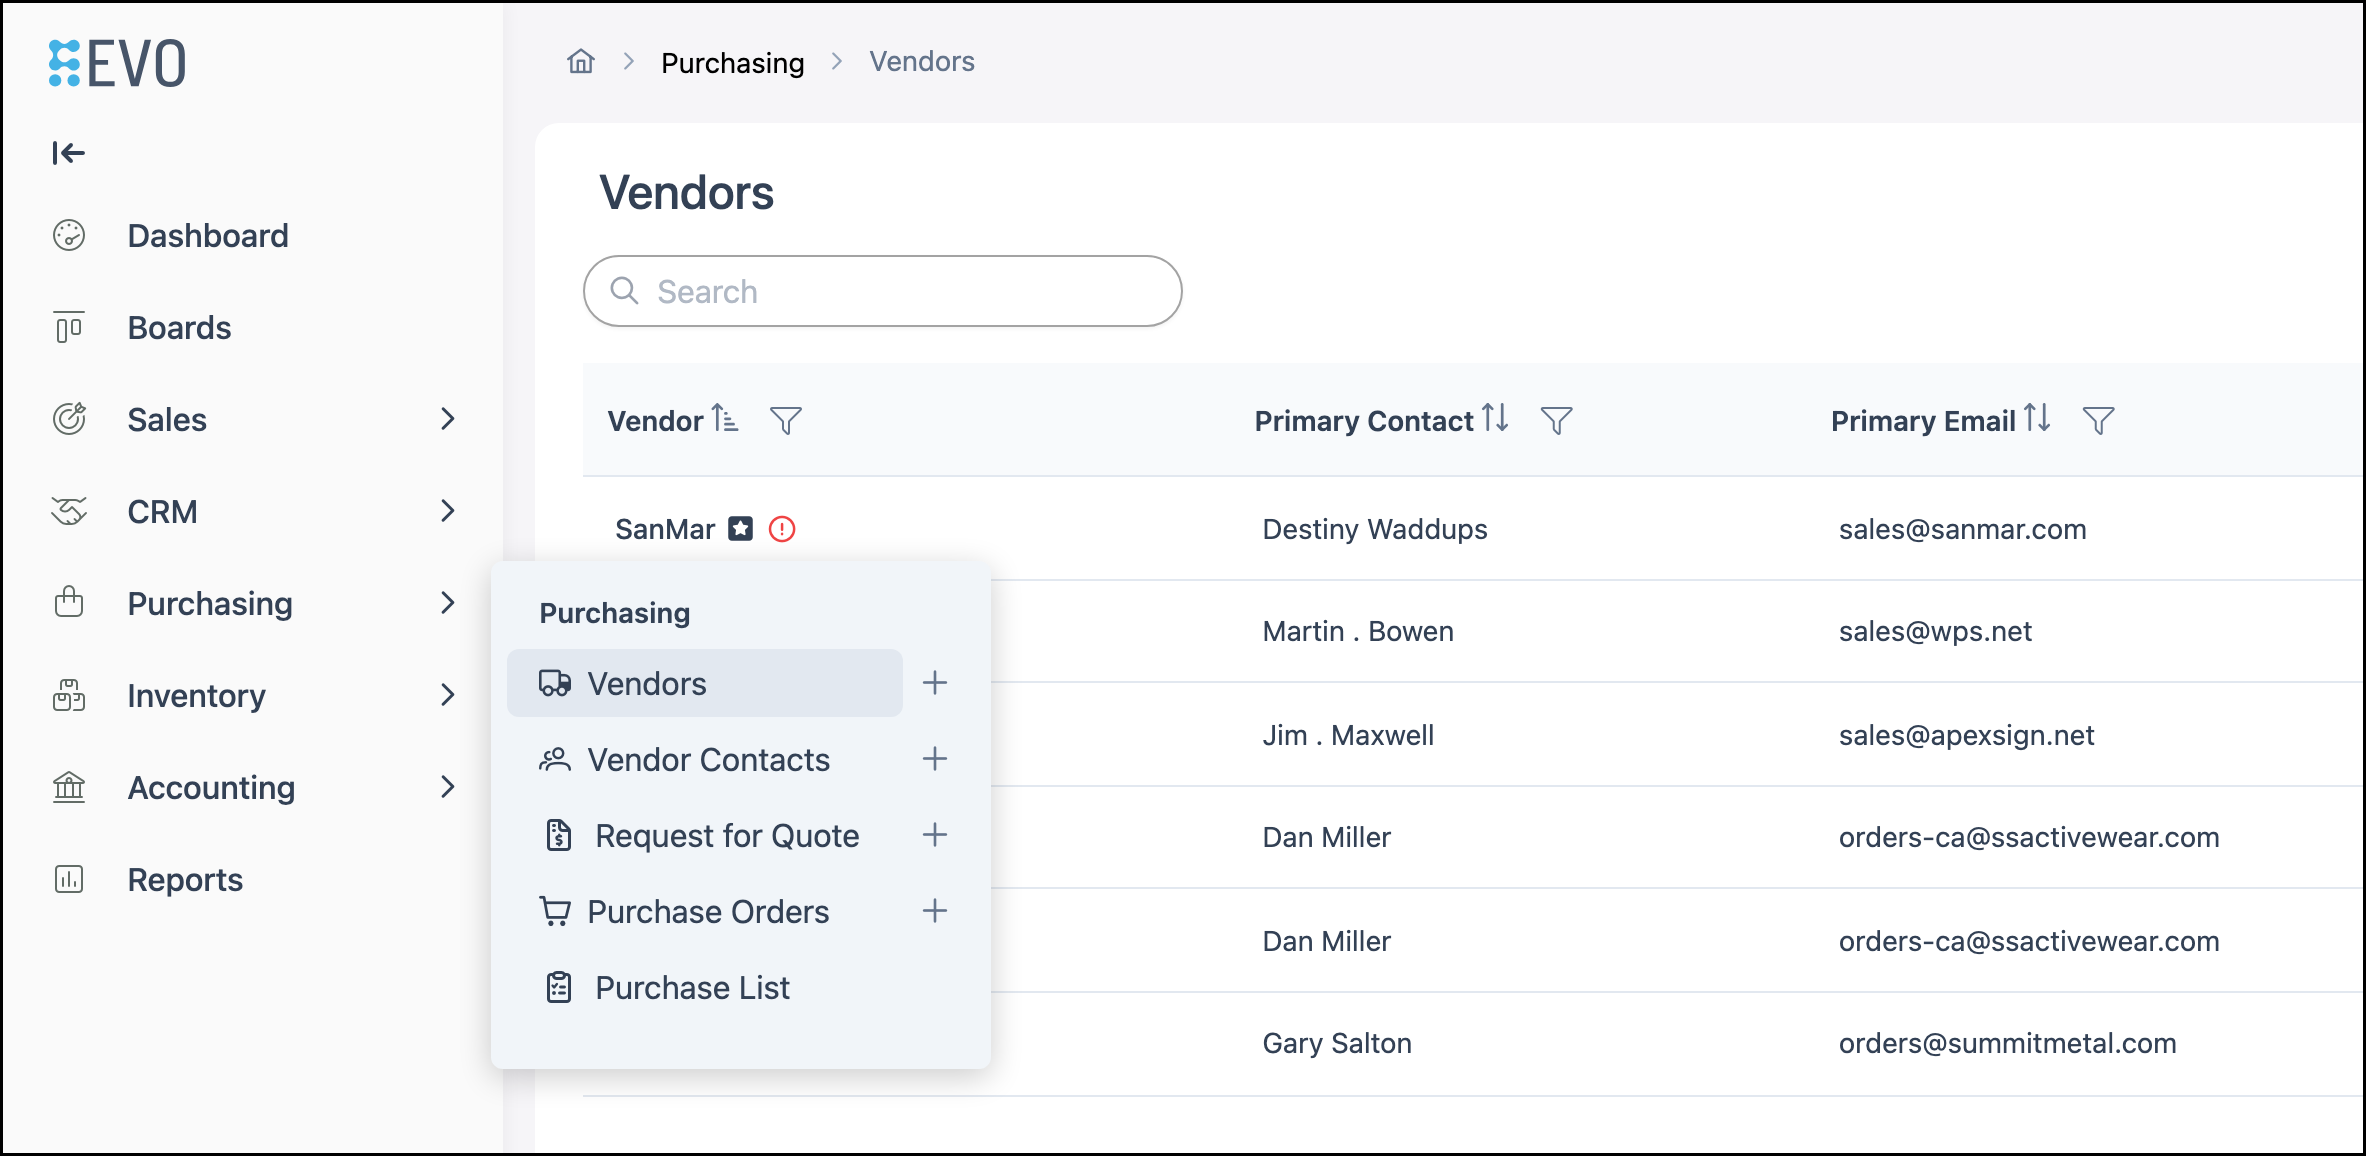
1. Select the Vendor you want to view from the list. Clicking the Vendor name opens the Vendor screen.
a. Use the Search box to find a Vendor by name or other criteria.
b. The + Vendor button opens the flow to create a new Vendor. For more information, see Creating Vendors.
c. Search Settings opens more options for the list.

Vendor Heading
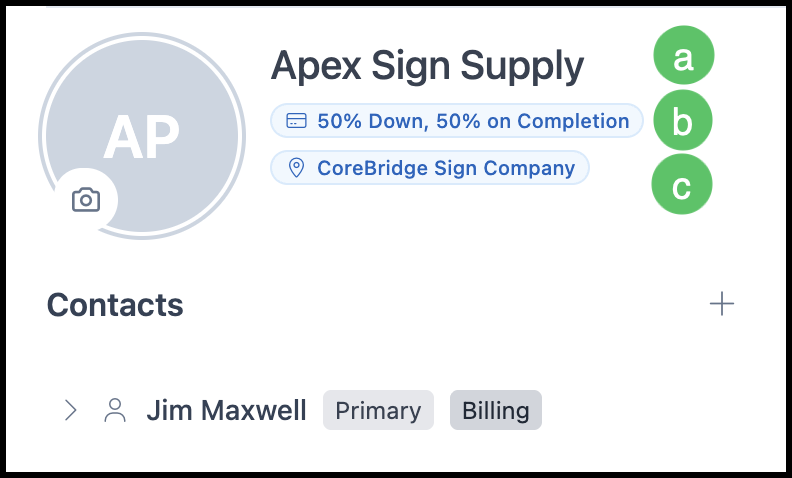
At the top of the Vendor screen is a heading area with quick information about the Vendor. What appears may depend on the information you have entered.
a. Vendor name - The name of the Vendor.
b. My Payment Terms with Vendor - The payment terms selected for this Vendor.
c. Default Location - The primary Location assigned to this Vendor.
Vendor Details
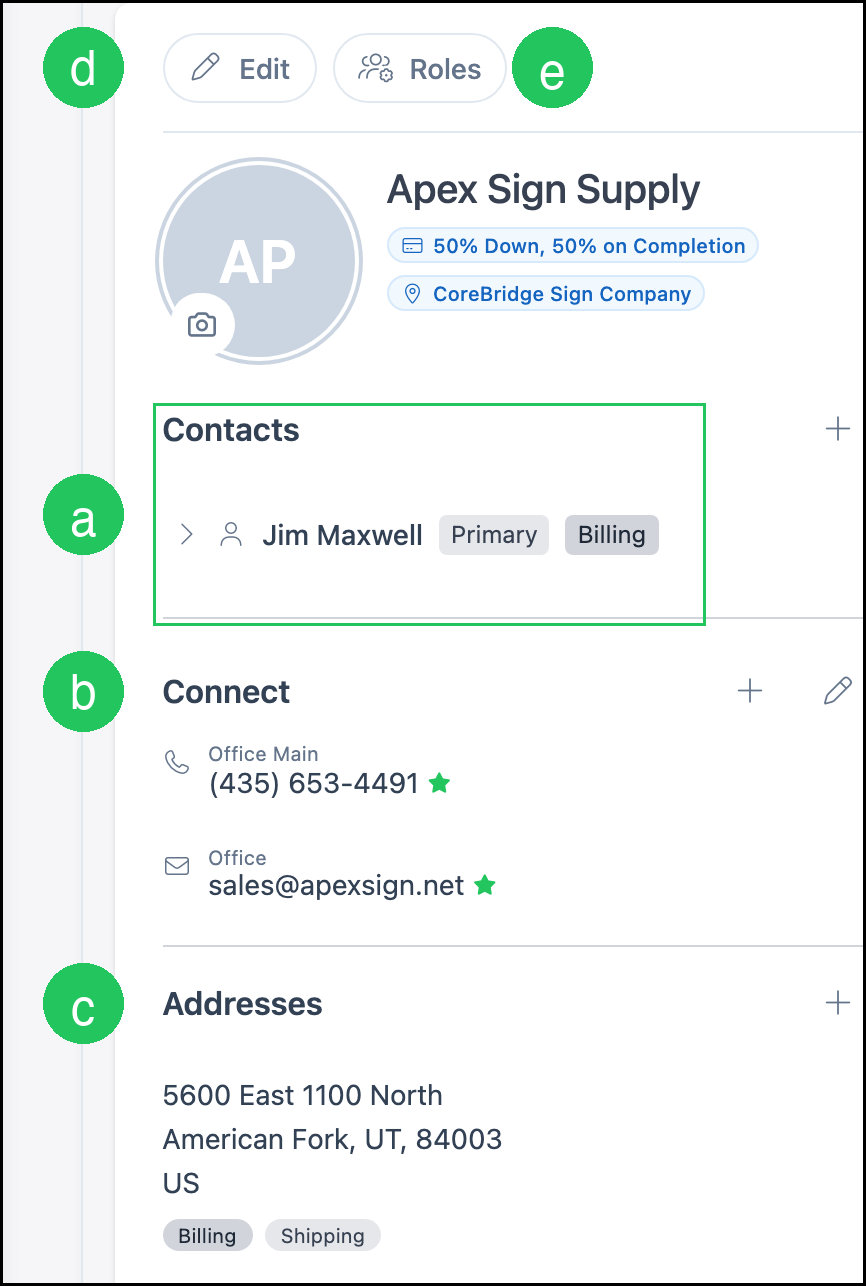
The Vendor screen includes sections where you can view and edit Vendor information. This includes the information entered when the Vendor was created, plus additional areas such as contact methods and addresses.
a. Contacts - The Contacts section lists all Contacts associated with this Vendor. Each Contact name is a link that opens that Contact. The Primary and Billing Contact roles are indicated; these can be the same or different people.
b. Connect - Phone numbers and email addresses for the Vendor (for example, Office Main, Office).
Note: Enter only numbers for phone fields; the system formats them automatically.
c. Addresses - Billing and shipping addresses, plus any additional addresses.
d. Edit - Opens the Edit Vendor dialog, where you can update Details, Vendor Context, and Accounting Details.
e. Roles - Opens the Roles/Team dialog, where you can manage the team members assigned to each Role for this Vendor. For more information on Roles, see Employee Roles and Permissions in Settings.
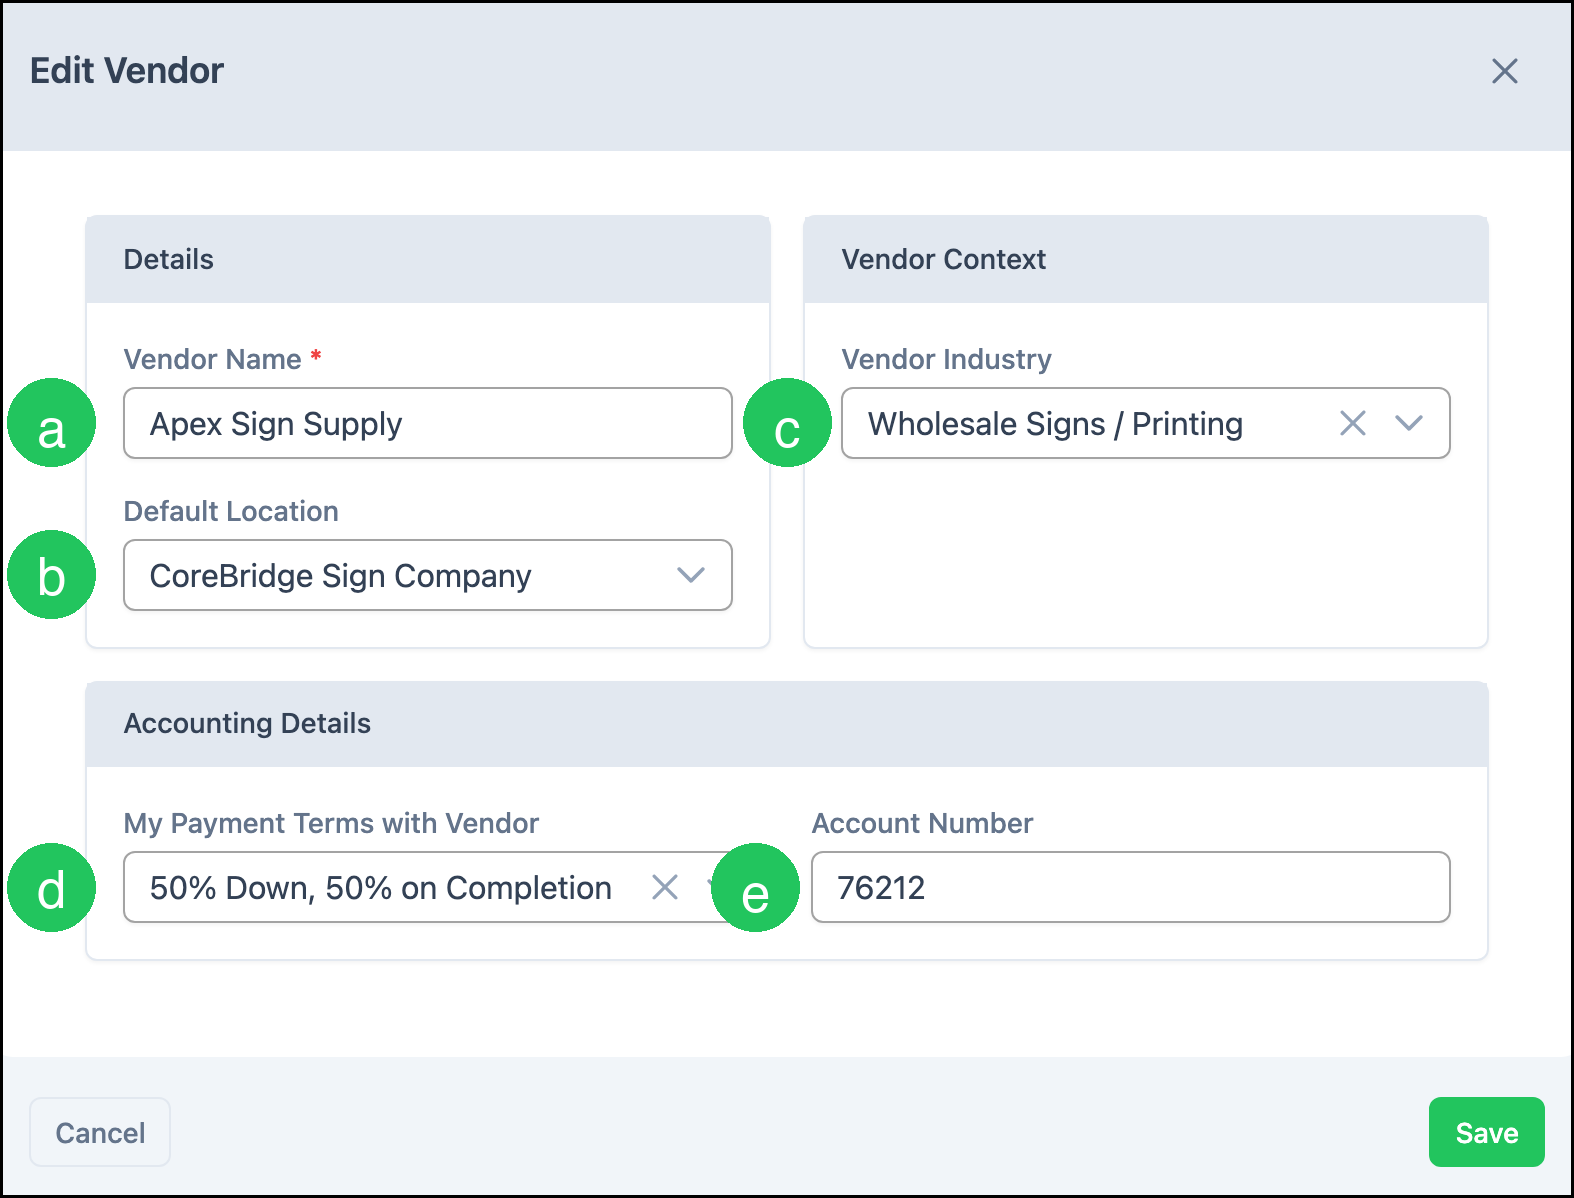
The Edit Vendor dialog includes these fields:
a. Vendor Name - The name of the Vendor. This field is required.
b. Default Location - The primary Location assigned to this Vendor.
c. Vendor Industry - The industry this Vendor is affiliated with.
d. My Payment Terms with Vendor - The payment terms selected for this Vendor.
e. Account Number - The account number your business uses with this Vendor.
Note: Click Save to apply your changes, or Cancel to close the dialog without saving.
Vendor Overview and Activity
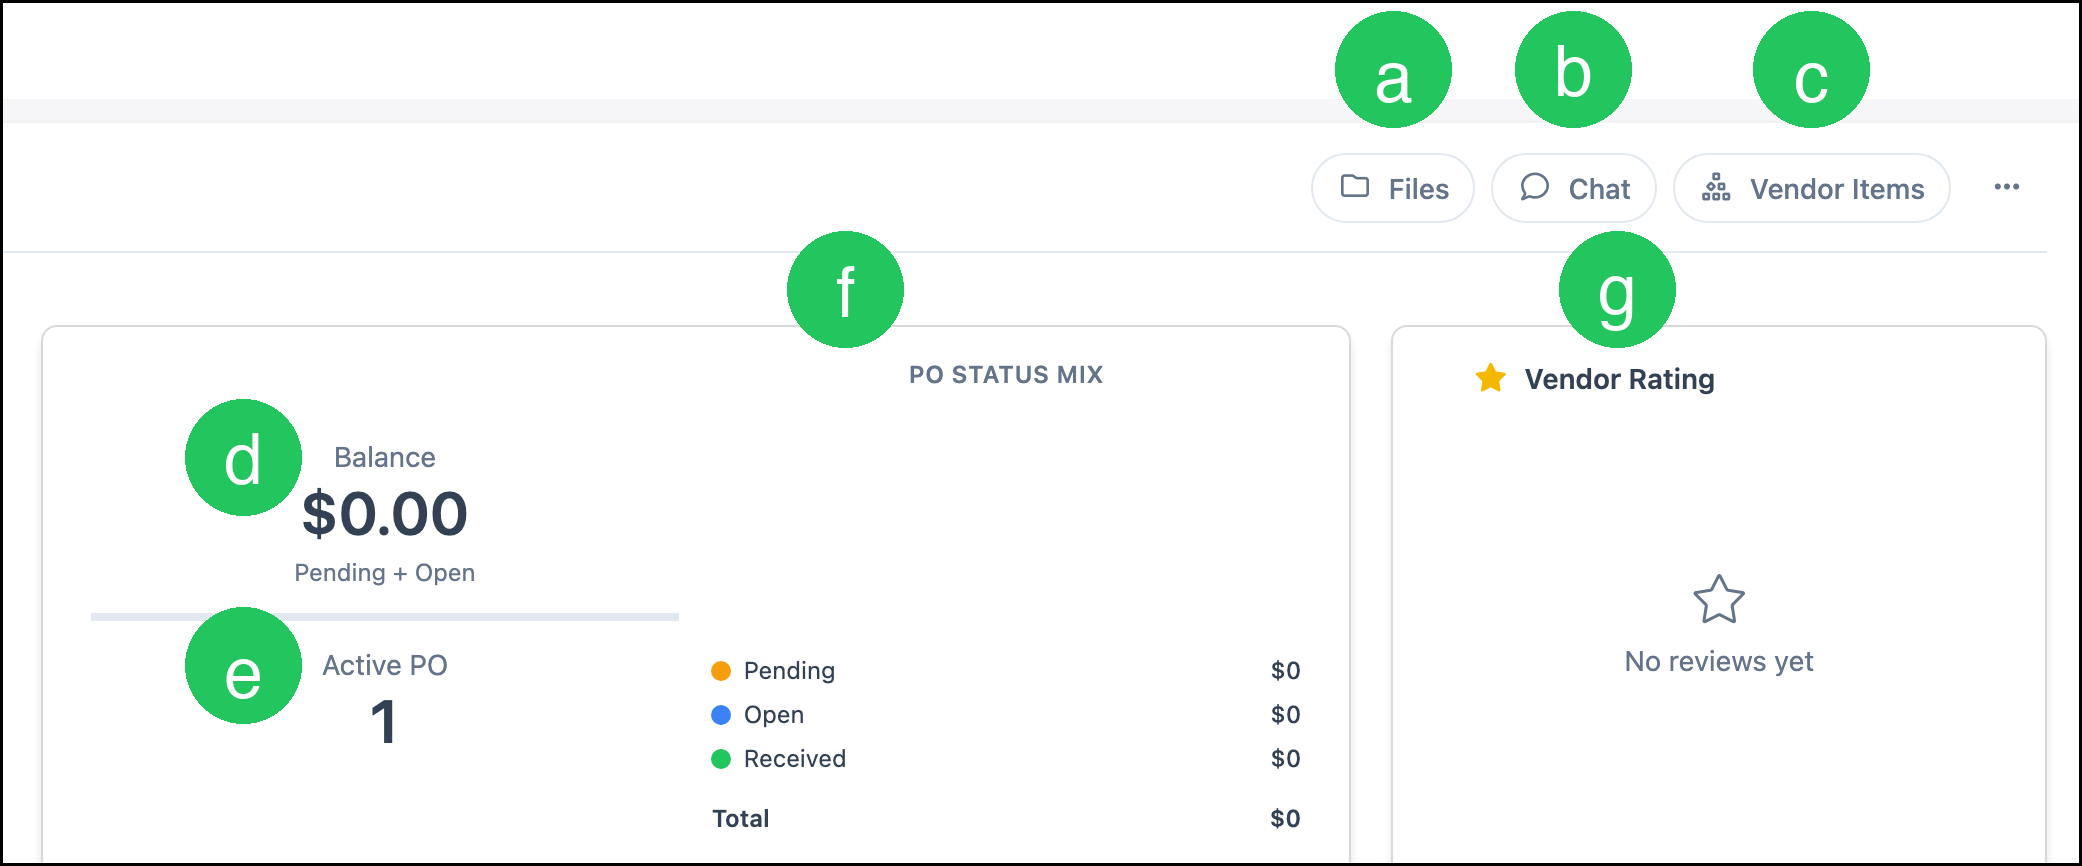
a. Files - Opens the Vendor Files dialog, where you can view and manage files associated with this Vendor.
b. Chat - An internal, timestamped conversation that allows Employees to ask questions, share updates, and collaborate about a specific Vendor in one centralized location. For more information on Chat, see Company Notes in Chat.
c. Vendor Items - Opens the Vendor Items associated with this Vendor. For more information, see Vendor Items.
Note: More Actions includes Required Documents, Send Upload Link, History, and Set Inactive. Vendors with active Purchase Orders cannot be set inactive. For preferred Vendors, ratings, and required documents, see Managing Vendors.
d. Balance - The outstanding balance with this Vendor, including pending and open amounts.
e. Active PO - The number of active Purchase Orders for this Vendor.
f. PO STATUS MIX - A summary of Purchase Order statuses for this Vendor.
g. Vendor Rating - Reviews and the rating for this Vendor. For more information, see Managing Vendors.
Purchase Orders
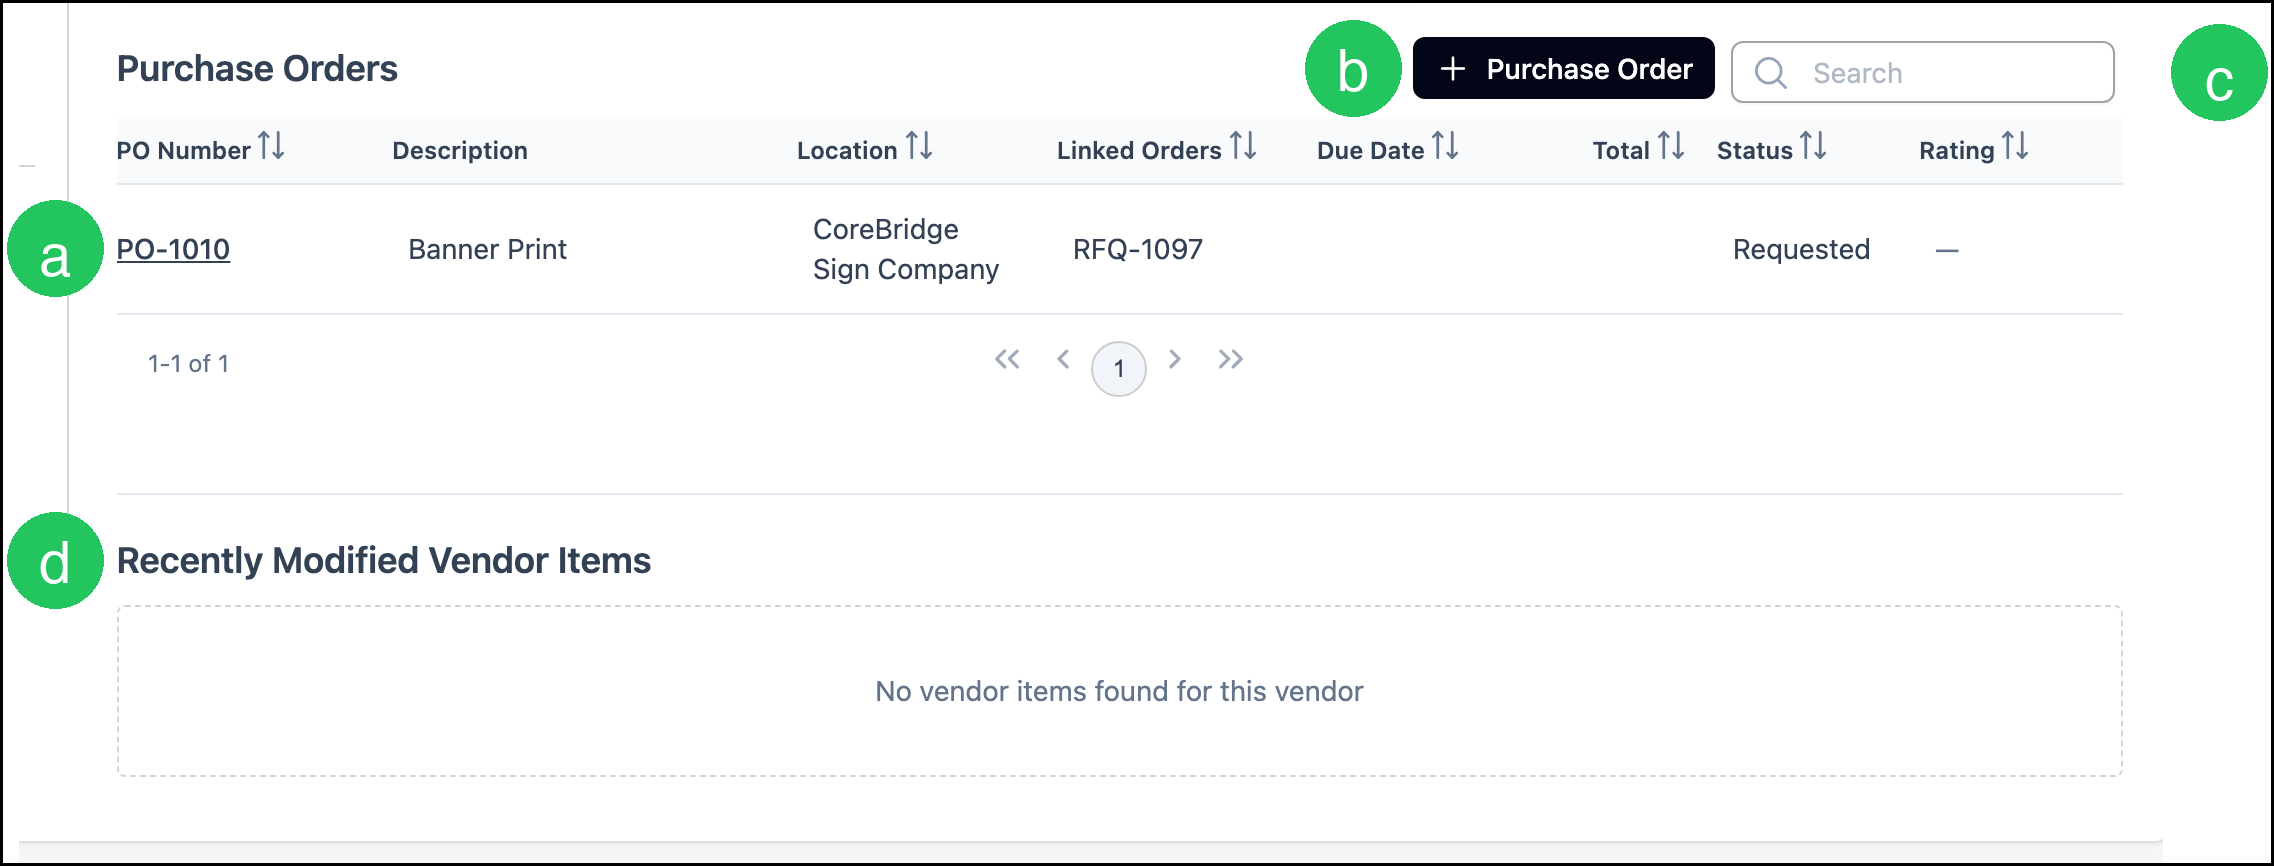
The Purchase Orders section lists Purchase Orders for this Vendor, with columns that show quick information about each Purchase Order.
a. Each row is a Purchase Order. Clicking the Purchase Order number opens that Purchase Order.
b. The Purchase Order button creates a new Purchase Order from the Vendor screen. When a record is created from this location, the associated Vendor information is populated.
c. Search for a Purchase Order using numbers or key phrases.
d. Recently Modified Vendor Items shows Vendor Items associated with this Vendor that were changed most recently.
Frequently Asked Questions
1. How do I mark a Vendor as preferred or add a rating?
Answer: Use the preferred control and Vendor Rating on the Vendor screen. For more information, see Managing Vendors.
2. Why is Set Inactive unavailable?
Answer: Vendors with active Purchase Orders cannot be set inactive. Complete or close those Purchase Orders first, then use More Actions and select Set Inactive.
3. Where do I manage files for a Vendor?
Answer: Click Files on the Vendor screen to open the Vendor Files dialog.
Related Articles
Company Notes in Chat
Creating Vendors
Employee Roles and Permissions in Settings
Managing Vendors