
Onboarding walks you through the setup needed to go live with CoreBridge EVO. Use the Onboarding screen to complete lessons at your own pace, track your progress, and open the Go Live form when you are ready.
Table of Contents
- Important Information
- Accessing Onboarding
- Onboarding Screen
- Completing Lessons
- Onboarding Process
- Going Live
- Frequently Asked Questions
- Related Articles
Important Information
- Every employee at your business sees the same Onboarding paths and lessons. Onboarding is not currently filtered by role, permission, or job title.
- Lesson completion is tracked for each employee. When you mark a lesson complete, it is complete for you only.
- Role and permission settings control what employees can do in CoreBridge. They do not change which Onboarding lessons appear.
- Employees with the Owner or Employee Administrator role may also see a first-login tour and a banner that links to Onboarding before the business goes live.
Accessing Onboarding
Open the Account menu and select Onboarding.
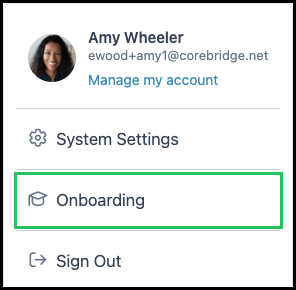
You can also open Onboarding from My Profile by clicking View Onboarding.
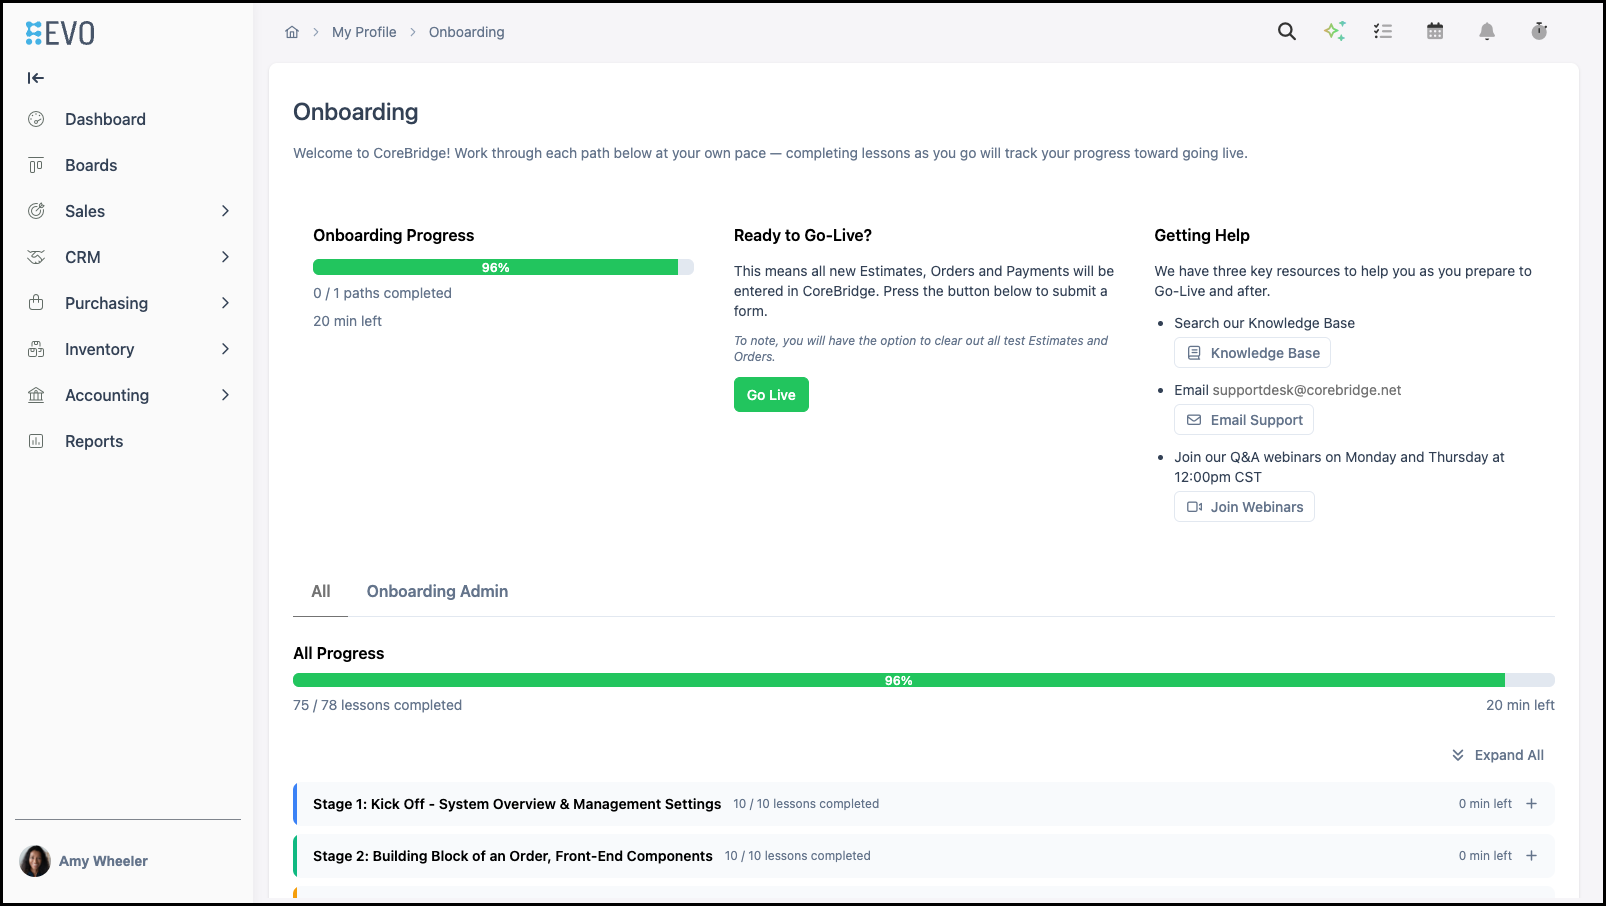
Onboarding Screen
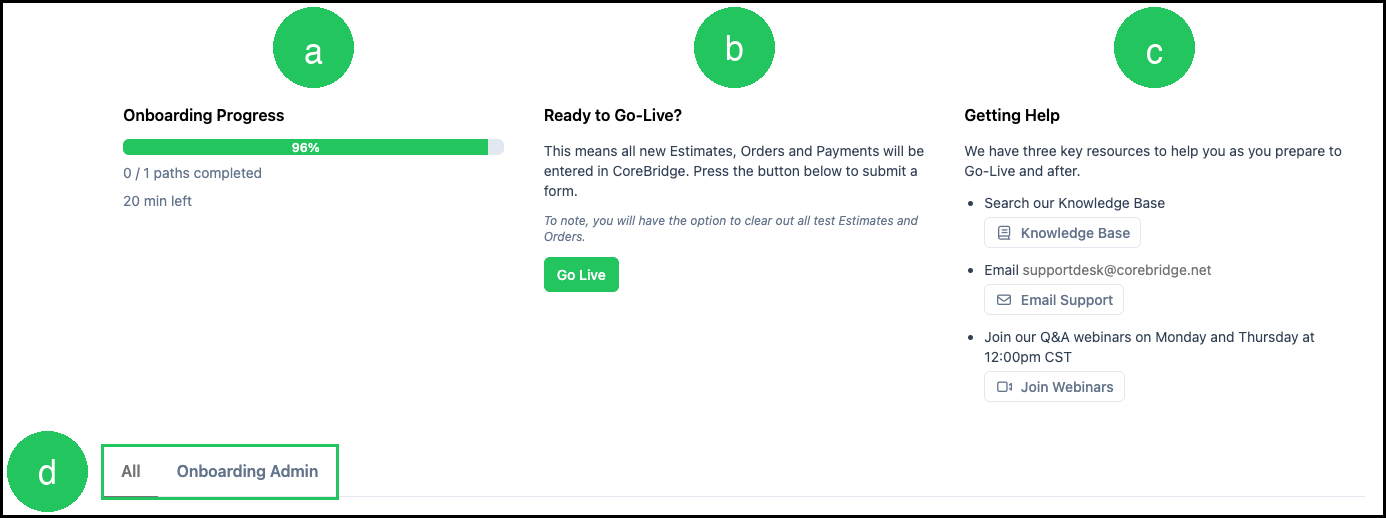
a. Onboarding Progress - Shows how far you are through the active Onboarding path, including lessons completed and estimated time remaining.
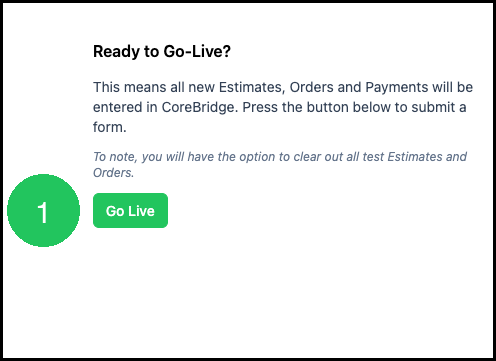
b. Ready to Go-Live? - Explains what going live means for Estimates, Orders, and Payments, and includes the Go Live button used to submit the Go Live form.
c. Getting Help - Opens the Knowledge Base, starts an email to Support, or opens the Q&A webinar schedule.
d. Path tabs - Switch between Onboarding paths assigned to your business. Every employee sees the same path tabs.
Completing Lessons
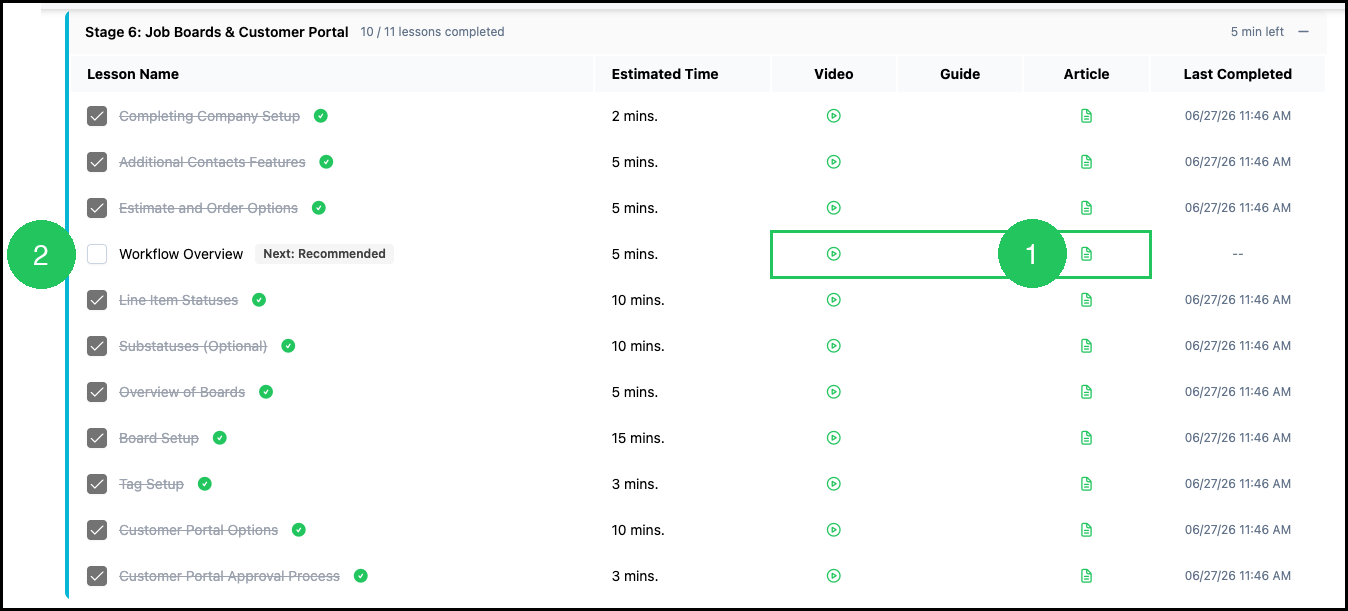
Onboarding is organized into stages. Stages start collapsed. Click a stage heading to expand its lessons, or click Expand All.
1. Click Video, Guide, or Article to open the lesson content.
2. Select the checkbox in the Lesson Name column to mark the lesson complete.
Note: Opening a video or article does not automatically mark the lesson complete.
Note: Next: Recommended identifies the next lesson in the path.
Onboarding Process
Work through the stages in order. Each stage includes videos, guides, and articles that match the setup work for going live.
Stage 1: Kick Off - System Overview & Management Settings
- System Overview
- Business Settings
- Tax Items
- Tax Groups
- Taxability Codes
- Localization Settings
- Integrations Marketplace
- CoreBridge Integrated Merchant Service Providers
- Creating Employees
- Managing Employees
Stage 2: Building Block of an Order, Front-End Components
- Estimates Overview
- Orders Overview
- Creating Companies
- Creating Contacts
- Creating Email Domains
- Email From Addresses Setup
- Email Templates
- Managing Chart of Accounts
- Adding Subaccounts
- CoreBridge Supported Accounting Integrations
Stage 3: Component Setup
- Materials Overview
- Component Categories Overview
- Adding Materials
- Material Import Template
- Labors Overview
- Labor Cost Worksheet
- Adding Labors
- Machines Overview
- Machine Cost Worksheet
- Machine Profiles
Stage 4: Products
- Cost Based Pricing
- Market Based Pricing
- Market-Based vs. Cost-Plus Pricing
- Intro to Products
- Product vs. Modifier
- Product Details
- Product Minimums and Fees
- Pricing Tables
Stage 5: Products Continued
- Using Component Categories
- Linked Components
- Component Details
- Work Order / Invoice Details
- How to Request Custom Products
Stage 6: Job Boards & Customer Portal
- Completing Company Setup
- Additional Contacts Features
- Estimate and Order Options
- Workflow Overview
- Line Item Statuses
- Substatuses (Optional)
- Overview of Boards
- Board Setup
- Tag Setup
- Customer Portal Options
- Customer Portal Approval Process
Stage 7: Calendar, Scheduling & Employee Permissions
- Destinations Overview
- How to Use Calendars
- Scheduling Overview
- Automations (Optional)
- Employee Roles and Permissions in Settings
- Sales Goals
Stage 8: Employee Training, Tips & Tricks, Payments & Refunds
- Payment Method Review
- Payment Terms Review
- Credit Line Options
- Taking Payments
- Refunds
- Reconciliation Overview
- Dashboard and Widget Setup
- Clipboard Feature Overview
- Quick Products
- Time Tracking for Managers
Stage 9: Reports & Importing Customer Data
- Document Options
- Using Reports
- Customer Import Process
Stage 10: Financial Reconciliation, Q&A
- Auto Reconciliation and Sync
- Review Customer Data
- Numbering Options
- Go Live Checklist
- Go Live Form
Going Live
When you are ready for all new Estimates, Orders, and Payments to be entered in CoreBridge, submit the Go Live form from Onboarding.
1. Click Go Live.
Note: You have the option to clear out test Estimates and Orders.
For more information, see Go Live Form and Go Live Checklist.
Frequently Asked Questions
1. Can Onboarding be limited or customized by role or permissions?
Answer: Onboarding paths are the same for every employee at your business. Roles and permissions control what employees can do in CoreBridge. They do not change which Onboarding lessons appear.
2. Why did another employee see the same Onboarding lessons I am completing?
Answer: All employees see the same lesson list. Each employee has their own checkboxes and progress. Completing a lesson for yourself does not complete it for anyone else.
3. Can Onboarding be tailored so employees only see information for their position?
Answer: The Onboarding screen shows the same paths to every employee. Use Employee Roles and Permissions in Settings to control what each employee can do in the rest of CoreBridge.