
Select Recipients records the Employee tied to an Automation. It is on Step 3 of 4 : Select Recipients when you add or edit an Automation. The address a Send Email action uses is entered in To on Step 4 of 4: Configure actions to be performed.
Table of Contents
Important Information
- Select Recipients chooses an internal Employee. It is not the Customer address.
- The Customer address for Send Email is the To field.
- When Recipient Type is Employee and Employees is empty, Issue Console shows At least one Recipient is required and Atleast one Employee Recipient is required. Those messages refer to Step 3, not To.
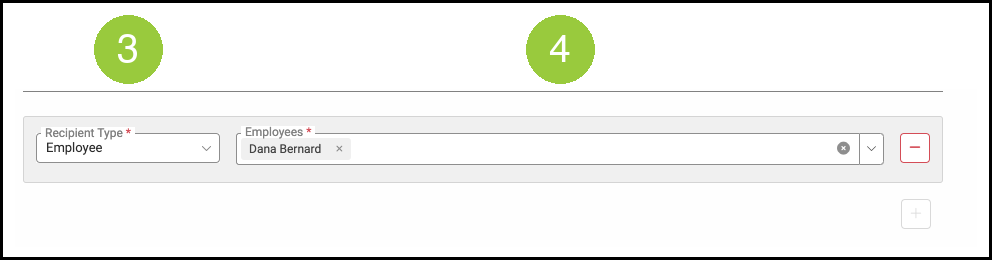
- One recipient row is allowed. The empty screen reads Click the + button below to add a Recipient. After the row is added, the Green Plus under the row is unavailable and the screen reads Limit of 1 recipient rows.
Set the Recipient
Navigate to Settings / Automations / Automations.
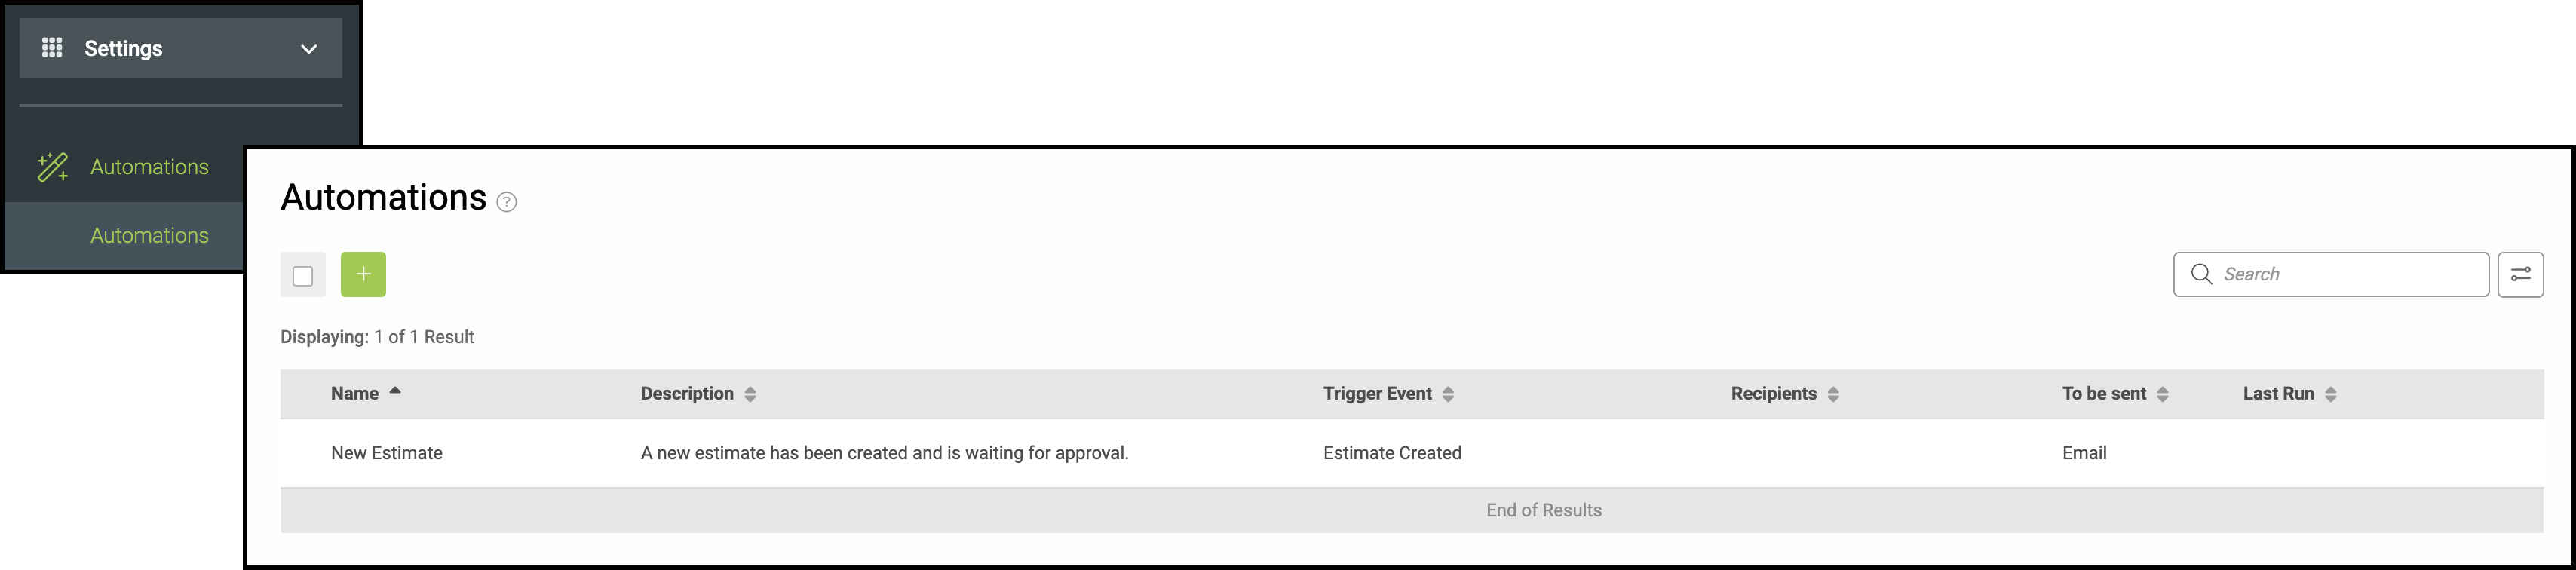
1. Click the Automation Name.

2. Click the Green Plus.

3. Select Employee from Recipient Type.
4. Select the Employee from Employees.
5. Click Save.

Set the To Address
1. Select Send Email from Action Type if that action is not already selected.

2. In To, enter the address. Type {{ to open Insert Merge Field. On an Estimate, the primary contact email is Contacts, then Primary, then Email. For more information, please see Merge Fields Overview.
