
When you grant Customer Portal access, CoreBridge sends an invitation email to the Contact. This article explains how to create a Contact Email Template with Message Template Type New Contact Login Email so that invitation uses your wording and includes the Invite URL.
Table of Contents
- Important Information
- Creating the Invitation Template
- Invitation Content
- Frequently Asked Questions
- Related Articles
Important Information
- Create this template on the Contact tab in Email Templates. Set Message Template Type to New Contact Login Email.
- Granting Customer Portal access sends this invitation to the selected Username. For more information, see How to Invite Customers to the Customer Portal.
- Include the Invite URL Merge Field in the body so the Contact can set up access and choose a password.
- Invite URL stays as a Merge Field token in Preview and populates when the email is sent.
Note: Default From addresses come from Email From Addresses. For more information, see Adding Email From Addresses.
Creating the Invitation Template
Navigate to System Settings / System / Email Templates.
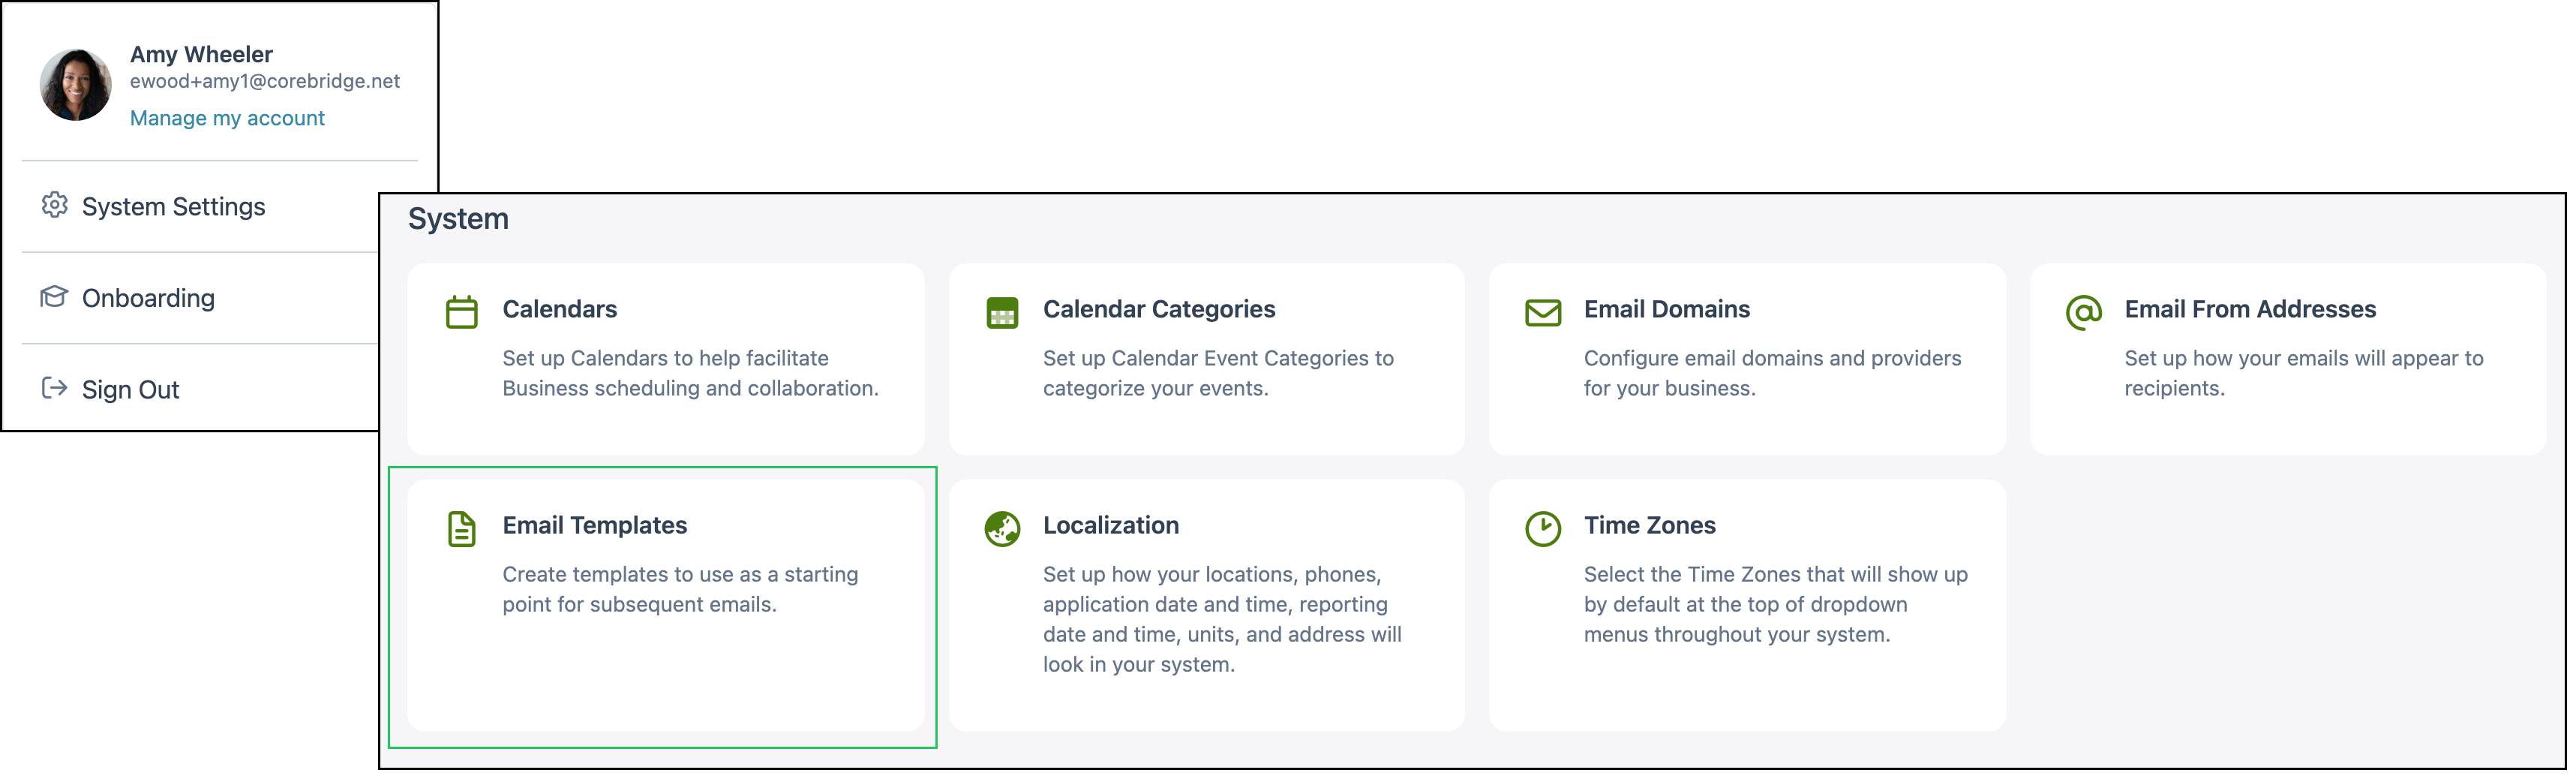
1. Click the Contact tab.
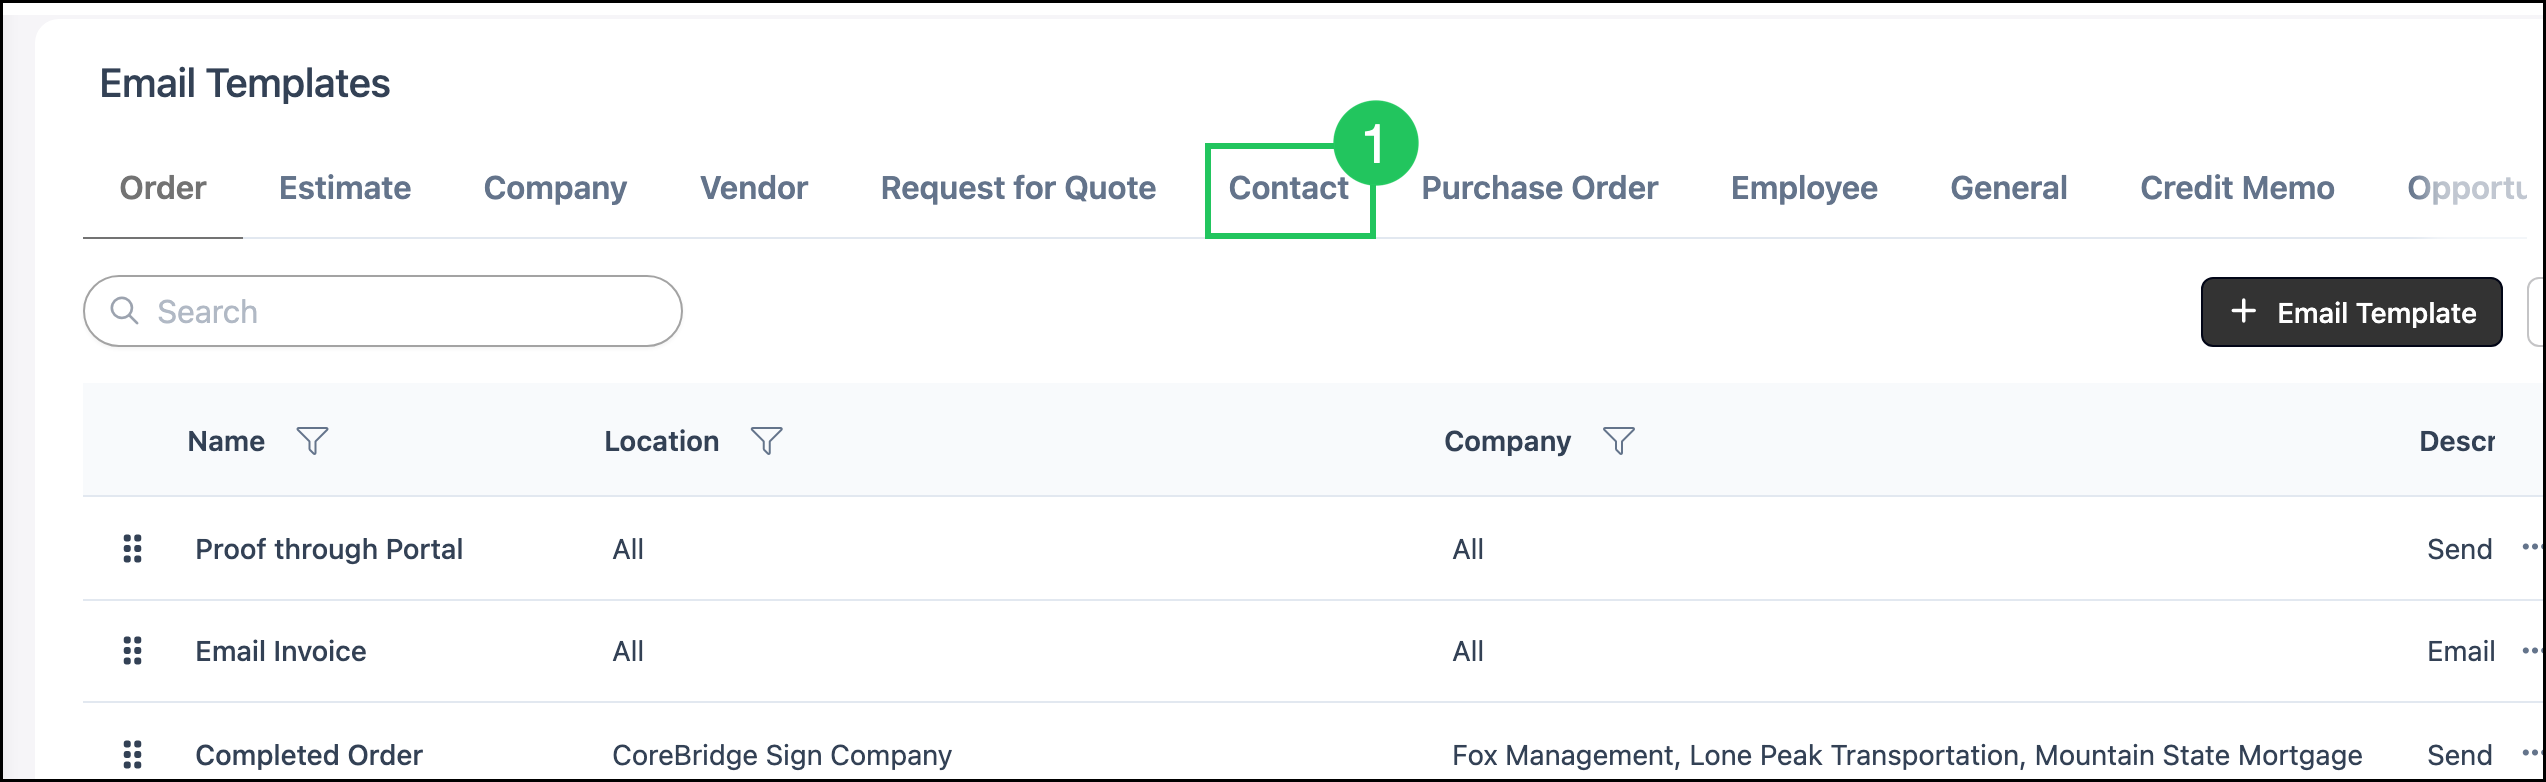
2. Click Email Template.
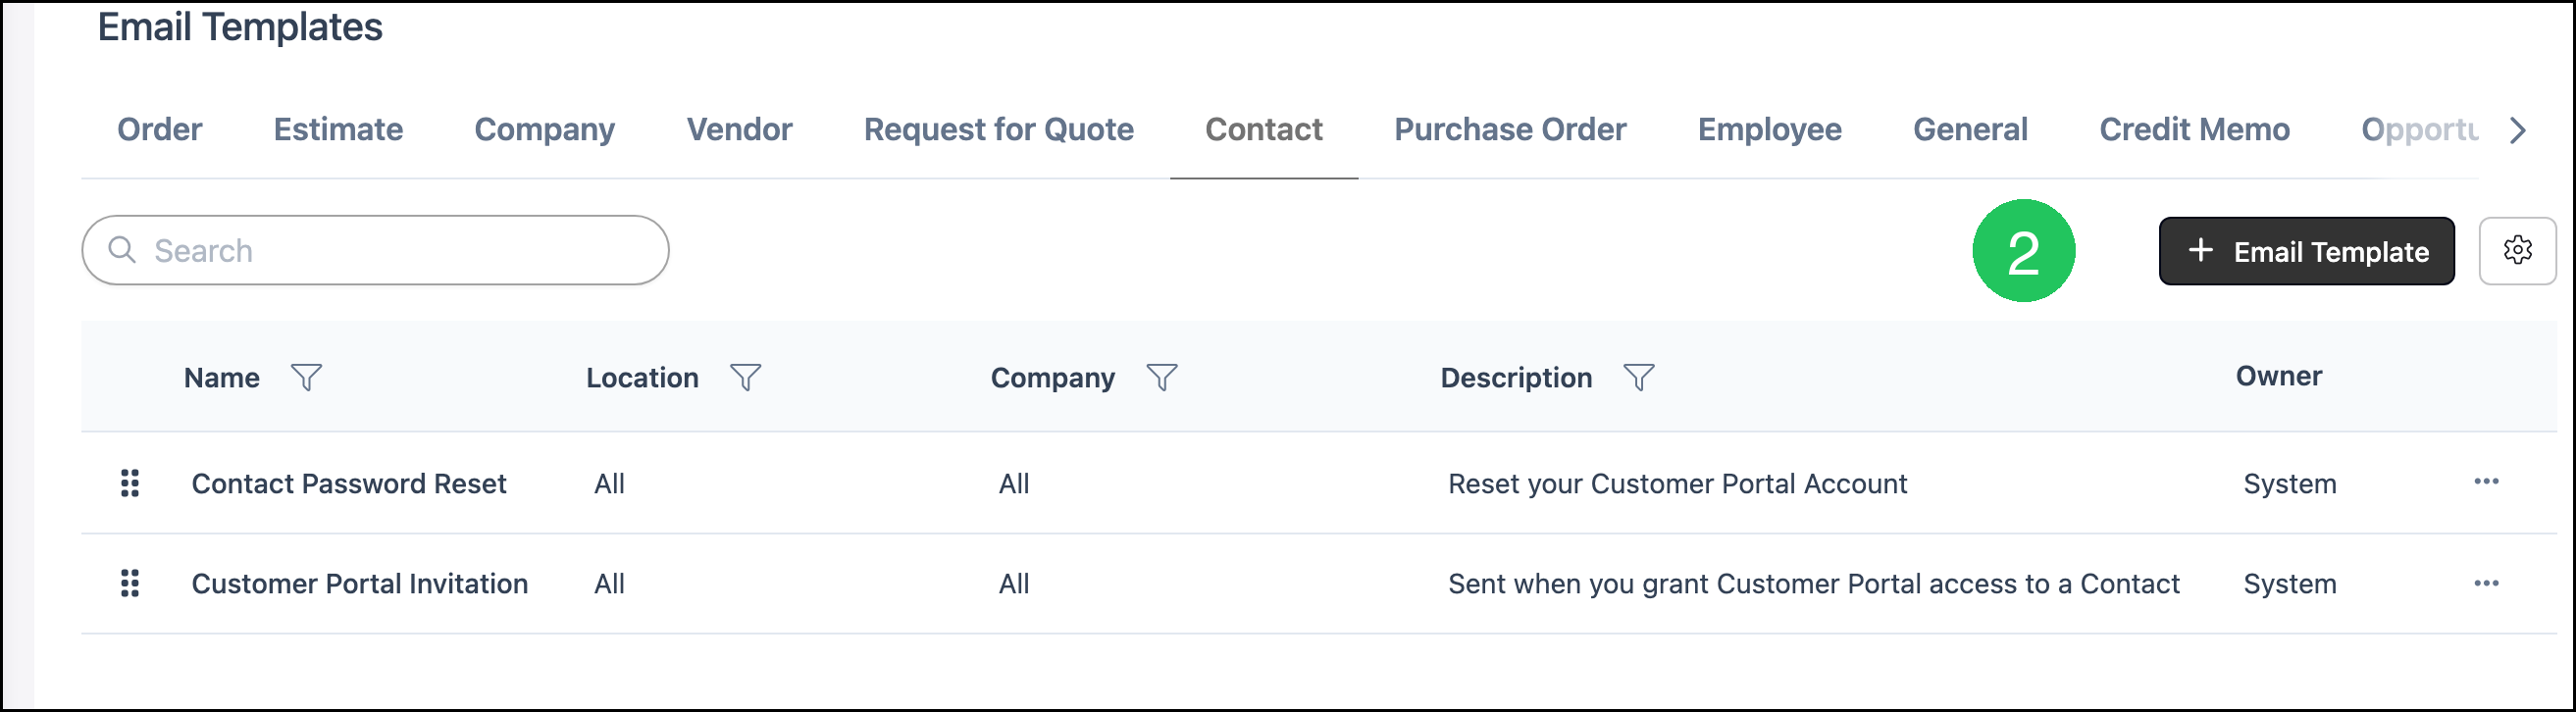
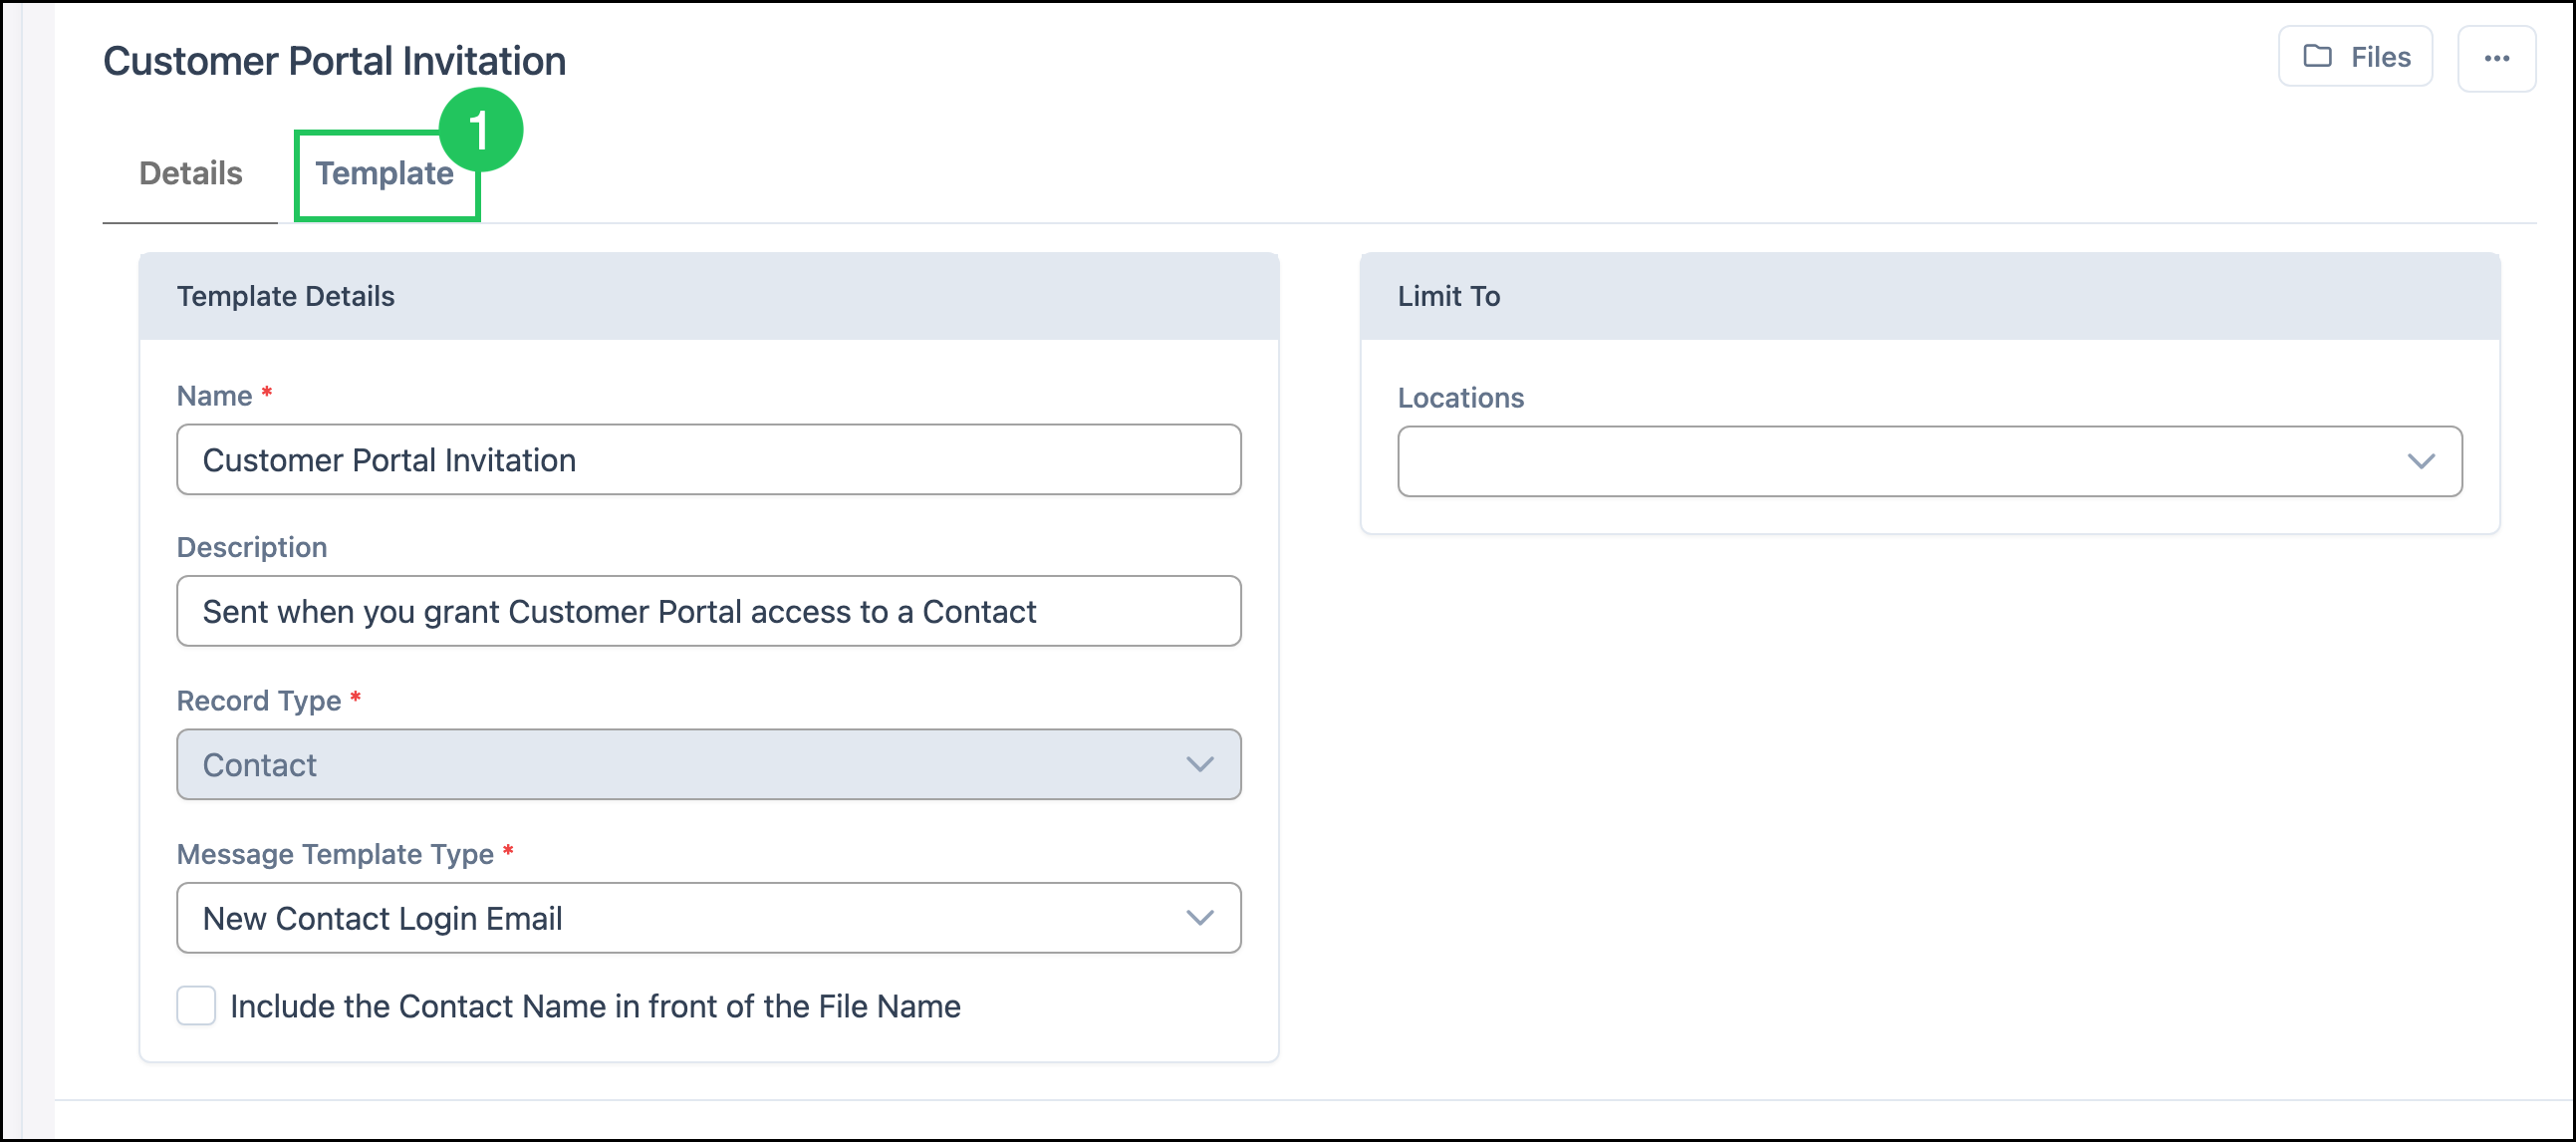
The Add New Email Template screen opens. Fields marked with a red asterisk are required.
a. Name - The name of the template, such as Customer Portal Invitation.
b. Description - A short description of when the template is used.
c. Record Type - Select Contact. Once saved, Record Type typically cannot be changed.
d. Message Template Type - Select New Contact Login Email.
e. Include the Contact Name in front of the File Name - Check this box if you attach a document and want the Contact name included in the file name.
Note: Locations under Limit To is optional. Leave it empty to use the template for all Locations.
3. Click Save.
Note: After you save Details, open the Template tab to enter the invitation content.
Invitation Content
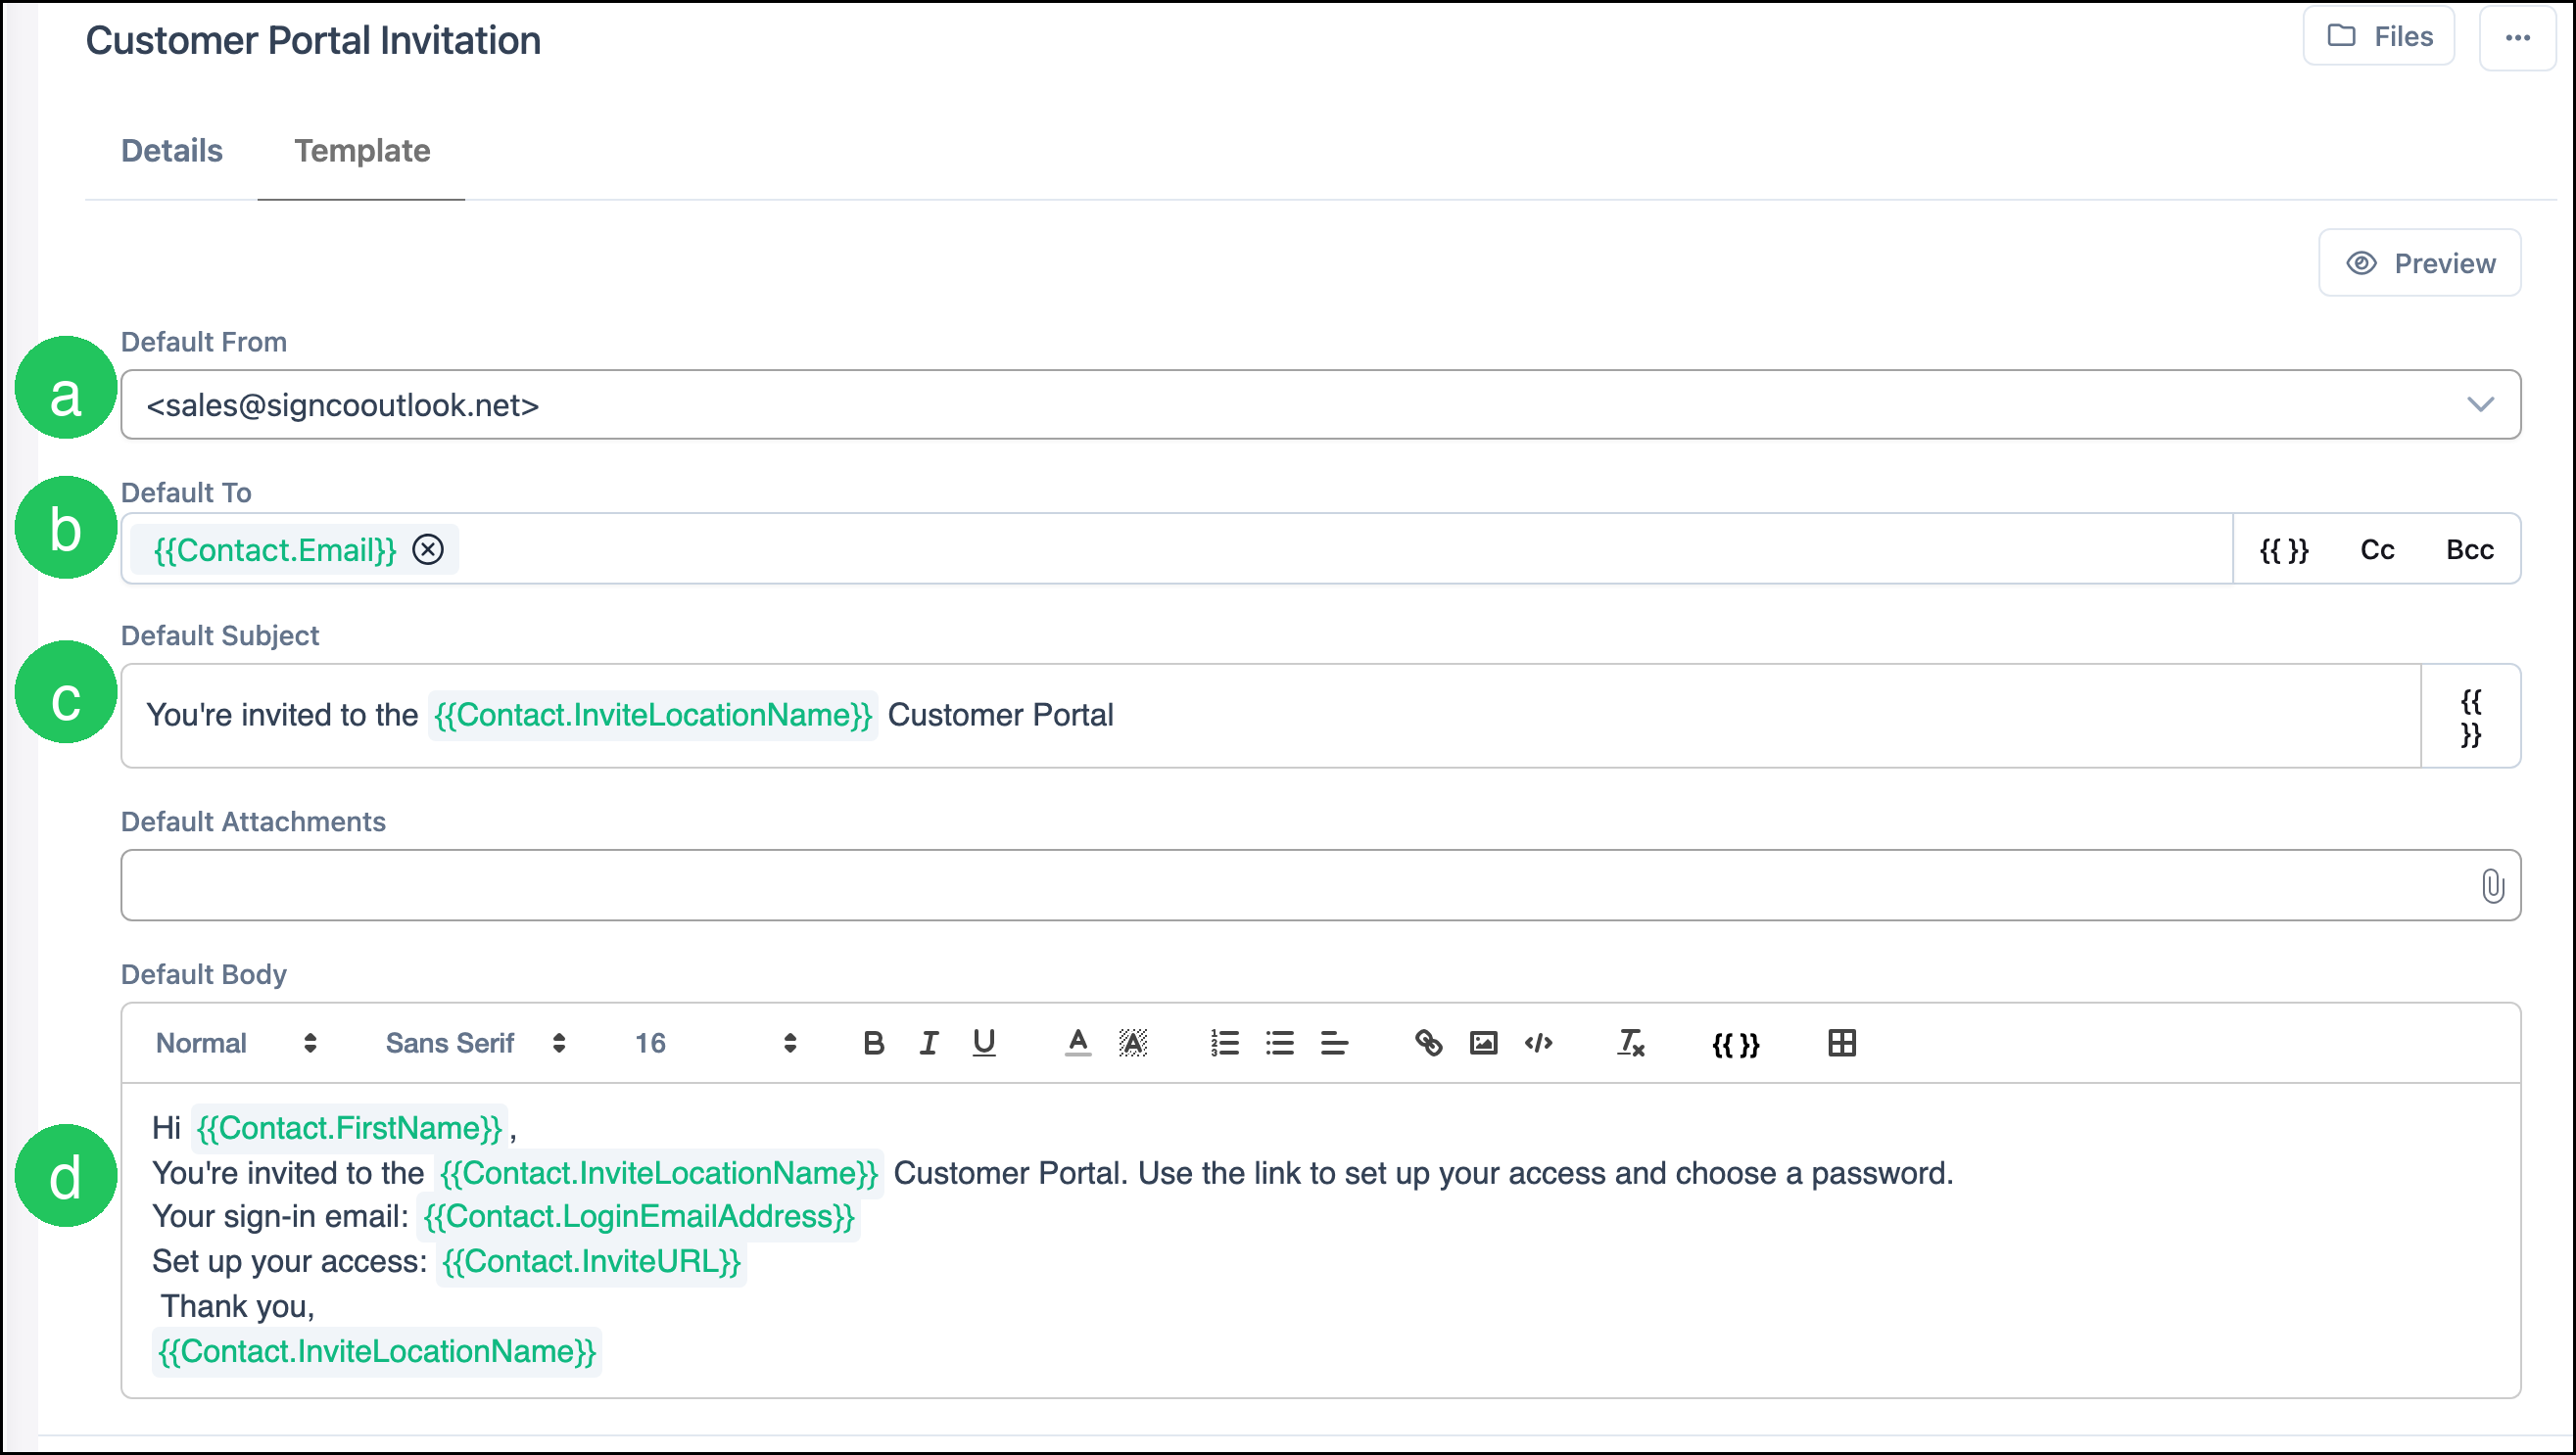
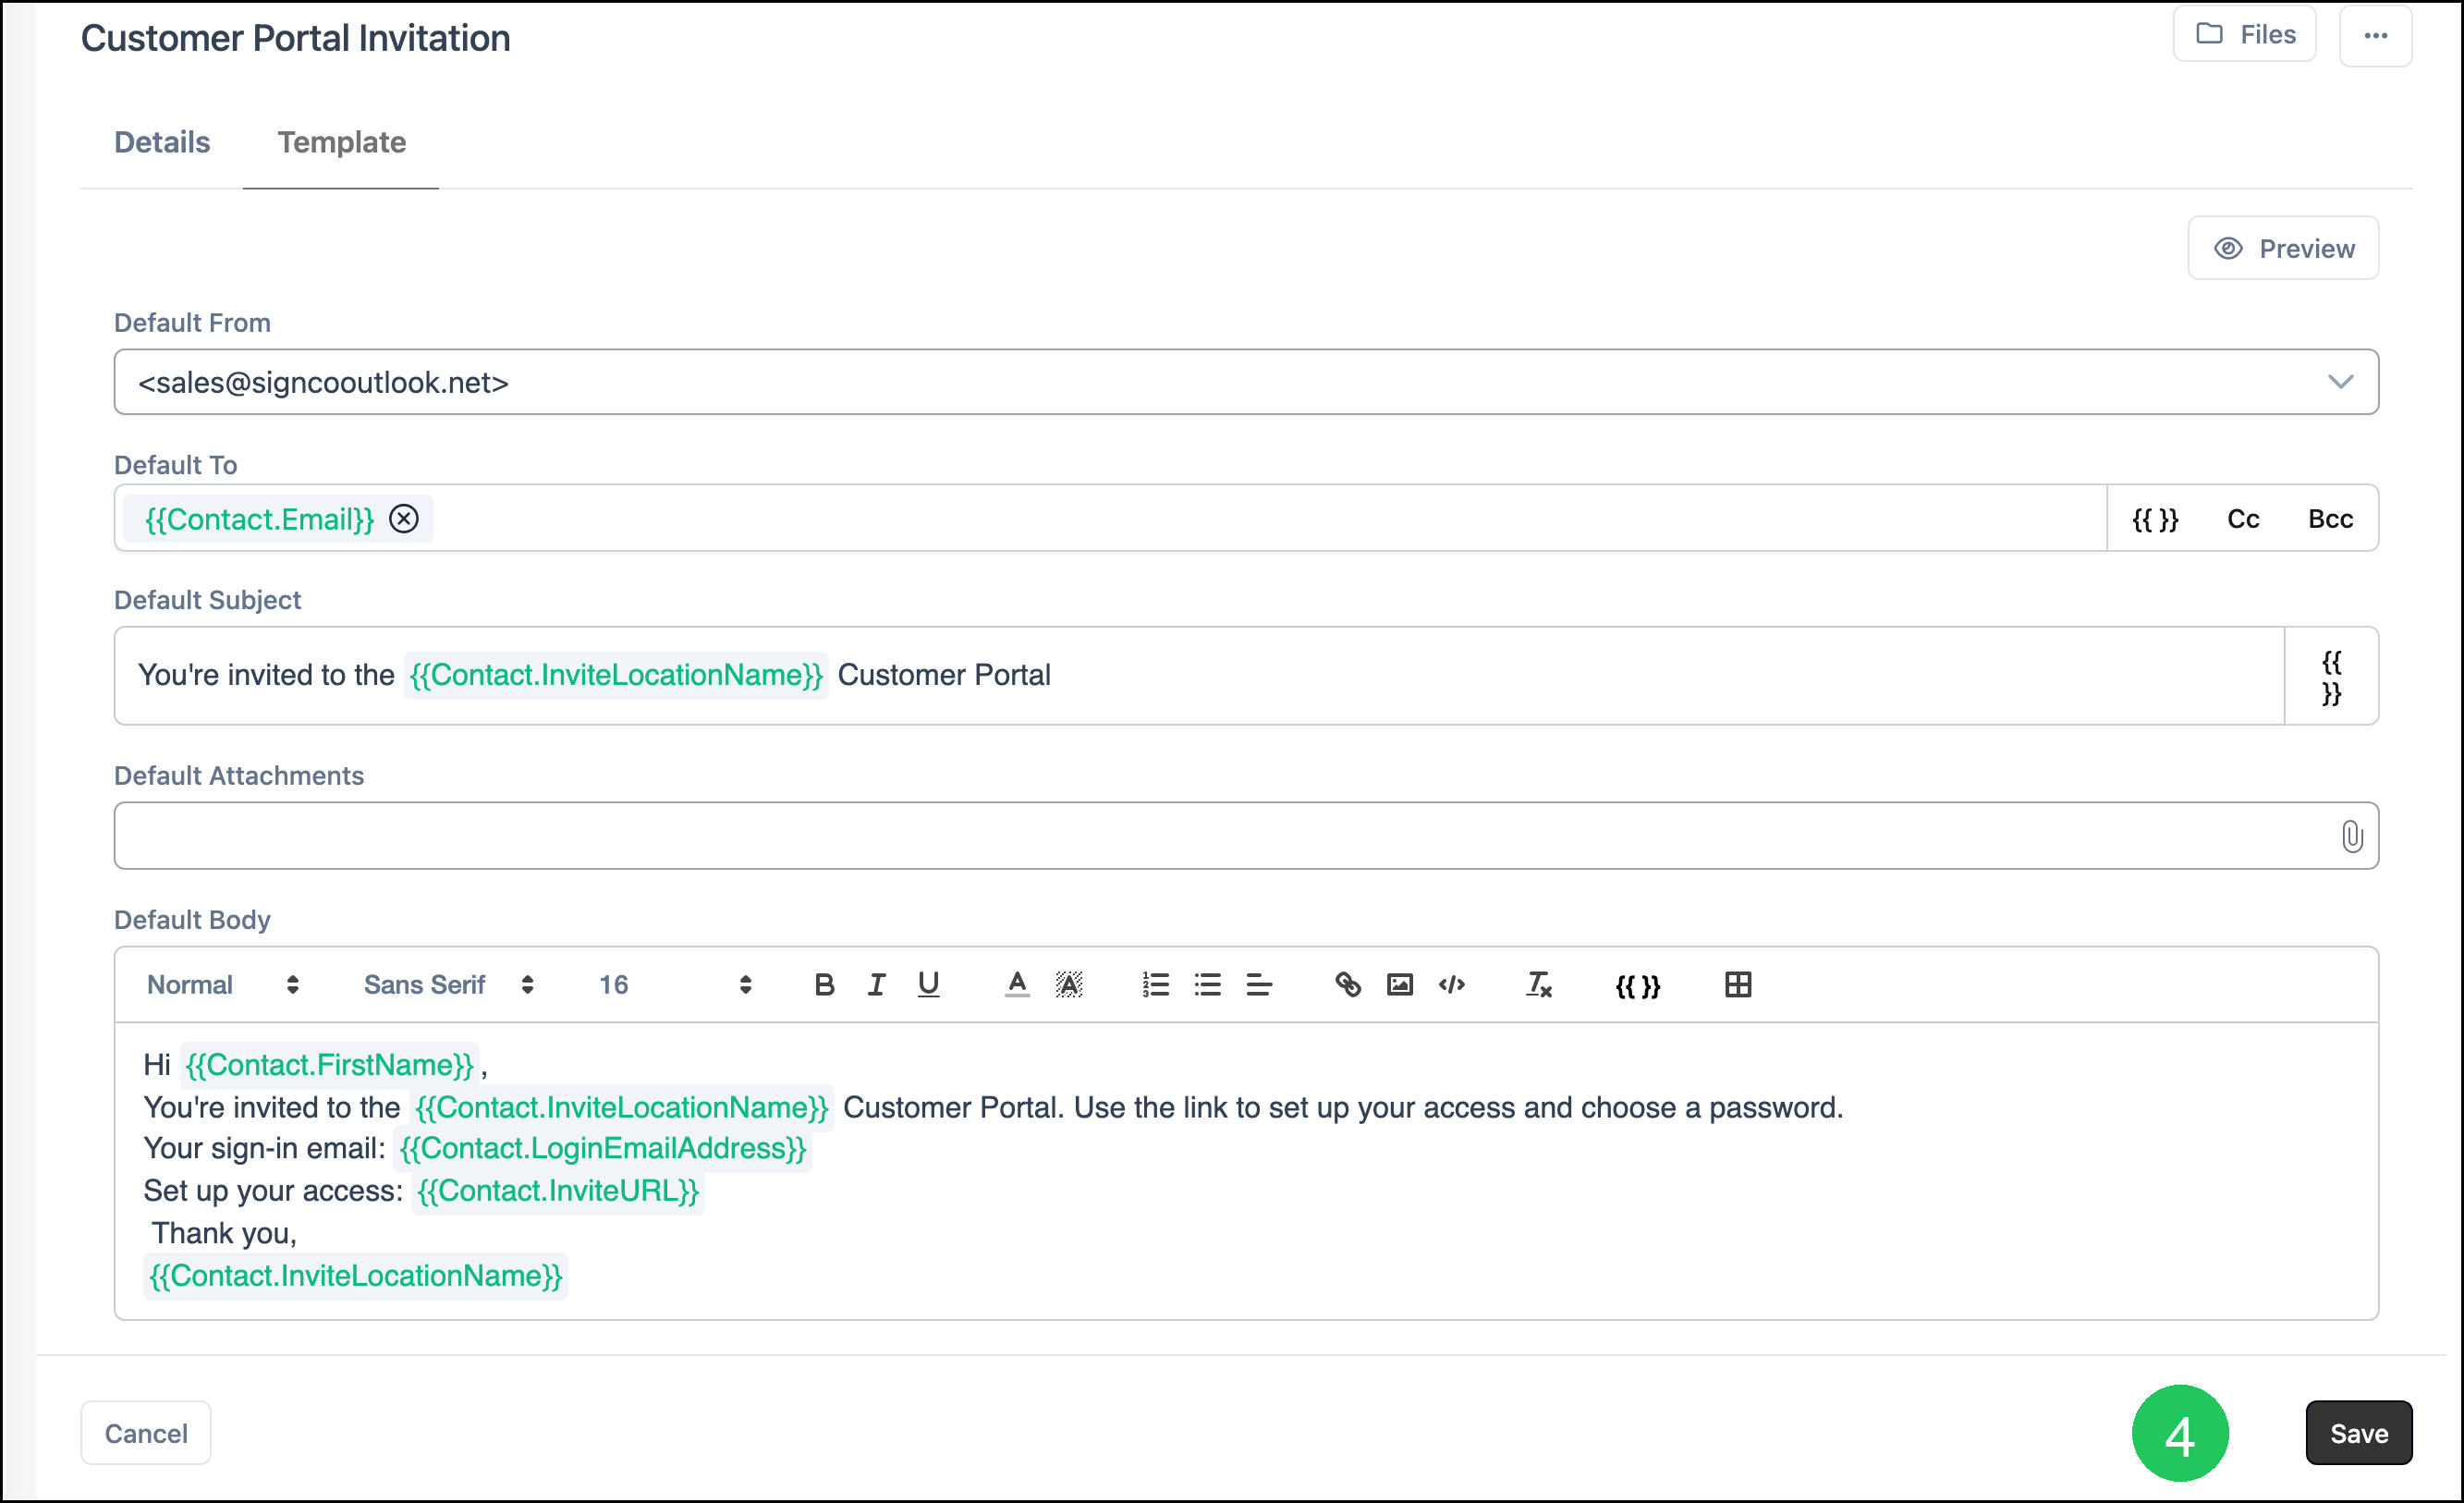
1. Click the Template tab.
a. Default From - The email account the invitation is sent from.
b. Default To - Insert the Email Merge Field so the invitation is sent to the Contact.
c. Default Subject - The subject line. You can include Merge Fields such as Invite Location Name.
d. Default Body - The invitation message. Include Invite URL so the Contact can set up access. Other useful Merge Fields include First Name, Invite Location Name, and Login Email Address.
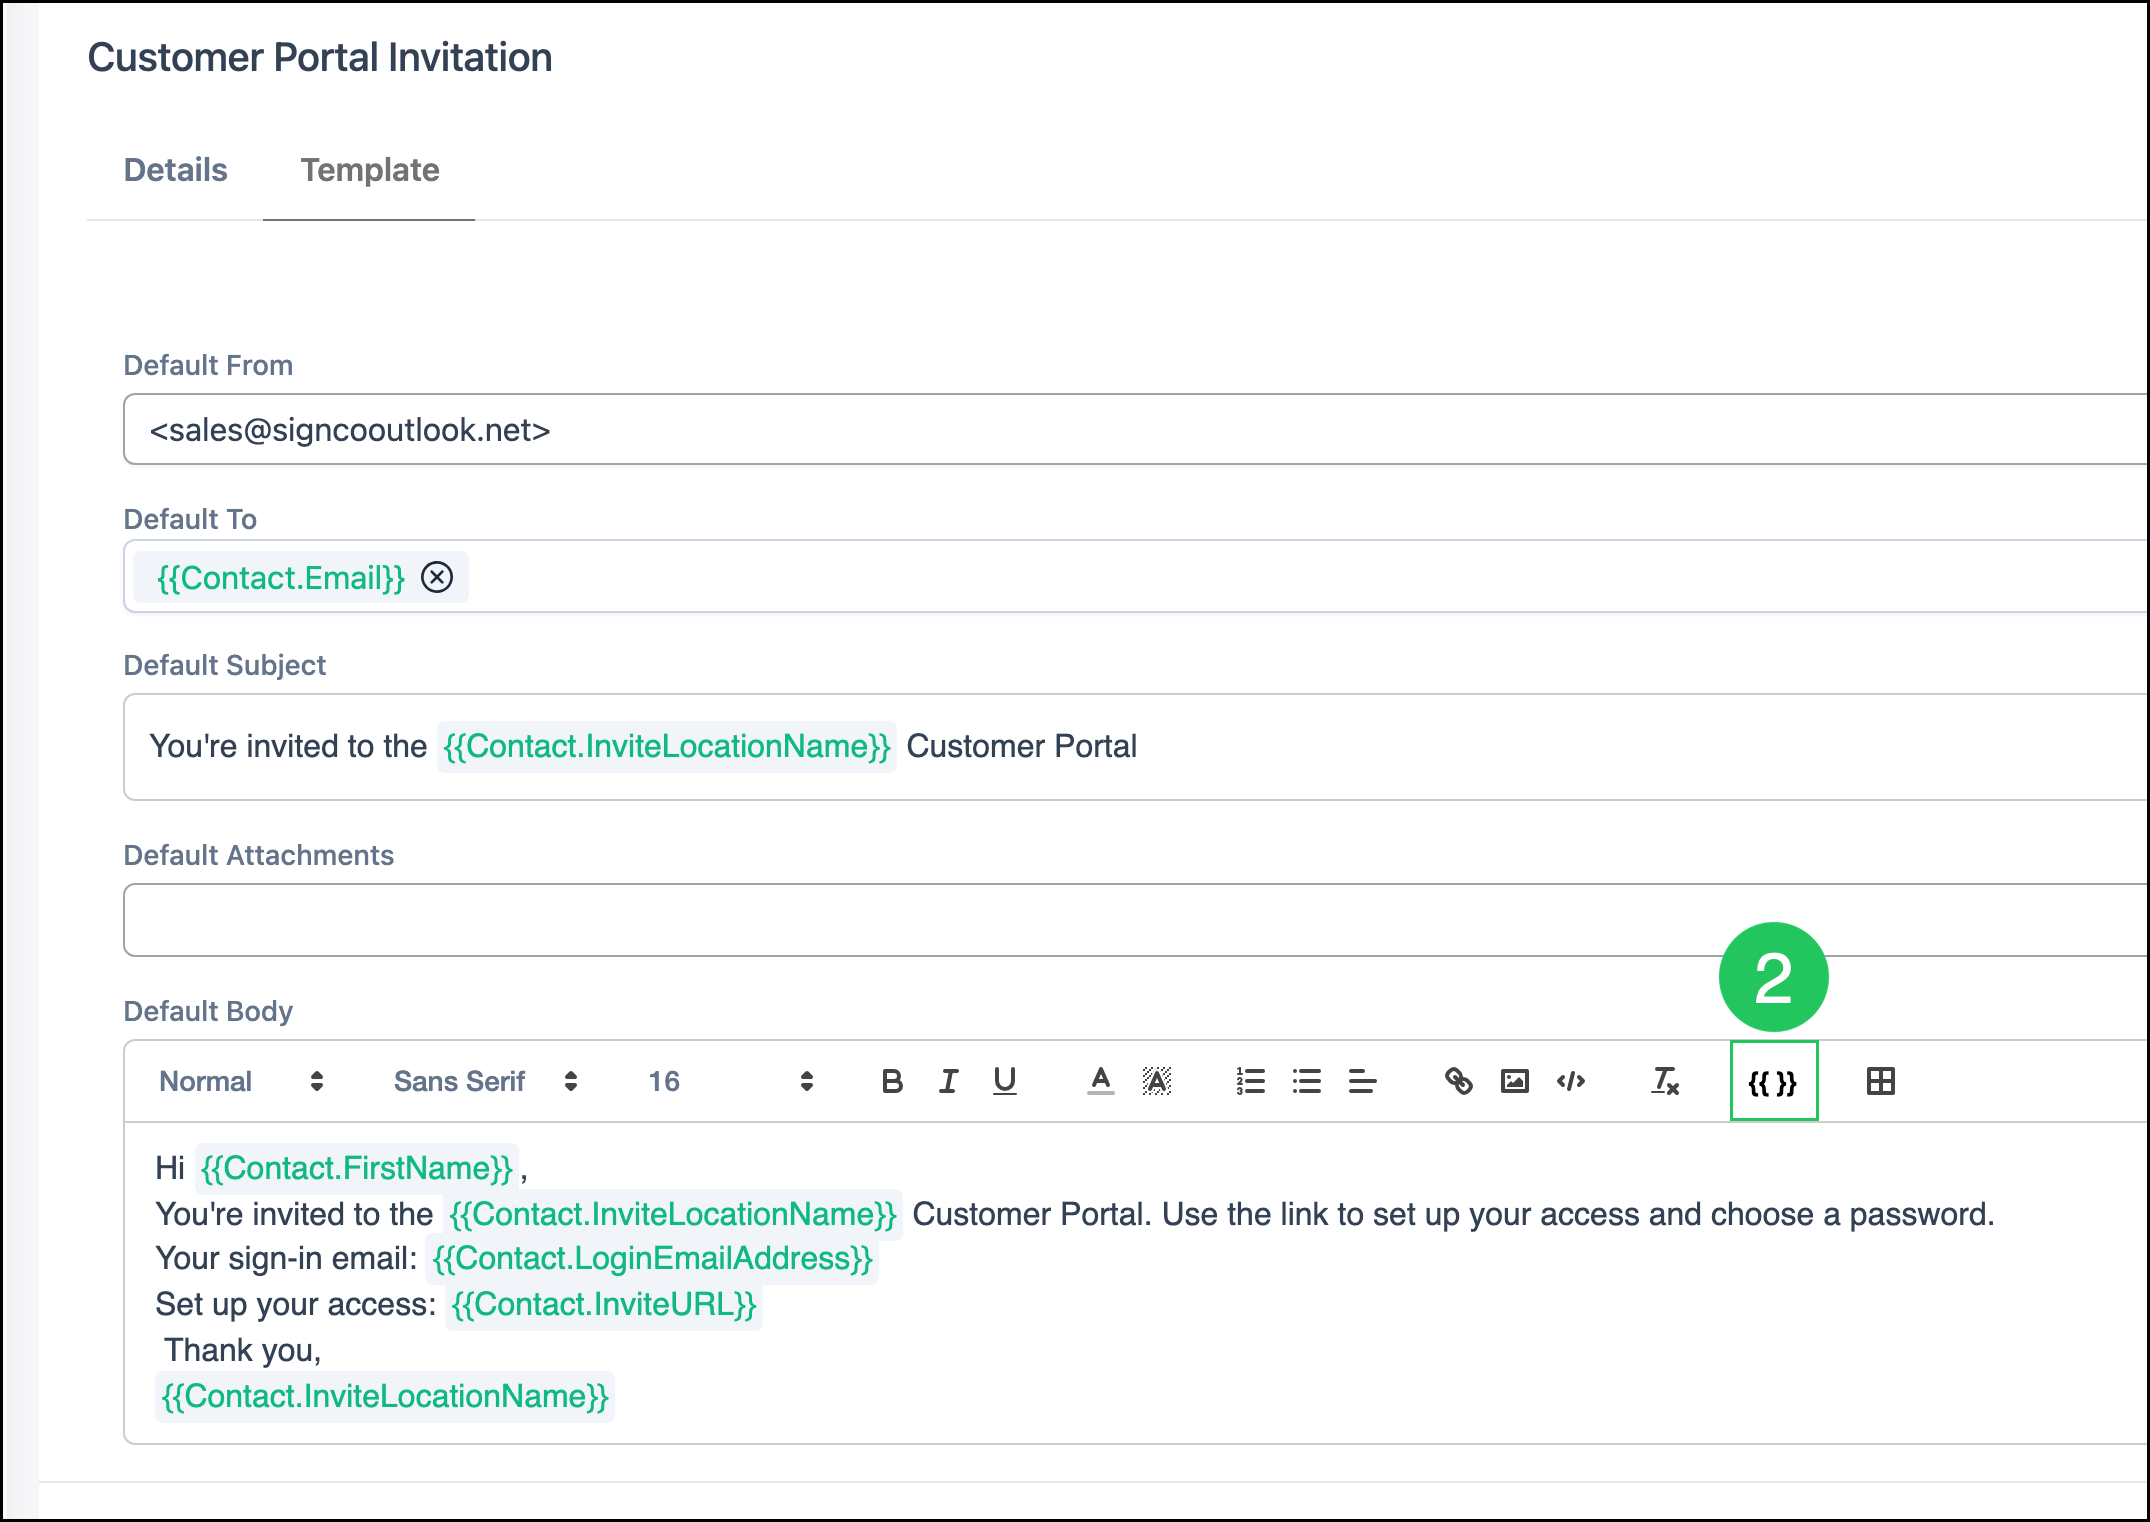
2. Click Insert merge field in Default Body to add Invite URL.
Note: Insert merge field also appears on Default To and Default Subject. For more information, see Merge Fields.
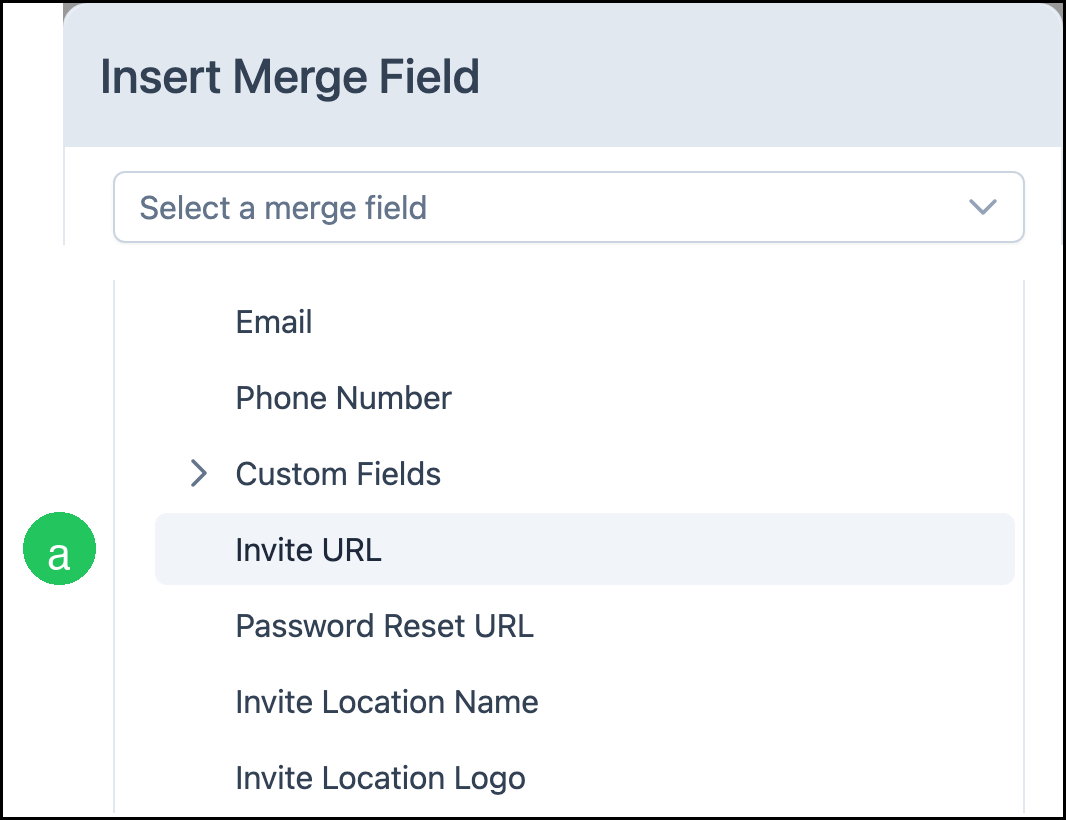
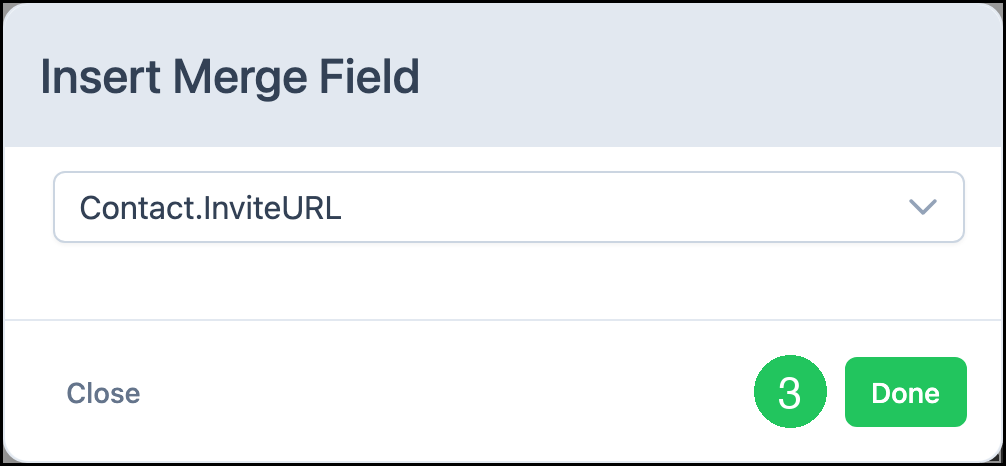
The Insert Merge Field dialog opens.
a. Select a merge field - Expand Contact and select Invite URL.
3. Click Done.
4. Click Save.
Frequently Asked Questions
1. When is the Customer Portal invitation email sent?
Answer: CoreBridge sends the invitation when you grant Customer Portal access on a Contact. For more information, see How to Invite Customers to the Customer Portal.
2. What does Message Template Type New Contact Login Email do?
Answer: New Contact Login Email identifies this Contact template as the invitation sent when you grant Customer Portal access.
3. Why does Preview still show Invite URL as a Merge Field?
Answer: Invite URL populates when the email is sent. Preview keeps the Merge Field token. For more information, see Merge Fields.
4. How is Invite URL different from a Customer Portal link on an Order or Estimate email?
Answer: Invite URL is the link the Contact uses to set up Customer Portal access. Order and Estimate templates can include a portal link to a specific document. Use Invite URL on this Contact invitation template.
5. What are the other Contact Message Template Types?
Answer: Contact templates can also use General Contact Email, Contact Password Reset Email, and Existing Contact Login Email. Contact Password Reset Email is the template used when you send Password Reset from a Contact.
Related Articles
Adding Email From Addresses
Creating and Editing Email Templates
Customer Portal Overview
How to Invite Customers to the Customer Portal
Merge Fields
Using Email Templates