
When a customer approves a Line Item in the Customer Portal, you can alert employees with an in-app Notification. You create this Notification in Automations by using the When line item status changes trigger, a condition that matches the status from your Approval Process, and the In-App Notification action.
Table of Contents
Important Information
- Creating and editing Automations requires the Access Workflow Settings permission. For more information, see Employee Roles and Permissions in Settings.
- The condition on this Notification must match the Line Item status your shop uses when a customer approves work. Those statuses are set in the Customer Portal Approval Process as No Proof Approved Status and Has Proof Approved Status. Estimates and Orders can use the same status or different statuses. For more information, see Customer Portal Approval Process.
Example: This article uses Proof Approved as the condition. Select the status your Approval Process applies when a customer approves a Line Item.
- If with-proof and without-proof approvals use different statuses, create a separate Notification for each status. Automation conditions combine with AND, so one Notification cannot watch two different statuses at the same time.
- Employees receive Notifications in the header Notifications window and on the Messages & Notifications screen. For more information, see Messages and Notifications.
Creating the Notification
Navigate to System Settings / Workflow / Automations.
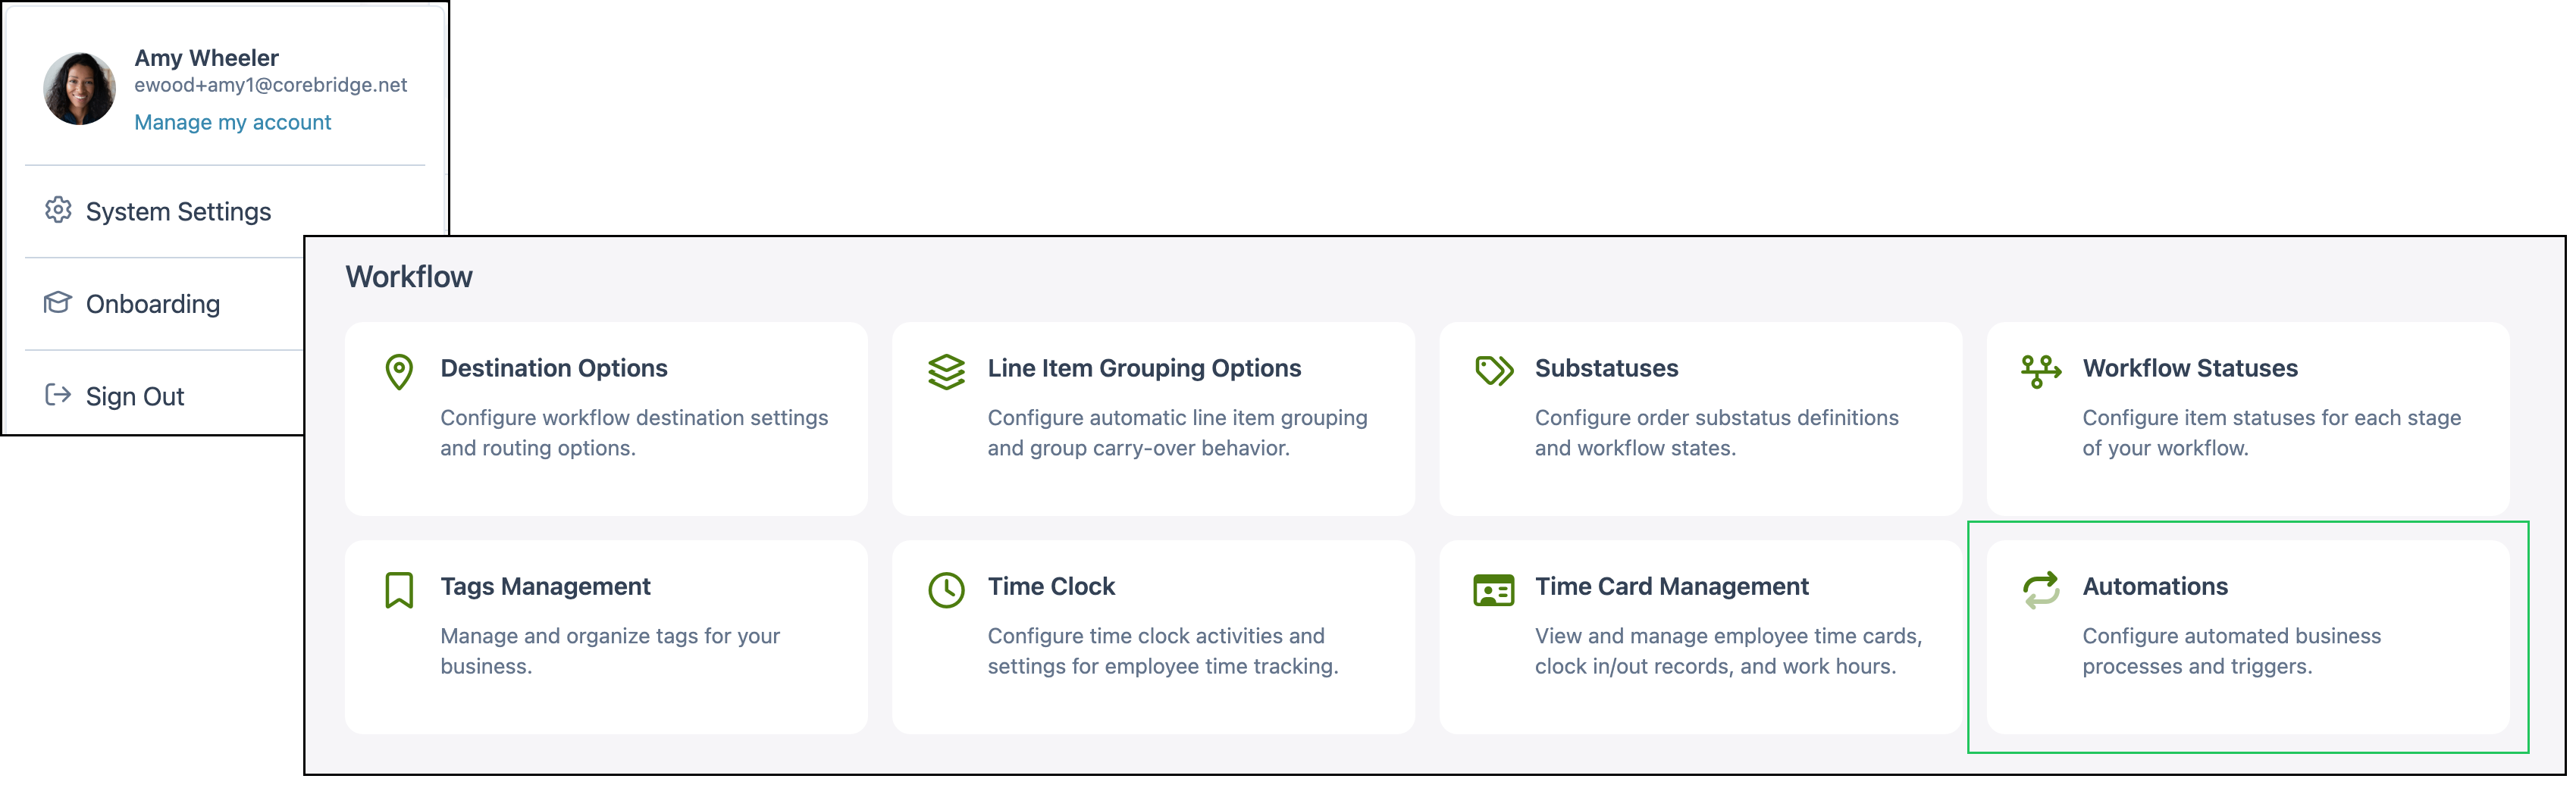
1. Click Automation.

2. Select Create from scratch.

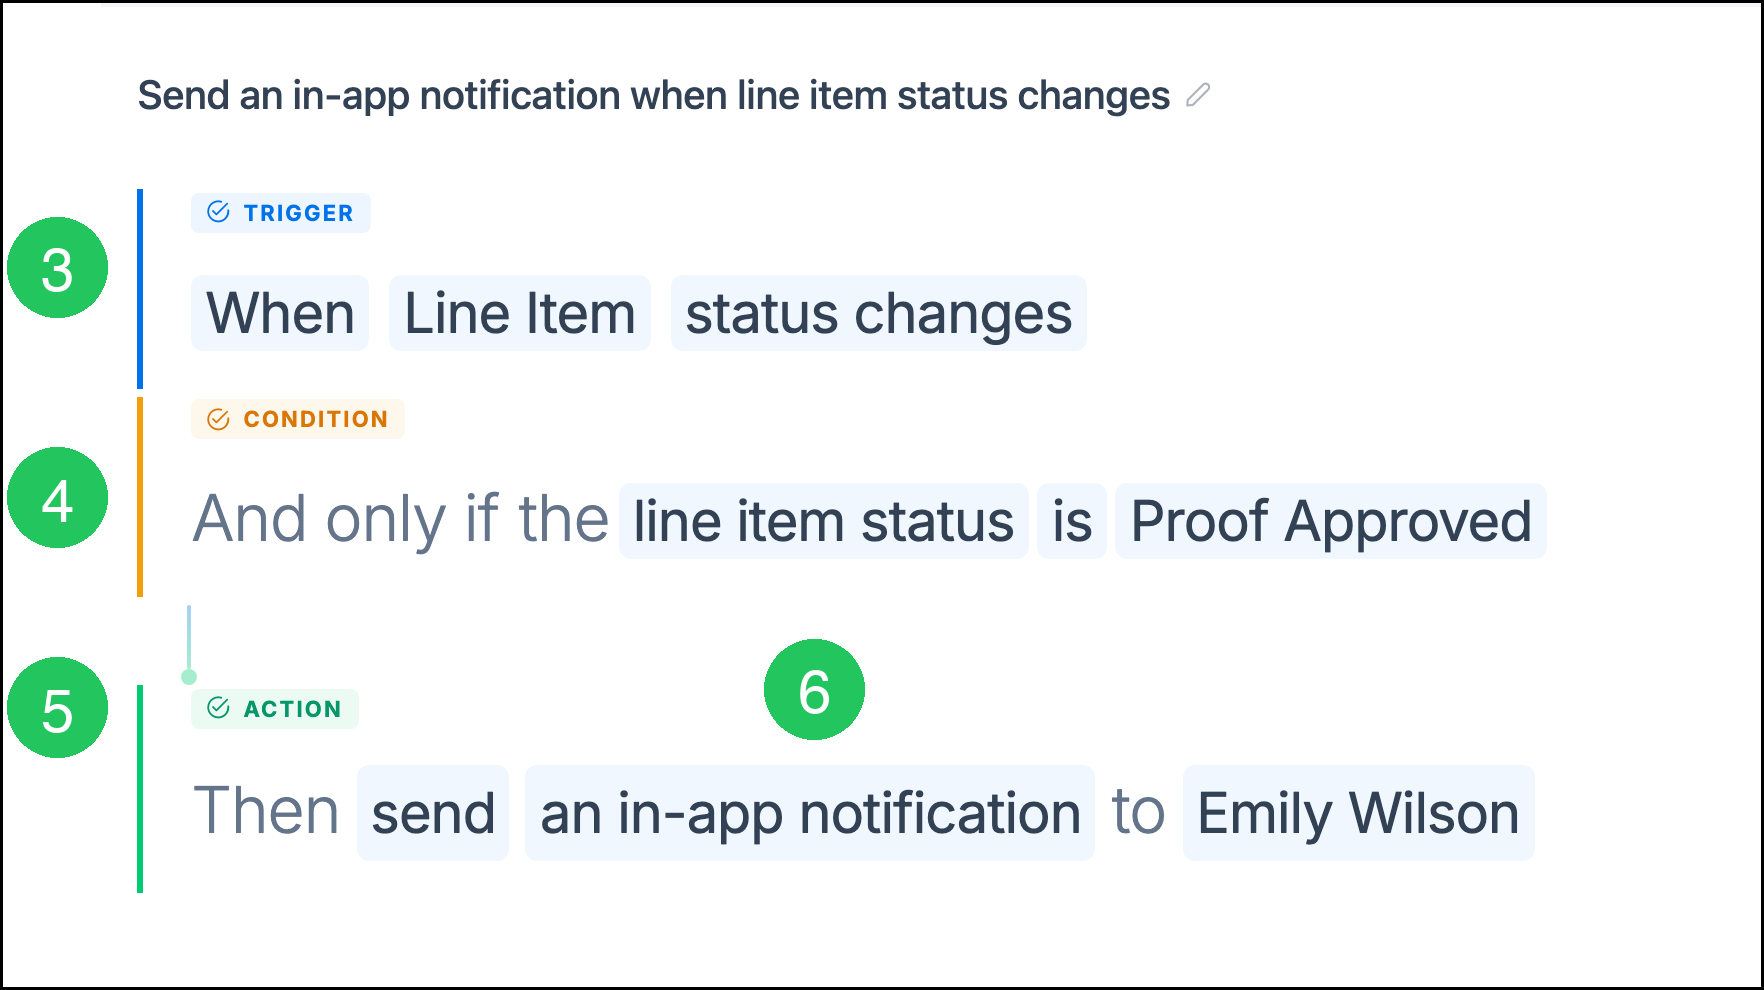
3. Click When this happens, then select When line item status changes.
4. Click Add condition. Select line item status, then select the status from your Approval Process.
5. Click Add action, select send an in-app notification, then select the recipient. Recipients can be People or Roles. Teams are available when Teams is included in your plan.
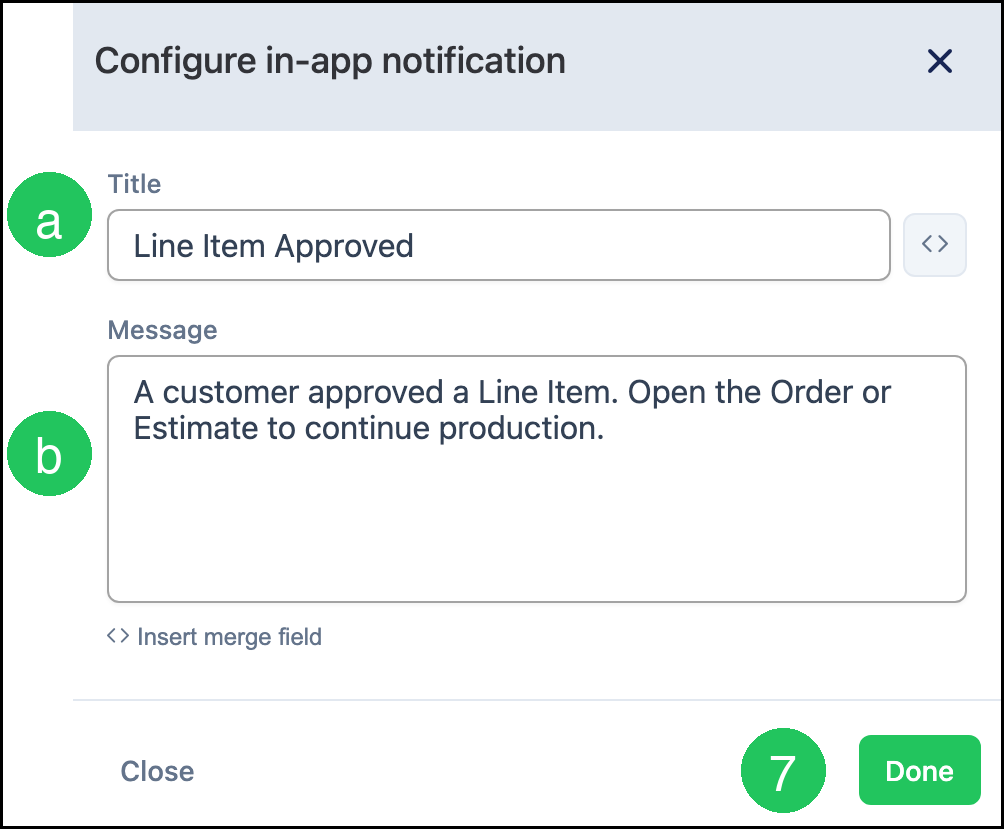
6. Click an in-app notification to open the Configure in-app notification dialog.
a. Title - The subject of the Notification. Merge fields can be inserted as needed.
b. Message - The body of the Notification. Merge fields can be inserted as needed.
7. Click Done.
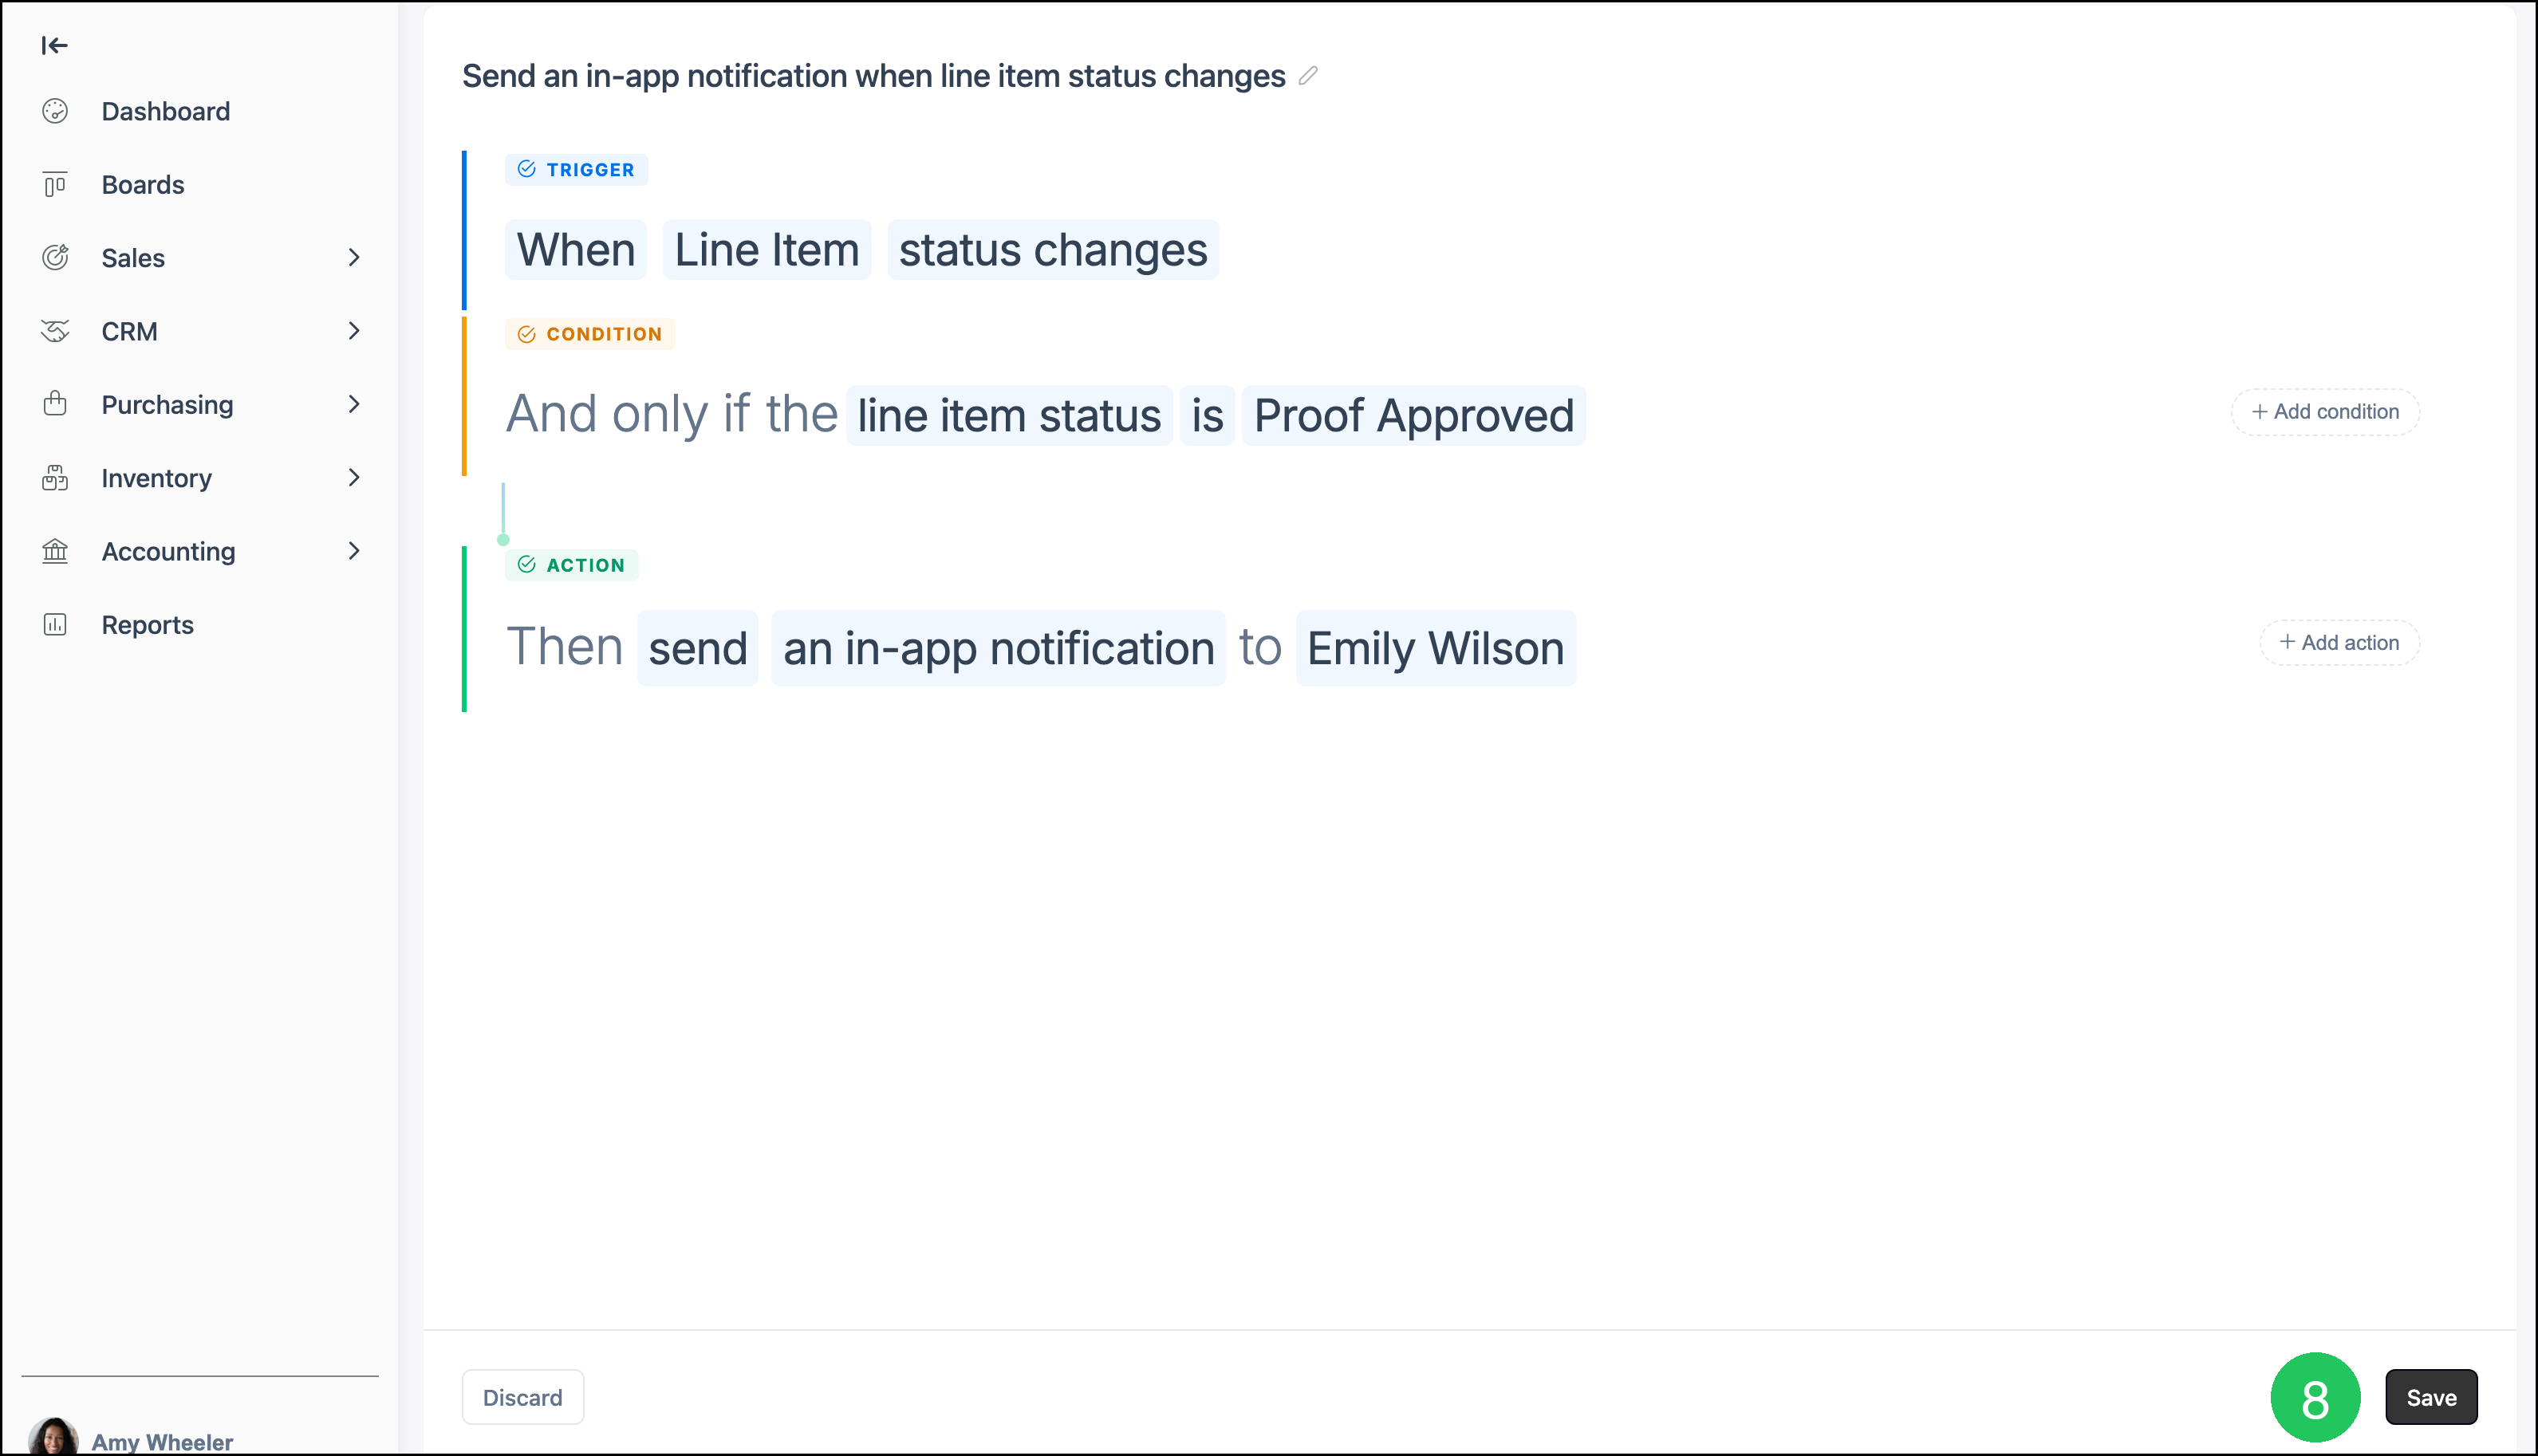
Note: The builder names the Automation from the trigger and action. Click the pencil next to the name to change it.
8. Click Save.
Note: For more information about triggers, conditions, and other Automation actions, see Automations Overview. For more information about creating Notifications, see Creating and Managing Notifications.
Frequently Asked Questions
1. Which Line Item status should I use in the condition?
Answer: Use the status your shop assigned in System Settings / Customer Portal / Approval Process for customer approval. Check No Proof Approved Status and Has Proof Approved Status for both Estimates and Orders, then select that same status in the Automation condition.
2. What if with-proof and without-proof approvals use different statuses?
Answer: Create two Notifications: one condition for the without-proof status and one for the with-proof status. Conditions on a single Automation combine with AND, so both statuses cannot be true at the same time.
3. Where do employees see this Notification?
Answer: Notifications appear in the header Notifications window and on the Messages & Notifications screen under the Notifications channel.
4. Can I notify a Role instead of one employee?
Answer: Yes. When you select the recipient, choose Roles to notify every employee in that Role. Choose People to notify specific employees. Teams appear when Teams is included in your plan.
5. Can I use When a proof is approved instead?
Answer: Yes, when you only need to notify employees after a proof is approved. Use When line item status changes when you also want to notify employees for Line Items that are approved without a proof.
Related Articles
Automations Overview
Creating and Managing Notifications
Customer Portal Approval Process
Employee Roles and Permissions in Settings
Line Item Statuses
Messages and Notifications
Practical Automation Examples