
Commission Groups define how sales commissions are calculated for employees. You create a group in System Settings, choose which order lifecycle event commission is based on, then configure plans, income accounts, and who the group applies to.
Table of Contents
- Important Information
- Create a Commission Group
- Group Details
- Commission Plans
- Income Accounts
- Applies To
- Publish a Commission Group
- Frequently Asked Questions
- Related Articles
Important Information
Commission Groups appear when the Commission license option is enabled for your account. The settings card is named Commission Settings. The destination screen is titled Commission Groups.
A new group saves as a Draft. Configure plans, income accounts, and assignments, then click Publish. Publishing locks the commission group.
Commission Based On selects which order lifecycle event starts the commission calculation. Available options are:
- Placed Orders
- Built Orders
- Orders Ready for Invoicing
- Invoiced
- Closed Orders
- Payments
Commission Period can be Monthly, Quarterly, or Annually.
Commission amounts are calculated from income or sales amounts using the plans you configure. To vary rates by product line, map products to different income accounts and assign plans on the Income Accounts tab.
Create a Commission Group
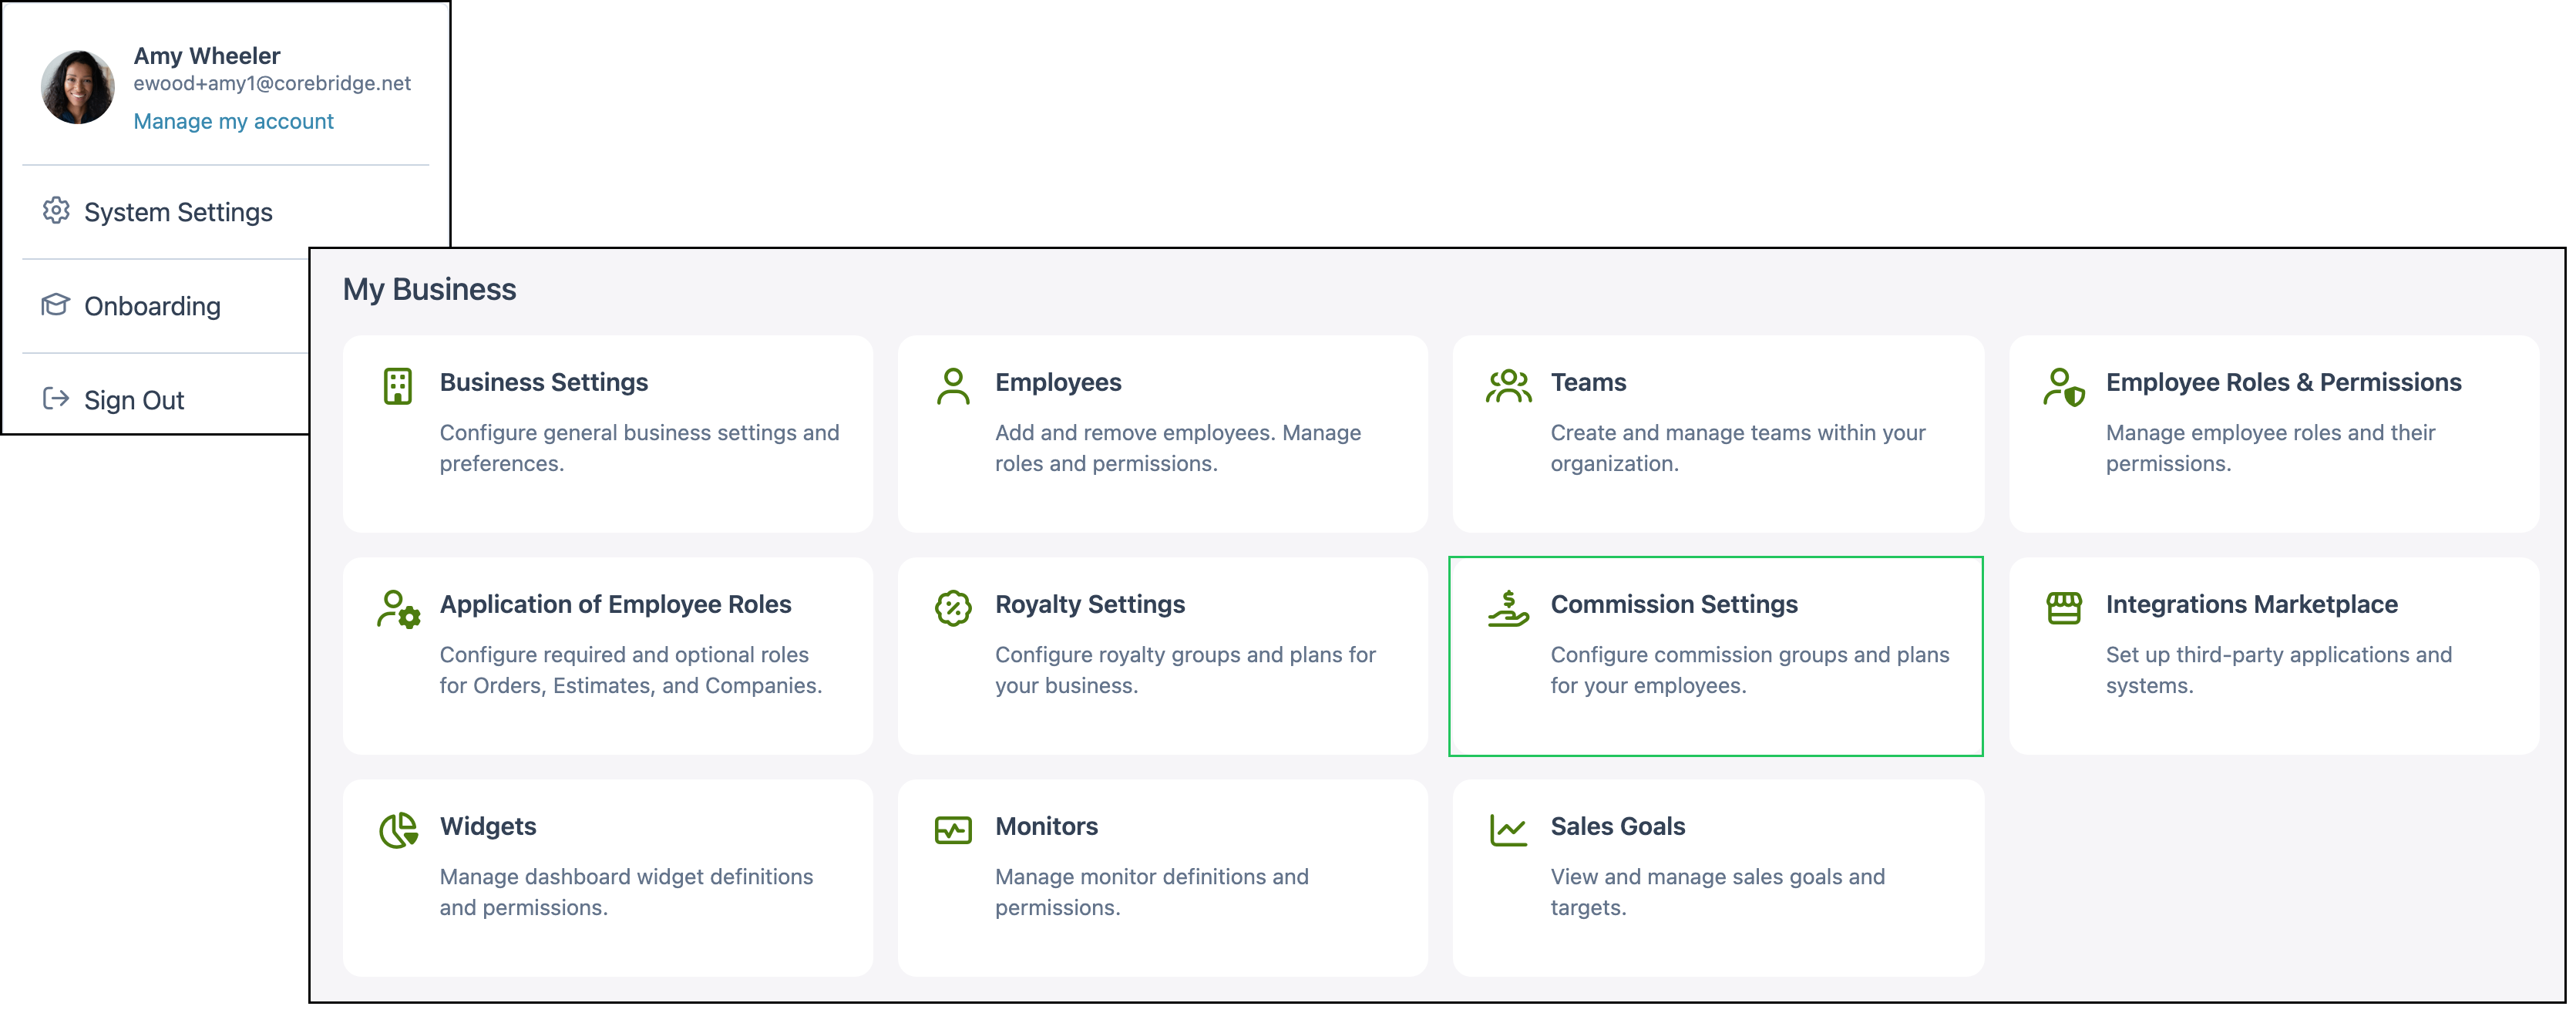
Navigate to System Settings / My Business / Commission Settings.
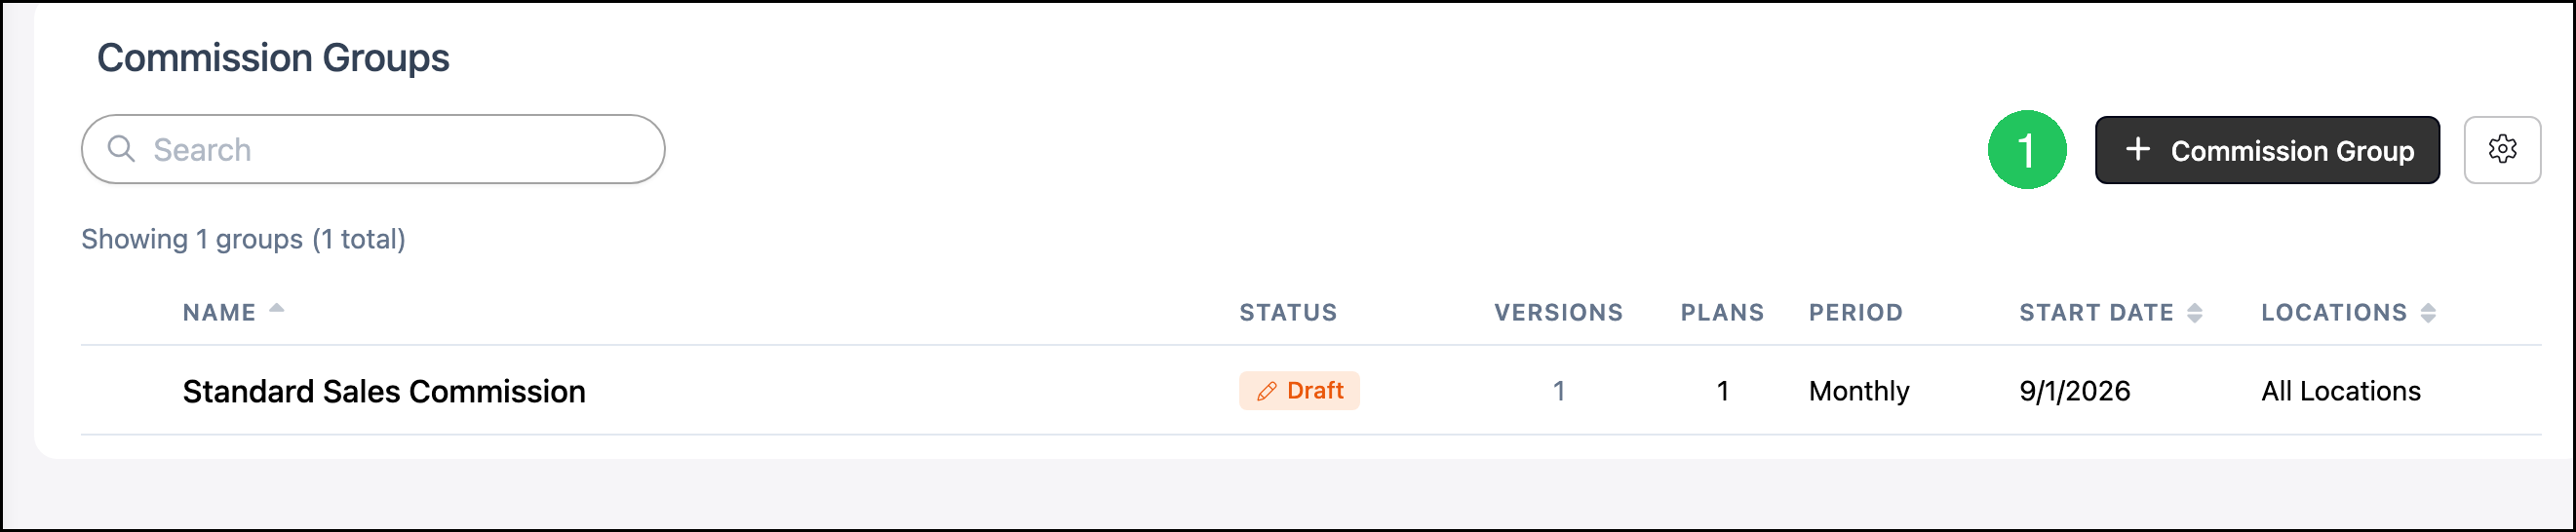
1. Click + Commission Group.
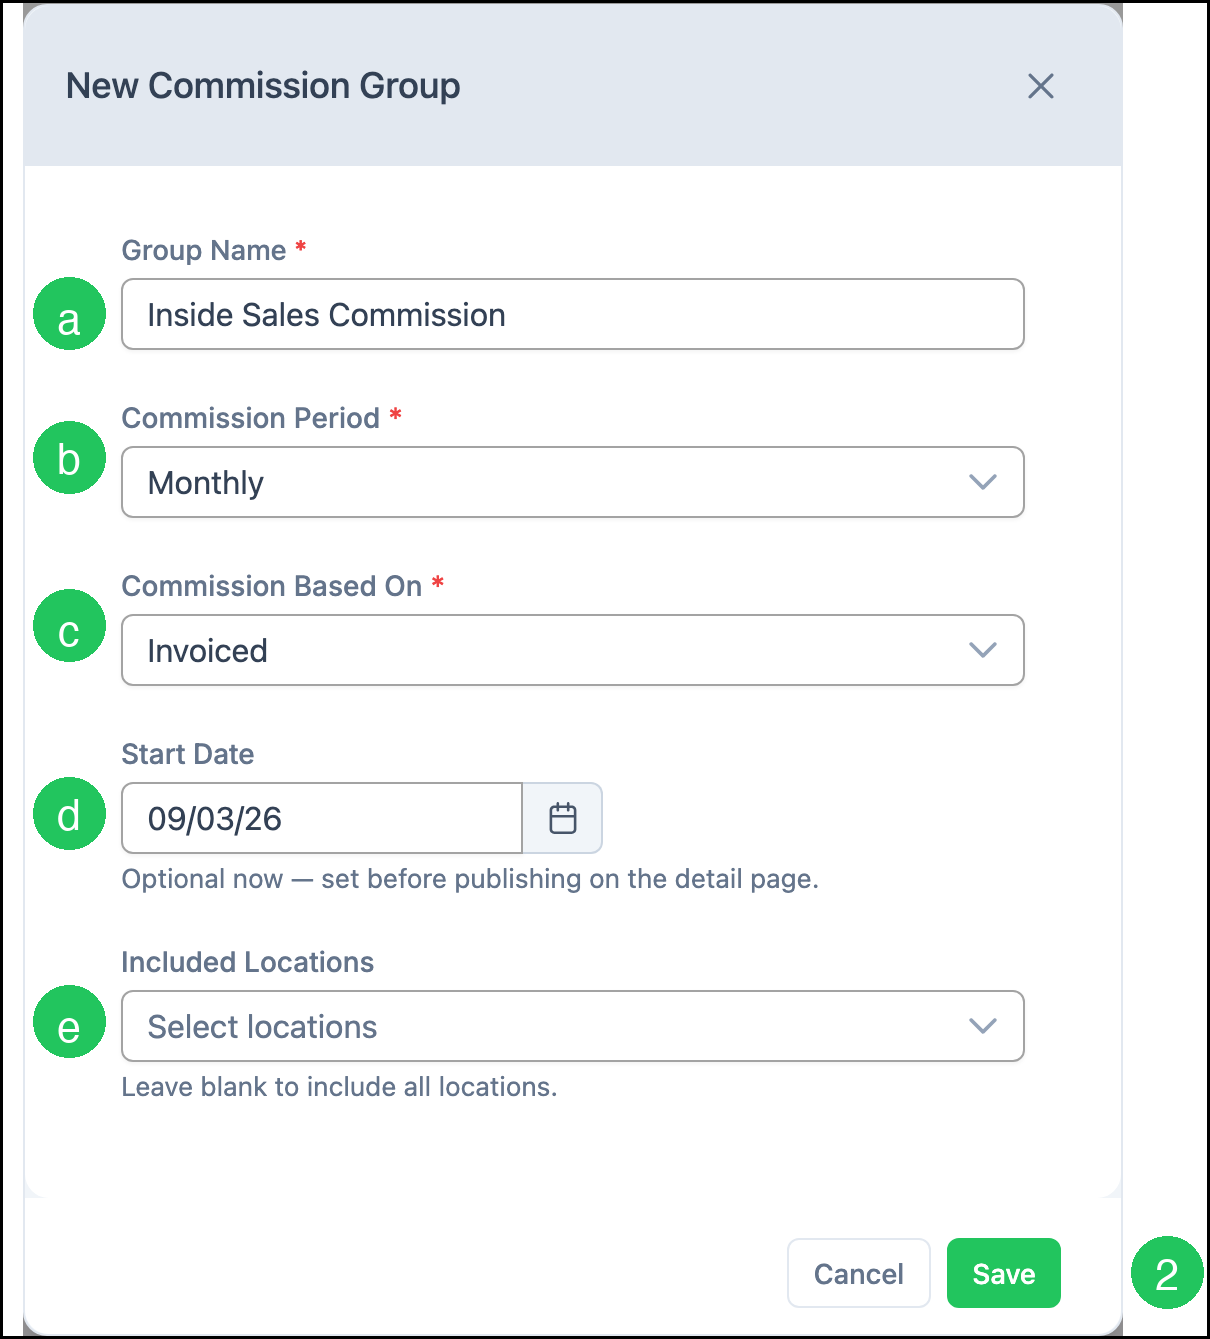
The New Commission Group dialog opens.
a. Group Name - The name of the commission group.
b. Commission Period - How often commission is calculated. Select Monthly, Quarterly, or Annually.
c. Commission Based On - The order lifecycle event that starts the commission calculation.
d. Start Date - The date the group starts. This field is optional when you create the group and is required before you publish.
e. Included Locations - The locations this group covers. Leave this field blank to include all locations.
2. Click Save.
The group opens as a Draft.
Group Details
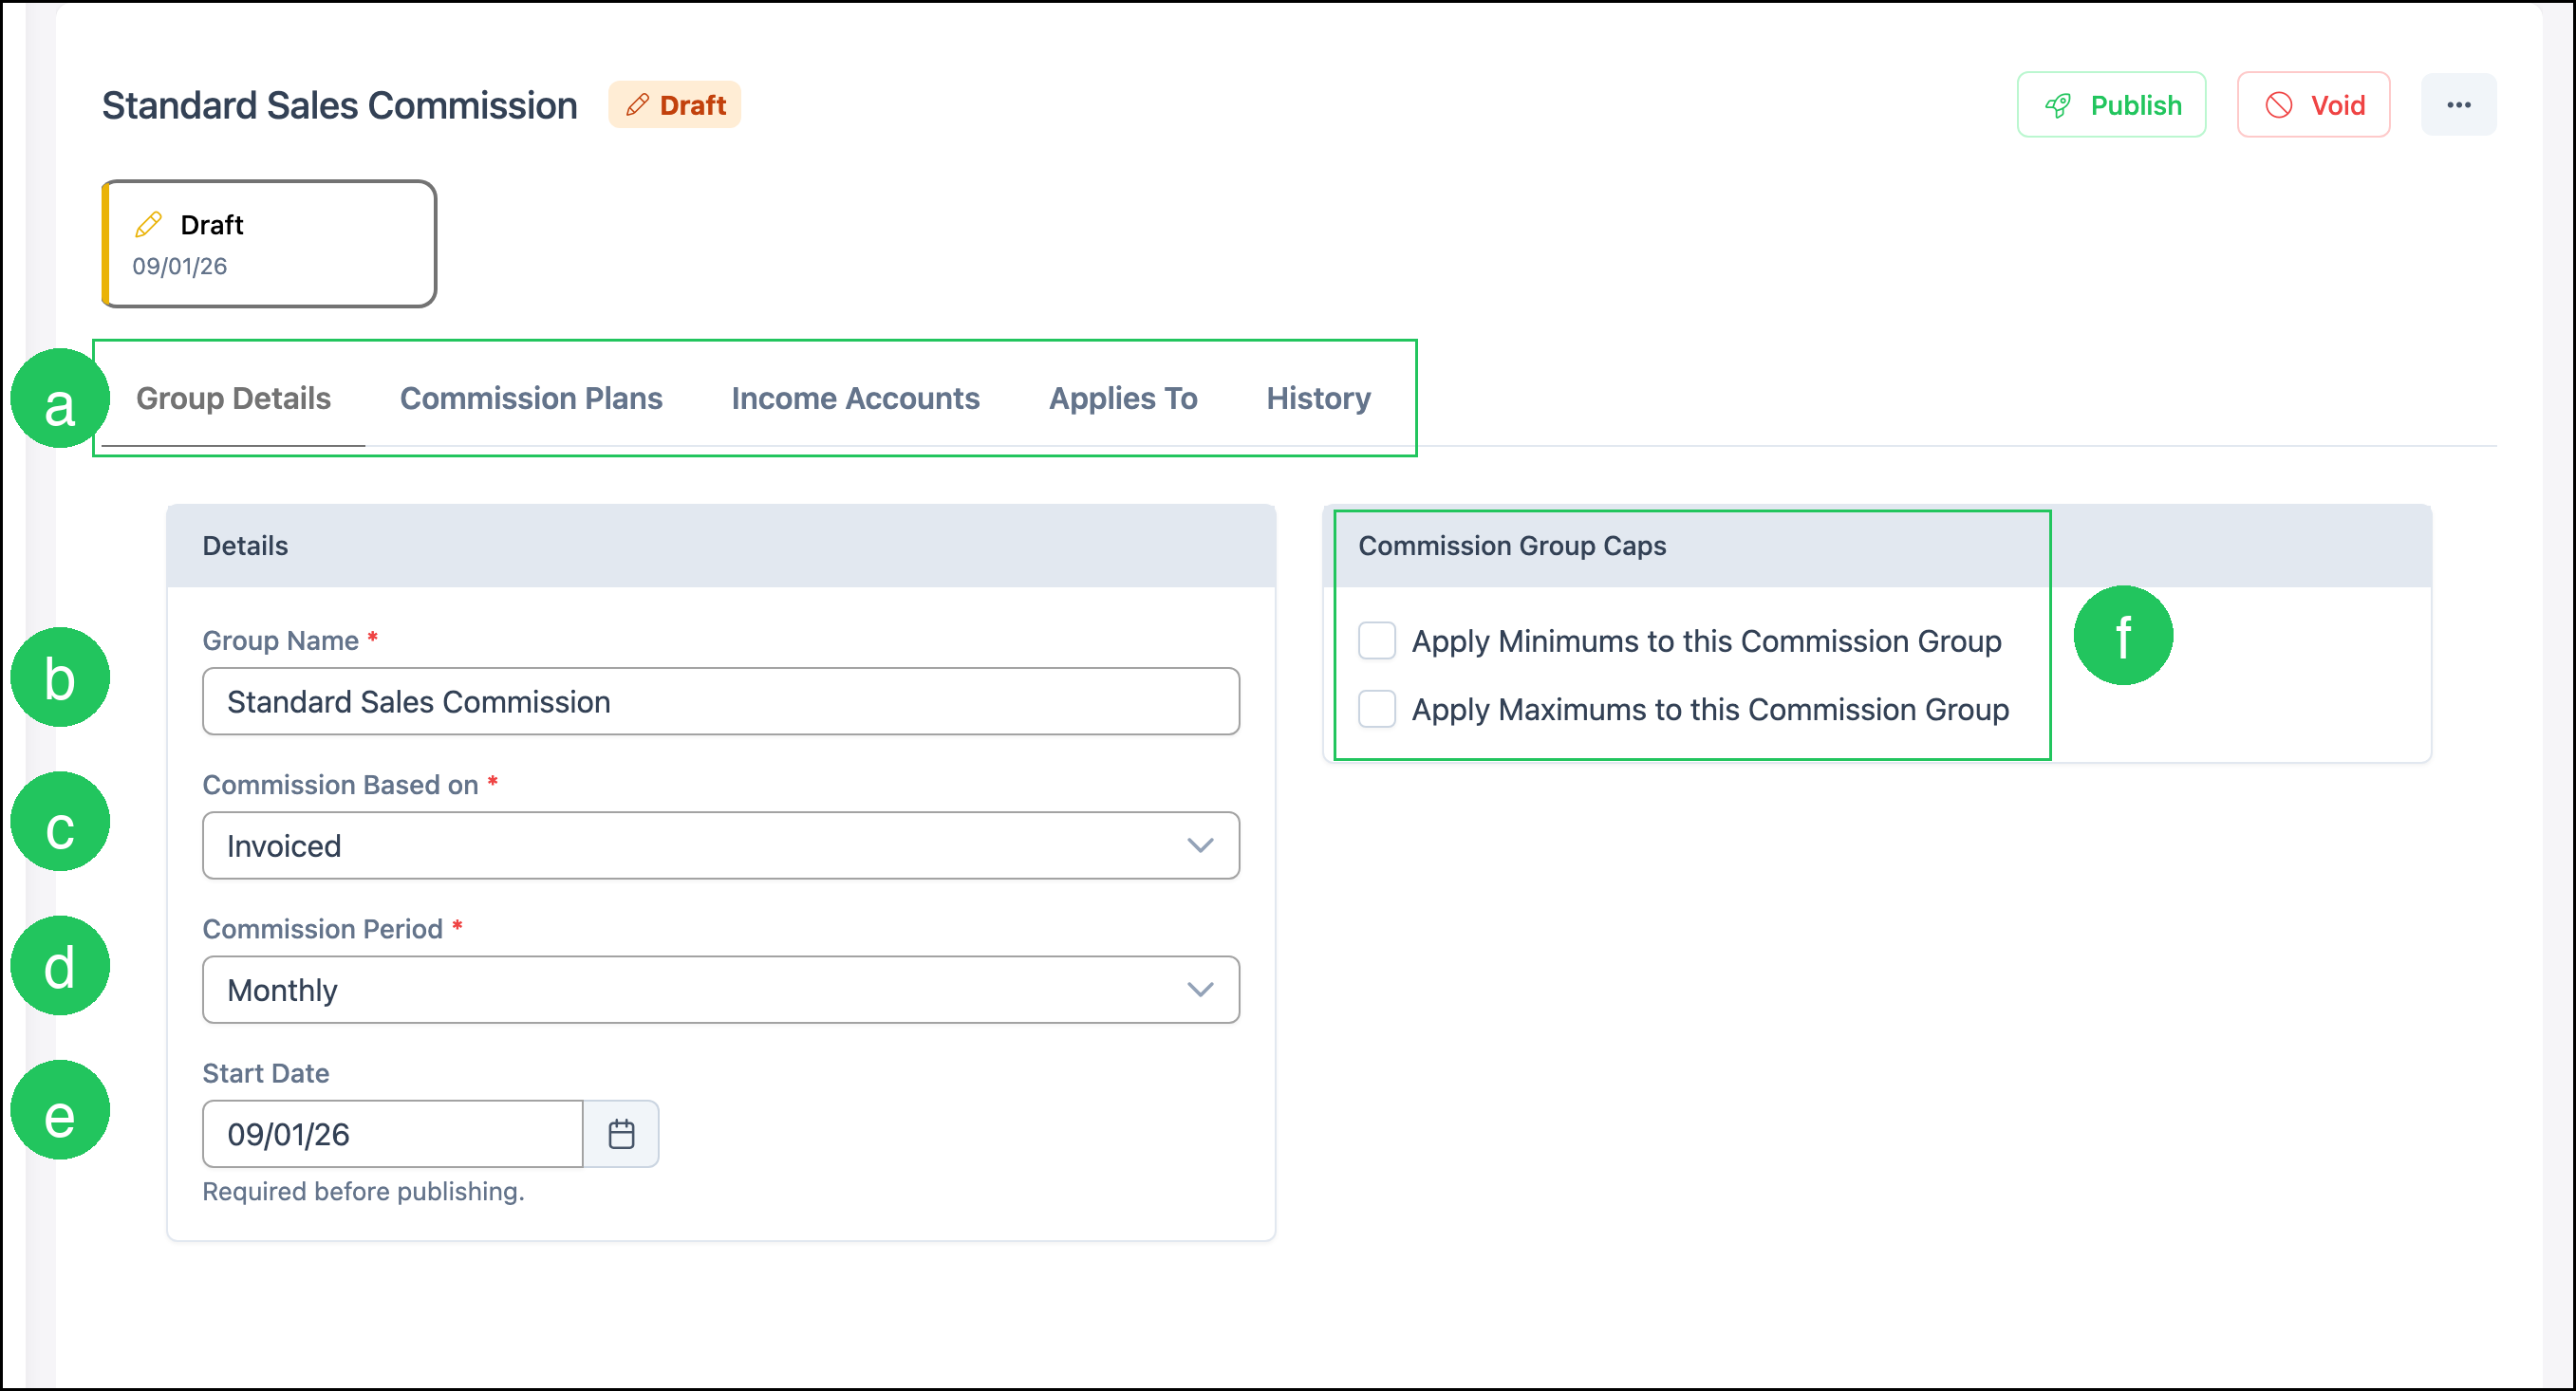
Use Group Details to review the group identity, period, start date, and caps.
a. Tabs - Switch between Group Details, Commission Plans, Income Accounts, Applies To, and History.
b. Group Name - The name of the commission group.
c. Commission Based on - The order lifecycle event that starts the commission calculation.
d. Commission Period - How often commission is calculated.
e. Start Date - The date the group starts. This field is required before you publish.
f. Commission Group Caps - Apply minimums or maximums to this commission group.
Note: The More Actions menu includes Clone and Delete.
Note: The History tab shows changes for the group.
Commission Plans
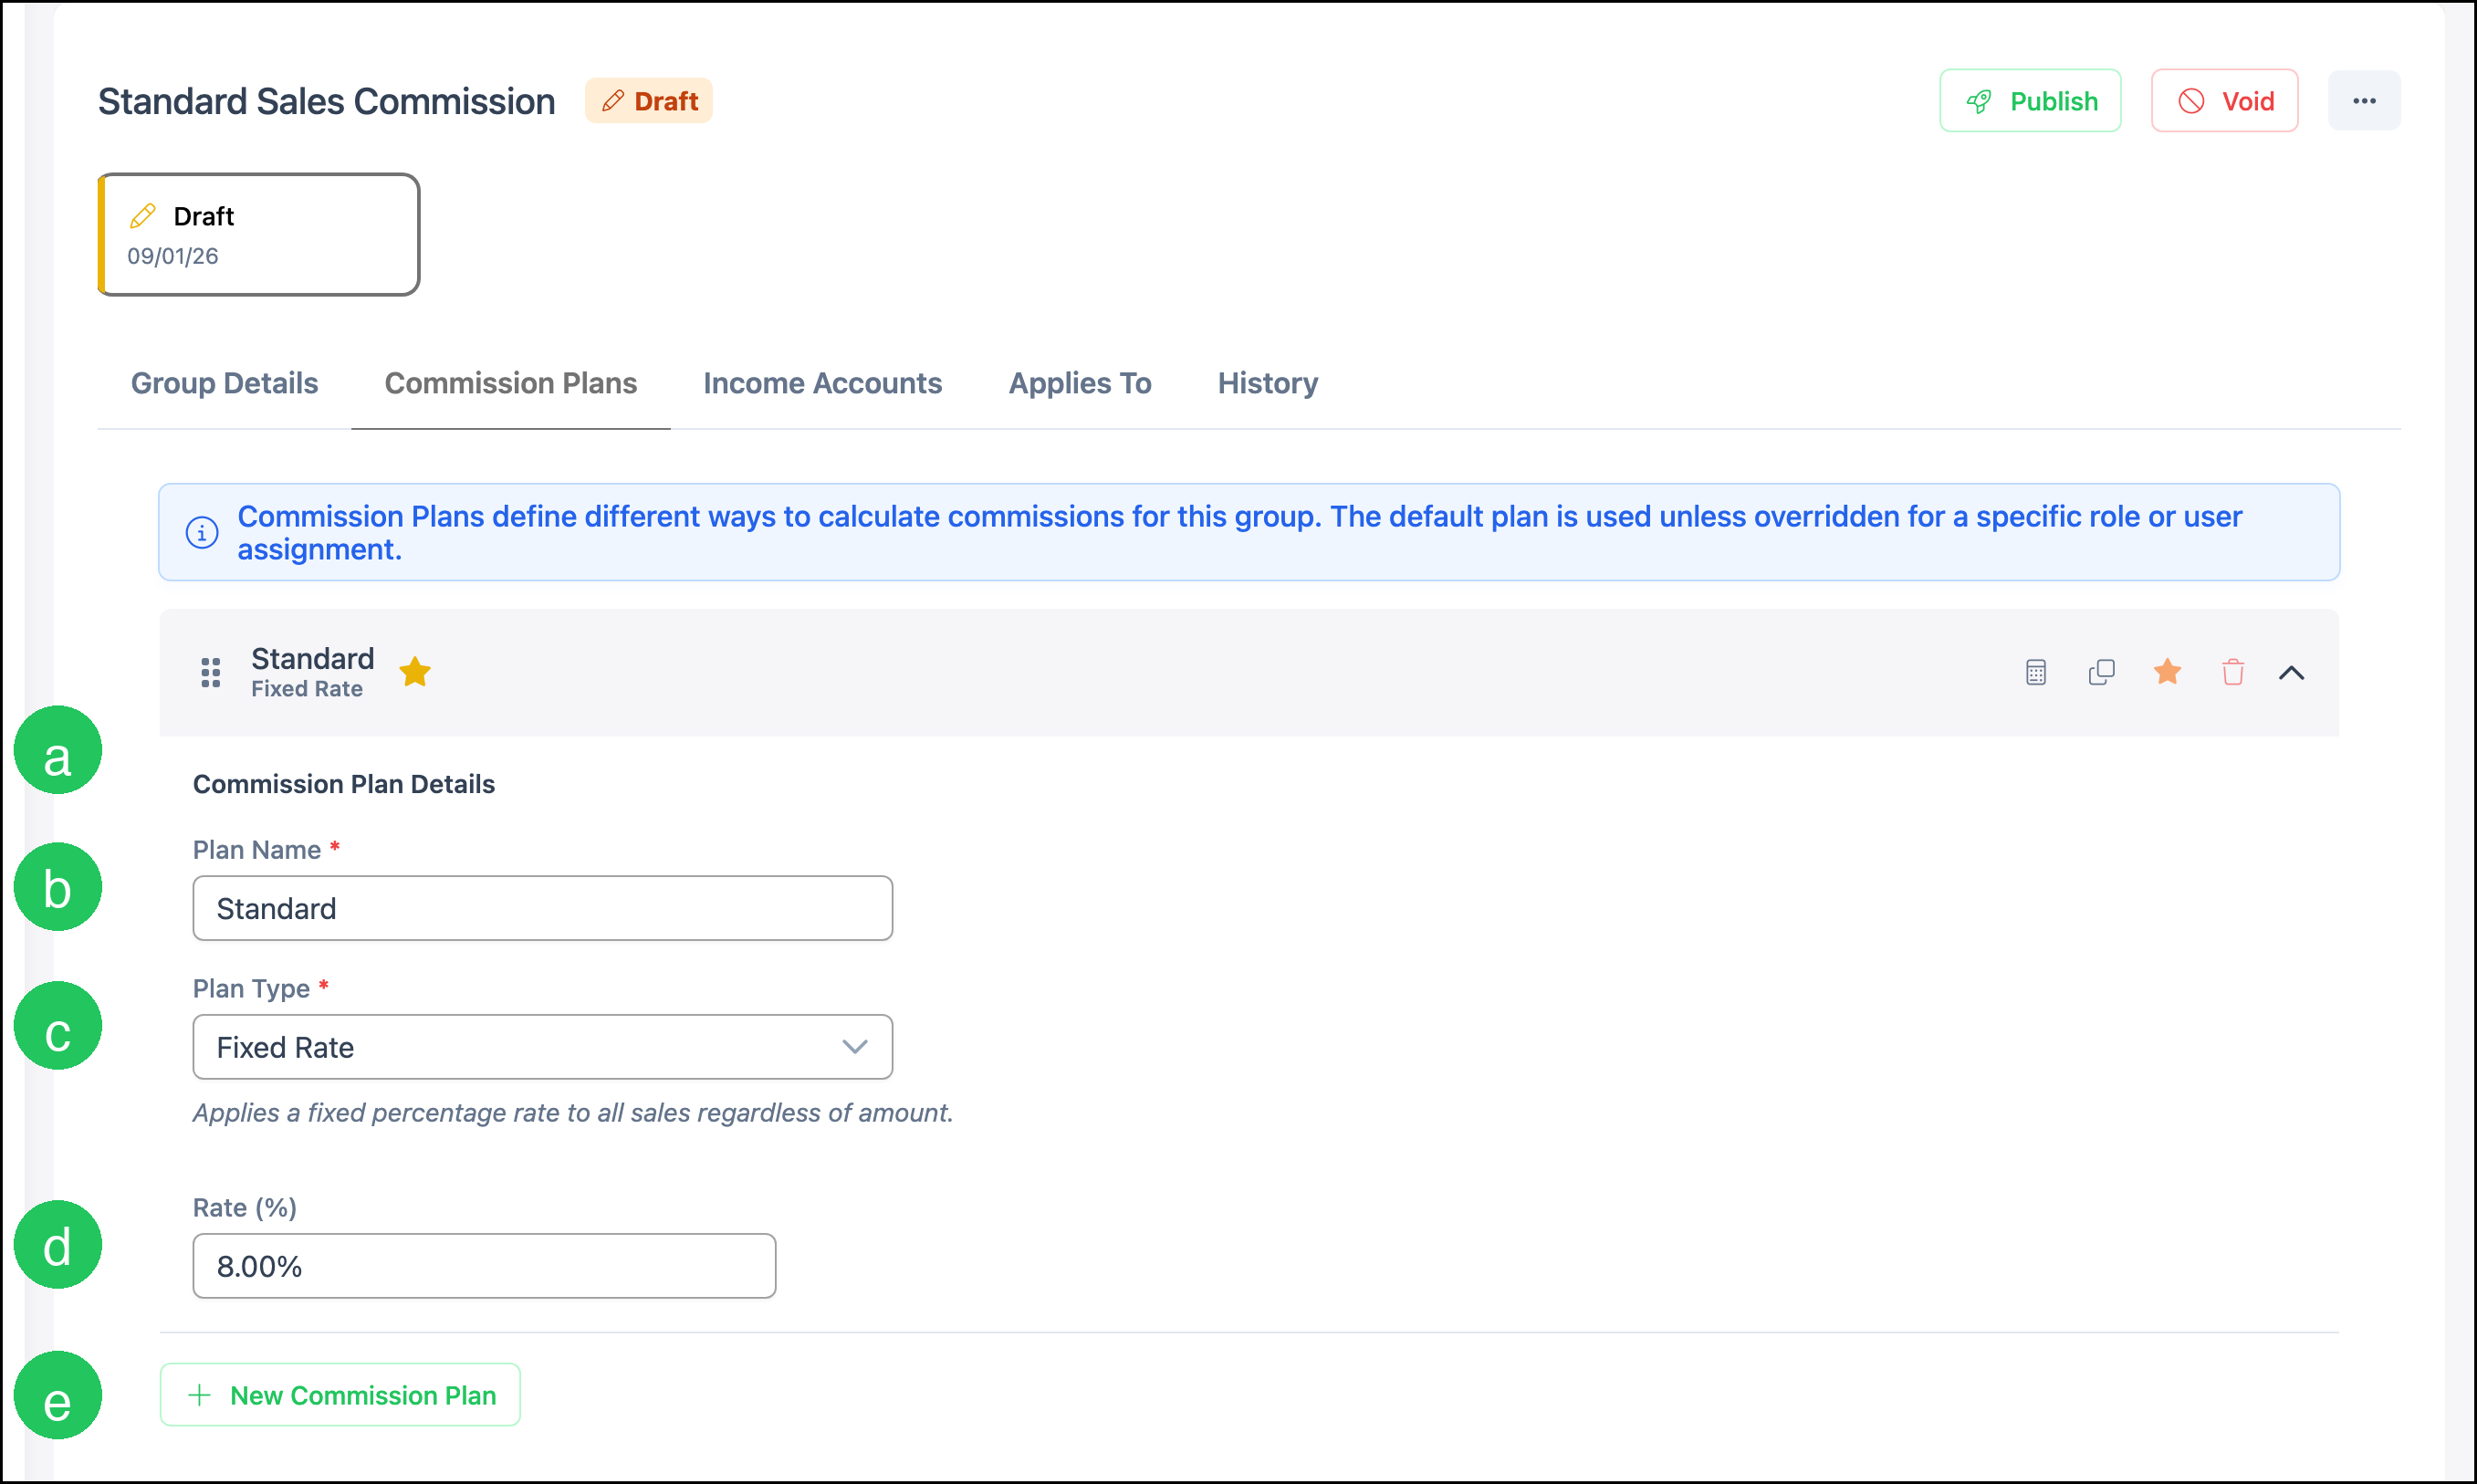
Commission plans define how commission is calculated. Assign which plan applies to each income account on the Income Accounts tab.
a. Commission Plan Details - The expanded plan, including the plan name and type.
b. Plan Name - The name of the plan.
c. Plan Type - How the plan calculates commission. Available types are:
- Exempt
- Fixed Rate
- Fixed Amount
- Rate Lookup
- Amount Lookup
- Incremental Rate
- Incremental Amount
d. Rate (%) - The percentage used when the plan type is Fixed Rate. Other plan types show the matching amount or lookup fields for that type.
e. + New Commission Plan - Adds another plan to this group.
Income Accounts
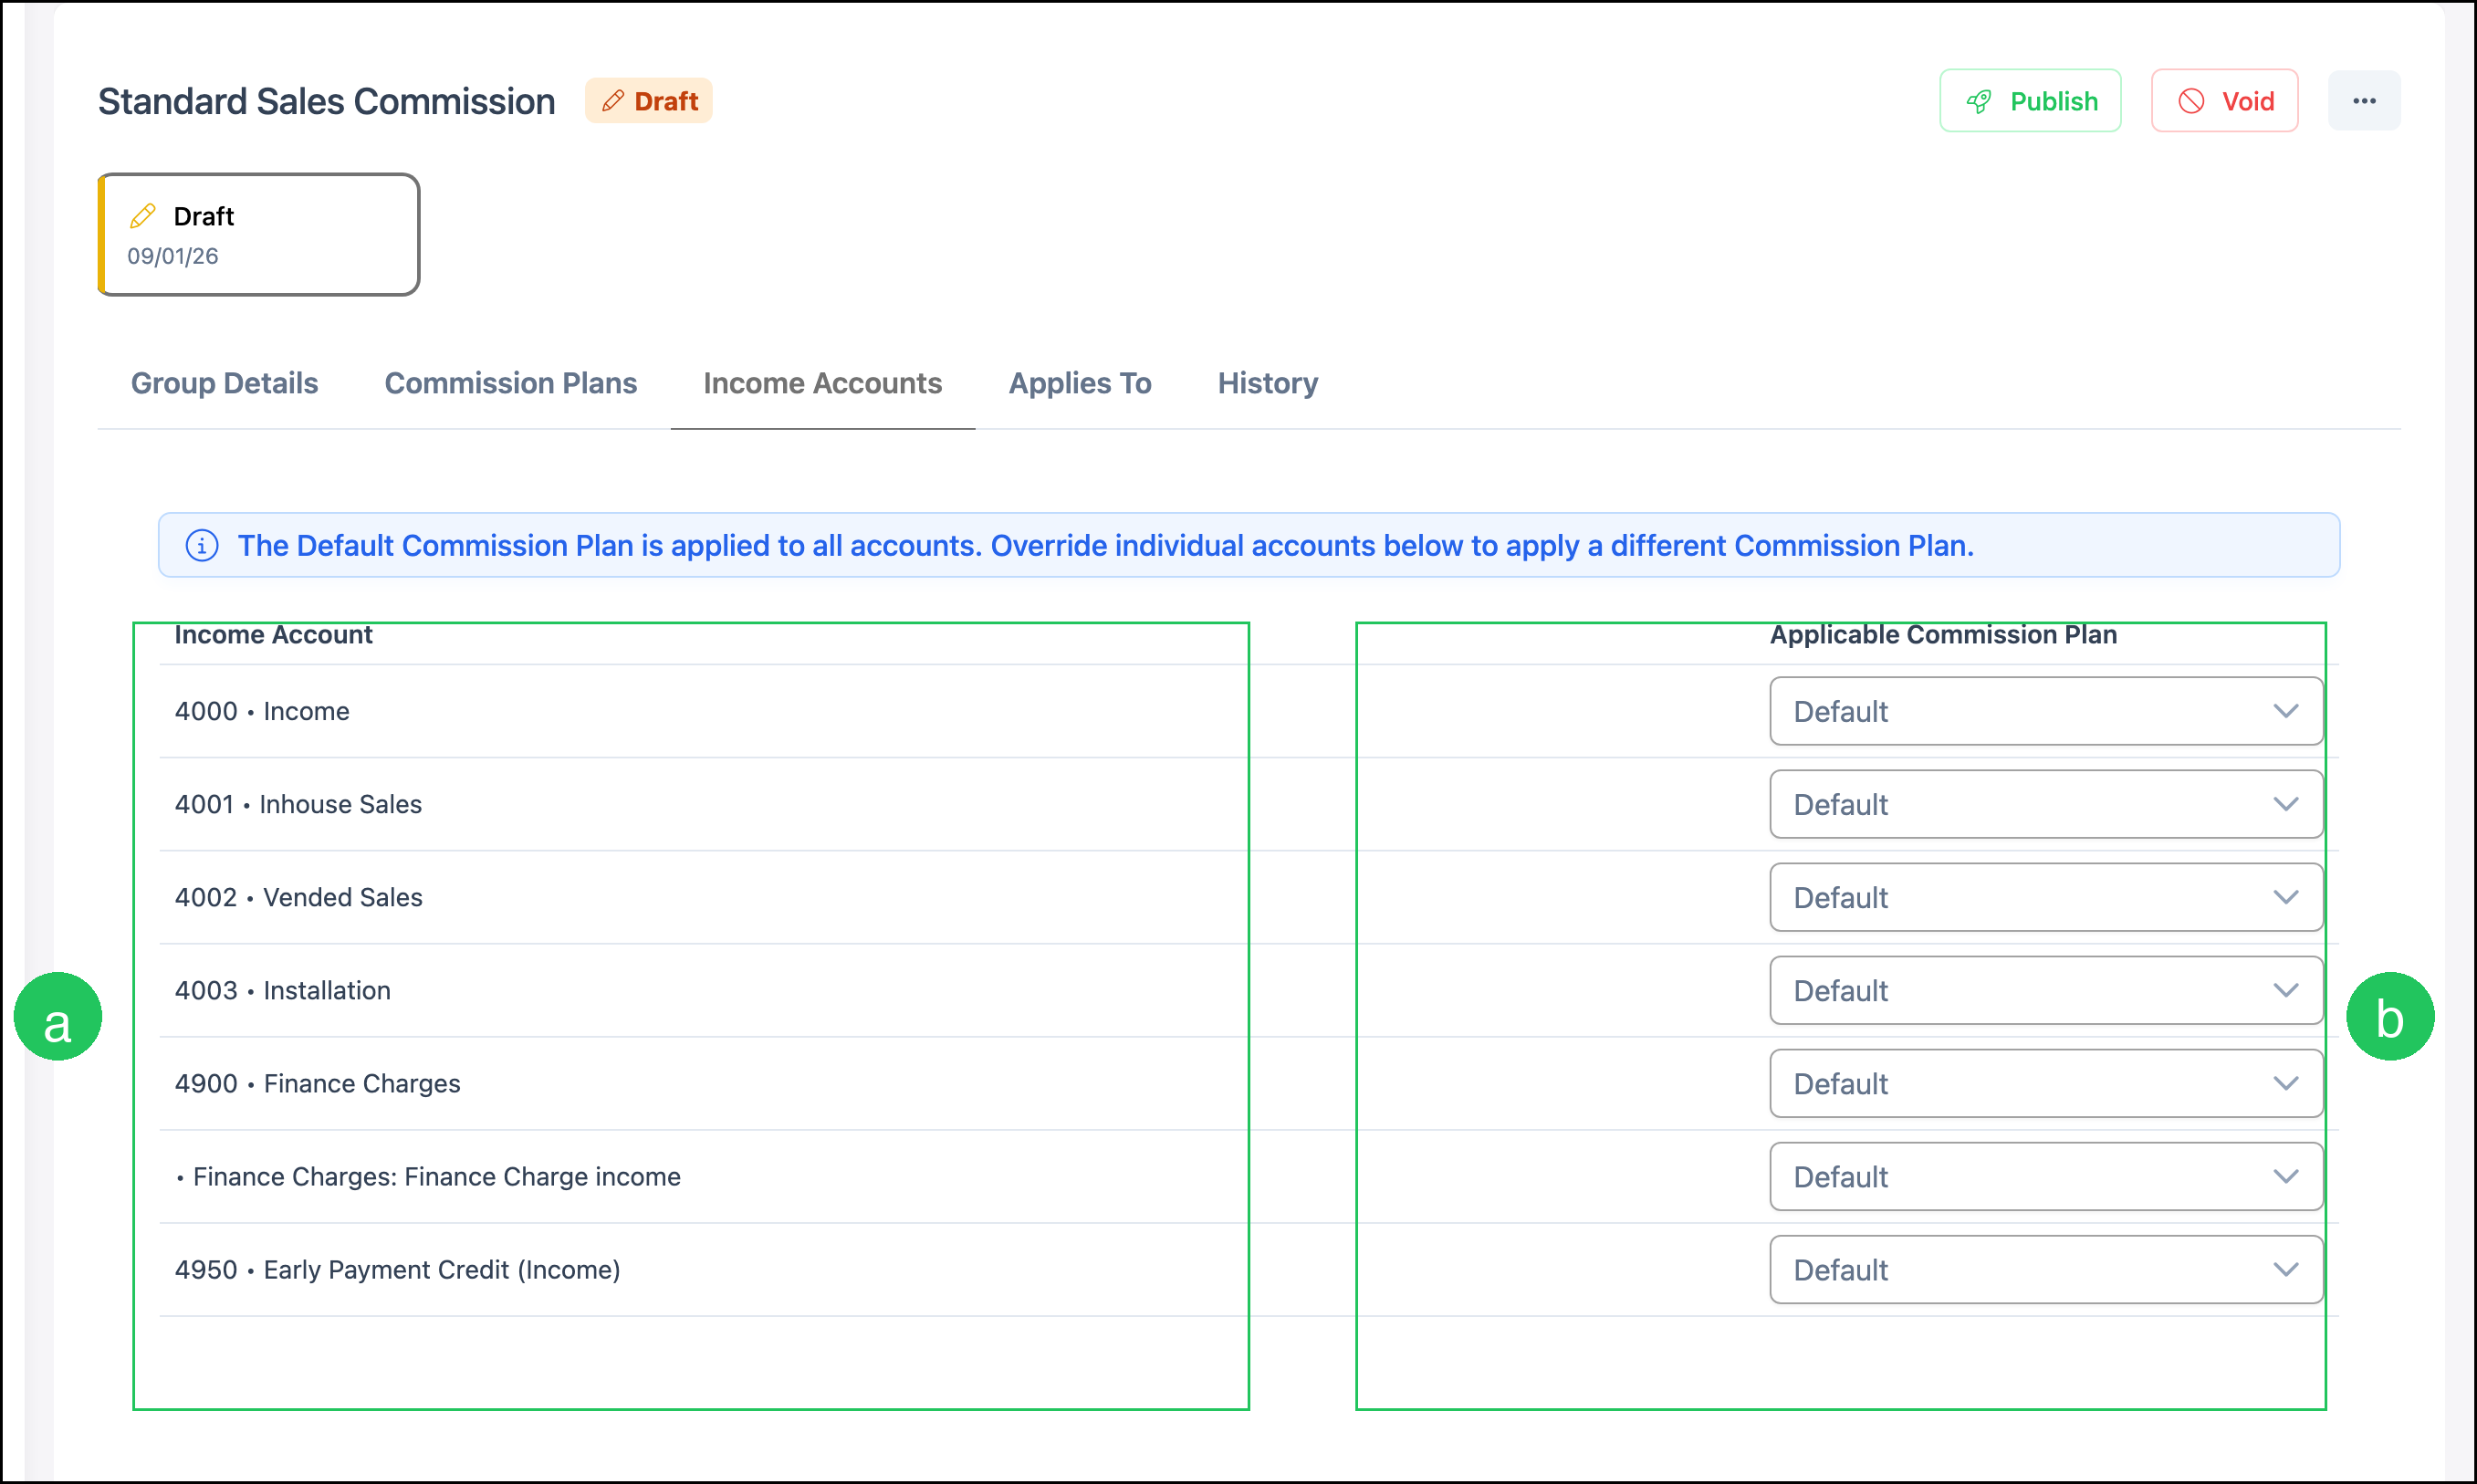
The Default commission plan applies to all income accounts. Override an account to apply a different plan, including Exempt.
a. Income Account - The general ledger income accounts used for sales.
b. Applicable Commission Plan - The plan used for that income account.
Applies To
Use Applies To to choose locations, roles, and employees for this commission group.
a. Included Locations - The locations this group covers. Leave this field blank to include all locations.
b. Role Assignments - Roles included in this group. Assigning a role includes all current and future employees with that role.
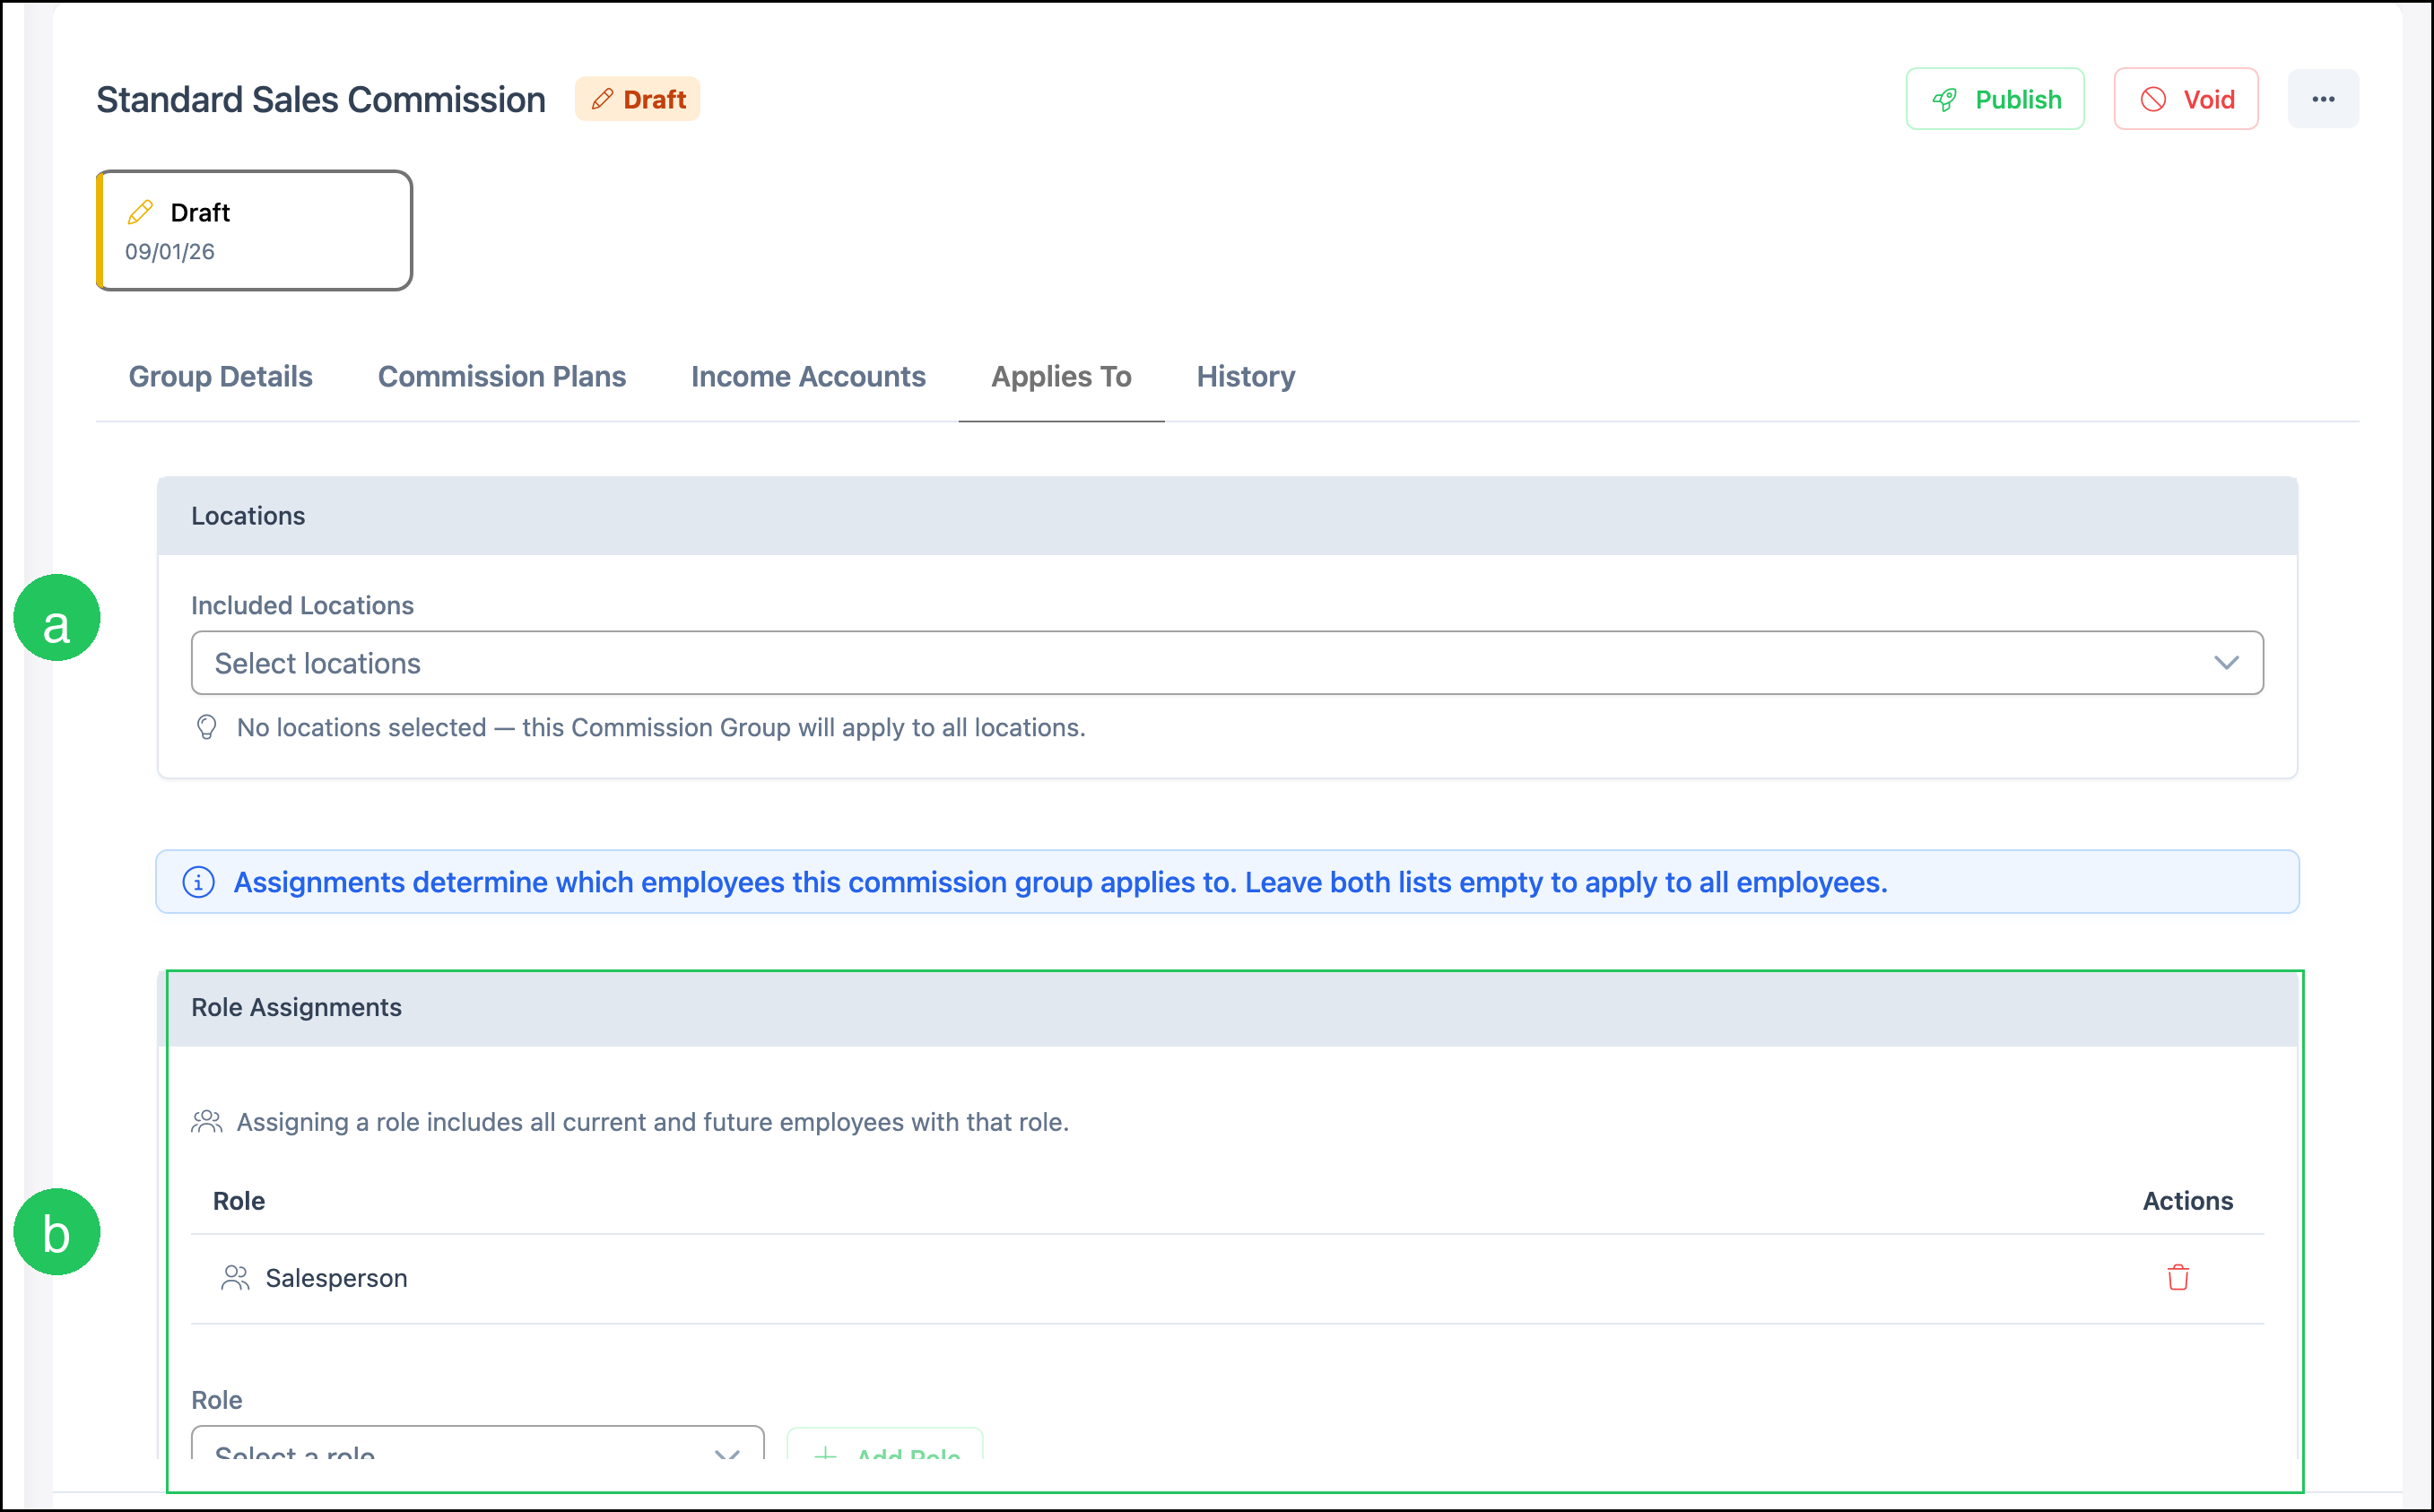
Note: Use User Assignments to include individual employees. Leave both Role Assignments and User Assignments empty to apply the group to all employees.
Publish a Commission Group
Set a Start Date before you publish. Publishing locks the commission group.
1. Click Publish.

A confirmation asks: Publishing will lock this commission group down. Are you sure you want to continue?
2. Click Yes, Publish.

Frequently Asked Questions
1. Does Commission Based On mean profit margin?
Answer: No. Commission Based On selects which order lifecycle event starts the commission calculation. Commission amounts come from the plans you configure, not from product profit margin (sale minus cost).
2. What happens if I leave Included Locations blank?
Answer: The commission group applies to all locations.
3. What happens if I leave Role Assignments and User Assignments empty?
Answer: The commission group applies to all employees.
4. Can I change a commission group after I publish it?
Answer: Publishing locks the commission group. Use Clone in the More Actions menu if you need a similar group with different settings.
5. Why do I not see Commission Settings?
Answer: Commission Groups appear when the Commission license option is enabled for your account. Contact Support if you expect to see this card and it is missing.
6. How do I use different rates for different product lines?
Answer: Create more than one commission plan, then assign the matching plan to each income account on the Income Accounts tab. For default income accounts, see Establishing Default GL Accounts.
Related Articles
Employee Roles and Permissions in Settings