Creating Teams in CoreBridge allows you to efficiently organize and group your employees. By setting up Teams, you can save time by eliminating the need to select individual employees and roles each time you create an Estimate or Order. Teams are most effective when they include a mix of employees with different role types, ensuring flexibility and coverage for various tasks.
Table of Contents
Adding Teams
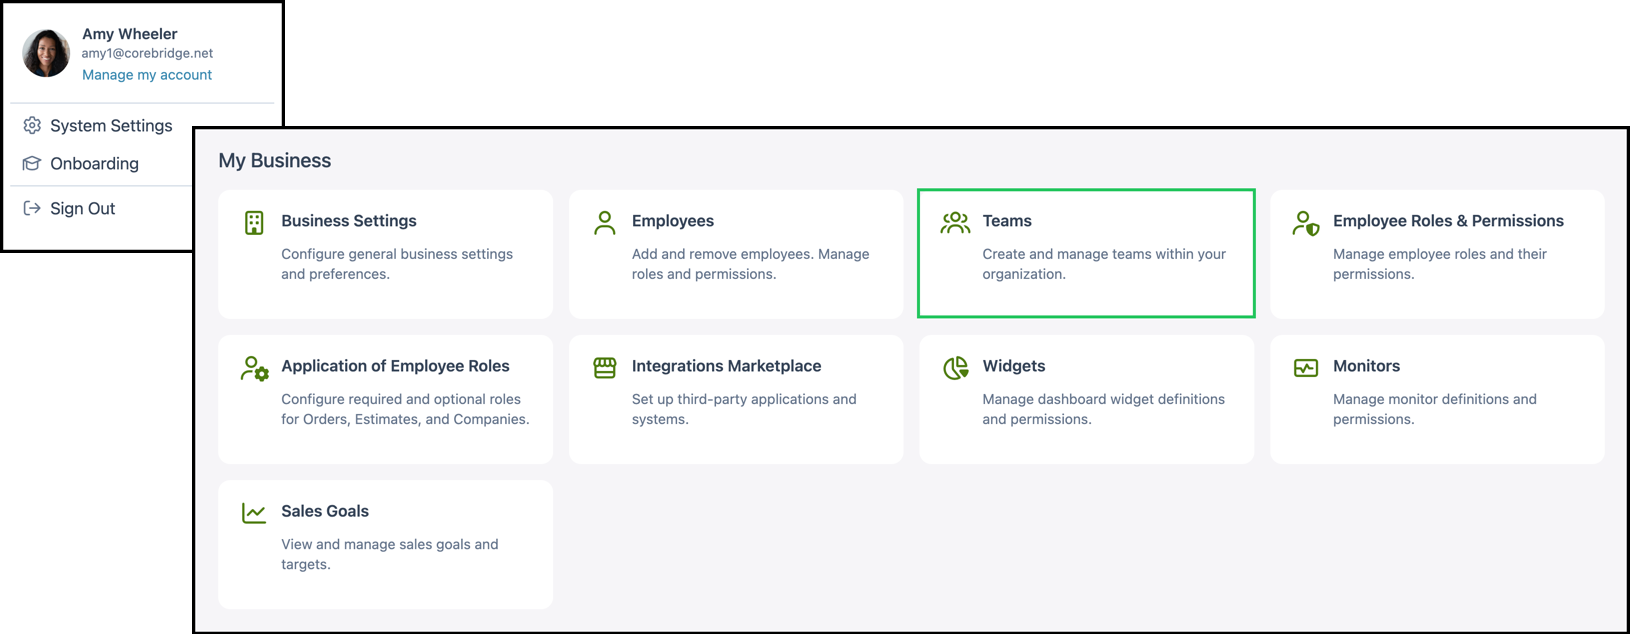
Navigate to Settings / My Business / Teams.
1. On the Manage Teams page, click the Add Team button.
2. In the Add Team dialog, enter a Team Name that reflects the focus of the team.
Example: Finishing Team or Basic Project Team.
3. Select the Location for this Team, if applicable.
4. Under Roles & Employees, click Add New to add one or more role and employee combinations. Select the Role and Employee from the drop downs for each row you add.
Note: Employees must have the appropriate role assigned in their profile (under Settings / My Business / Employees) before they can be added to a team. Roles are configured in your system settings.
5. Click Save.

Assigning Teams
After a Team is created, it can be assigned at the Company level. When a Team is assigned to a Company, new Estimates or Orders created for that Company can automatically include the Team members in the appropriate Roles.
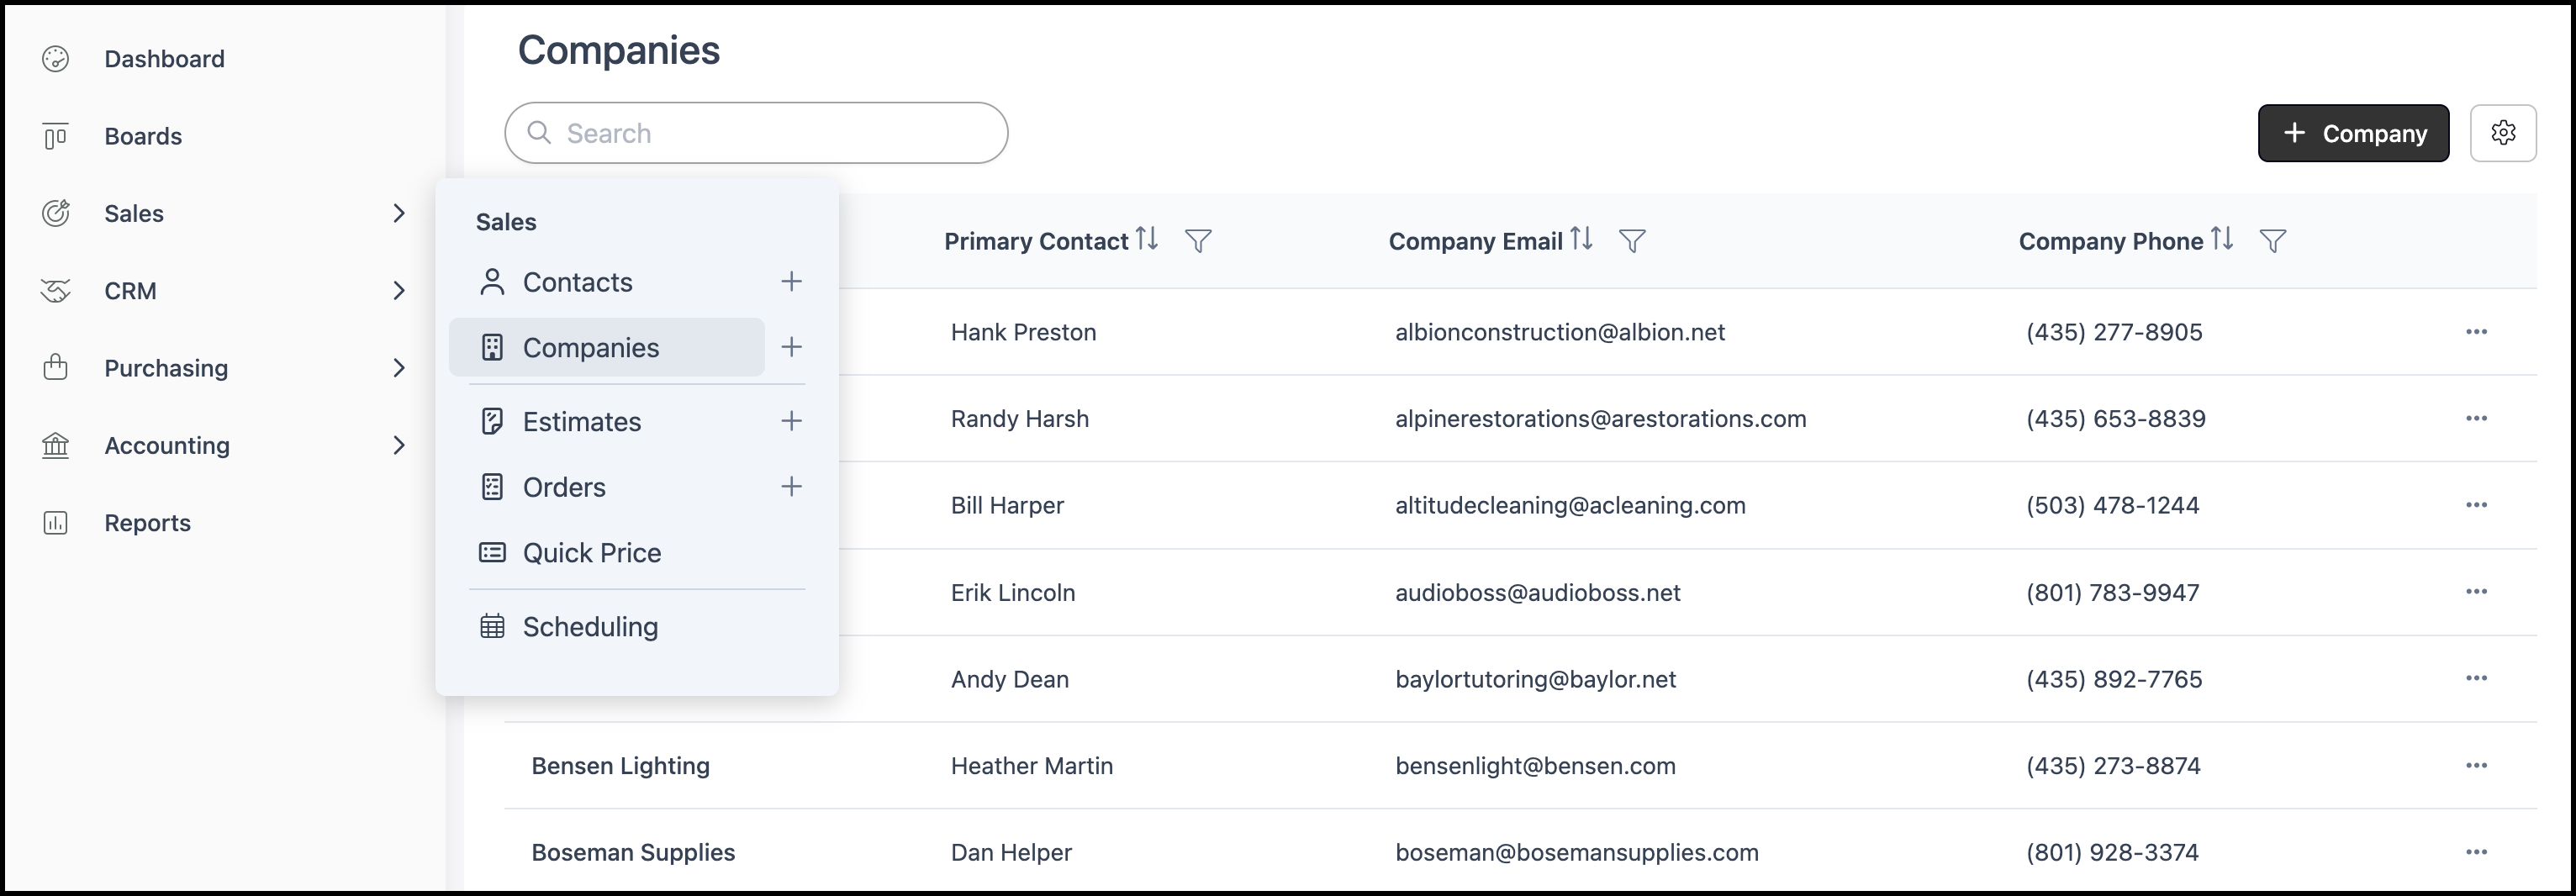
Navigate to Sales / Companies and select the Company you want to assign a Team to.
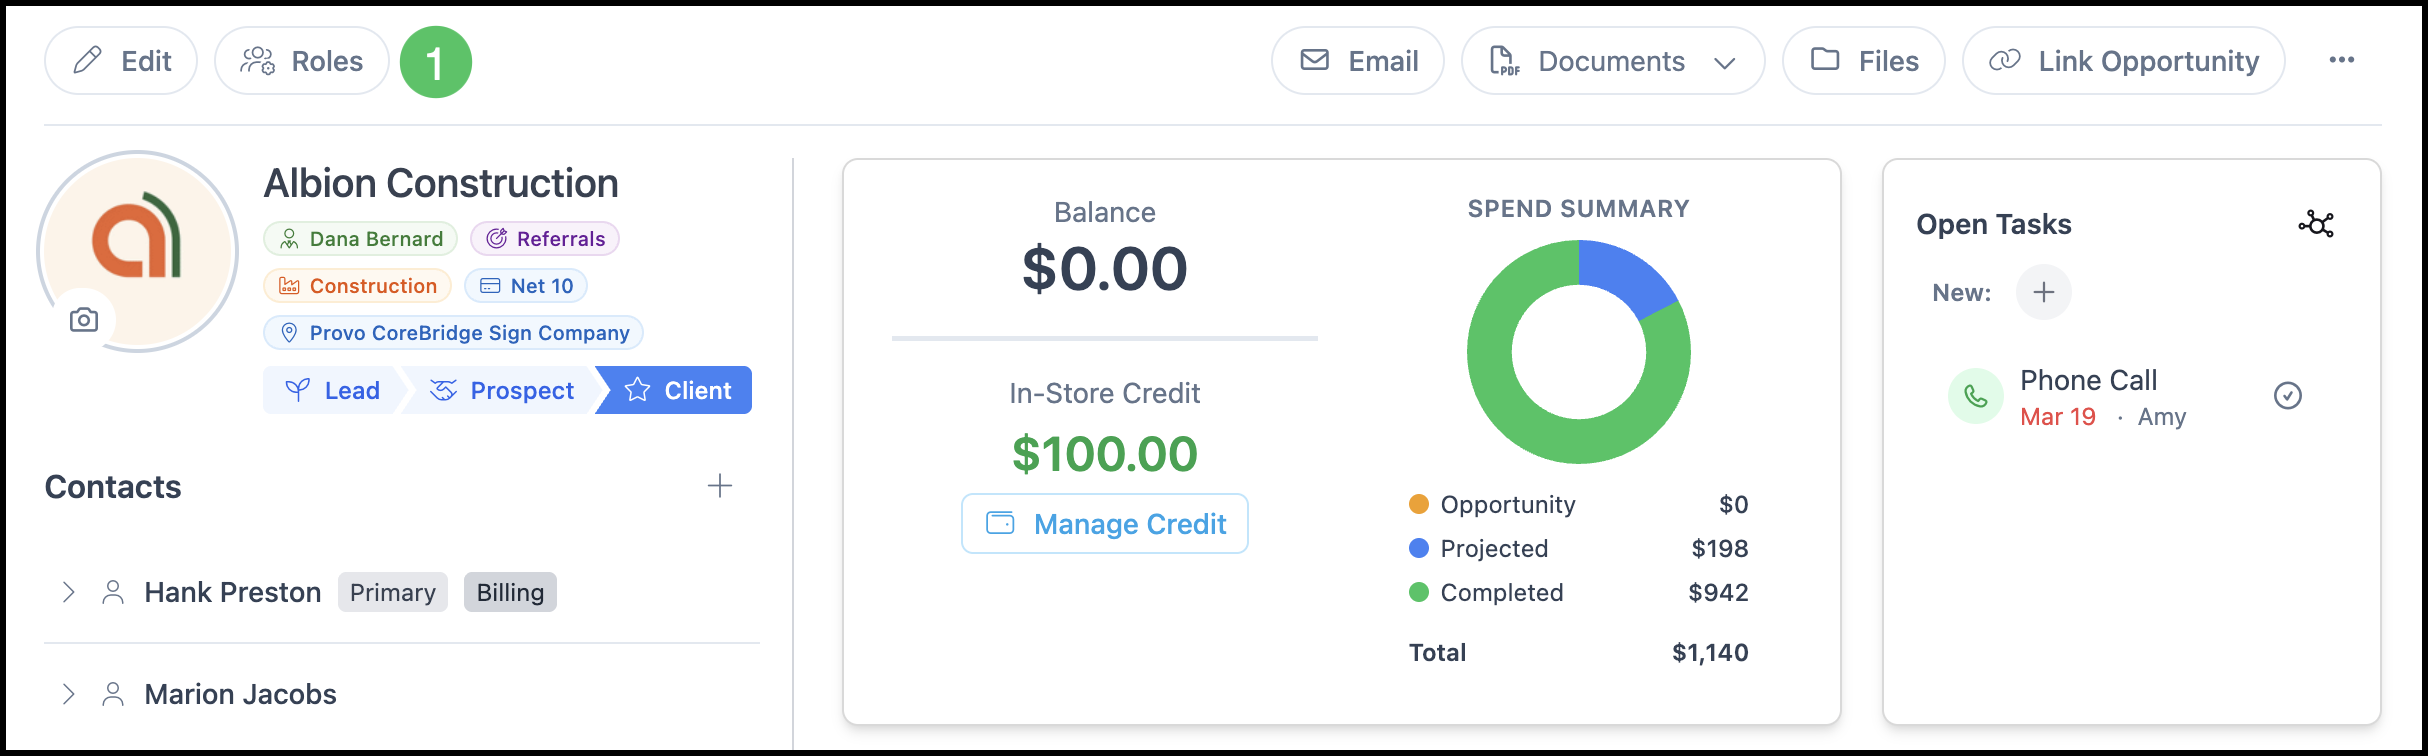
1. Click the Roles icon.
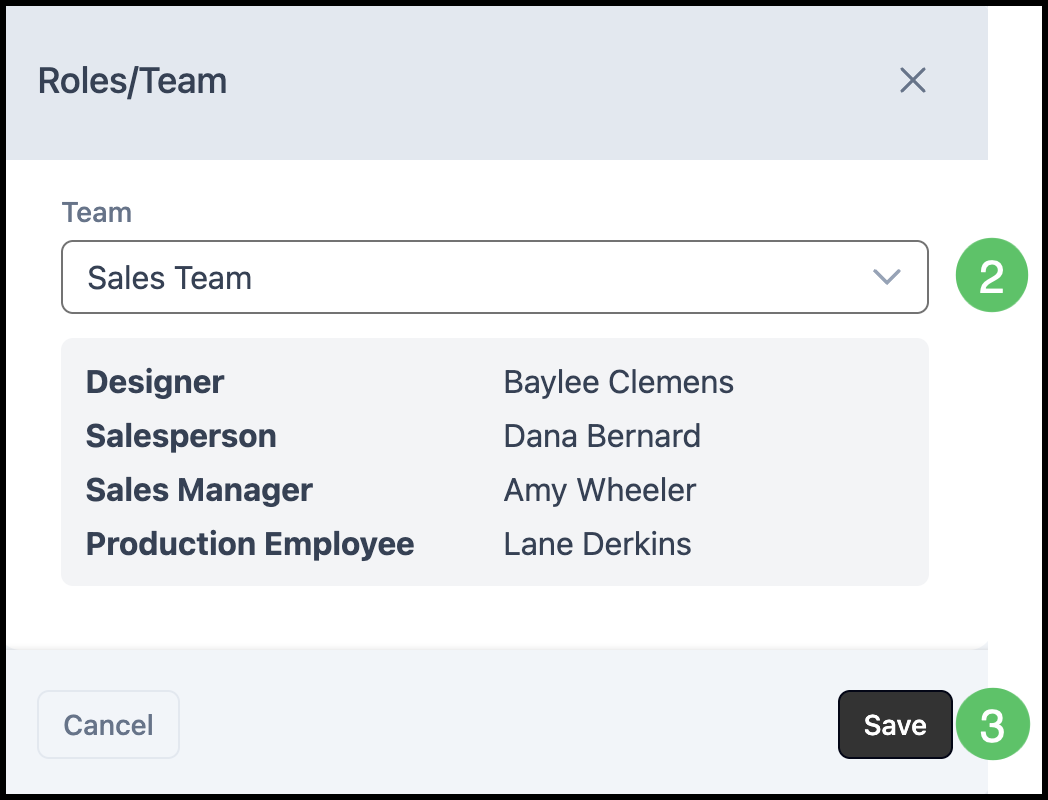
2. Select the Team from the dropdown.
3. Click Save.
Once a Team is assigned, the team members will populate in the corresponding roles when you create new Estimates or Orders for this Company. You can still edit or add roles on individual Orders and Estimates as needed. Team assignments apply only to newly created records and do not change existing Estimates or Orders.