CoreBridge uses a combination of fixed main statuses (document-level workflows for Estimates, Orders, Purchase Orders, and Calendar events) and configurable item statuses and substatuses to reflect how your shop operates. This overview explains how these three layers work together, outlines the standard main statuses, and directs administrators to where line-level options are managed.
Table of Contents
How Statuses Work in CoreBridge
In CoreBridge, there are three levels of statuses: Main Statuses, Item Statuses, and Item Substatuses.
a. Main Statuses - the overall status reflection of an Estimate, Order, Purchase Order, or Calendar Event.
b. Item Statuses - the status that reflects where an individual Line Item is at in its workflow.
c. Item Substatuses - an additional status selection that can be used to clarify in more detail where a Line Item is at in its workflow.
When using statuses, the Estimate, Order, and Purchase Order will take the earliest reflection of workflow to represent the entire Main Status.
Example: If you have three Line Items, one with an Item Status of Pre-WIP, one with an Item Status of WIP, and one with an Item Status of Built, the Main Status would be Pre-WIP, since that is the earliest reflection of workflow.
As each item moves through the workflow, the Main Status will automatically be updated.
Example: If you have only one Line Item with an Item Status that is changed from Pre-WIP to WIP, the Main Status will automatically update to WIP.
If you choose to manually update the Main Status, it will automatically update all Line Item Statuses that come earlier than the Main Status to the newly selected Main Status.
Example: If you have one Line Item with the Item Status of WIP, and then change the Main Status to Built, the Item Status on the Line Item will automatically update to Built.
Main Statuses
CoreBridge comes equipped with built in system statuses for Estimates, Orders, Purchase Orders, and Calendar Events. These statuses can not be altered, but Item Statuses and Item Substatuses can be used to further clarify where an item is at in its workflow.
Estimates:
- Pending: The first initial status of an Estimate. This can indicate that there is more work to be done on the Estimate before it is ready to move forward in the workflow.
- Awaiting Approval: An Estimate that is waiting for customer approval, including proof and pricing checks, would be Awaiting Approval.
- Approved: The customer has reviewed the Estimate and formally accepted it, authorizing work to proceed.
- Lost: This status indicates that the sale did not proceed for some reason, such as the customer choosing a competitor.
- Voided: This status is used for an Estimate that is no longer valid, such as the items are no longer offered, or entry errors.
Orders:
- Pre-WIP: This status is used for Orders that have been formalized or Estimates that have been converted to Orders, but production or fulfillment has not yet started.
- WIP (Work in Progress): The Order is currently in production or actively being worked on.
- Built: The Order has been completed but has not yet been delivered to the customer pending shipment, pickup, or installation.
- Invoicing: The Order is in the process of being billed.
- Invoiced: The invoice has been finalized and sent to the customer. This status confirms that billing is complete and the customer has officially been asked for payment.
Note: Once an Order has been moved to Invoiced status it is locked, meaning you can no longer make changes to the Order.
- Closed: The Order has been fully completed and the invoice has been paid in full.
- Voided: This status is used for an Order that was invalidated after being formalized, but before fulfillment or invoicing.
Purchase Orders:
- Requested: A Purchase Order has been created and submitted for review, but has not yet been approved or acted on. This status signals a need but no commitment yet.
- Approved: The Purchase Order has been reviewed and authorized internally. It’s ready to be sent to the vendor but has not yet been placed.
- Ordered: The Purchase Order has been officially sent to the vendor or supplier. The order is now pending fulfillment.
- Received: The items or services in the Purchase Order have been delivered and confirmed. This status indicates that the vendor has fulfilled the order, either partially or in full.
- Voided: The Purchase Order has been canceled and is no longer valid. This may happen due to errors, duplicates, or changes in purchasing needs. No further action will be taken on it.
Calendar Events:
- Scheduled: Indicates events that have been put on the Calendar and are upcoming.
-WIP: (Work in Progress): This status is used for events that are actively in progress.
-Complete: The scheduled time for the event has passed and it was concluded as scheduled.
-Incomplete: The scheduled time for the event has passed without being completed.
Item Statuses
Workflow Statuses define the item-level stages used to track progress within an order, estimate, or purchase order. These statuses provide more detailed visibility into where each Line Item stands in your workflow. Because they directly impact how work is managed and reported, only administrators can create, edit, or maintain these statuses.
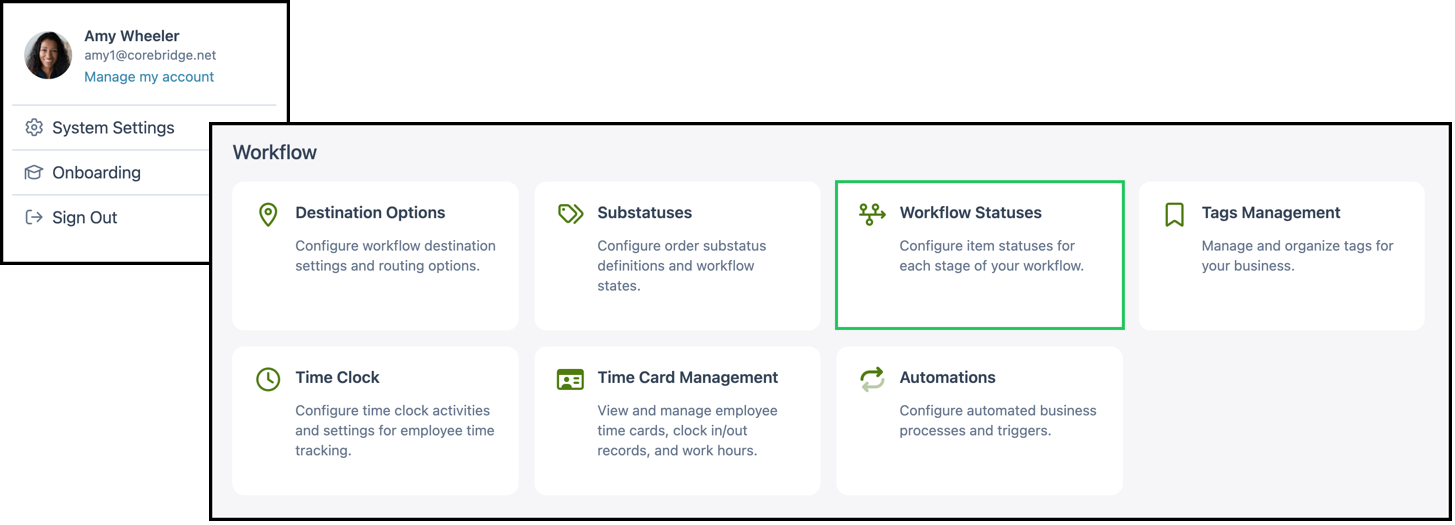
Navigate to System Settings / Workflow / Workflow Statuses.
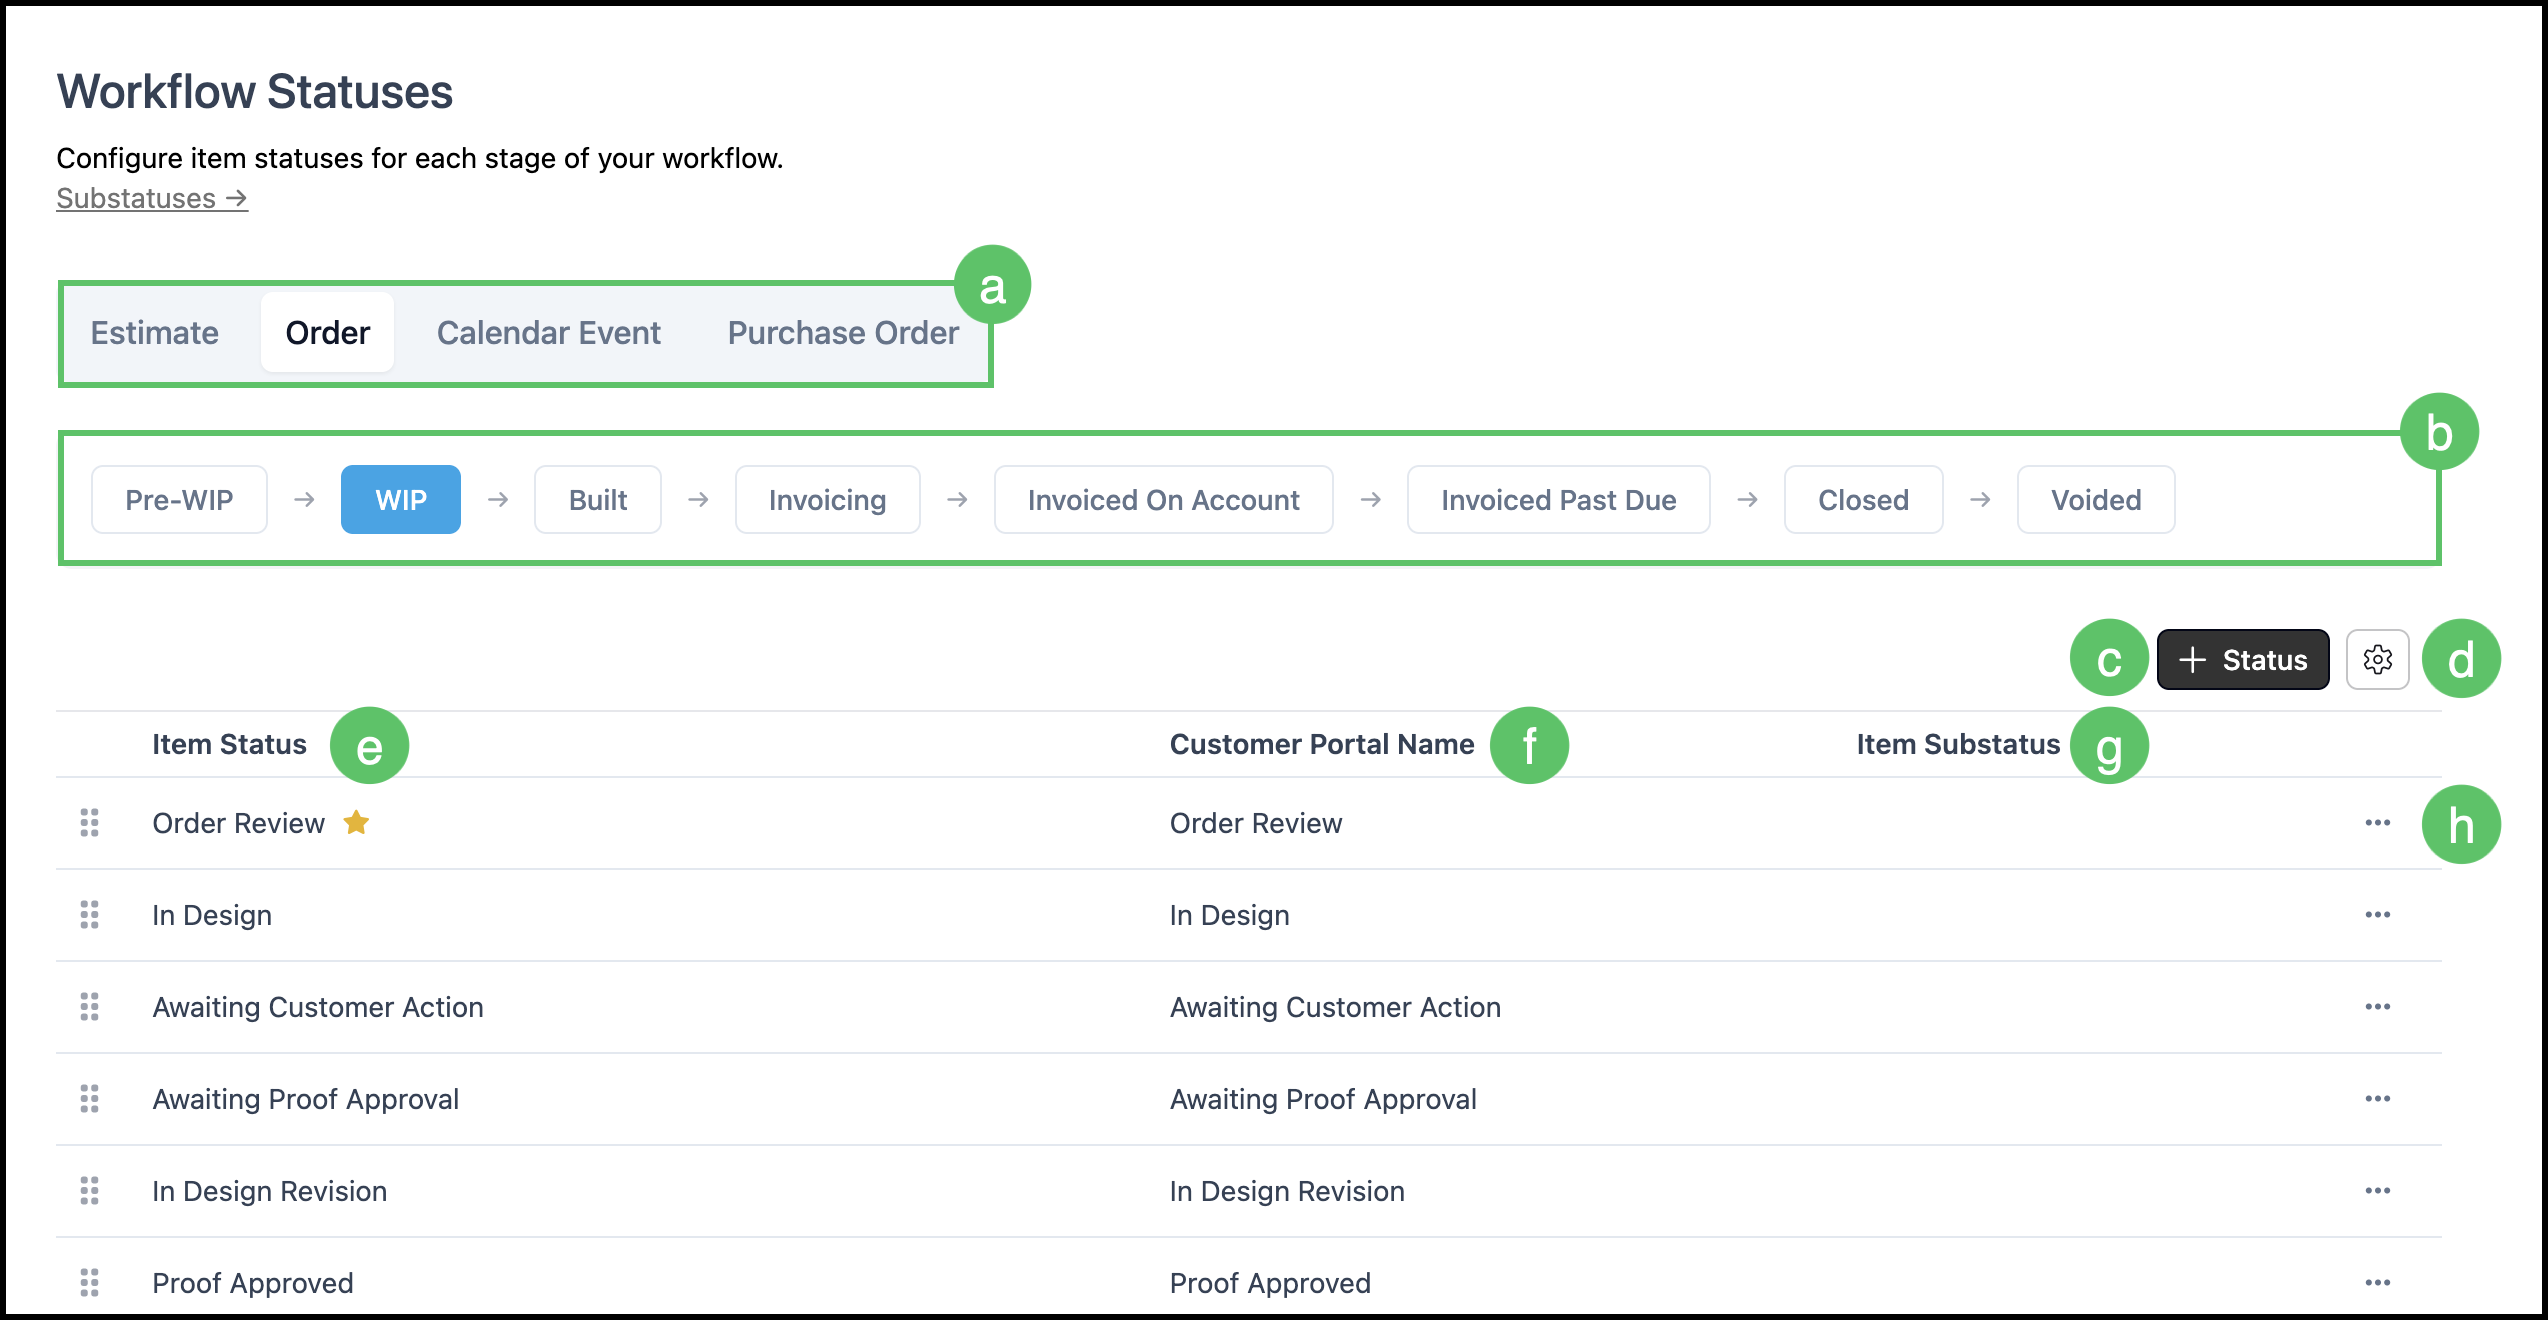
a. Document tabs indicate the type of document currently being viewed and group statuses accordingly.
b. Main Status chips are arranged in workflow order and display the associated item statuses within each stage.
c. The Add Status option represents the starting point for creating new item statuses.
d. Search Settings include filters that control the visibility of inactive records.
e. Item Status Name identifies each status used at the line level.
f. Customer Portal Name reflects how the status appears externally and may differ from the internal name.
g. Linked Item Substatuses are displayed to show any additional detail associated with the status.
h. The Actions menu contains available status management options, such as setting a default, marking inactive, or deleting when permitted.
Adding an Item Status
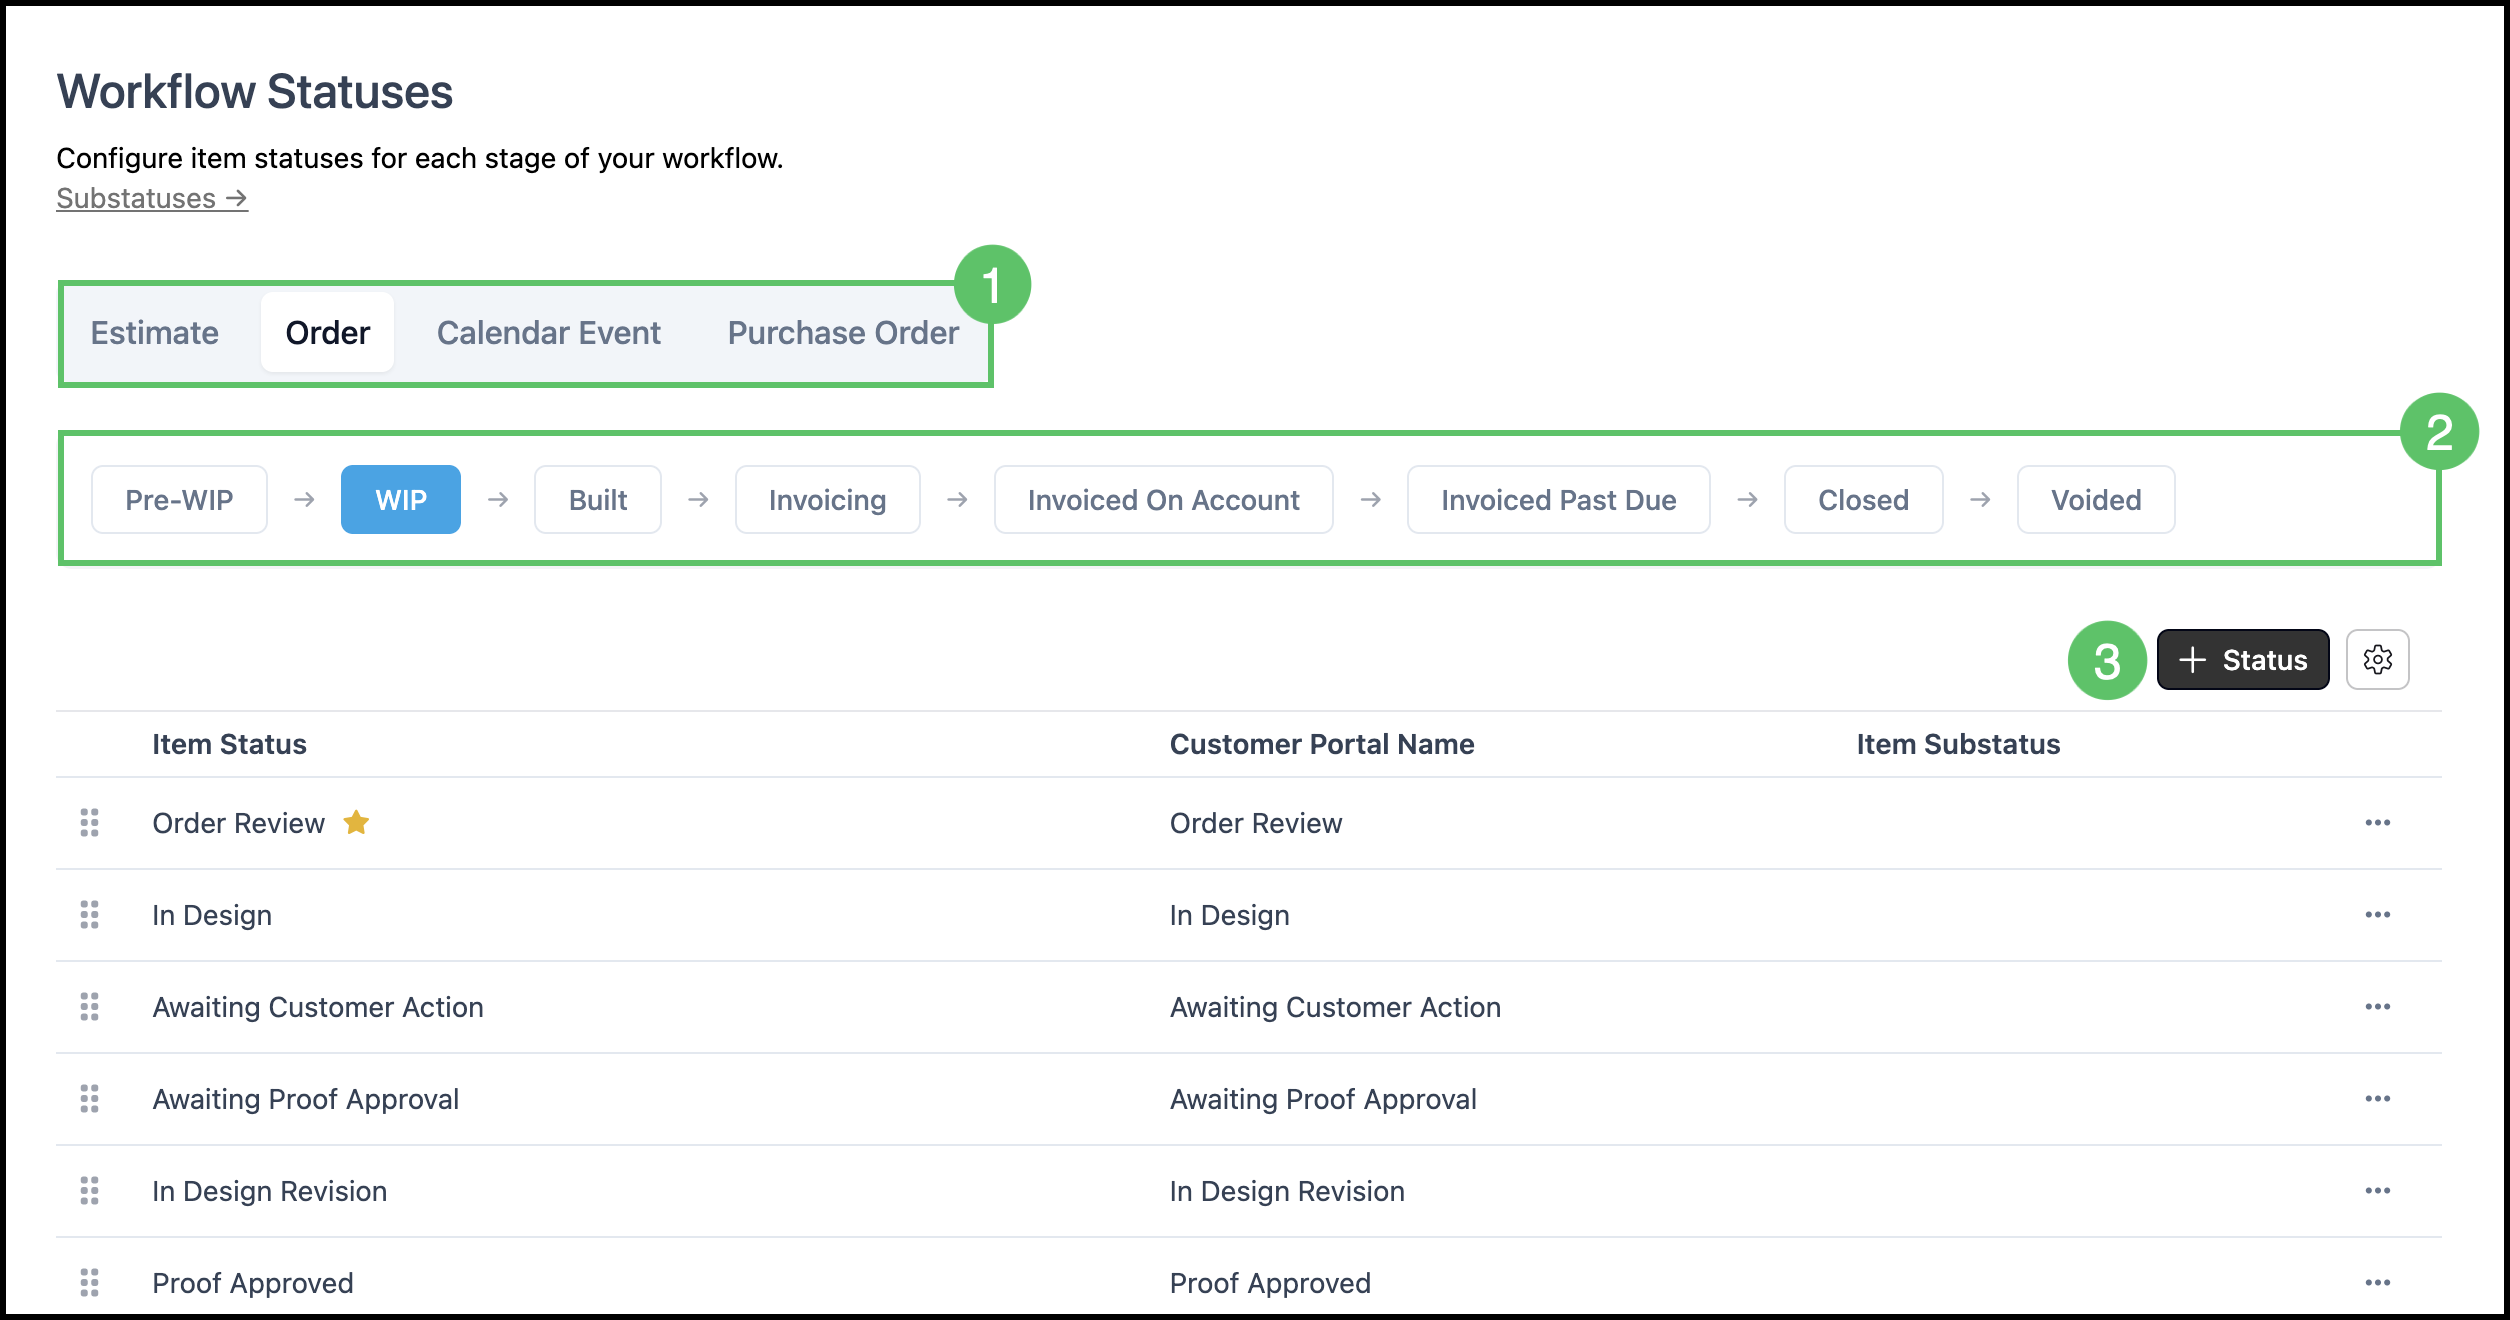
1. Pick a document tab: Estimate, Order, Calendar Event, or Purchase Order.
2. Click a main status chip (for example Pending on Estimates or WIP on Orders).
3. Click Add Status.
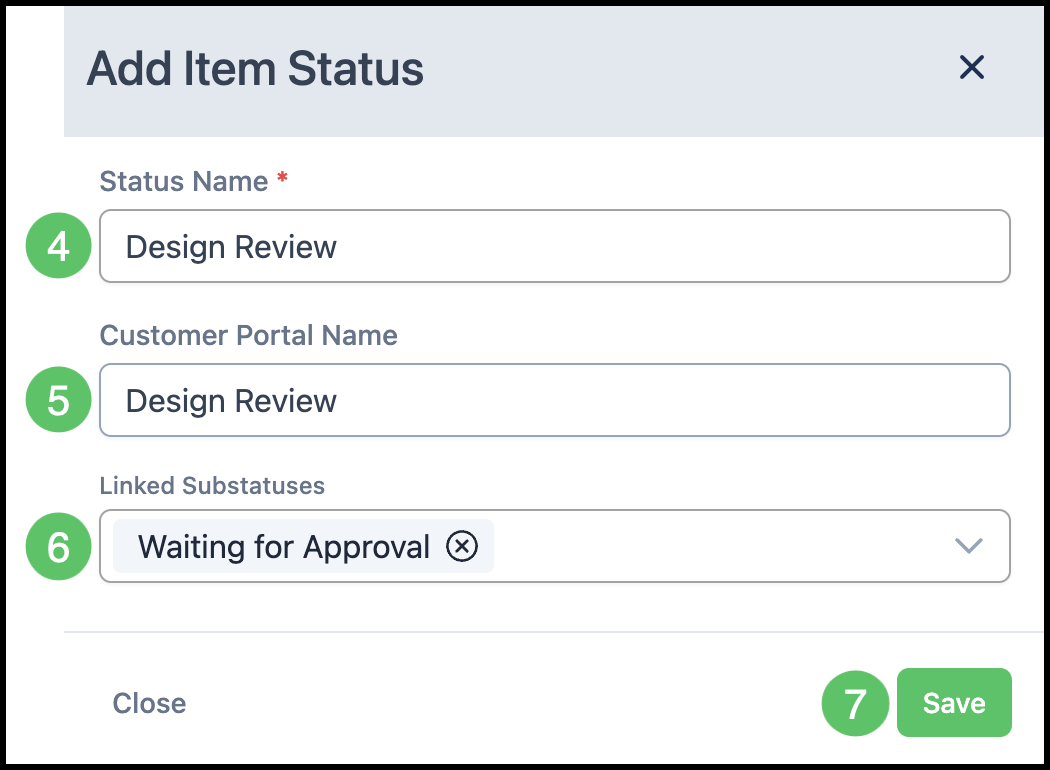
4. Enter a Status Name.
5. Enter a Customer Portal Name, if desired.
6. Link any necessary Substatuses.
Note: Substatuses must be linked to an item status in order to be available for selection on Line Items. For more information, please see Substatuses.
7. Click Save.