Item substatuses provide an additional layer of detail within item-level workflows, helping teams more precisely track progress at each stage. Administrators configure item statuses and substatuses to reflect how work is completed across your operation. This article explains how substatuses function, how they relate to item statuses, and how they are used to support line-level tracking.
An item substatus must be linked to an item status before it can be selected on Line iItems. This relationship is managed through the Linked Substatuses setting on the corresponding item status.
Table of Contents
- Setting Up Item Statuses
- Setting Up Item Substatuses
- Linking an Existing Item Substatus to an Item Status
- Related Articles
Setting Up Item Statuses
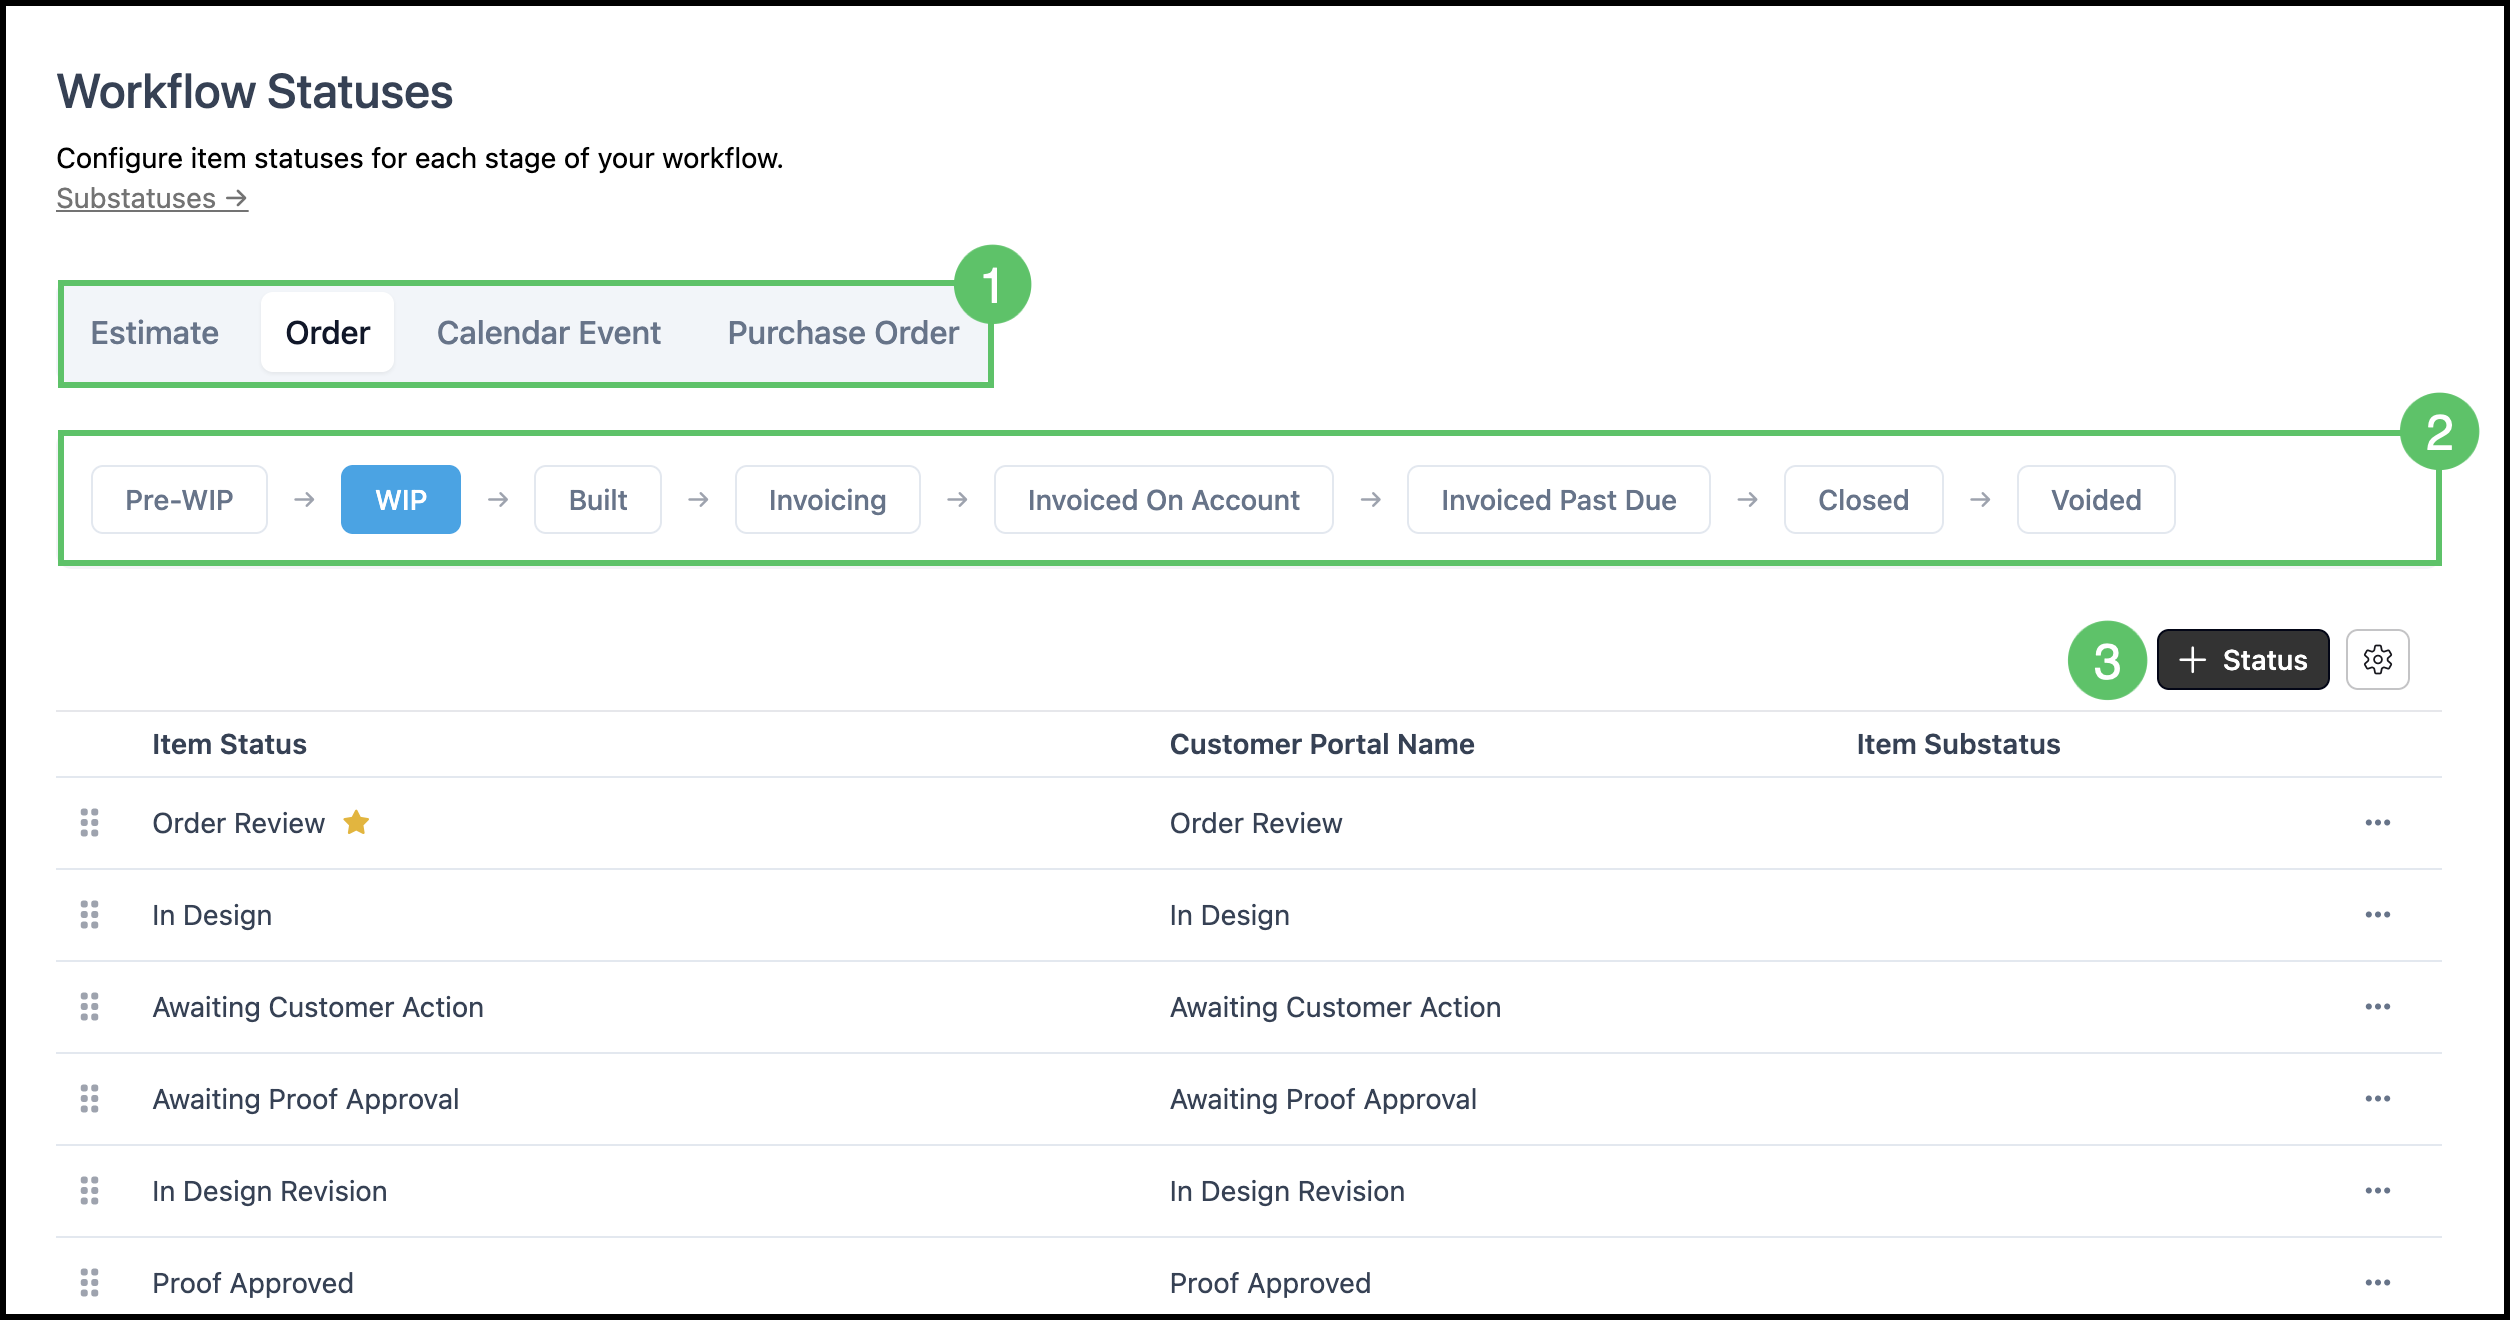
Navigate to System Settings / Workflow / Workflow Statuses.

1. Pick a document tab: Estimate, Order, Calendar Event, or Purchase Order.
2. Click a main status chip (for example Pending on Estimates or WIP on Orders).
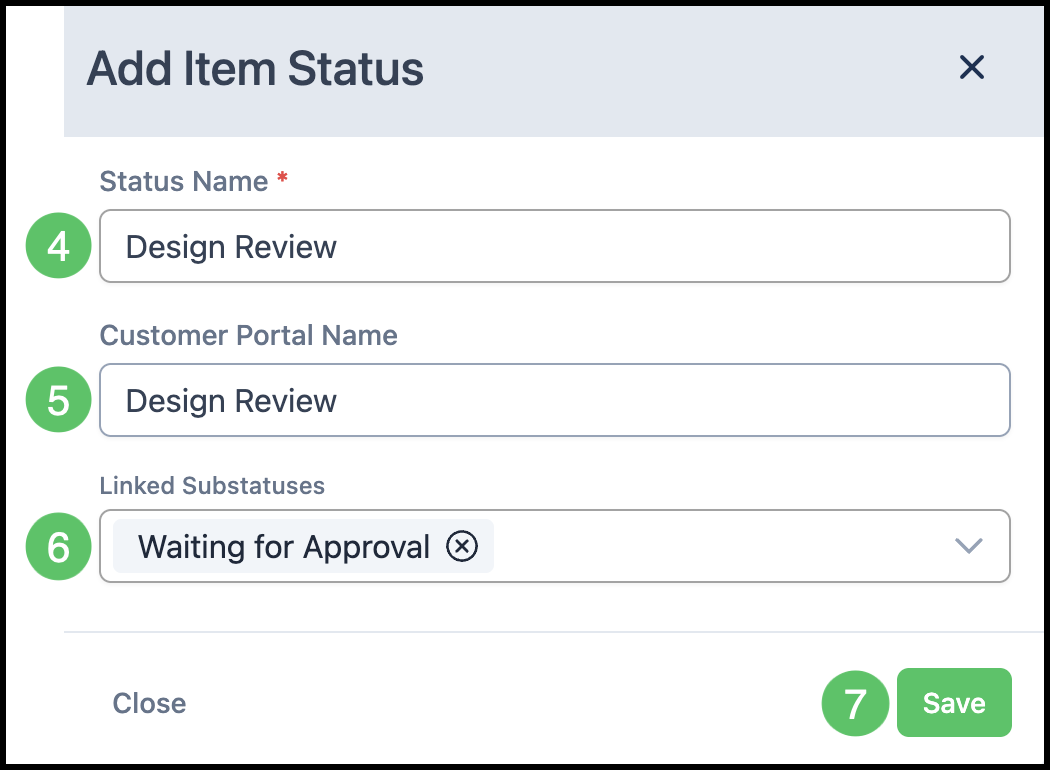
3. Click Add Status.
4. Enter a Status Name.
5. Enter a Customer Portal Name, if desired.
6. Link any necessary Substatuses.
Note: Substatuses must be linked to an item status in order to be available for selection on Line Items.
7. Click Save.
Setting Up Item Substatuses
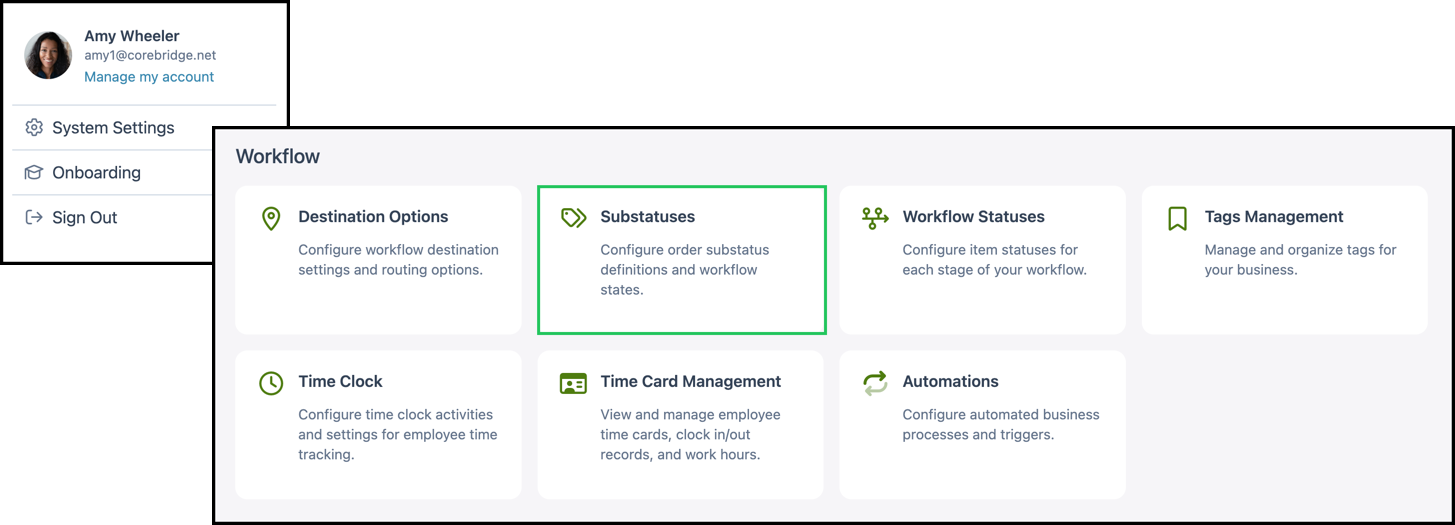
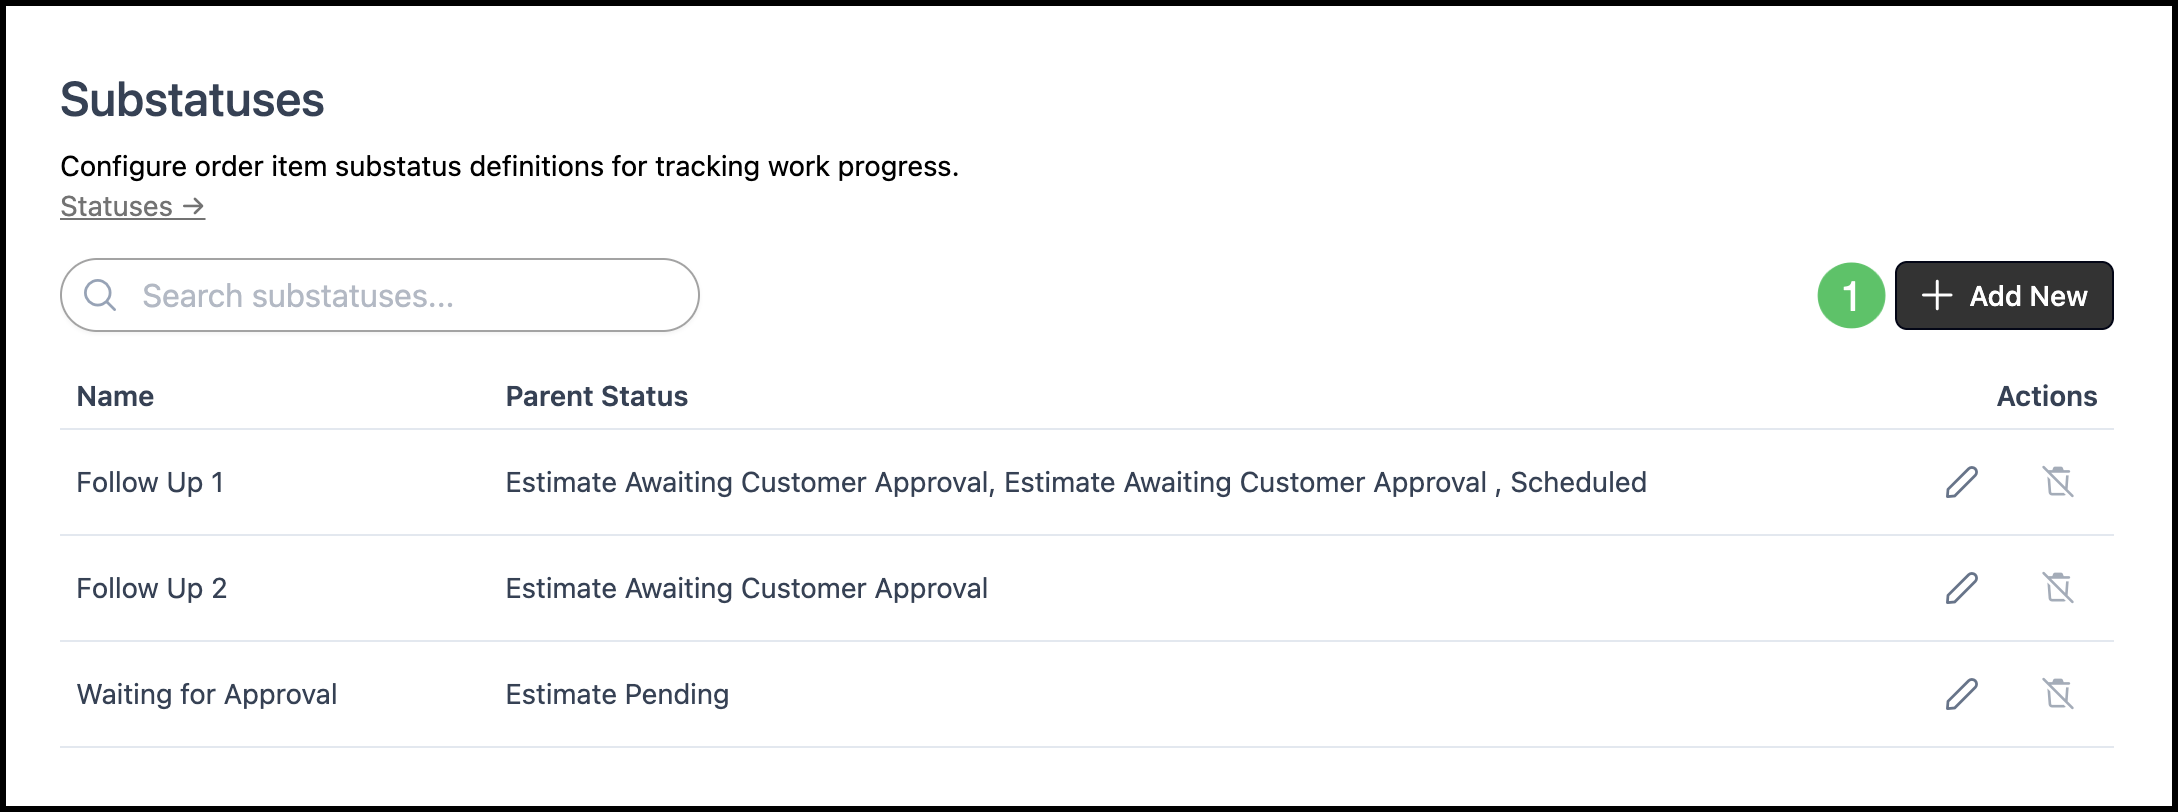
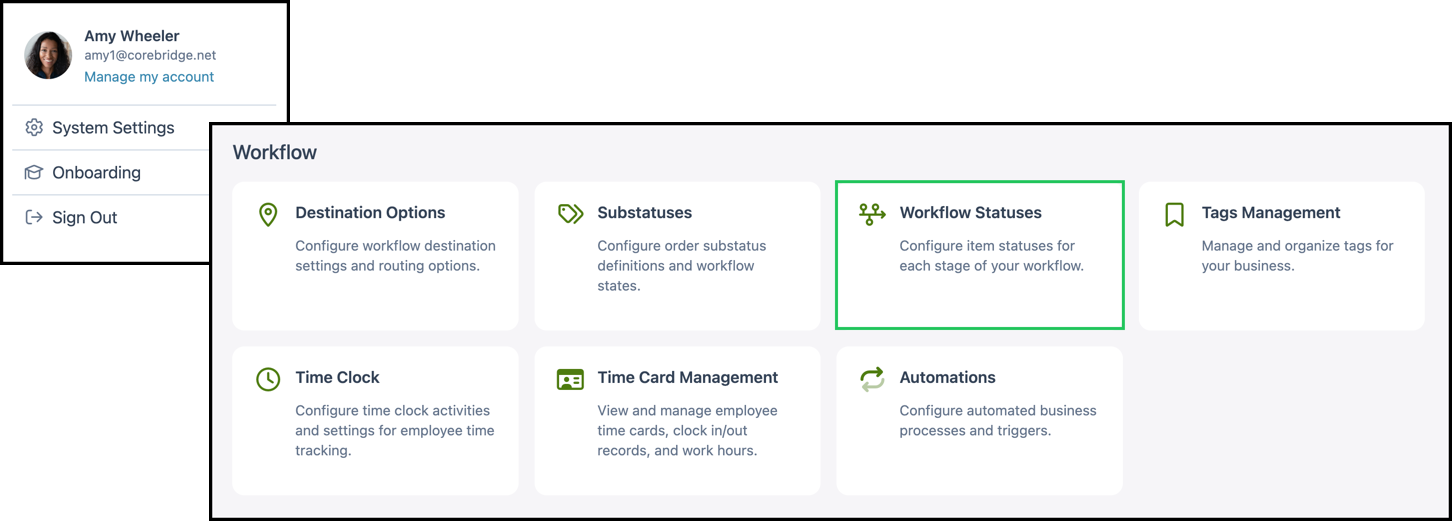
Navigate to System Settings / Workflow / Substatuses.
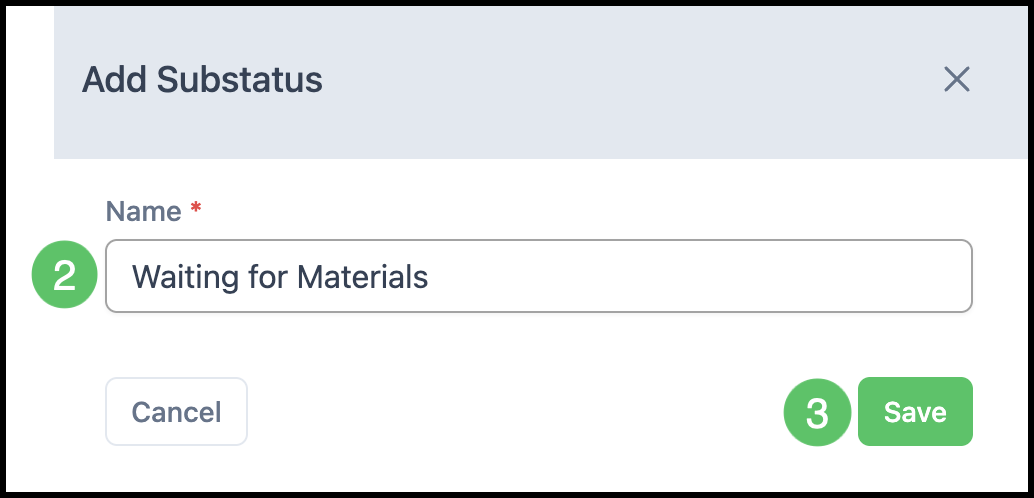
1. Click Add New.
2. Enter the Name (required).
3. Click Save.
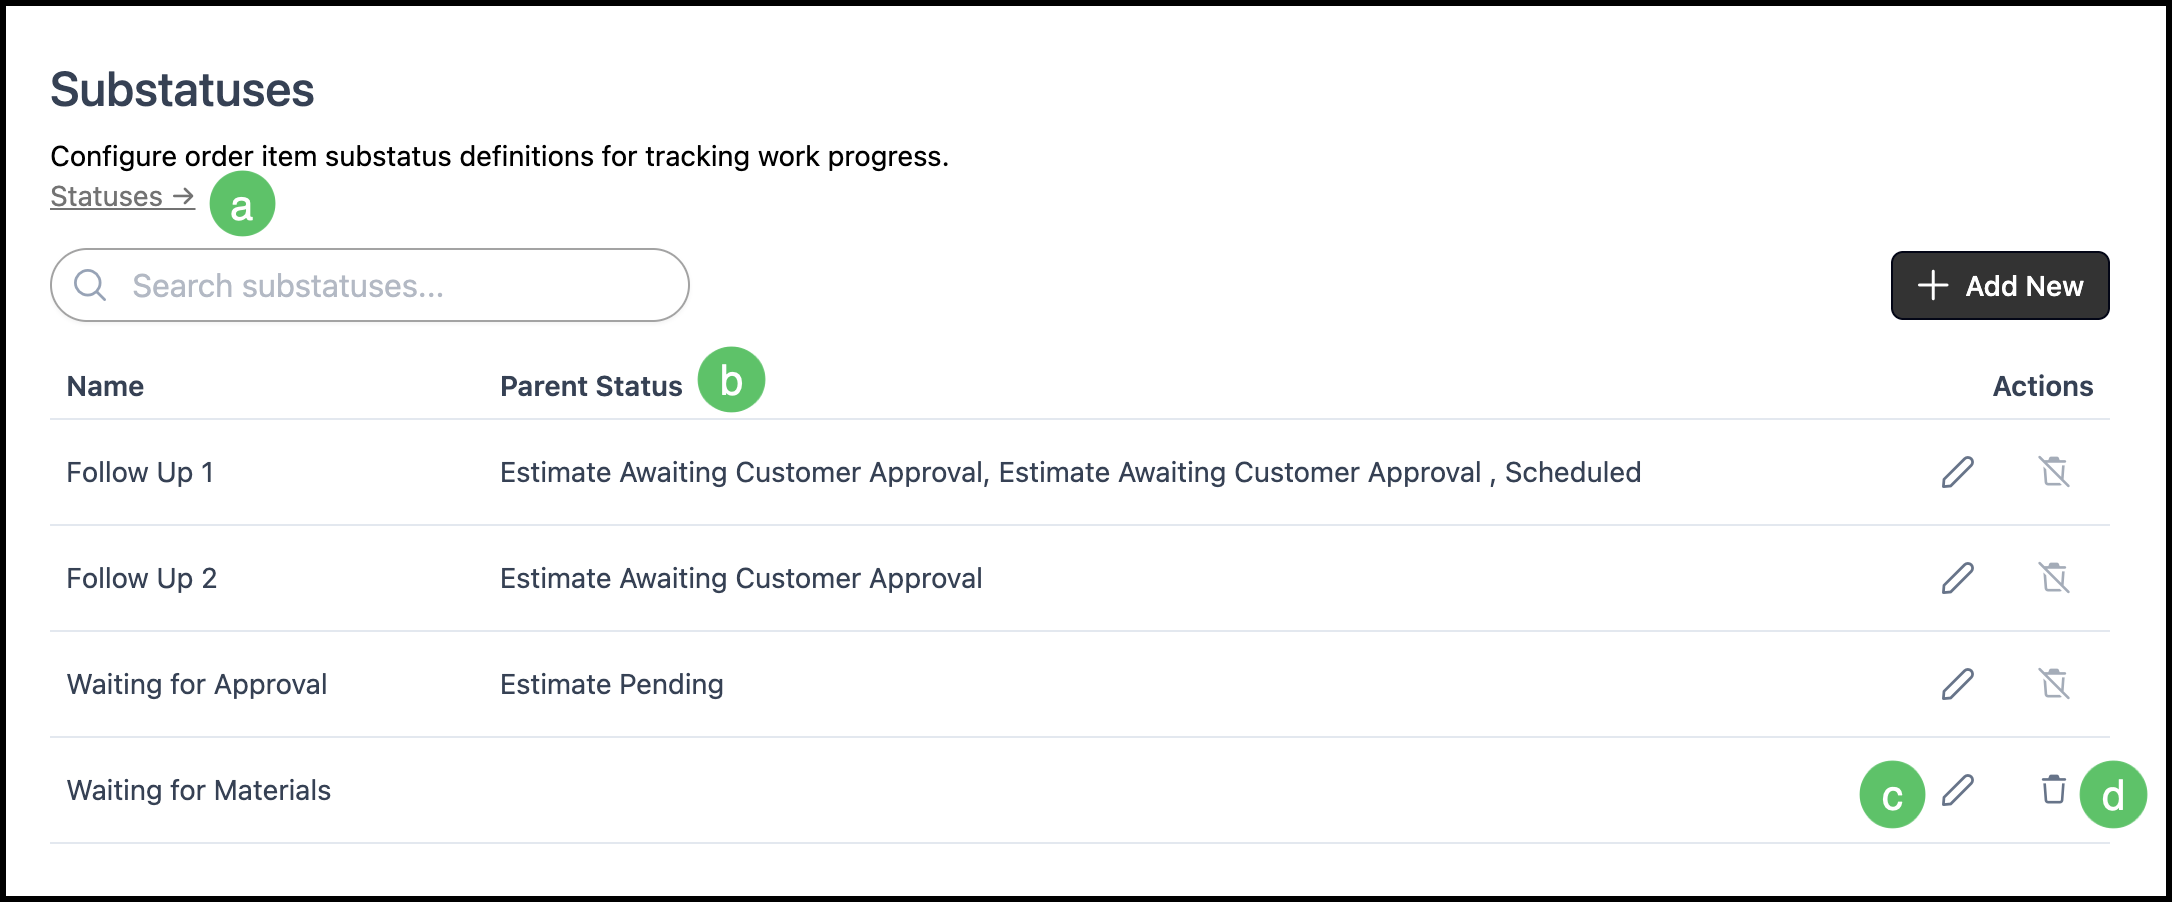
a. This link takes you directly to System Settings / Workflow / Workflow Statuses.
b. The list displays each substatus along with a Parent Status column, indicating which item statuses it is linked to.
c. The Edit icon allows you to make changes to the substatus.
d. Substatuses not currently in use can be deleted.
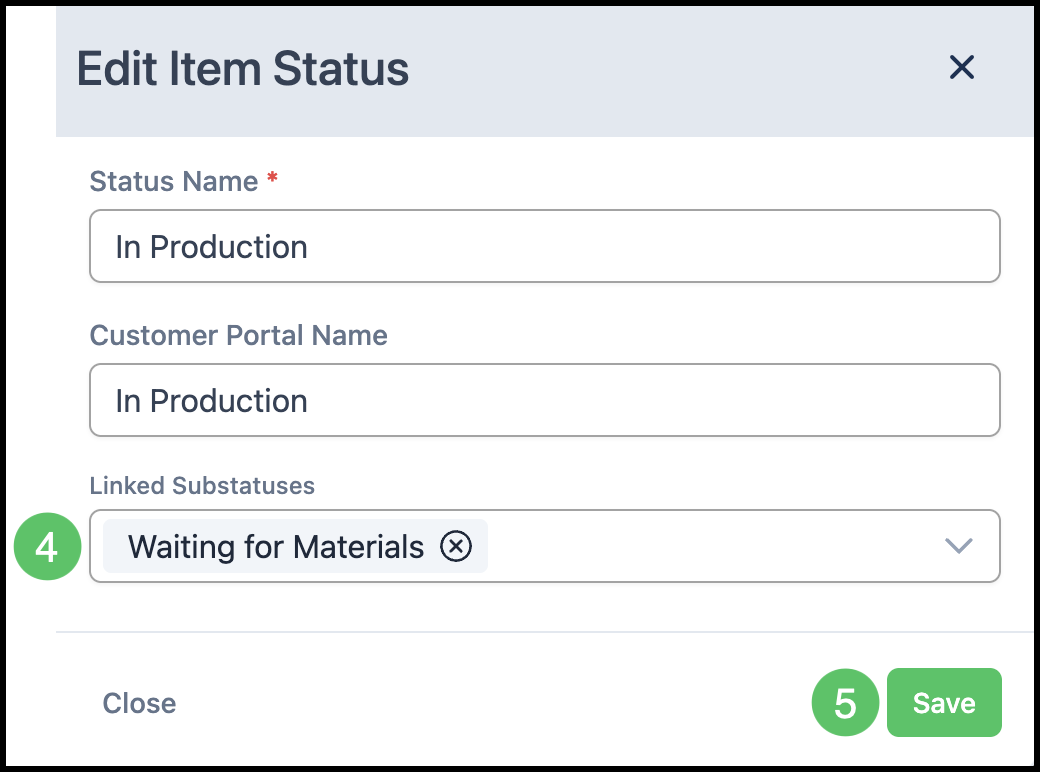
Linking an Existing Item Substatus to an Item Status
After a substatus exists, it must be tied to at least one item status before it appears on Orders, Estimates, or other Line Items.
Navigate to System Settings / Workflow / Workflow Statuses.
1. Pick a document tab: Estimate, Order, Calendar Event, or Purchase Order.
2. Click a main status chip (for example Pending on Estimates or WIP on Orders).
3. Select an Item Status.

4. Use the dropdown to select a Substatus.
Note: You can link multiple substatuses to the same item status.
5. Click Save.