Inventory Settings control how inventory is displayed and managed throughout CoreBridge. Use these settings to configure inventory behavior on Estimates and Orders, manage stock adjustment reasons, and customize how inventory information appears throughout the system.
Table of Contents
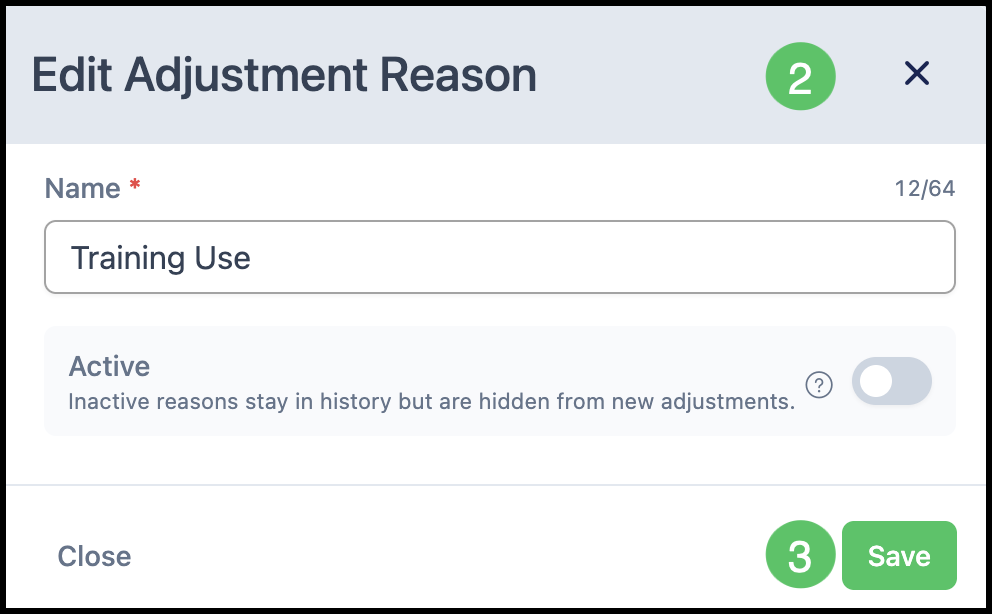
Navigate to System Settings / Purchasing Settings / Inventory.
General Settings
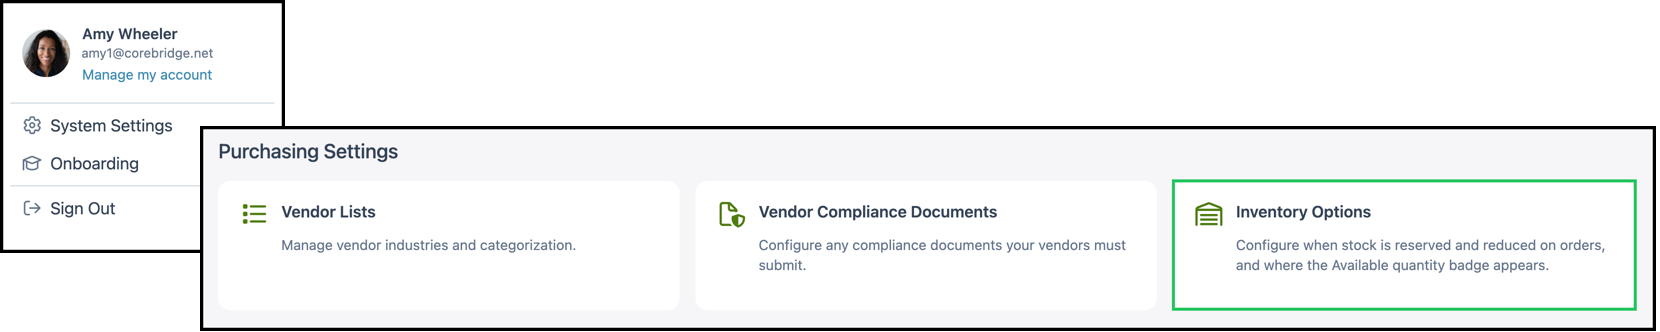
1. Select the General tab.
2. Set Availability Display.
a. Show Available on Estimates - Displays the available inventory quantity for tracked Materials on Estimate Line Items.
b. Show Available on Orders - Displays the available inventory quantity for tracked Materials on Order Line Items.
3. Set Automatic Reserve & Reduce.
a. Reserve-When Status - Defines the Workflow Status at which Materials are reserved. When stock is reserved, the Available quantity decreases while the On-Hand quantity remains unchanged.
b. Reduce-When Status - Defines the Workflow Status at which reserved stock is deducted from the On-Hand inventory quantity.
Note: The Reduce-When Status must be the same as or occur after the Reserve-When Status.
Note: Set either the Reserve-When Status or Reduce-When Status to Disabled to prevent that automatic inventory action from occurring.
4. Click Save.
Adjustment Reasons
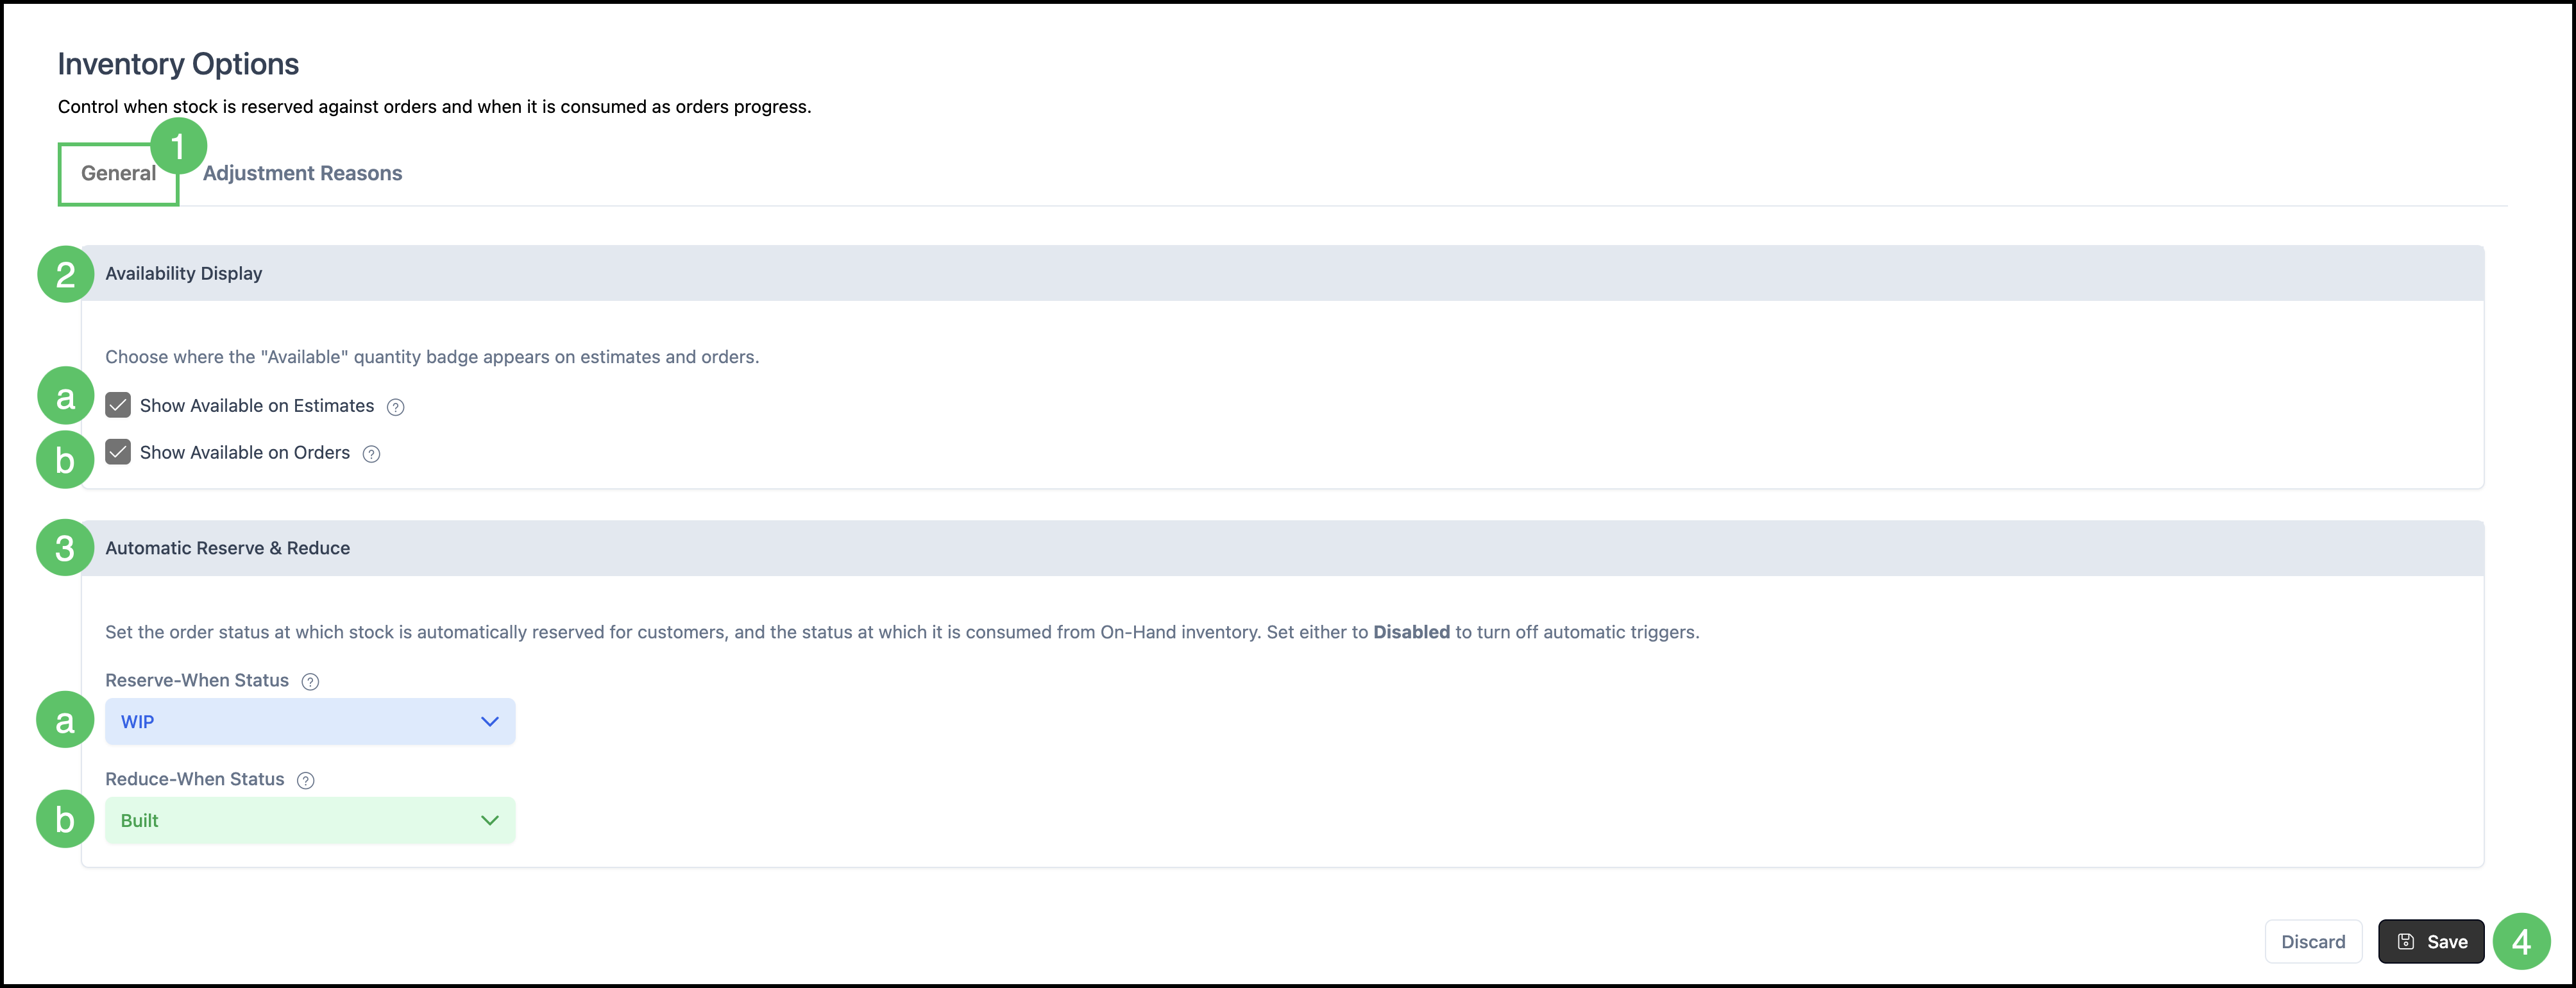
1. Select the Adjustment Reasons tab.
a. Add Reason - Opens the Add Reason dialog, where you can create a new inventory adjustment reason.
b. Search Settings - Controls whether inactive adjustment reasons are displayed.
c. Reason List - Displays the available adjustment reasons. Reasons can be reordered by dragging and dropping to change the order in which they appear in the Adjust Stock dialog. See the example below.
d. Edit/Delete - Provides options to edit an existing adjustment reason or delete a reason that is no longer needed.
Note: CoreBridge includes four system-defined adjustment reasons by default. These reasons can be set to active or inactive, but their names cannot be changed and they cannot be deleted because they are used for reporting.
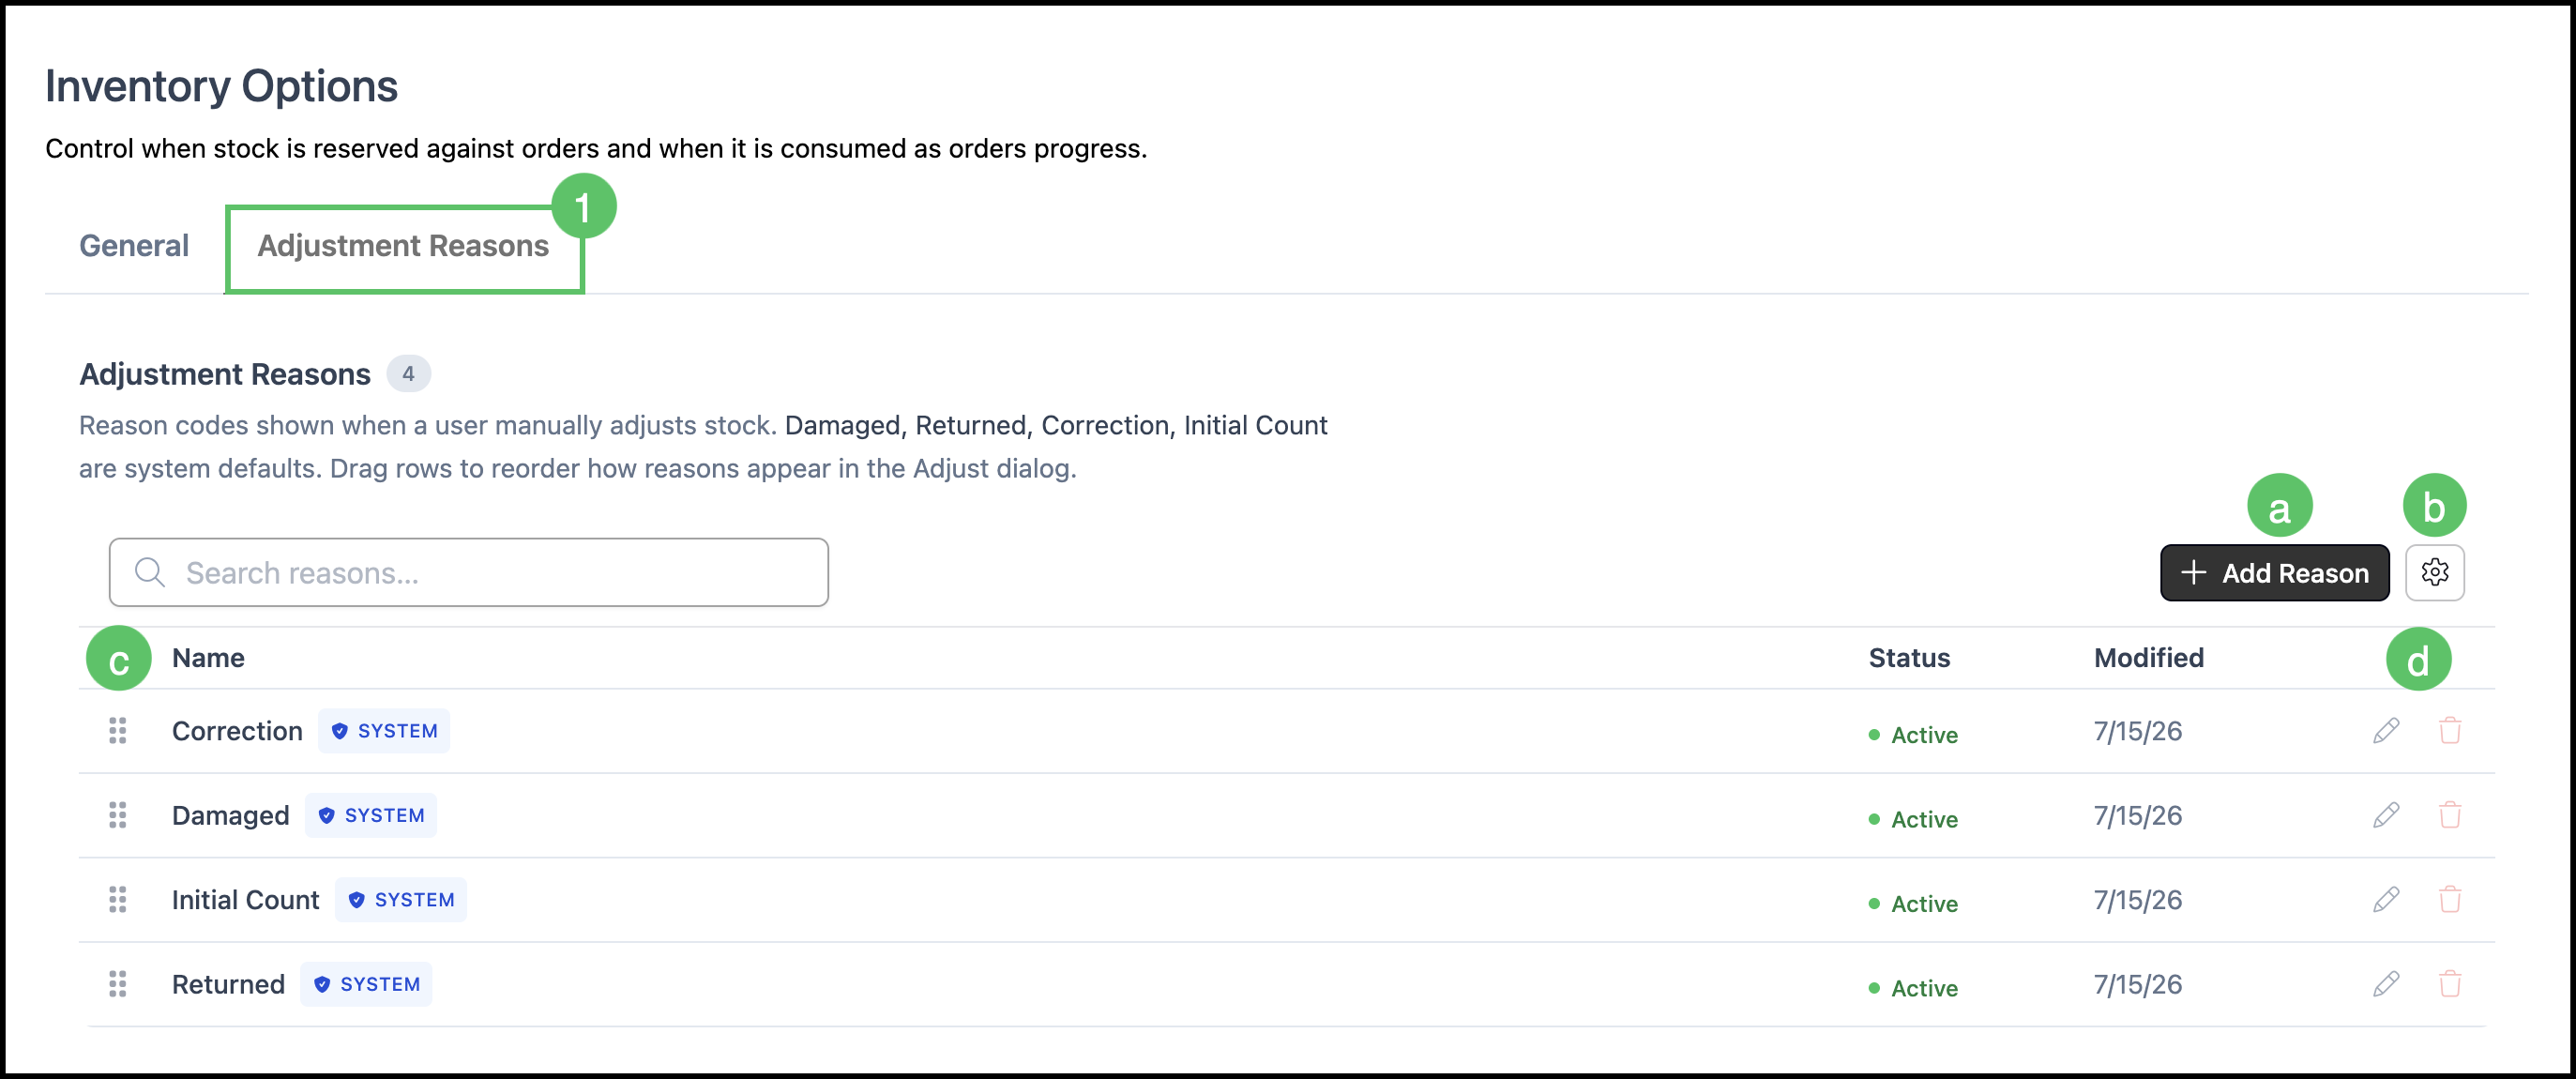
Example:
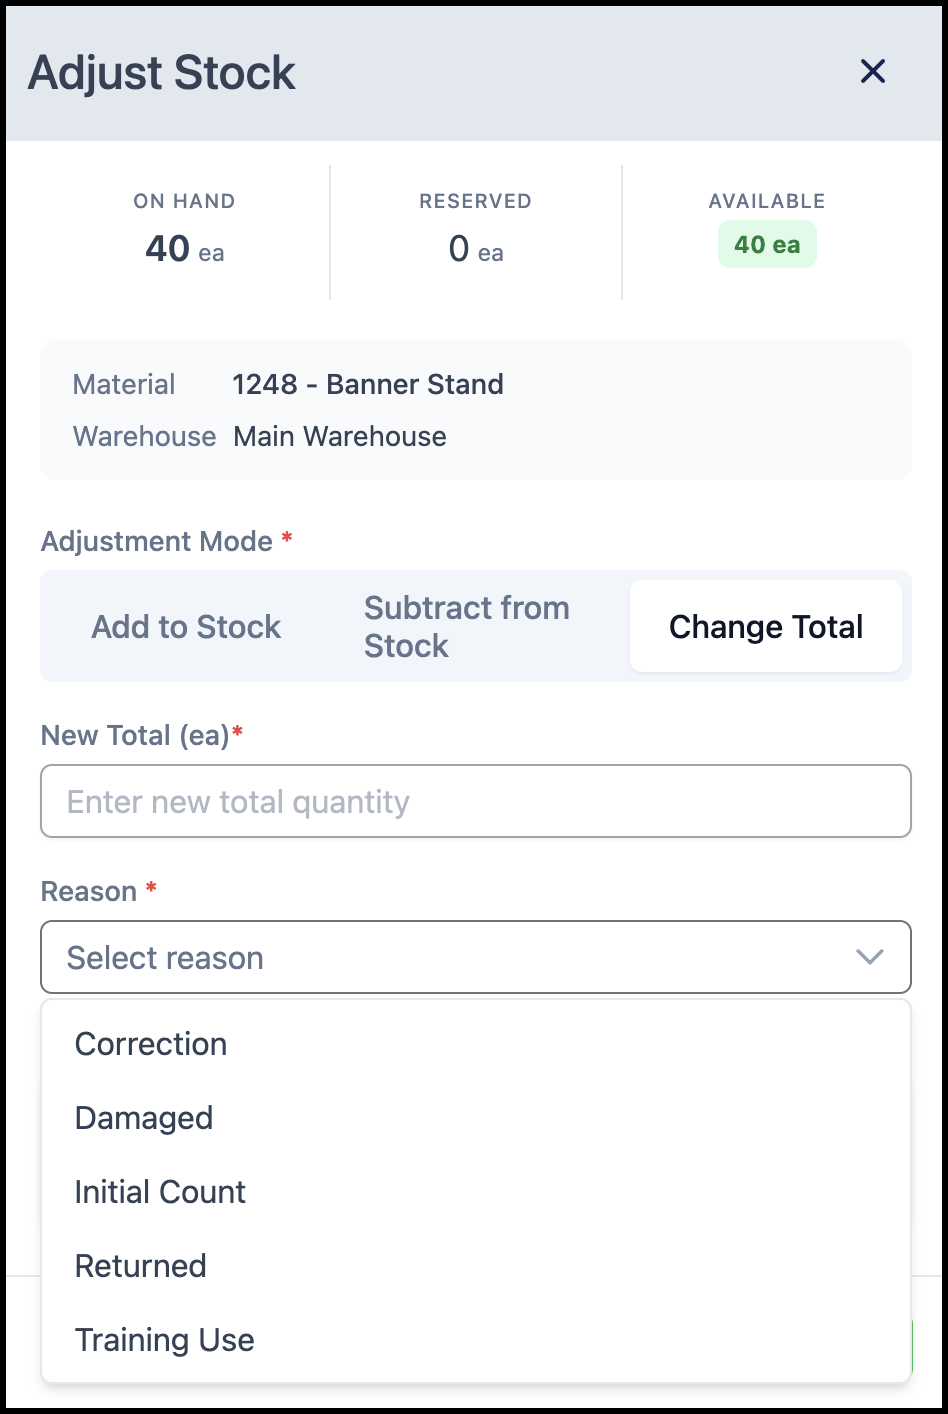
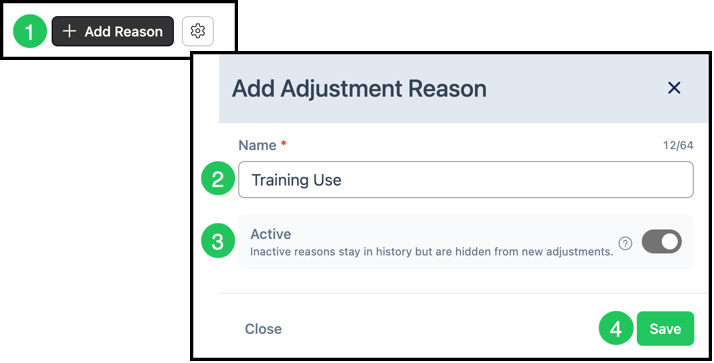
Adding an Adjustment Reason
1. Click Add Reason.
2. Enter a Name.
3. Verify Active.
Note: This is enabled by default.
4. Click Save.
Editing a Reason
1. Click the Edit icon.
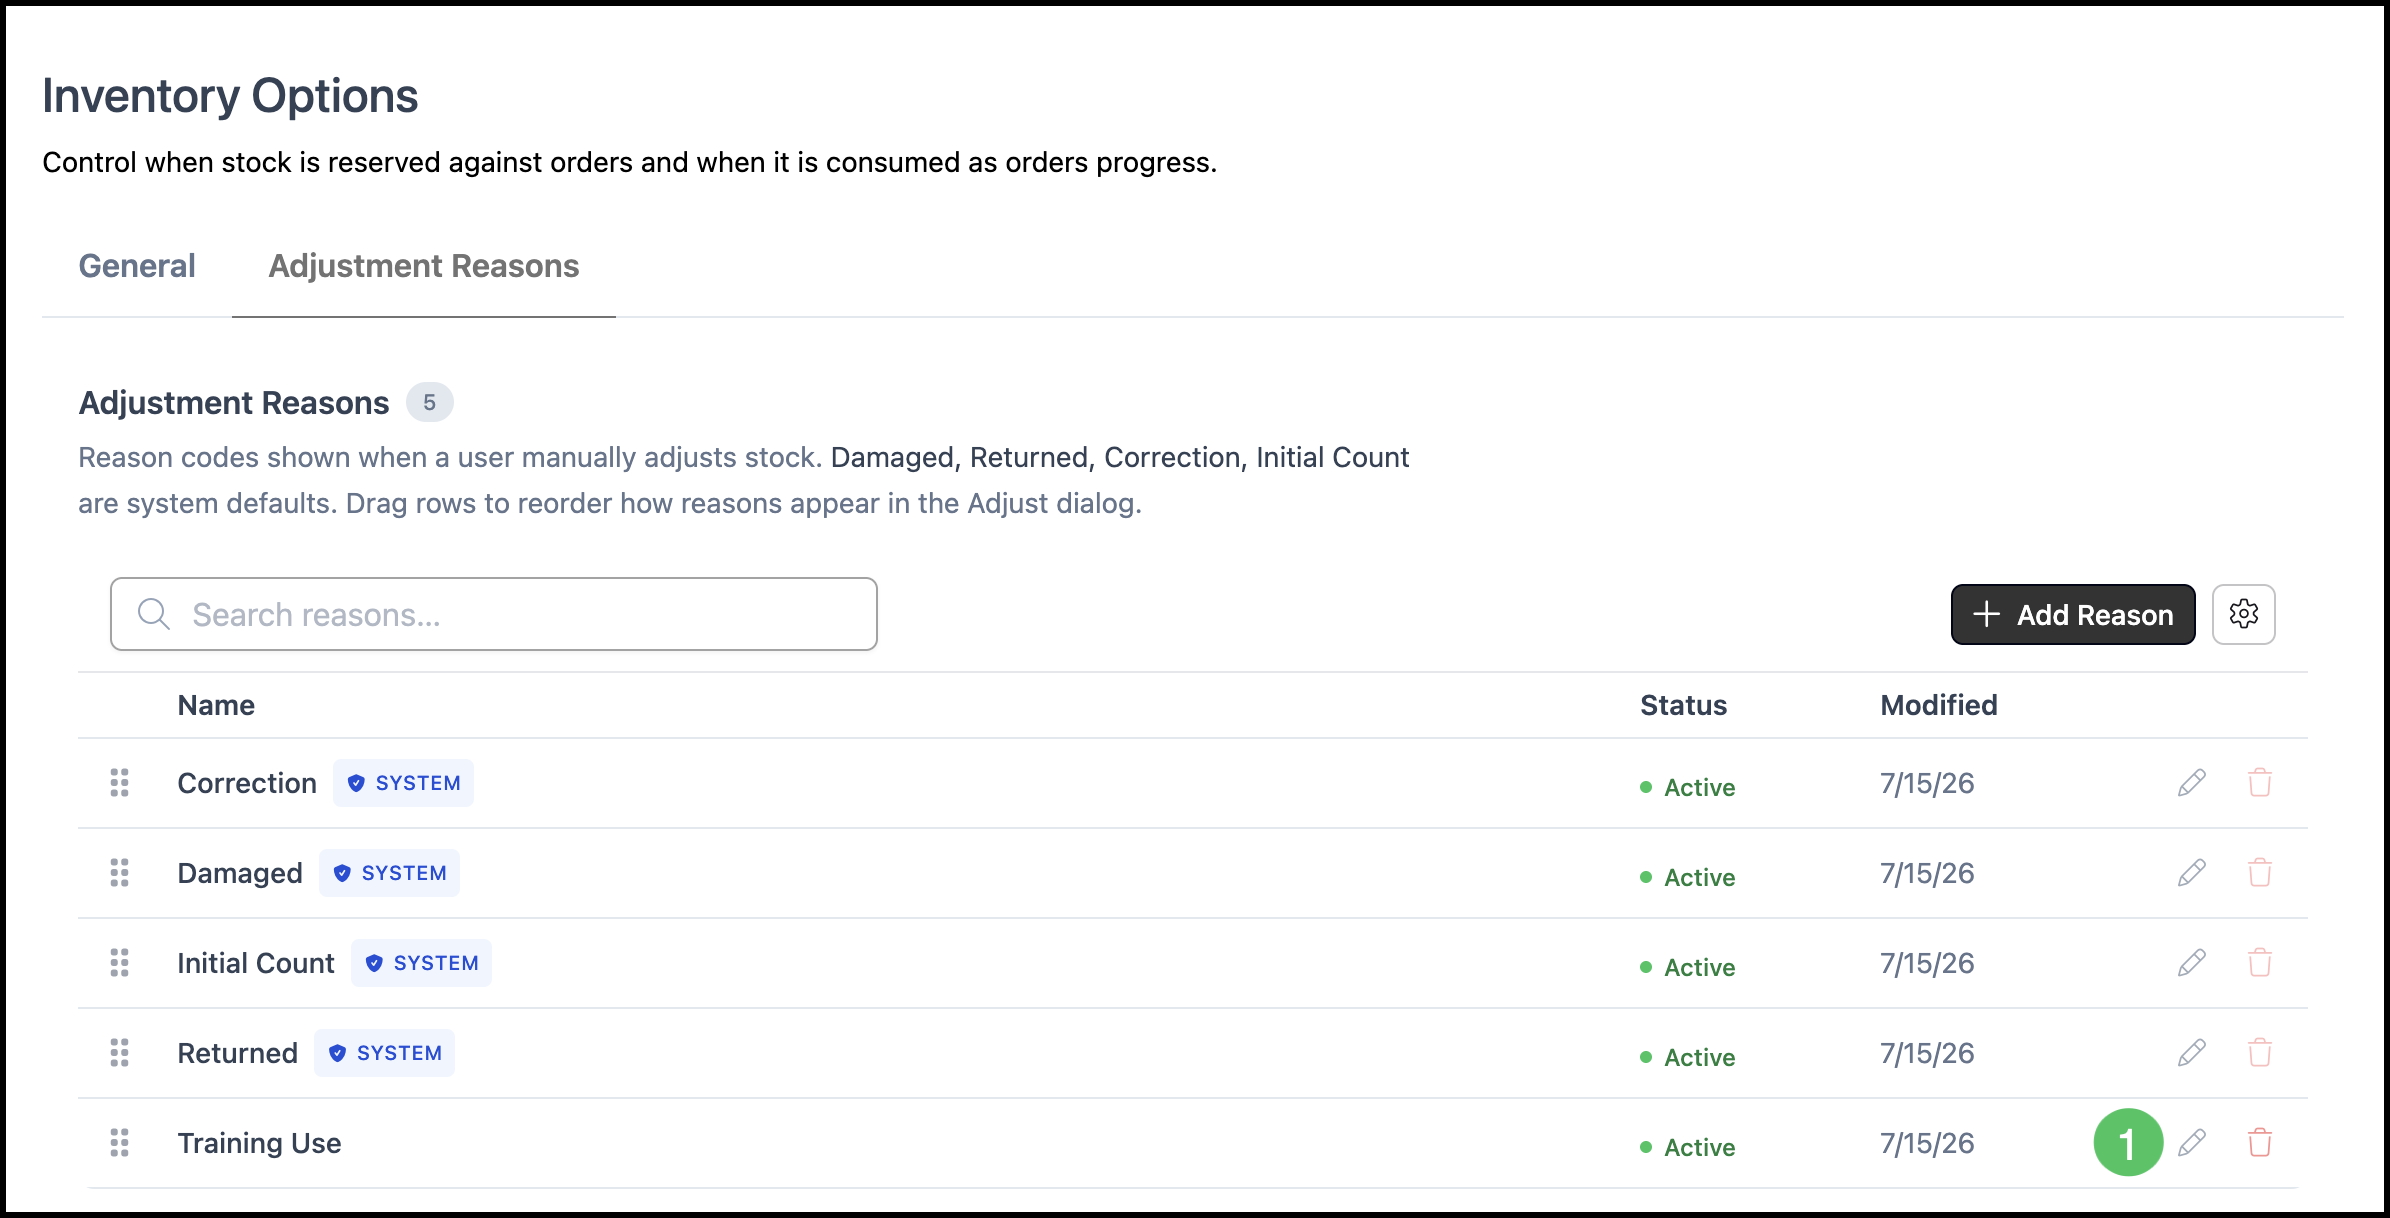
2. Make the necessary changes.
3. Click Save.