The Inventory module in CoreBridge EVO™ lets you track stock levels for your Materials, monitor usage across Orders and Estimates, and manage warehouses from one central location. Inventory is an optional feature that must be enabled for your account. Until it is enabled, the Inventory module does not appear in CoreBridge.
Table of Contents
- Understanding Stock Quantities
- Stock Status
- Inventory Tracking for Materials with Variants
- Managing Stock Within Materials
- Managing Stock Within the Inventory Module
- Setting First Quantity
- Related Articles
Understanding Stock Quantities
The Inventory module uses three quantity values to show the current state of a Material's stock. These values are calculated automatically based on Order activity and any manual adjustments you make.
- On Hand is the total physical stock available, adjusted for any reductions from invoiced Orders.
- Reserved is the quantity allocated to active Orders that have not yet been invoiced. Stock is reserved when an Order reaches the status you configure in Inventory Settings.
- Available is On Hand minus Reserved. This is the quantity that can still be committed to new Orders.
Stock Status
Each tracked Material displays one of three statuses based on its current quantity and the threshold you set on the Material record.
- In Stock: The quantity on hand meets or exceeds the reorder threshold.
- Low: The quantity on hand has dropped below the reorder threshold.
- Out / Back Order: The quantity on hand is at zero or has gone negative, which can occur when back orders are in place.
Inventory Tracking for Materials with Variants
Materials track inventory in one of two ways, depending on whether they have Variants. Knowing which method applies to a Material helps you understand where its stock numbers come from and how to make changes.
- Material without Variants is tracked as a single item. The quantity shown on the Material is its actual stock count.
- Material with Variants is tracked separately by each Variant. Every Variant has its own On Hand, Reserved, and Available quantity per Warehouse. The total shown at the Material level is the combined total of all its Variants, not a number you can set directly.
Note: Stock for a Material with Variants must be added or adjusted one Variant at a time. There is currently no option to update all Variants at once.
The Reorder Threshold is set once at the Material level and is shared across all of its Variants. If the combined stock drops below the threshold, the Material shows as Low, even if the shortage is limited to a single Variant.
When a Variant is added to an Order or Estimate, Reserve and Reduce actions apply only to that Variant, not to the Material's other Variants.
Managing Stock Within Materials
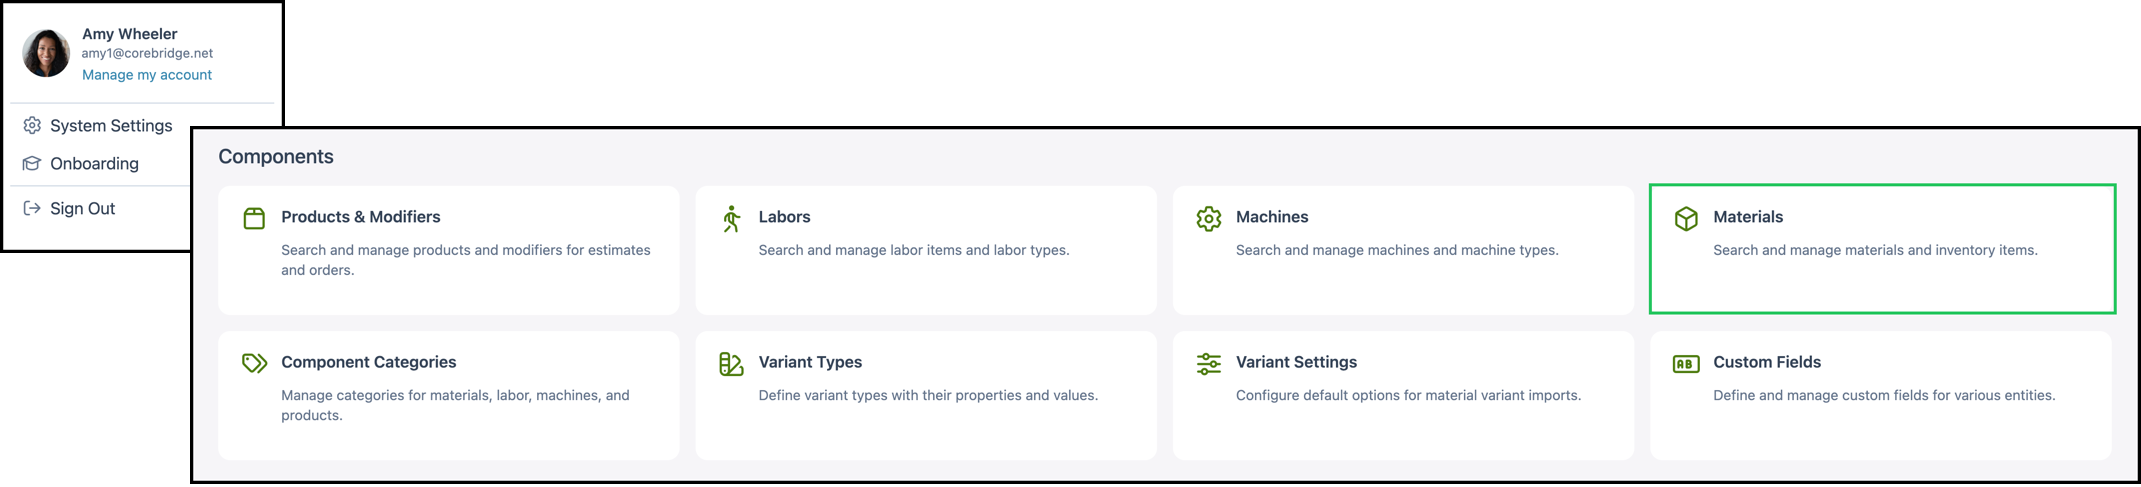
Navigate to System Settings / Components / Materials and select the appropriate Material.
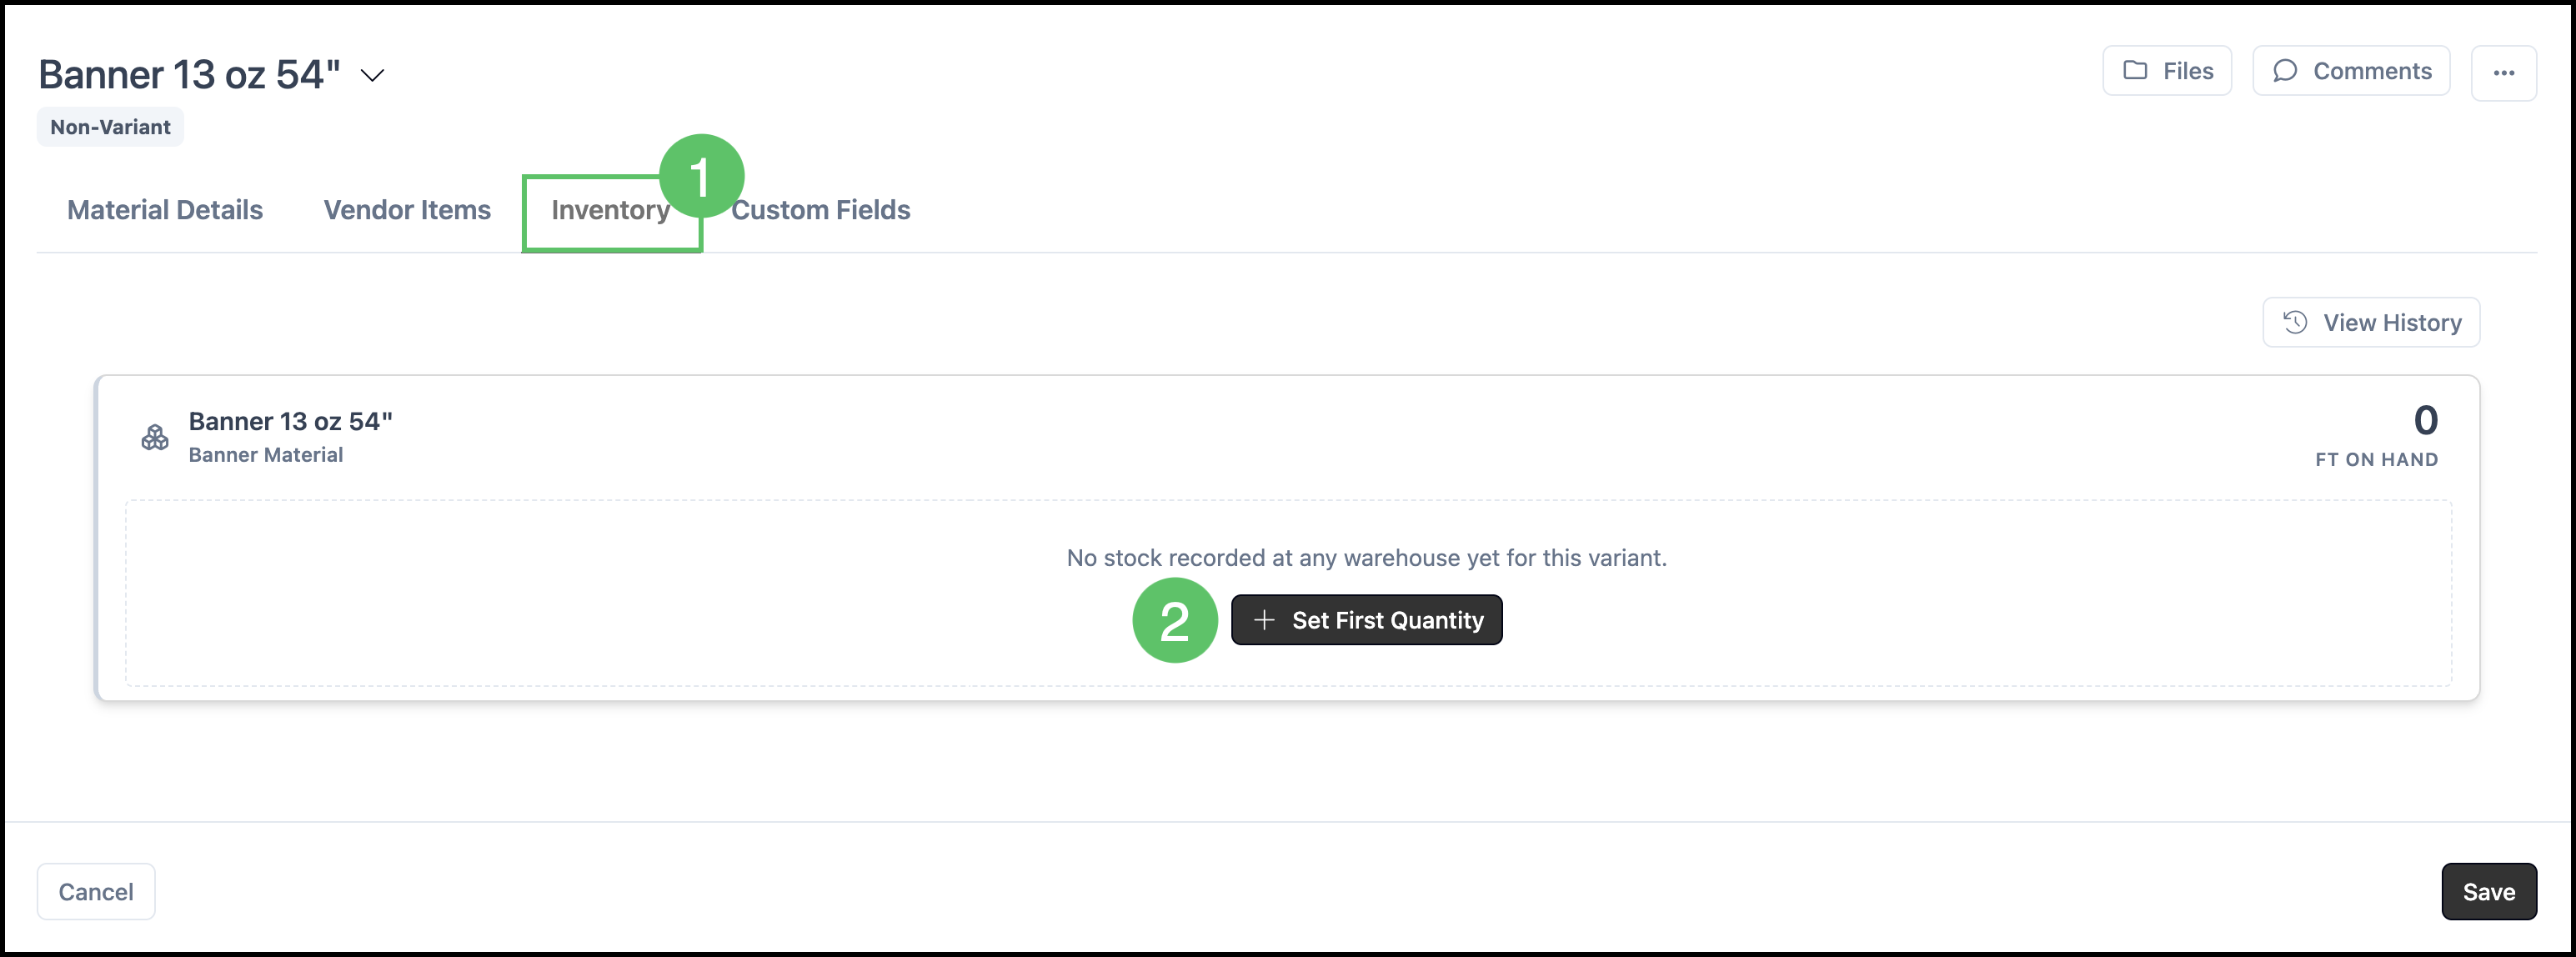
Setting First Quantity
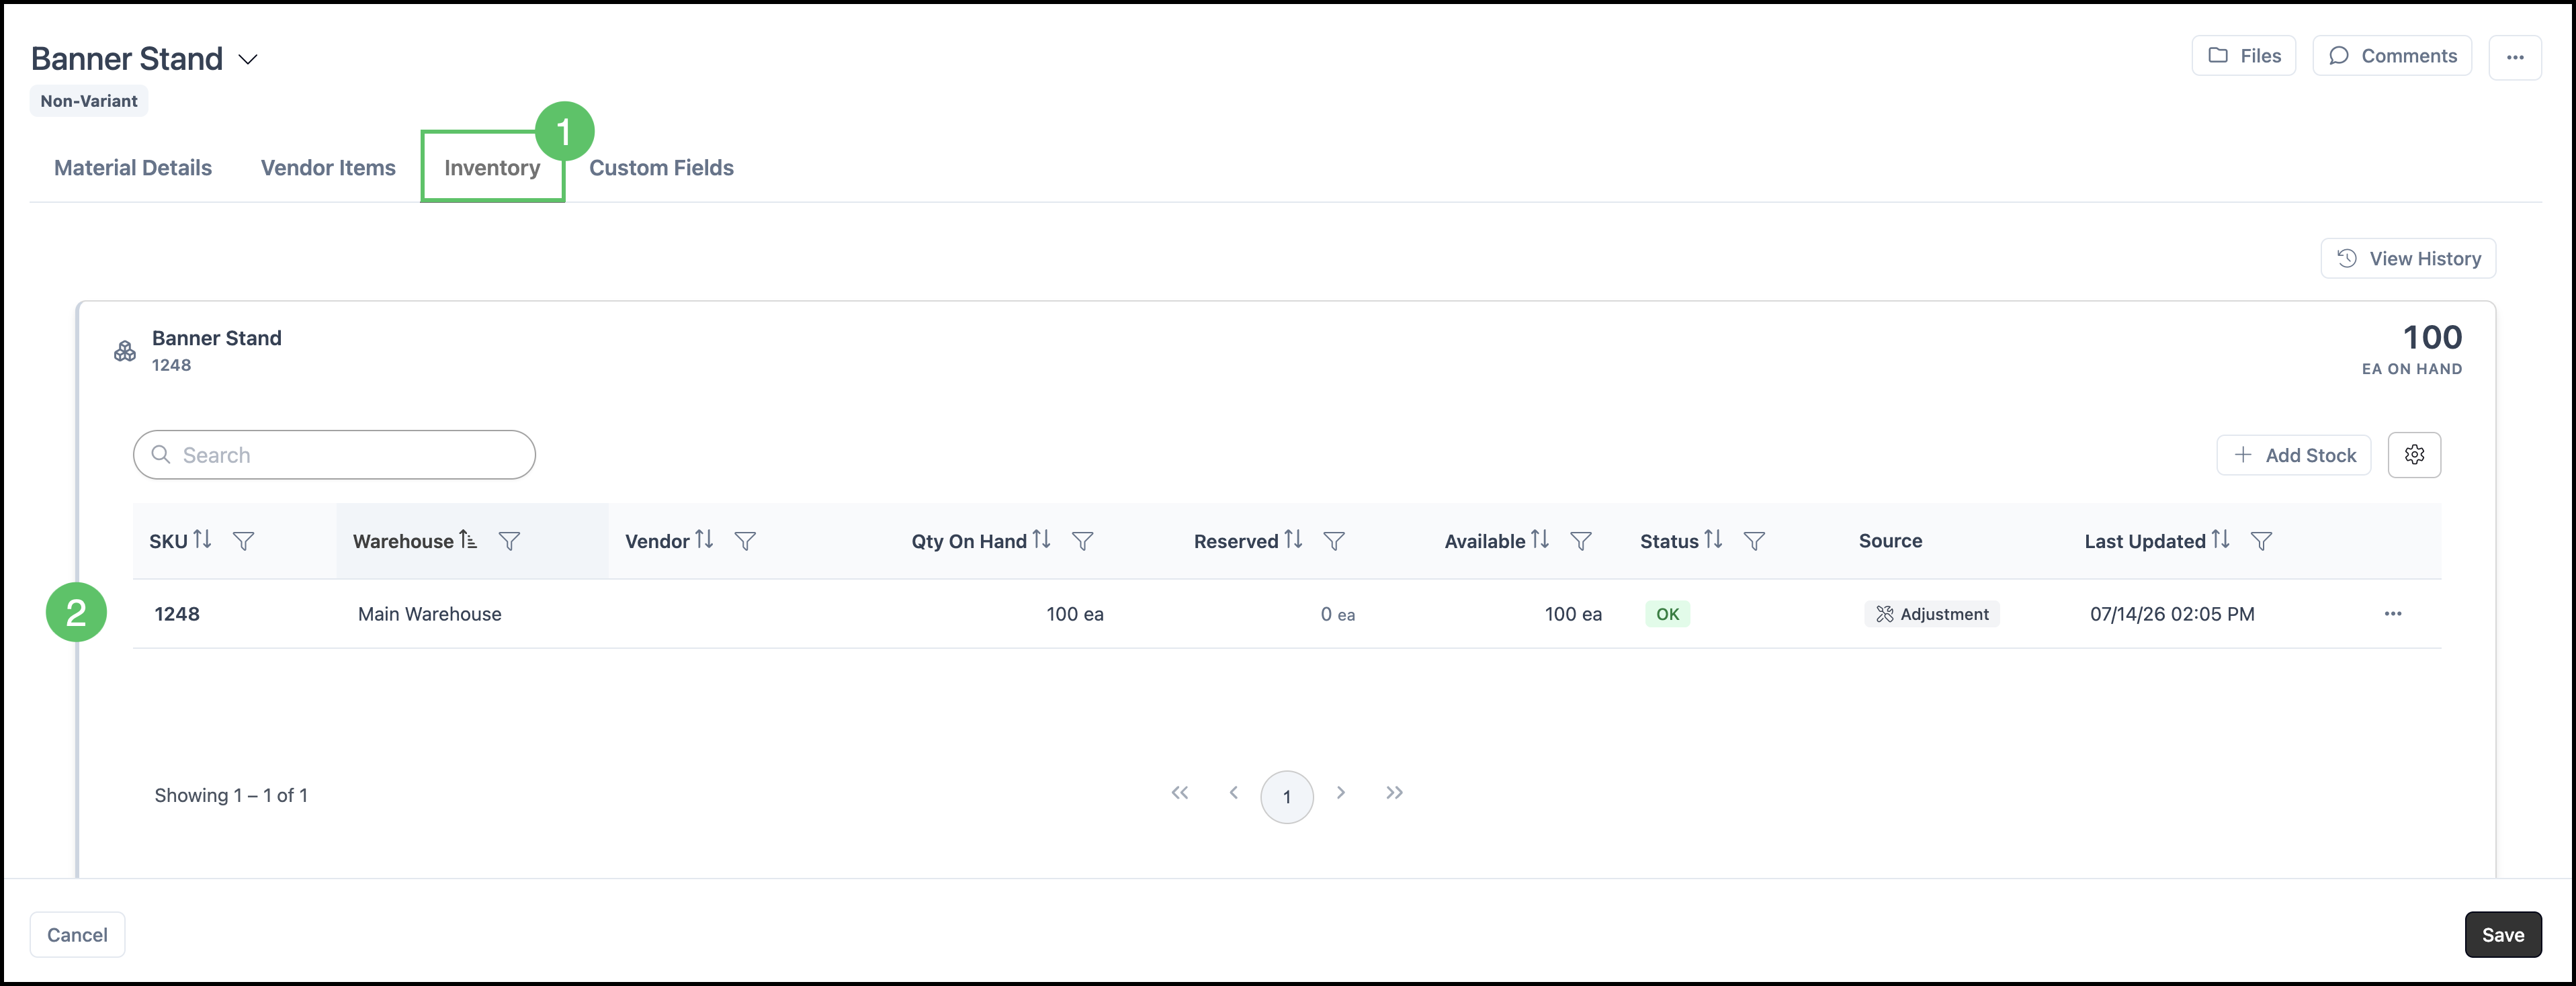
1. Select the Inventory tab.
2. Click Set First Quantity.
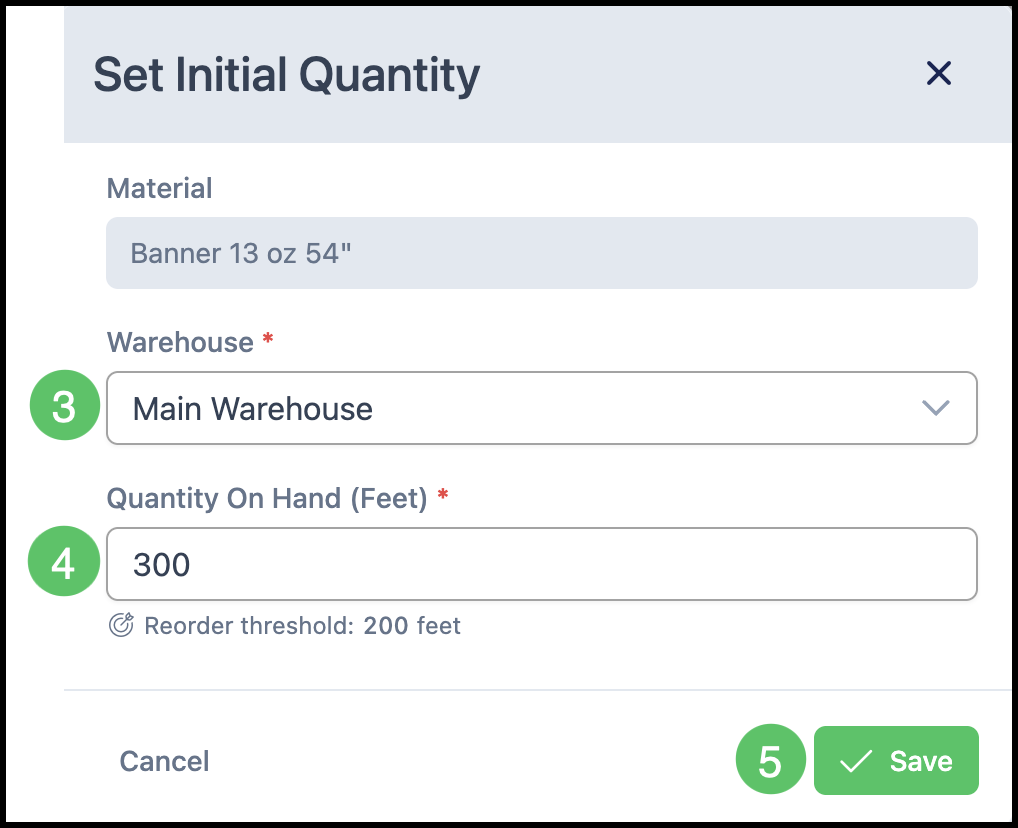
3. Select the Warehouse.
4. Set the Quantity on Hand.
5. Click Save.
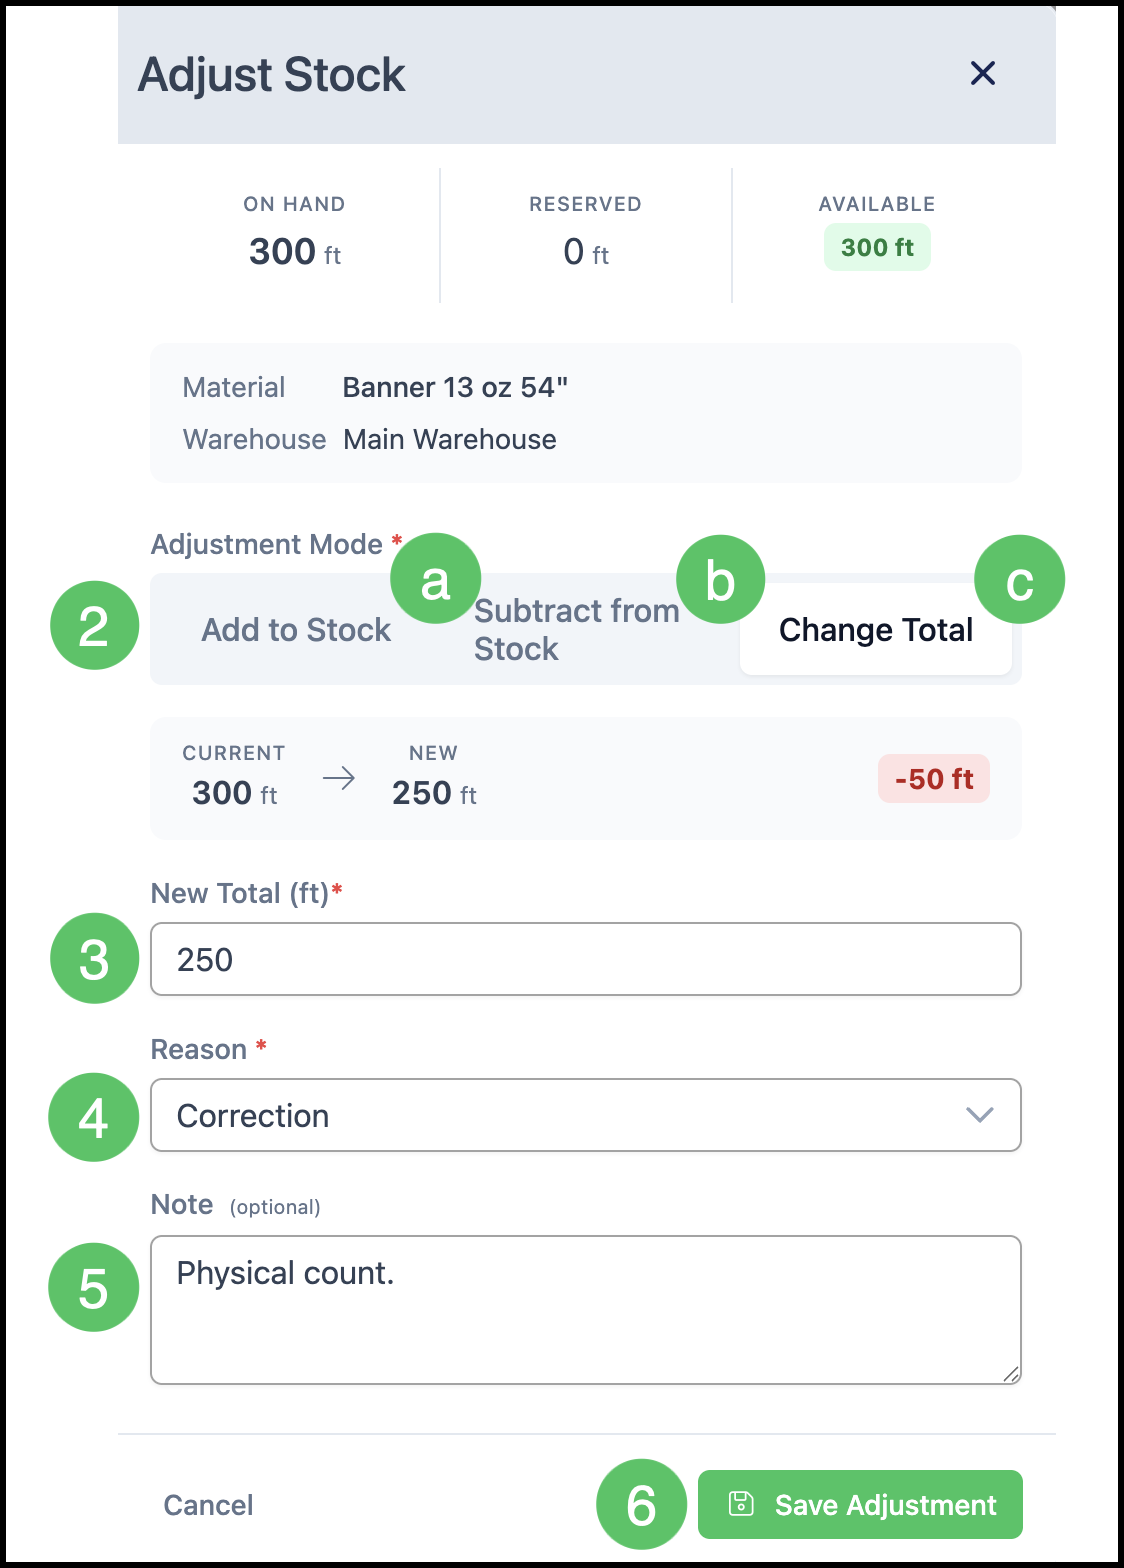
Adjusting Stock
1. Select the Inventory tab.
2. Select the inventory row.
Note: You can also access Edit Quantity under the More Actions menu at the end of the row.
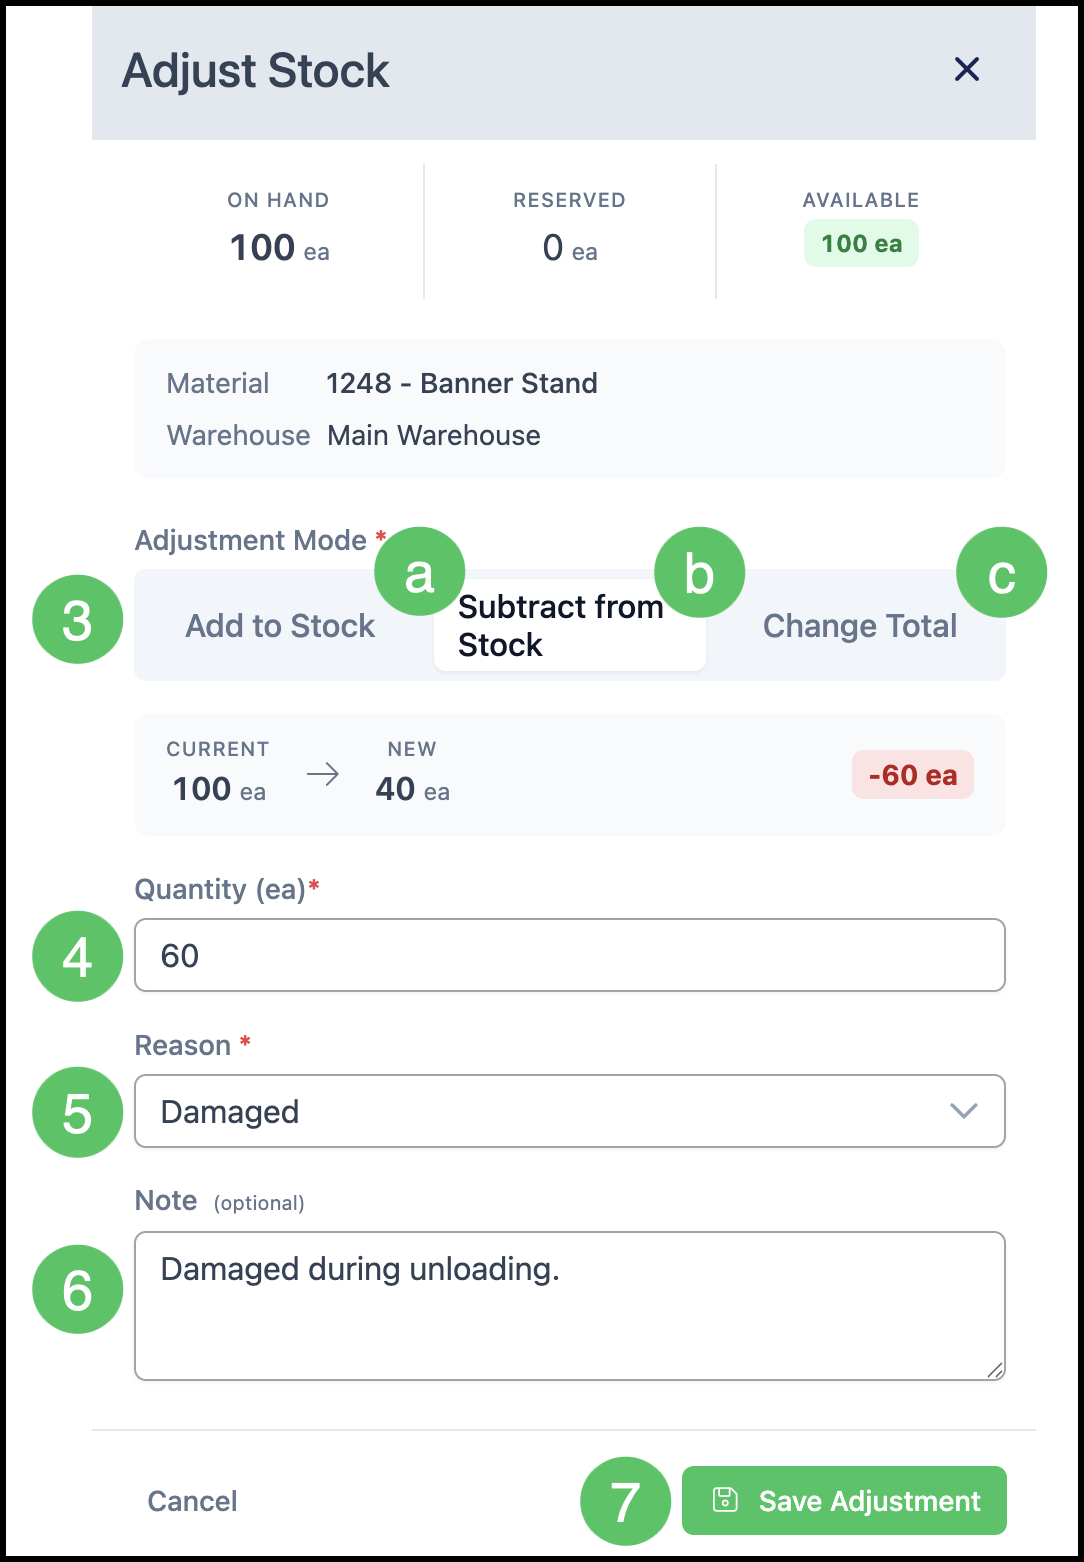
3. Select the Adjustment Mode.
Note: Inventory is managed through manual stock adjustments. Barcode and QR code scanning are not used to update stock quantities.
a. Add to Stock - Adds to the current total when new stock arrives (for example, a new shipment).
b. Subtract from Stock - Subtract from the current total when stock is lost or damaged.
c. Change Total - Set a new total and let the system calculate the difference. This is useful after a physical count.
4. Enter the Quantity or New Total.
5. Select the Reason.
Note: Each adjustment must have a reason entered.
6. Enter a Note, if desired.
7. Click Save Adjustment.
Viewing Stock History
1. Select the Inventory tab.
2. Click View History.
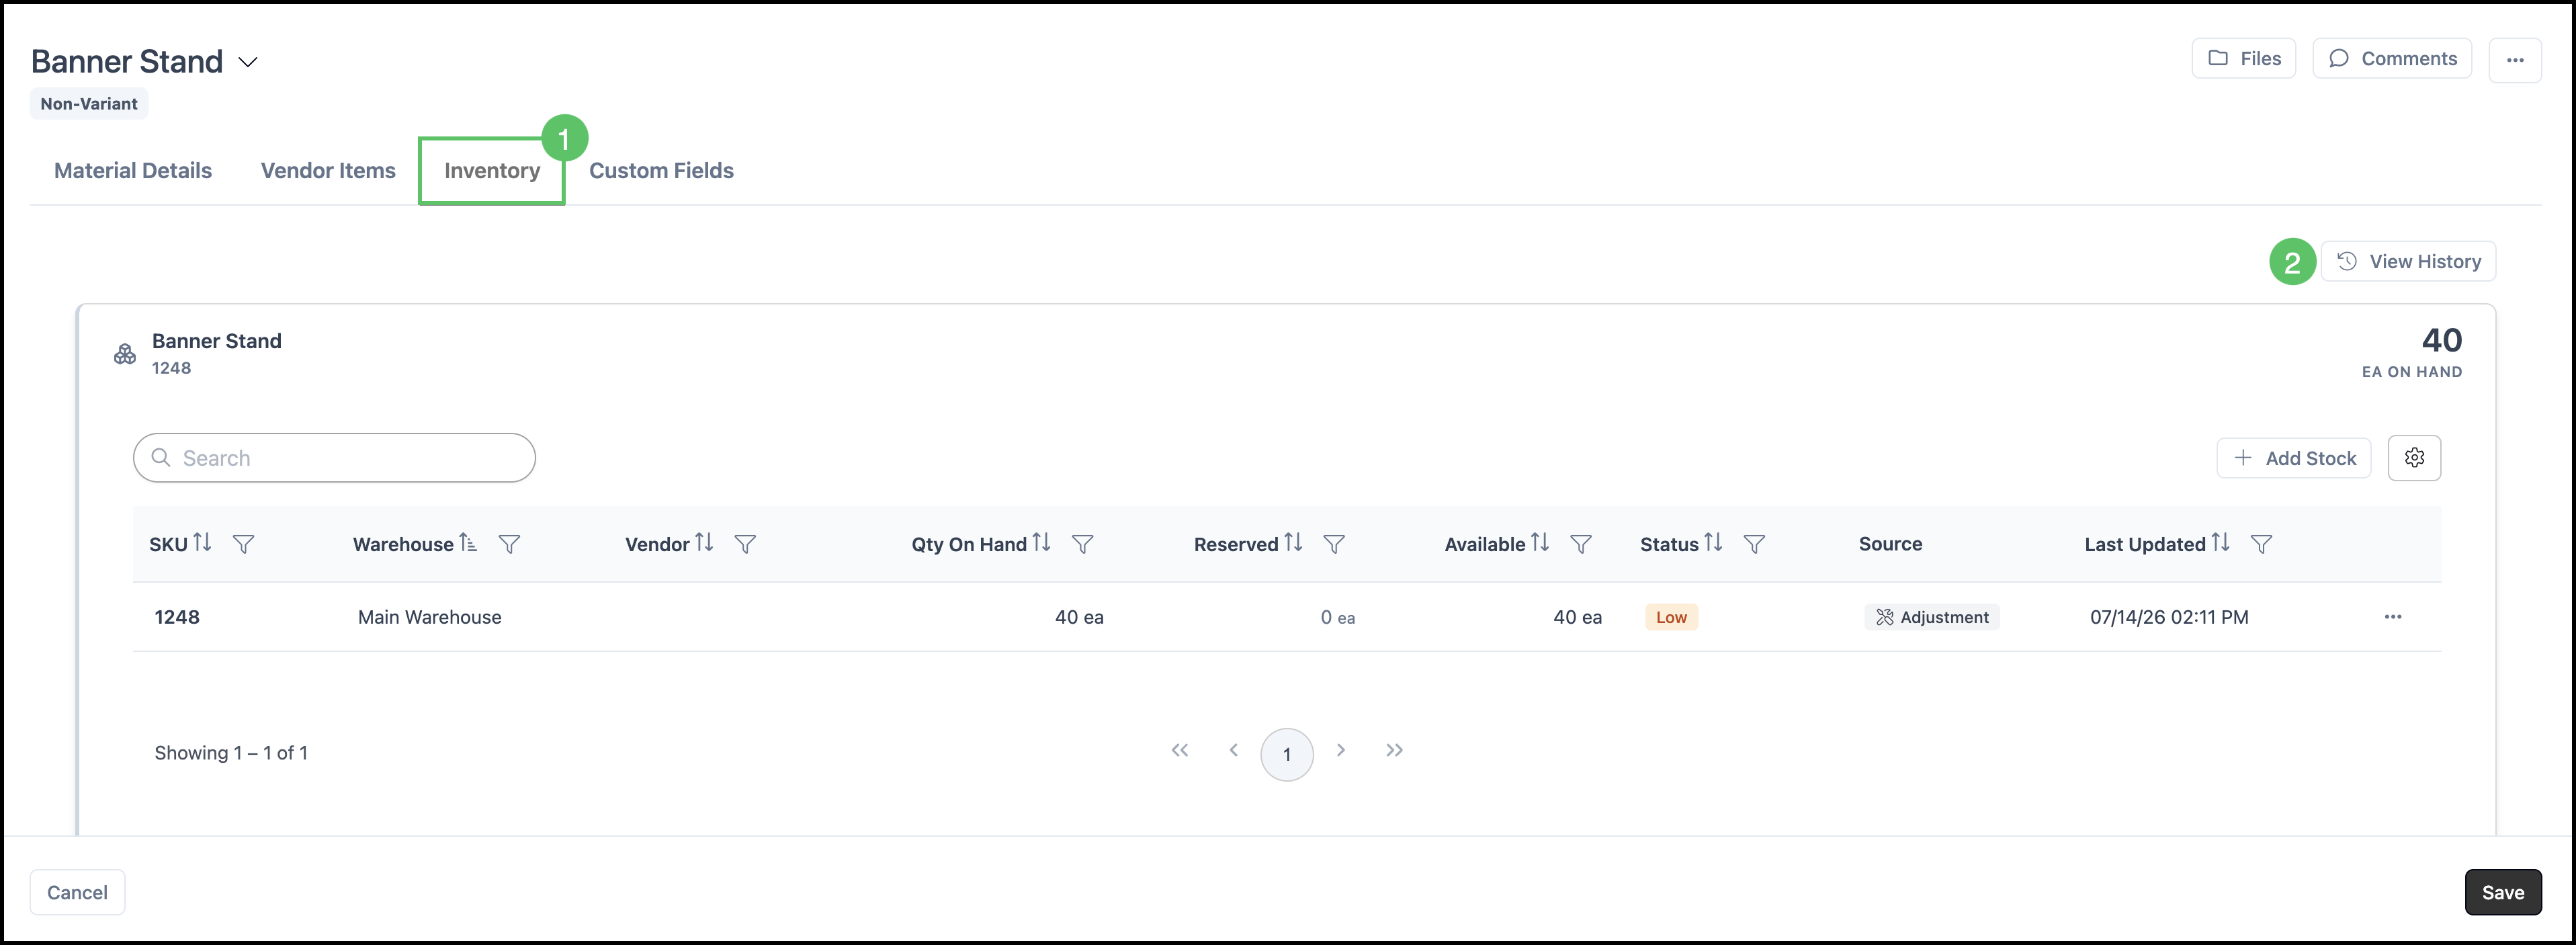
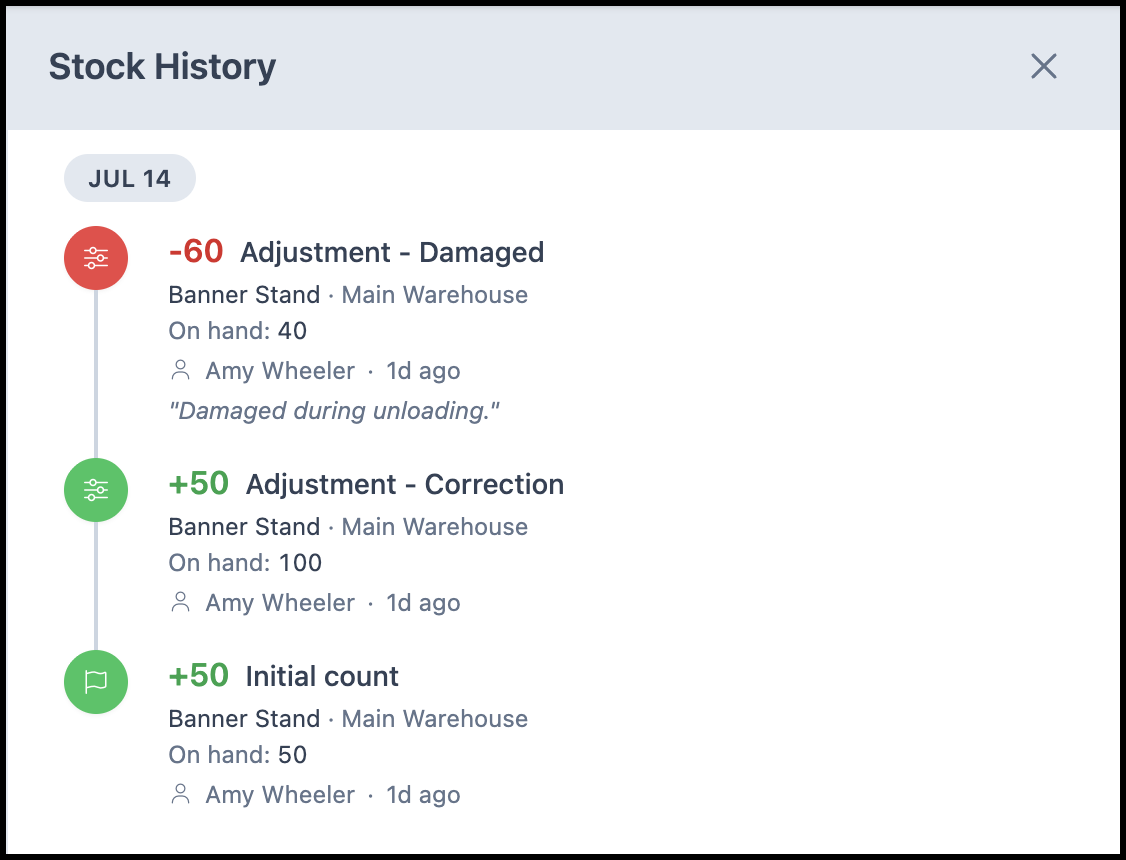
This opens up a side panel with the stock history for this Material.
Managing Stock Within the Inventory Module
Navigate to Inventory / Stock.
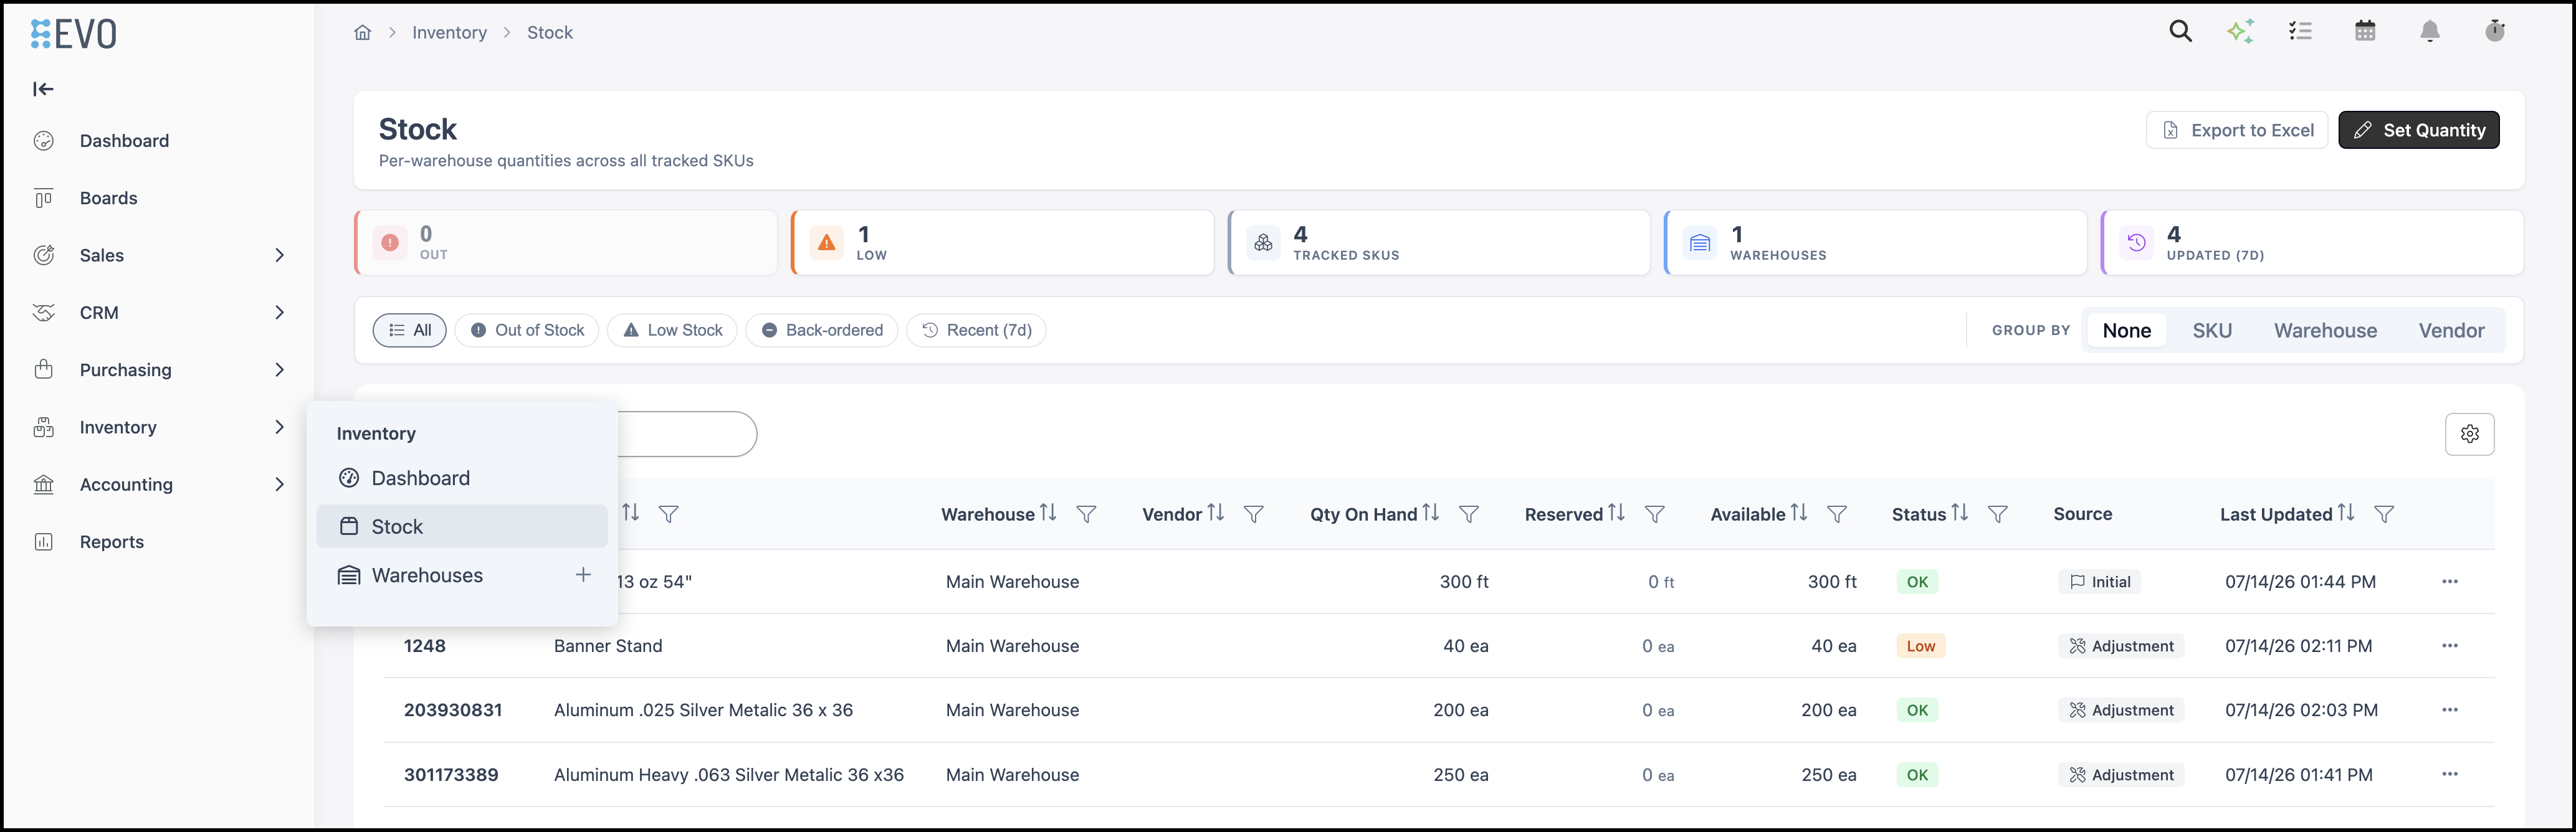
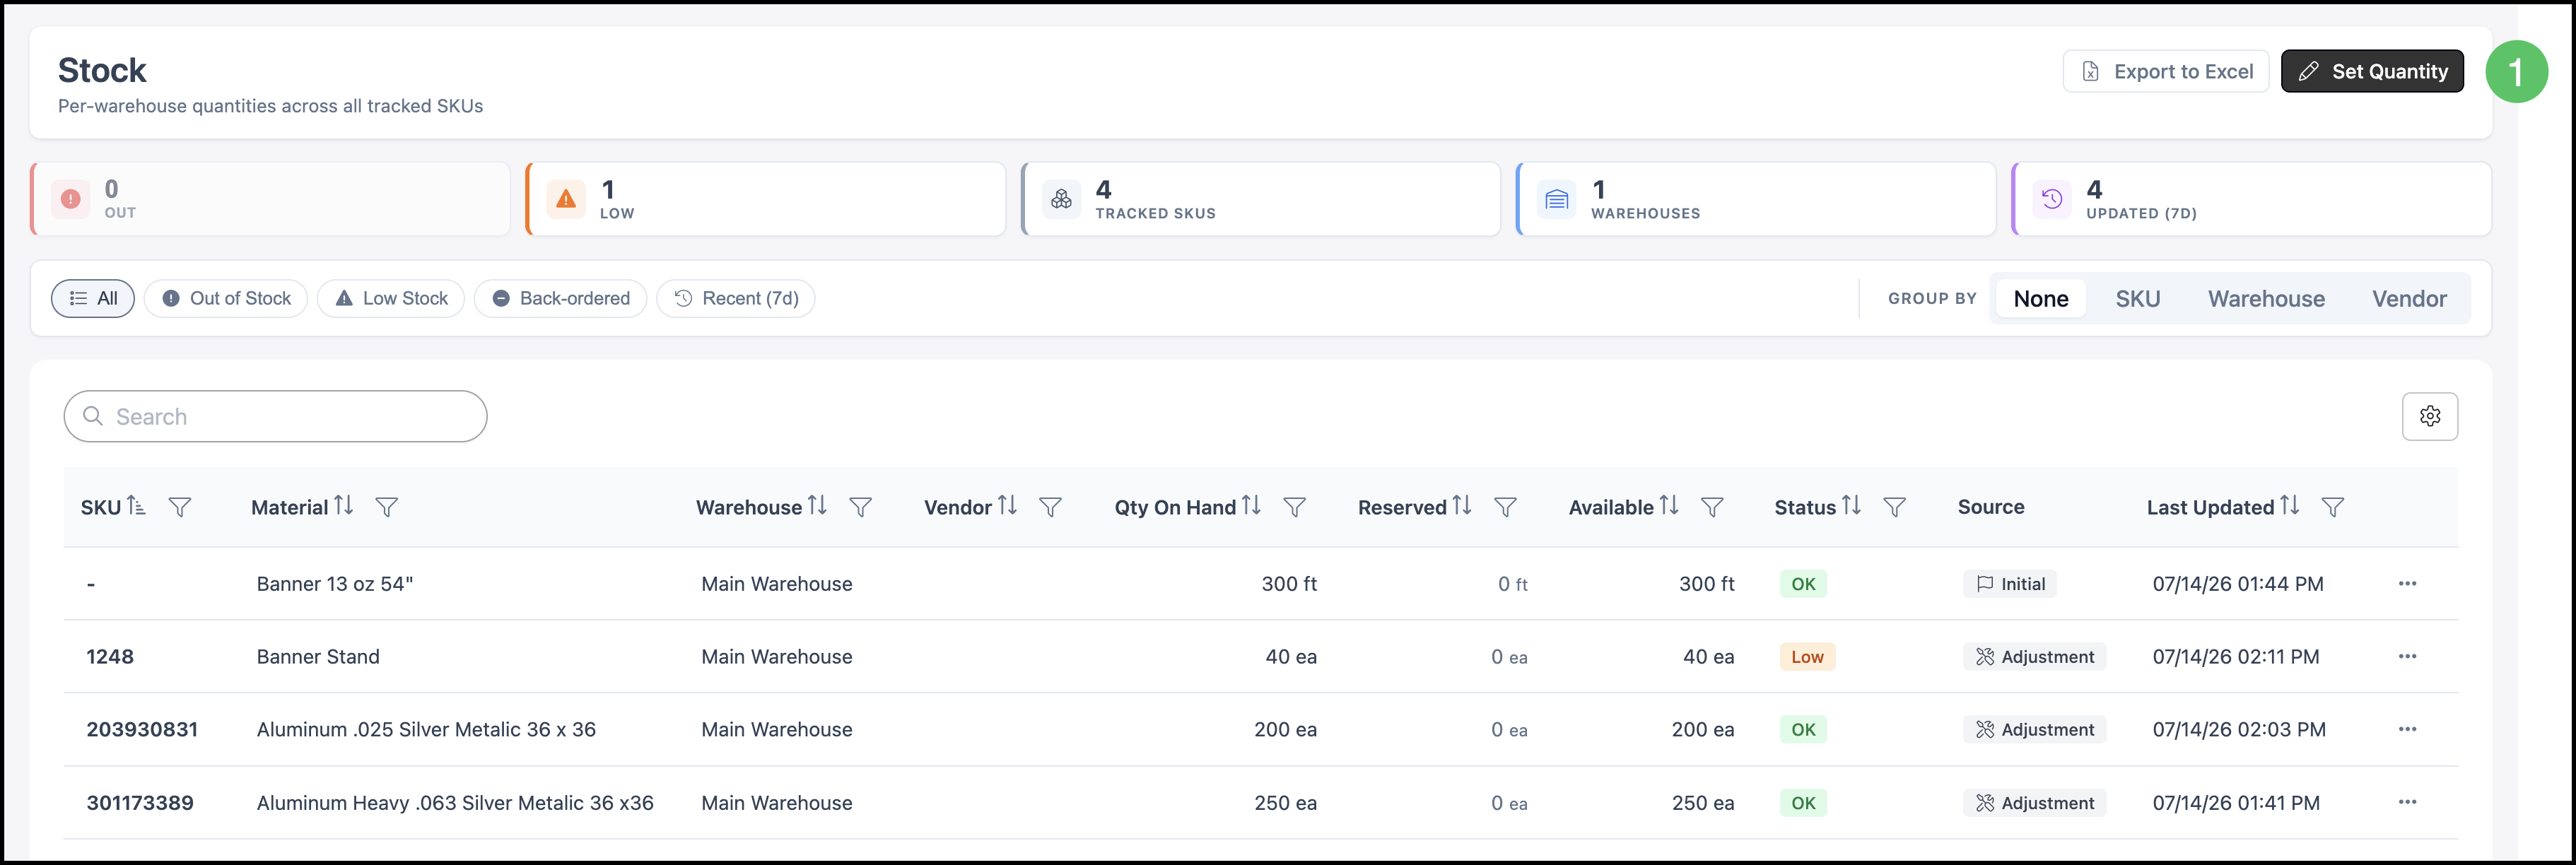
Setting First Quantity
1. Click Set Quantity.
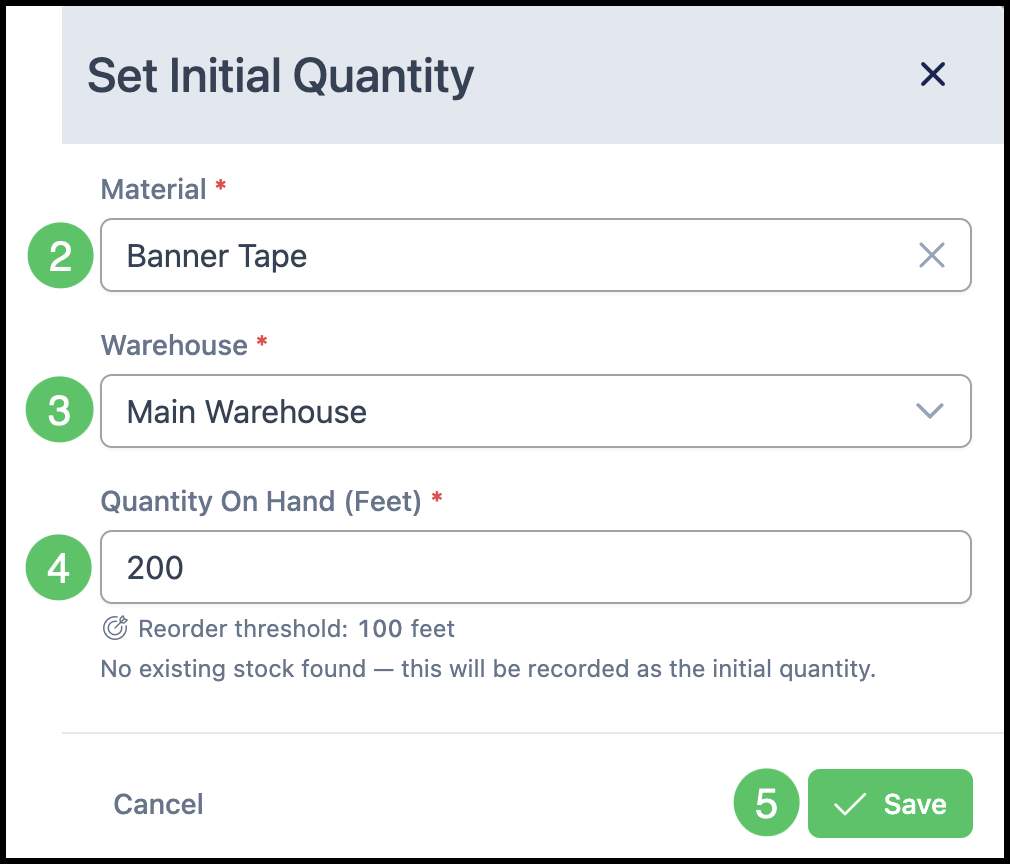
2. Select the Material.
Note: Inventory tracking is configured individually for each Material and is not enabled by default. Only Materials with inventory tracking enabled are available for selection here. For more information, see Setting up Inventory.
3. Select the Warehouse.
4. Enter the Quantity.
5. Click Save.
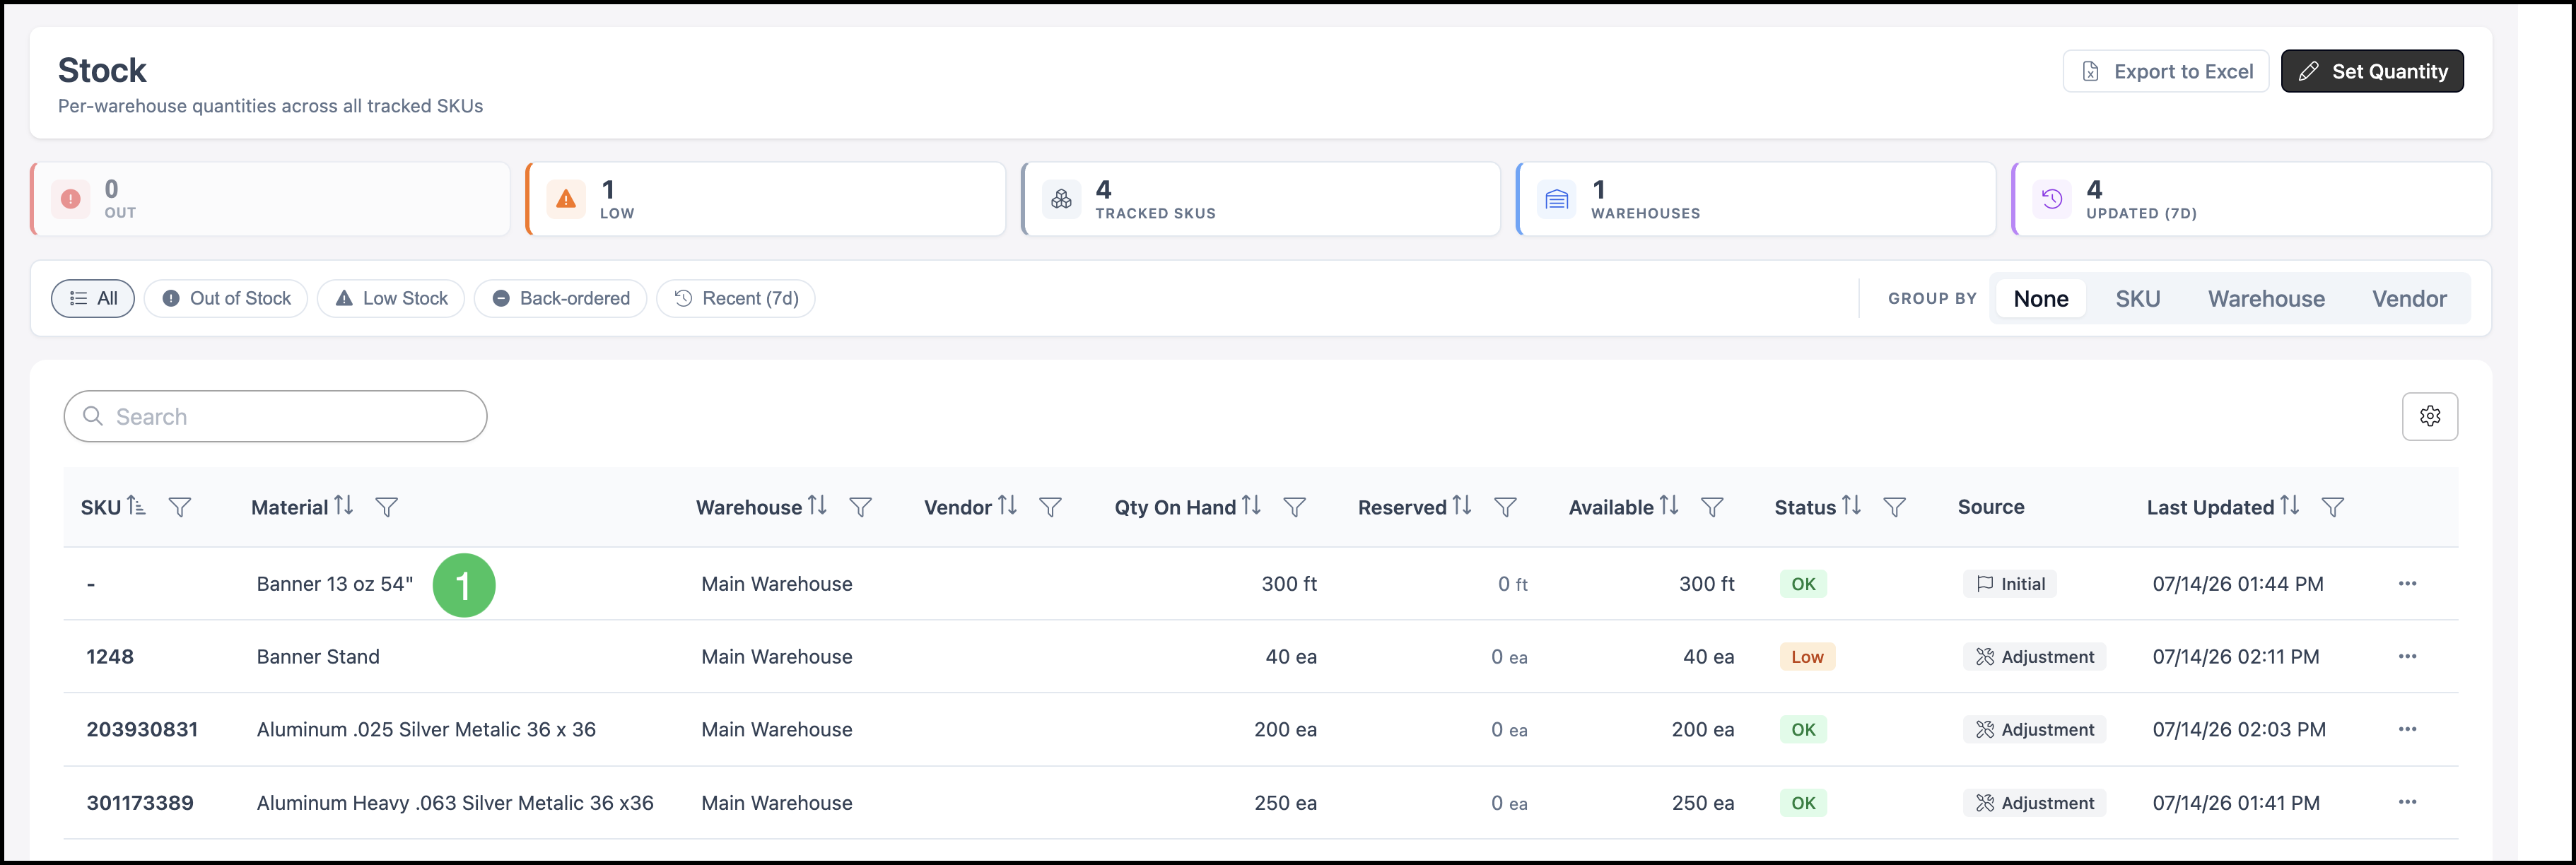
Adjusting Stock
1. Select the inventory row.
2. Select the Adjustment Mode.
a. Add to Stock - Adds to the current total when new stock arrives (for example, a new shipment).
b. Subtract from Stock - Subtract from the current total when stock is lost or damaged.
c. Change Total - Set a new total and let the system calculate the difference. This is useful after a physical count.
3. Enter the Quantity or New Total.
4. Select the Reason.
Note: Each adjustment must have a reason entered.
5. Enter a Note, if desired.
6. Click Save Adjustment.