
Import Options control how Customer and Order information is handled when CoreBridge imports data from a spreadsheet or other external source. These settings keep imported records consistent by defining defaults for blank fields and how source values map to CoreBridge fields.
- When details are missing from the import file, or a source value does not match a CoreBridge record, the system uses a Default value.
- A default is a preset value, such as a Location, Tax Group, or salesperson, that fills in whenever that field is blank in the source data.
- Mappings connect names in your source file to the matching records already set up in CoreBridge.
Table of Contents
- Opening Import Options
- Setting Defaults for Customer Imports
- Setting Defaults for Order Imports
- Setting Mappings
- Frequently Asked Questions
- Related Articles
Opening Import Options
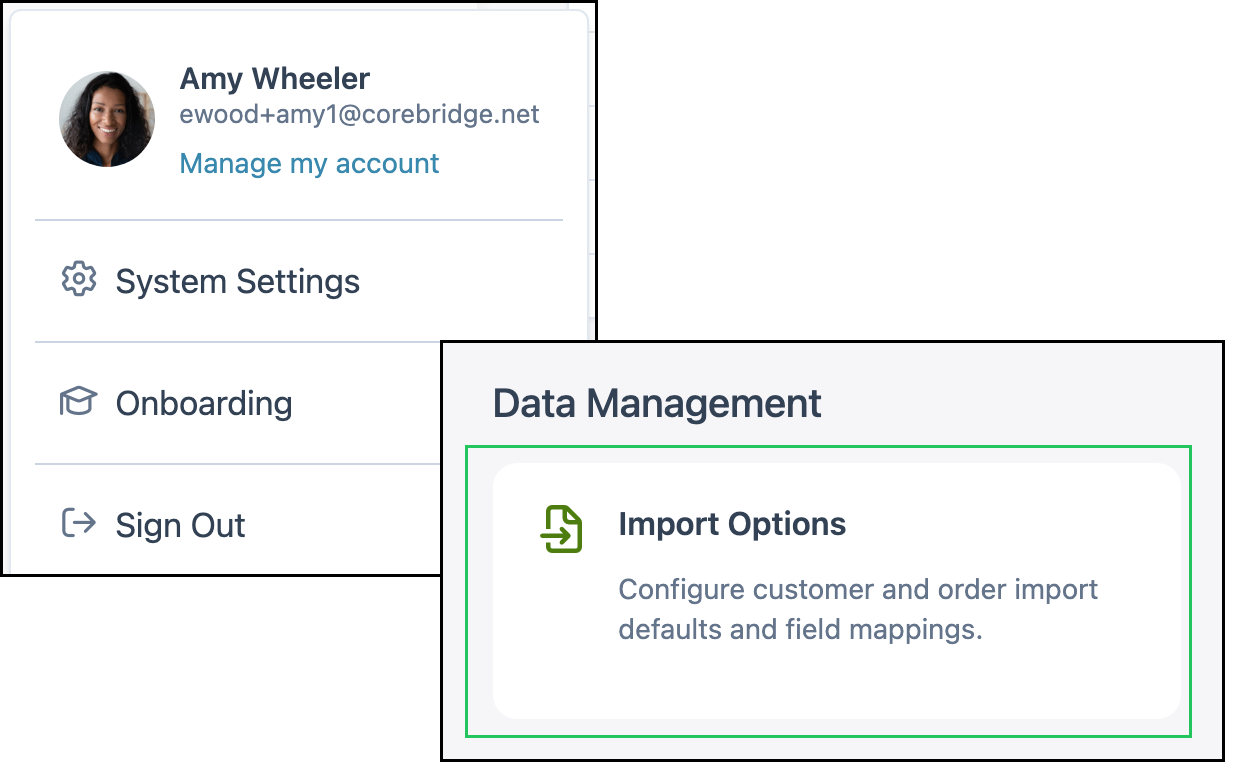
Navigate to System Settings / Data Management / Import Options.
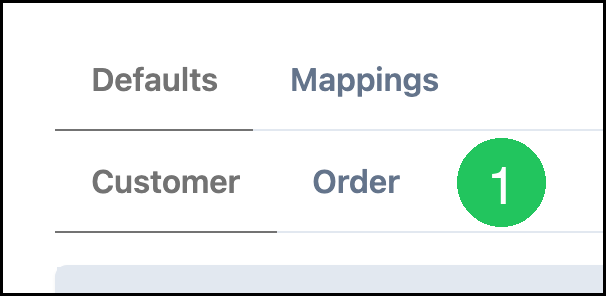
Import Options opens on the Defaults tab with the Customer subtab selected.
Setting Defaults for Customer Imports
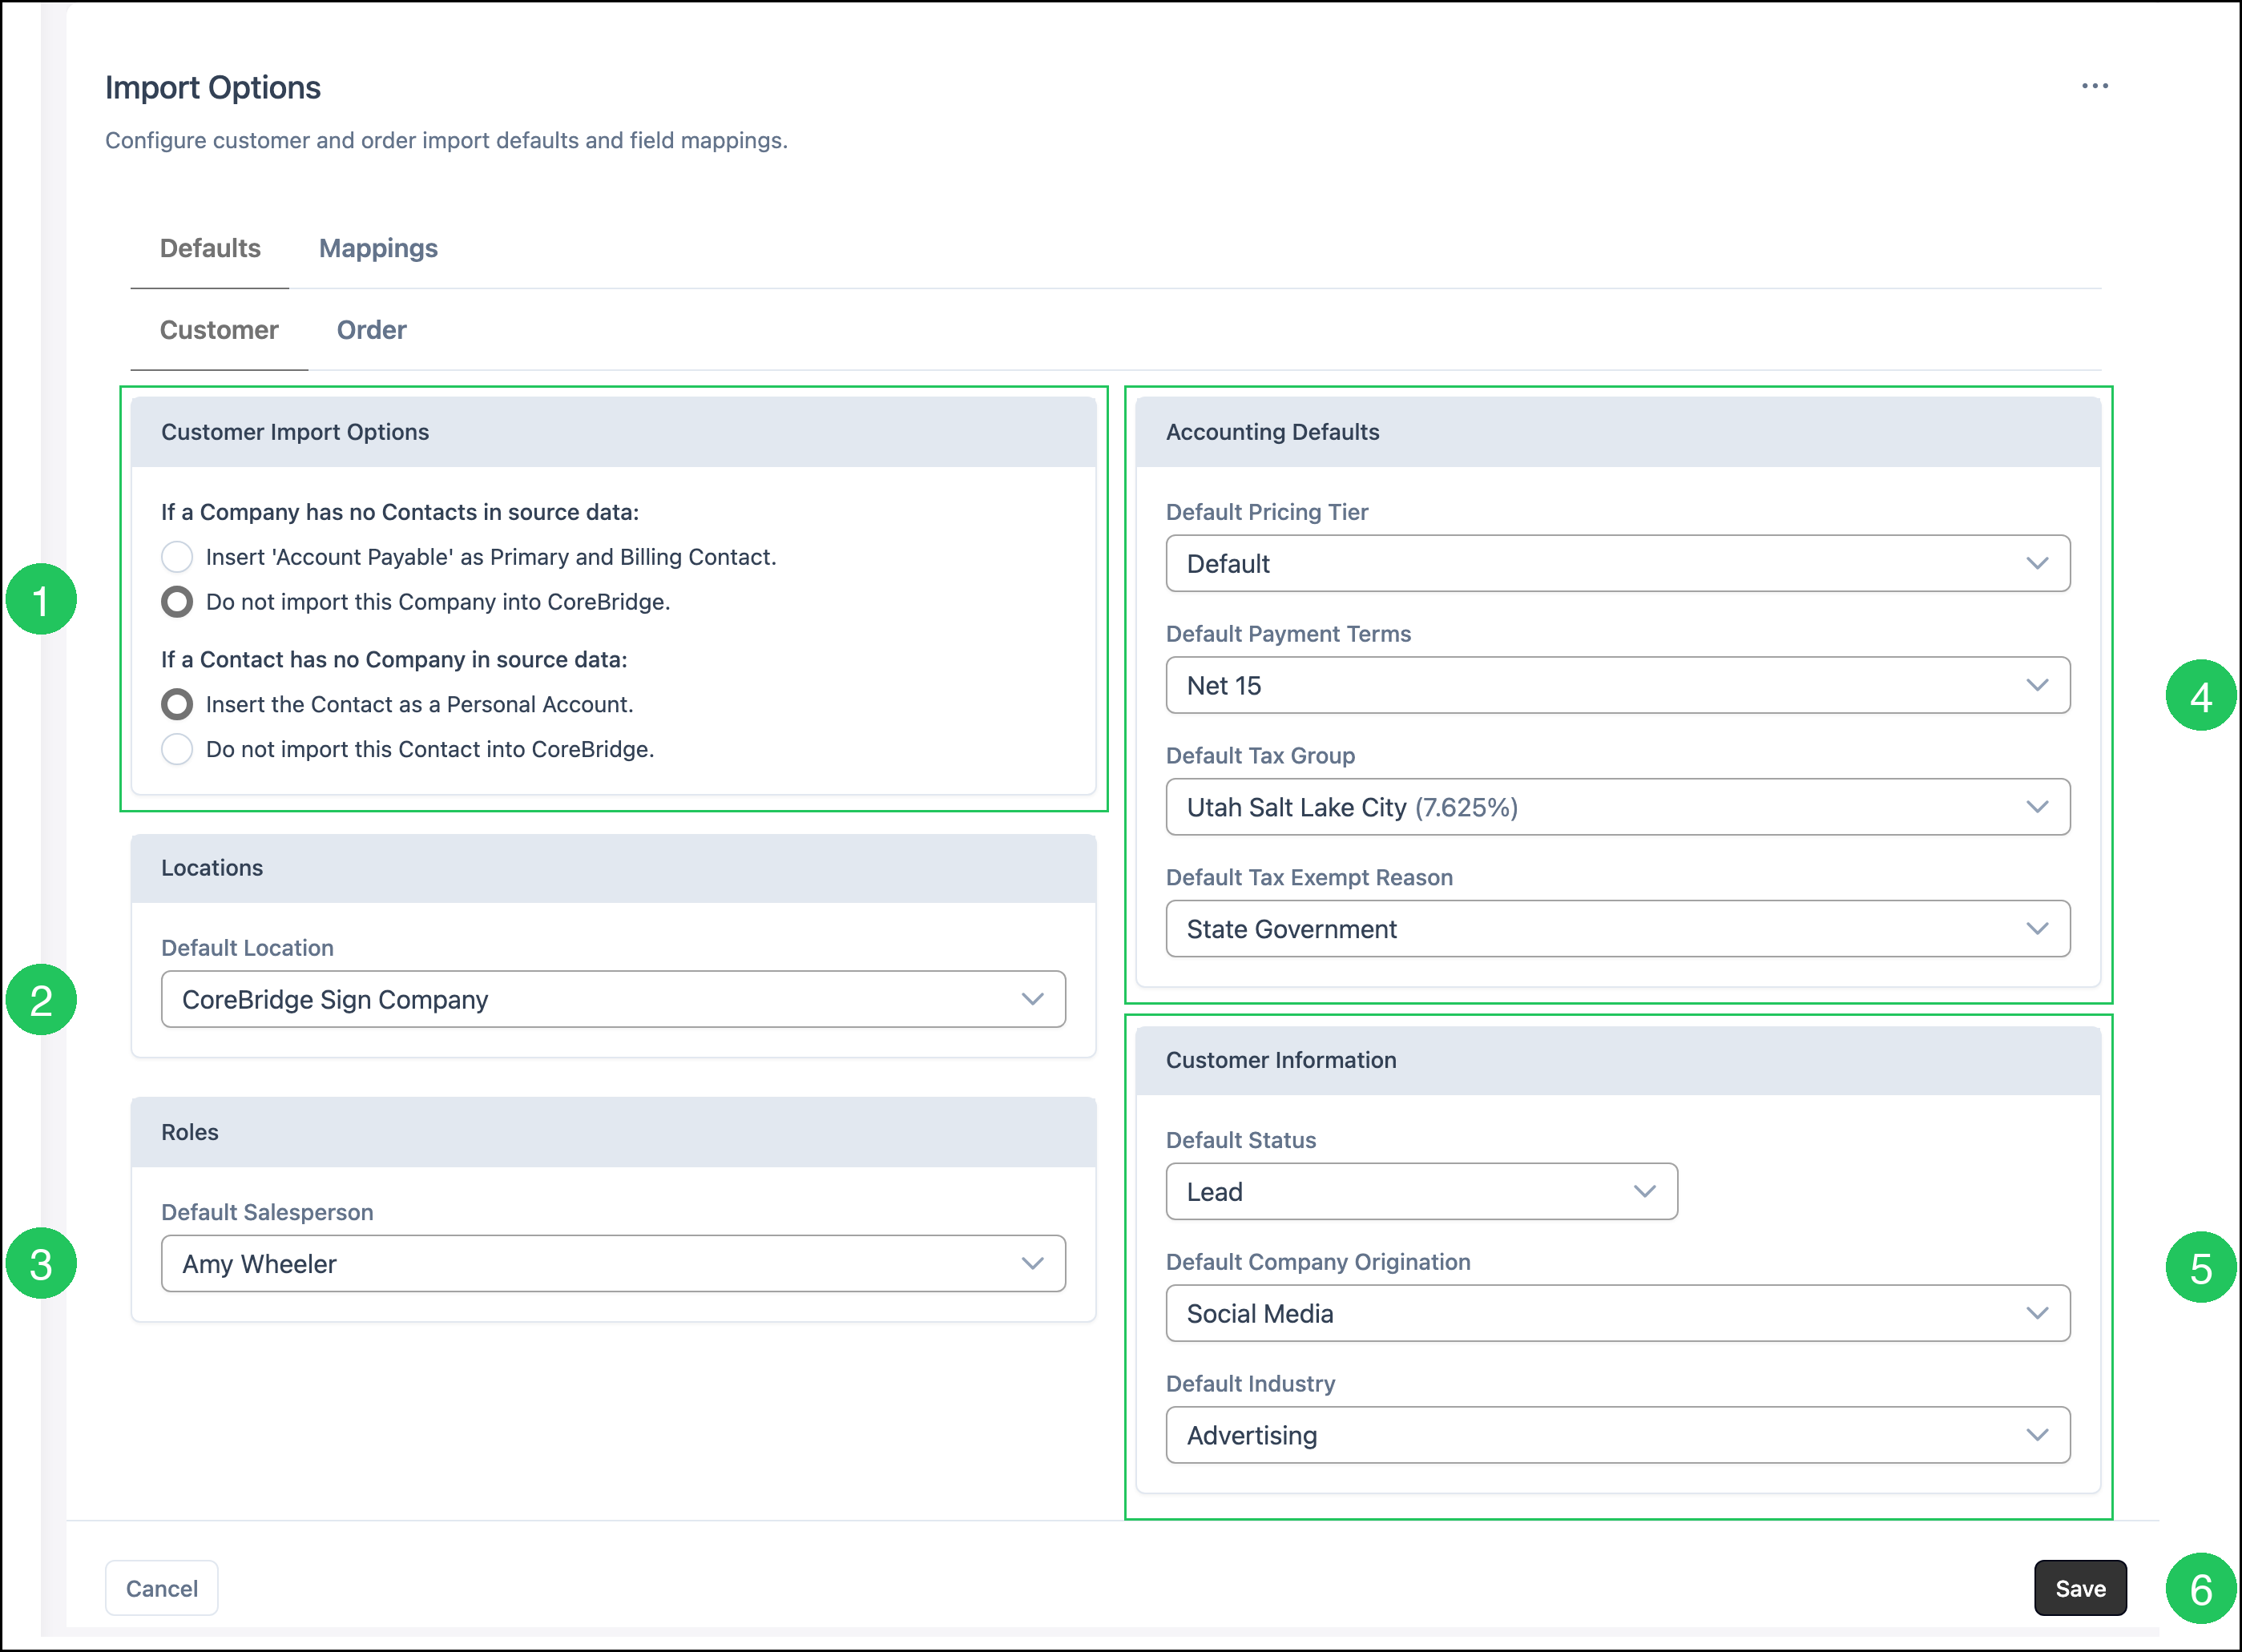
1. Under Customer Import Options, select what should happen when a Company has no Contacts, or a Contact has no Company, in the source data.
2. Under Locations, select a Default Location.
3. Under Roles, select a Default Salesperson. This salesperson is assigned when the import does not specify one.
4. Under Accounting Defaults, select the Default Pricing Tier, Default Payment Terms, Default Tax Group, and Default Tax Exempt Reason.
5. Under Customer Information, select the Default Status, Default Company Origination, and Default Industry.
6. Click Save.
Note: For more information on accounting defaults, see Payment Terms Settings or Tax Items.
Setting Defaults for Order Imports
1. Click the Order subtab.
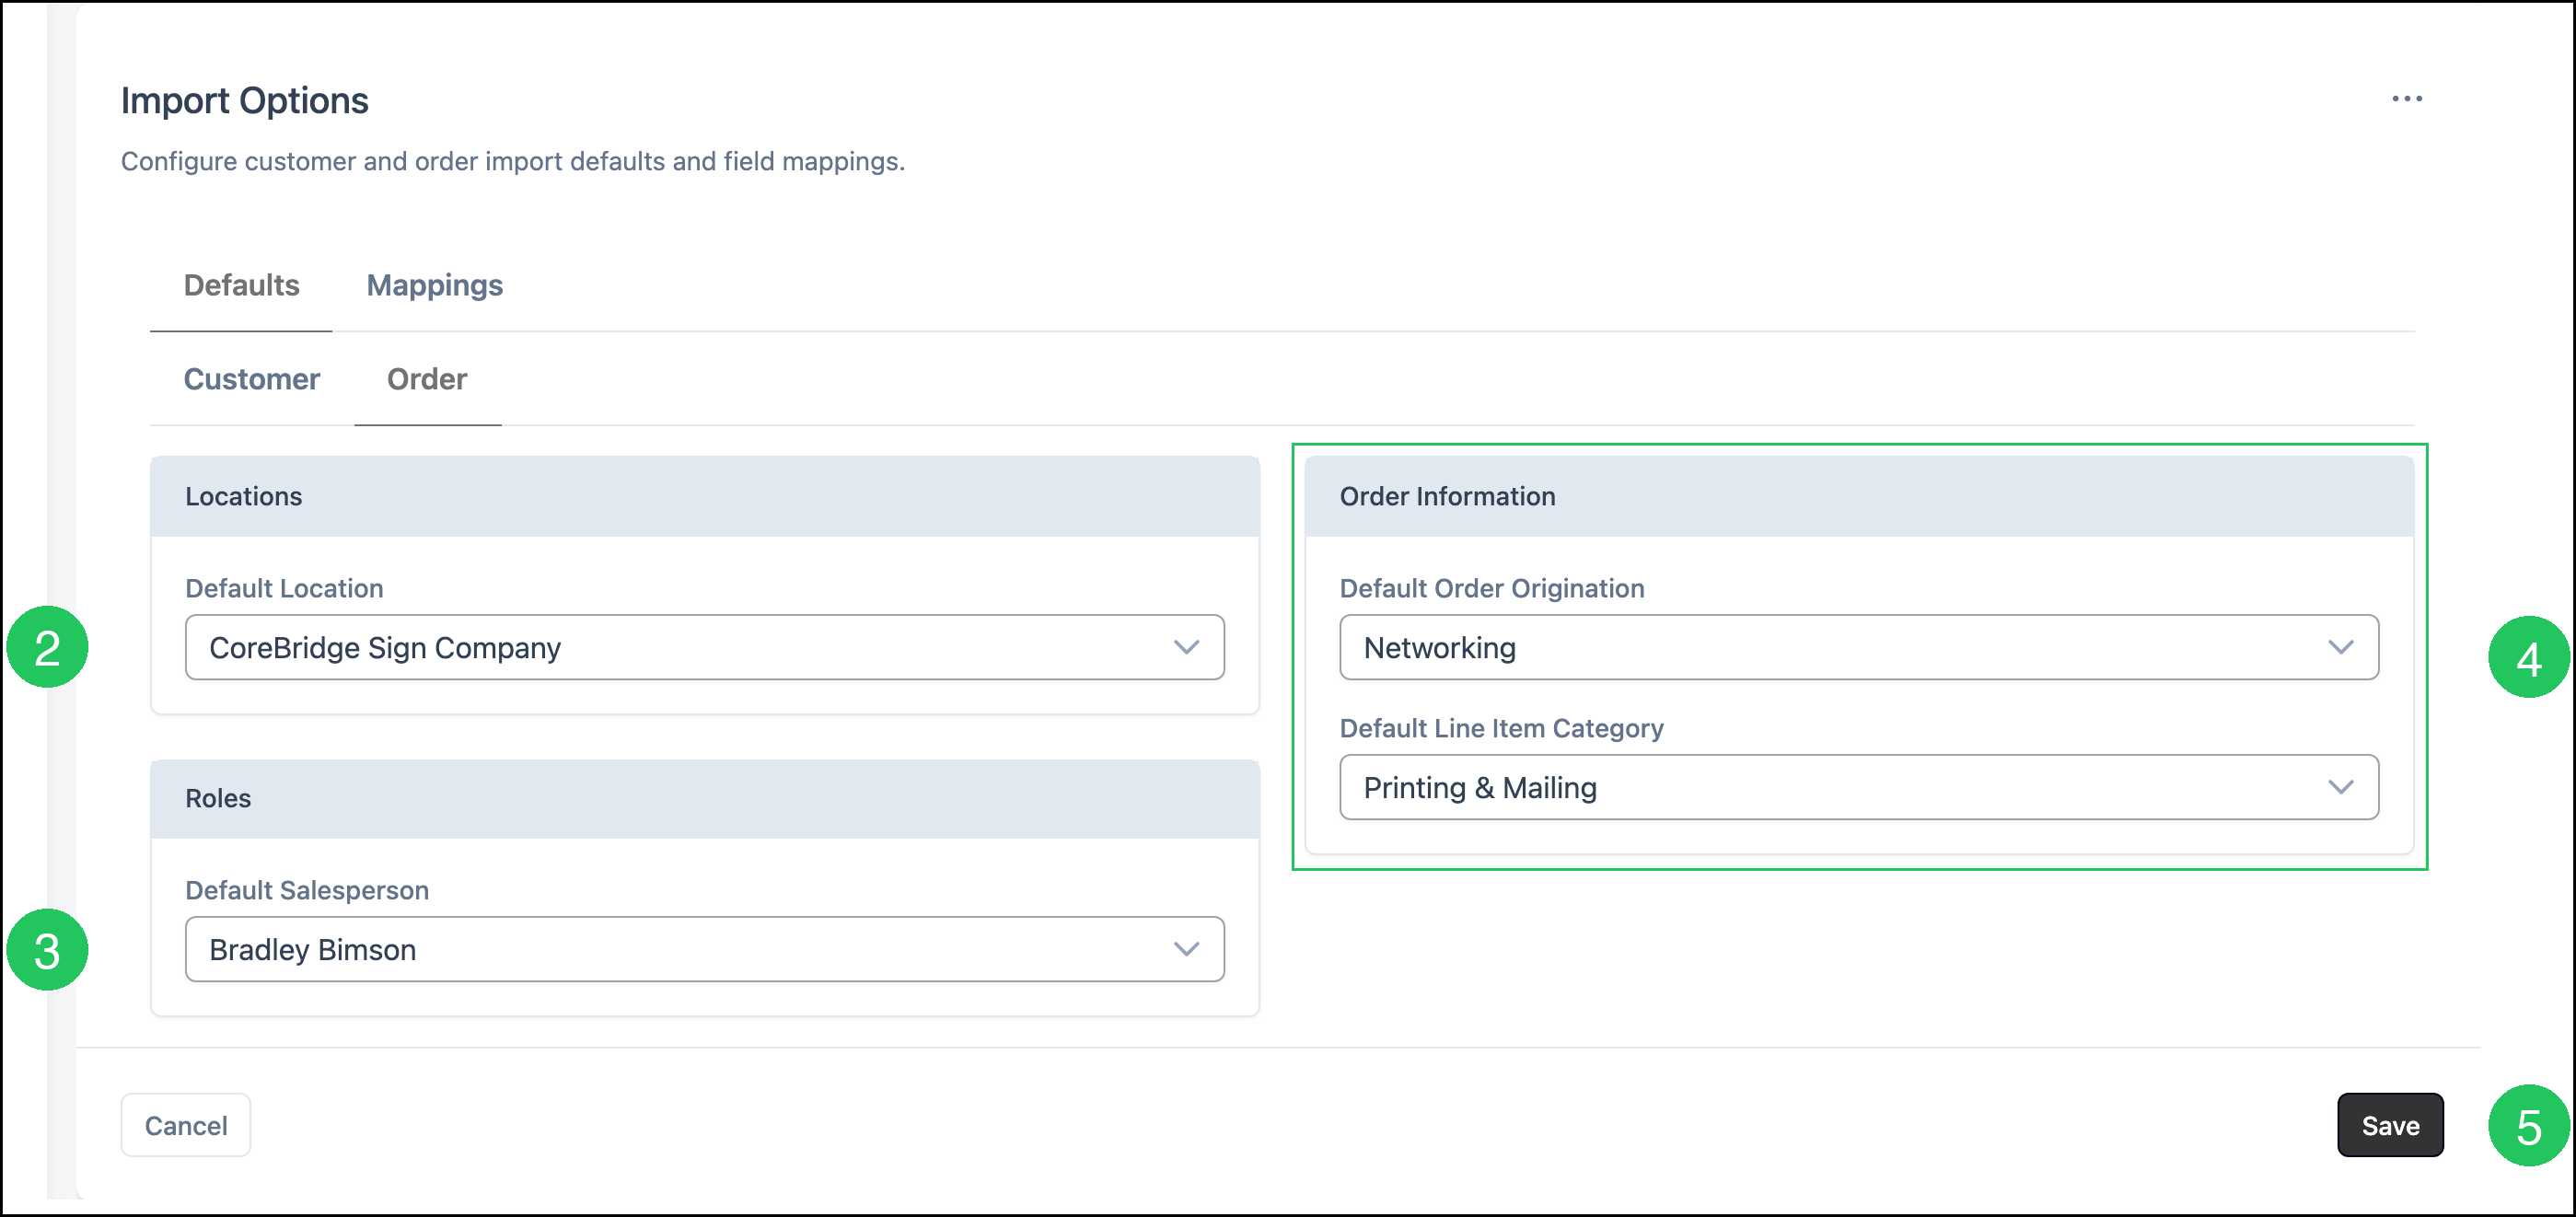
2. Under Locations, select a Default Location.
3. Under Roles, select a Default Salesperson. This salesperson is assigned when the import does not specify one.
4. Under Order Information, select the Default Order Origination and Default Line Item Category.
5. Click Save.
Note: If the Default Order Origination you need is not listed, add it in System Settings / Sales Settings / CRM Lists.
If the Default Line Item Category you need is not listed, manage categories in System Settings / Sales Settings / Line Item Categories.
Setting Mappings
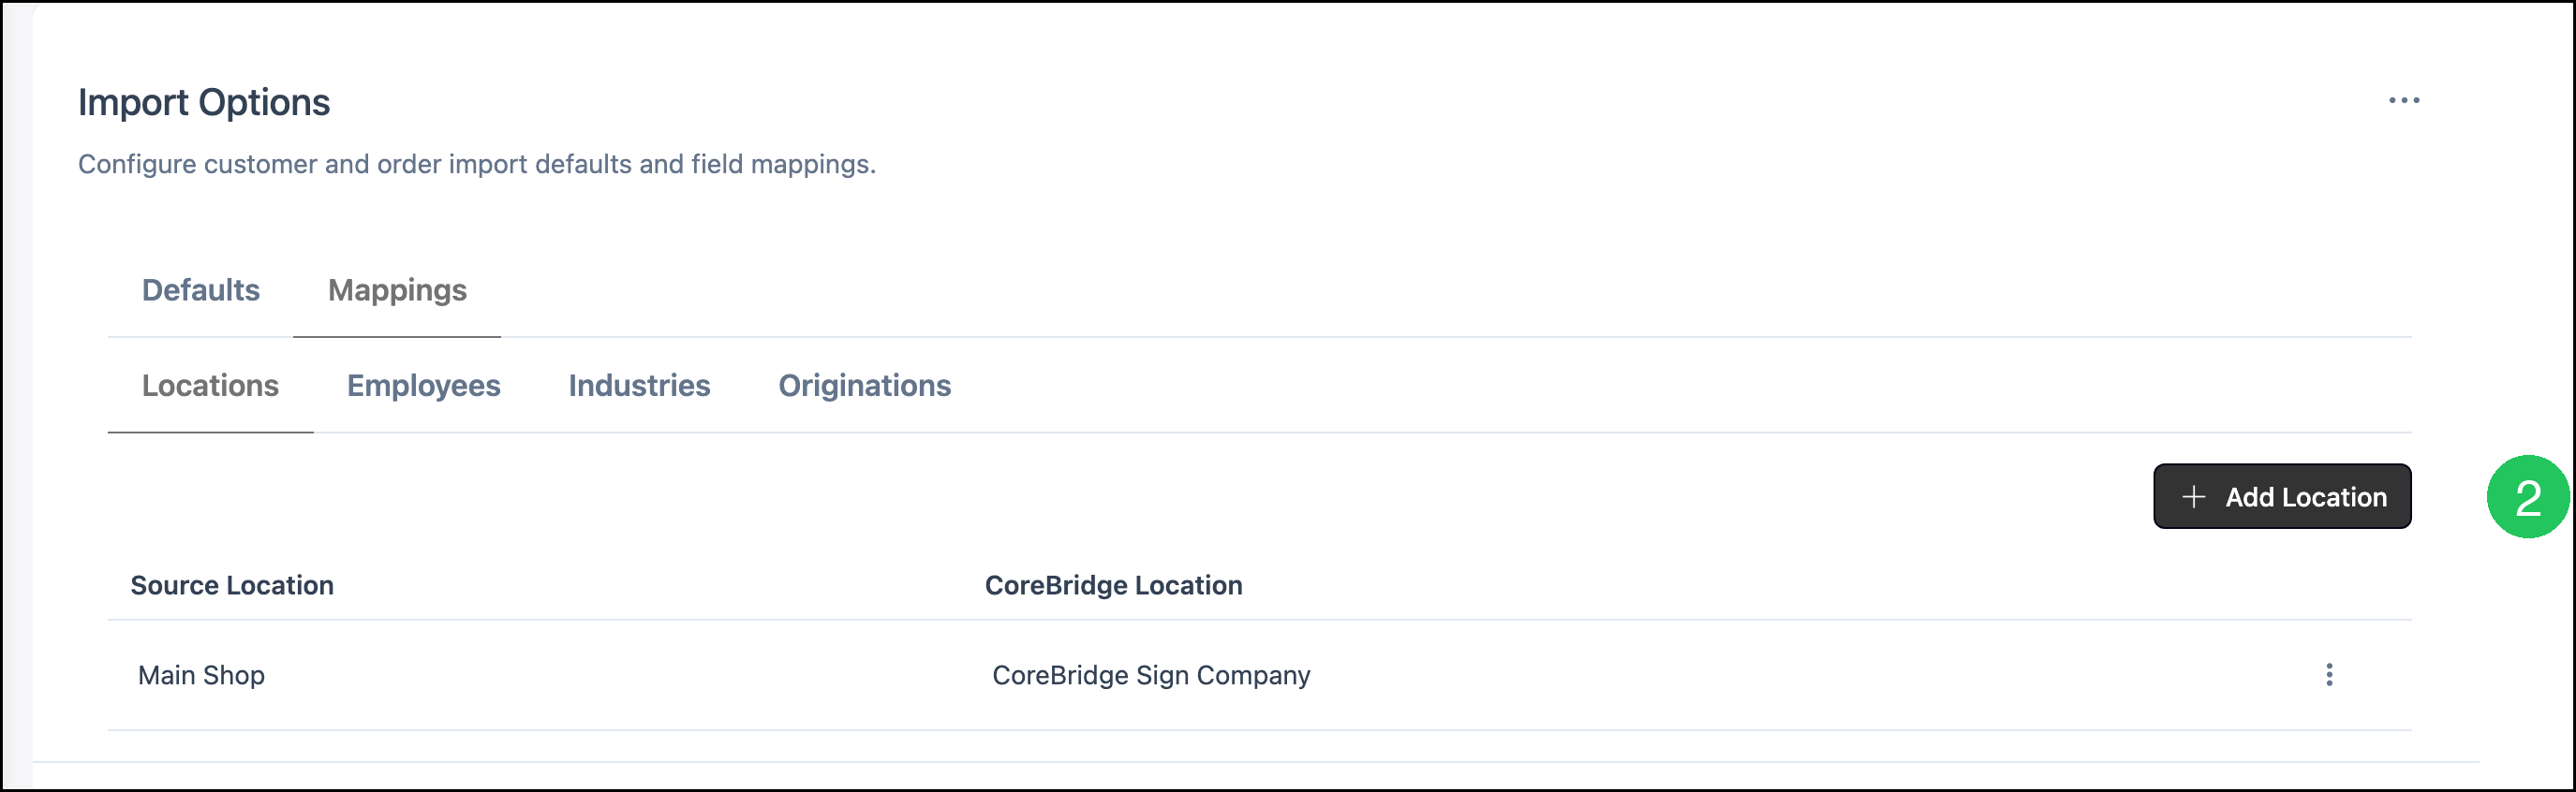
1. Click the Mappings tab.

2. Click Add Location. The Locations subtab is selected. Employees, Industries, and Originations work the same way with a matching Add button.
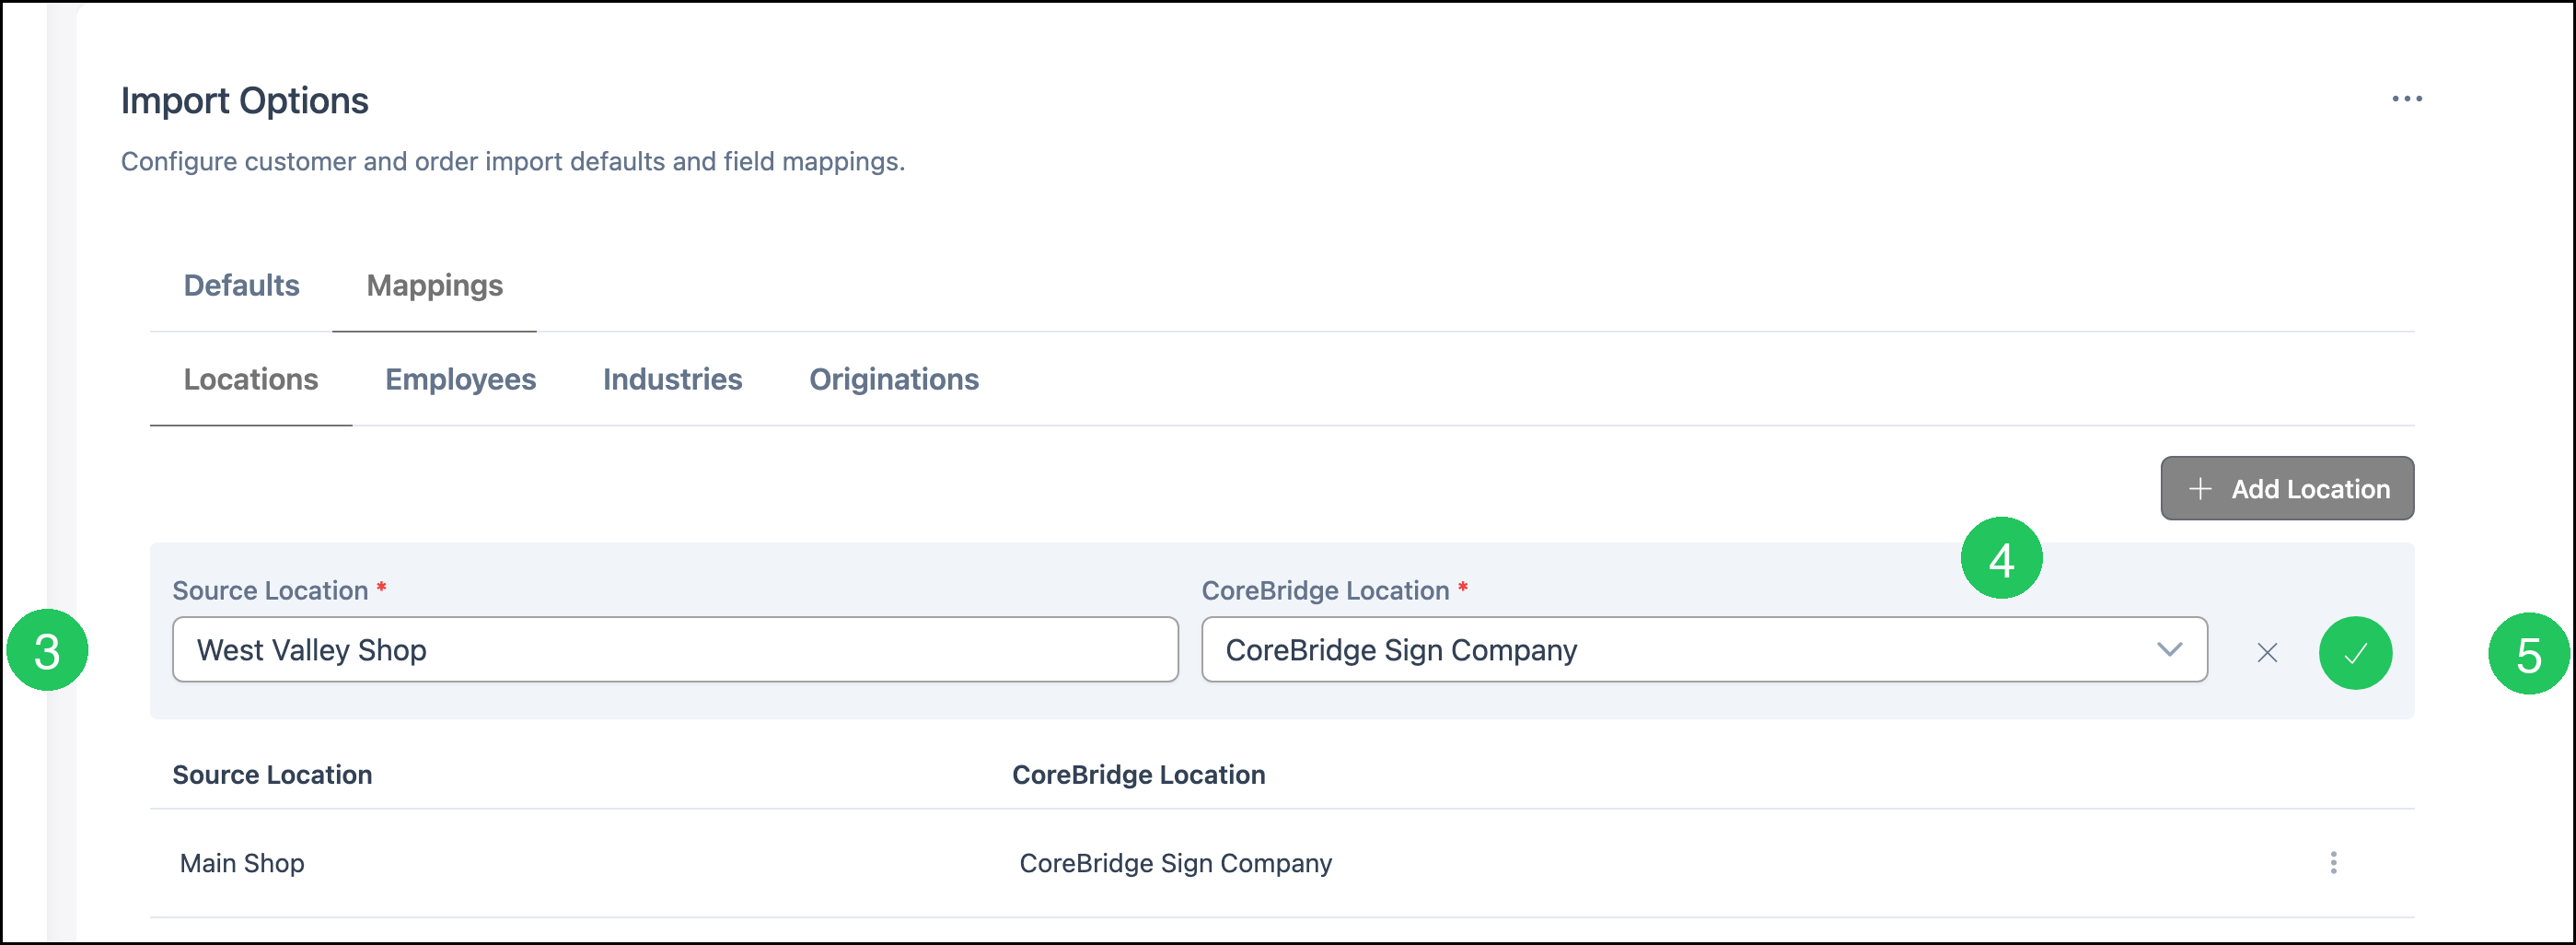
3. Enter the Source Location exactly as it appears in your import file.
4. Select the matching CoreBridge Location.
5. Click the checkmark to keep the mapping row.
Frequently Asked Questions
1. What is the difference between a default and a mapping?
Answer: A default fills in a CoreBridge value when the import file is blank or does not match. A mapping matches a specific source name, such as Main Shop, to an existing CoreBridge record.
2. Why is Save unavailable until I change a value?
Answer: On the Defaults tab, Save becomes available after you change a setting. Change the value you need, click Save, or click Cancel to discard the change.
3. How do I keep a mapping after I add a row?
Answer: Complete Source Location and CoreBridge Location, then click the checkmark. Click the X if you do not want to keep the new row.