In CoreBridge, a Dashboard is a customizable overview where you can gather and display key information relevant to your workflow using applications known as Widgets. Customizing your Dashboards can help you view useful data and analytics at a glance.
Table of Contents
- Finding the Dashboard
- Finding the Sales Monitor
- Adding a Widget
- Refreshing a Widget
- Moving a Widget
- Resizing a Widget
- Viewing and Editing Settings
Finding the Dashboard
1. Select Dashboard from the main navigation.
2. Click Dashboard.
Note: Within the Dashboard, different Widgets display statistics and information relevant to your workflow. Which Widgets you see is determined by your permissions. Permissions can be managed in Settings / My Business / Widgets.

Finding the Sales Monitor
1. Select Dashboard from the main navigation.
2. Click Sales Monitor.
a. The Locations dropdown allows you to display data for individual Locations or a combined view of all Locations.
b. The Refresh icon updates the page with the latest available information.
c. Sales Monitor Settings provide options for customizing the monitor display and refresh behavior. See below for additional details.

Sales Monitor Settings
a. The Refresh Interval dropdown controls how often the monitor automatically updates.
b. Display options determine which information appears on the monitor.
Note: Changes take effect immediately and remain in place when navigating away from the page.

Finding the Financial Monitor
1. Select Dashboard from the main navigation.
2. Click Financial Monitor.
a. The Locations dropdown allows you to display data for individual Locations or a combined view of all Locations.
b. The Refresh icon updates the page with the latest available information.
c. Financial Monitor Settings provide options for customizing the monitor display and refresh behavior. See below for additional details.

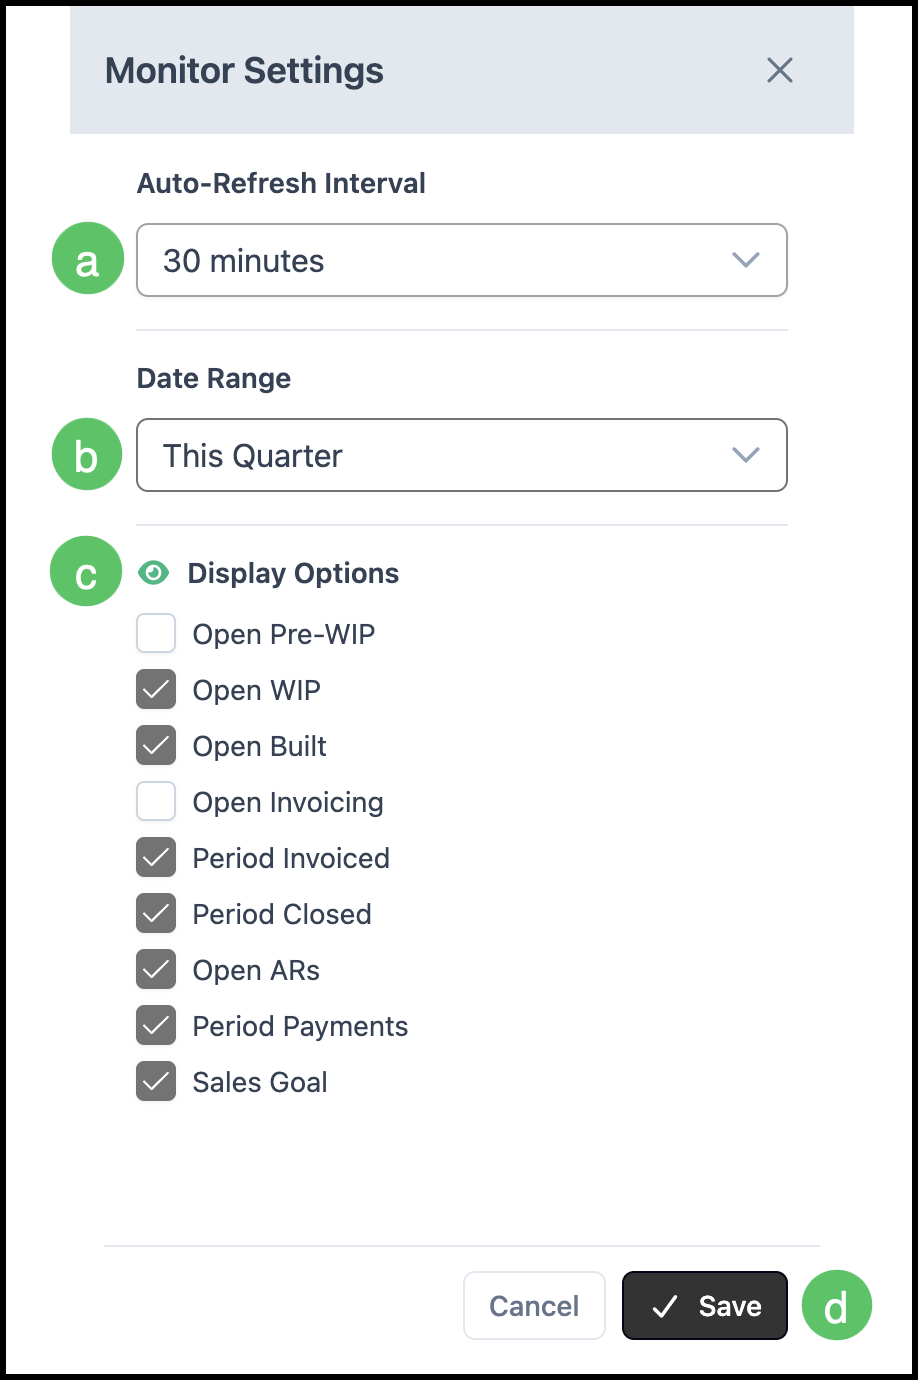
Financial Monitor Settings
a. The Refresh Interval dropdown controls how often the monitor automatically updates.
b. The Date Range filter controls the time period displayed on the monitor.
c. Display options determine which information appears on the monitor.
d. Changes made here must be saved manually.
Adding a Widget
1. Click the Add Dashboard Widget icon.
2. Select the appropriate Widget from the list.
Note: You can filter Widgets by category using a dropdown or use a search bar to find a specific Widget.
3. Click Add Widget.

Refreshing a Widget
Widgets are typically set to update automatically on an interval (e.g., every 30 minutes). For a quick update, you can refresh the Widget manually.
1. Click the ellipsis to open more actions.
2. Click Refresh.
Note: Refreshing the browser page does not refresh individual Widgets. Use the refresh control on each Widget when you need updated data right away.

Moving a Widget
You can rearrange Widgets on the dashboard by moving them to a different area.
1. Hover your cursor near the top bar of the Widget until a Move cursor (hand) appears.
2. Click and drag the Widget, then drop it in the desired position on the dashboard.

Resizing a Widget
Hover your cursor near the corner or side of the Widget. A resizing arrow will appear. Click and drag until the Widget is the desired size.

Viewing and Editing Settings
Each Widget can have settings that control its name, refresh interval, location filter, and other options. The exact settings depend on the Widget type.
1. Click the ellipsis at the top right of the Widget.
2. Select Settings to open the Widget settings.
Common settings include:
a. Name - The name of the Widget as it appears on your dashboard.
b. Refresh Interval - How often the Widget updates (e.g., every 30 minutes). You can change this value; the minimum is typically 5 minutes. Refreshing too frequently can affect system performance.
c. Filter by Location - If your system has multiple Locations, you can filter the data shown in the Widget by Location.
d. Options - Additional options specific to the selected Widget type.
3. Click Save to apply your changes.
Note: Viewing each Widget is permission-based, determined by employee roles. Widget permissions can be managed in Settings / My Business / Widgets.
