Scheduling in CoreBridge brings team calendars together so you can see commitments, add events, and tie work to Orders or Estimates. This article explains how to open Scheduling, choose which calendars appear, create and edit events, link records, and use record shortcuts.
Table of Contents
- Scheduling Overview
- Viewing Calendars
- Adding Events
- Linking Estimates or Orders
- Record Shortcuts
- Using Record Shortcuts to Add an Event
- Related Articles
Scheduling Overview
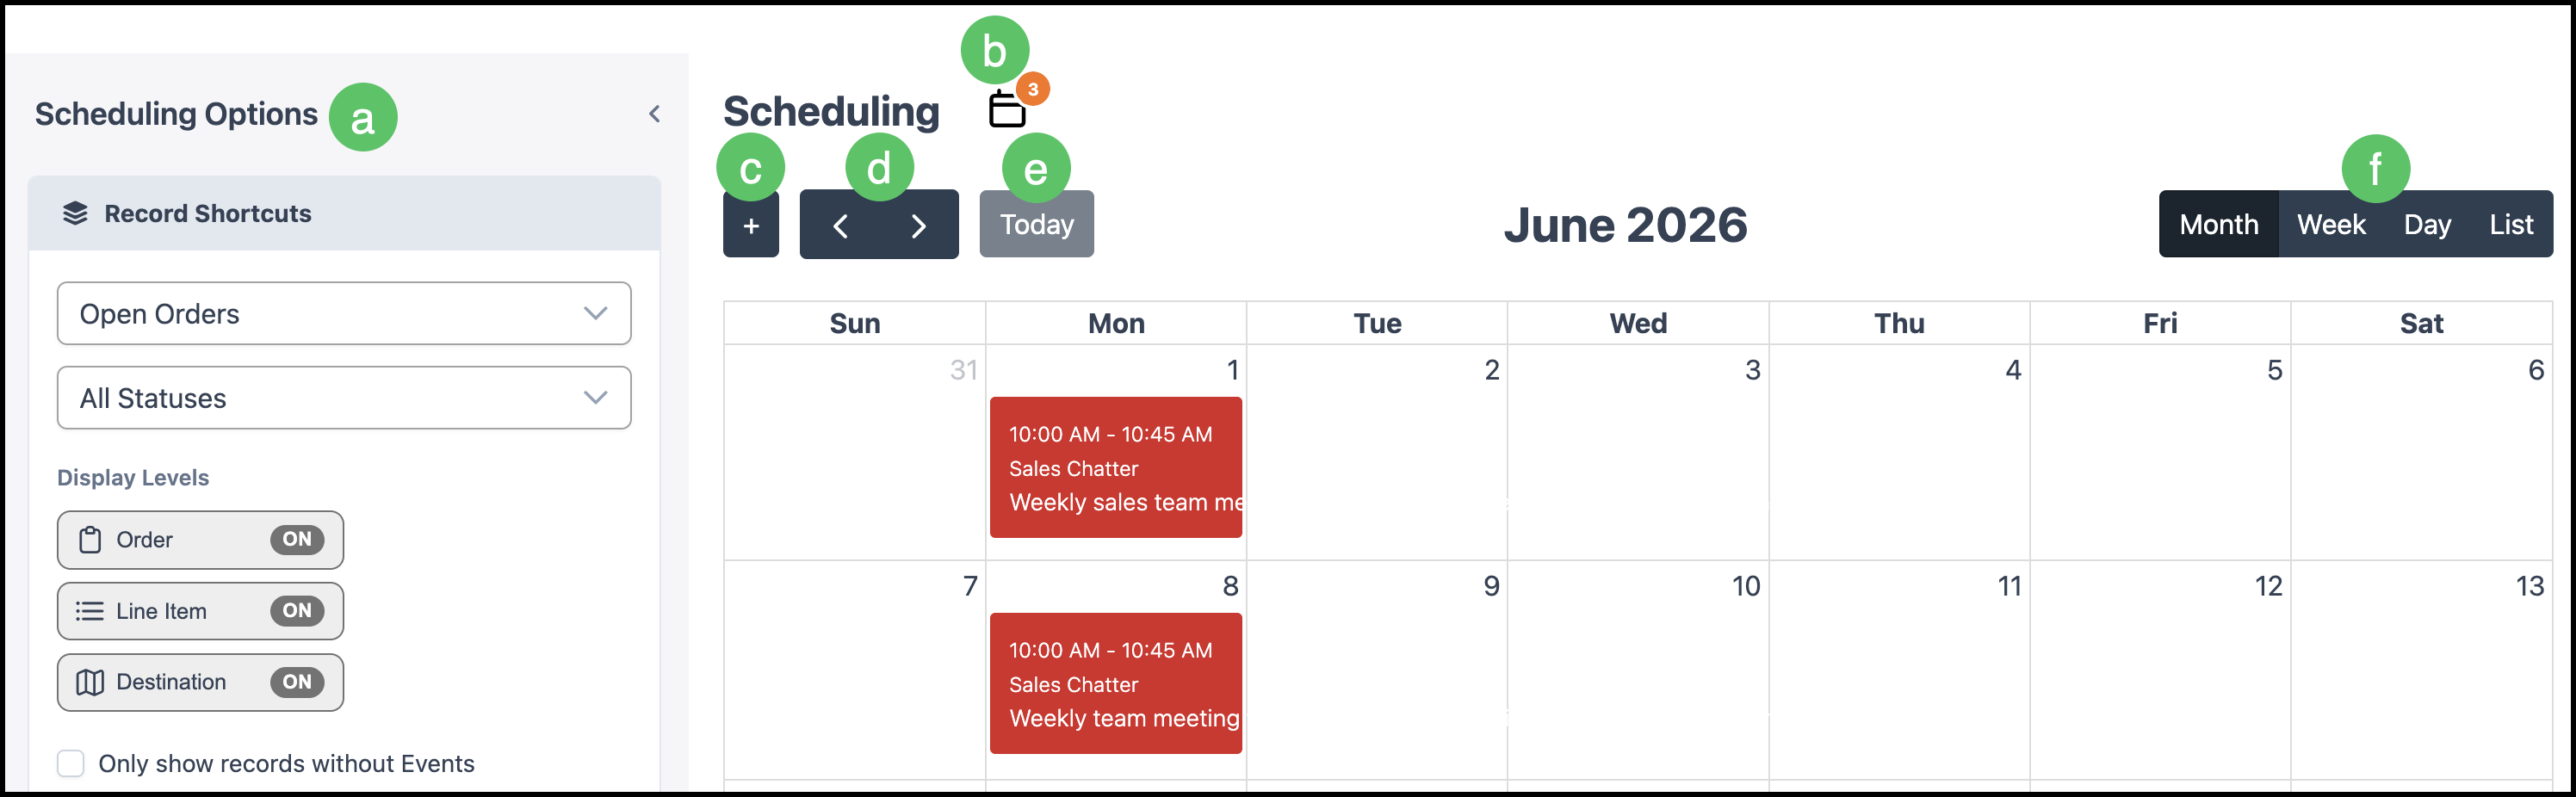
Navigate to Sales / Scheduling.

a. Scheduling Options contains Record Shortcuts allowing you to easily locate records for event creation.
b. Calendar visibility is controlled from the Calendar button where you can easily select which Calendars will be visible on the Scheduling page.
c. The Plus button adds an event.
d. Use Previous month and Next month to move the visible range. How far the view moves depends on the active range control (Month, Week, Day, or List).
e. Today returns the calendar to the current date when you have moved to another range.
f. Month, Week, Day, or List changes how events are laid out on the page.
Viewing Calendars
Viewing calendars in Scheduling is quick and simple. These can be adjusted at any time.
- After a calendar is checked, you can add events from either Scheduling or from Calendars.
- Events added in either location will sync and display in both.
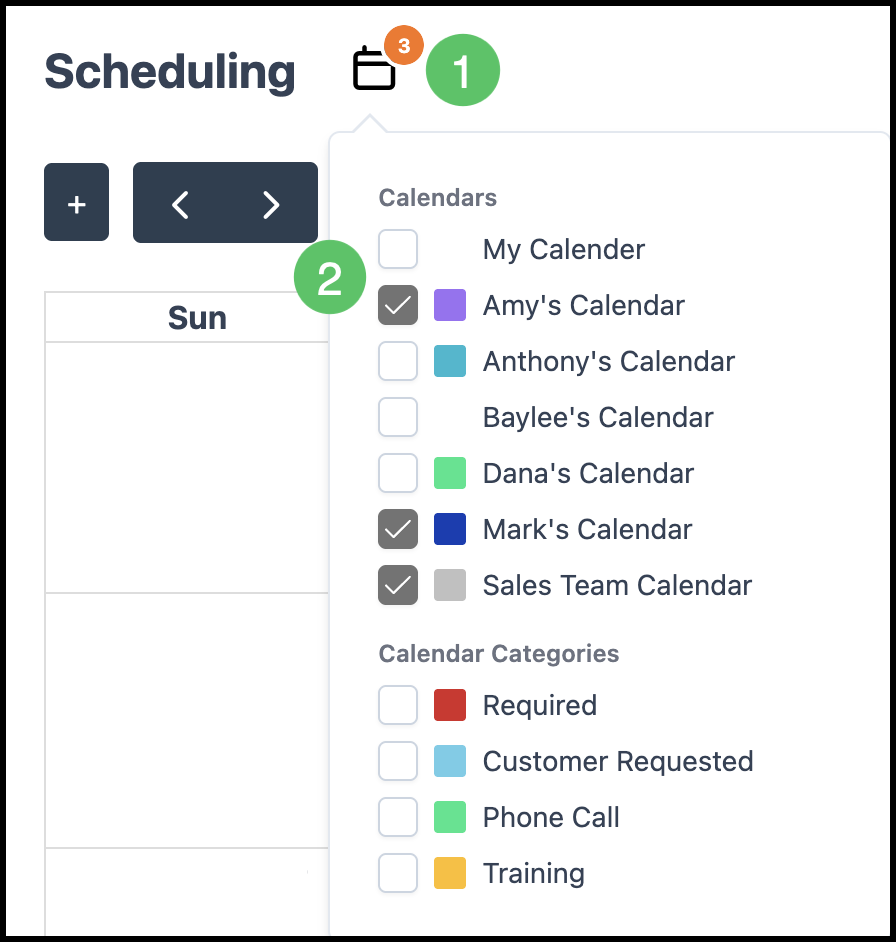
1. While on Sales / Scheduling, click the Calendar button.
2. Select the calendars you want reflected on the schedule.
Adding Events
Create events directly from Sales / Scheduling so installs, meetings, and reminders stay with the right calendar.
1. Click the Plus button.
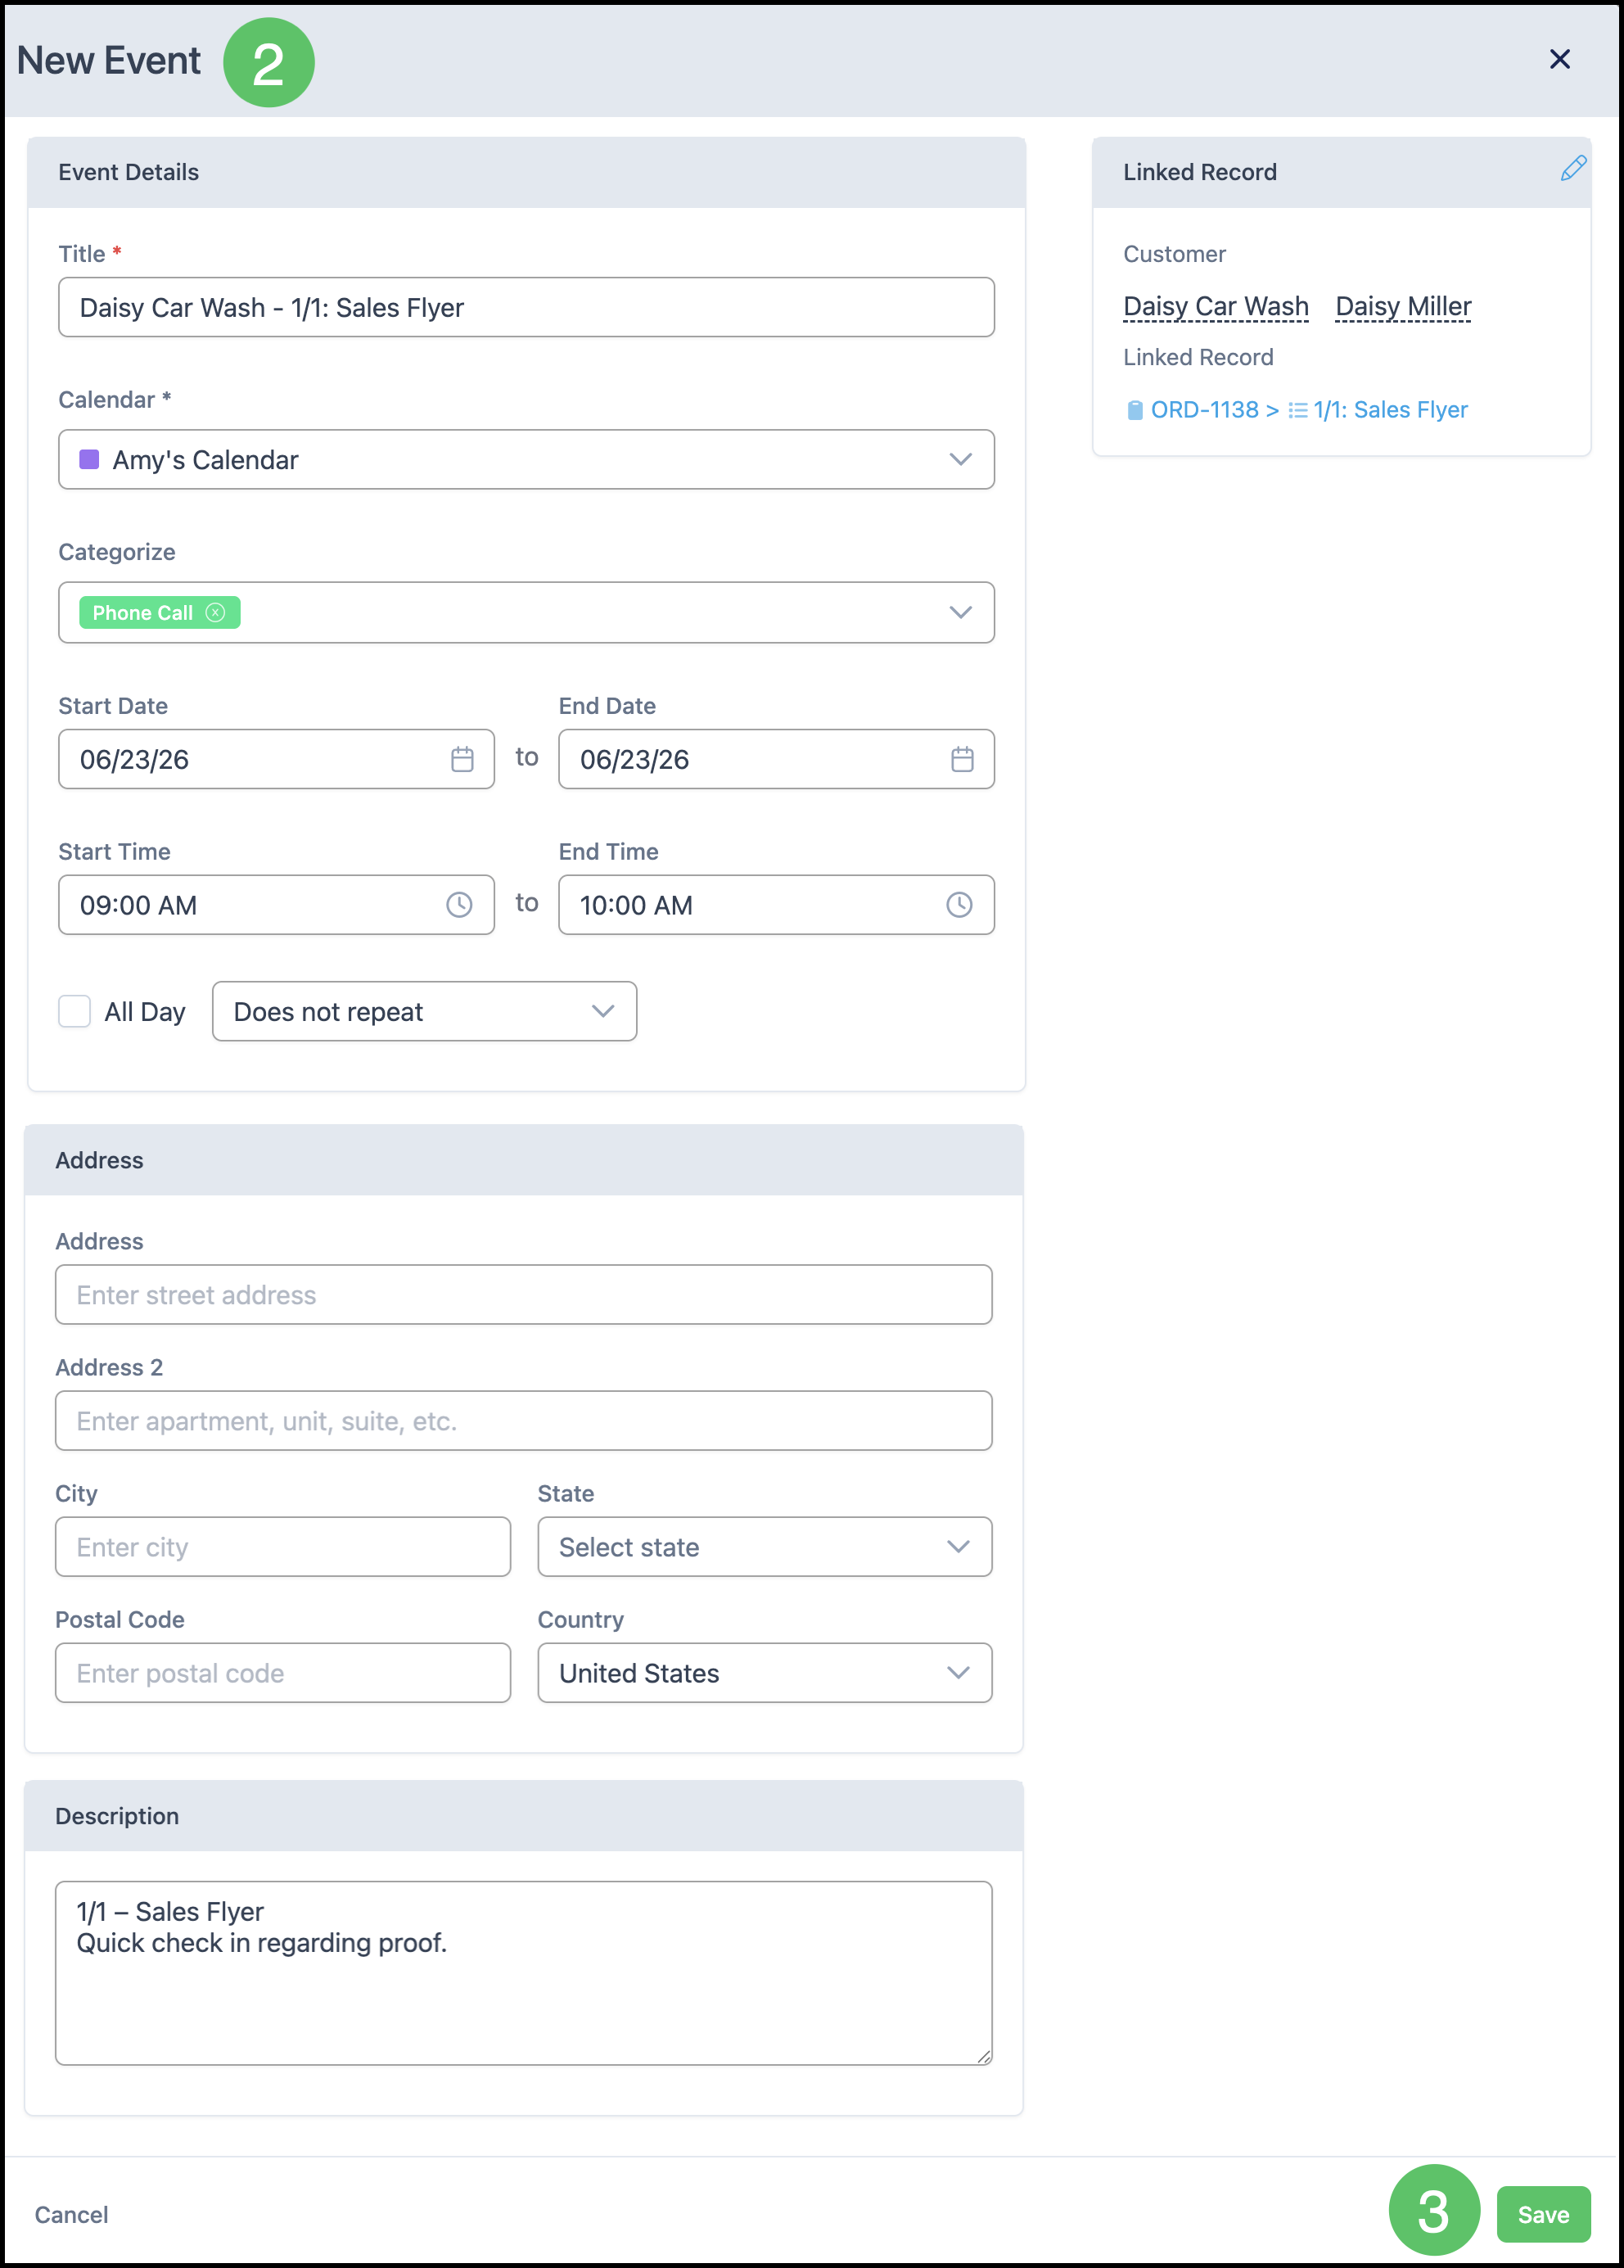
2. Complete Event Details as needed.
a. Title - The name of the calendar event as it appears on the selected Calendar.
b. Calendar - Identifies which Calendar the event belongs to. Available Calendars are managed in Settings / Calendars.
c. Categorize - Allows one or more Calendar Categories to be assigned to the event for organization and filtering. Categories are managed in Settings / Calendar Categories.
d. Start Date / End Date - Defines when the event begins and ends.
Note: When All Day is selected, the event spans the entire day. Clear All Day to specify start and end times.
e. Repeat - Determines whether the event occurs once or on a recurring schedule.
Note: New events default to Does not repeat.
3. Fill in an address, if applicable.
4. Enter a Description, if desired.
5. To tie sales work to the event, use Add Linked Record.
6. Click Save to store the event.
Note: Click an existing event on the calendar anytime you need to edit it.

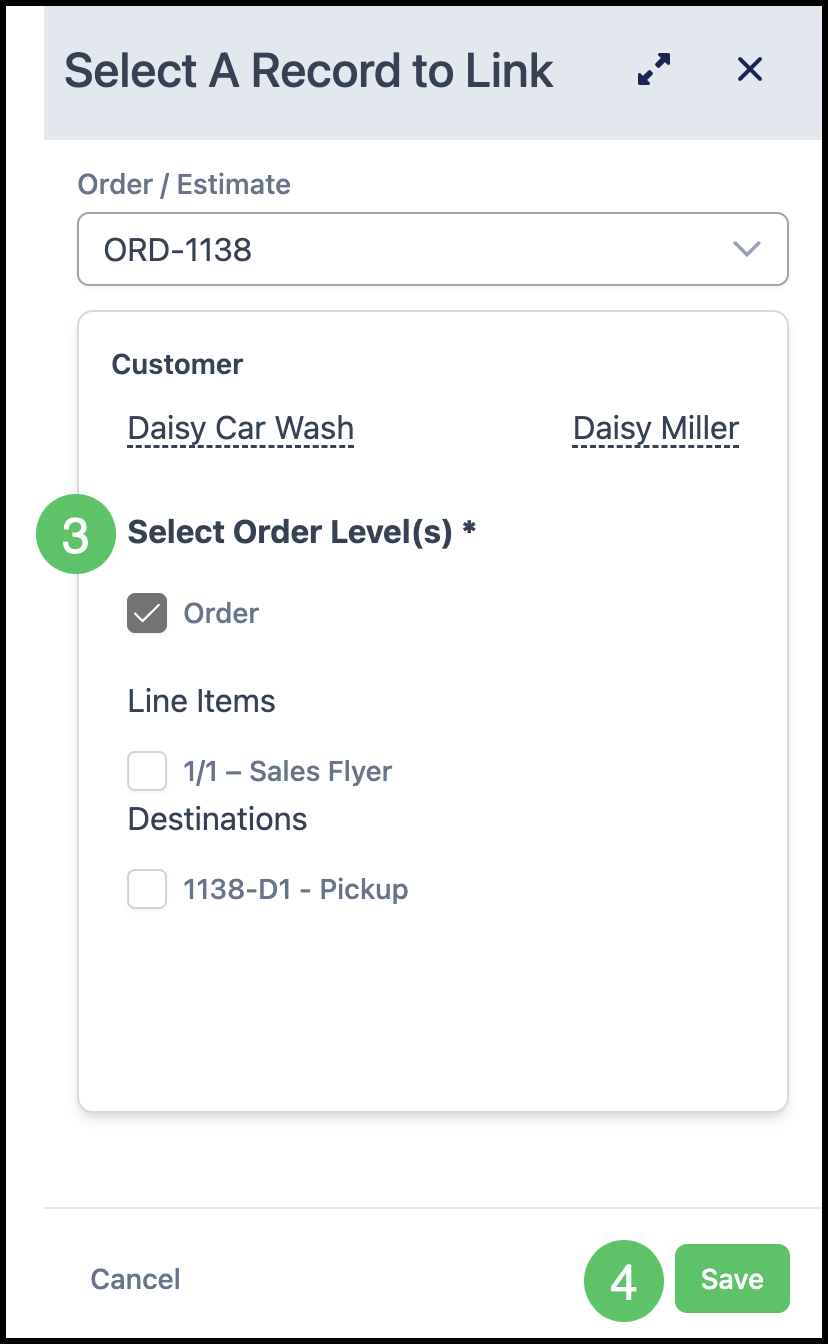
Linking Estimates or Orders
Linking shows the related Estimate or Order on the event so the team sees context on the schedule.
1. In Add event or when editing an event, click Add Linked Record.
2. Use the dropdown to select the record.
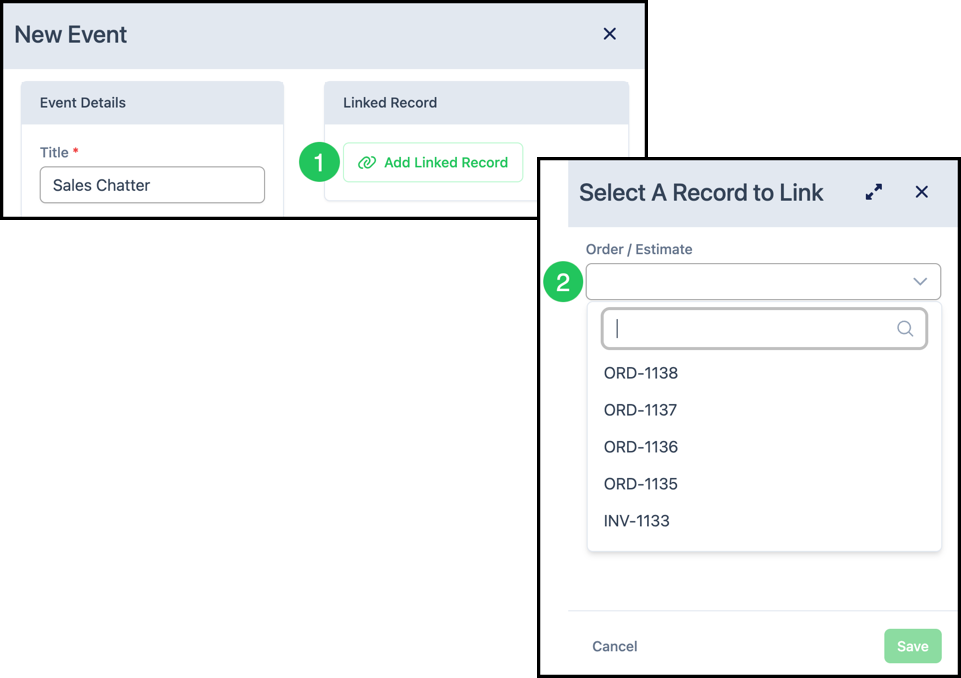
3. Select the Order or Estimate Levels.
4. Click Save to return to the event.
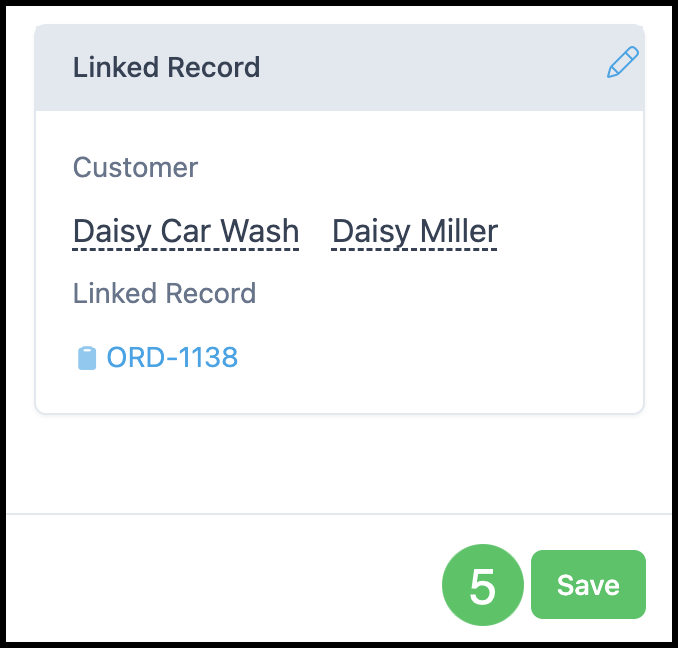
5. Click Save on the main event window to finish.
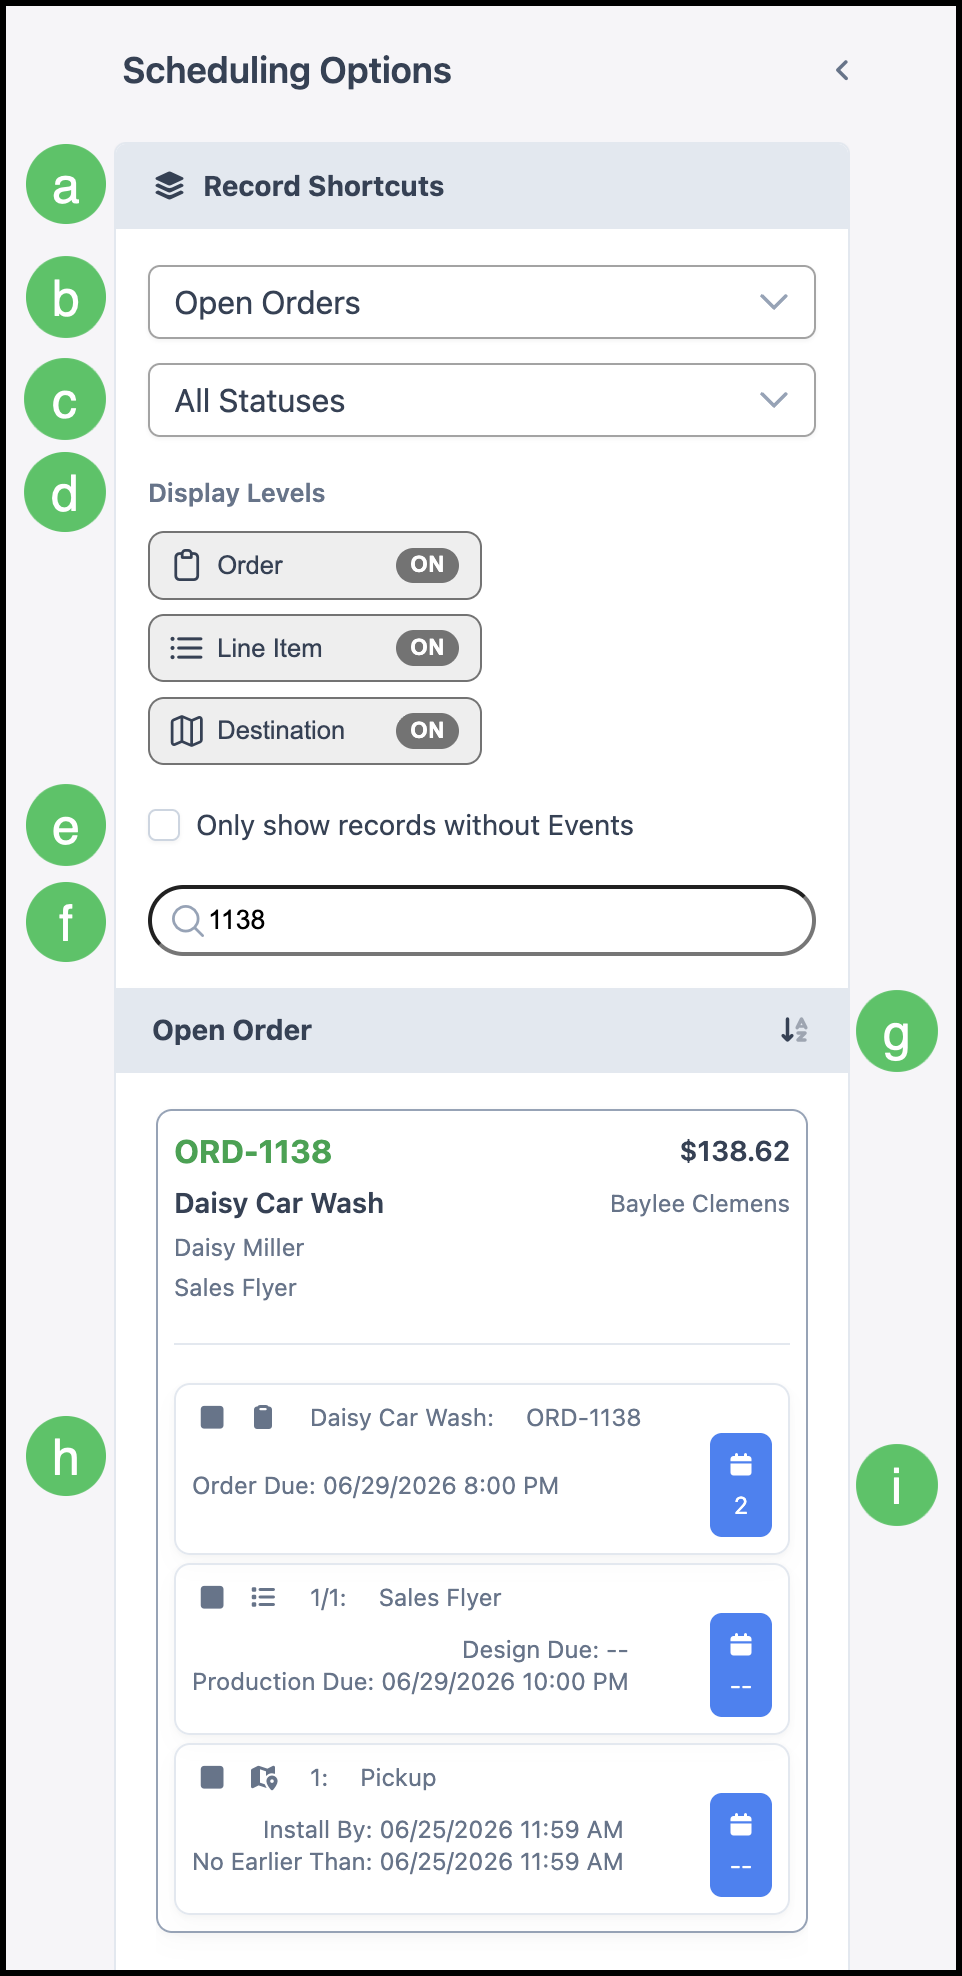
Record Shortcuts
Record shortcuts let you drag an open Order or Estimate onto the calendar so the event is created already linked to that record.
Overview
a. Record Shortcuts - Displays a list of Orders and Estimates that can be scheduled. The panel is located to the left of the scheduling calendar and can be expanded or collapsed using the arrow.
b. Record Type - Filters the shortcut list to display either Orders or Estimates.
c. Status Filter - Limits the shortcut list to records with the selected Status.
d. Display Levels - Controls whether Order, Line Item, and Destination records are included in the shortcut list. Each toggle displays ON when that record level is shown. Icons on each row indicate the corresponding record level.
e. Only show records without Events - Filters the list to display only records that do not already have a linked calendar event.
f. Search - Filters the shortcut list by company name or document number.
g. Grouping Control - Records are grouped by company. When available, this control changes the group sort direction.
h. Records that can be dragged from the shortcut list onto the calendar to create a new event.
Note: Dropping a record on a Month view creates an all-day event by default; dropping on Week or Day creates a one-hour block anchored to the time you chose.
i. The number on this icon indicates how many events this record is linked to.
Using Record Shortcuts to Add an Event
1. Click and drag the record to the correct day or time slot.
2. Complete Event Details in the window that opens. For more information, please see Adding Events above.
3. Click Save.