
The Inventory module in CoreBridge EVO™ lets you track stock levels for your Materials, monitor usage across Orders and Estimates, and manage warehouses from one central location. Inventory is an optional feature that must be enabled for your account. Until it is enabled, the Inventory module does not appear in CoreBridge.
For more information on the Inventory Module, please see Inventory Module Overview.
Table of Contents
- Setting Up Inventory
- Configure Inventory Permissions
- Creating a Warehouse
- Enable Inventory Tracking
- Related Articles
Setting Up Inventory
Before you can configure Inventory, it must be enabled for your account. Once enabled, the Inventory module becomes available in CoreBridge. If Inventory is not currently available, contact CoreBridge Support at supportdesk@corebridge.net to request access.
Configure Inventory Permissions
Inventory permissions control access to the Inventory module and determine which inventory-related tasks Employees can perform, such as viewing or editing stock. For more information on Employee Roles and Permissions, please see Employee Roles and Permissions in Settings.
Navigate to System Settings / My Business / Employee Roles & Permissions.
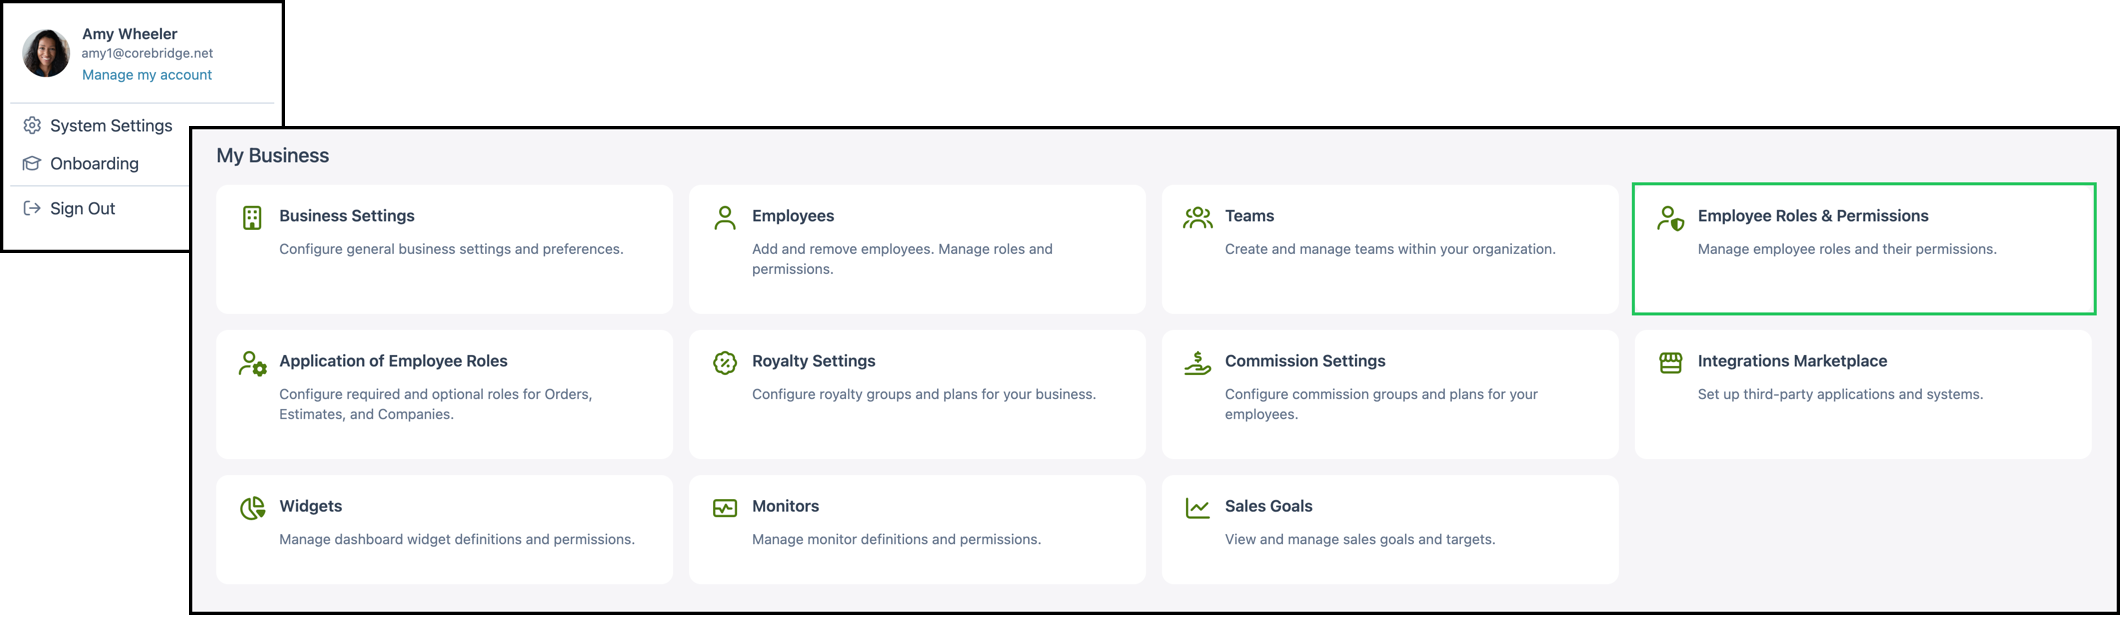
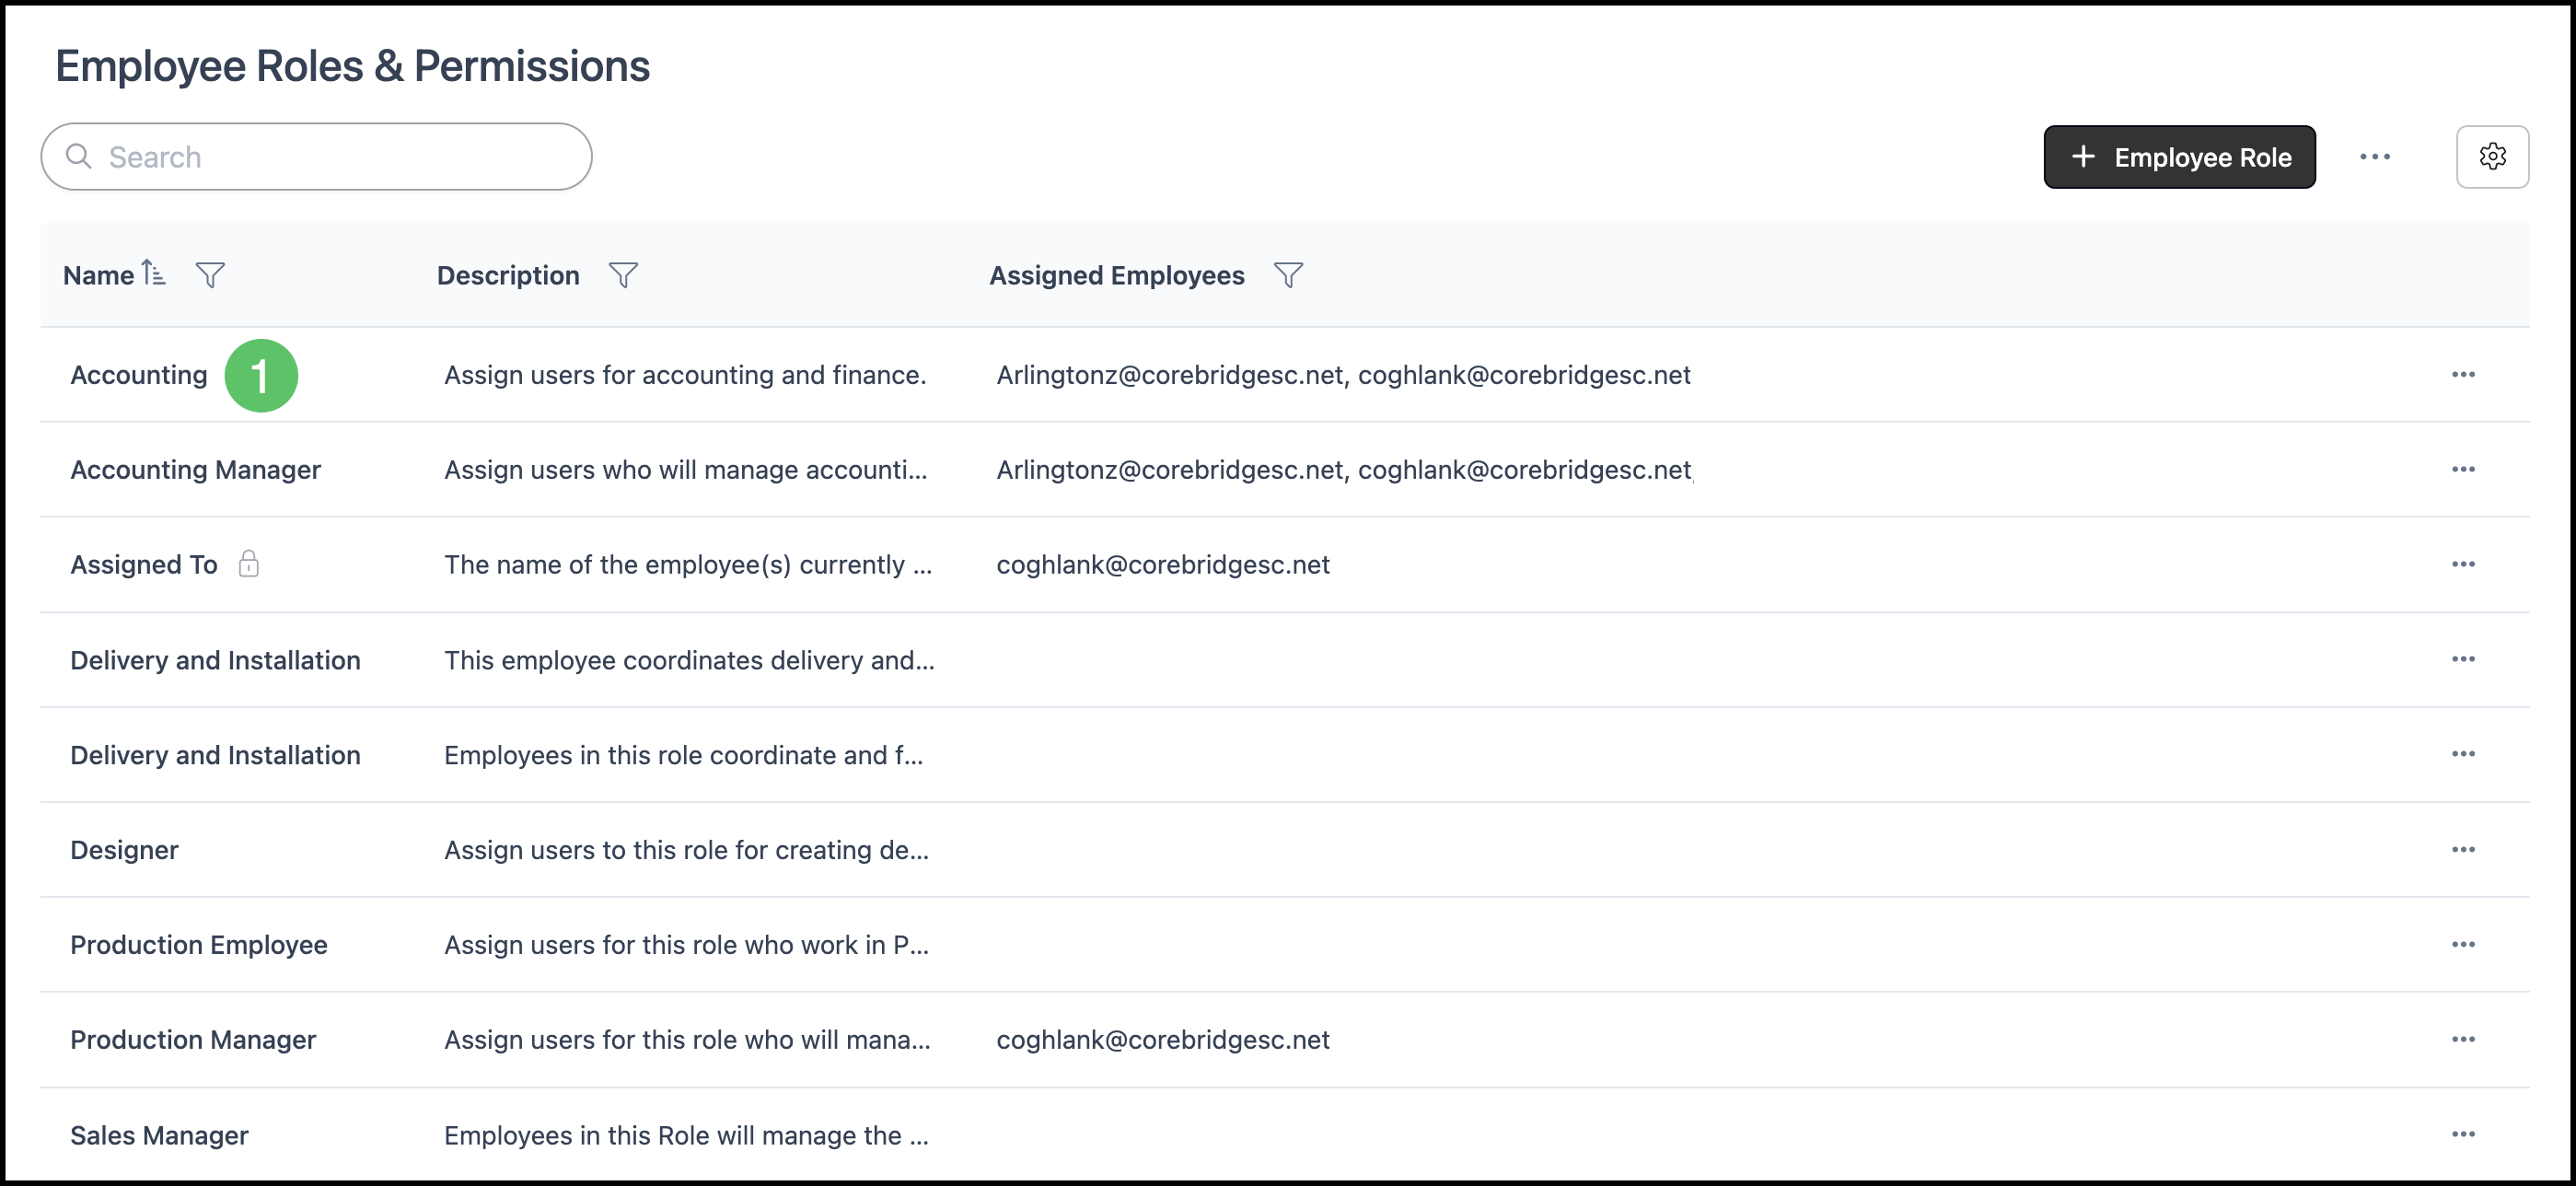
1. Select the Role whose Inventory permissions you want to configure.
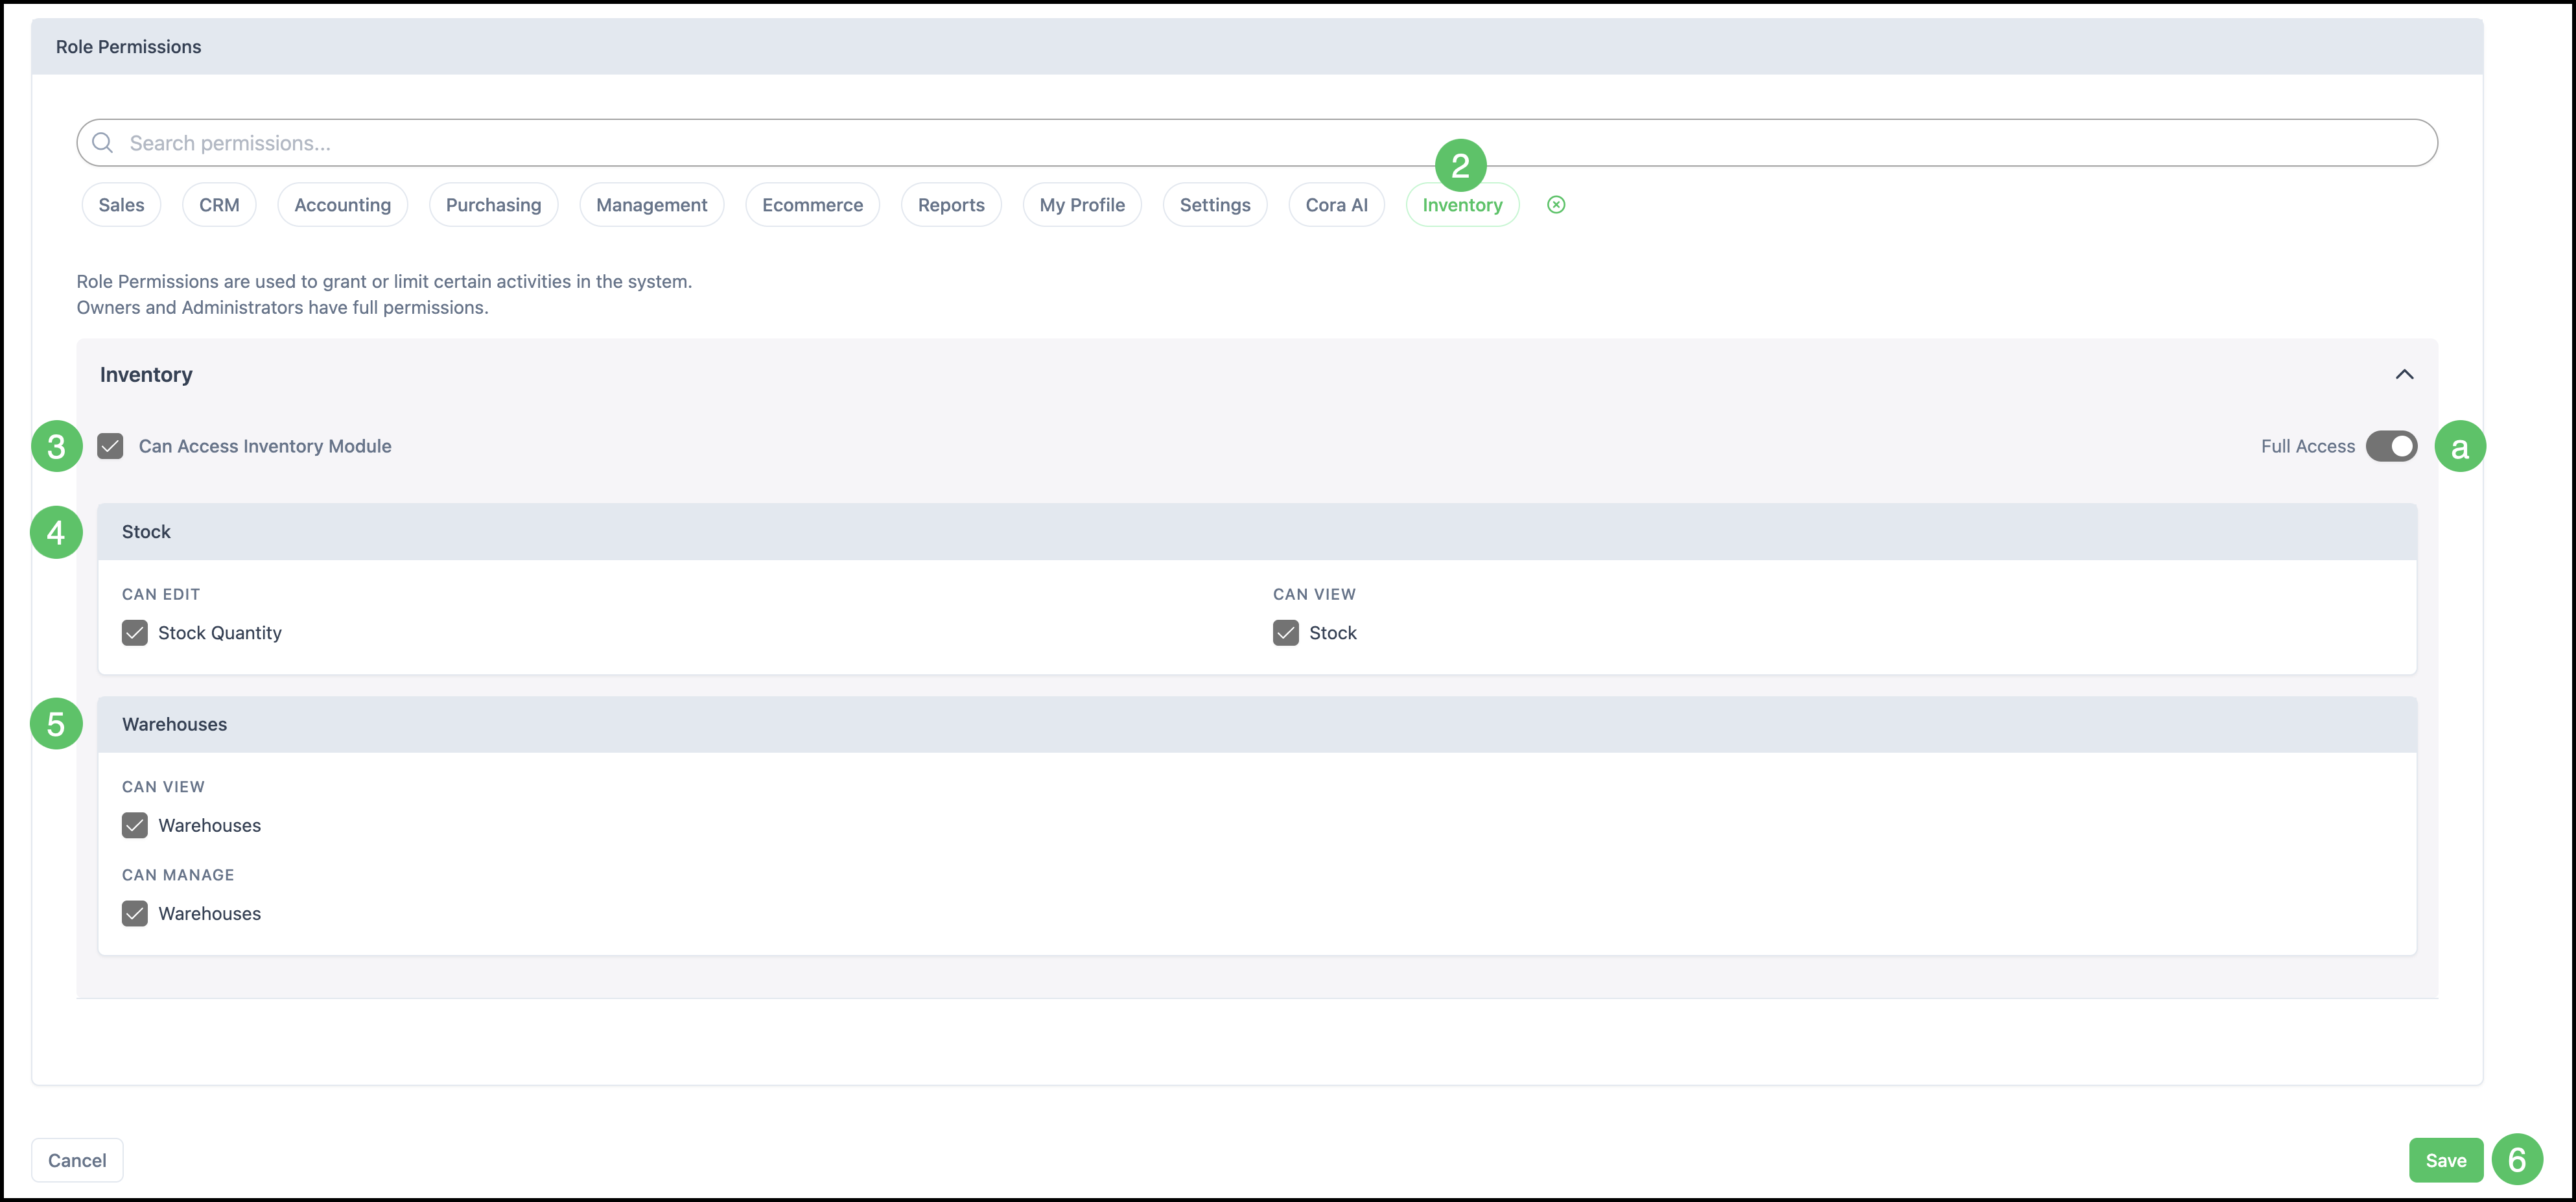
2. Select the Inventory card or scroll down to the Inventory section.
3. Enable Access for the Inventory module.
a. Full Access is enabled by default. To assign only specific Inventory permissions, turn Full Access off and select the permissions you want to grant.
4. Review and select the Stock access you would like to grant.
5. Review and select the Warehouse access you would like to grant.
6. Click Save.
Creating a Warehouse
At least one warehouse must exist in your system before stock can be added.
Navigate to Inventory / Warehouses.
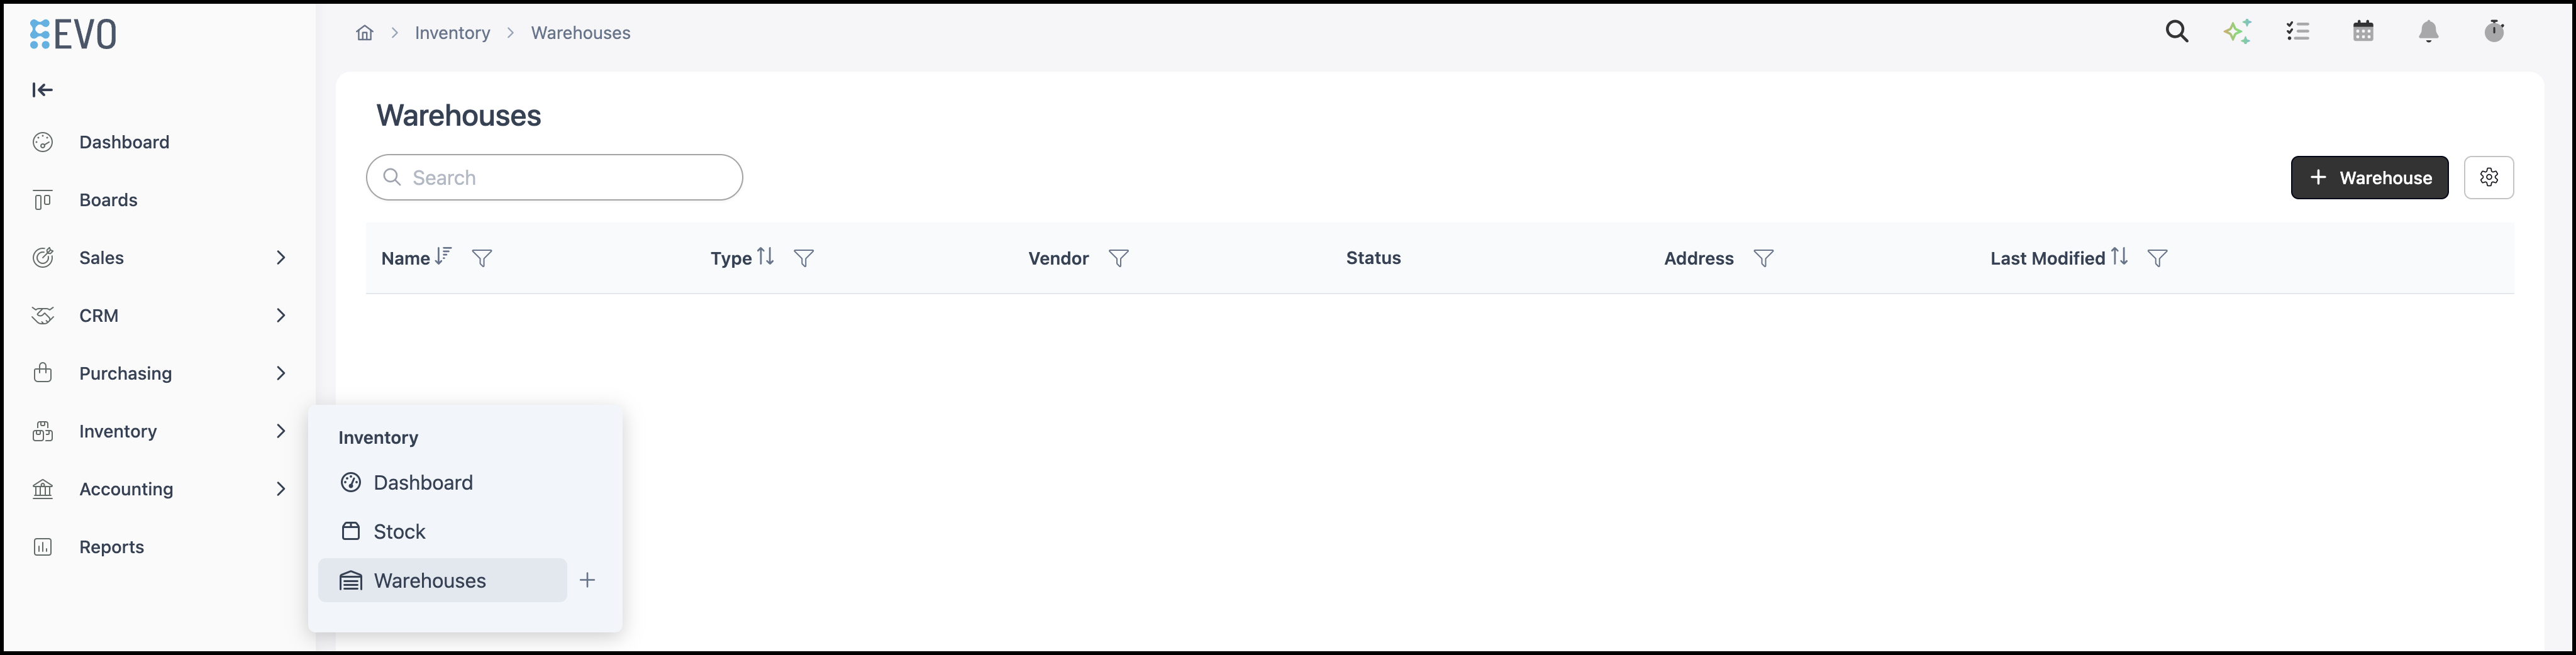
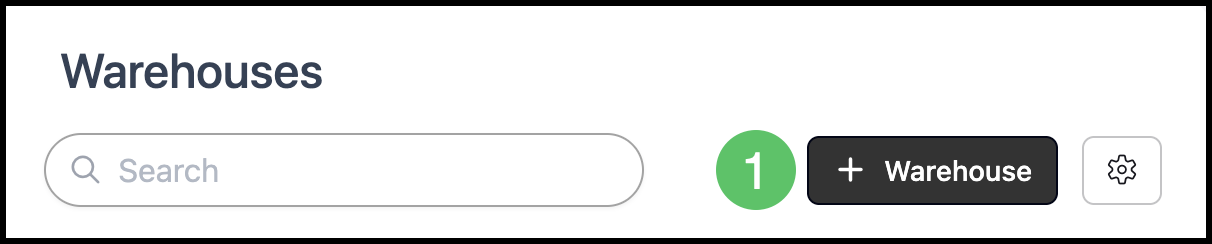
1. Click Add Warehouse.
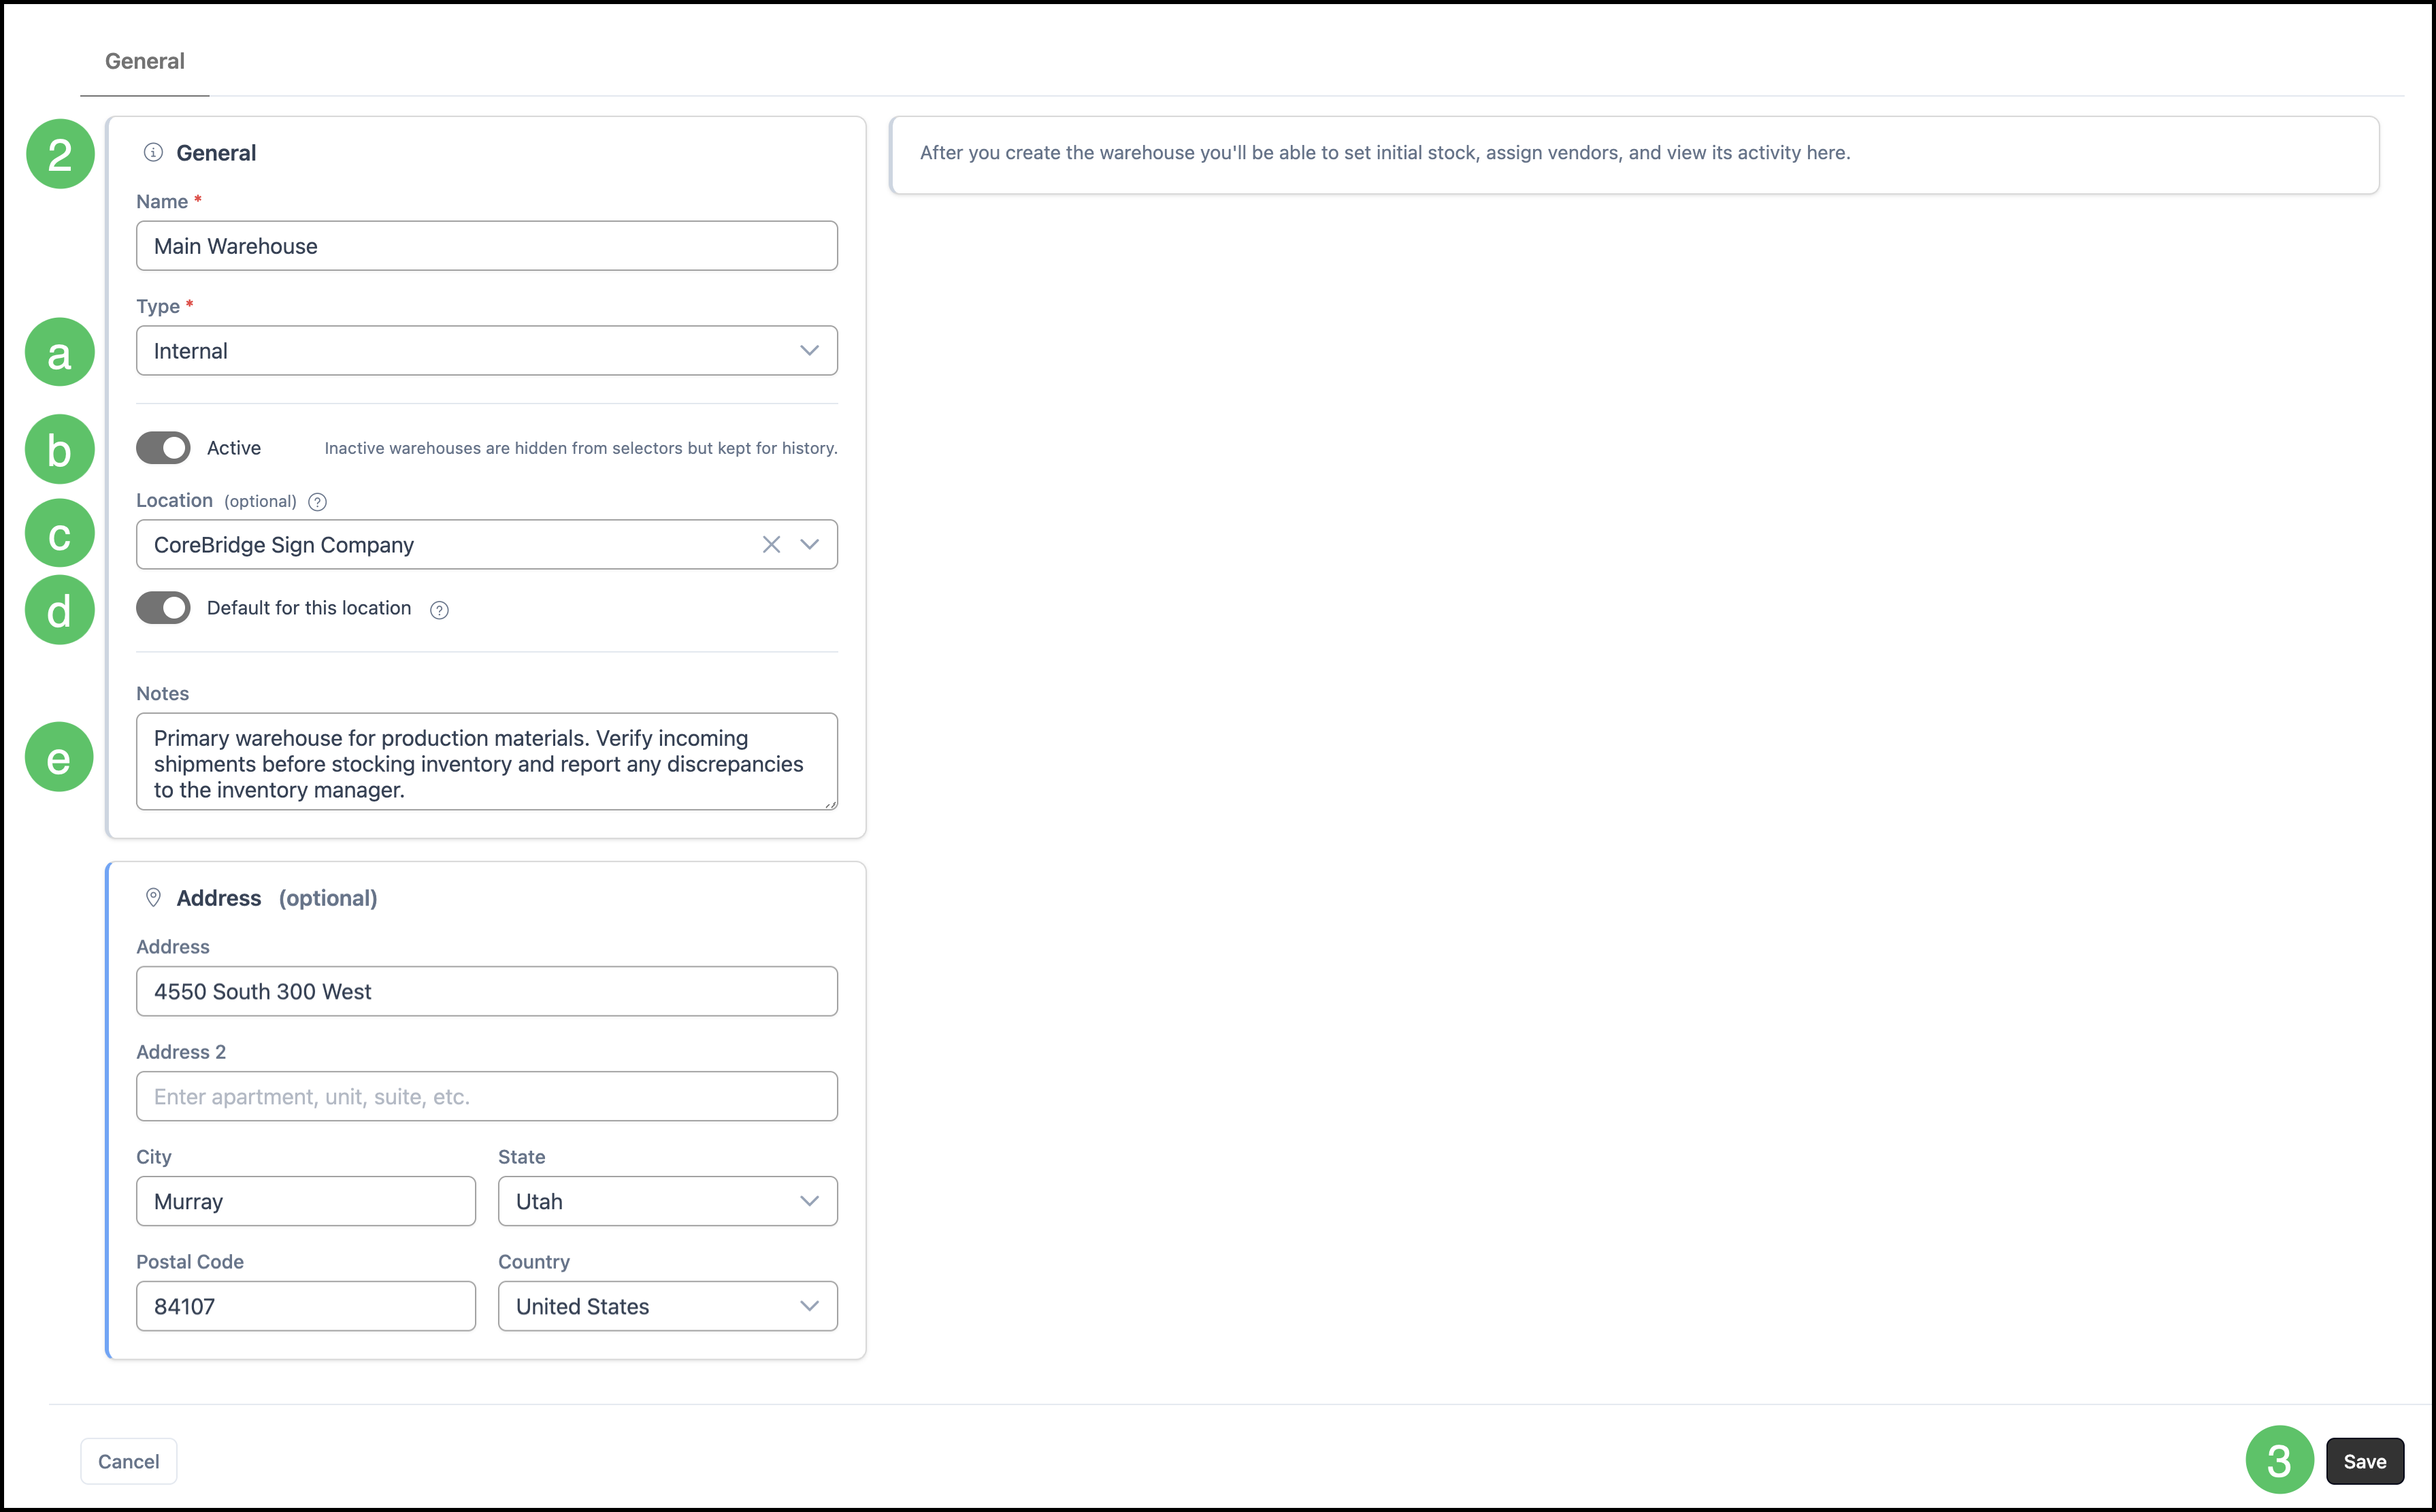
2. Fill in the warehouse information. Required fields are indicated with a red asterisk.
a. Type - Determines whether the warehouse represents an Internal warehouse or a Vendor warehouse. Vendor warehouses can be linked to a Vendor record for organizational purposes, while Internal warehouses represent inventory stored by your business.
Note: Vendor stock levels are managed independently and are not automatically synchronized with CoreBridge.
b. Active - Controls whether the warehouse is available for use. Inactive warehouses are hidden from day-to-day use while remaining available for historical records and reporting.
c. Location - Associates the warehouse with a specific Company Location. Once a Location is selected, the warehouse can be designated as the default for that Location.
d. Default for This Location - Designates the warehouse as the default inventory source for the selected Location. Orders created for that Location reserve stock from this warehouse first.
Note: Only one warehouse can be designated as the default for each Location.
e. Notes - Stores internal information about the warehouse. Notes are visible only to users with Inventory permissions.
3. Click Save.
Enable Inventory Tracking
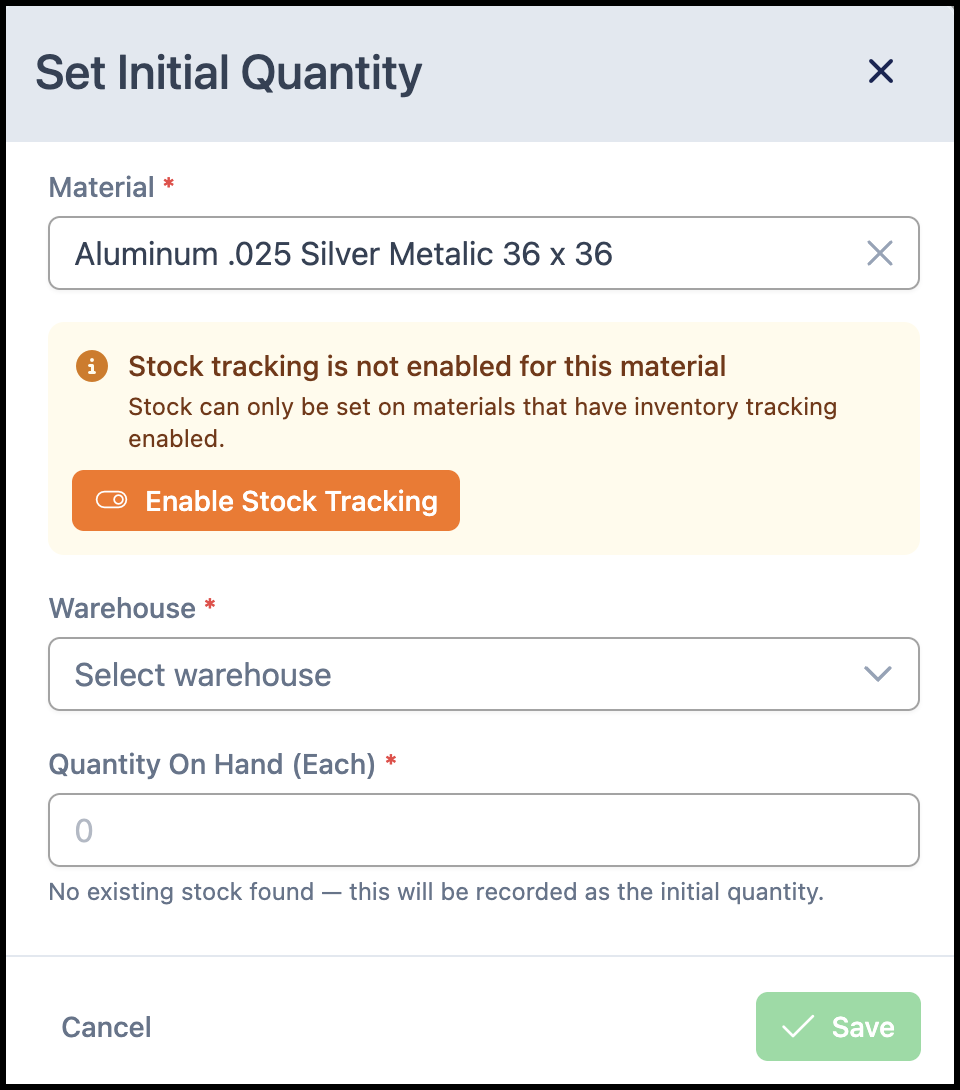
Inventory tracking is configured individually for each Material and is not enabled by default. Enable inventory tracking for every Material you want to include in inventory management. If you attempt to add stock to a Material without inventory tracking enabled, CoreBridge prompts you to enable it before continuing, see Example below.
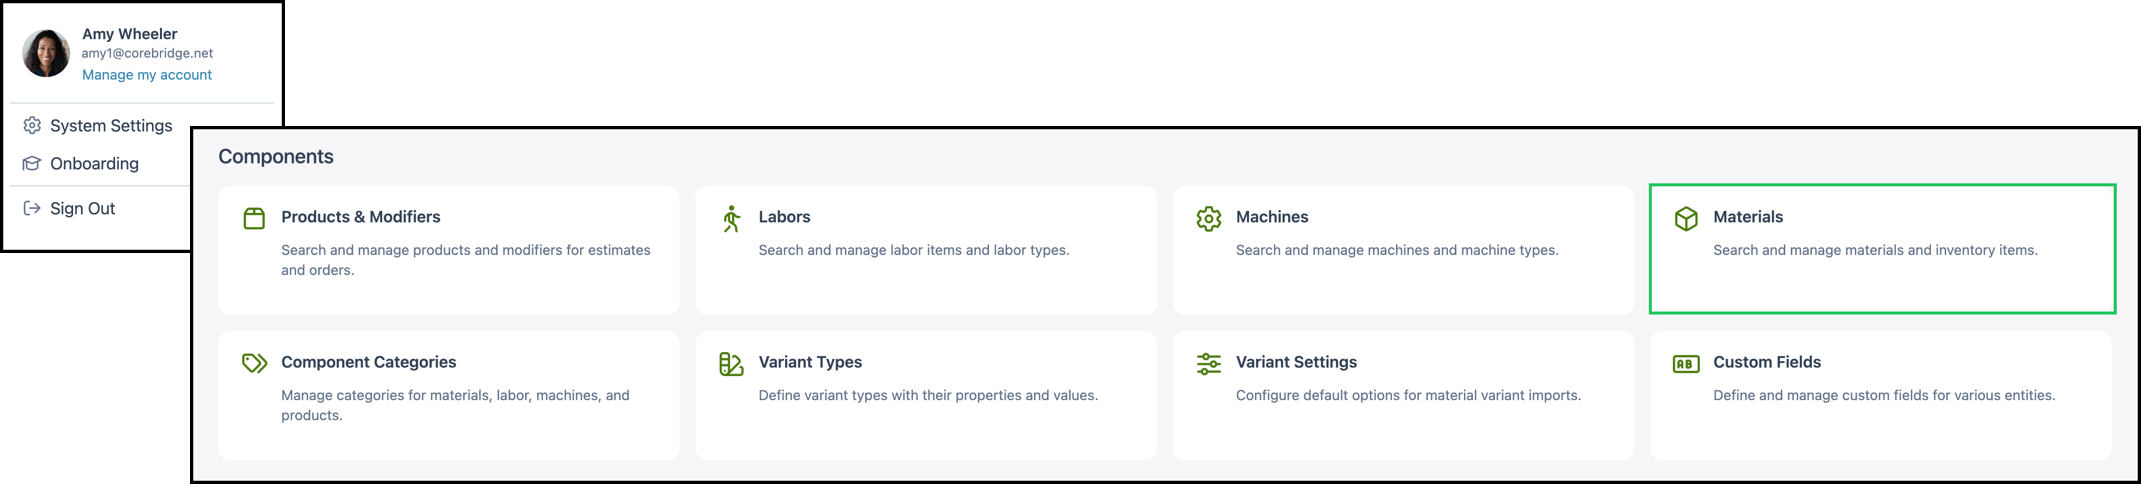
Navigate to System Settings / Components / Materials and select the appropriate Material.
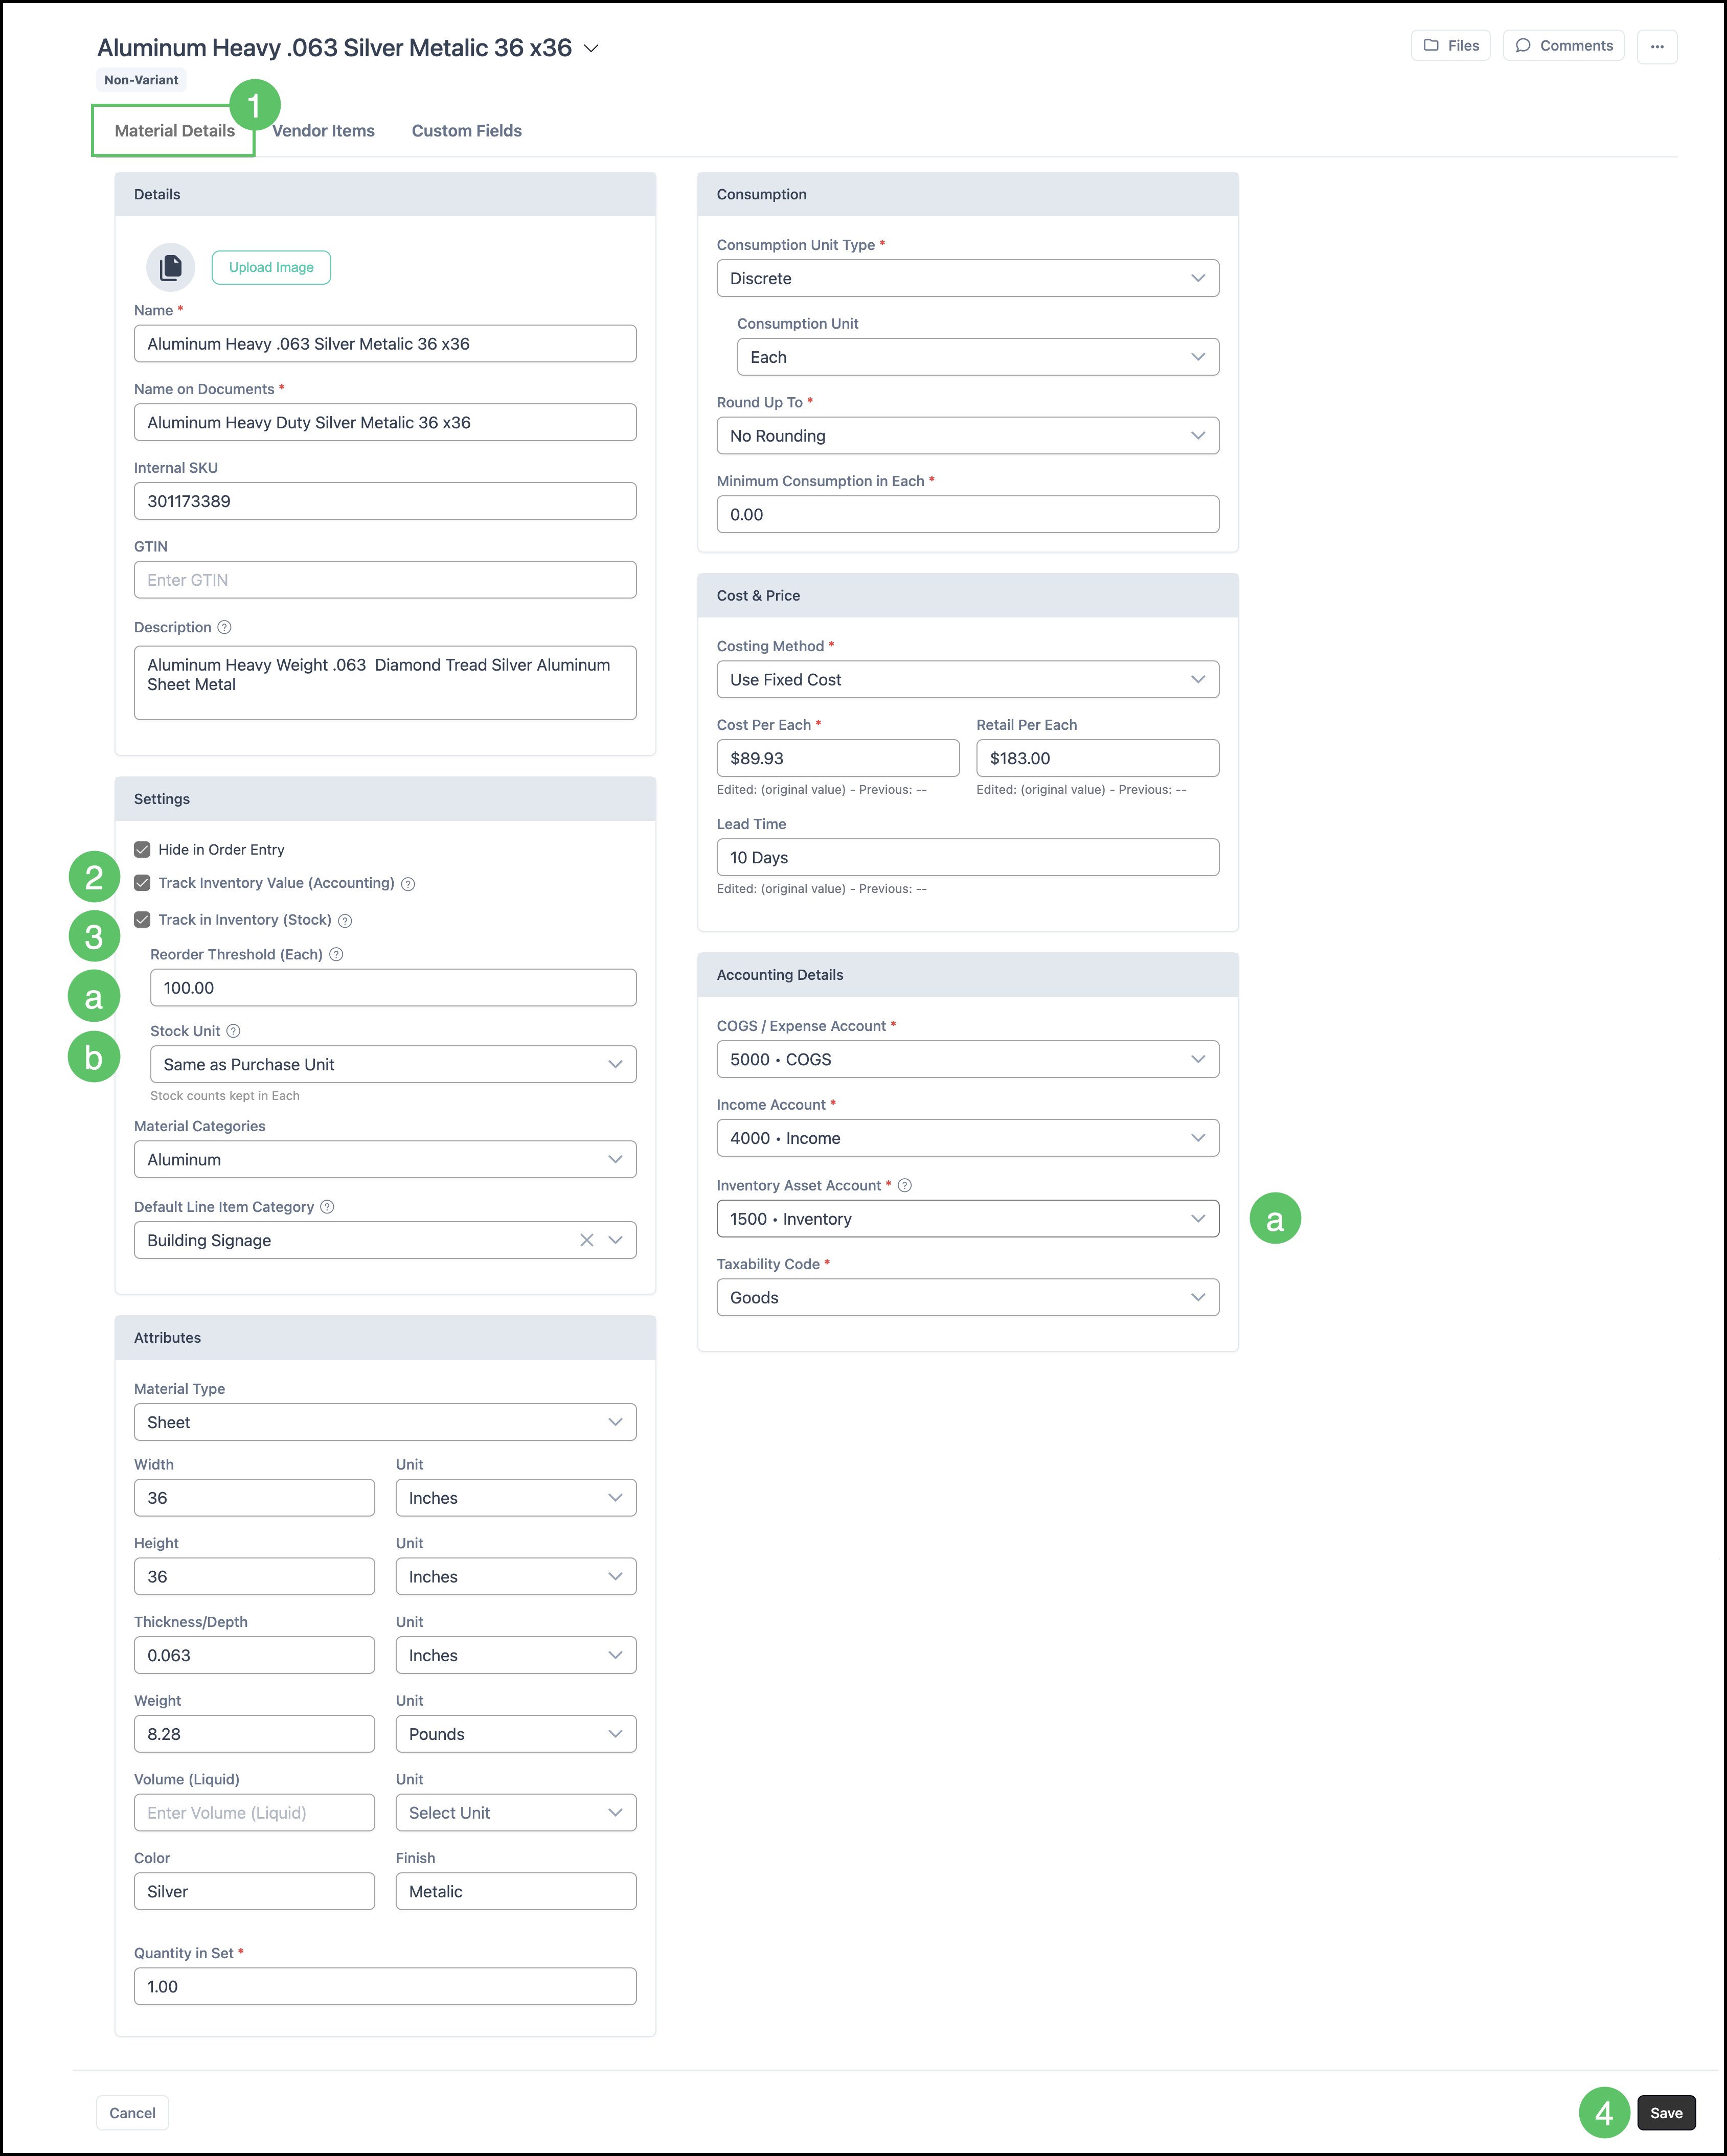
1. Select the Material Details tab.
2. Enable Track Inventory Value, if desired.
a. This is an accounting setting that requires you to select an Inventory Asset Account when enabled.
3. Enable Track in Inventory.
a. Enter a Reorder Threshold to define the stock level at which the Material is identified as low inventory.
Note: For Materials with Variants, the threshold is set once at the Material level and applies to all Variants collectively, not to each Variant individually.
b. Select a Stock Unit to determine whether inventory quantities are measured using Purchase Units or Consumption Units.
4. Click Save.
Example:
Related Articles
Understanding and Managing Stock