The Opportunities Pipeline gives you a visual way to track and manage potential sales from initial contact through close. Opportunities appear as cards on a board; each column is a Stage in your sales process. You can customize Stages, assign Estimates and Orders to an Opportunity, and move cards between stages manually. This article covers navigation, the board, adding Stages, adding Opportunities, linking records, and moving cards.
TABLE OF CONTENTS
- Opportunities Pipeline Overview
- Pipeline Board
- Adding Opportunities
- Editing an Opportunity
- Moving Opportunities Between Stages
Opportunities Pipeline Overview
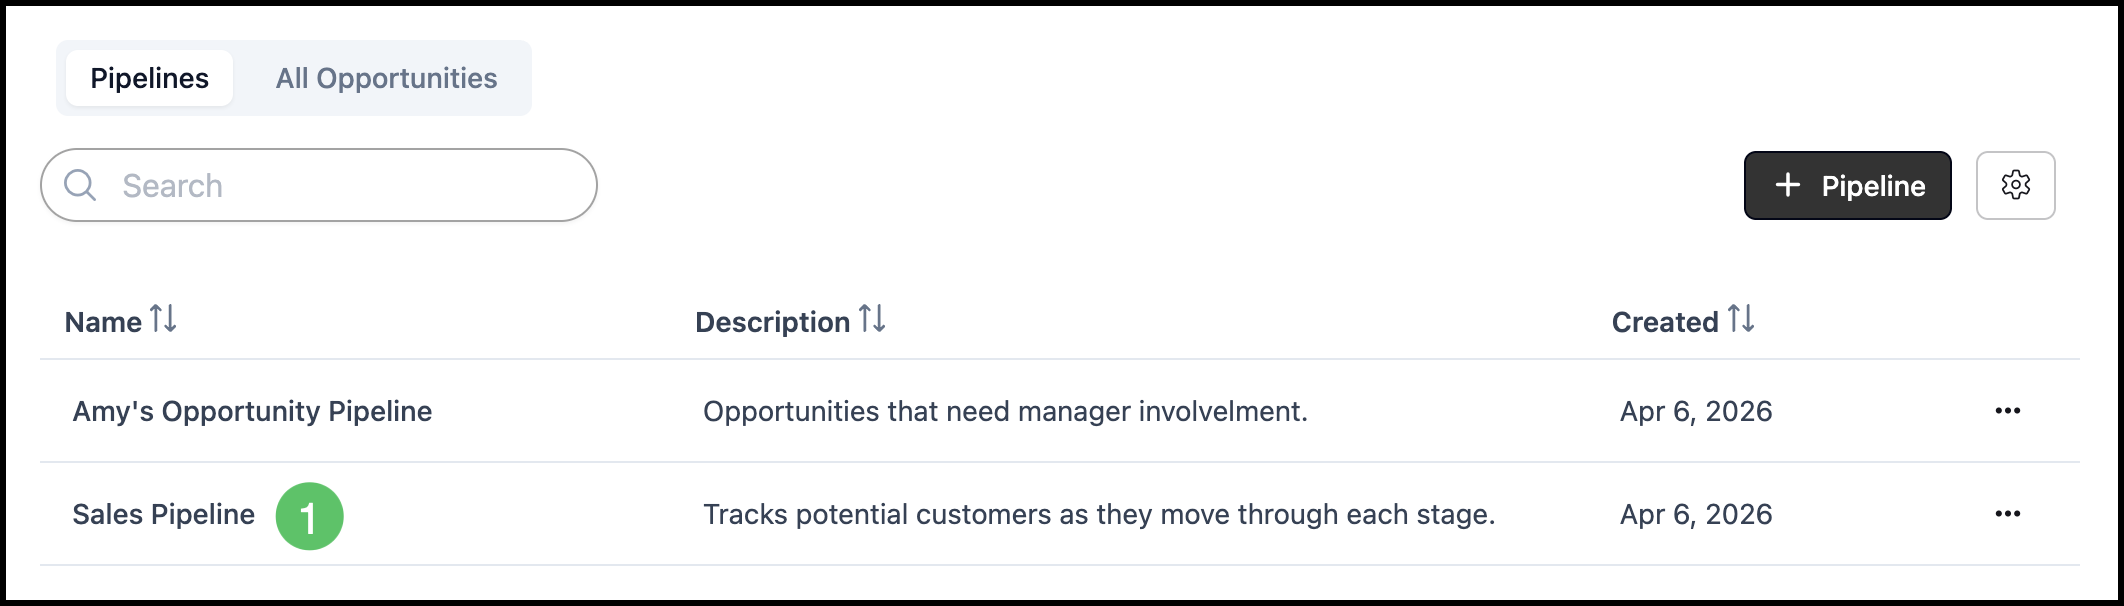
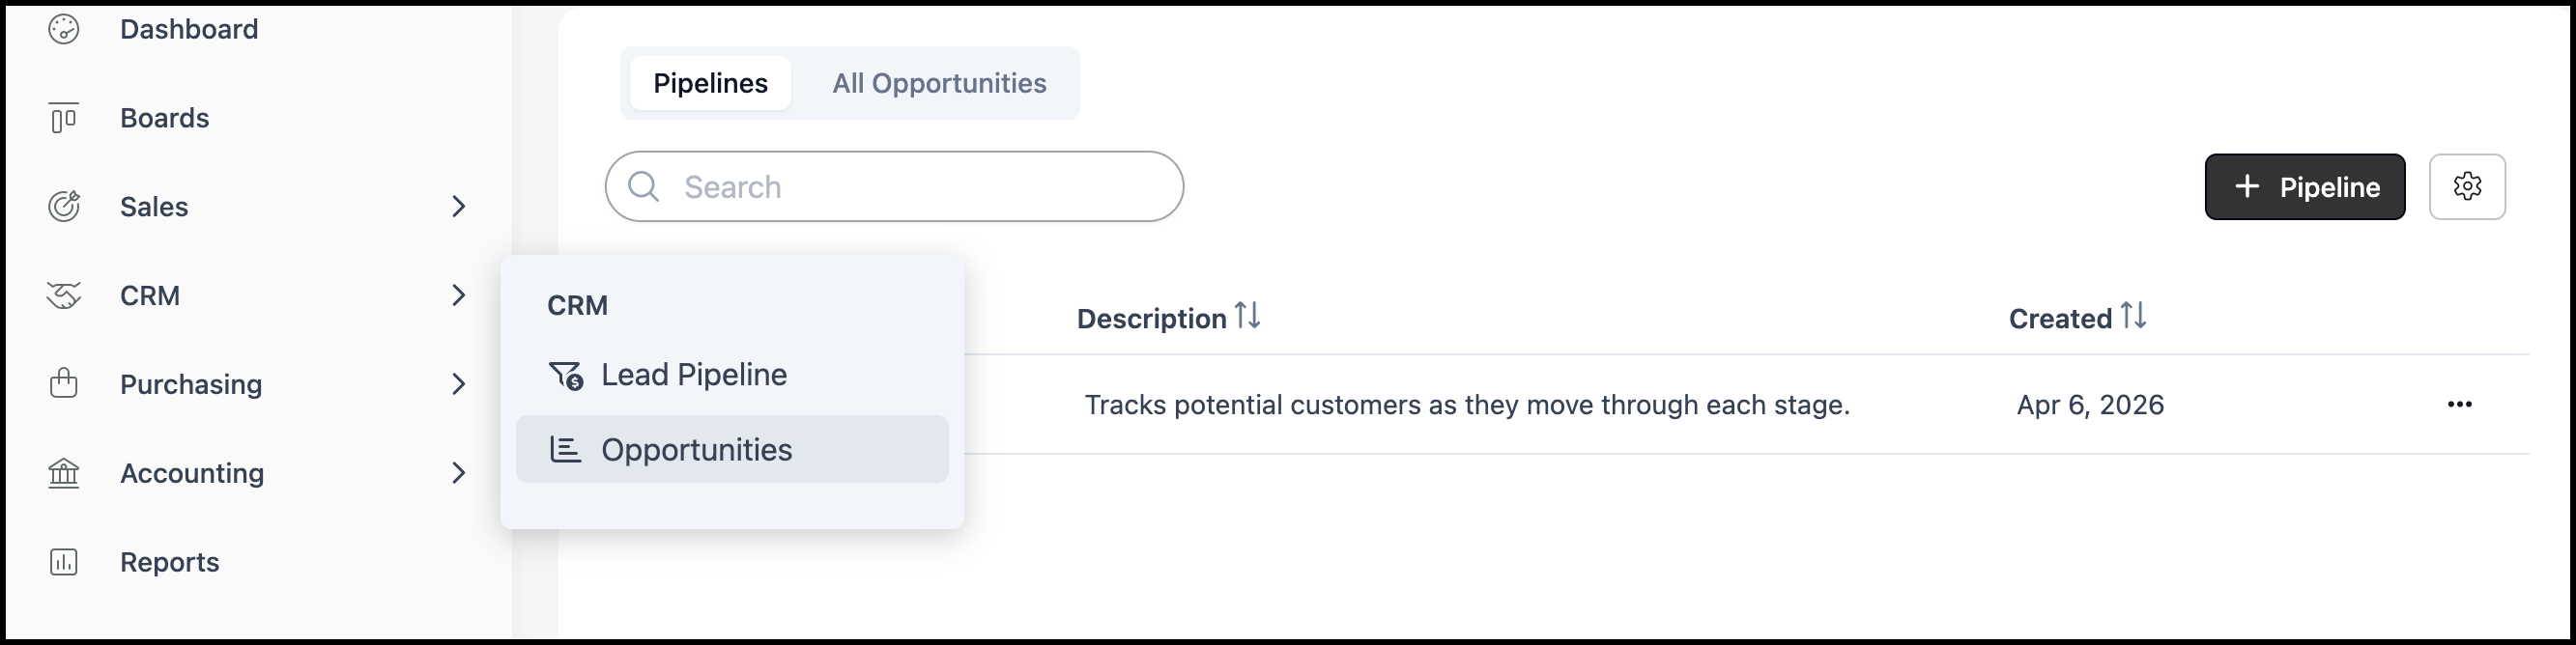
Navigate to Sales / Opportunities.

a. This allows you to quickly navigate between the Pipelines screen and All Opportunities.
b. Quickly find the correct Pipeline using the Search field.
c. If your organization uses more than one Pipeline, you can select the Pipeline you want to work in.
d. Click here to create a new Pipeline.
Note: This will bring up a dialog box for information entry. Please see example below.
e. The Search Settings allows you to select the columns displayed or to include inactive Pipelines.
f. The more actions ellipsis allows you to set a Pipeline as inactive.

Example:

Pipeline Board
Navigate to Sales / Opportunities.

1. Select a Pipeline on the Pipeline Screen.

The Pipeline board displays Opportunities as cards organized into columns. Each column represents a Stage. Cards move from left to right as an Opportunity progresses.
Note: Cards move between the stages manually.
a. Filter - Use this to select which Opportunities appear on this board.
b. Sort - Use this to choose how the Opportunities will be sorted.
c. Fields - This allows you to select which Stages will be displayed. You may also add additional Stages here.
d. Expand to a full screen view here.
e. The ellipses gives you further options to Edit Pipeline, Manage Access, Favorite a Pipeline, or Clone a Pipeline.
f. Clicking here will display the Pipeline in Card View.
g. Clicking here will display the Pipeline in List View.
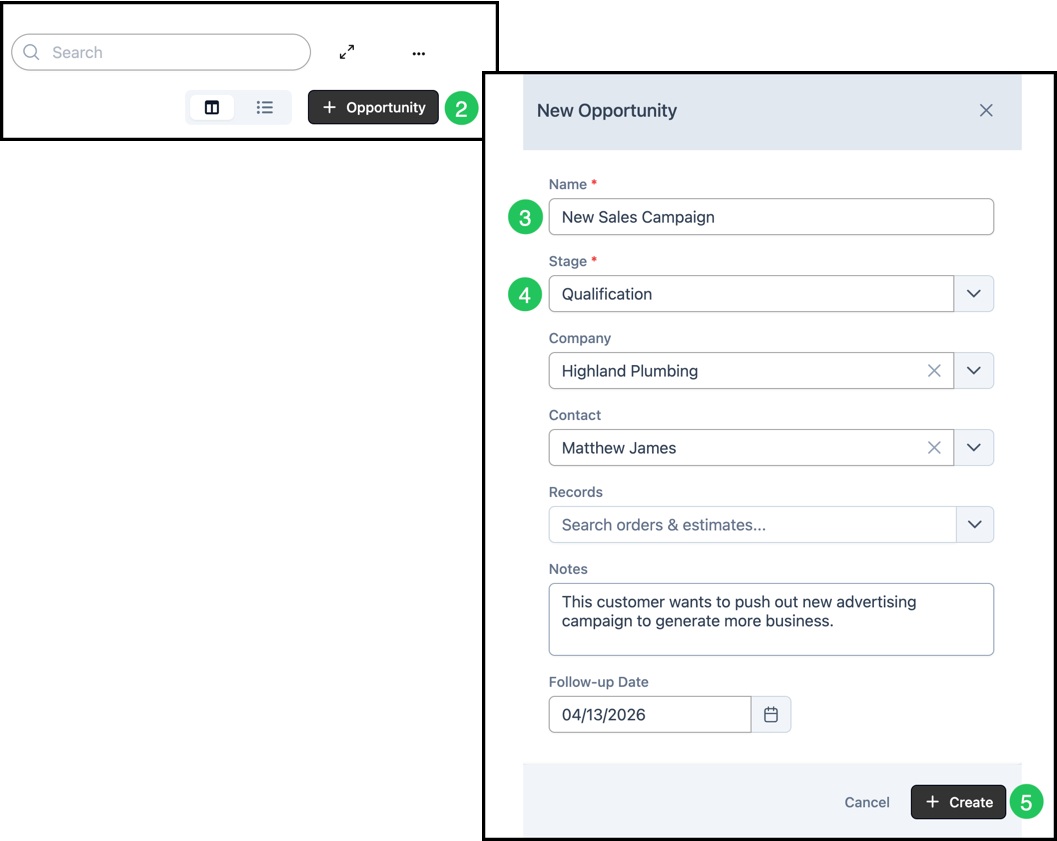
h. Clicking here will allow you to add an Opportunity.
i. Each card displays key information about the Opportunity, including associated records.

Configure Pipeline Stages
Utilize the Fields button to customize the stages on your board. You can add new stages, remove or edit existing ones, and reorder them to match your workflow.
1. Click Fields.

a. Additional Stages can be added by clicking here.
b. Stages can be reordered to match your workflow.
c. Use the Edit icon for updating Stage information.
d. Use the Delete icon to remove a Stage.

Adding a Stage
Navigate to Sales / Opportunities and select the appropriate Pipeline.

1. Click Fields.

2. Enter a Stage Name.
a. Toggle the Terminal option if moving a card to this stage should remove it from your Pipeline.
b. Select a destination Pipeline if you want cards in this Stage to transfer to another team member's Pipeline automatically.
3. Click Save.
Note: The option to transfer an Opportunity to another Pipeline is only available when the Terminal toggle is enabled for that Stage.

Adding Opportunities
From the appropriate Pipeline, add a new Opportunity, enter details (including the related contact where applicable), and place it in the appropriate Stage.
Navigate to Sales / Opportunities.

1. Select a Pipeline on the Pipeline Screen.
2. Click Add Opportunity from the pipeline view.
3. Enter the Opportunity Name.
4. Assign the Opportunity to a Stage and add any other relevant details.
5. Click Create.
Editing an Opportunity
Navigate to Sales / Opportunities.
1. Select a Pipeline on the Pipeline Screen.

2. Select the appropriate Opportunity.

This opens up the side panel allowing you to make updates and view details on this Opportunity.
Opportunity Side Panel
a. Clicking on the Opportunity Name will take you to the Opportunity Details page.
b. The more actions ellipsis allows you to Clone the Opportunity or set it to Inactive.
c. Clicking on the Customer Name will take you to the Customer Details page.
d. Deal Health provides statistics on this Opportunity.
e. The Description can be viewed here and edited on the Opportunity Details page.
f. Tasks allows you to create and view the Tasks associated with this Opportunity.
g. Total is amount from linked records.
h. Custom Fields can be managed in Settings / Components / Custom Fields.
i. Notes provides a place for internal conversations regarding the Opportunity.
j. Dates indicating the creation and last modified date are shown here.

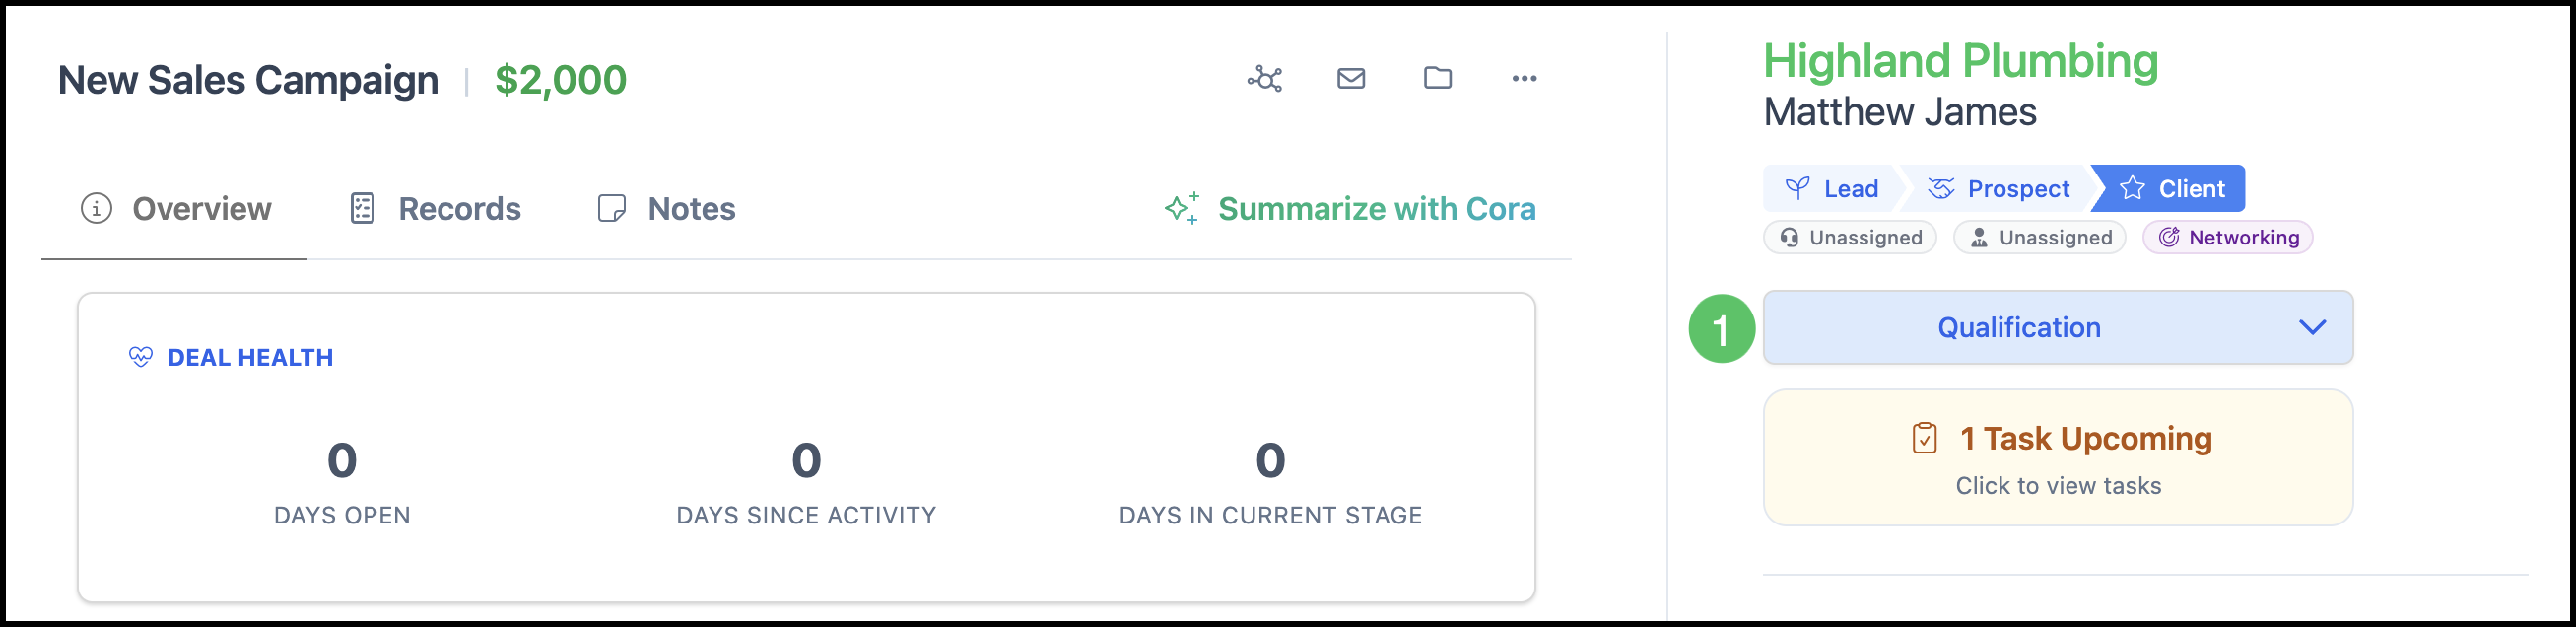
Opportunity Details Page
More detailed edits can be made on the Opportunity Details page.
1. Click the Name of the Opportunity.

a. Click the Name or the Edit icon here to make changes to either the Opportunity Name or the Opportunity Amount.
b. The Activity icon allows you to see a timeline of all activities associated with this Opportunity.
c. The Email icon will bring up an email template.
d. The Files icon allows you to upload relevant files.
e. The more action ellipsis allows you to Create Opportunity, Clone, view History, or Set Inactive.
f. Clicking here will create a summary of this Opportunity.
Note: These options will be available regardless of the tab chosen.

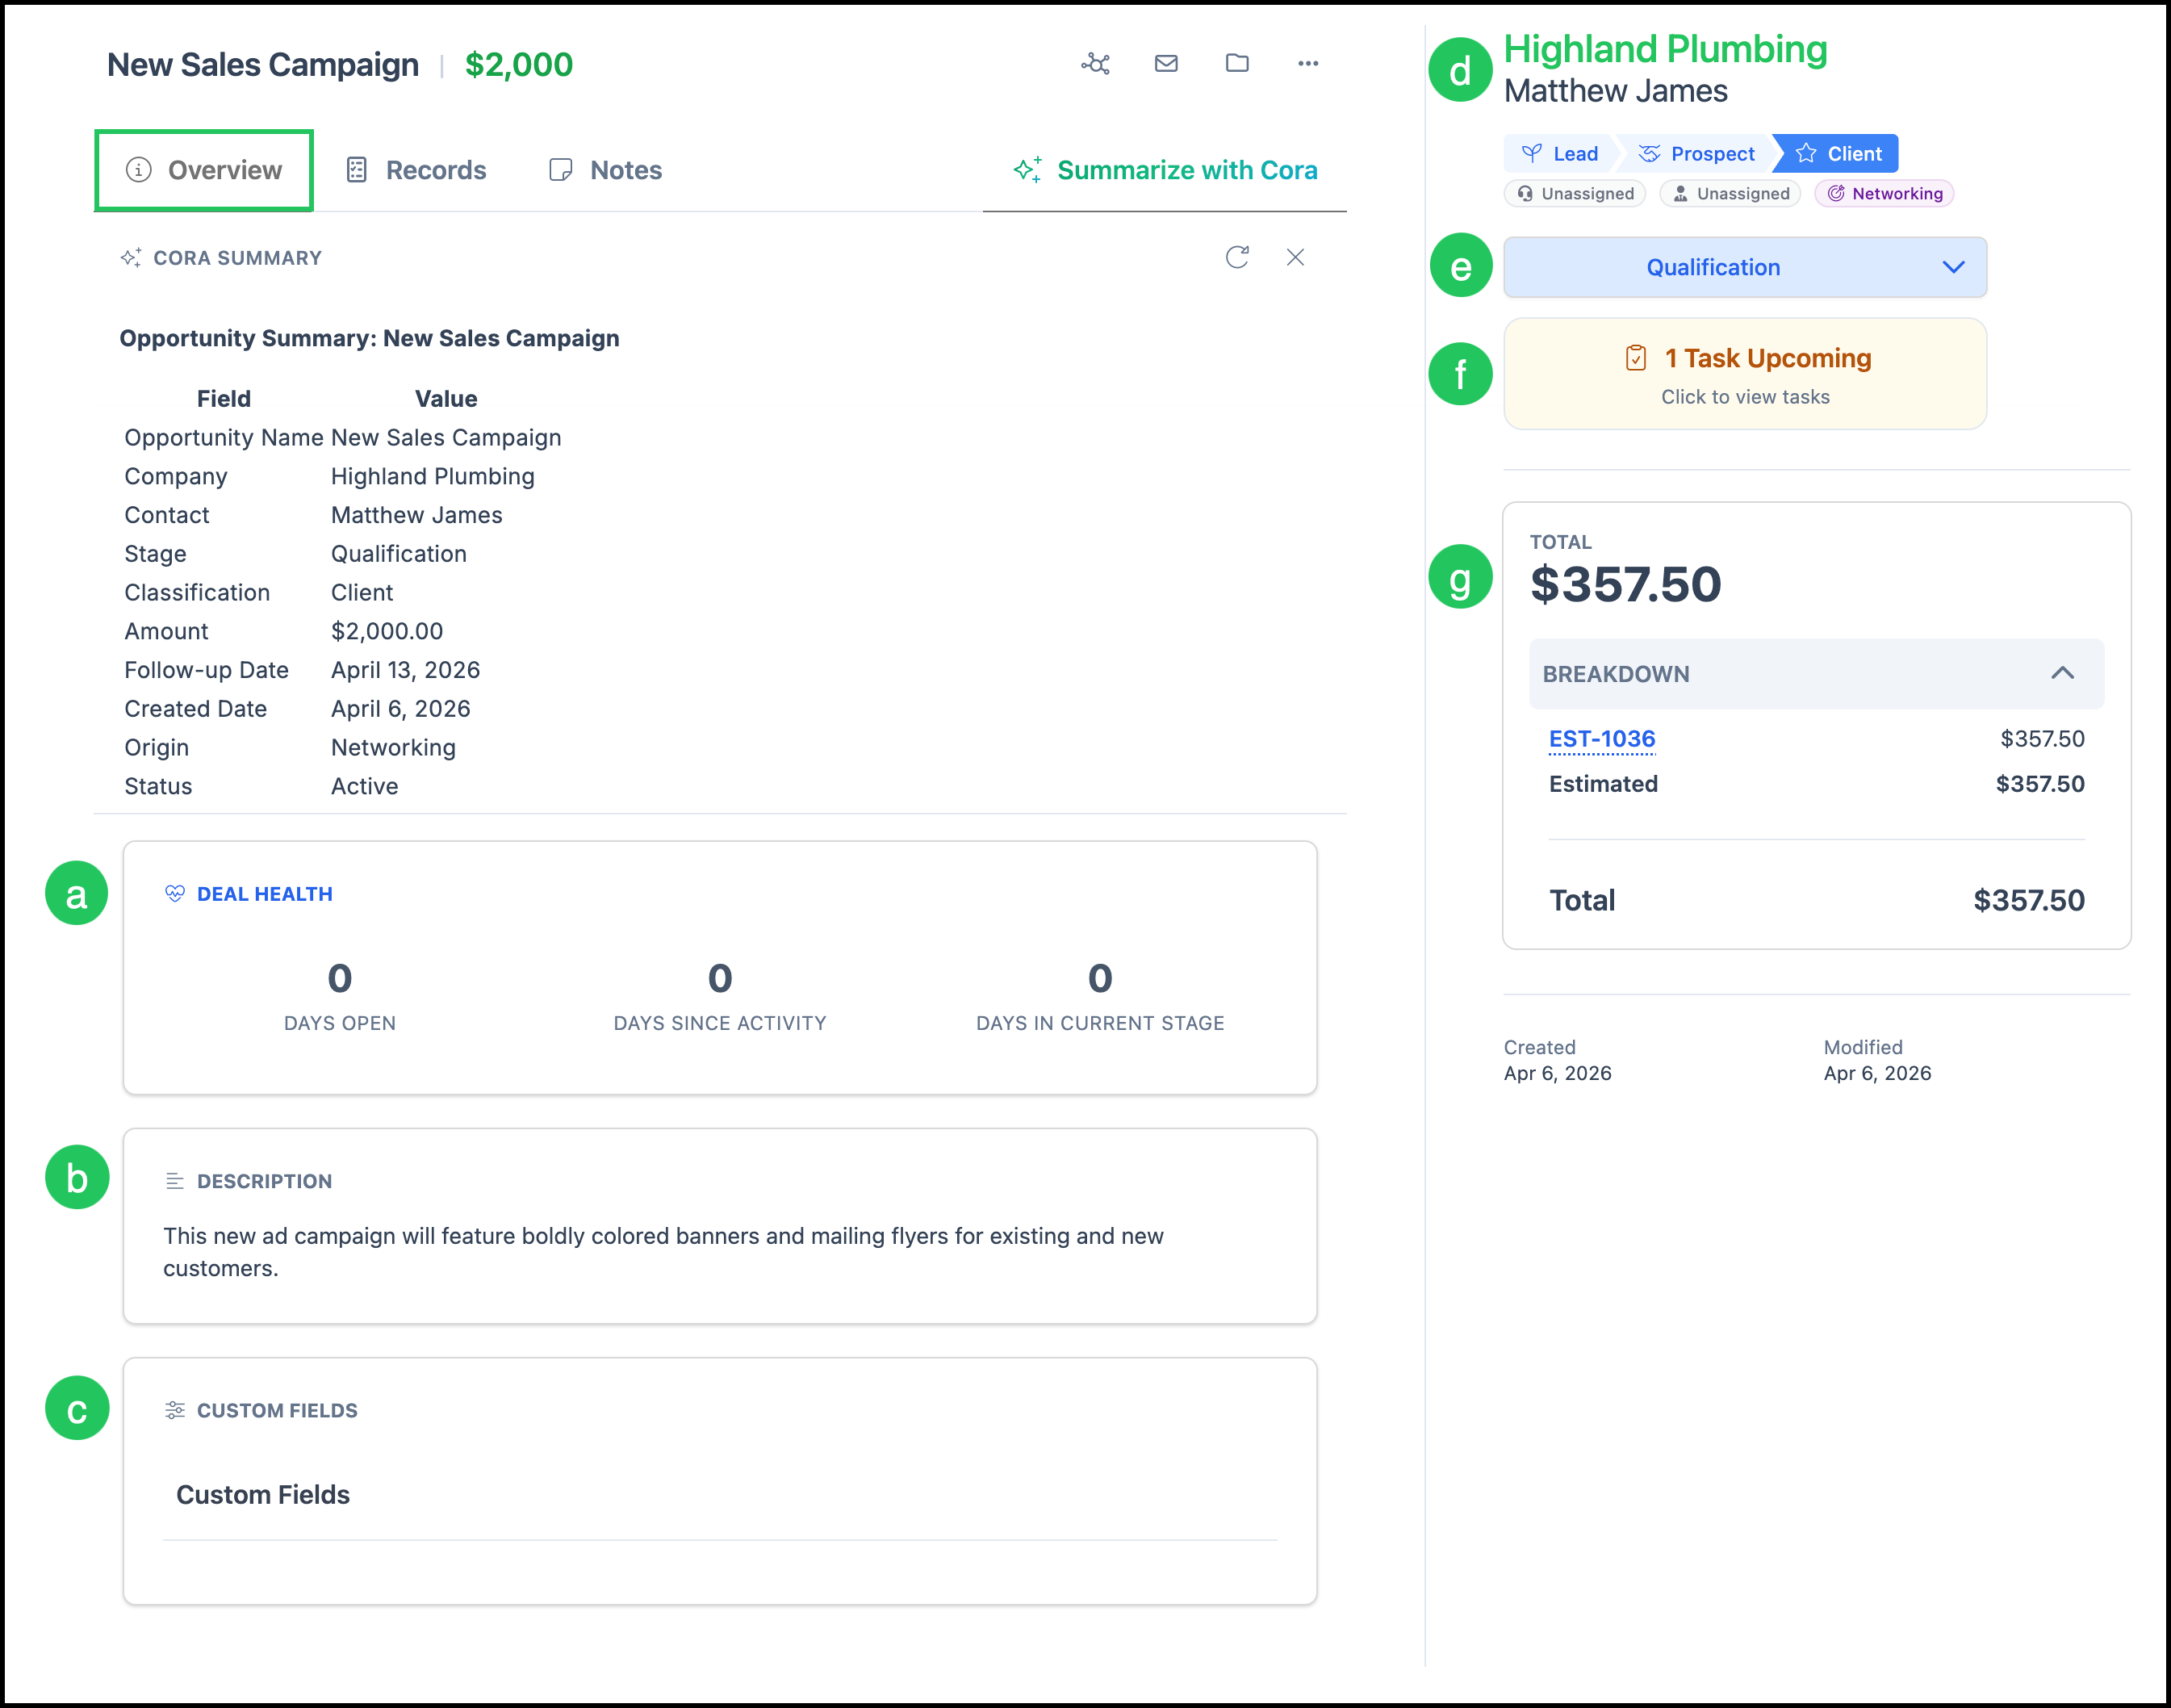
Overview Tab
a. Deal Health shows the history of the Opportunity broken down by Days Open, Days Since Activity, and Days in Current Stage.
b. The Description of the Opportunity can be viewed and edited here.
c. Custom Fields can be managed in Settings / Components / Custom Fields.
d. If this Opportunity is for an existing Customer, the Customer information will populate automatically.
e. This dropdown can be used to move the Opportunity to another Stage.
f. Tasks can be managed here.
g. The Total amount for linked records is broken down here.
Note: Information located under the Company name will be visible and editable regardless of tab selected.
Records Tab
a. The search bar allows you to find and link more records to this Opportunity.
b. Clicking the Estimate Number will open up the Estimate. Clicking the Contact will open up the Contact page.
c. This icon will Unlink the record.

Notes Tab
a. This field allows you to enter an internal note regarding this Opportunity.
b. This icon allows you to open the Note using the Rich Text Editor.
c. This icon posts the typed Note.

Moving Opportunities Between Stages
There are two ways to allow a card to progress an Opportunity to the next Stage.
From the Pipeline Board:
1. Select the Opportunity card you want to move and drag it into the appropriate Stage Column.

2. Verify the card is now in the correct column.

From the Opportunity Details Page:
1. Use the dropdown to select the appropriate Stage.
Note: Use the dropdown on the Opportunity Details page (see above) to select the appropriate Stage.