As a manager, one of your key responsibilities is overseeing employee work hours. This includes reviewing, approving, and, when necessary, editing time entries to ensure accuracy and compliance with company policies. To do this effectively, it's important to properly configure the Time Clock settings within your system so that your team can log their time accurately and consistently.
Before employees can begin clocking in and out, you’ll need to enable the Time Clock feature for your team and assign Paid and Unpaid Activities. This setup not only streamlines payroll and reporting but also helps foster accountability and transparency across your workforce.
Table of Contents
- Time Clock Activity Types
- Adding Activities
- Editing Time Clock Entries
- Adjusting Clock In or Out Times
- Changing Activity Selection
- Splitting Activities
Time Clock Activity Types
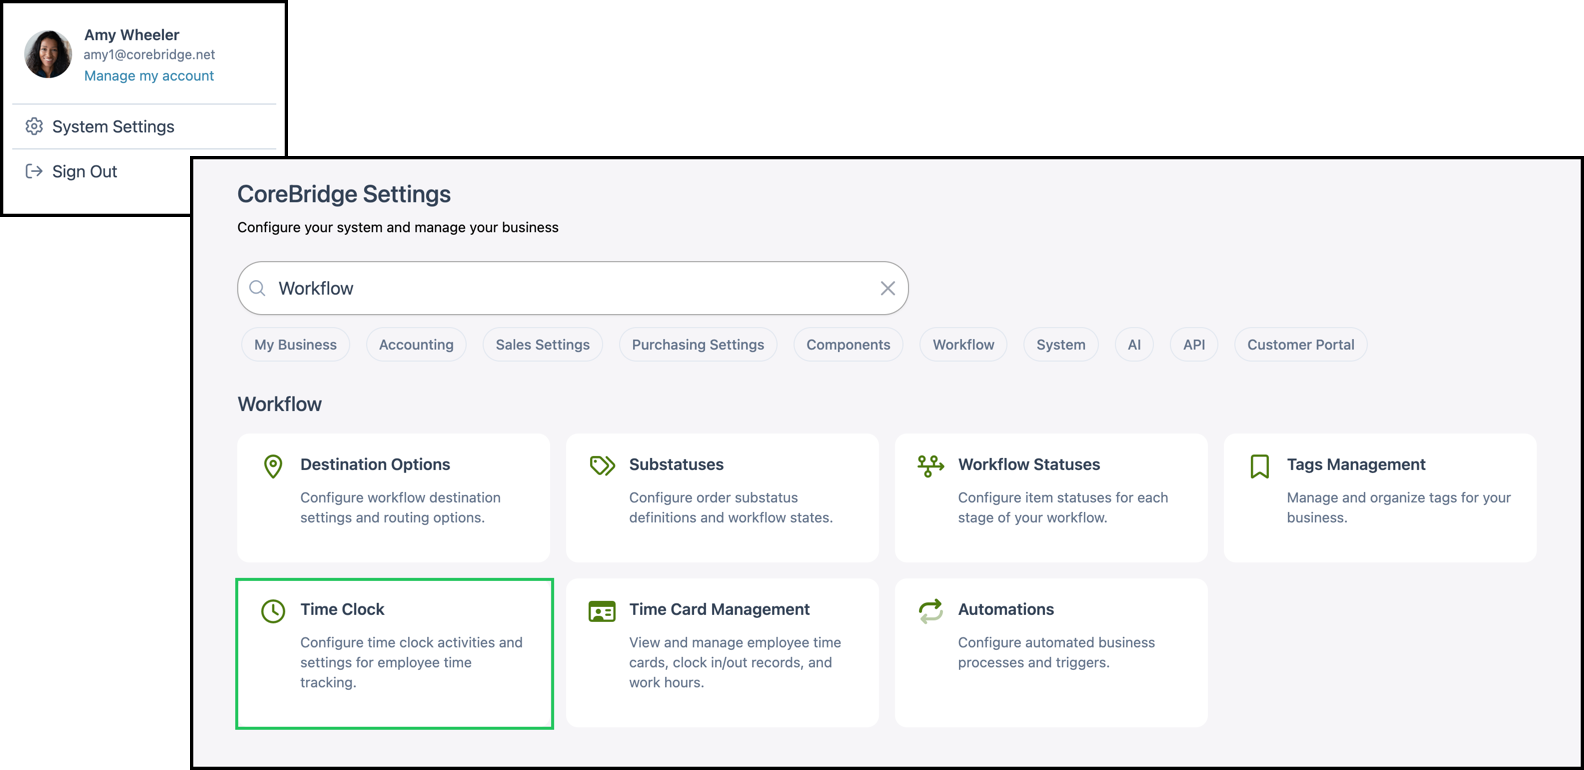
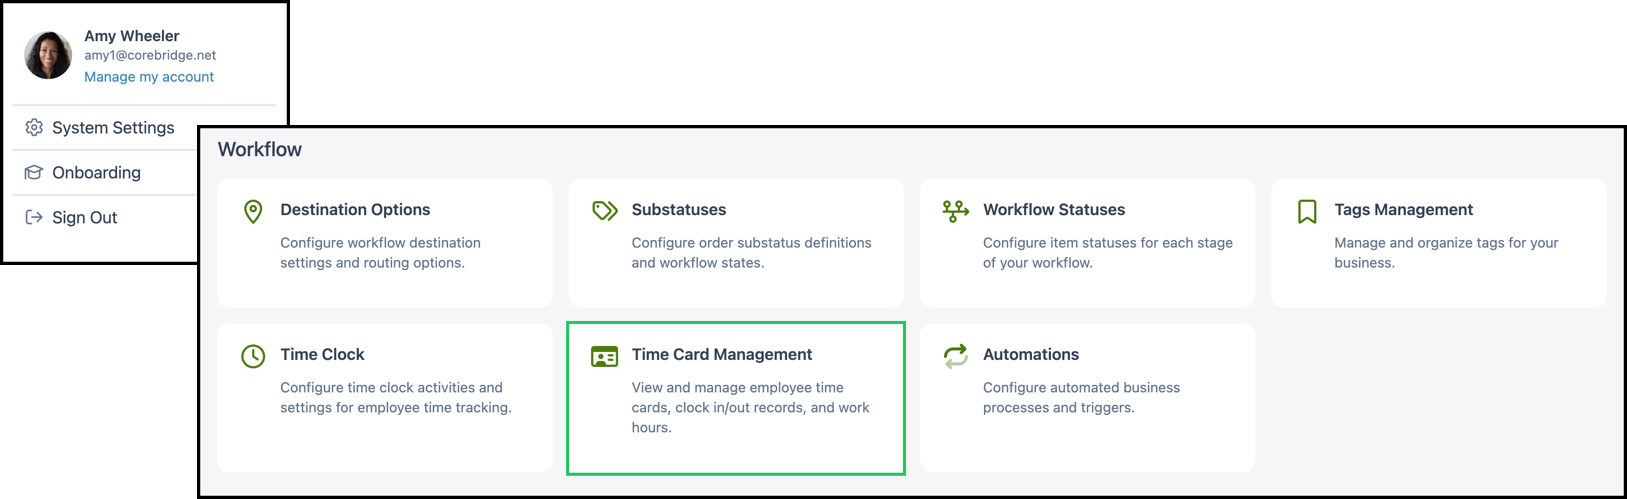
Navigate to System Settings / Workflow / Time Clock.

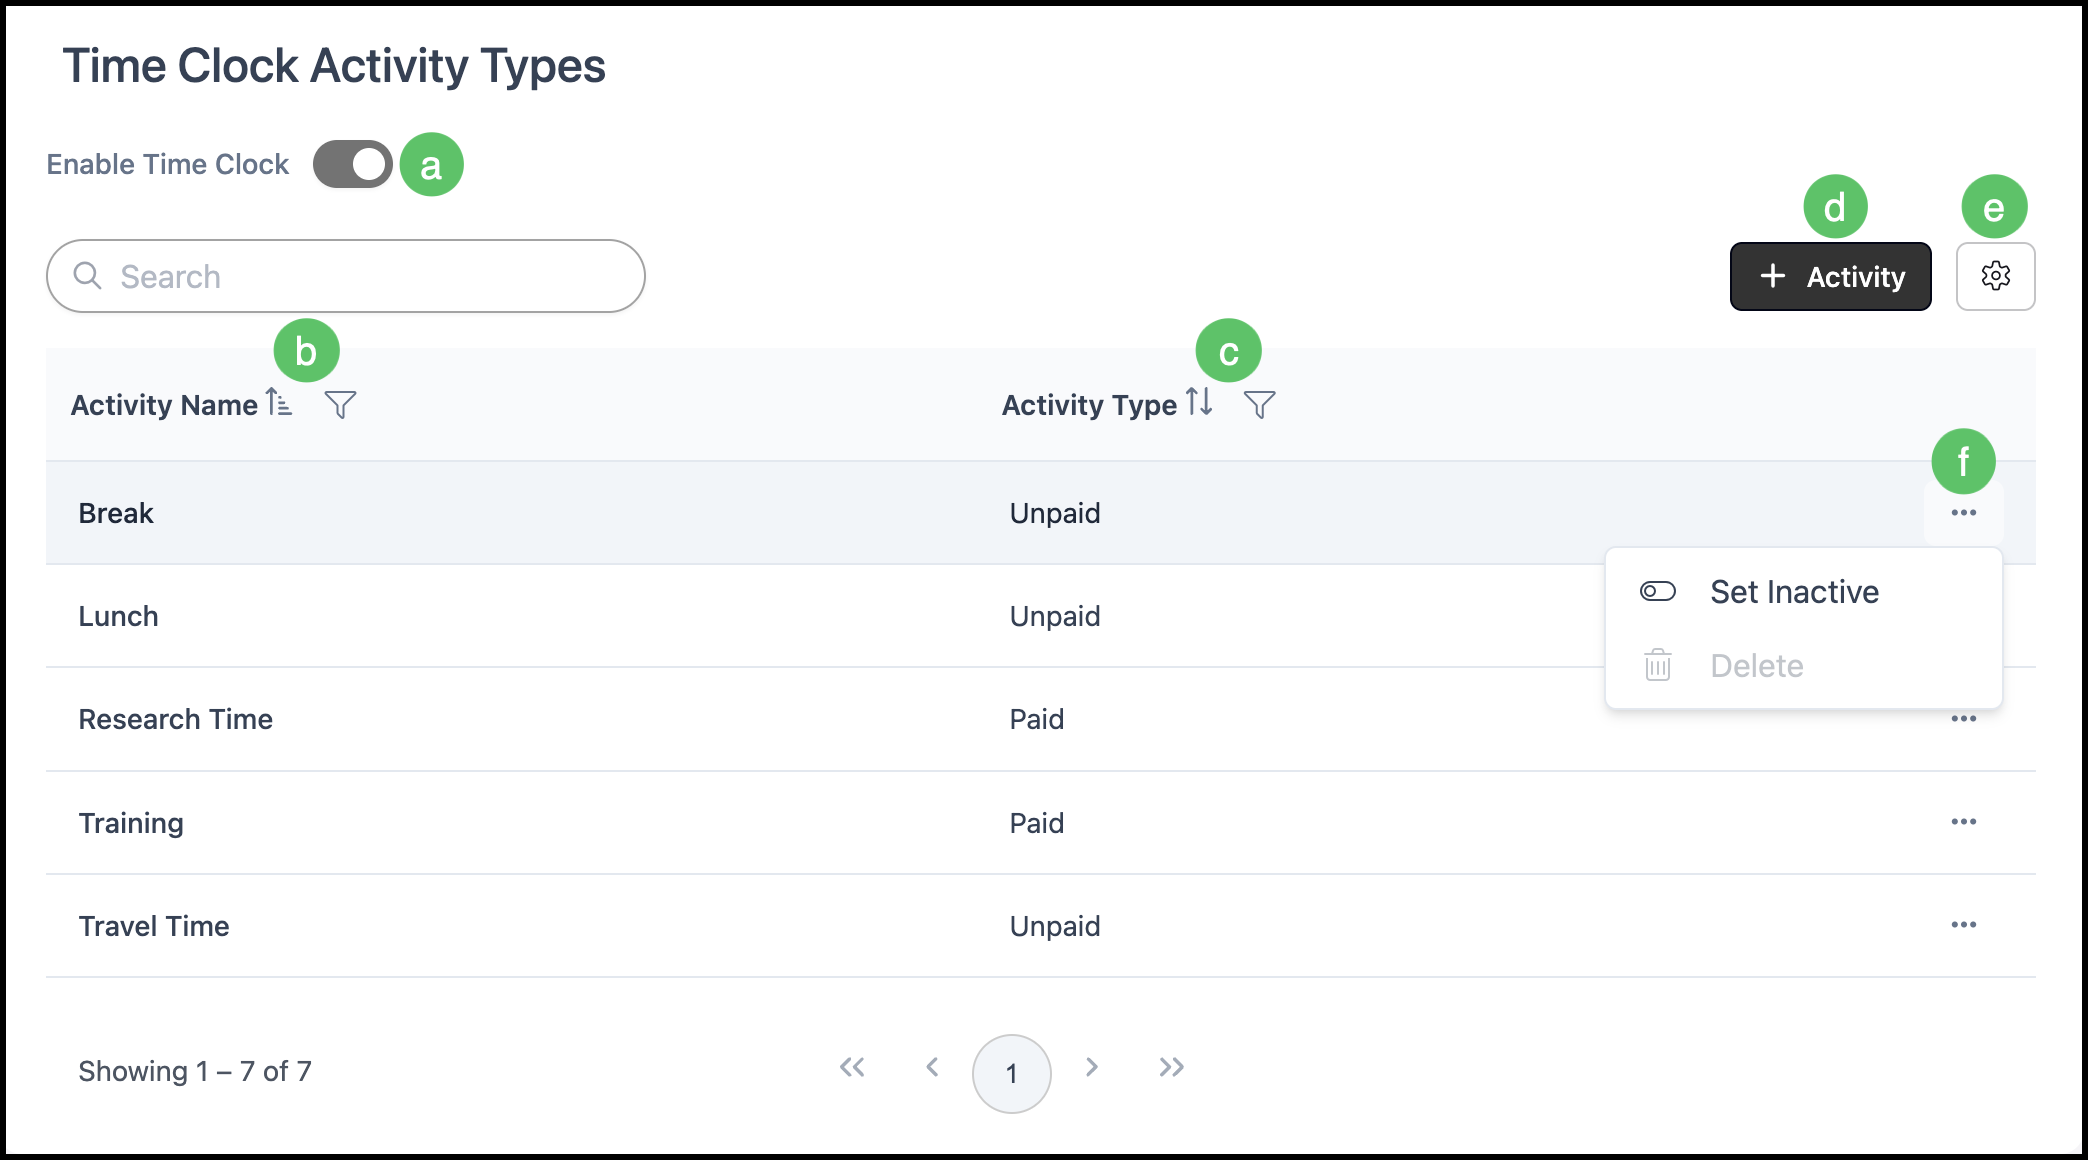
a. Enable Time Clock switch allows Employees to use Time Clock features when the switch is on.
b. Activity Name can be sorted and filtered.
c. Activity Type (Paid or Unpaid).
e. Sort - This icon is visible on many columns or lists throughout the system. Clicking it will change the order of the display.
Note: When multiple columns are present, only one controls how items are sorted. The column currently driving the display is identified by a distinct Sort icon, which appears differently from the arrows in the other columns.
f. Column Filters - This icon is visible on many columns throughout the system. This allows you to set rules that will filter the results for this column. See Column Filters Example below.
d. To add an activity, click Activity.
e. Search Settings allows you to view inactive records.
f. The ellipsis gives you options to Set Inactive or Delete.
Note: Activities currently being used will not have the option to Delete.
Adding Activities
Navigate to System Settings / Workflow / Time Clock.
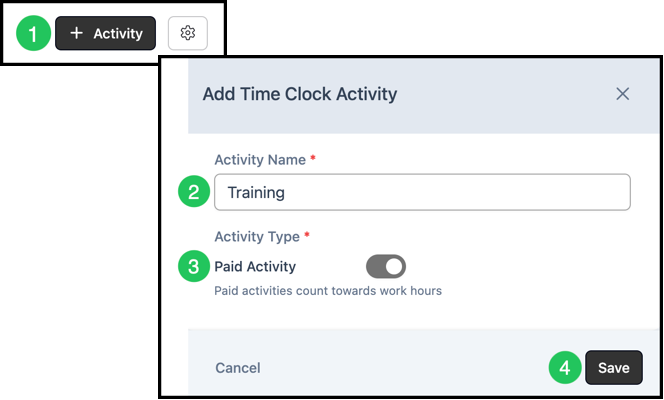
1. Click Add Activity button.
2. Fill in the Activity Name.
3. Select whether this is a Paid or Unpaid Activity.
4. Click Save.
Editing Time Clock Entries
Editing another employee’s time is limited to users with the appropriate manager or owner-level permissions. That restriction keeps payroll and labor history accurate.
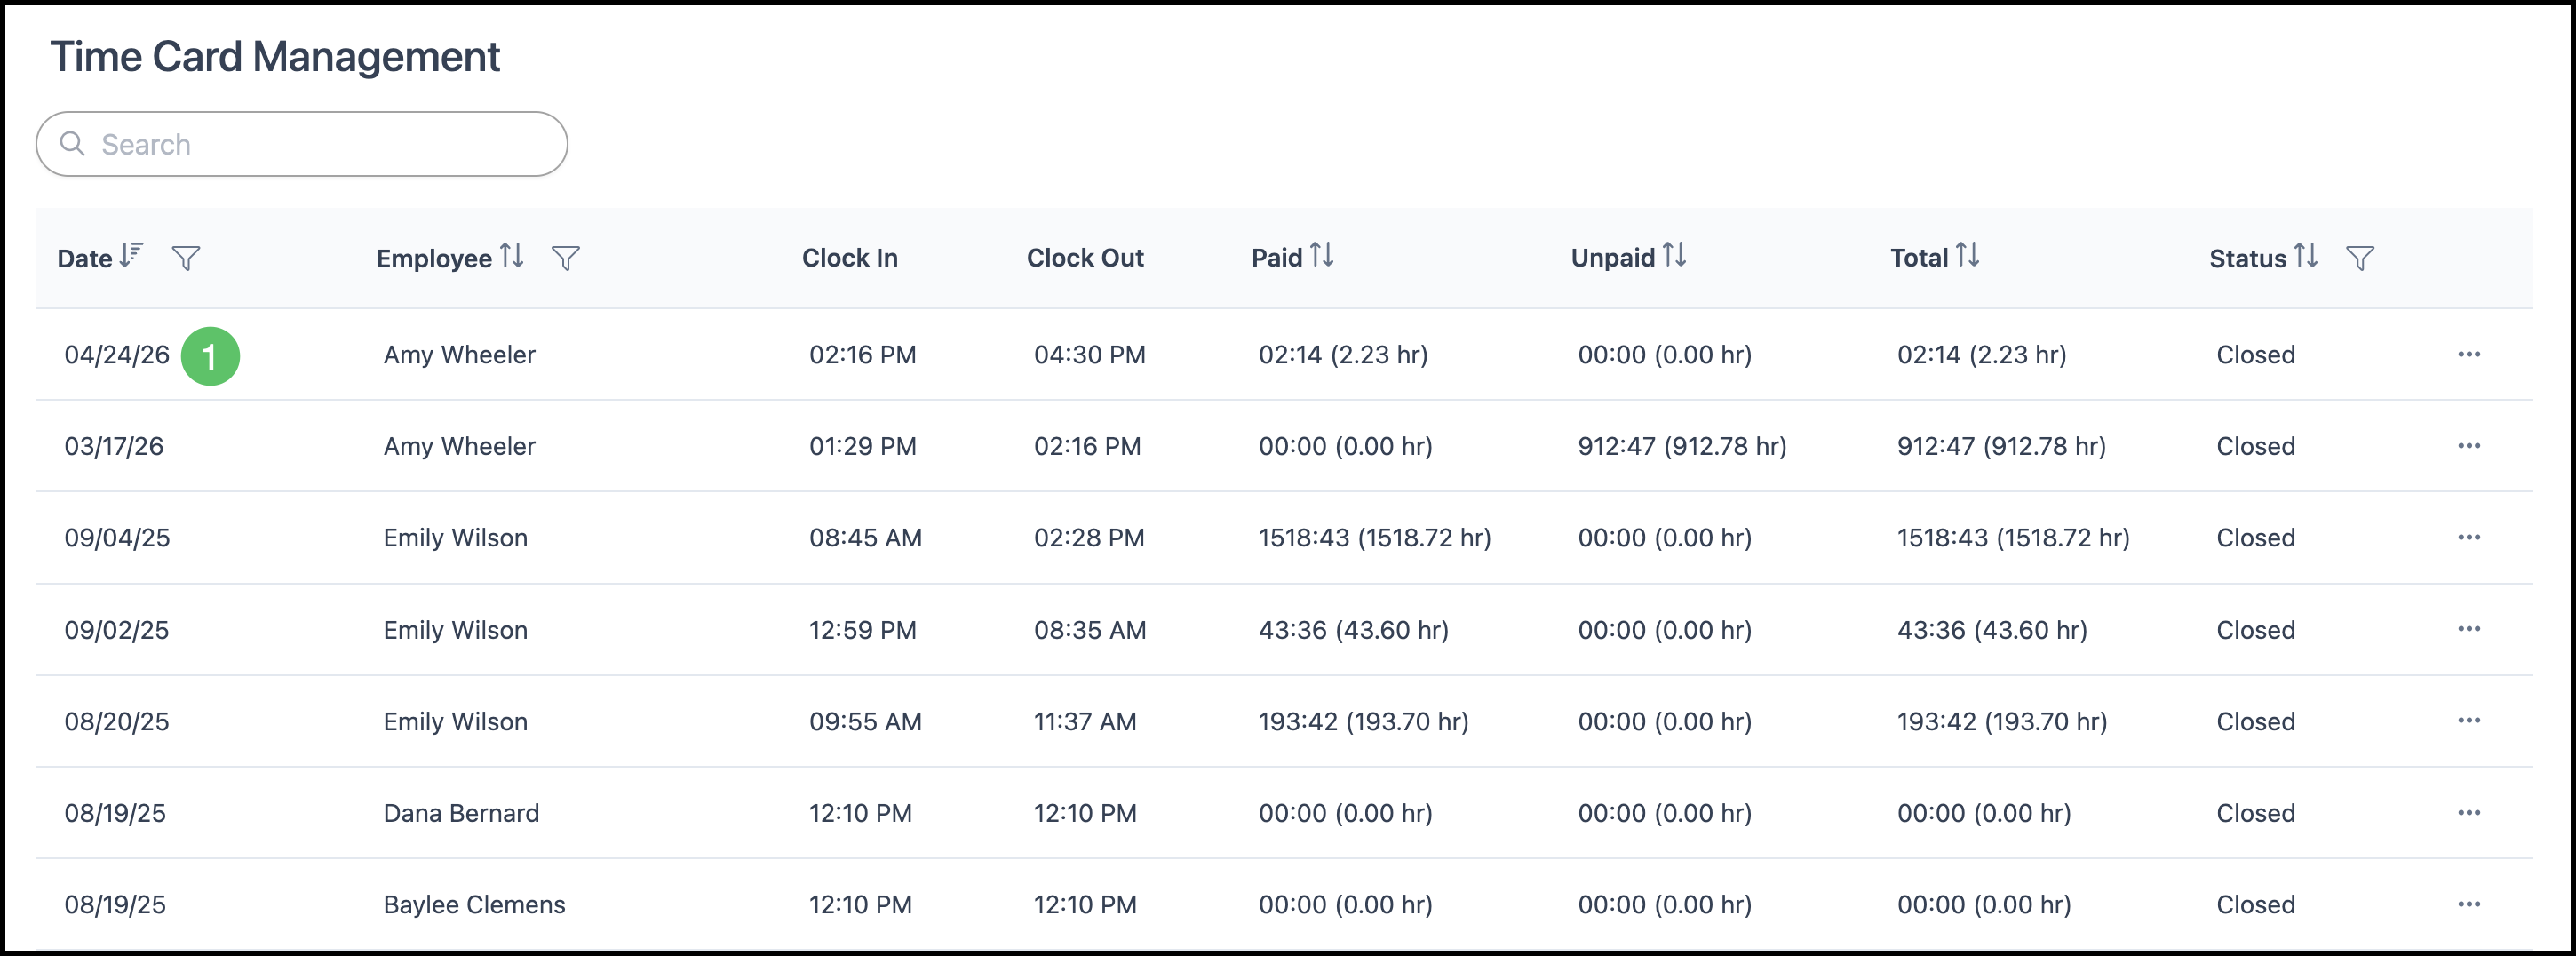
Navigate to Settings / Workflow / Time Card Management.
Note: If you do not see Time Card Management under Workflow, you may lack permission for this area. Ask a system administrator to confirm your Employee Role and Permissions, or contact CoreBridge support for guidance.
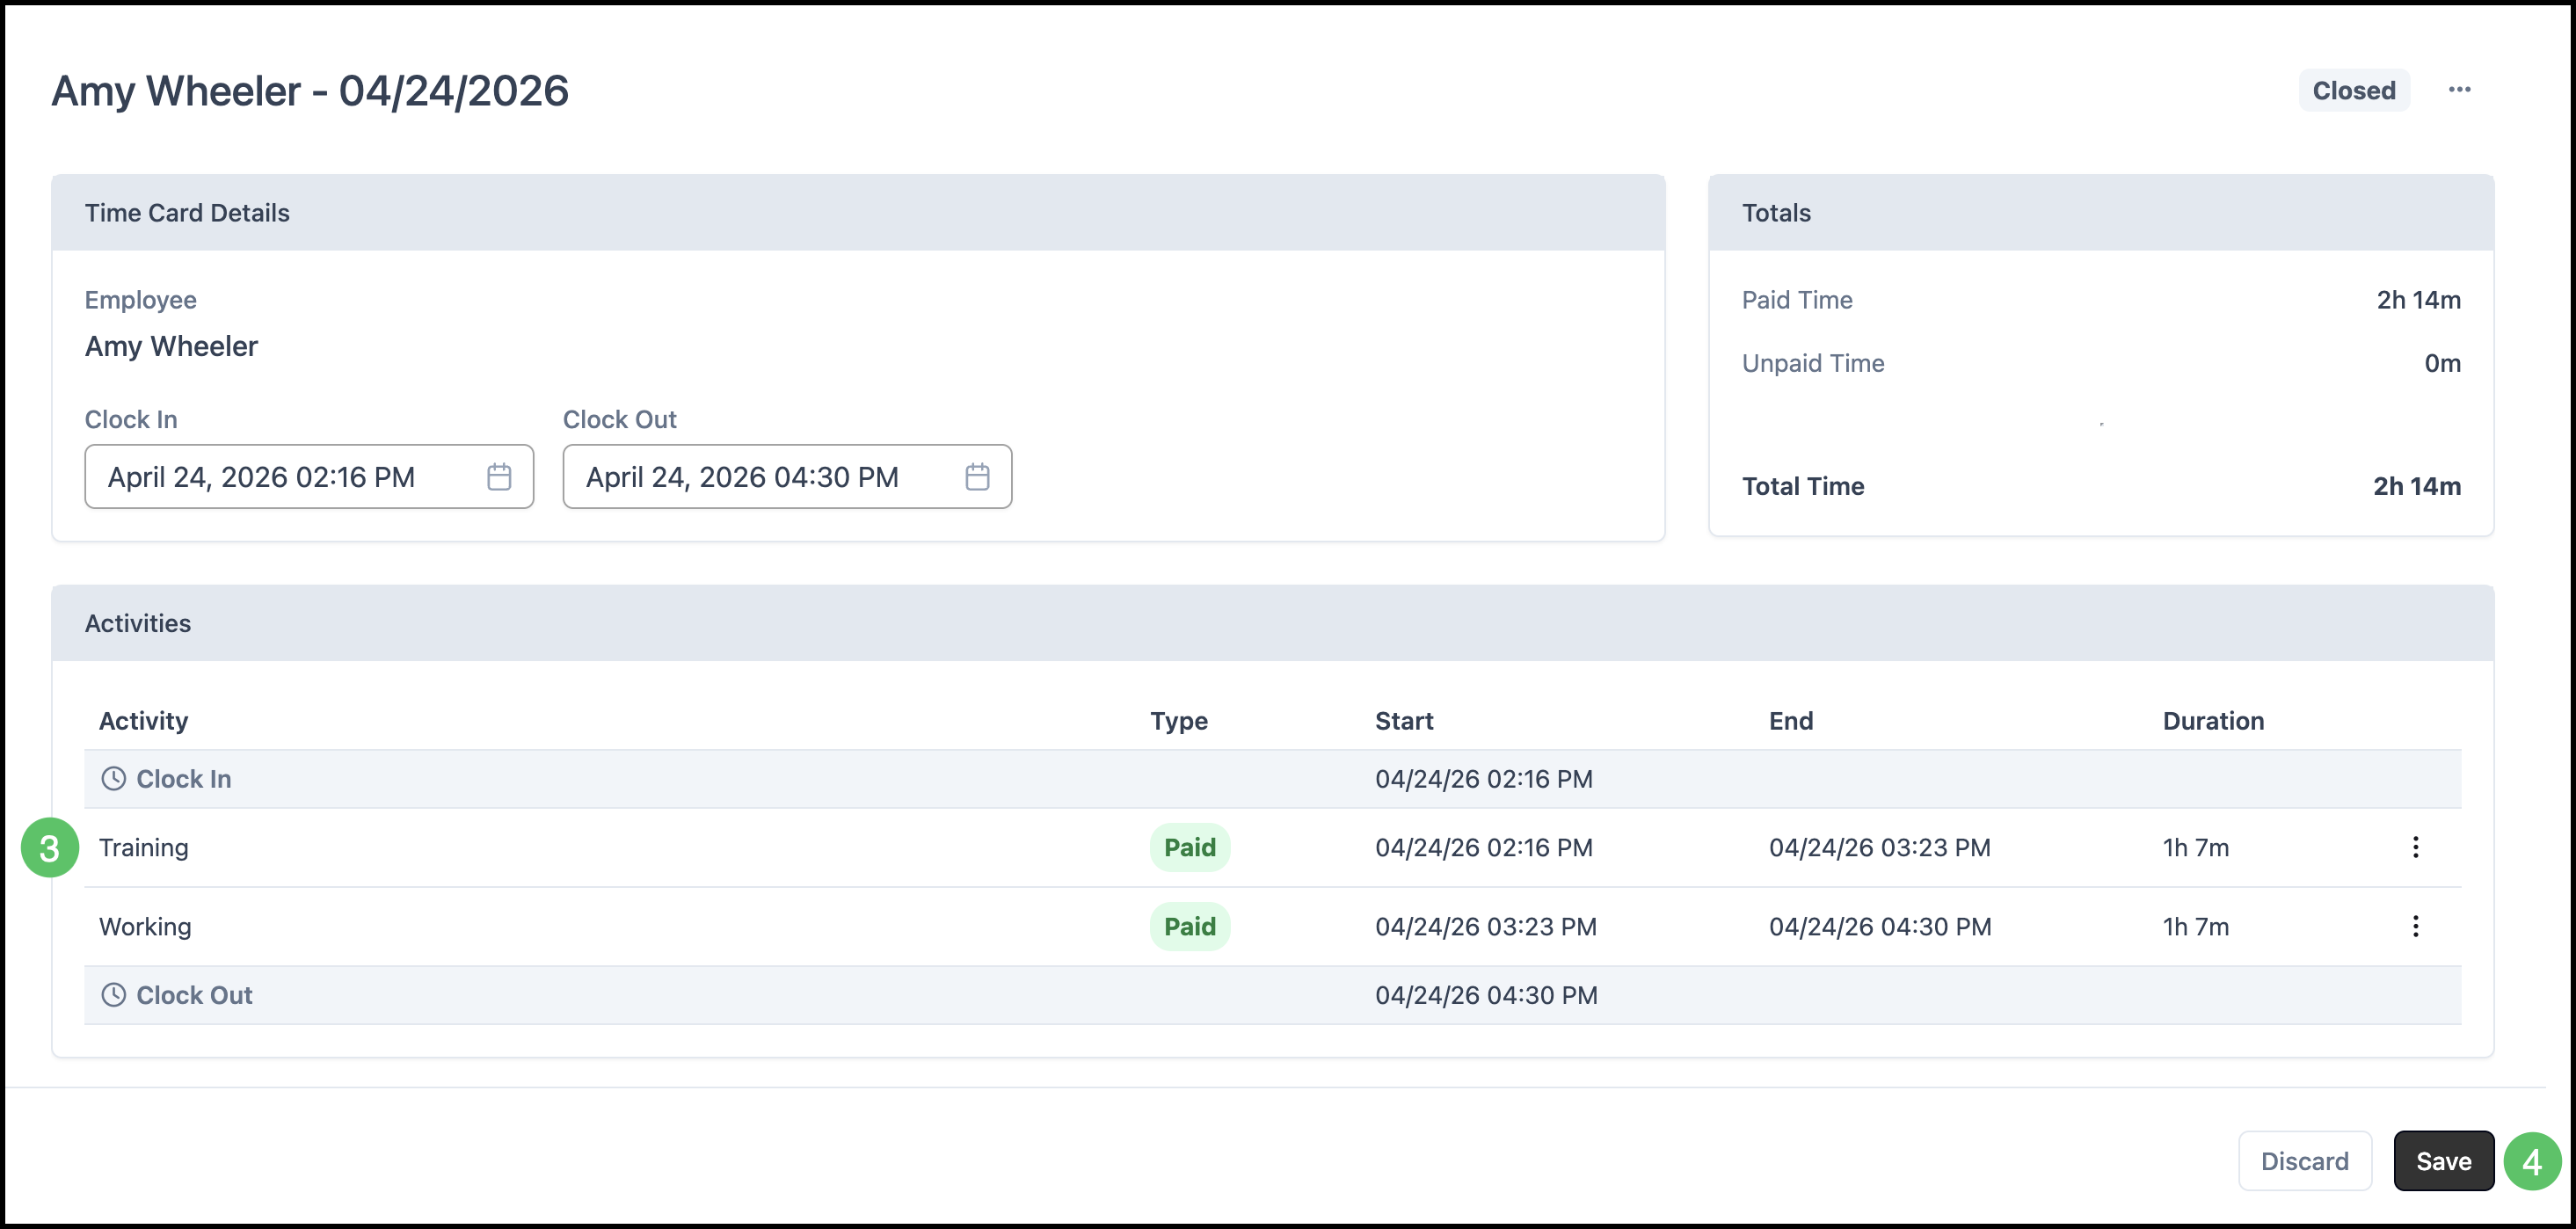
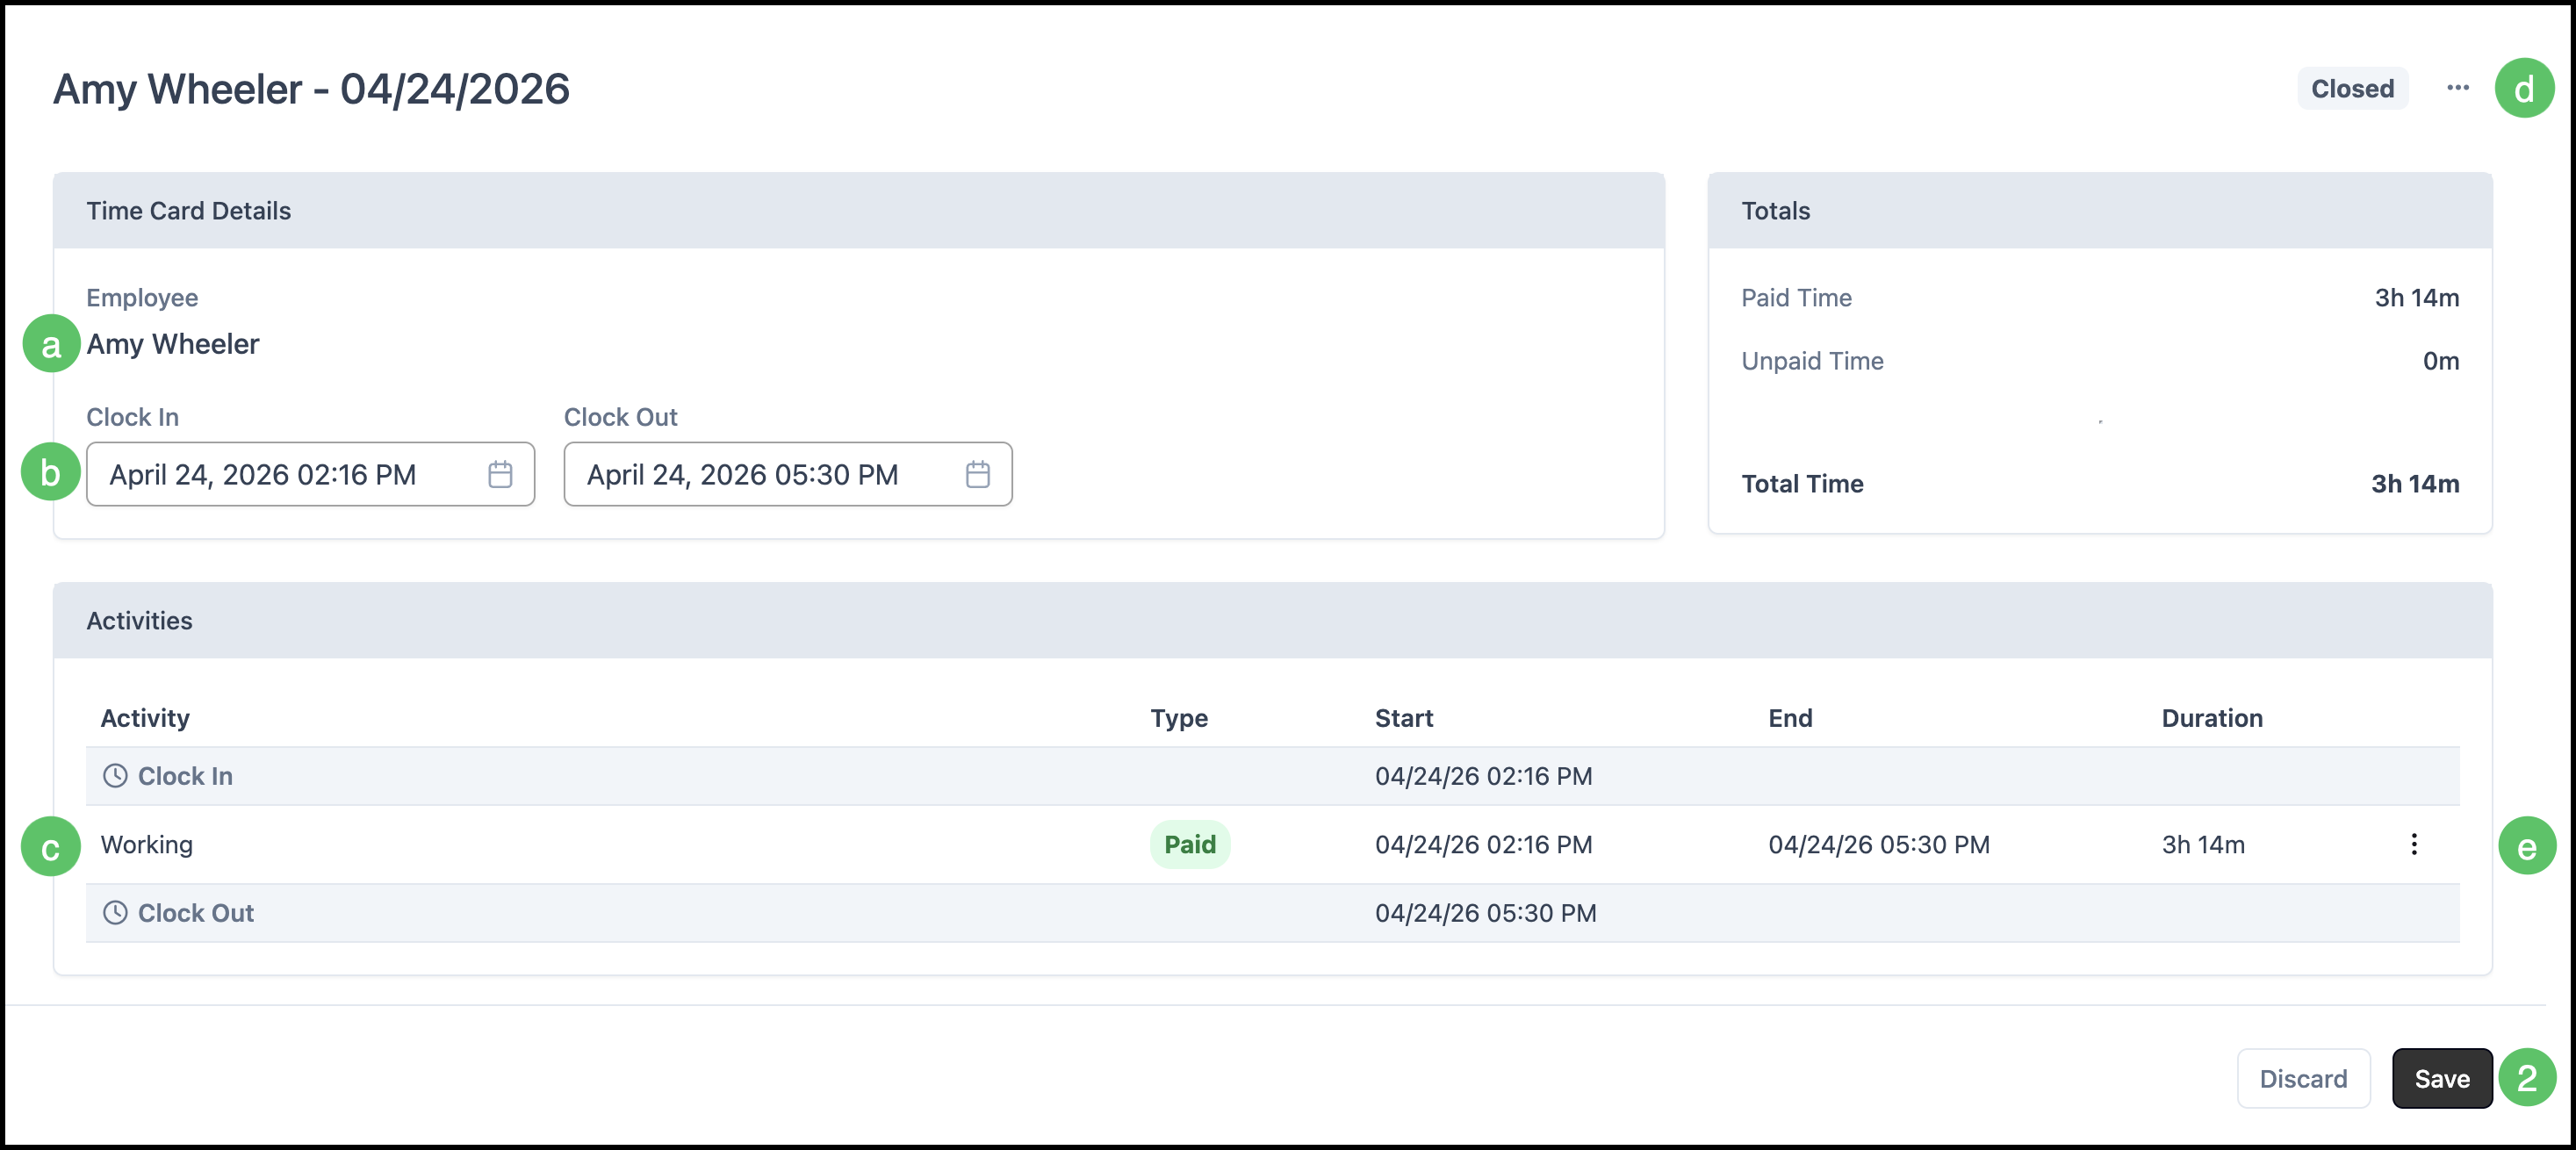
1. From the Time Tracking list, open the entry that needs adjustment.
a. The Employee field identifies whose time card you are viewing. To work on a different person, return to the list and select another entry.
b. Use the Clock In and Clock Out dropdowns to correct punch times. See Adjusting Clock In or Out Times below for detailed use of the time controls.
c. Change the Activity assigned to a segment using the activity field or dropdown for that line. See Changing Activity Selection.
d. Use the Actions menu to delete the time card when policy allows.
e. Where activities are listed for the shift, the Actions menu lets you split segments. See Splitting Activities.
2. Click Save to keep your edits.
Adjusting Clock In or Out Times
After you open a time entry from Time Tracking, adjust the recorded Clock In or Clock Out timestamps.
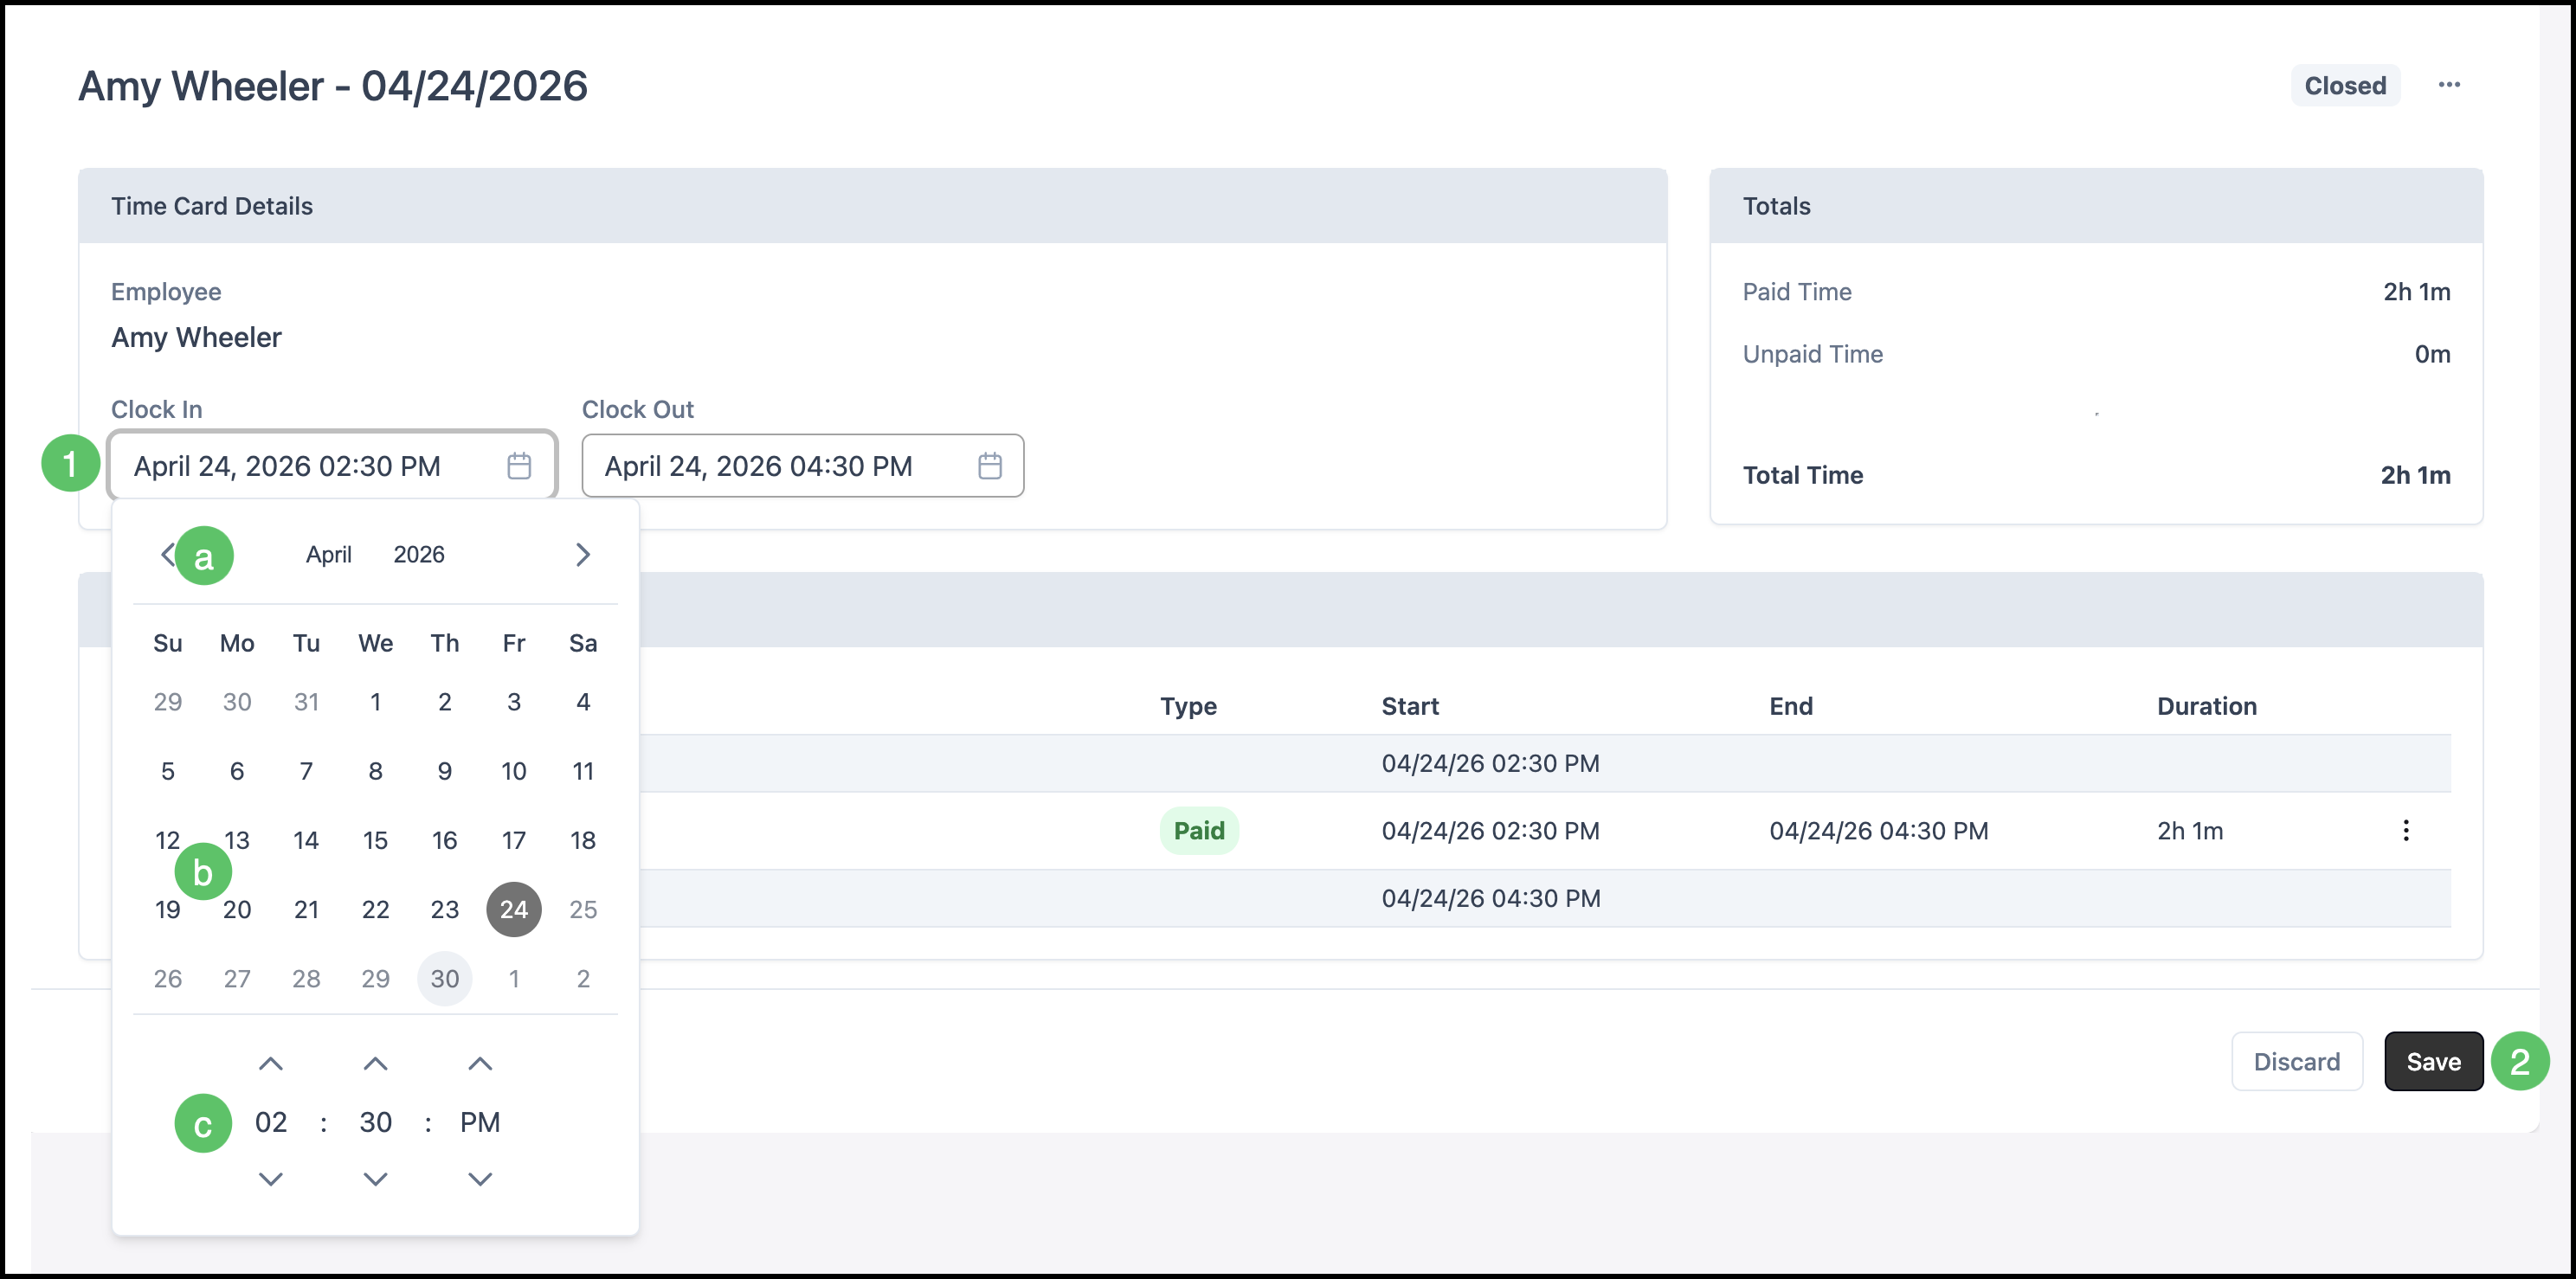
1. Open the picker for Clock In or Clock Out.
a. Move by month when a month control is shown.
b. Choose the correct calendar day for the punch.
c. Set hour, minute, and AM or PM with the arrows or fields provided.
2. Click Save.
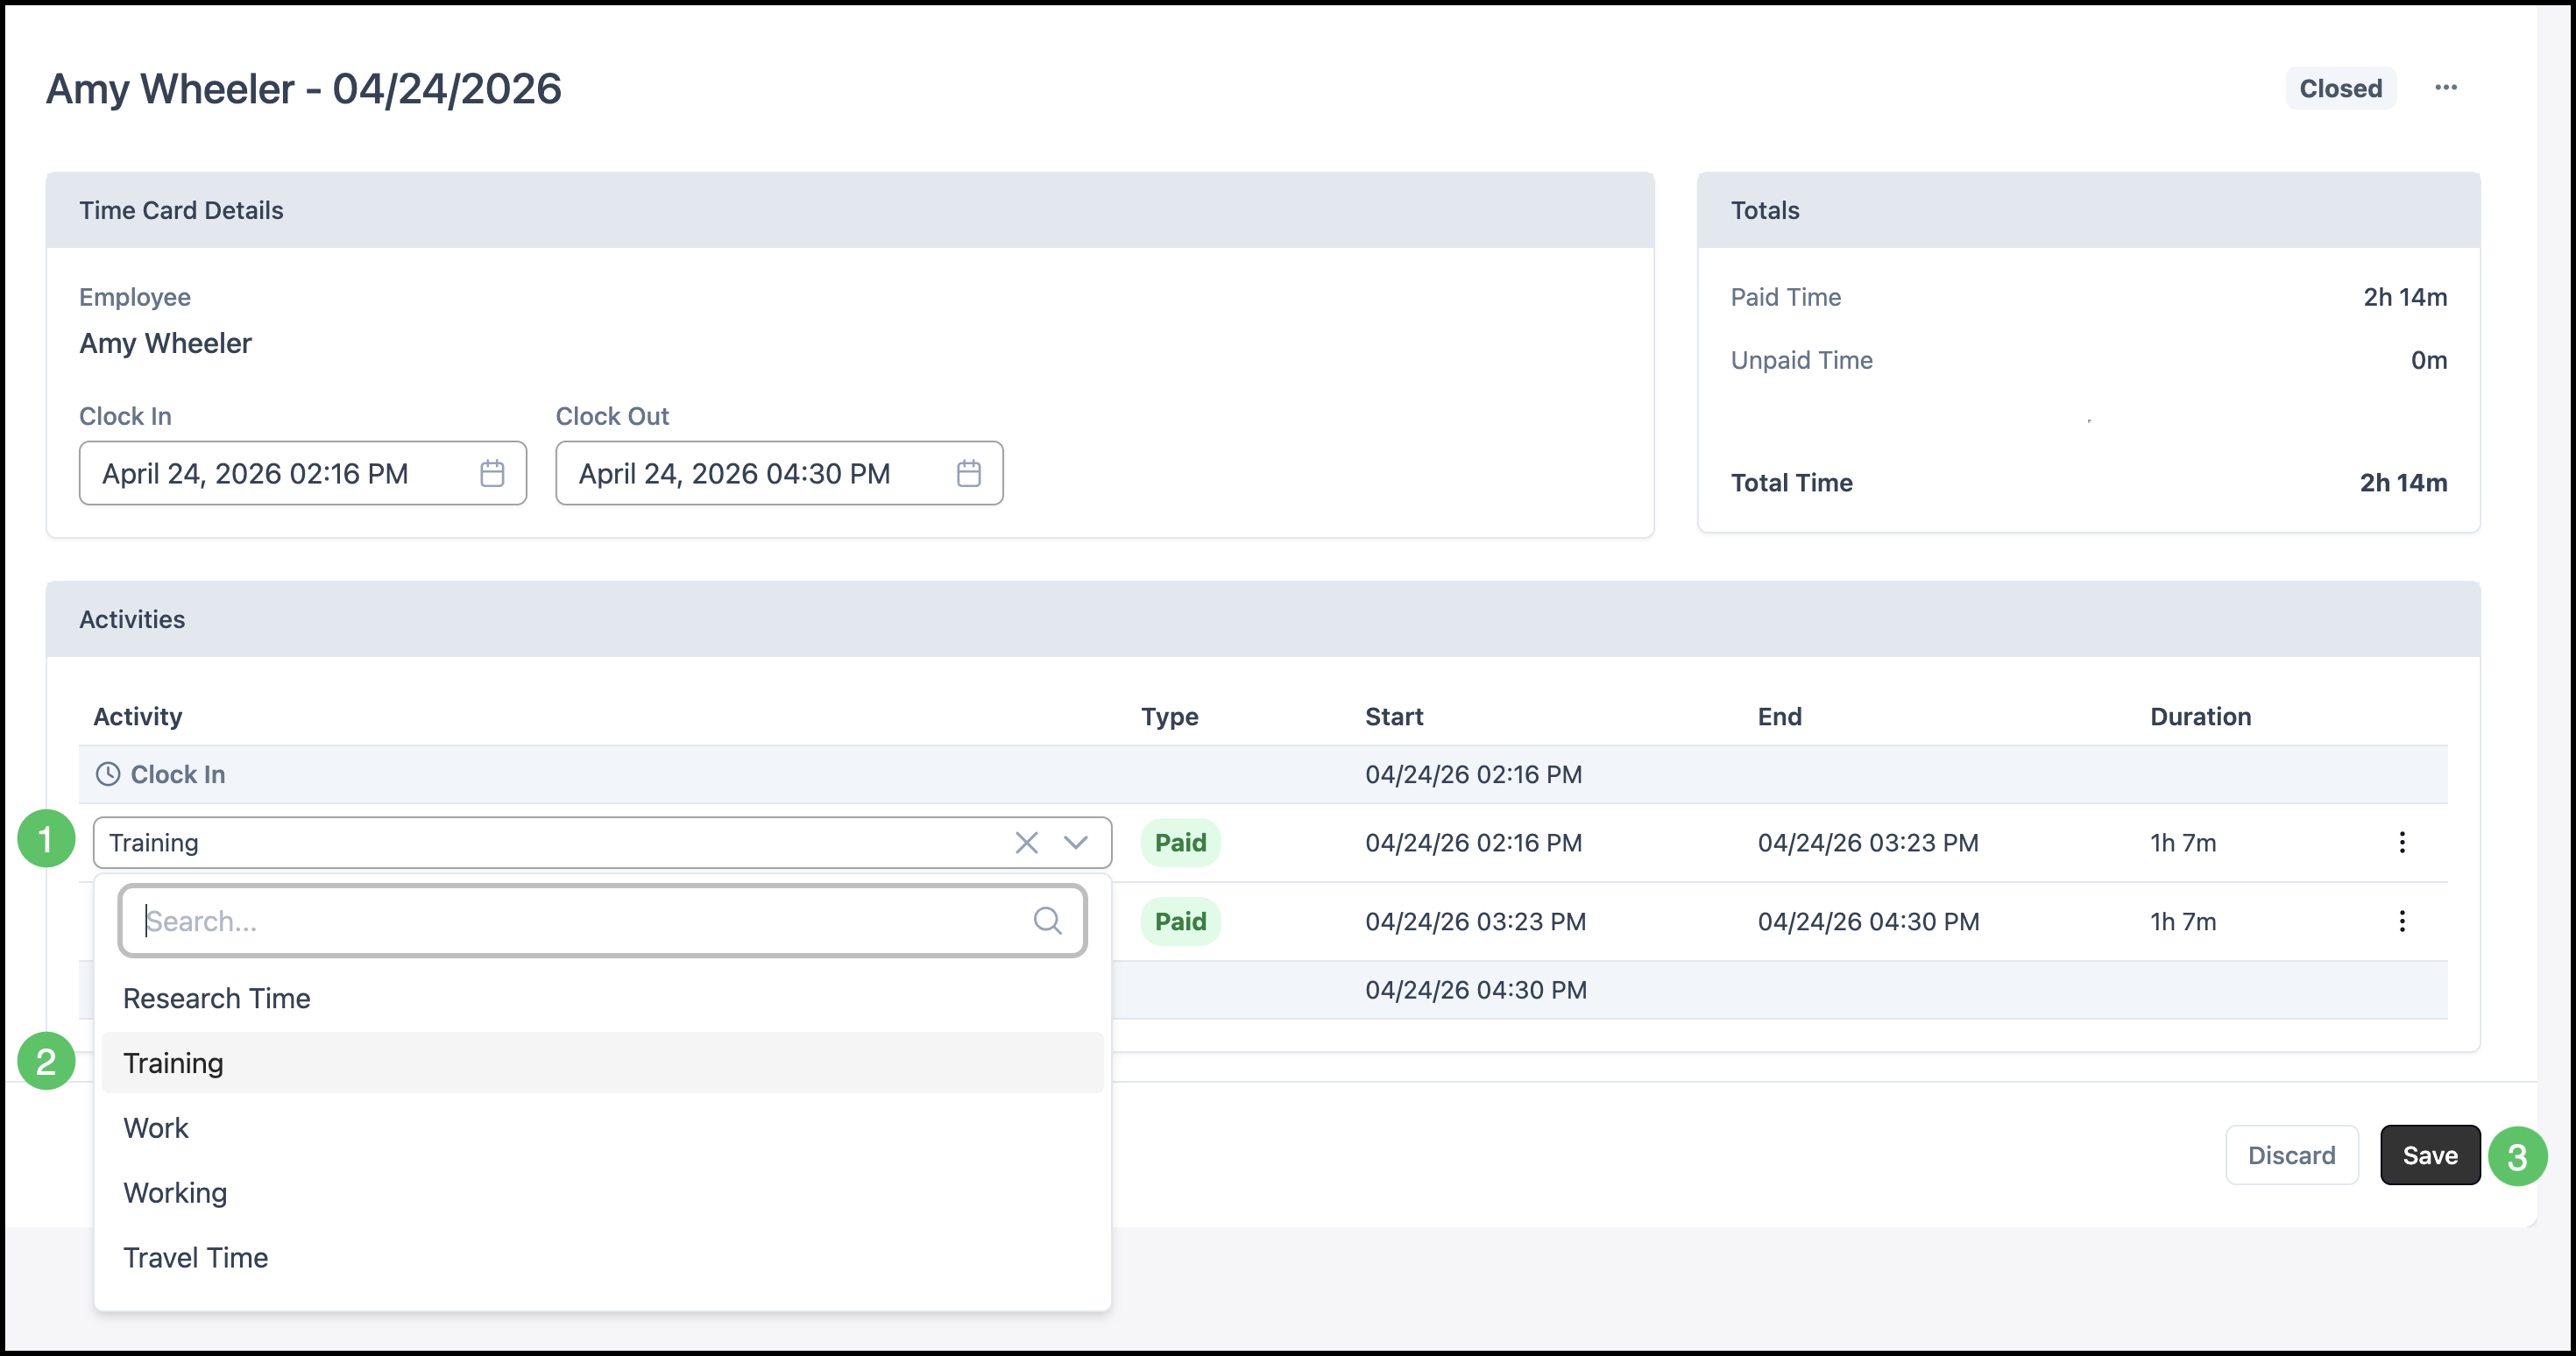
Changing Activity Selection
Inside a time entry, you can change which Activity applies to a segment.
1. Click into the Activity field.
2. Select another Activity from the list.
Note: Activities available in the list are maintained on System Settings / Workflow / Time Clock.
3. Click Save.
Splitting Activities
When a shift lists more than one activity segment, you can divide or remove segments within the time card entry so the time card matches what actually happened.
1. Click the Actions menu.
2. Click Split.
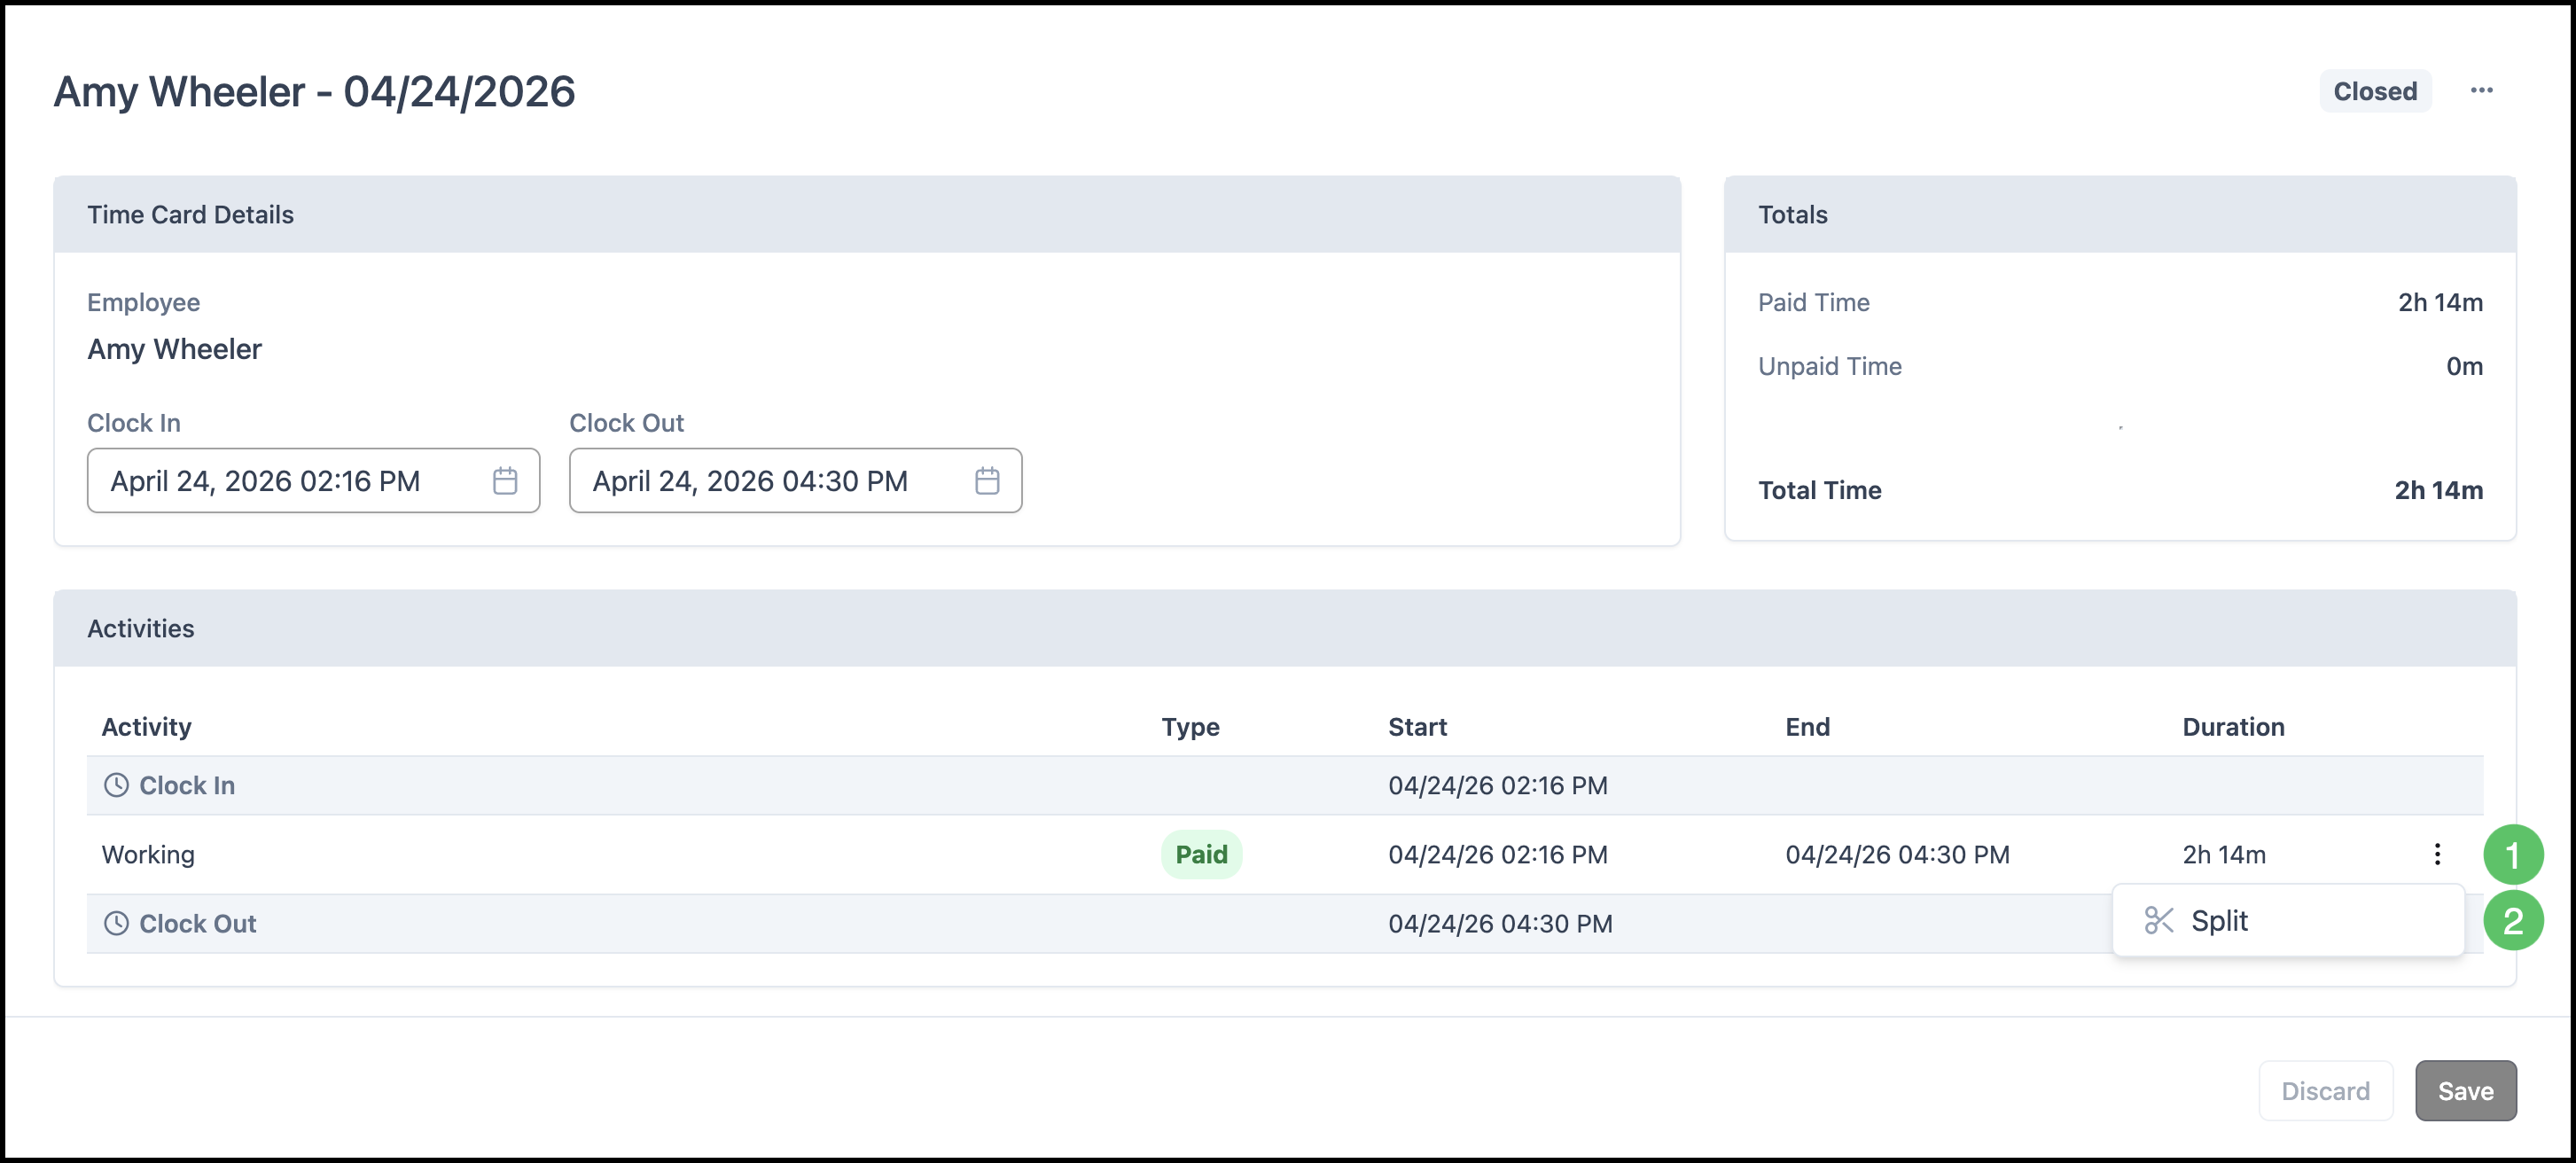
3. Update the Activity information as needed.
4. Click Save.