CoreBridge manages the progress of your Estimates and Orders through a board-based workflow system. This article introduces how boards and statuses work together to move jobs from start to finish.
For more information on Boards, please see Boards Overview.
Table of Contents
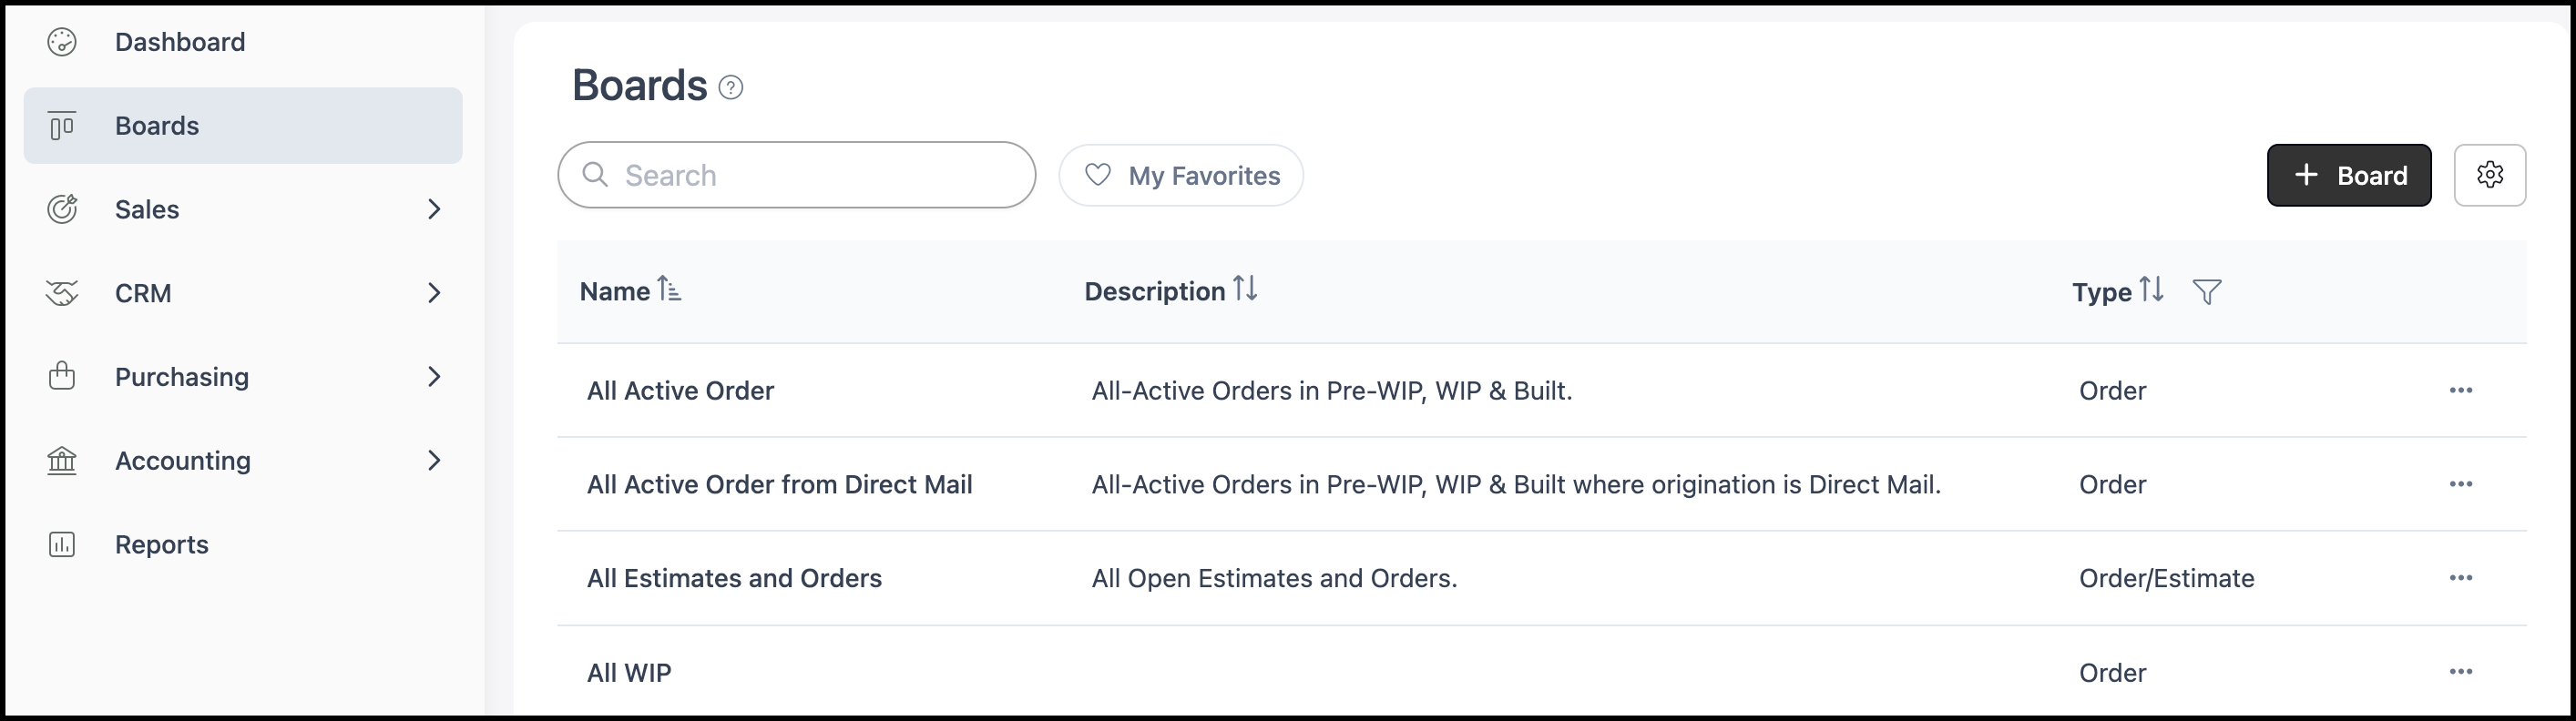
Boards
Boards organize and display your Orders so you can track their progress at a glance. CoreBridge has two types of Boards, and understanding the difference helps you choose the right view for your team's needs.
Navigate to the Boards module.
a. Board Type - Displays the type of Board. The column can be filtered to show only the Board types relevant to your workflow. See example below.
b. Clicking on any of the rows will open that Board.
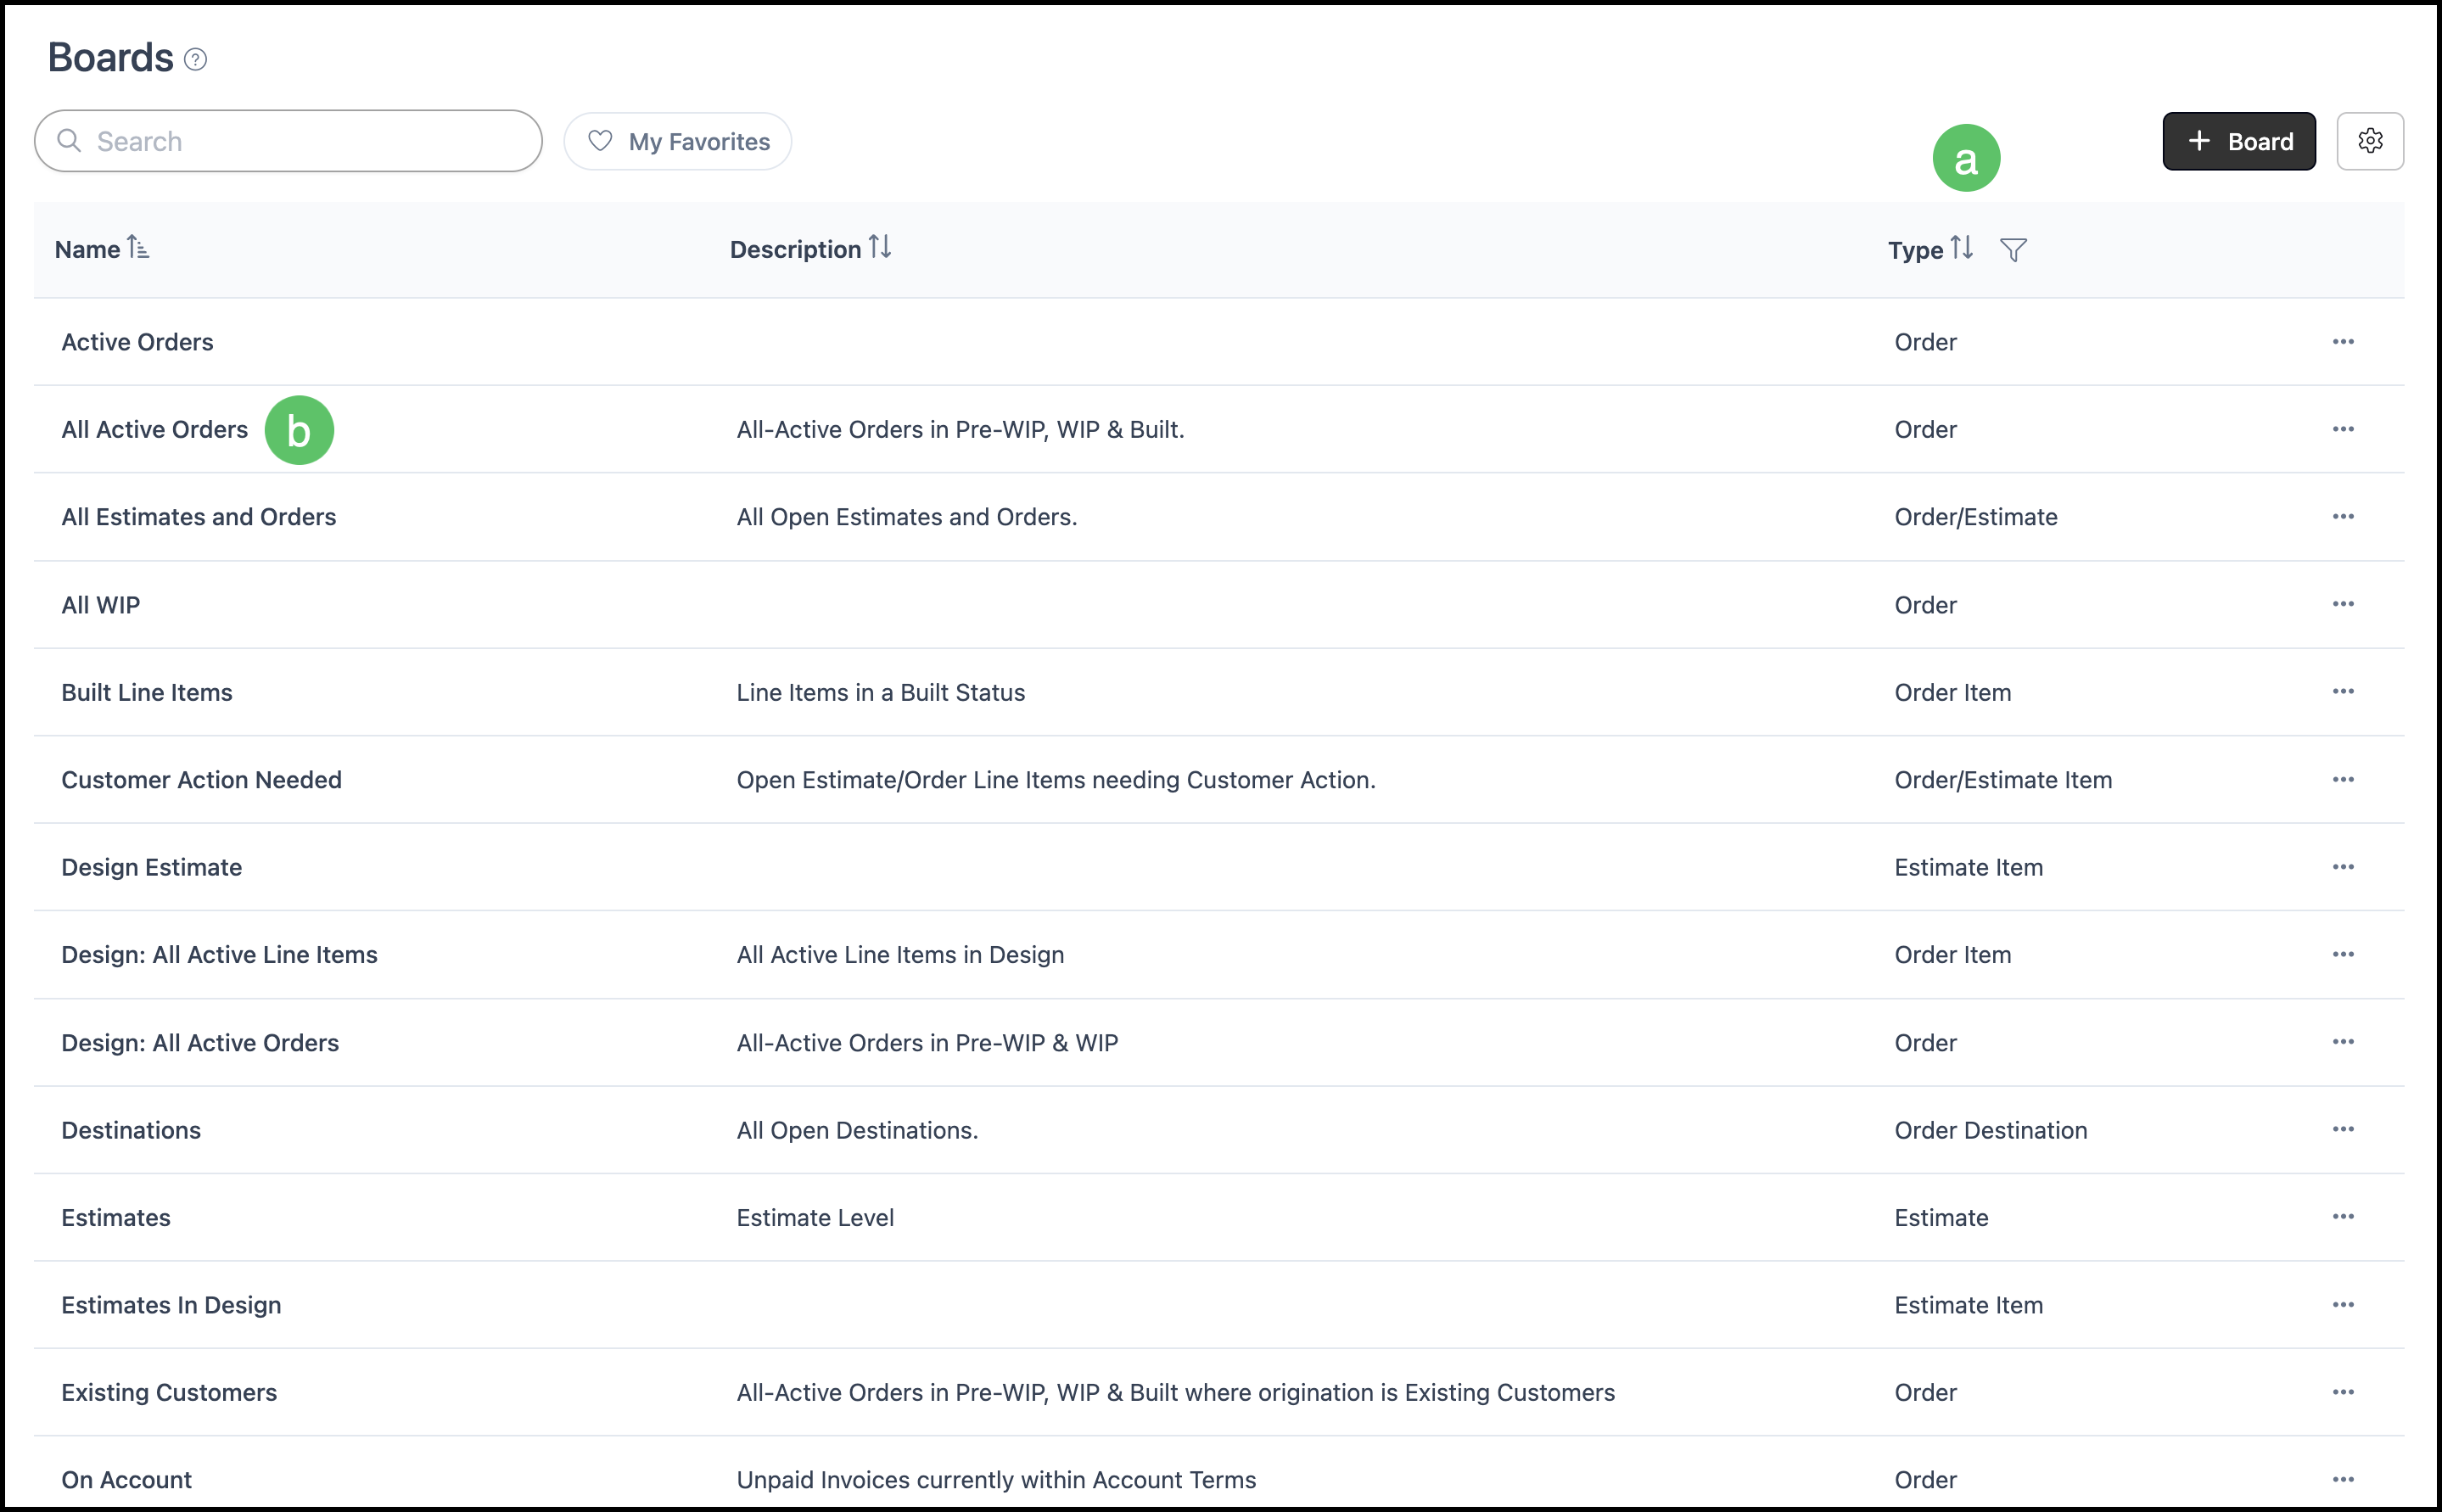
Example:

Estimate and Order-Level Boards
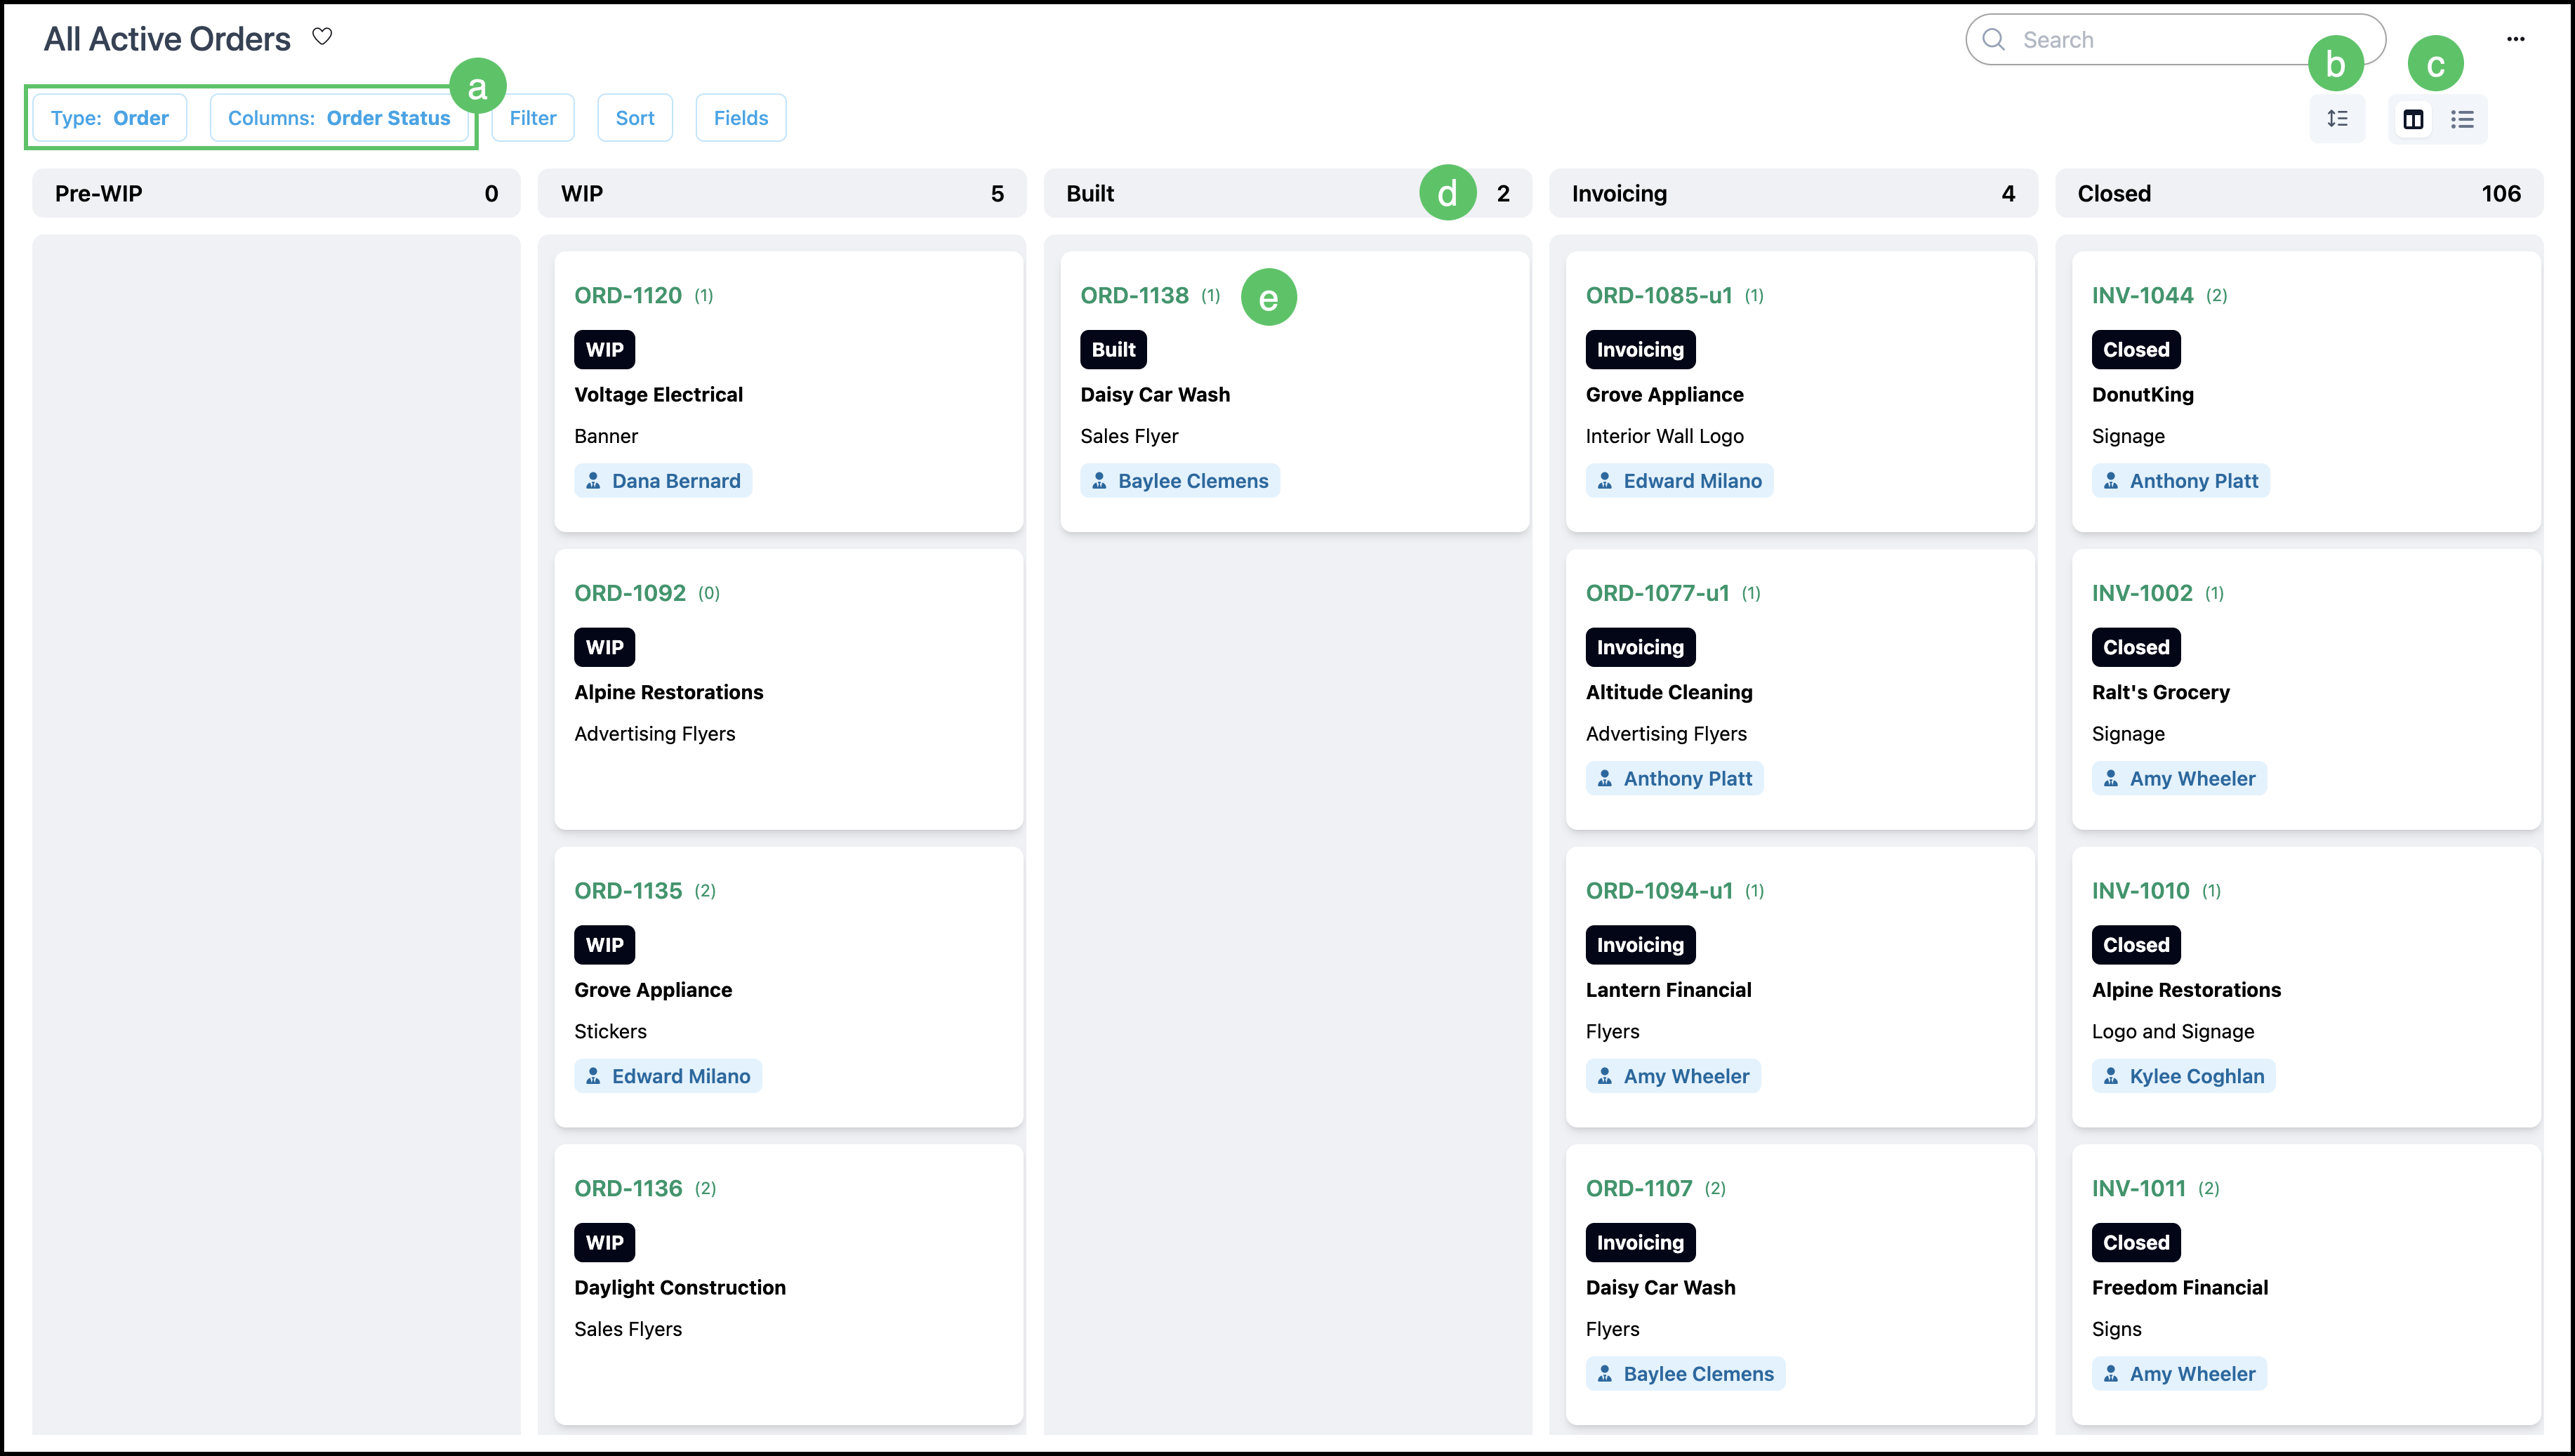
An Estimate or Order-level or Board displays one card or row per record. All Line Items on that Estimate or Order are grouped together into a single card, so an Order with multiple Line Items appears as one entry on the board. Clicking and dragging cards from one column to the next moves the record along in the workflow.
Card View:
a. Type and Columns describe the active configuration and are only changeable when in Edit mode for this Board.
b. Card display toggle - Alternates between compact and expanded Cards.
Note: This icon is only visible when in Card view.
c. The paired icons switch between Card view and List view.
d. This number indicates how many cards are in the column.
e. Each card represents an entire record, either an Estimate or Order. Clicking on the card opens up a side panel with additional information.
Note: The green hyperlink takes you to that record.
List View:
a. Type describes the configuration of this Board.
b. The paired icons switch between Card view and List view.
c. Each row represents a single record, either an Estimate or an Order. Clicking on the row opens up a side panel with additional information.

Item-Level Boards
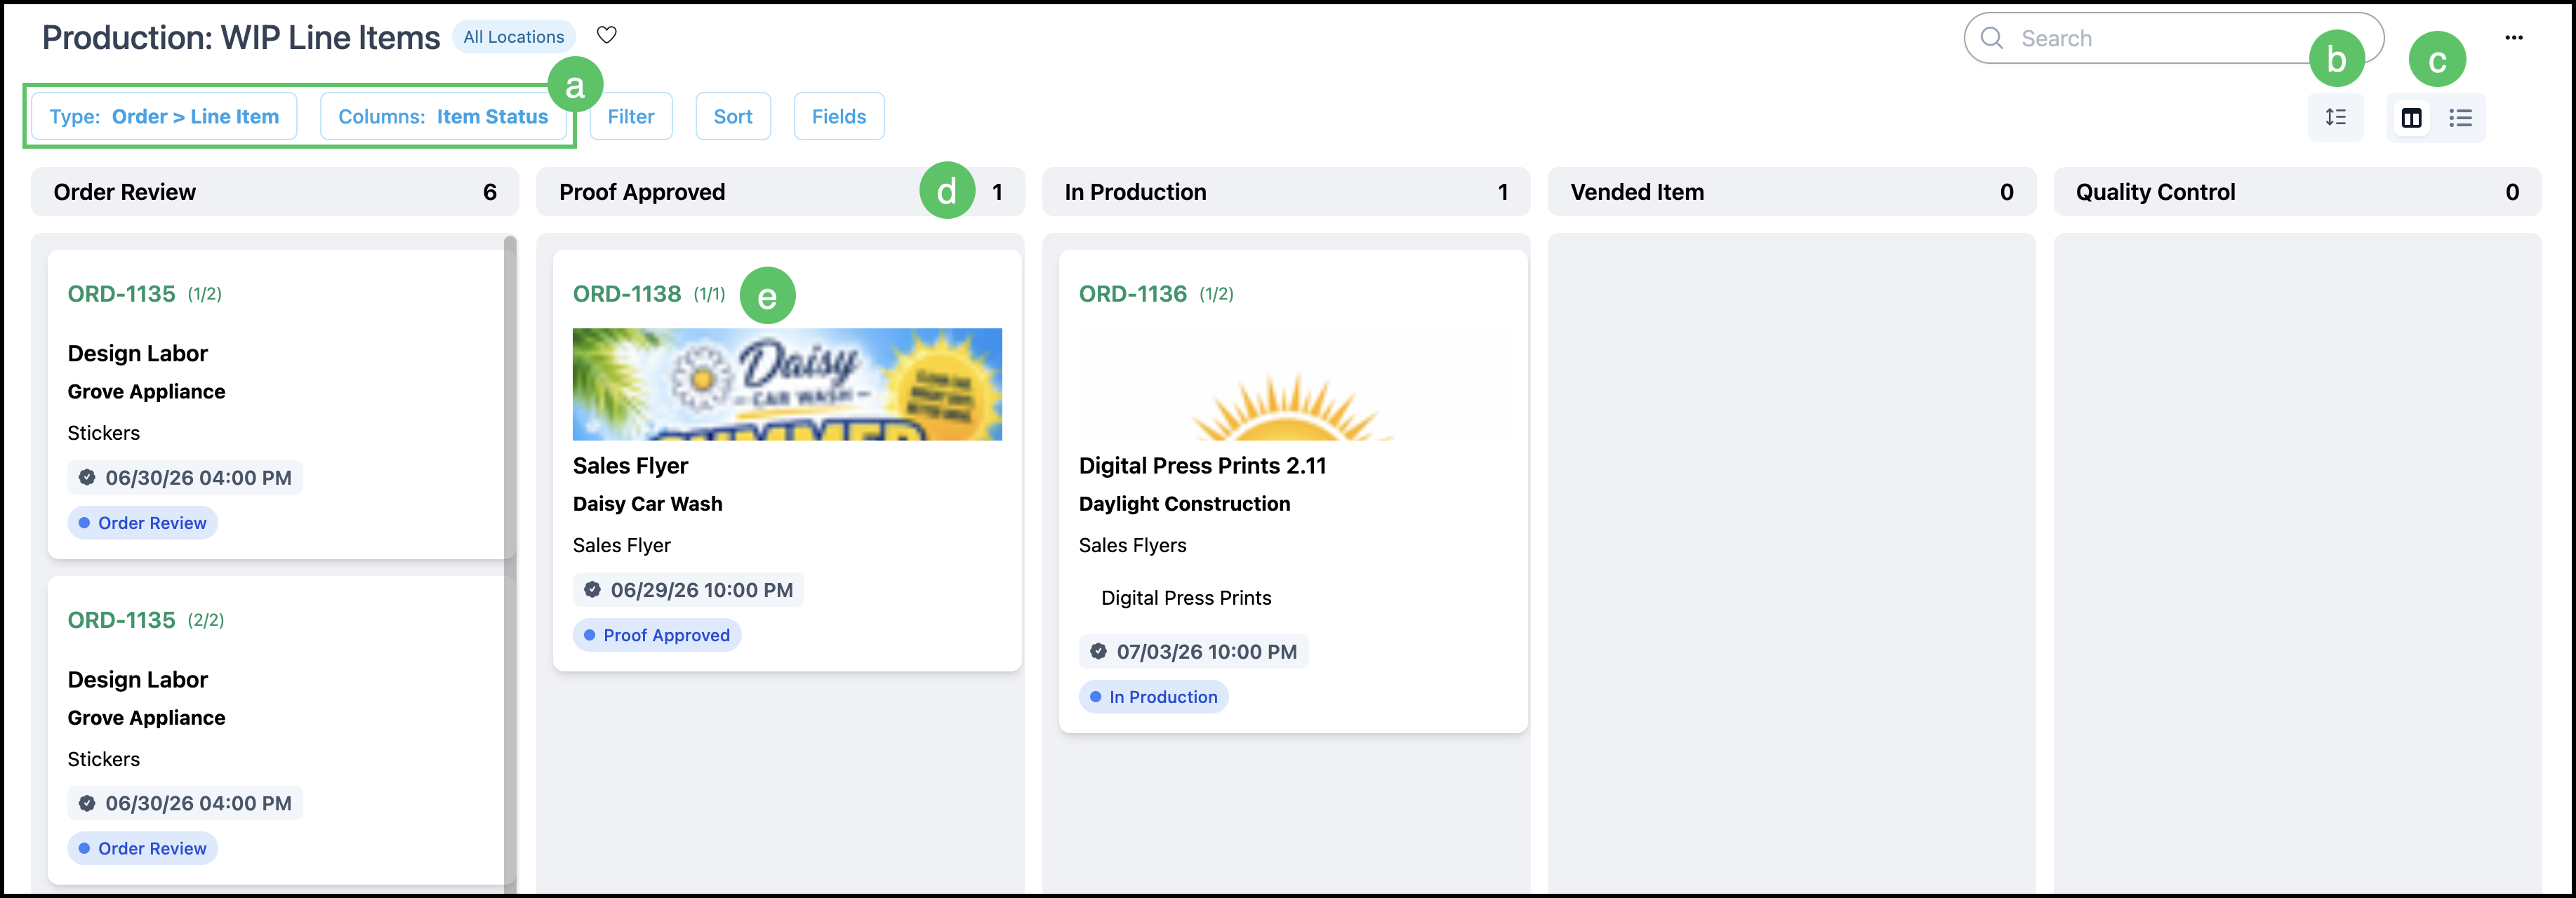
An Item-Level board displays a separate card for each Line Item. If an Order has two Line Items, you will see two cards - Line Item 1 of 2 and Line Item 2 of 2. This view is useful for production teams that need to track individual pieces of work independently. Clicking and dragging cards from one column to the next moves the Line Item along in the workflow.
Card View:
a. Type and Columns describe the active configuration and are only changeable when in Edit mode for this Board.
b. Card display toggle - Alternates between compact and expanded Cards.
Note: This icon is only visible when in Card view.
c. The paired icons switch between Card view and List view.
d. This number indicates how many cards are in the column.
e. Each card represents a single Line Item. Clicking on the card opens up a side panel with additional information.
Note: The green hyperlink takes you to that record and Line Item.
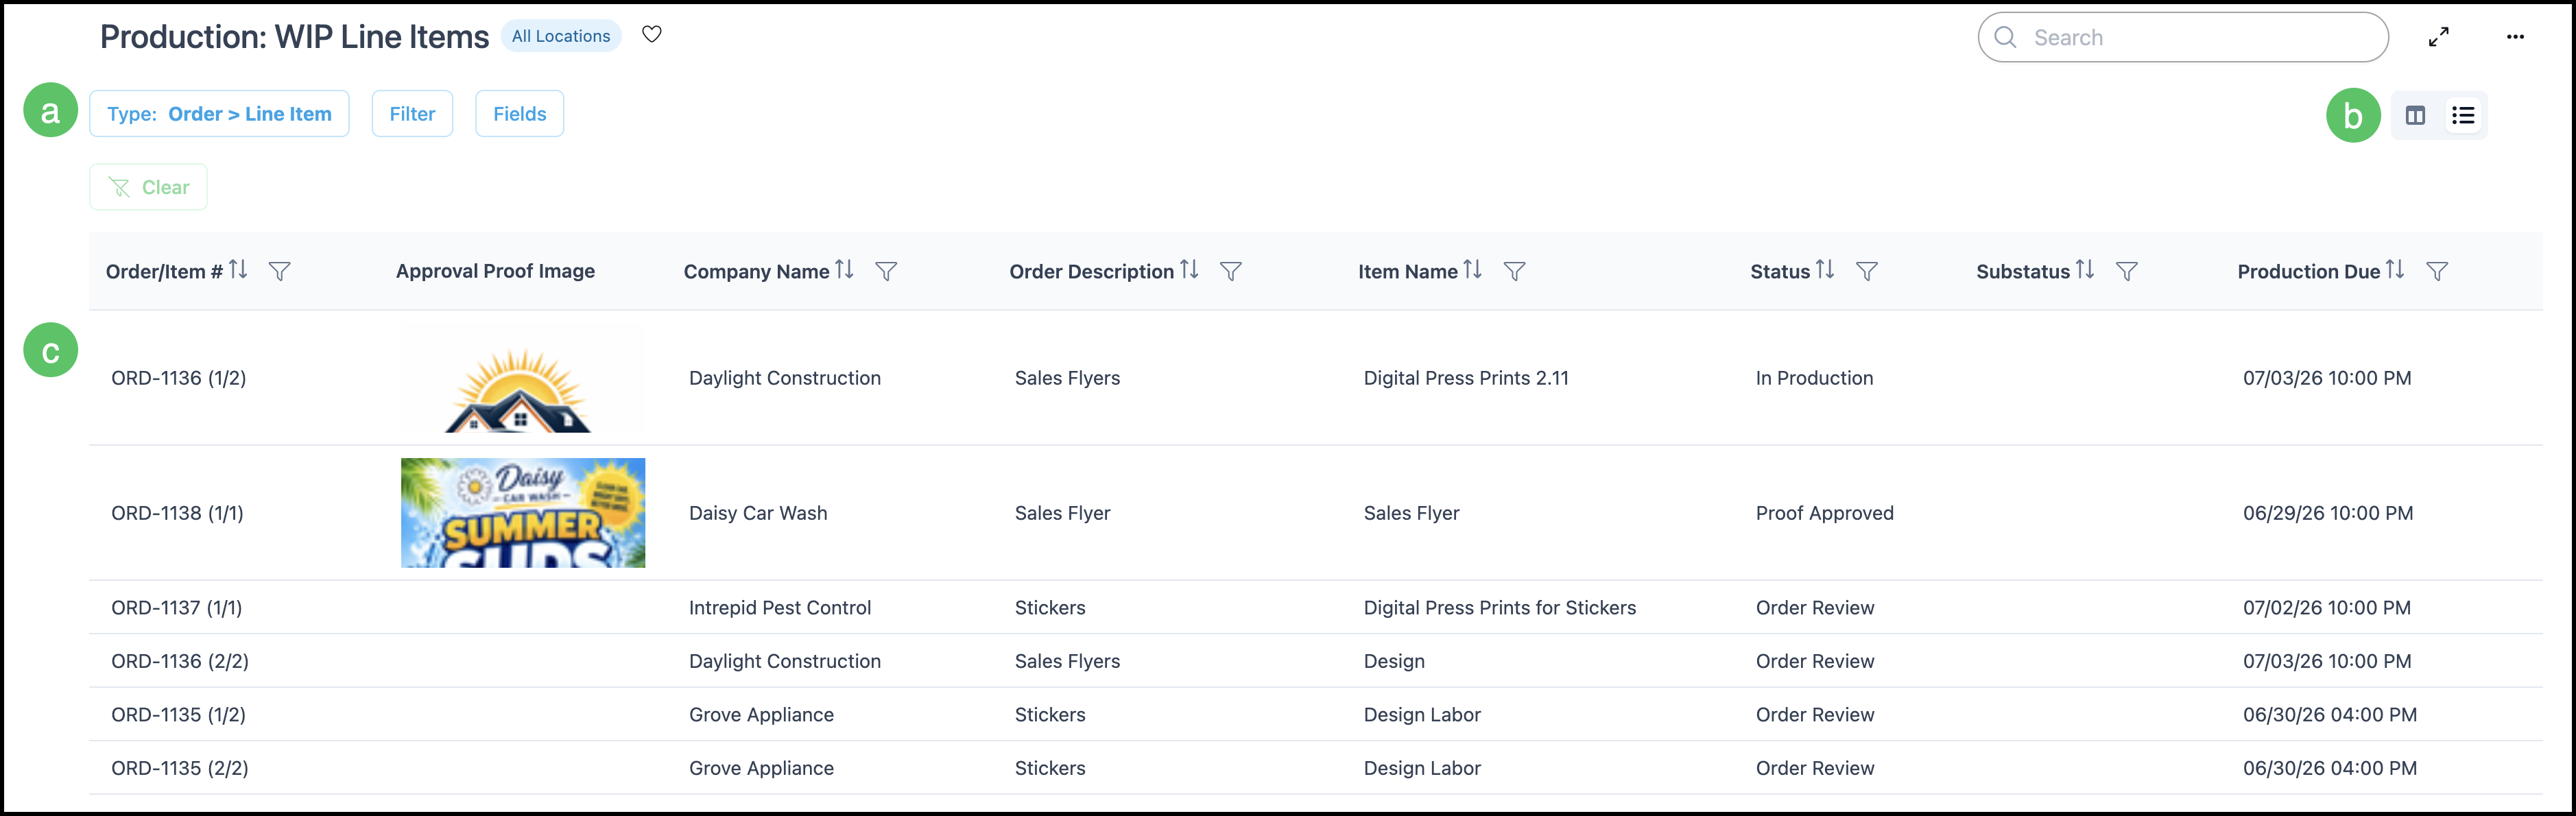
List View:
a. Type describes the configuration of this Board.
b. The paired icons switch between Card view and List view.
c. Each row represents a single Line Item. Clicking on the row opens up a side panel with additional information.
Side Panel
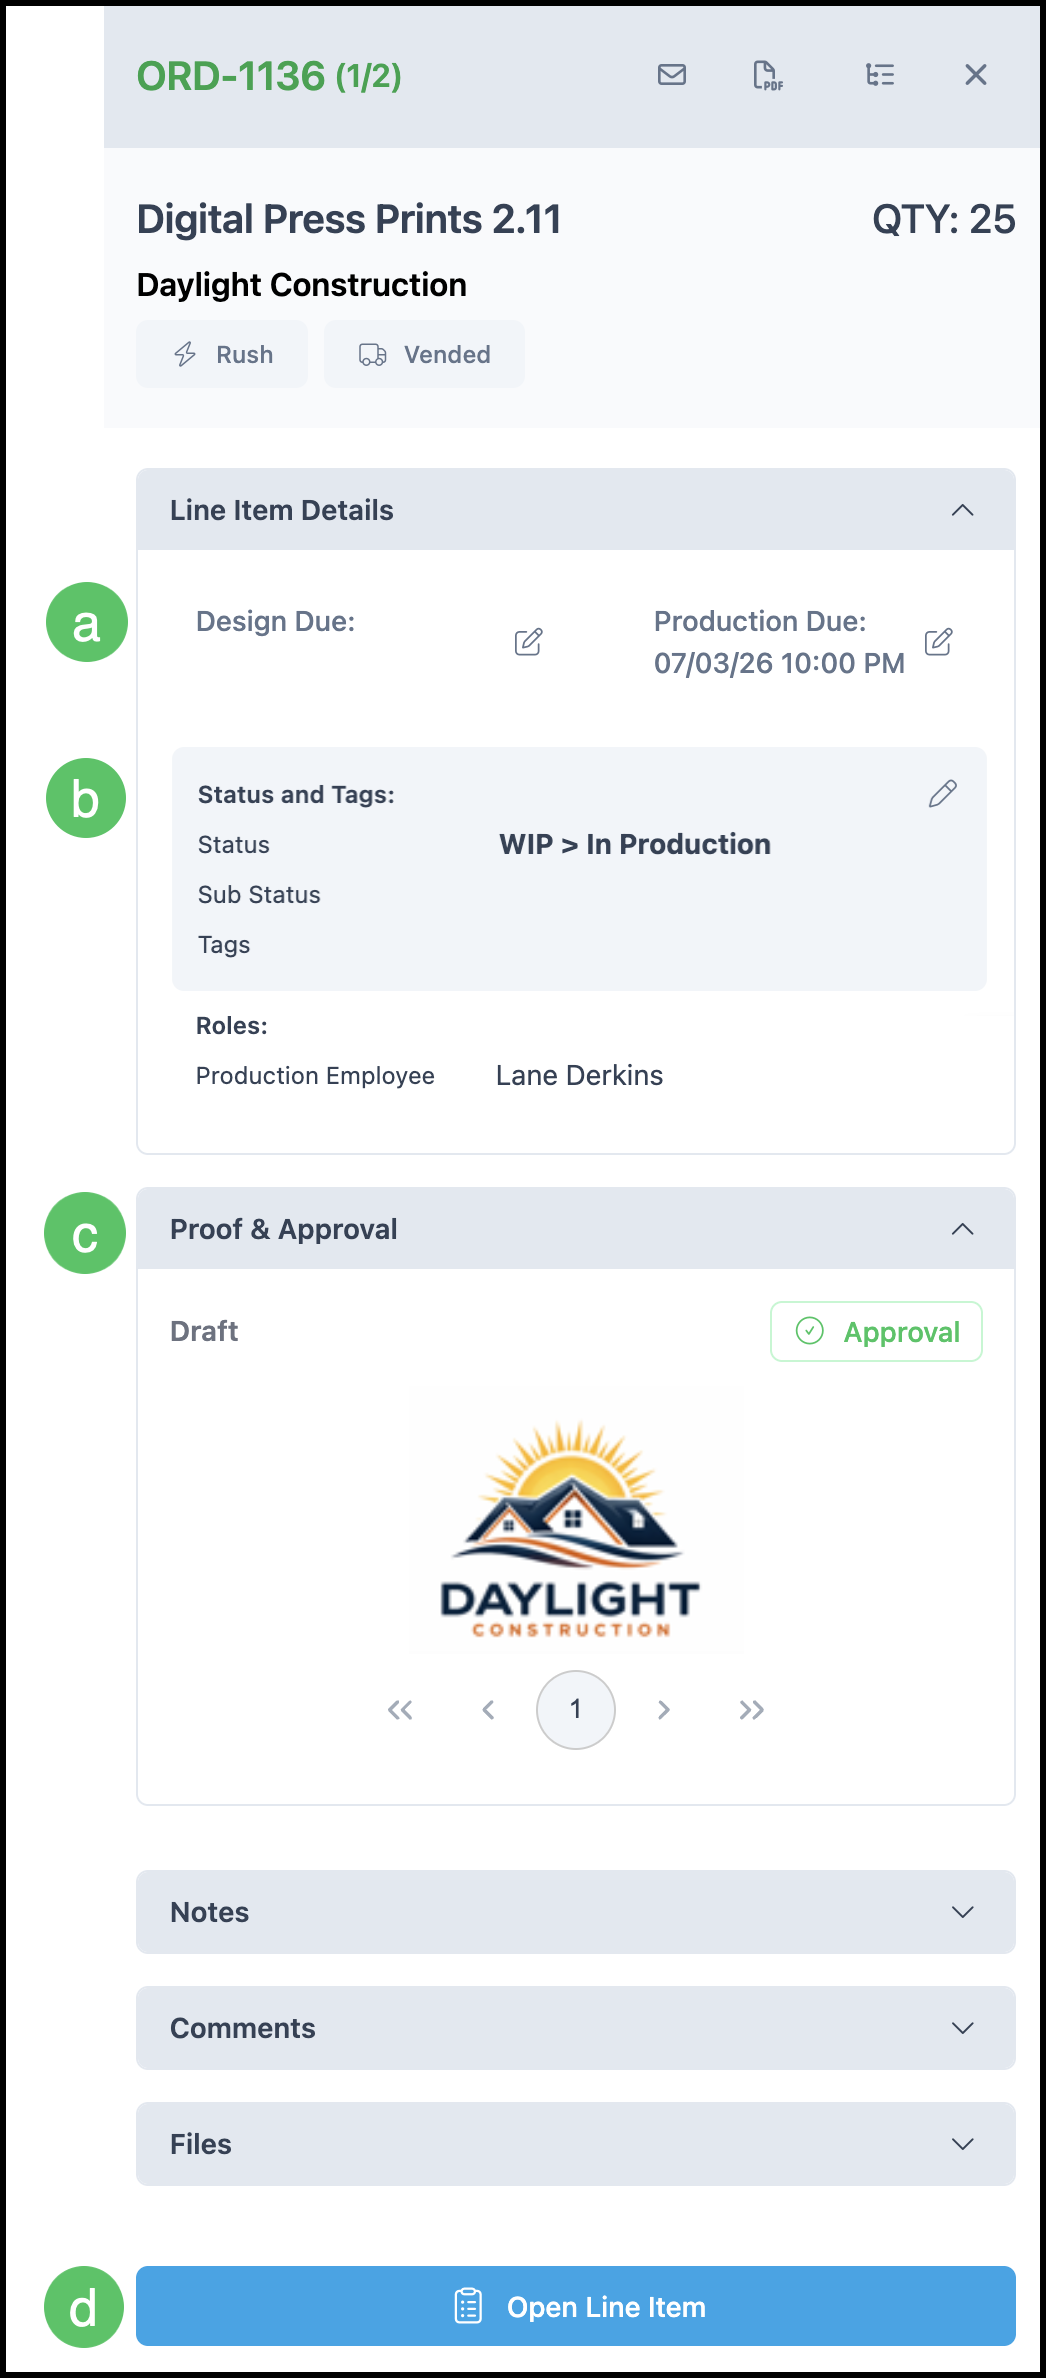
Clicking on a Line Item opens up a side panel with further information.
a. Due dates can be edited by clicking on the edit icon.
b. Status can be updated by clicking on the edit icon that appears on hover.
c. Associated Proofs will be displayed here with the approval status.
d. This link opens up the associated Line Item in a new tab.
Statuses
Statuses define the stage of an Estimate or Order as it moves through your workflow. CoreBridge uses the same status structure for both Estimates and Orders.
At the Estimate or Order level, statuses represent the overall stage of the job. Within each Estimate or Order status, you can create as many Line Item Statuses as your workflow requires.
For more information on Statuses, please see Line Item Statuses.
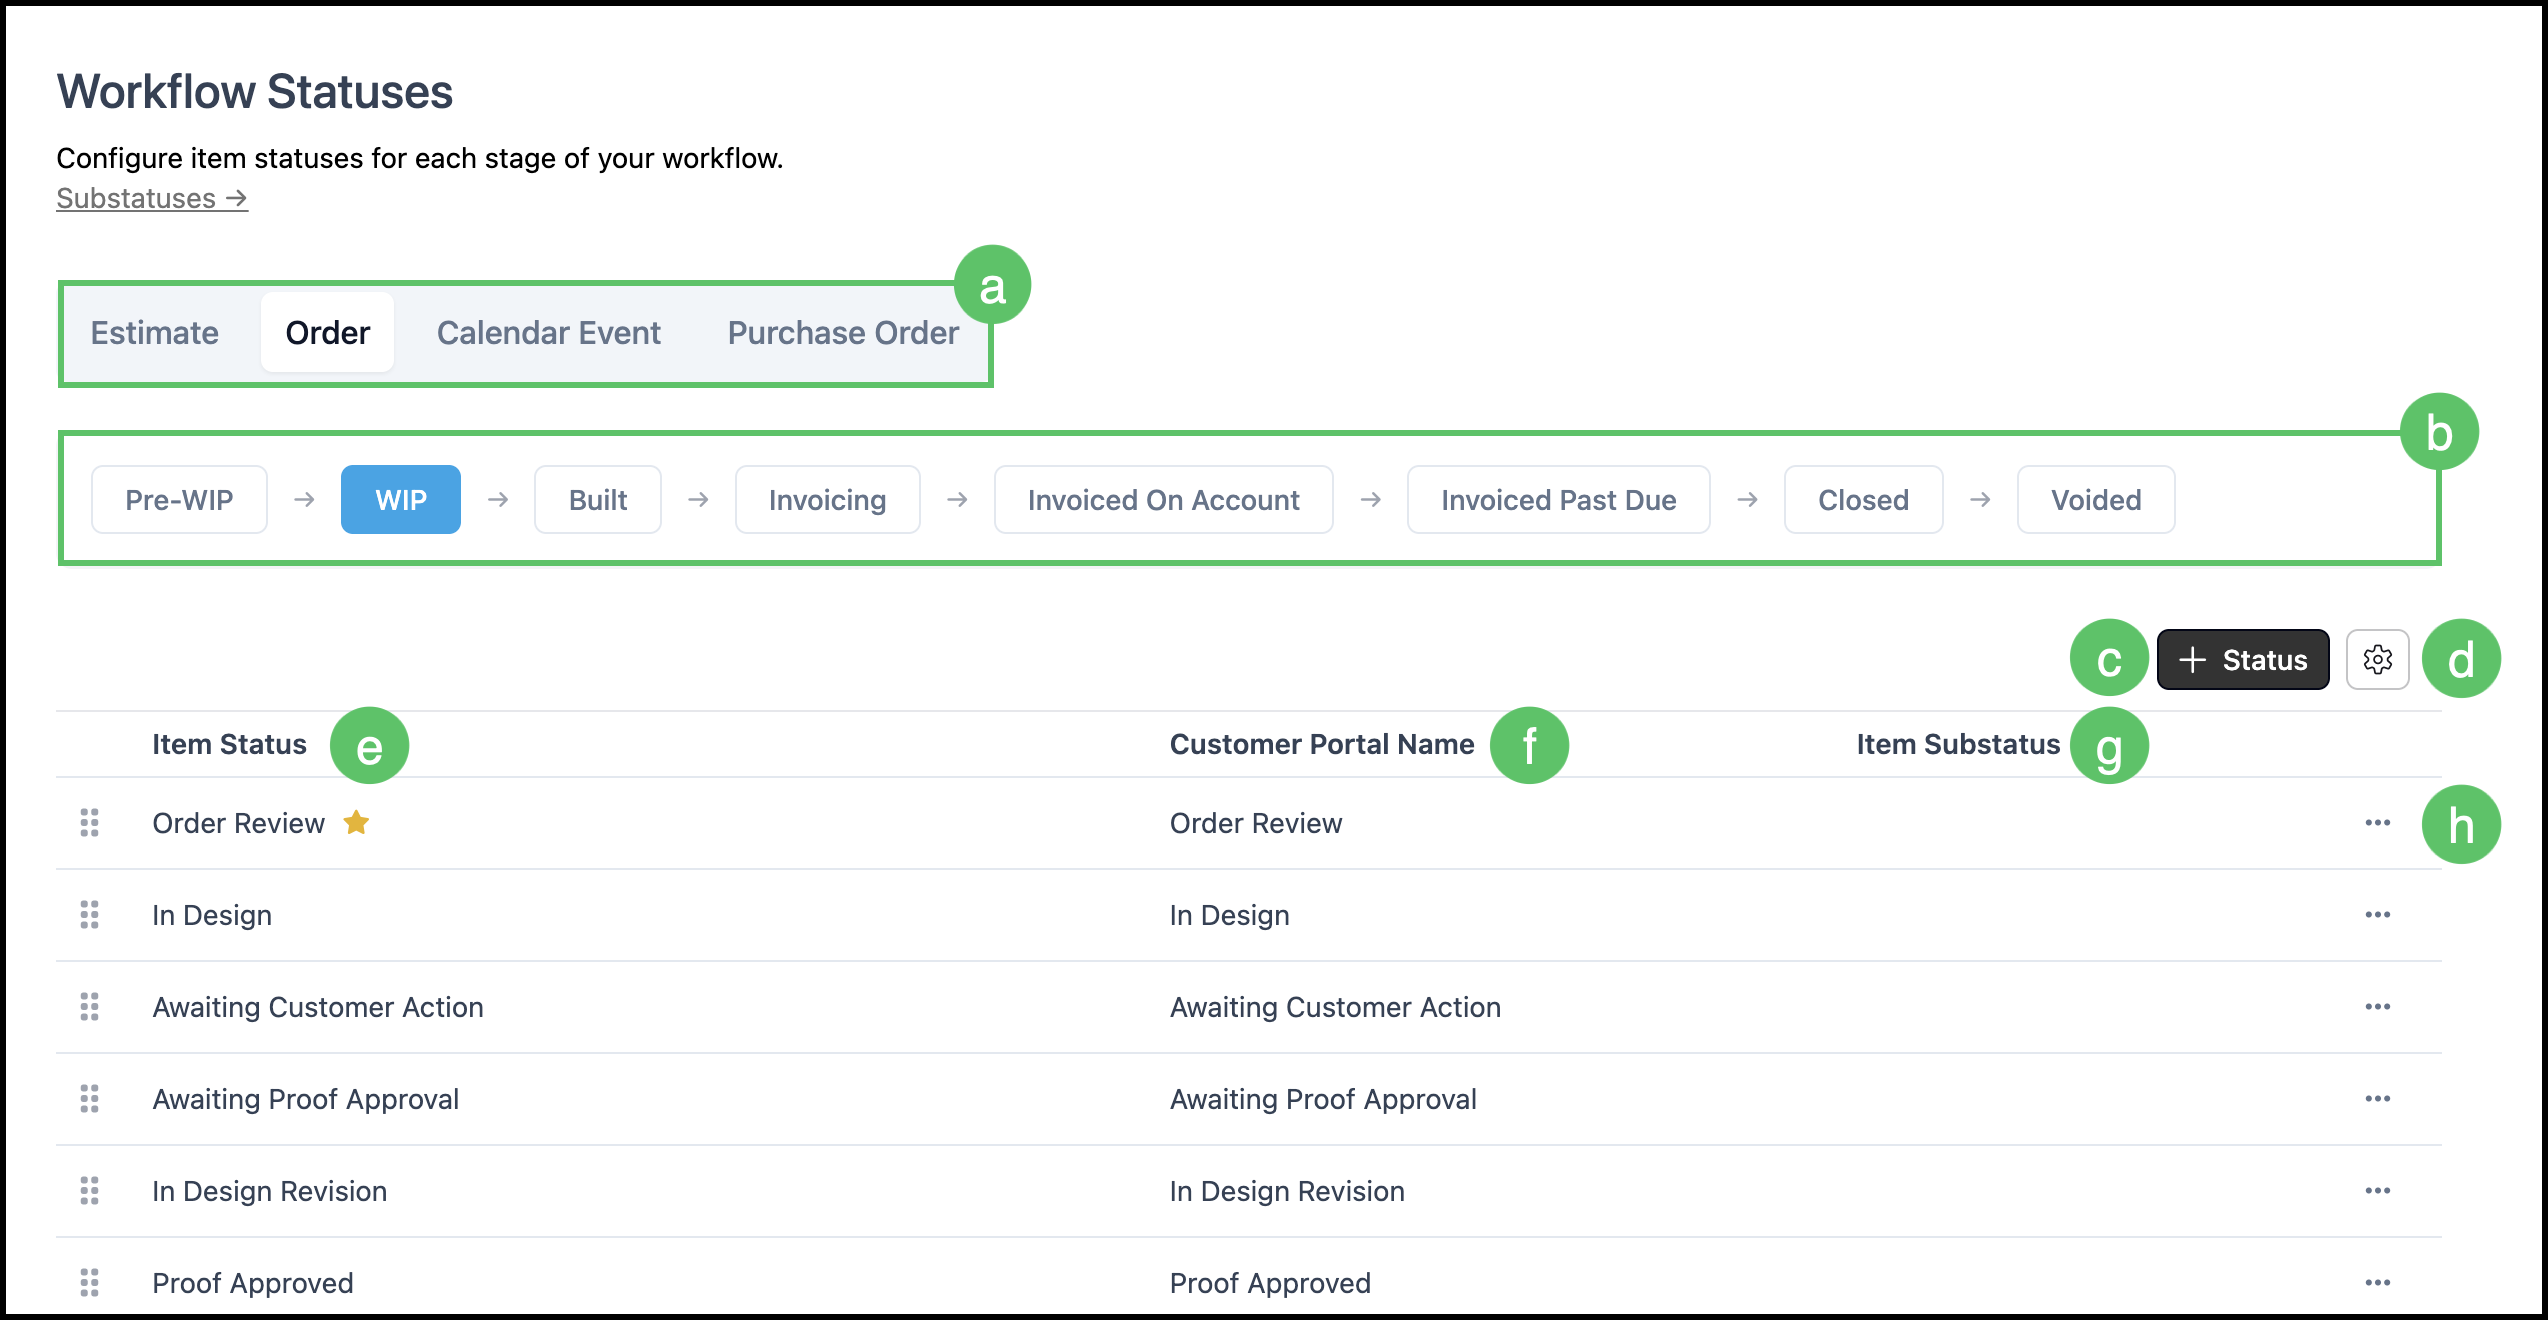
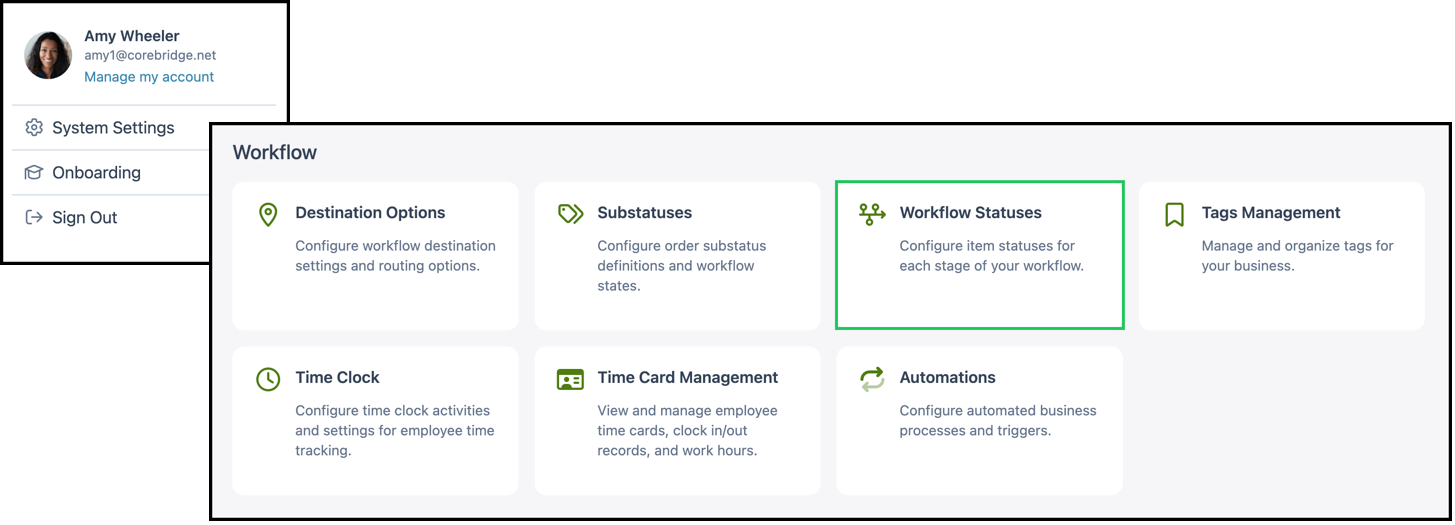
Navigate to System Settings / Workflow / Workflow Statuses.
a. Document tabs indicate the type of document currently being viewed and group statuses accordingly.
b. Main Status chips are arranged in workflow order and display the associated item statuses within each stage.
c. The Add Status option represents the starting point for creating new item statuses.
d. Search Settings include filters that control the visibility of inactive records.
e. Item Status Name identifies each status used at the line level.
f. Customer Portal Name reflects how the status appears externally and may differ from the internal name.
g. Linked Item Substatuses are displayed to show any additional detail associated with the status.
h. The Actions menu contains available status management options, such as setting a default, marking inactive, or deleting when permitted.