By creating Boards, you can customize your CoreBridge experience for your business needs. Boards can be added to the boards module to help view and manage items, Estimates, and Orders as they move through their lifecycle.
Table of Contents
- Creating a Board
- Editing Boards
- Filters Within a Board
- Customizing Card View
- Customizing List View
- Related Articles
Creating a Board
Navigate to the Boards module.

1. Select the Add Board icon.

2. Enter a Board Name.
3. Click Board Type or Type.
Note: This opens up a side panel.

4. Select the record level for the board (for example Order, Order > Line Item, Estimate, Estimate > Line Item, Order/Estimate, Order/Estimate > Line Item, or Order Destination). The type drives which columns, filters, and fields you can use.

5. Click Filters.
Note: You can also click Save Board at this point in the creation process. Filters can be added at a later date, if desired.

6. Select the desired Filter.
7. Make any associated selections.
a. Use the subtract button if you want to remove a single Filter.
b. Use the add button if you would like to add an additional Filter.
8. Click Save Board.

Editing Boards
Navigate to the Boards module and select the board to edit.

1. Click the Actions menu.
2. Click Edit Board.
Note: Availability of the Actions menu is depends on user permissions, as changes made here apply at a Company wide level.

3. Make any necessary edits. This can include the Board name, Locations, Type, Columns, Filter, Sort, or Fields.
Note: Clicking on Type, Columns, Filter, Sort, or Fields will open a side panel allowing you to make changes.
4. Click Save Board.

Note: To exit out of editing without making changes, select View Mode found under the Actions menu.

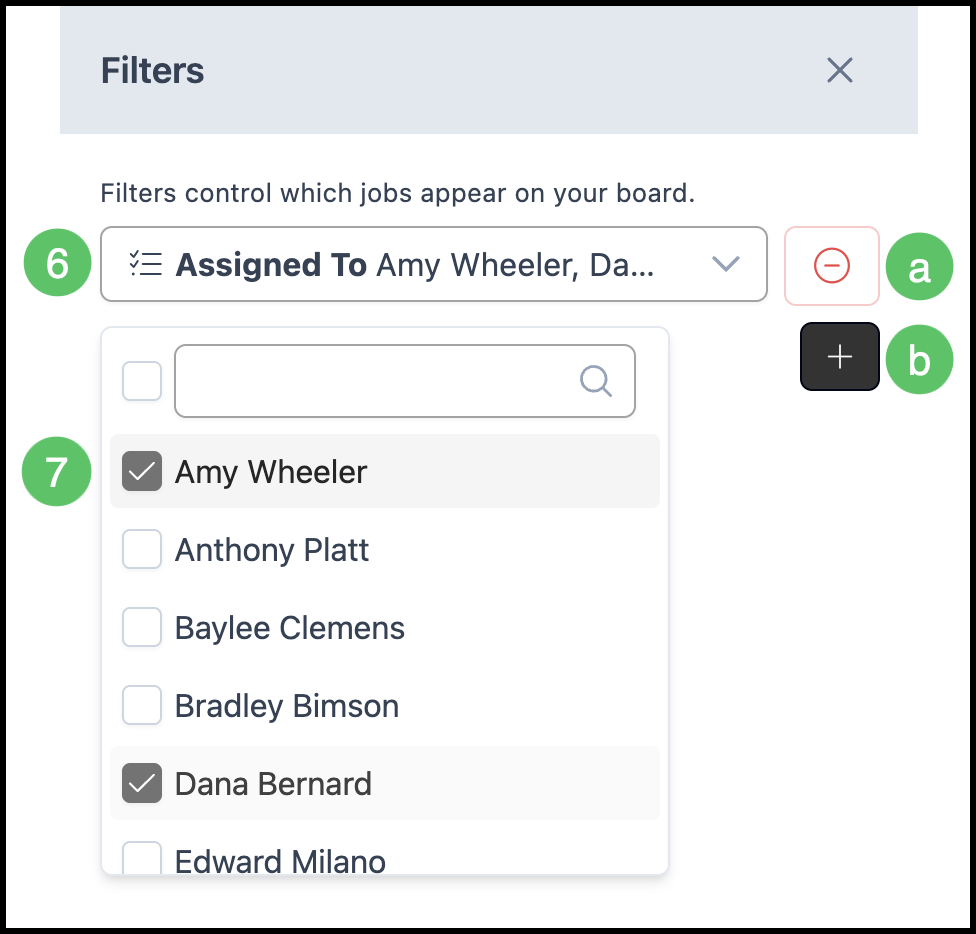
Filters Within a Board
Filters control which jobs appear; set values (such as status) and apply so only matching records stay visible. Changes made here apply to the currently signed-in user and remain active even after navigating away from the Board.
1. Select Filter to open the Filters panel on the right.
2. Select the desired Filter.
3. Make any associated selections. Filters will be applied immediately.
a. The Reset button will undo your selections at any time.
Note: Another Reset button is available outside of the filter side menu. See example below.
b. Use the subtract button if you want to remove a single Filter.
c. Use the add button if you would like to add an additional Filter.

Example:
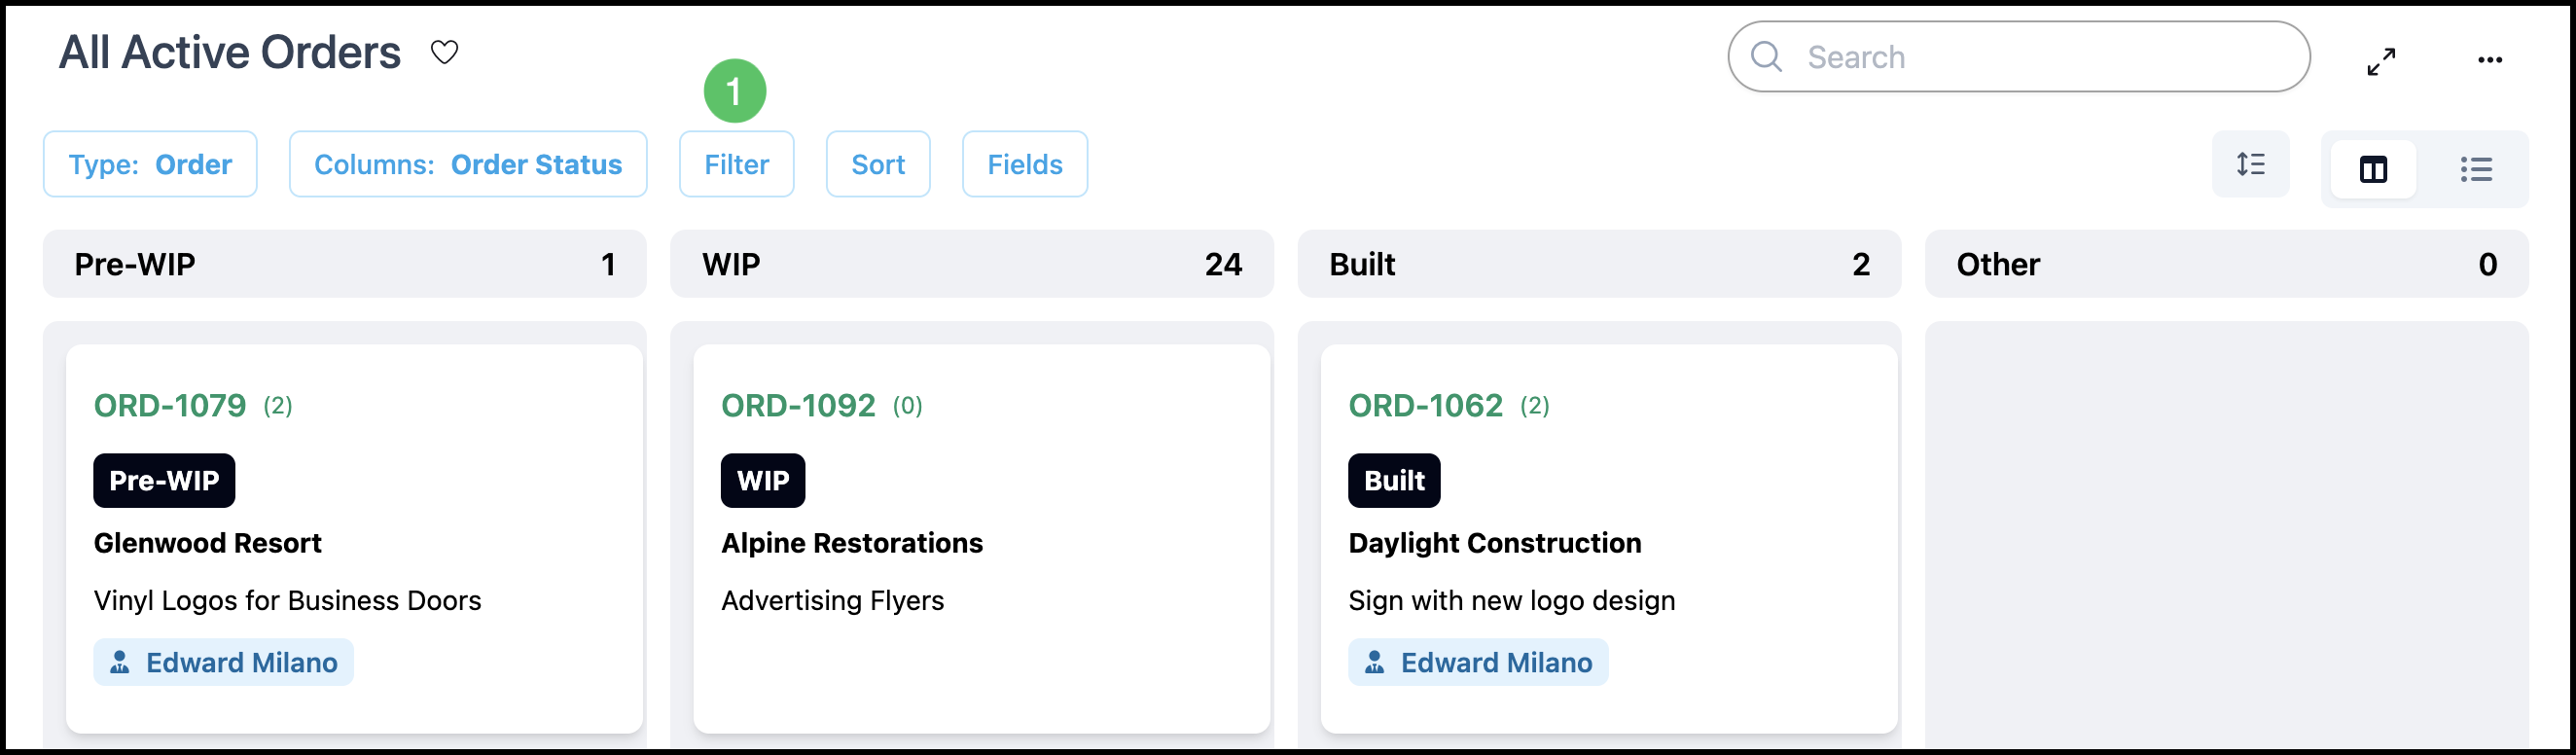
Customizing Card View
Card view is the grid of cards grouped under column headers. These columns can be customized by each user. Changes made here apply to the signed-in user and will persist after navigating away.
Note: Type and Columns are only available to change within the edit menu. Filters are covered above.
1. Select Card View.
2. Select Sort to open the Sort panel.
3. Use the dropdown to select how the cards will be sorted. The arrow controls whether this is descending or ascending order.
Note: To revert to the original sorting, click Reset.

4. Click Fields.
5. Use the Move icon to reorder the fields.
6. Use the toggle to enable or disable the desired fields.

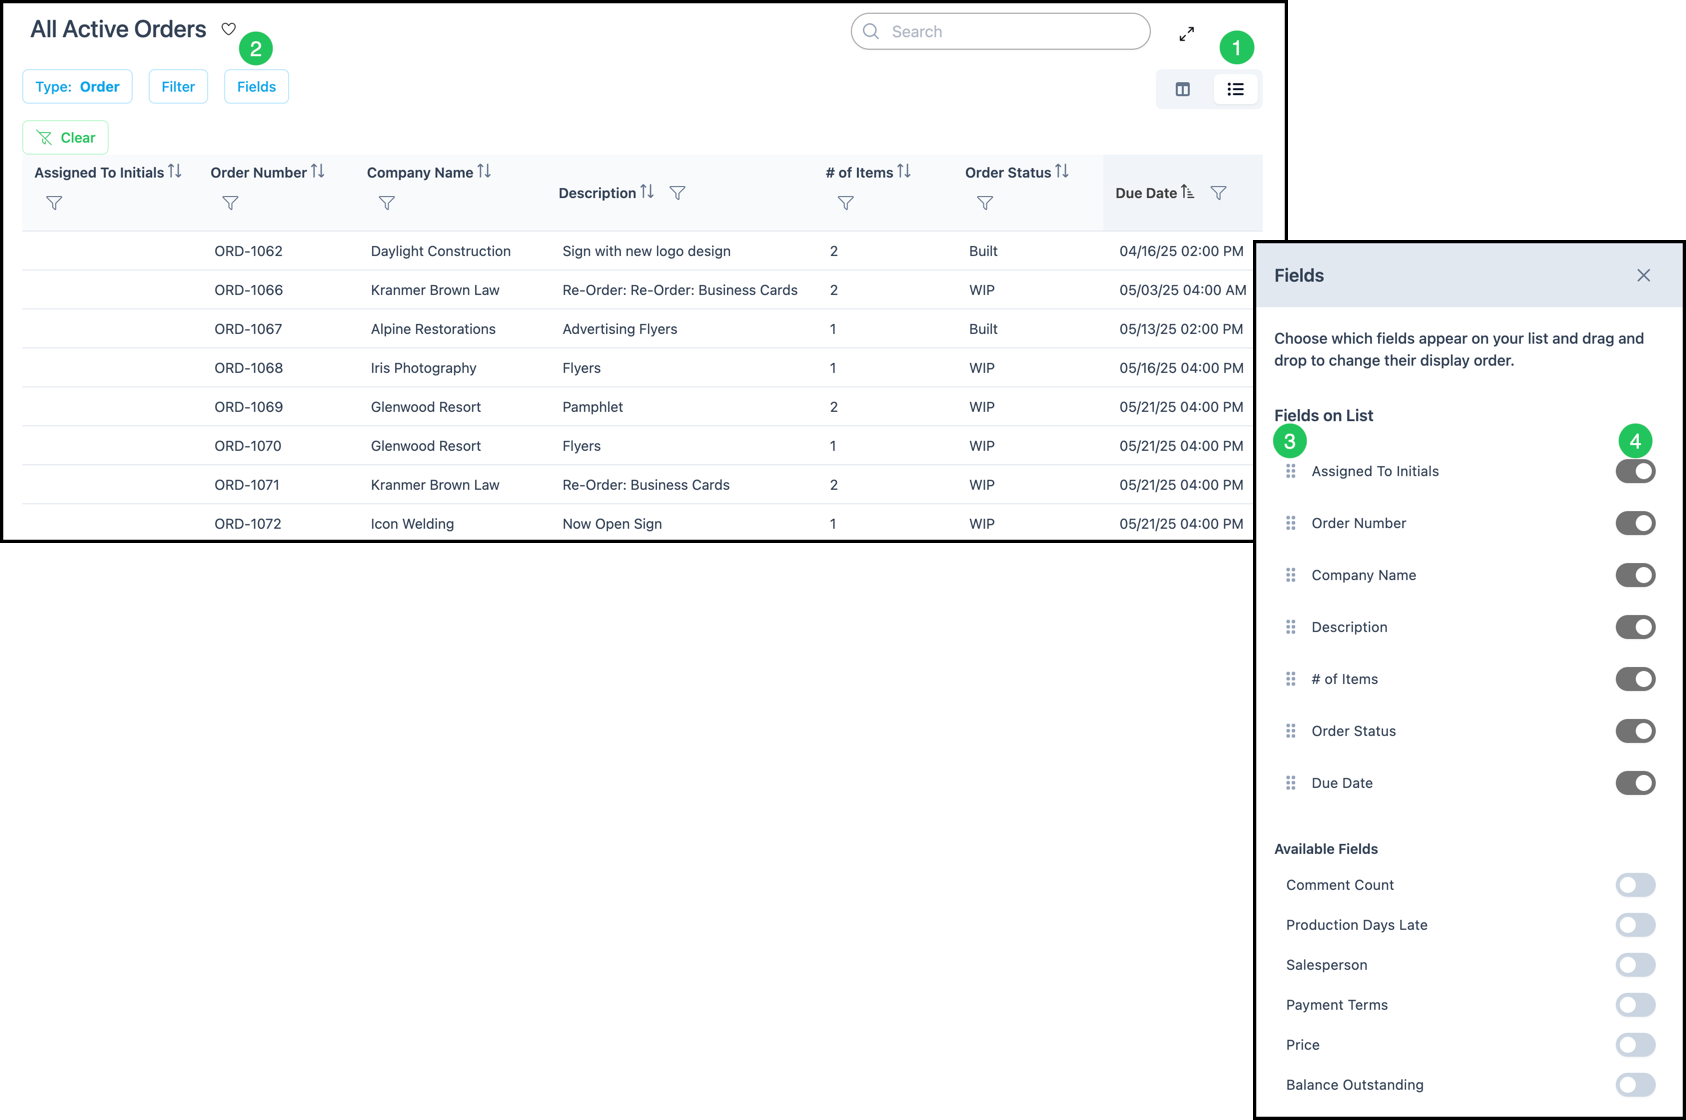
Customizing List View
List View displays the Boards in rows and columns. These can be customized by individual users. Changes made here will persist after navigating away and apply to the signed-in user.
Note: Type is only available to change within the edit menu. Filters are covered above.
1. Select List View.
2. Click Fields.
3. Use the Move icon to reorder the fields.
4. Use the toggle to enable or disable the desired fields.