
Materials are physical items used when creating a Product or delivering a service. When one Material is offered in multiple options, such as different sizes, colors, or finishes, create a Material with Variants so those options stay under one parent Material with their own cost, retail, and item details.
Note: When a similar Material already exists, cloning is often faster than creating from scratch. See Cloning a Material.
For an overview of Materials with Variants screens and tabs, see Materials with Variants Overview. For a single Material without variants, see Adding Materials.
Table of Contents
Creating a Material with Variants
Navigate to System Settings / Components / Materials.
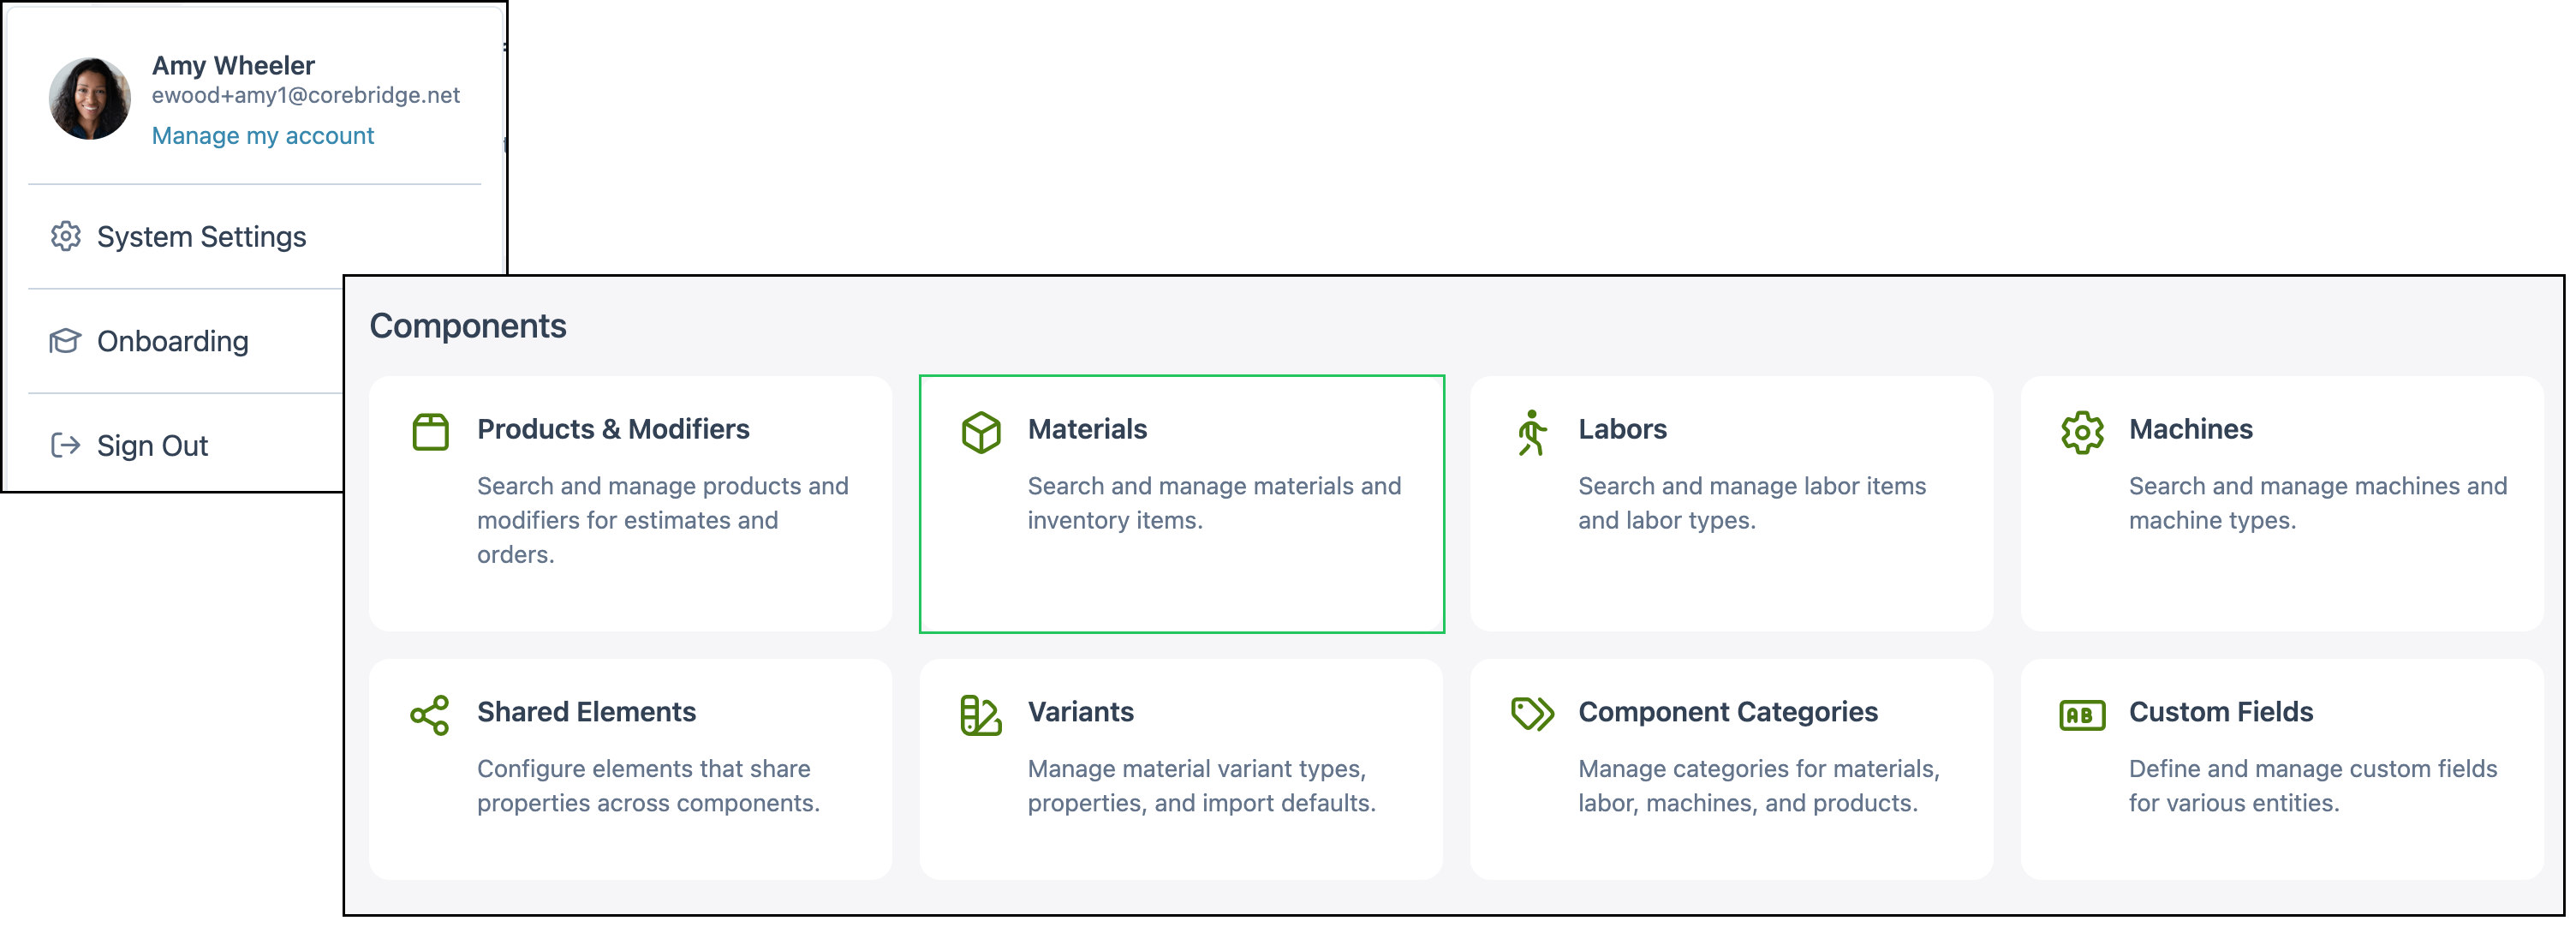
1. Click Material.

2. On the format selection screen, select Material with Variants.
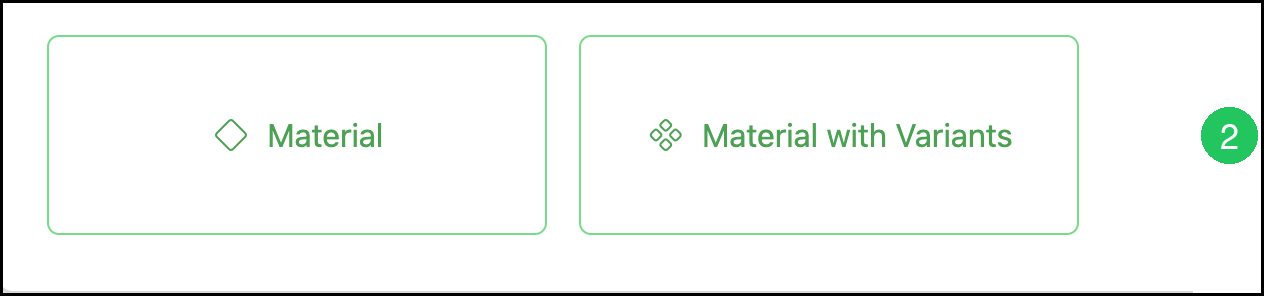
The create flow opens on step 1 Material Details.
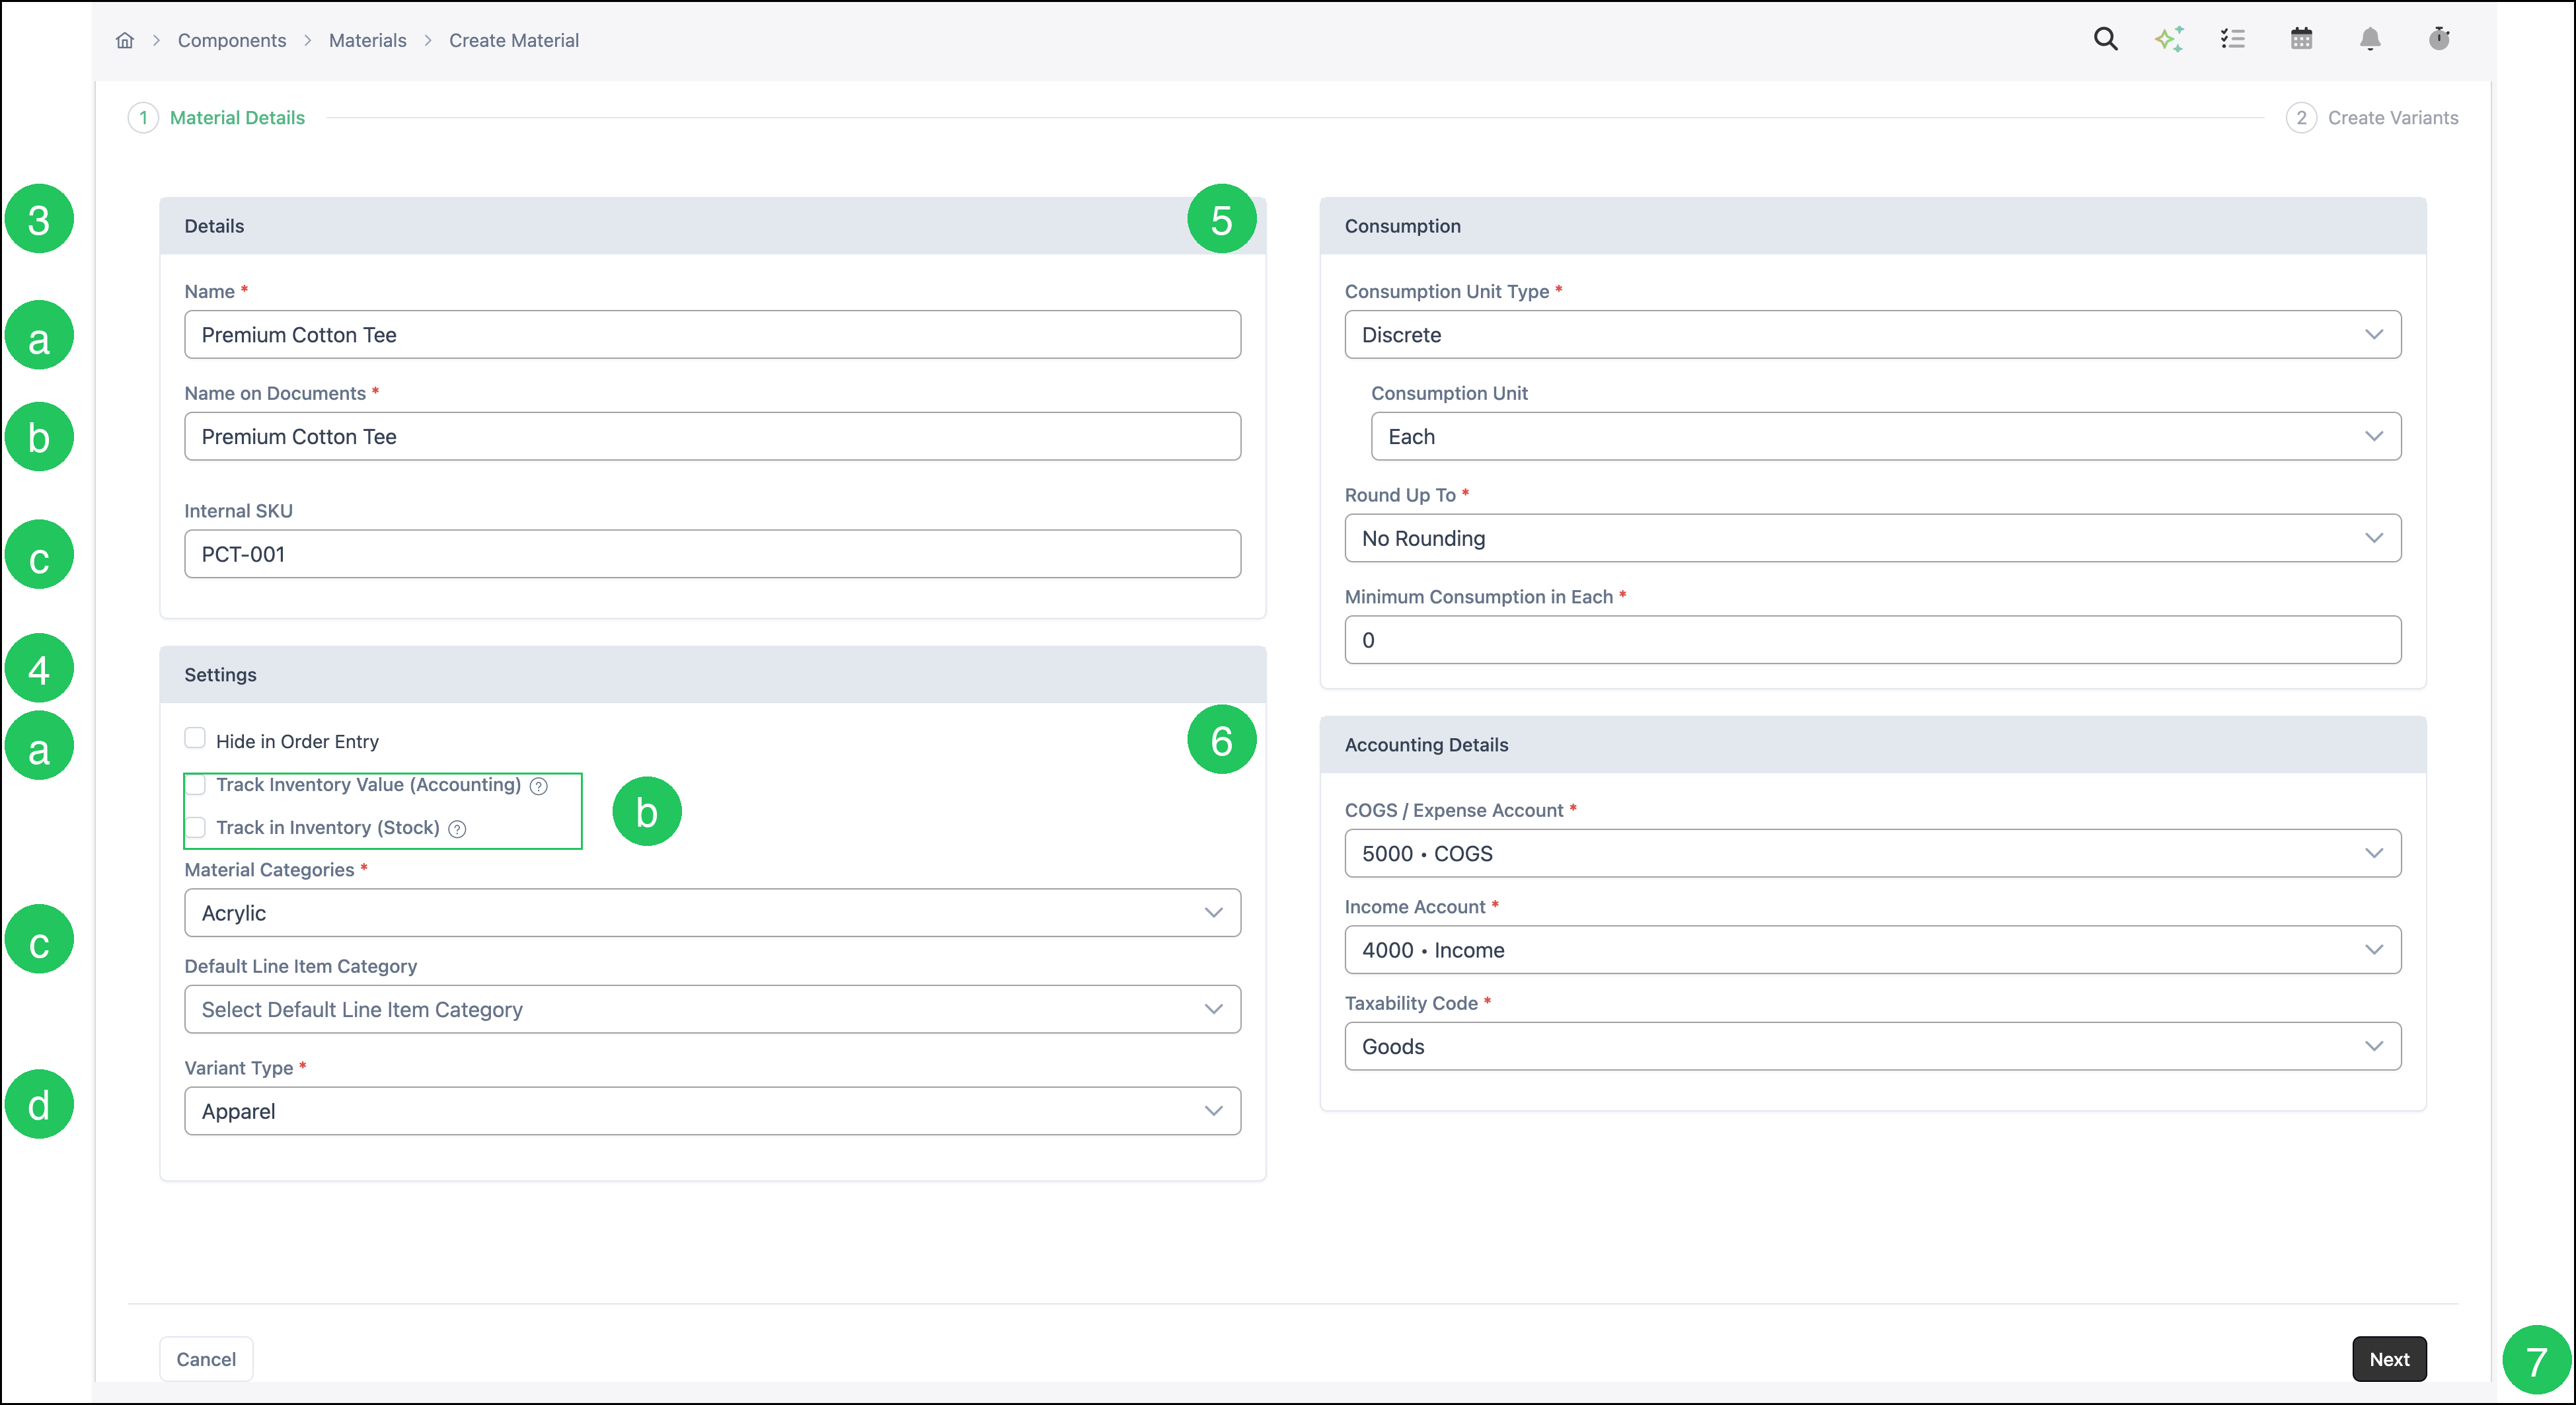
3. In the Details section, enter the parent Material information.
Note: Fields marked with a red asterisk are required to continue.
a. Name is the Material name shown in the Materials list.
b. Name on Documents is how the Material appears on customer-facing documents such as Estimates and Invoices.
c. Internal SKU is an optional internal stock keeping unit.
4. In the Settings section, complete the options that apply.
a. Hide in Order Entry hides the Material from Line Item selection during Order entry.
b. Use the inventory tracking checkboxes when you track accounting value or stock for this Material.
c. Material Categories organizes the Material for filtering and Assembly use.
d. Variant Type selects the Properties and Values available for Variants (for example color and size). Apparel is currently available.
Note: Default Line Item Category optionally sets the category applied when the Material is added to an Estimate or Order. Variant Types are managed under System Settings / Components / Variants.
5. In the Consumption section, set how the Material is consumed and rounded.
a. Consumption Unit Type and Consumption Unit define the measurement used in production.
b. Round Up To controls automatic rounding.
c. Minimum Consumption in Each sets the lowest amount used in calculations.
6. In the Accounting Details section, select the COGS or expense account, income account, and taxability code.
7. Click Next to continue to Create Variants.
Create Variants Step
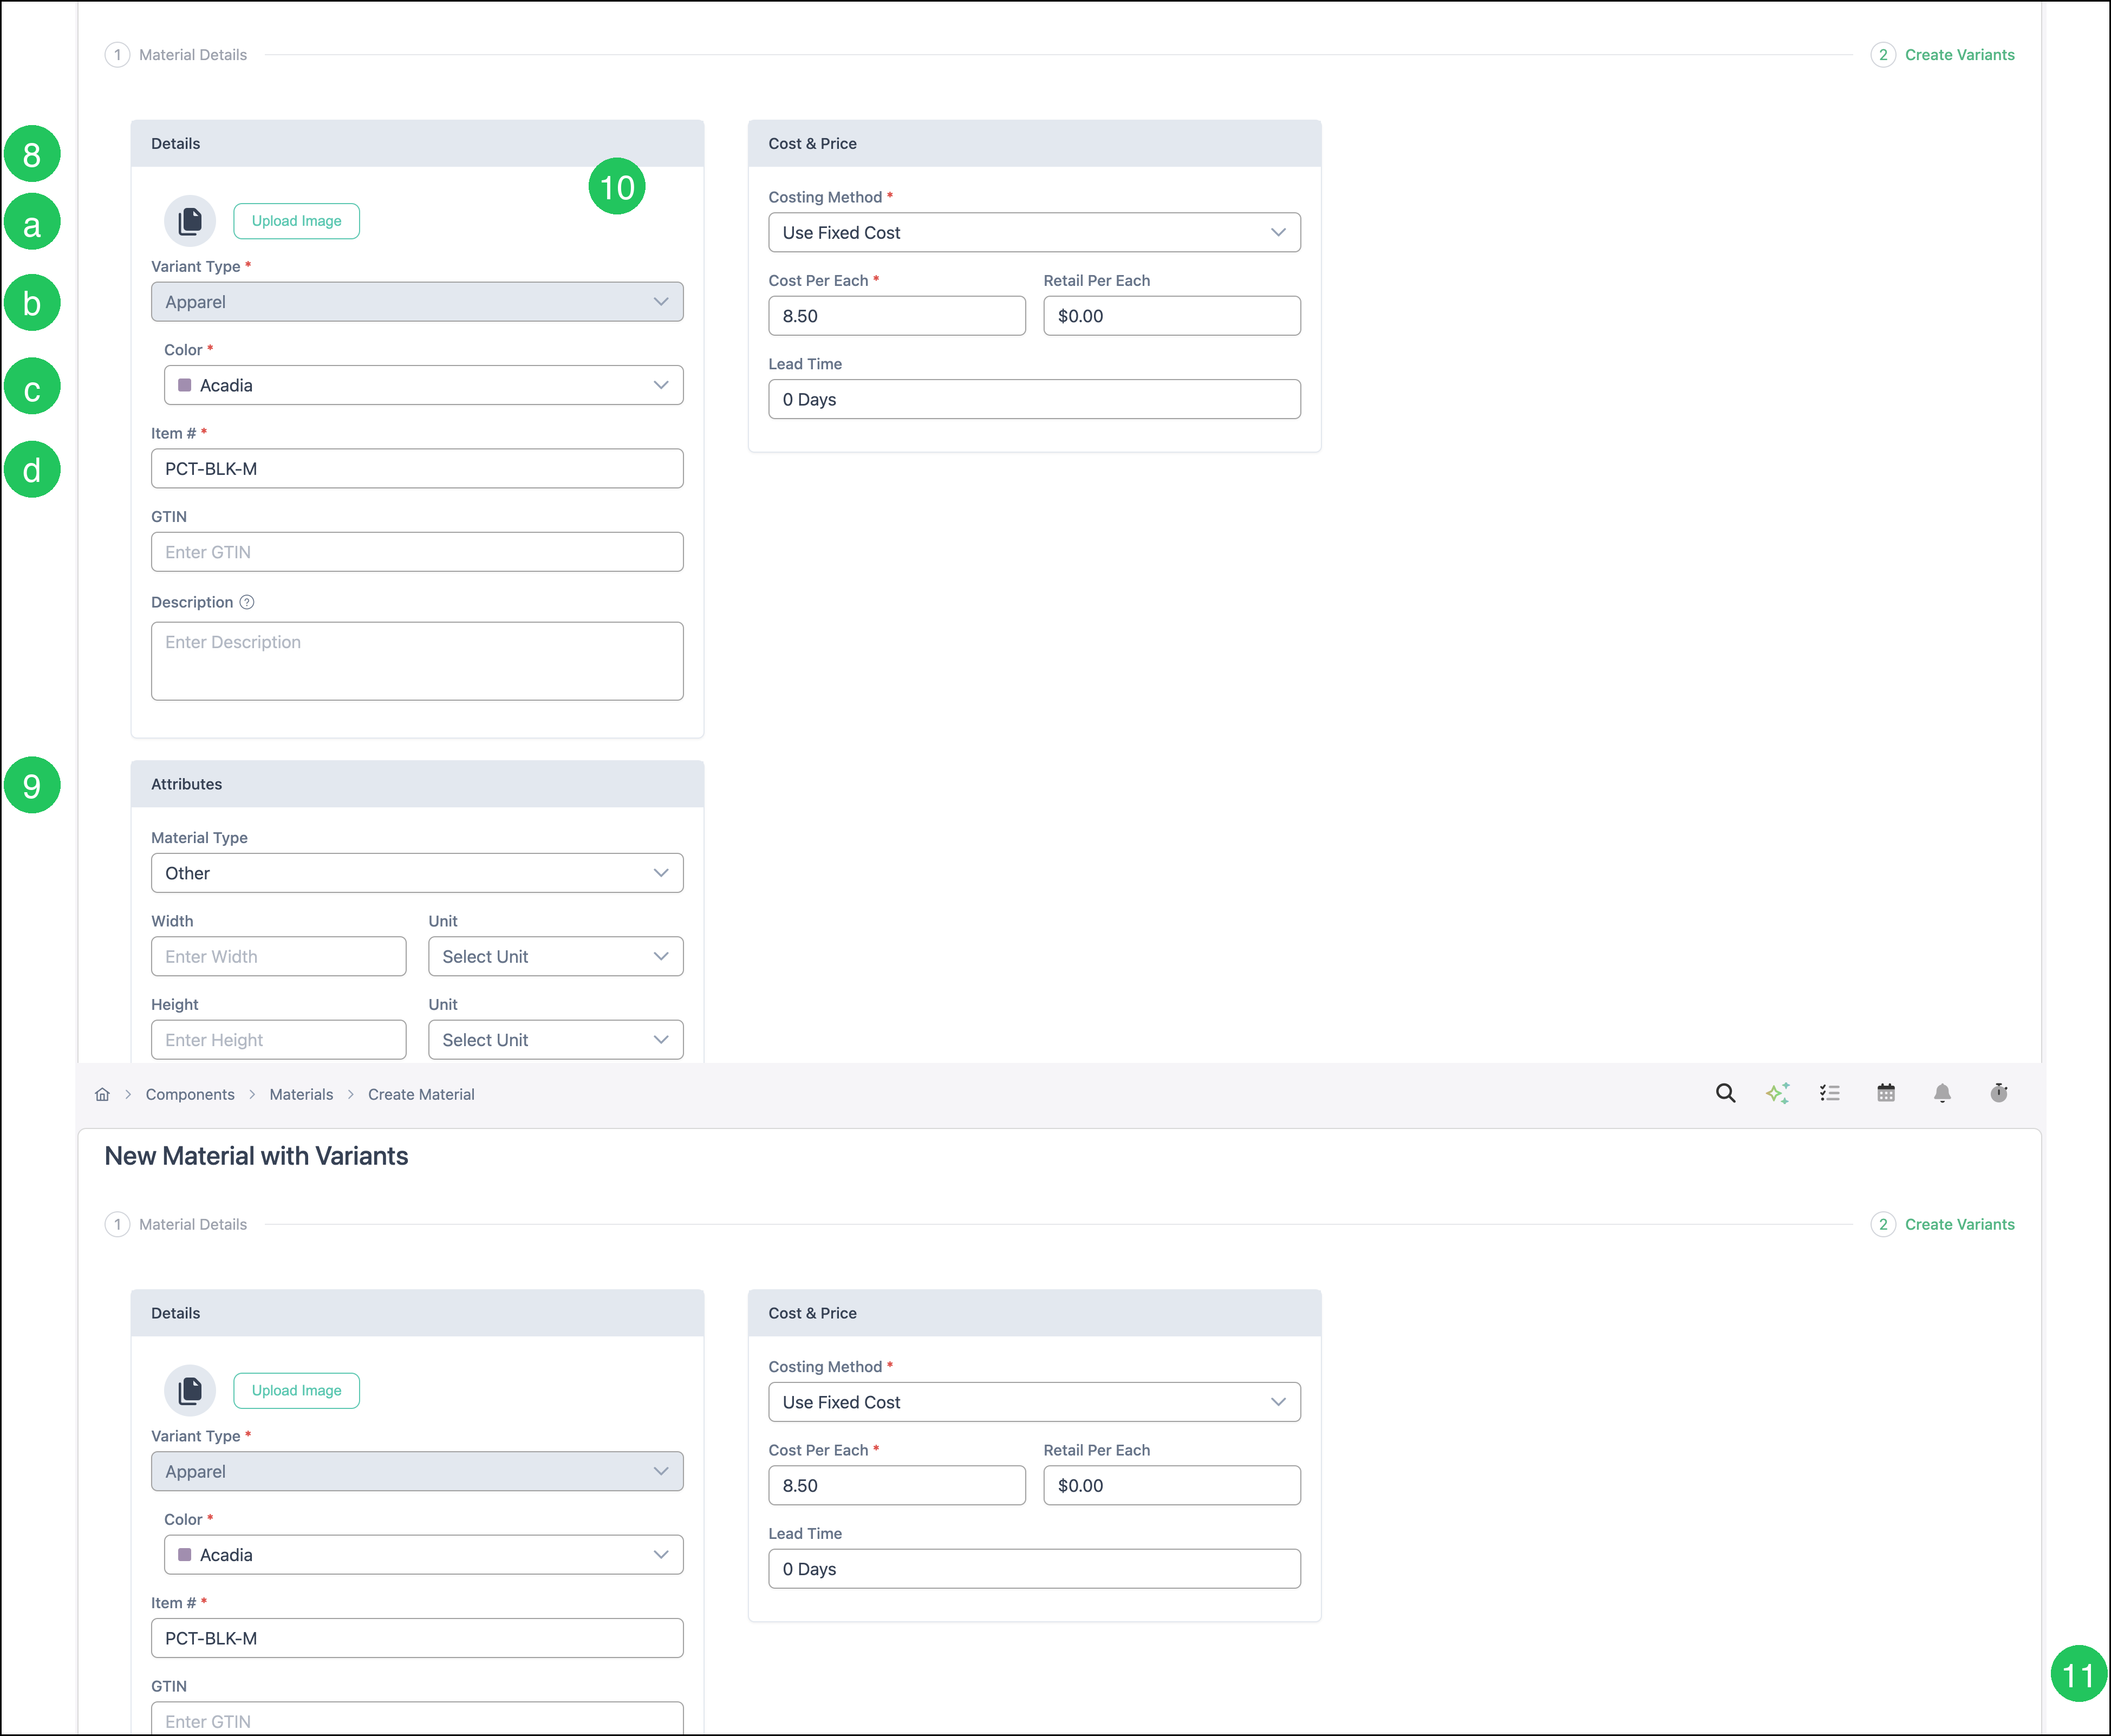
Step 2 Create Variants is where you define the first Variant for the new Material.
8. In Details, complete the Variant fields.
a. Upload an image for the Variant, if desired.
b. Confirm the Variant Type.
c. Select property values such as Color (and Size when shown for the Variant Type).
d. Enter the Item #, and optionally GTIN and Description.
9. Complete Attributes that apply, including Quantity in Set when required.
10. In Cost & Price, set Costing Method, Cost Per Each, and optionally Retail Per Each and Lead Time.
11. Click Save to create the Material with Variants.
Note: Use Previous to return to Material Details, or Cancel to leave without saving. After the Material is created, open the Variants tab and click Material Variant to add more Variants. See Variants Overview for Variant fields and actions.
Frequently Asked Questions
1. When should I choose Material with Variants instead of Material?
Answer: Choose Material with Variants when options such as color or size should share one parent Material and have their own cost, retail, or item numbers. Choose Material for a single set of values.
2. Where do I set parent Material cost during create?
Answer: Cost and retail are set on the Variant in step 2 Create Variants (and later on each Variant). The parent Material does not use a separate Cost & Price section during this create flow.
3. Is Material Categories required?
Answer: Yes. Material Categories is required when creating a Material with Variants.
4. Can I add more Variants after Save?
Answer: Yes. Open the Material, select the Variants tab, then click Material Variant.
Related Articles
Adding Materials
Cloning a Material
Components Overview
Materials with Variants Overview
Materials Overview
Variants Overview