
Vendor Contacts are the people you work with at your Vendors. You can create a Contact, link the Contact to an existing Vendor, or create a Contact and a new Vendor in one step. After a Vendor Contact is created, the Contact screen is where you review Vendor links, contact methods, addresses, activity, and Vendor Portal access.
Note: For creating and managing Vendors, see Creating Vendors and Managing Vendors. For the Vendor screen, see Additional Vendor Features.
Table of Contents
- Accessing Vendor Contacts
- Creating a Vendor Contact
- Vendor Contact Heading
- Vendor Contact Details
- Vendor Overview and Activity
- Frequently Asked Questions
- Related Articles
Accessing Vendor Contacts
Navigate to Purchasing / Vendor Contacts.
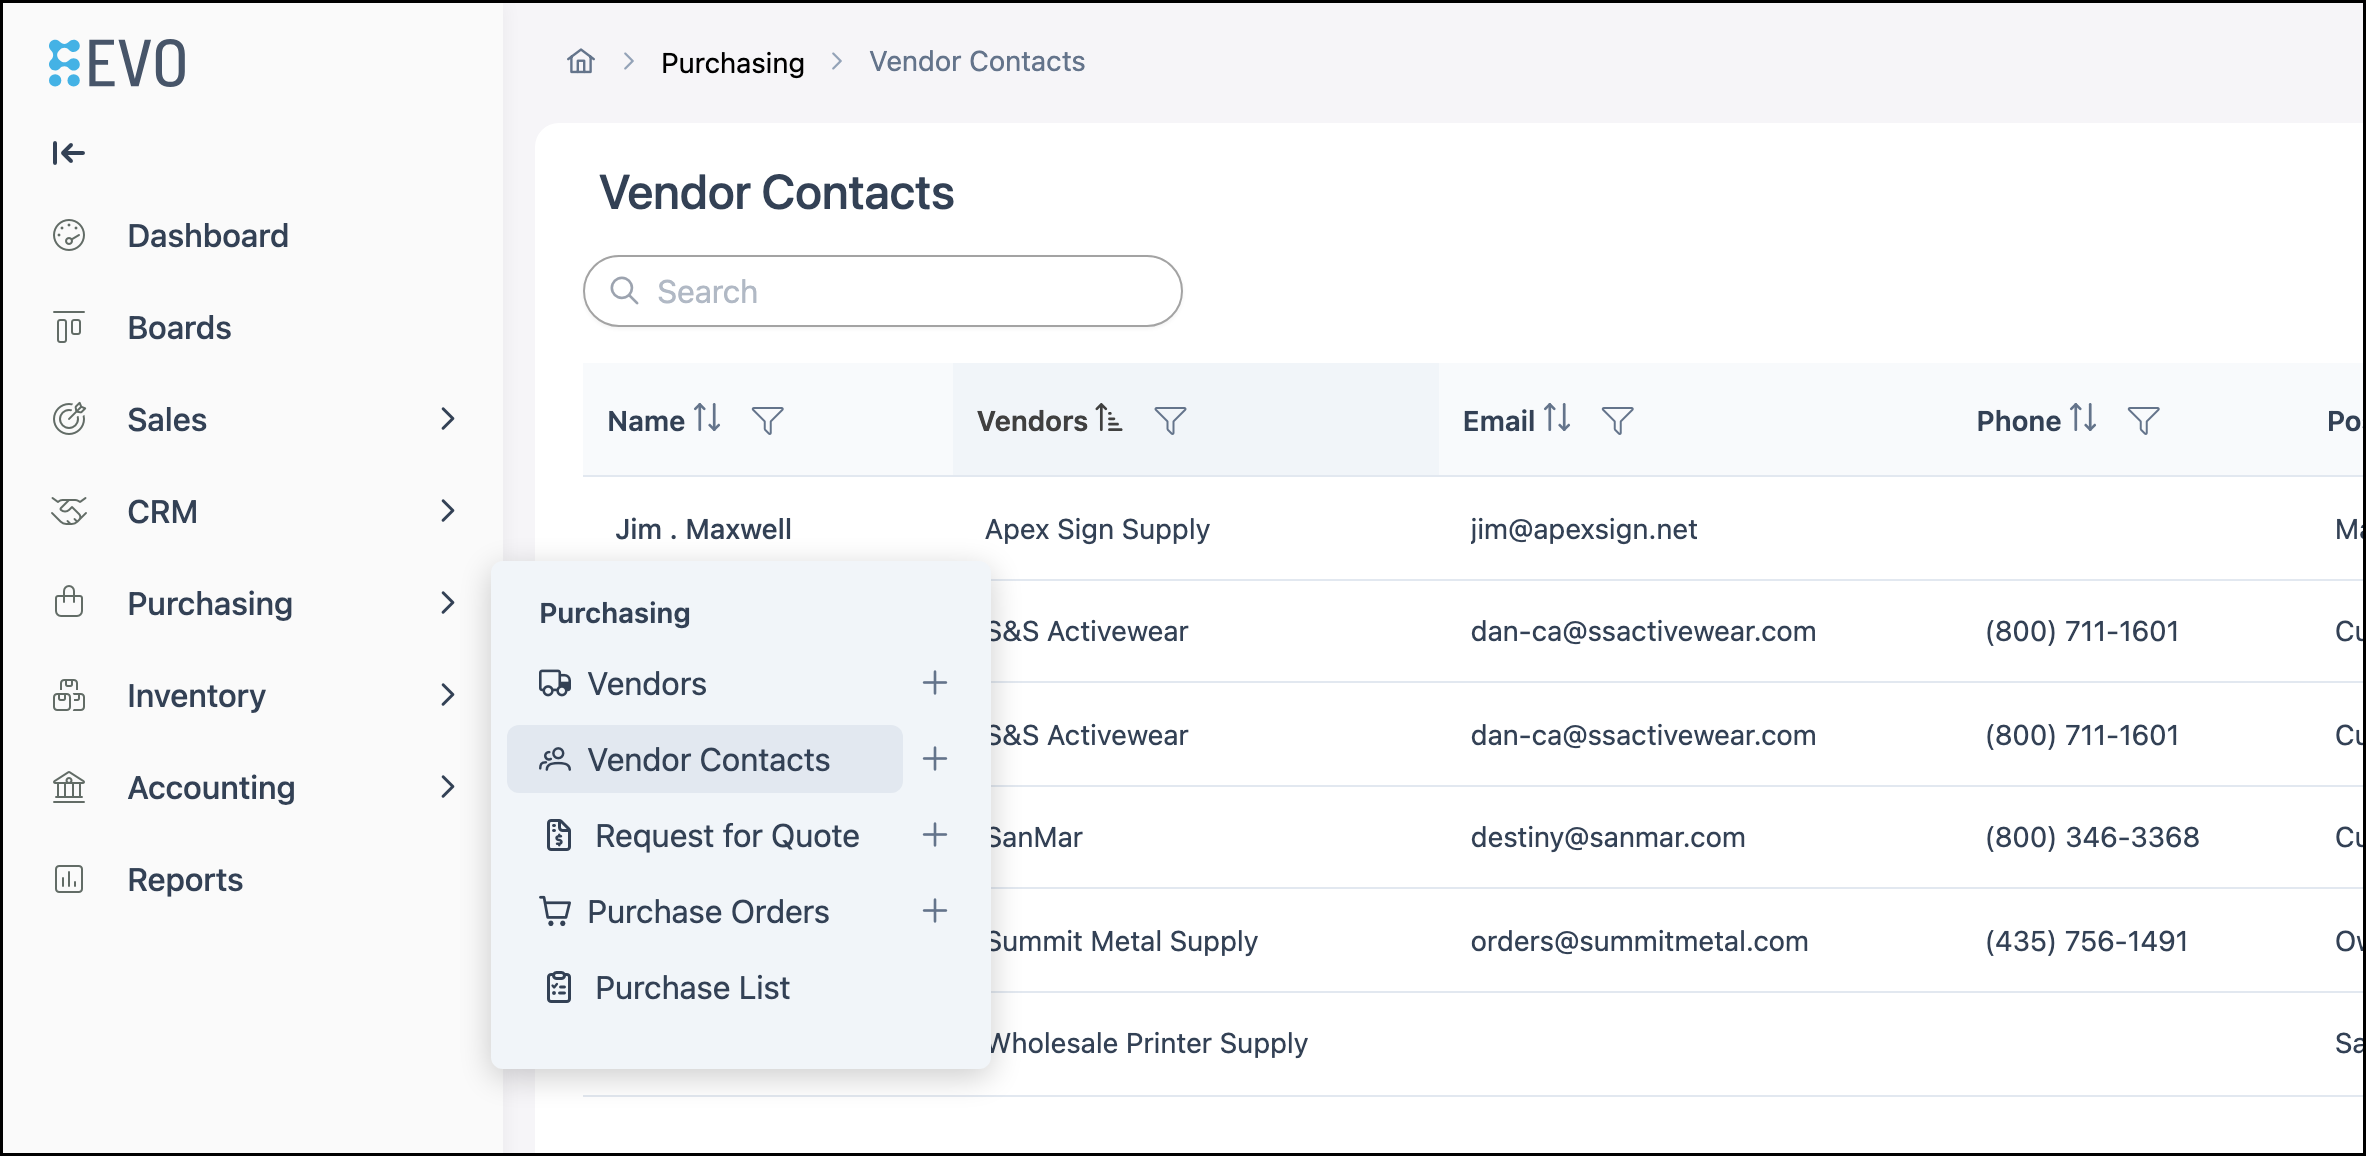
The Vendor Contacts list is where you find existing Contacts and start a new one.
a. Use the Search box to find a Contact by name or other criteria.
b. The Contact button opens the flow to create a new Vendor Contact.
c. Search Settings opens more options for the list.
d. Contact names open the Vendor Contact screen.

Creating a Vendor Contact
1. Click Contact to open Create Vendor Contact.

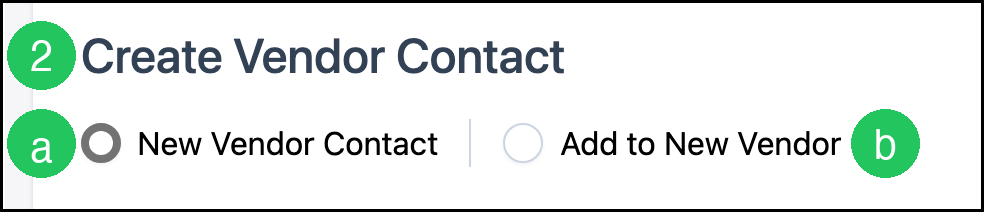
2. Select how you want to create the Contact:
a. New Vendor Contact - Create a Contact. You can optionally link the Contact to an existing Vendor, or leave the Vendor unselected to create a standalone Contact.
b. Add to New Vendor - Create a Primary Contact and a new Vendor in one step.
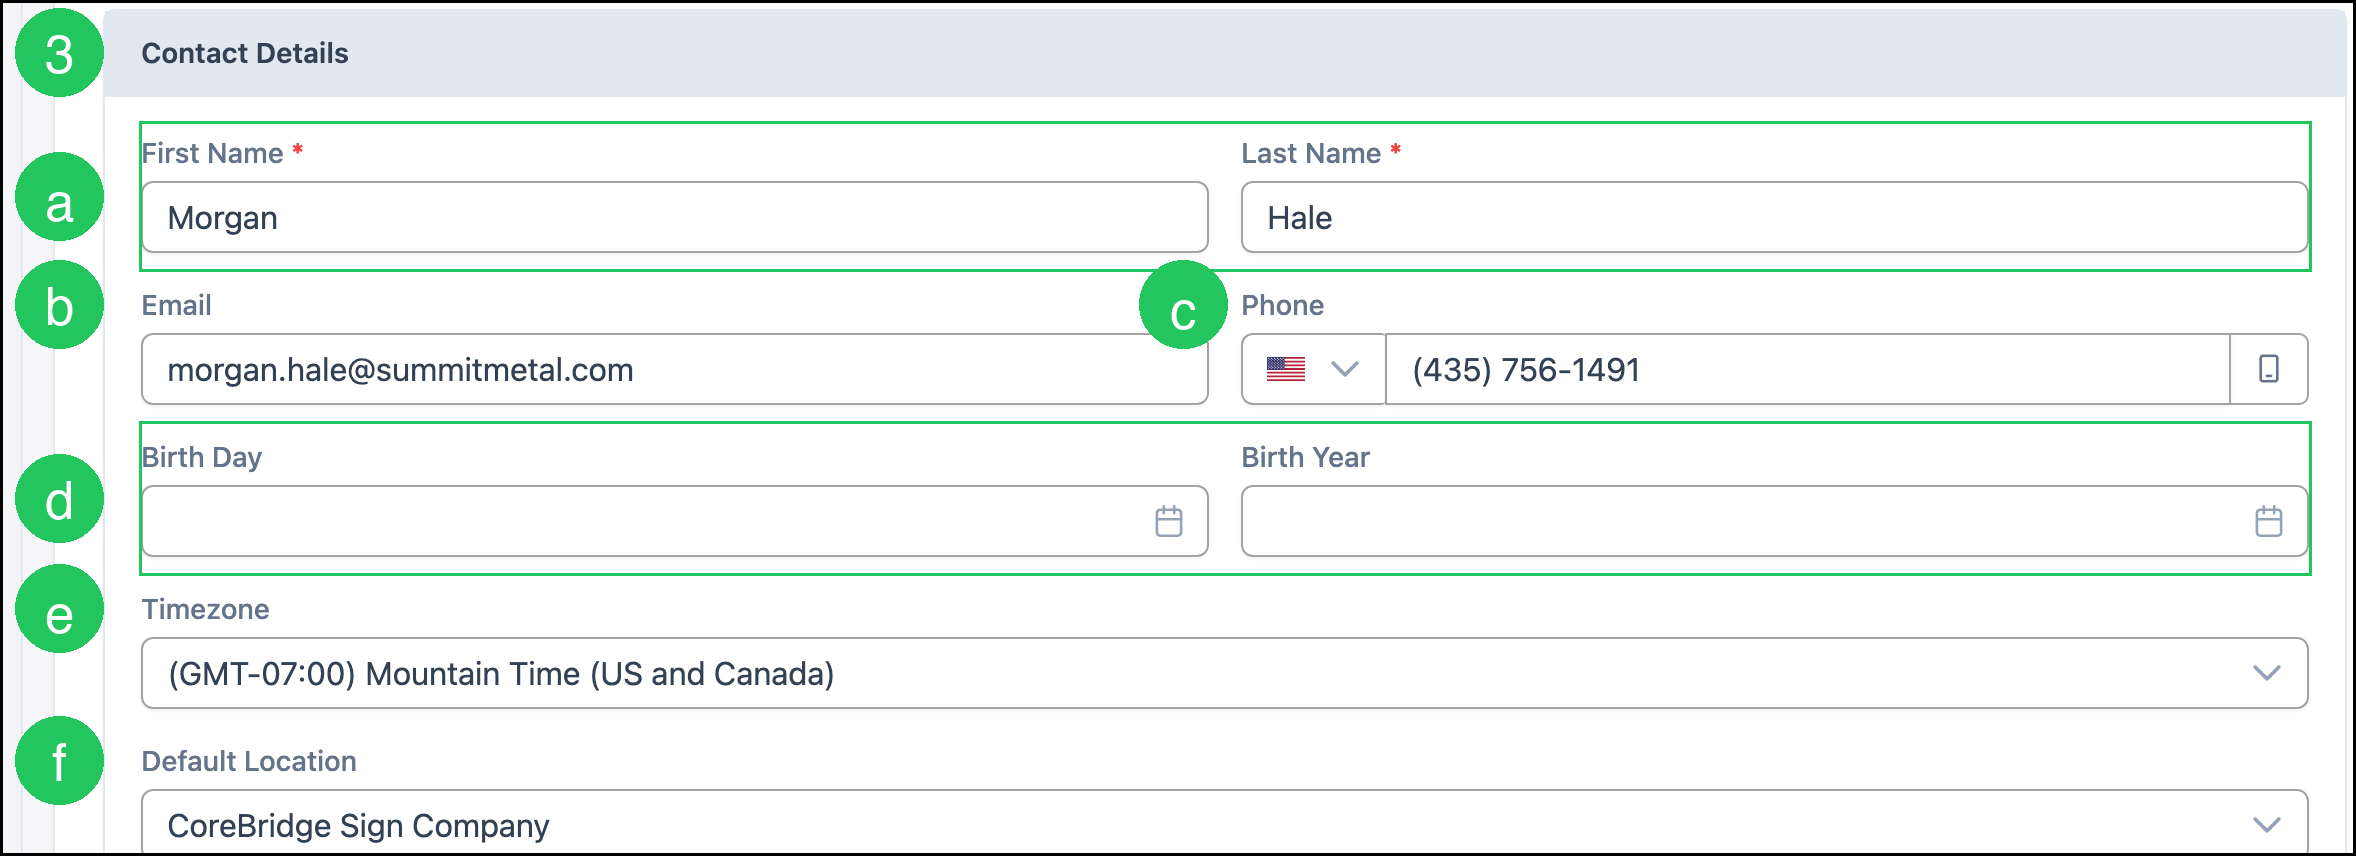
3. Enter the Contact Details.
a. First Name and Last Name - These fields are required.
b. Email - Needed if the Contact will use the Vendor Portal.
c. Phone - Enter only numbers; the system formats them automatically.
d. Birth Day and Birth Year - Optional; you can enter one or both.
e. Timezone - Set as needed for the Contact.
f. Default Location - The Location assigned to this Contact.
If you chose New Vendor Contact:
4. Use Link to Vendor to optionally select an existing Vendor. Leave this empty to create a standalone Contact.
5. Click Save.

If you chose Add to New Vendor:
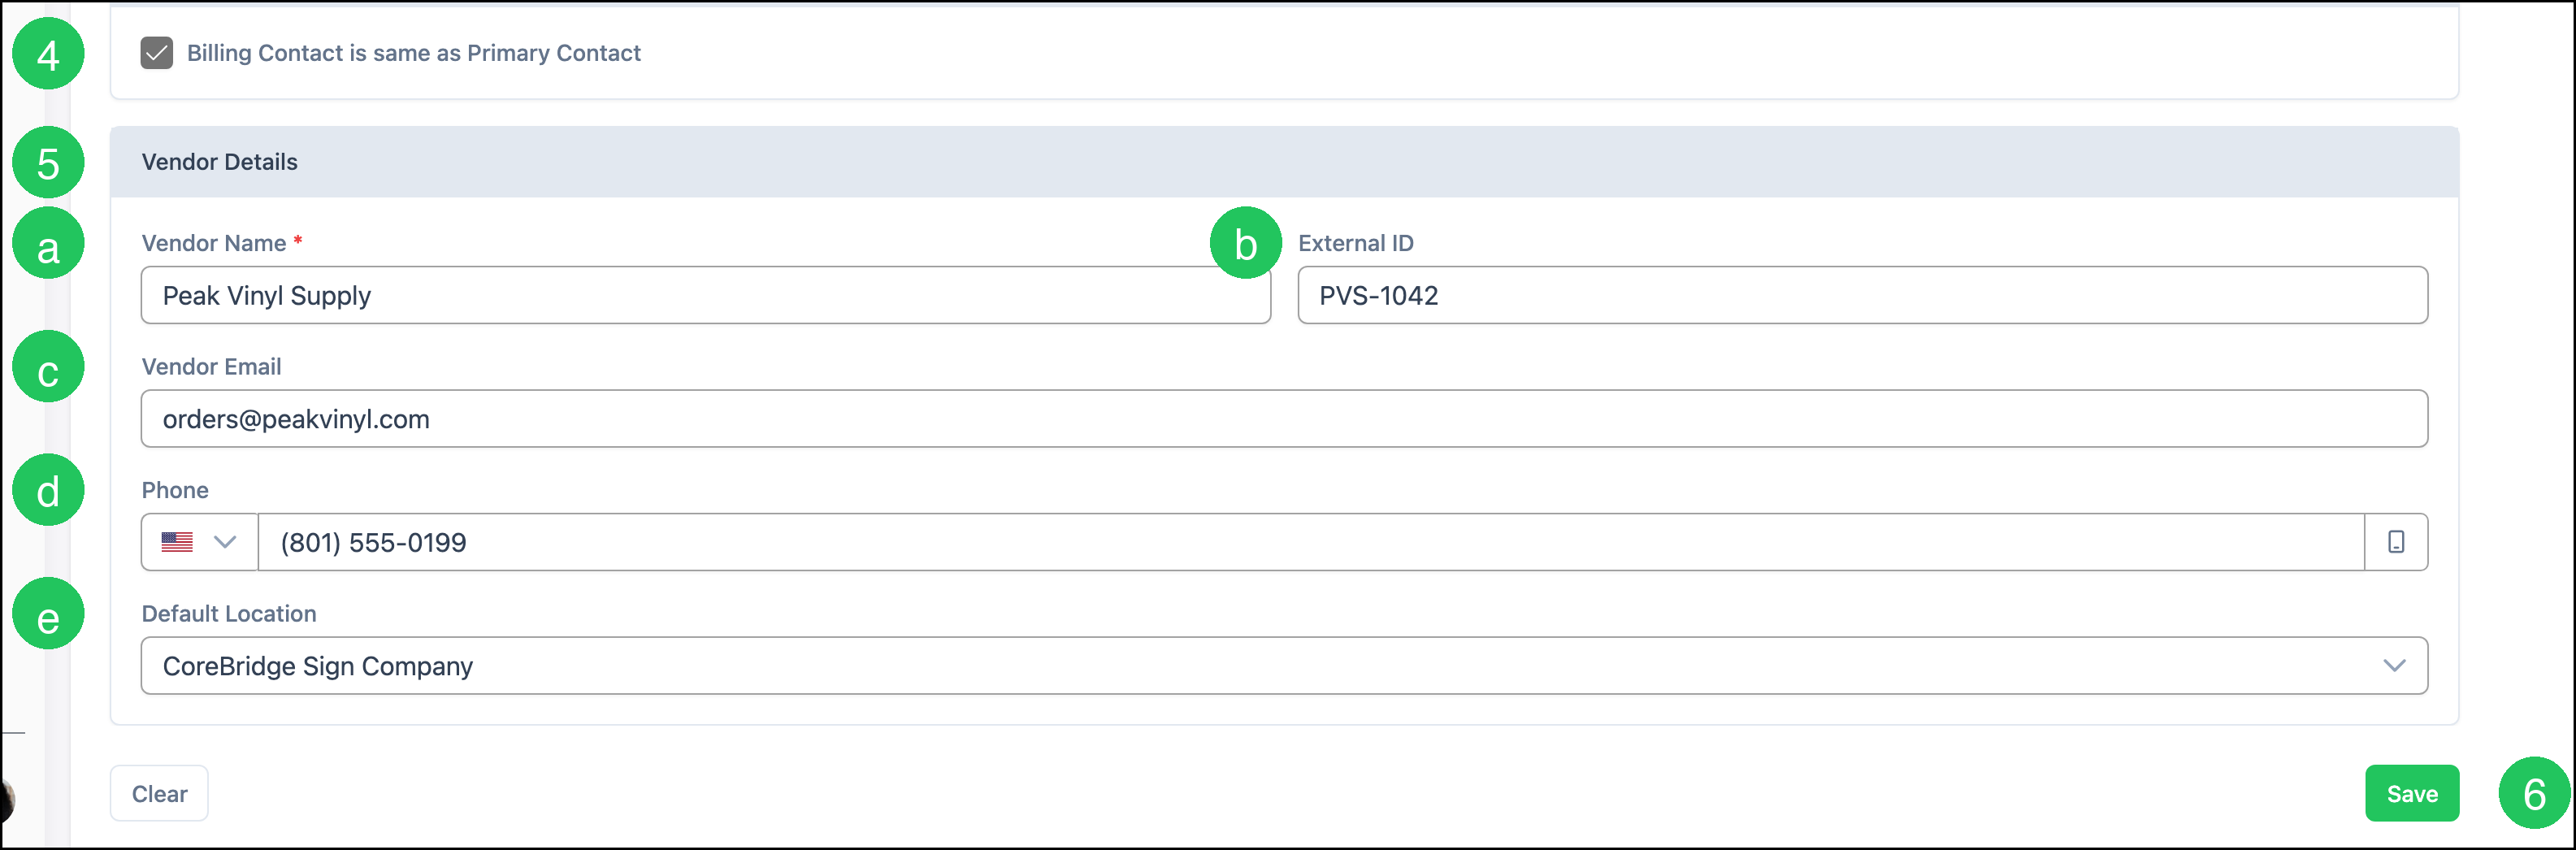
4. Leave Billing Contact is same as Primary Contact selected, or clear it and enter a separate Billing Contact.
5. Complete Vendor Details.
a. Vendor Name - This field is required.
b. External ID - An identification number you use to reference this Vendor, if applicable.
c. Vendor Email - Main email for this Vendor.
d. Phone - Enter only numbers; the system formats them automatically.
e. Default Location - The Location assigned to this Vendor.
6. Click Save.
Note: After the Vendor is created, you can add Sales Context and Accounting Details on the Vendor screen. See Creating Vendors.
Vendor Contact Heading
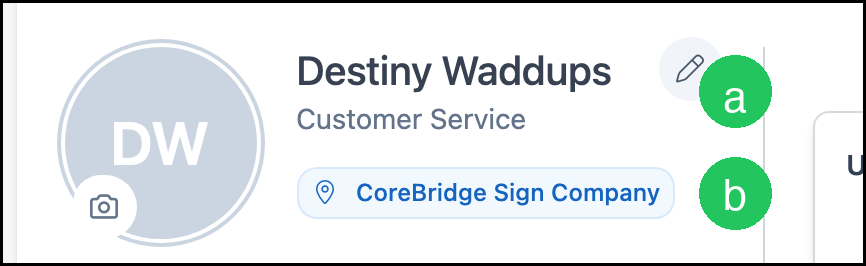
At the top of the Vendor Contact screen is a heading area with quick information about the Contact. What appears depends on the information you have entered.
a. Contact name - The name of the Contact and position with the Vendor.
b. Default Location - The Location that handles business with this Contact.
Vendor Contact Details
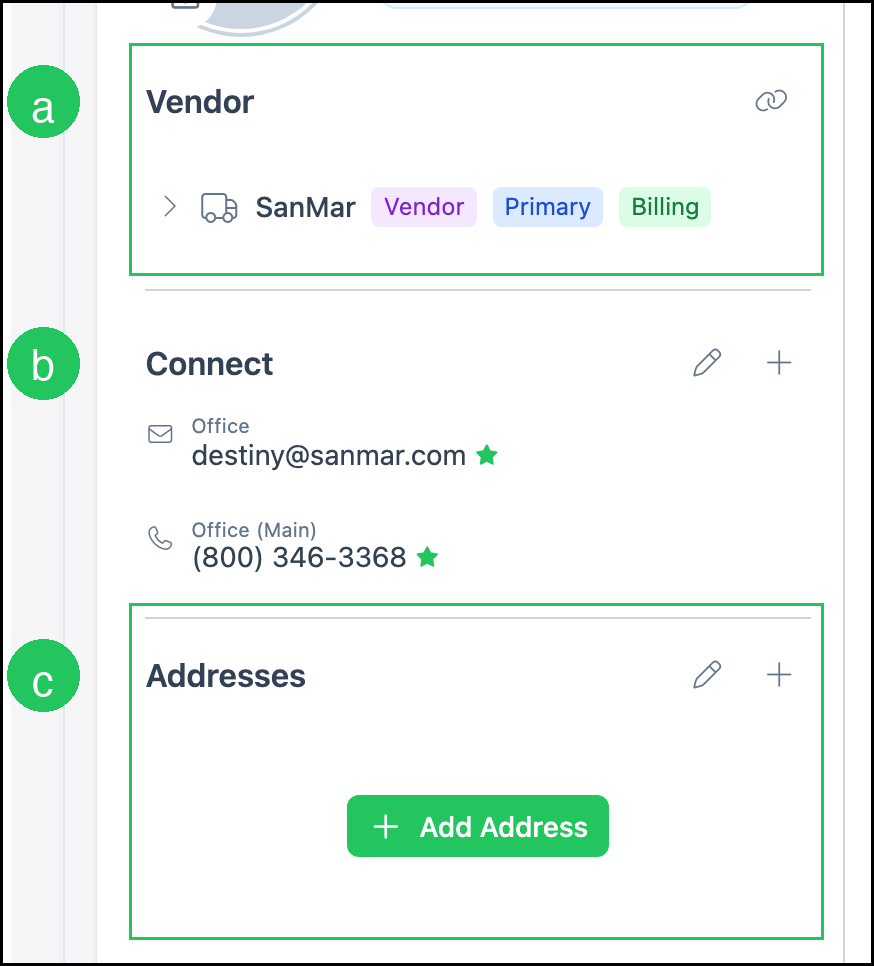
The Vendor Contact screen includes the information entered when the Contact was created, plus linked Vendors, contact methods, and addresses.
a. Vendor - The Vendors linked to this Contact. Each Vendor name is a link that opens that Vendor. Primary and Billing are shown where applicable.
b. Connect - Email addresses and phone numbers (for example, Office, Office Main).
Note: Enter only numbers for phone fields; the system formats them automatically.
c. Addresses - Addresses for this Contact. Click Add Address to add a new address.
Note: For Contacts that are not linked to a Vendor, the Contact screen does not show a Vendor list.
Vendor Overview and Activity
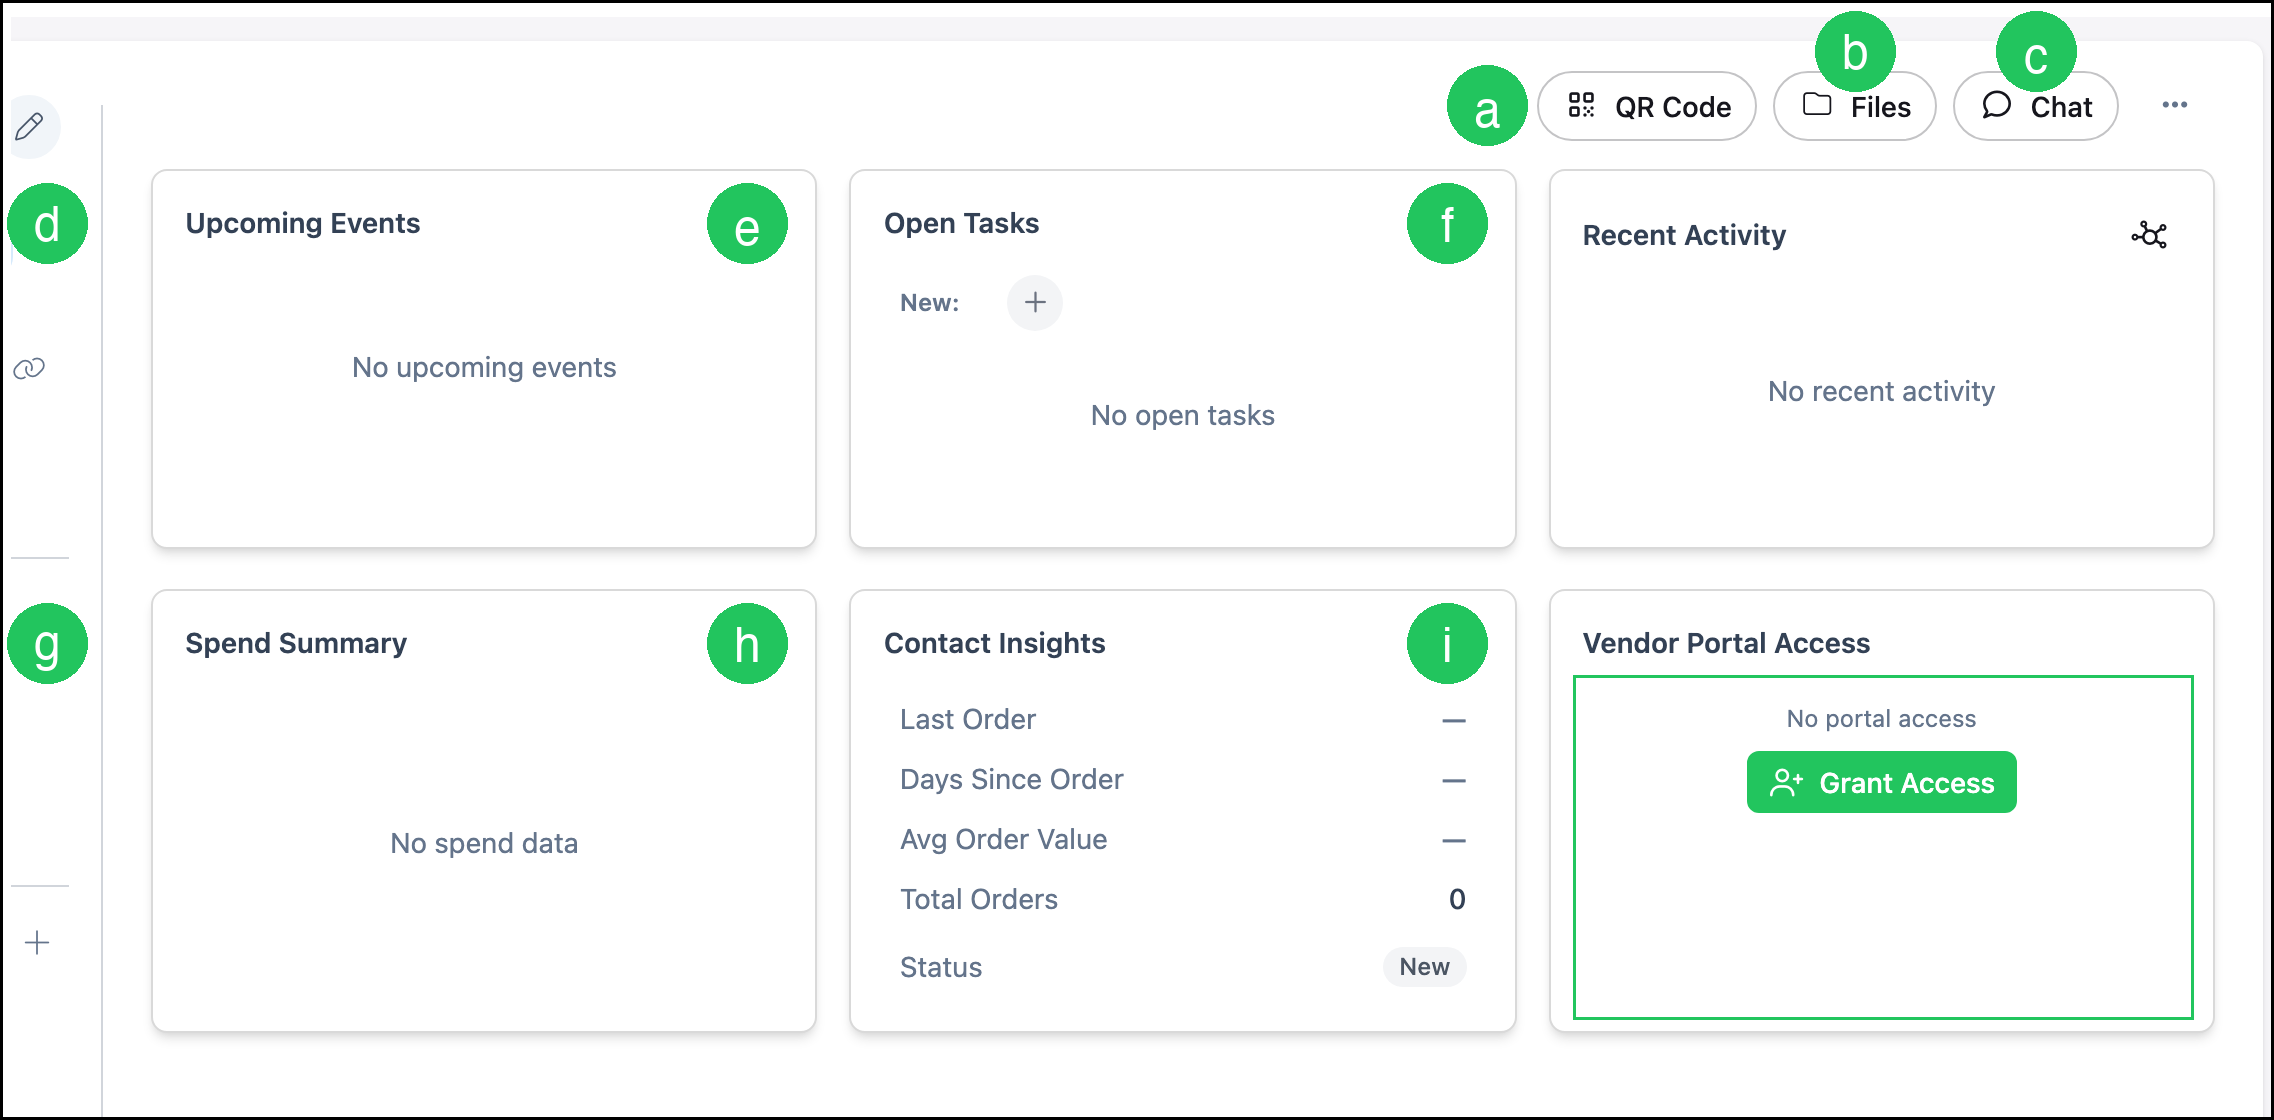
a. QR Code - View or generate a QR code for this Contact.
b. Files - View and manage files associated with this Contact.
c. Chat - An internal, timestamped conversation that allows Employees to ask questions, share updates, and collaborate about a specific Contact in one centralized location. For more information on Chat, see Company Notes in Chat.
Note: More Actions includes Set Inactive, History, and Log Activity.
d. Upcoming Events - Scheduled Calendar events associated with this Contact. If there are none, the section indicates that.
e. Open Tasks - Tasks associated with this Contact that are not yet complete. If there are none, the section indicates that.
f. Recent Activity - Recent activity for this Contact. If there is none, the section indicates that.
g. Spend Summary - Spend associated with this Contact, when data is available.
h. Contact Insights - Key metrics such as Last Order, Days Since Order, Avg Order Value, Total Orders, and Status.
i. Vendor Portal Access - Shows whether this Contact has access to the Vendor Portal. If the Contact does not have access, use Grant Access to send an invitation. For more information, see Vendor Portal.
Frequently Asked Questions
1. How is a Vendor Contact different from a Sales Contact?
Answer: Vendor Contacts are managed under Purchasing / Vendor Contacts and link to Vendors. Sales Contacts are managed under Sales and link to Companies. For Sales Contacts, see Creating Contacts.
2. Can I create a Vendor at the same time as a Contact?
Answer: Yes. On Create Vendor Contact, select Add to New Vendor, enter the Primary Contact and Vendor Details, then click Save.
3. How do I give a Vendor Contact access to the Vendor Portal?
Answer: Open the Contact and click Grant Access in Vendor Portal Access. The Contact needs an email address. For more information, see Vendor Portal.
Related Articles
Additional Contact Features
Additional Vendor Features
Company Notes in Chat
Creating Contacts
Creating Vendors
Employee Roles and Permissions in Settings
Managing Vendors