
CoreBridge provides tools to help you track vendor performance, manage compliance documents, and identify preferred suppliers. This article covers marking a vendor as preferred, the vendor rating system, and required documents.
Table of Contents
Preferred Vendors
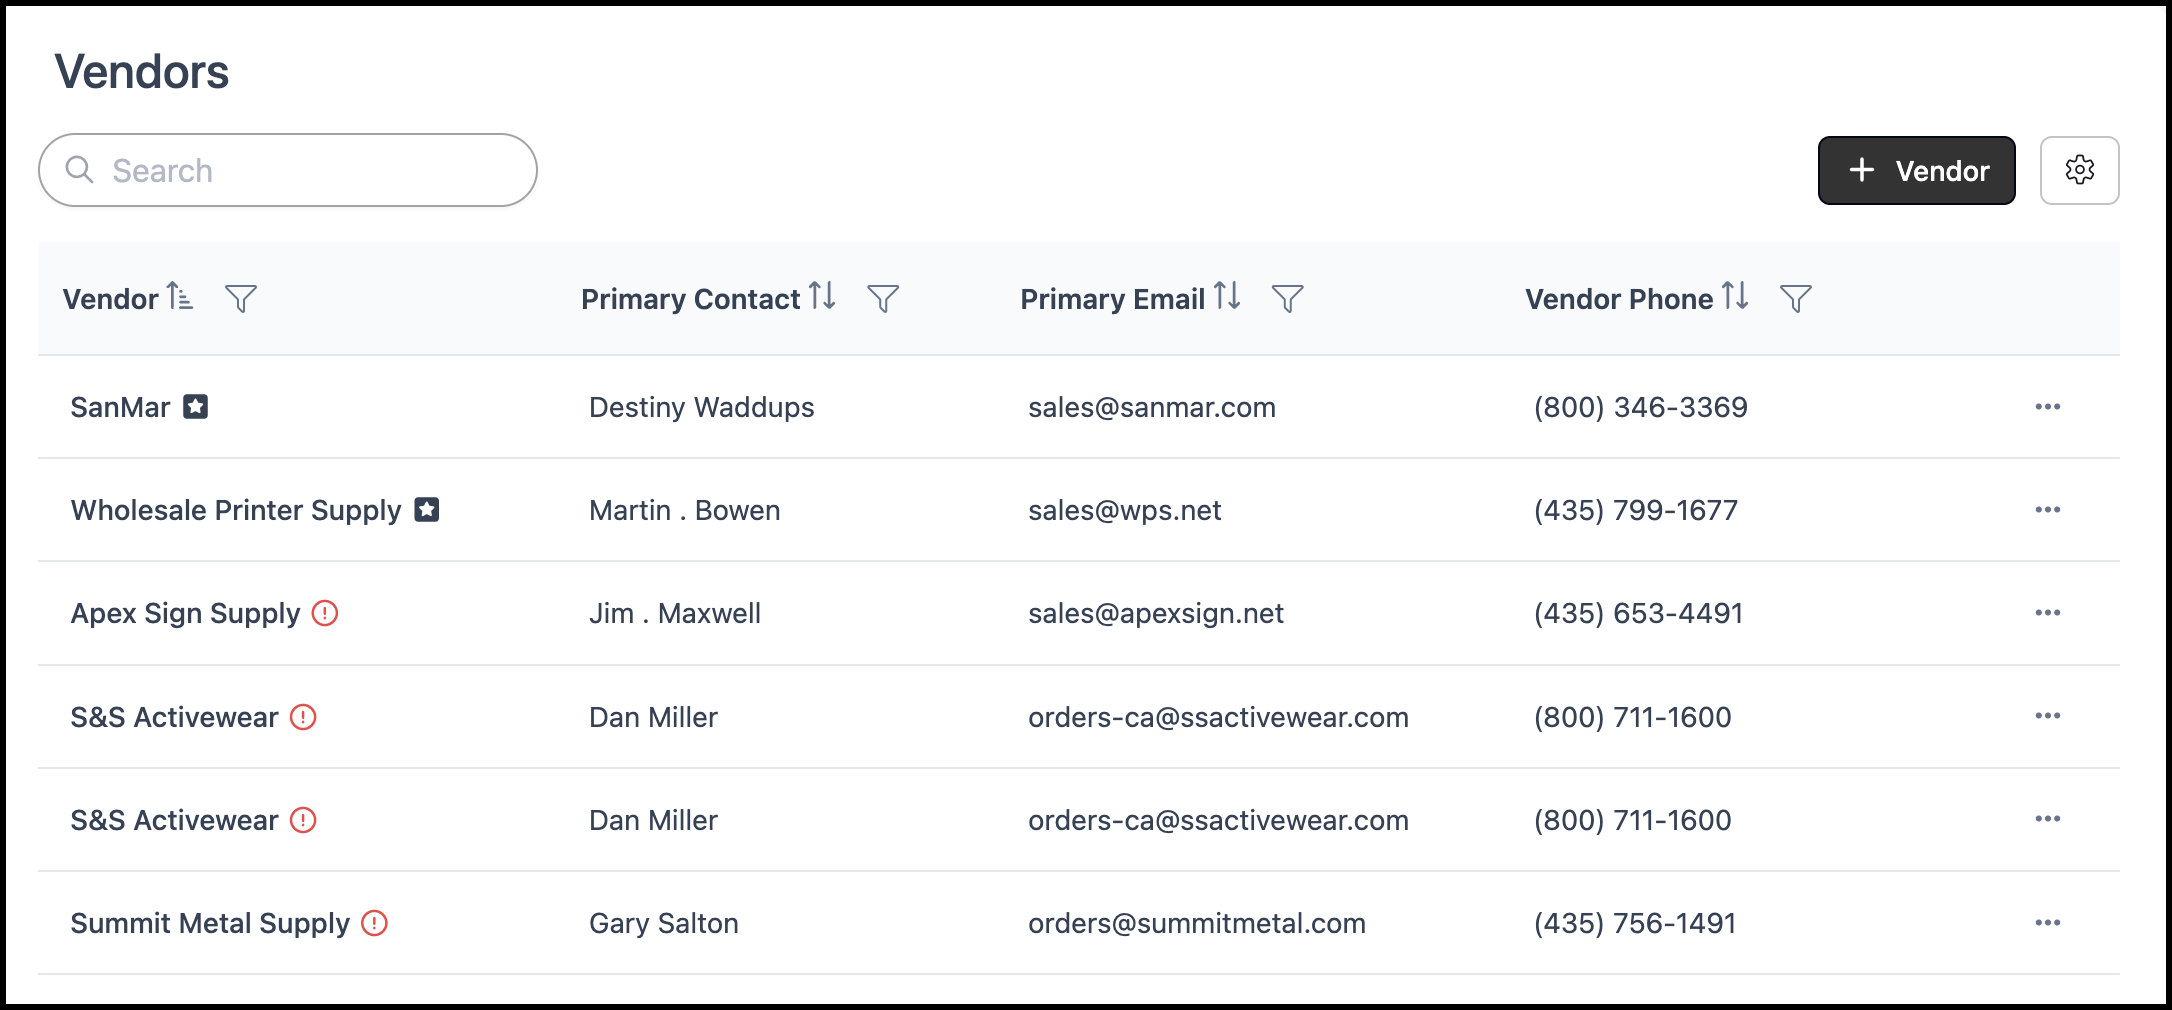
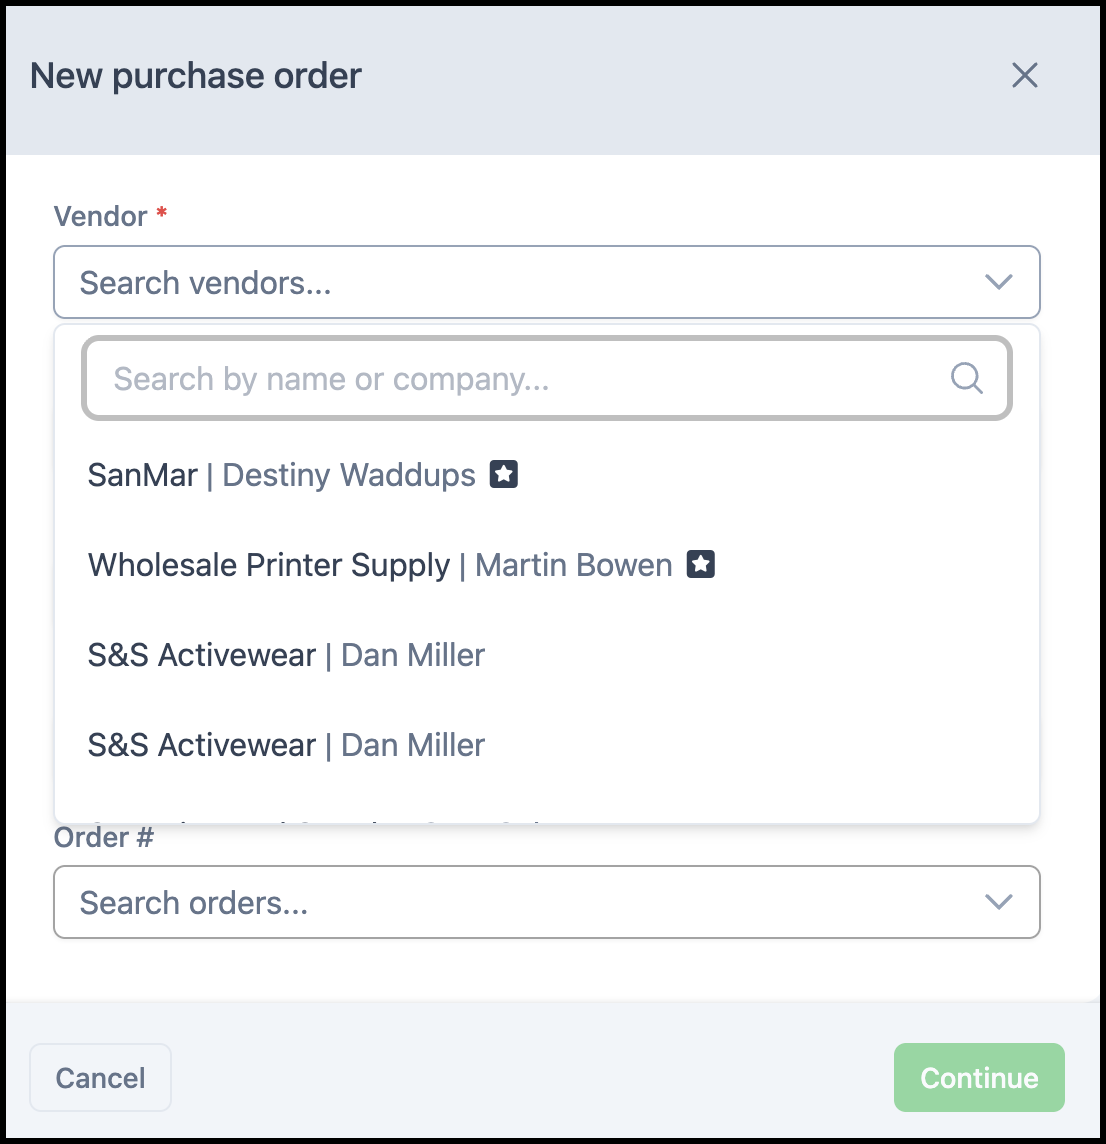
Marking a vendor as preferred makes it easy to identify your go-to suppliers on the Vendor search screen and when creating purchase orders.
Navigate to Purchasing / Vendors and open the vendor.
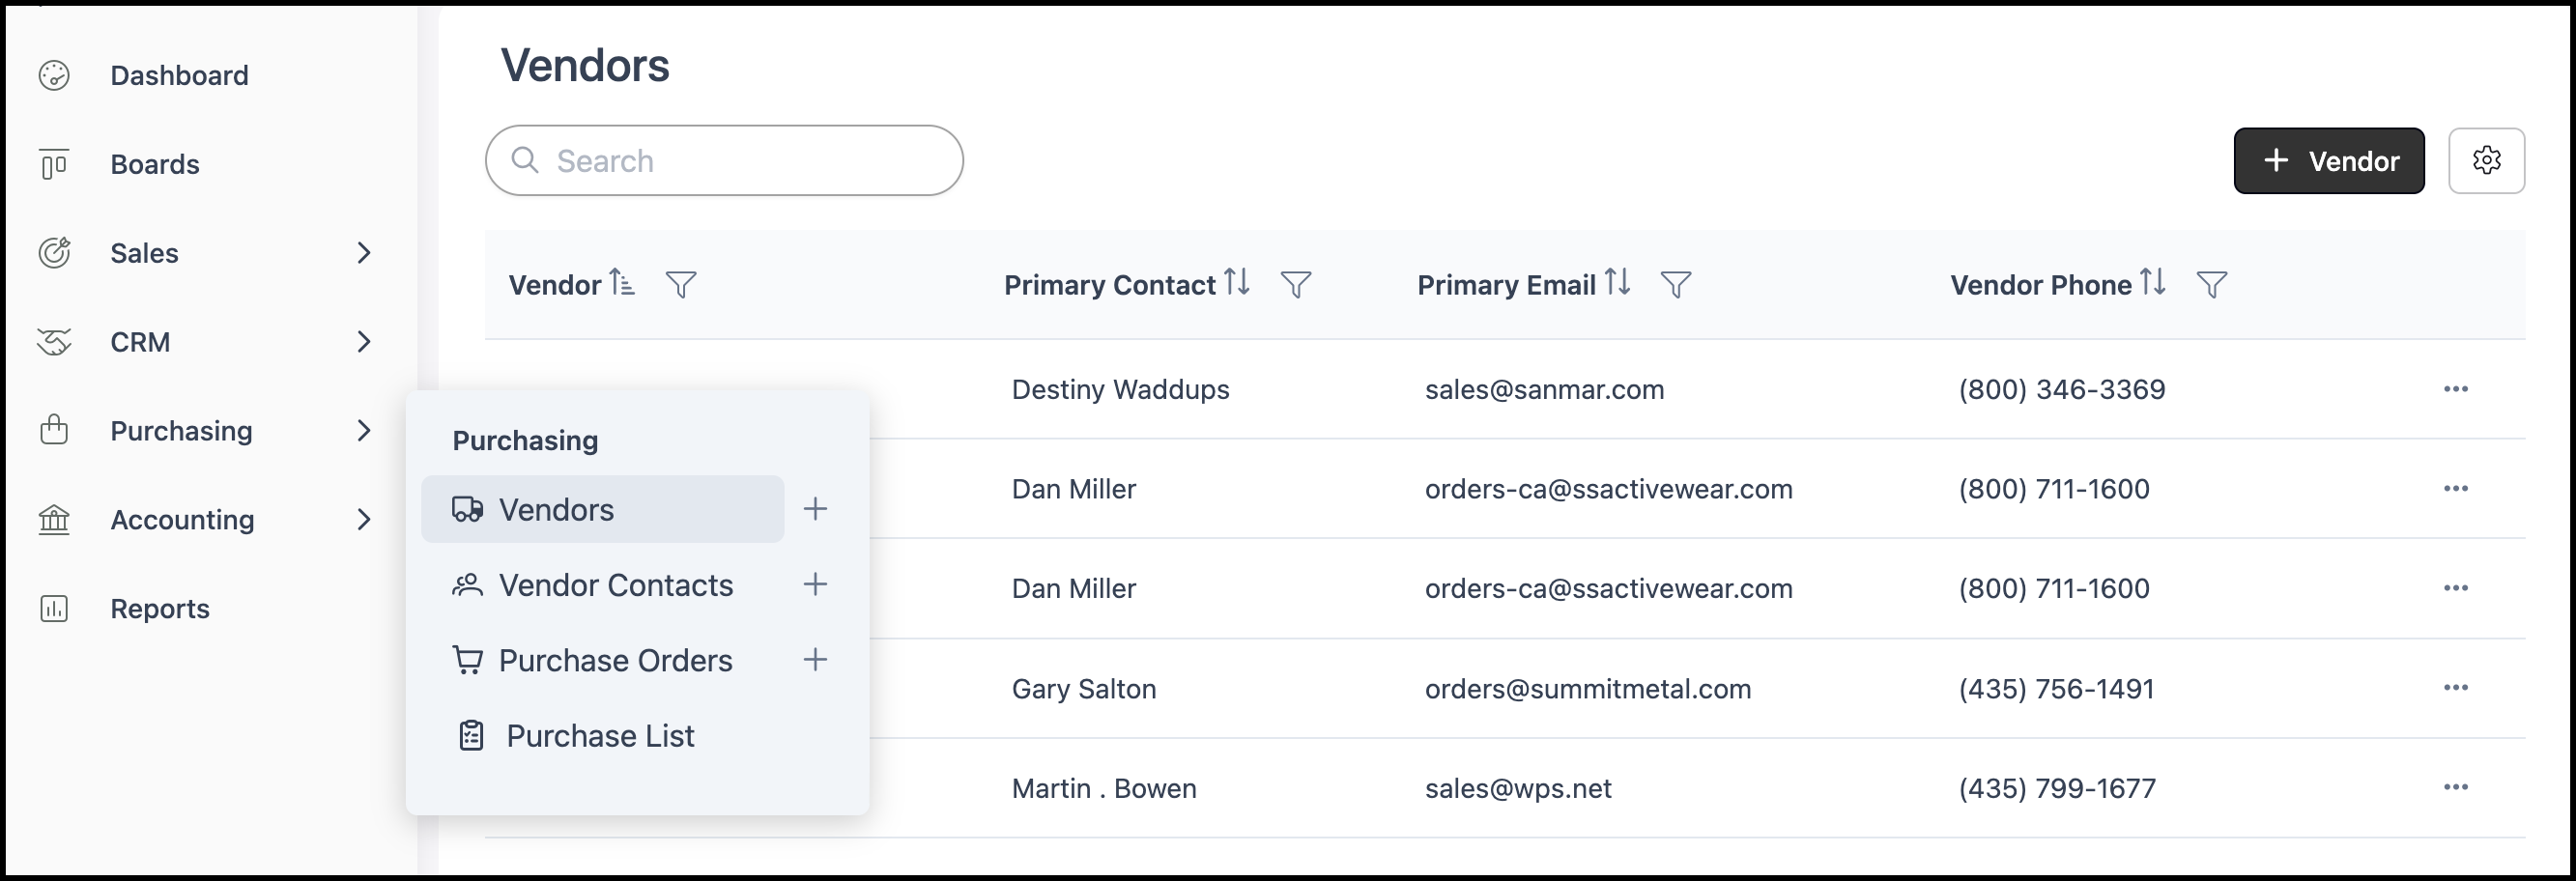
1. Select the bookmark icon at the top of the vendor page to mark it as preferred. The icon will appear filled when the vendor is preferred.
Note: To remove the preferred status, select the icon again.
Note: Preferred status is displayed on the main vendor page as well as in the vendor dropdown when creating a Purchase Order. Preferred vendors will be moved to the top of these lists. See Examples below.
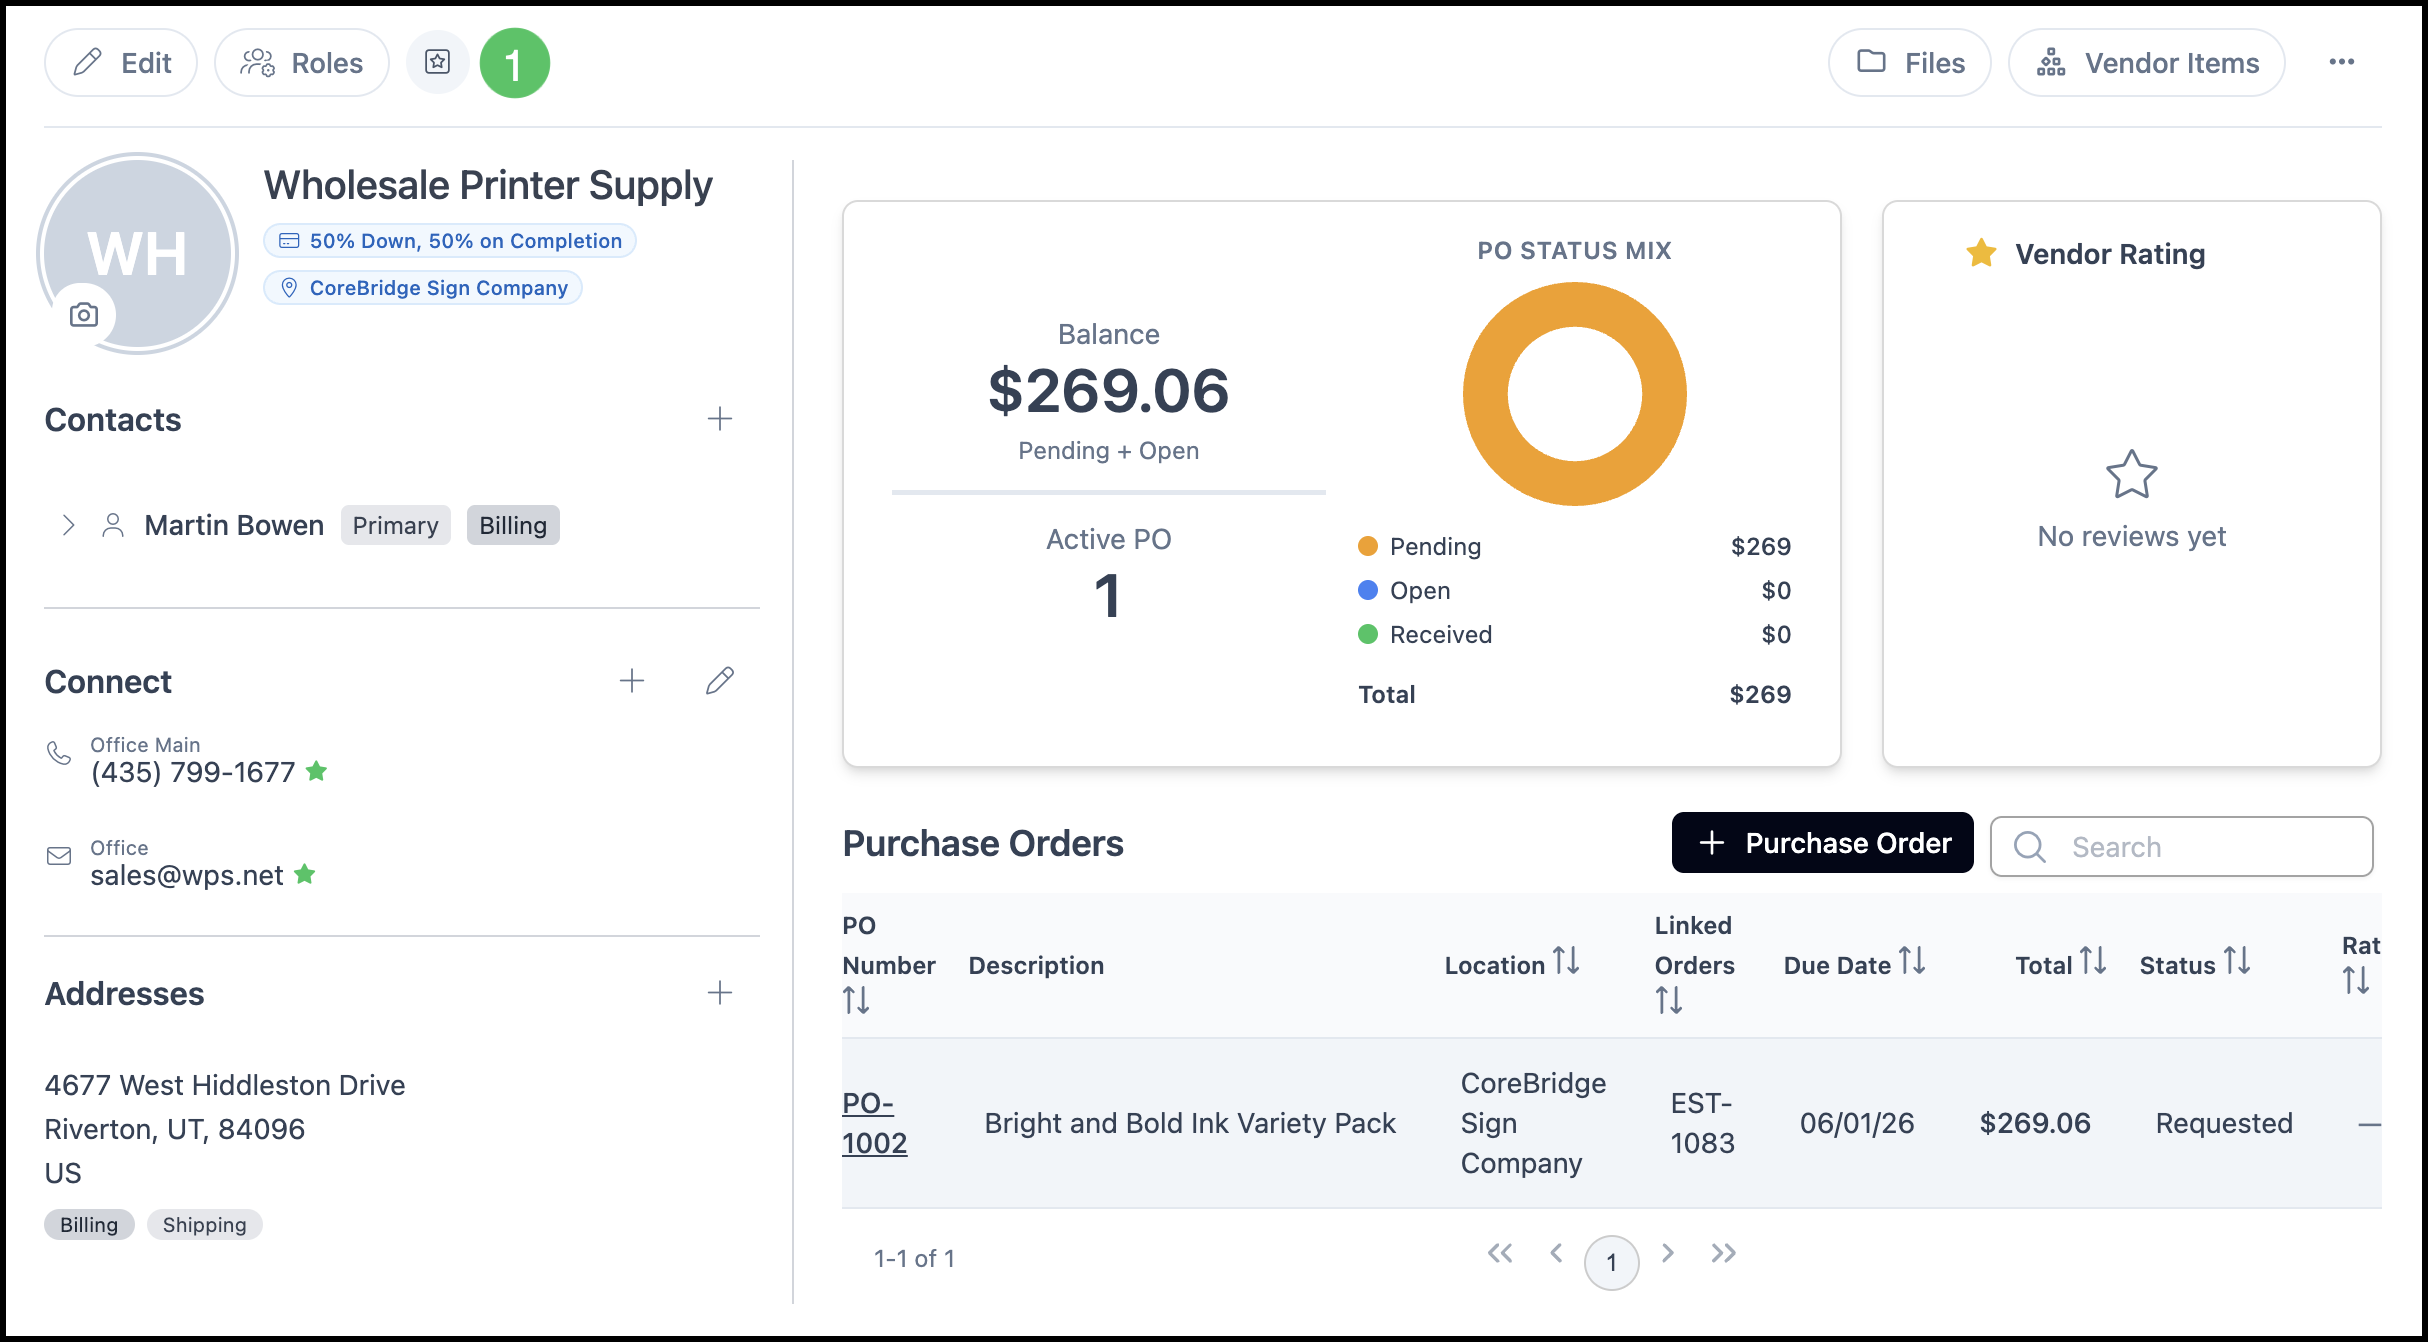
Examples:
Vendor Rating
CoreBridge tracks vendor performance through a star rating system. Ratings are submitted when a Purchase Order is marked as Received and display on the vendor profile in real time.
Submitting a Rating
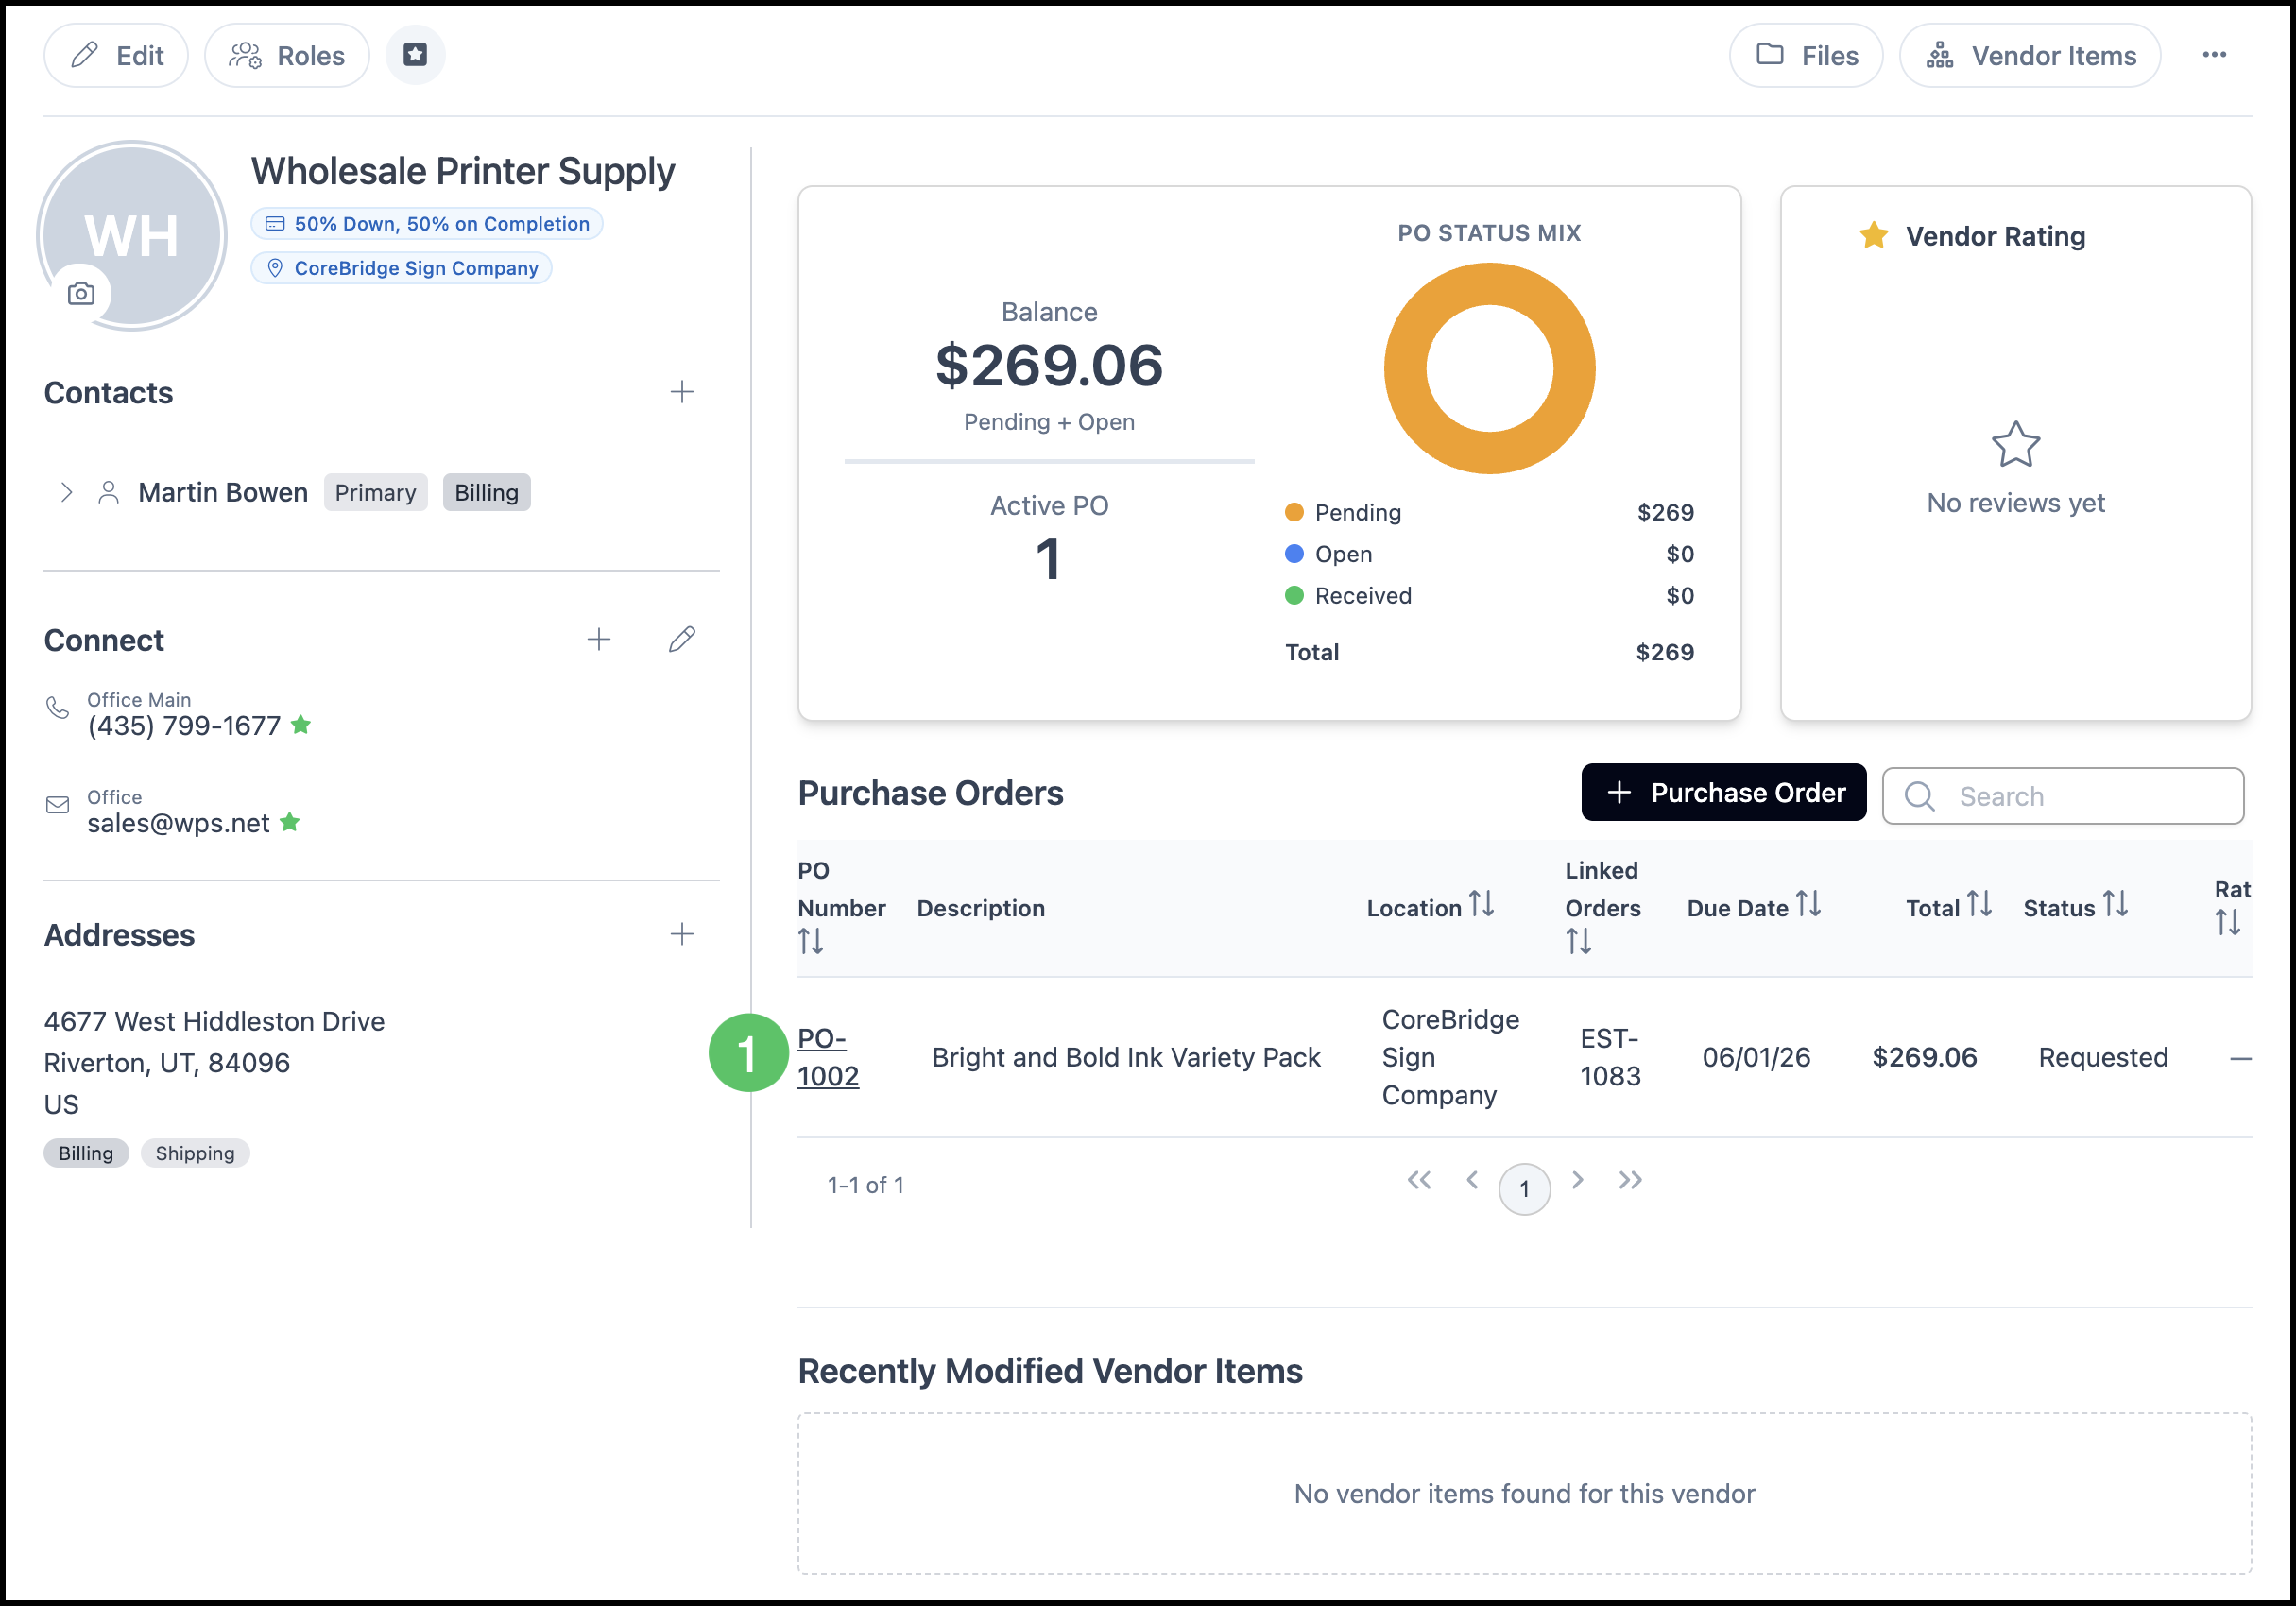
1. Select the Purchase Order from the vendor screen.
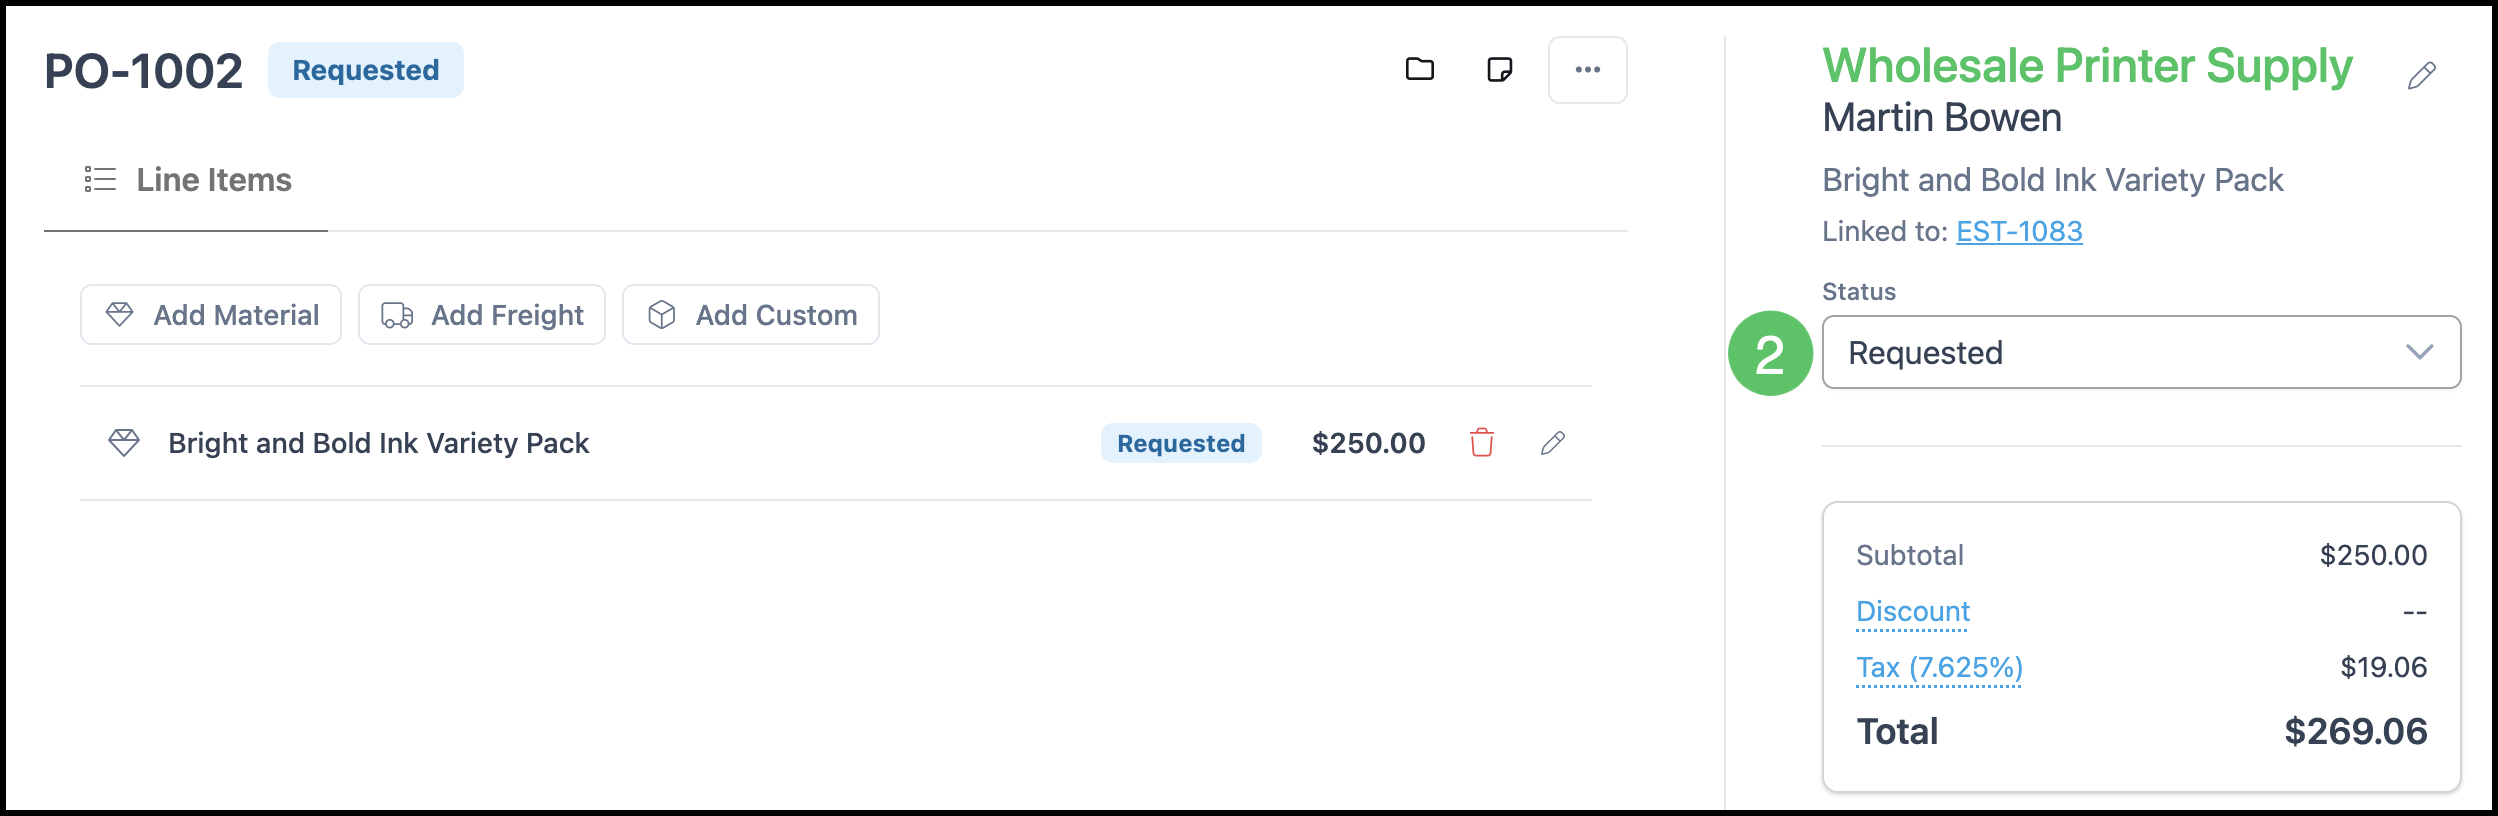
2. Update the Status to Received.
Note: When marking a Purchase Order as Received, you will be prompted to submit a star rating and an optional comment.
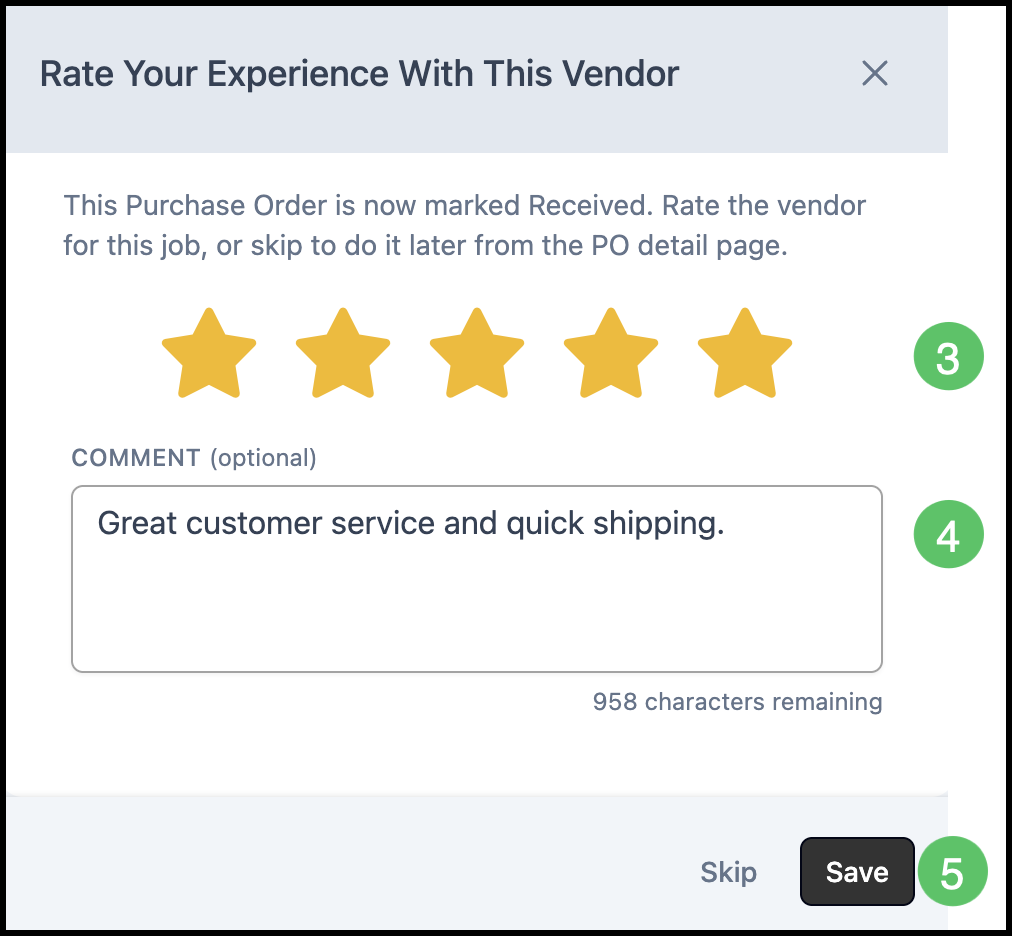
3. Rate your experience.
4. Provide a comment, if desired.
5. Click Save.
Note: Rating can be skipped.
Viewing Ratings
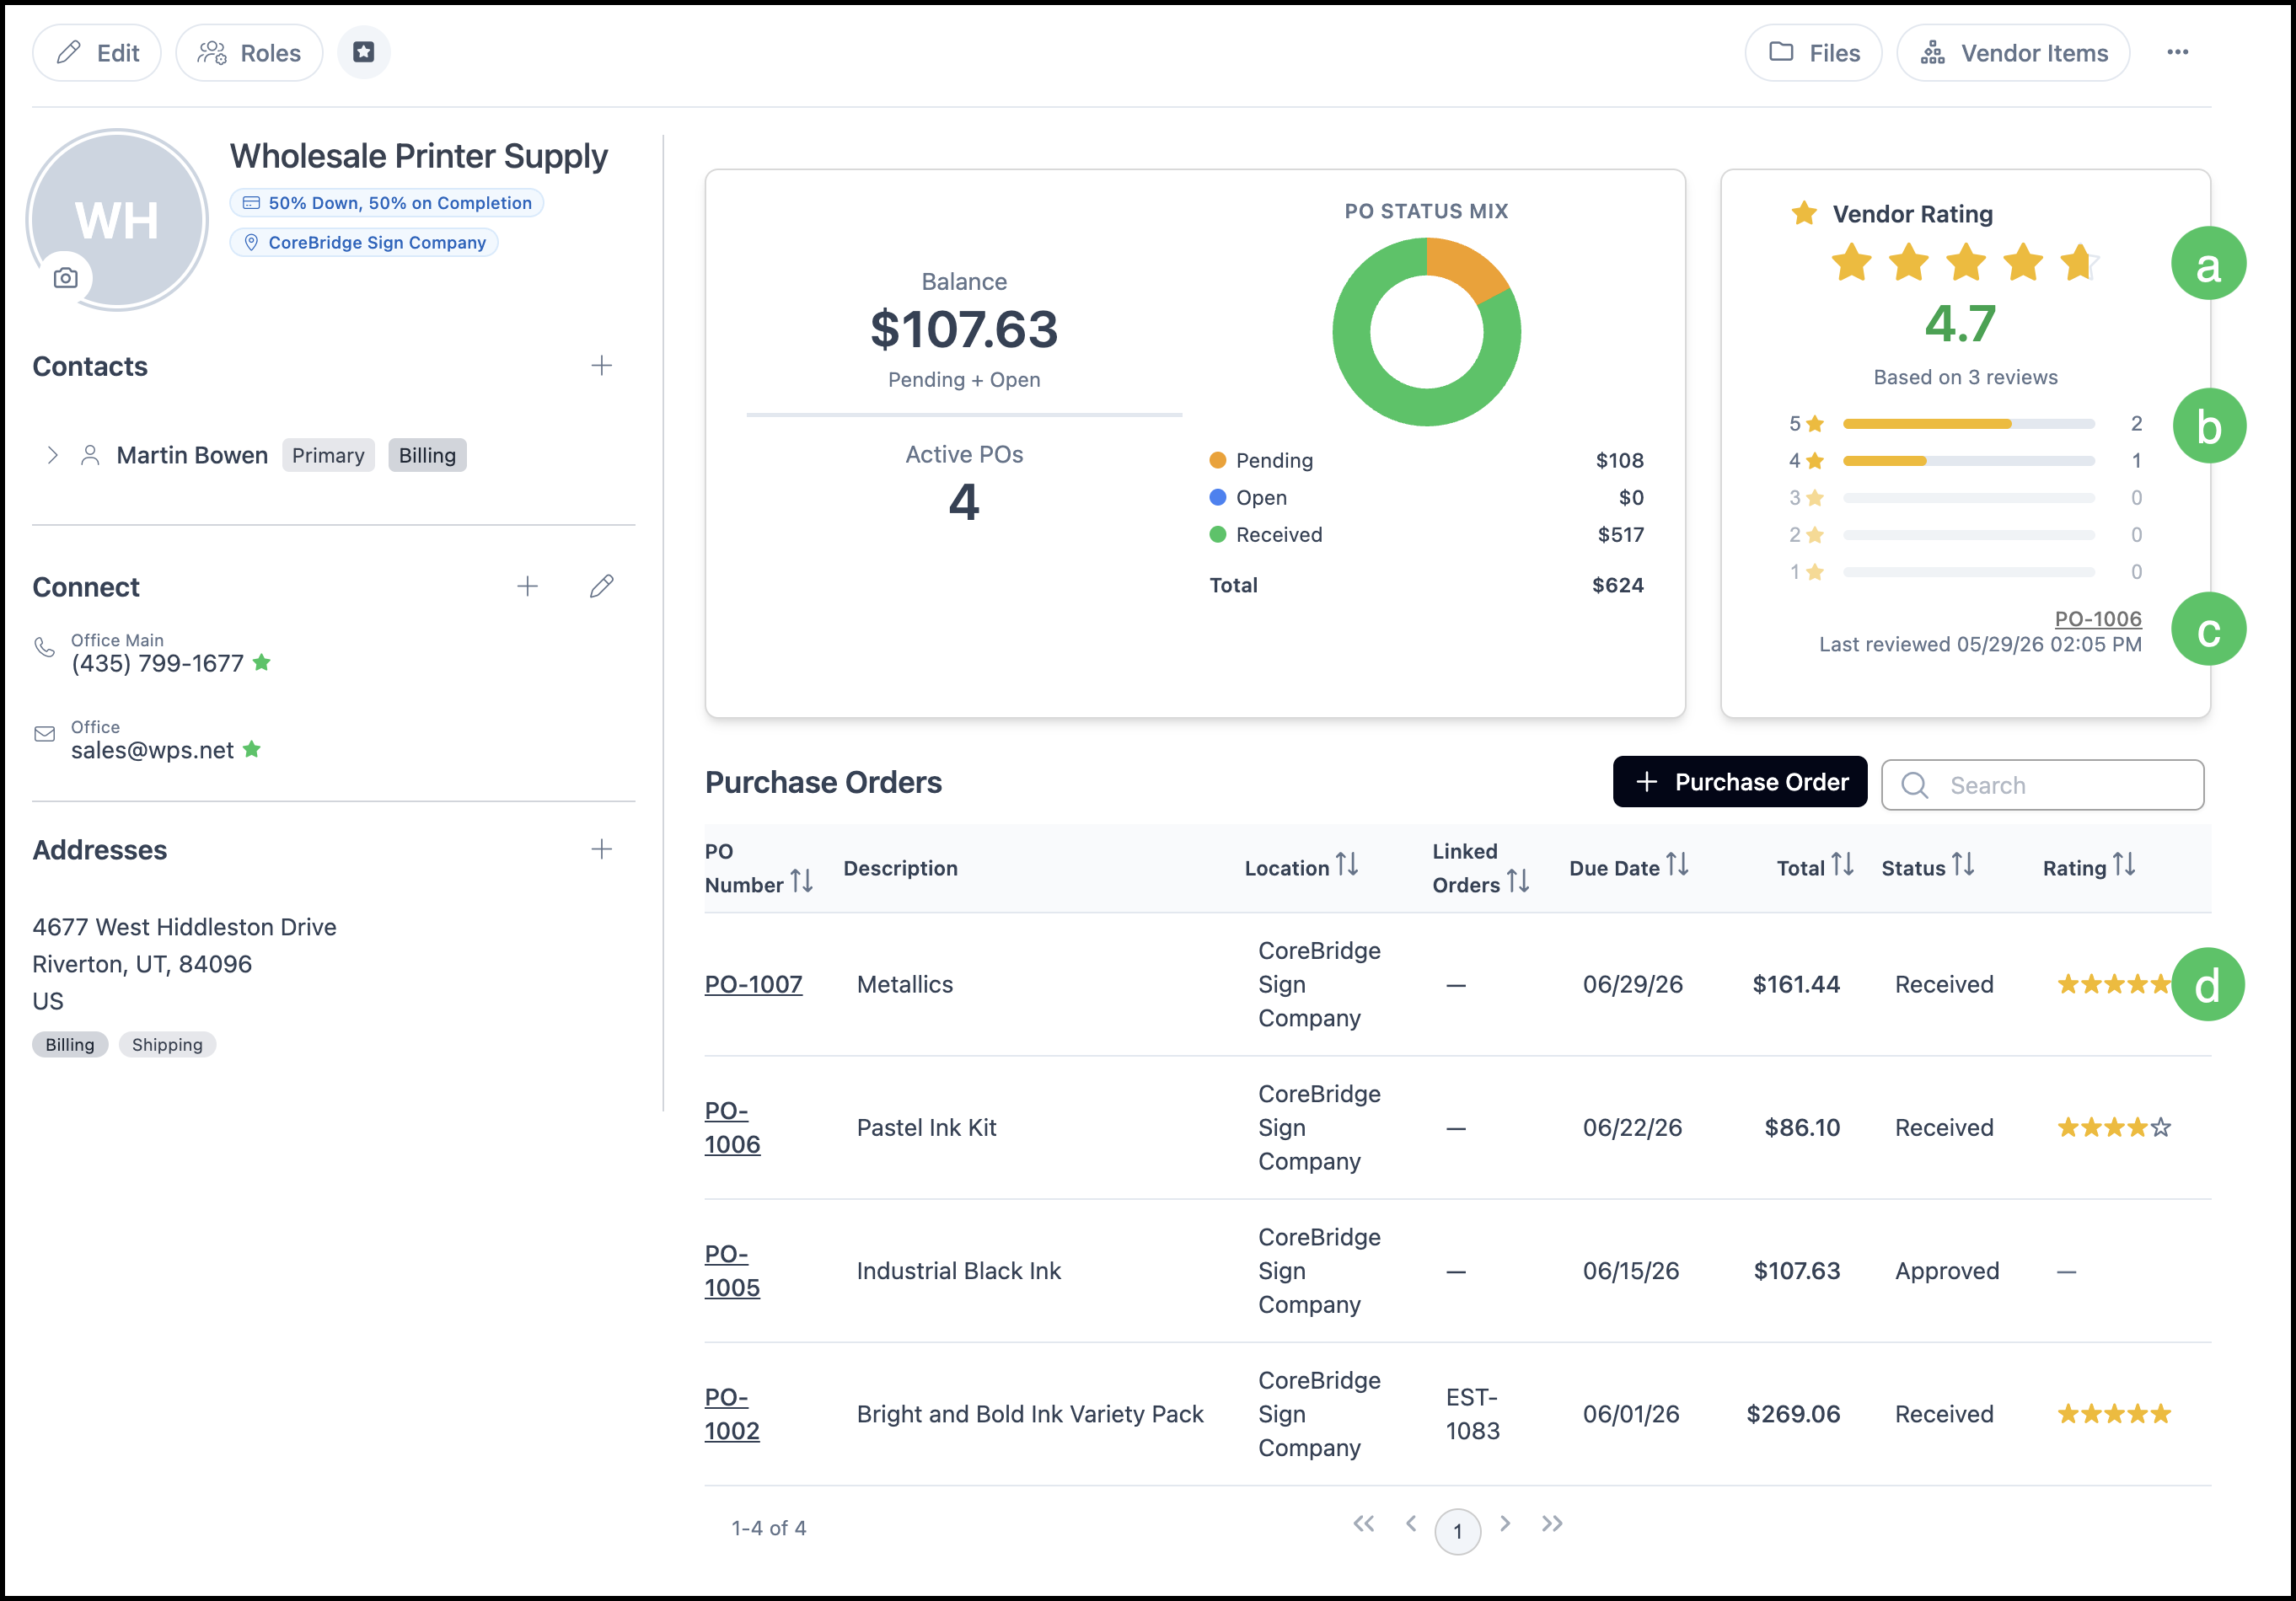
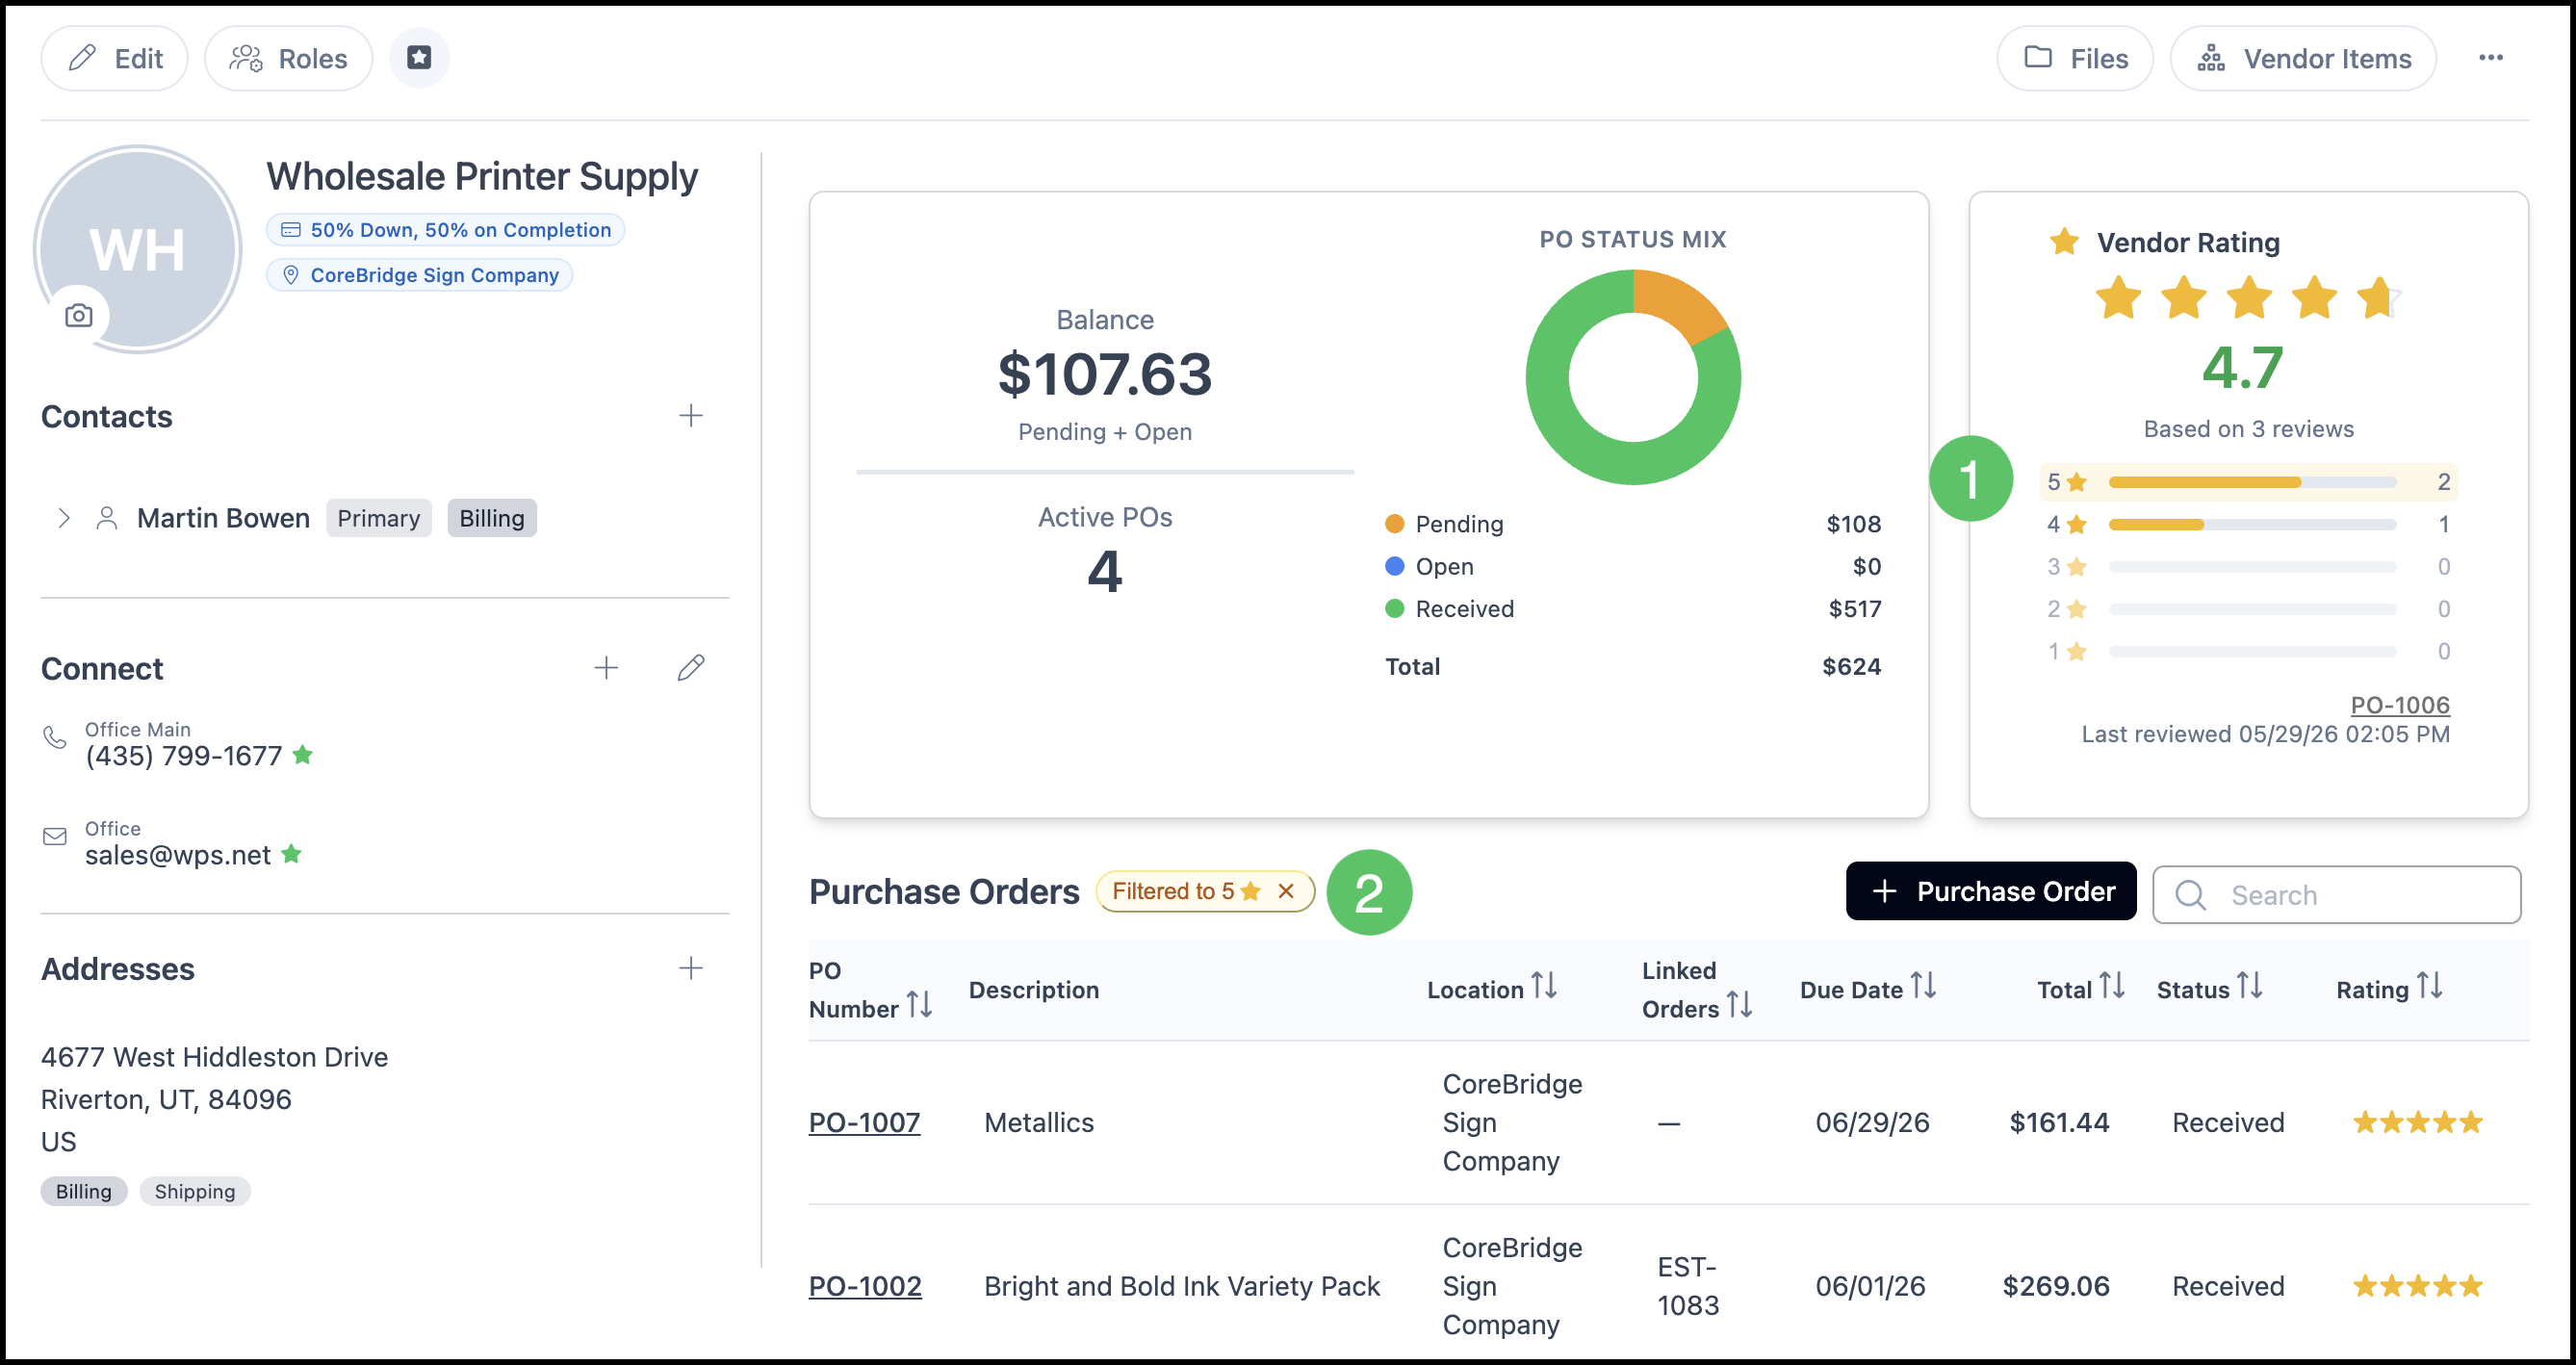
The Vendor Rating panel on the vendor profile displays the following information.
a. Overall star rating and total number of reviews.
b. A breakdown of ratings by star level (1 through 5).
c. The most recently reviewed purchase order and the date it was reviewed.
You can also see the rating for each individual purchase order in the Purchase Orders list on the vendor profile.
d. Hovering over the star rating displays the associated comment in a popup.
Filter by Rating
1. Select a star rating to display only Purchase Orders with that rating.
2. Select the X to clear the filter and return to the full list of Purchase Orders.
Required Documents
CoreBridge allows you to require compliance documents from vendors, such as a W-9. Document types are configured in Settings and can be applied to individual vendors. If a required document is missing or expired, the system will alert you and prevent purchase orders from being created until the document is uploaded.
Configuring Document Types
Document types are set up in Settings before they can be applied to vendors.
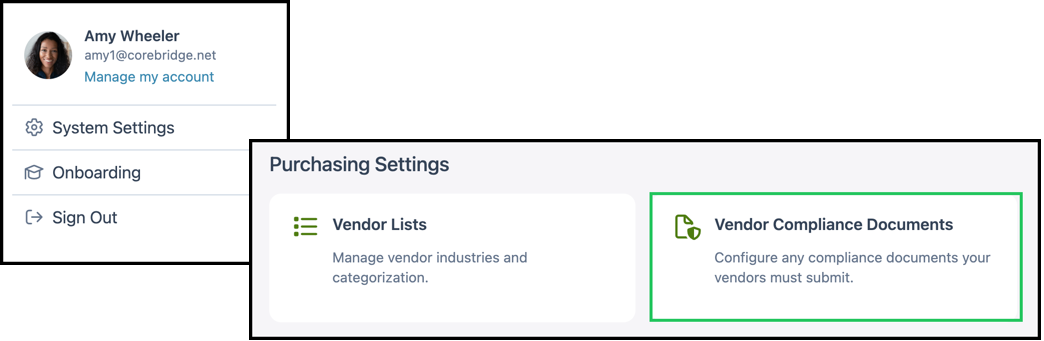
Navigate to System Settings / Purchase Settings / Vendor Compliance Document.
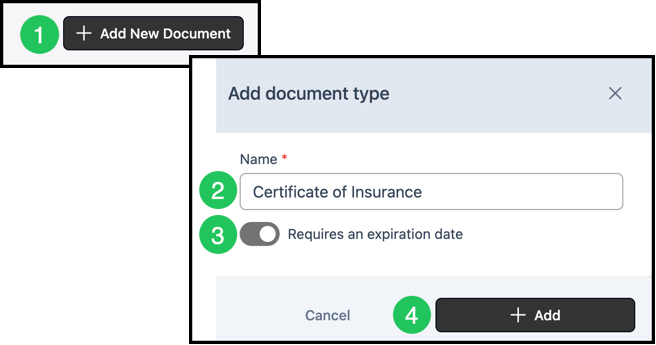
1. Select Add New Document.
2. Give the document a Name.
3. Choose whether the document requires an expiration date.
Note: Expiration dates on documents are entered in by the Vendor through the Vendor Portal during upload.
4. Click Add.
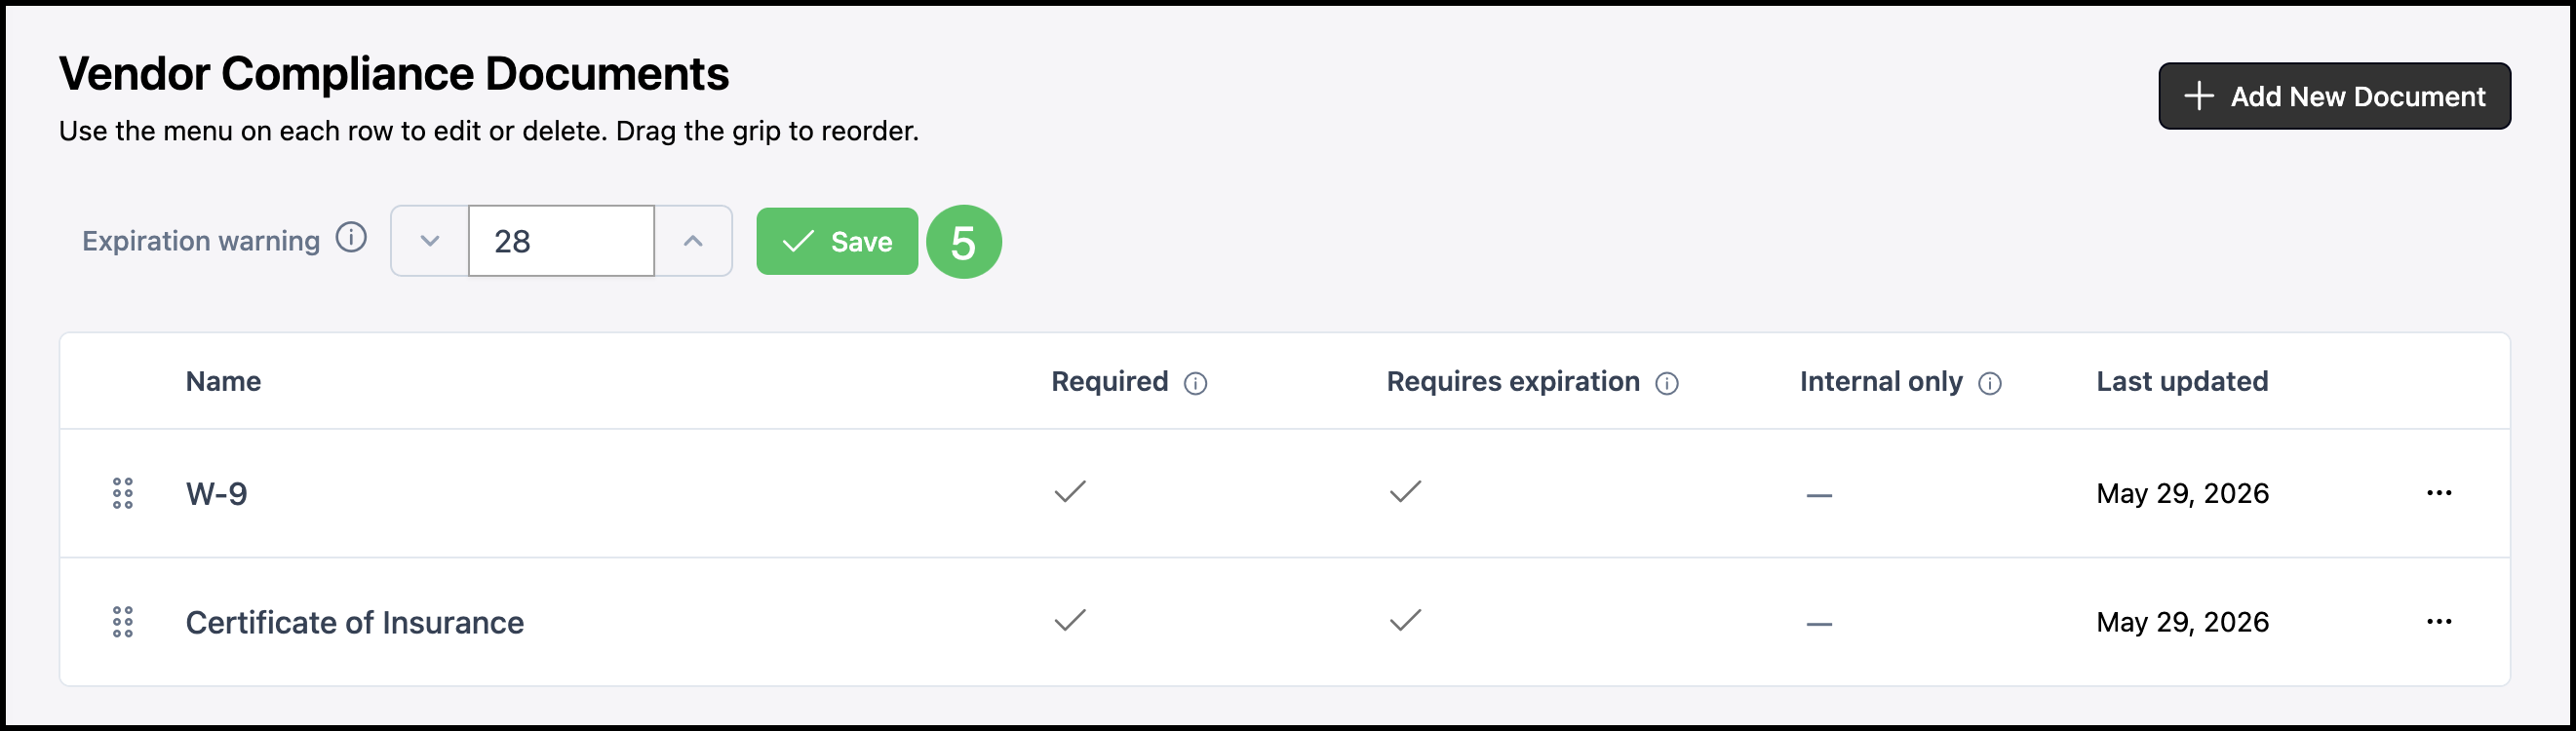
5. Use the arrows to set the expiration warning period - the number of days in advance the system will alert you before a document expires, then click Save.
Note: This warning applies to all vendor compliance documents.
Applying Documents to a Vendor
Once document types are configured, you can apply them to individual vendors and manage uploads from the vendor profile.
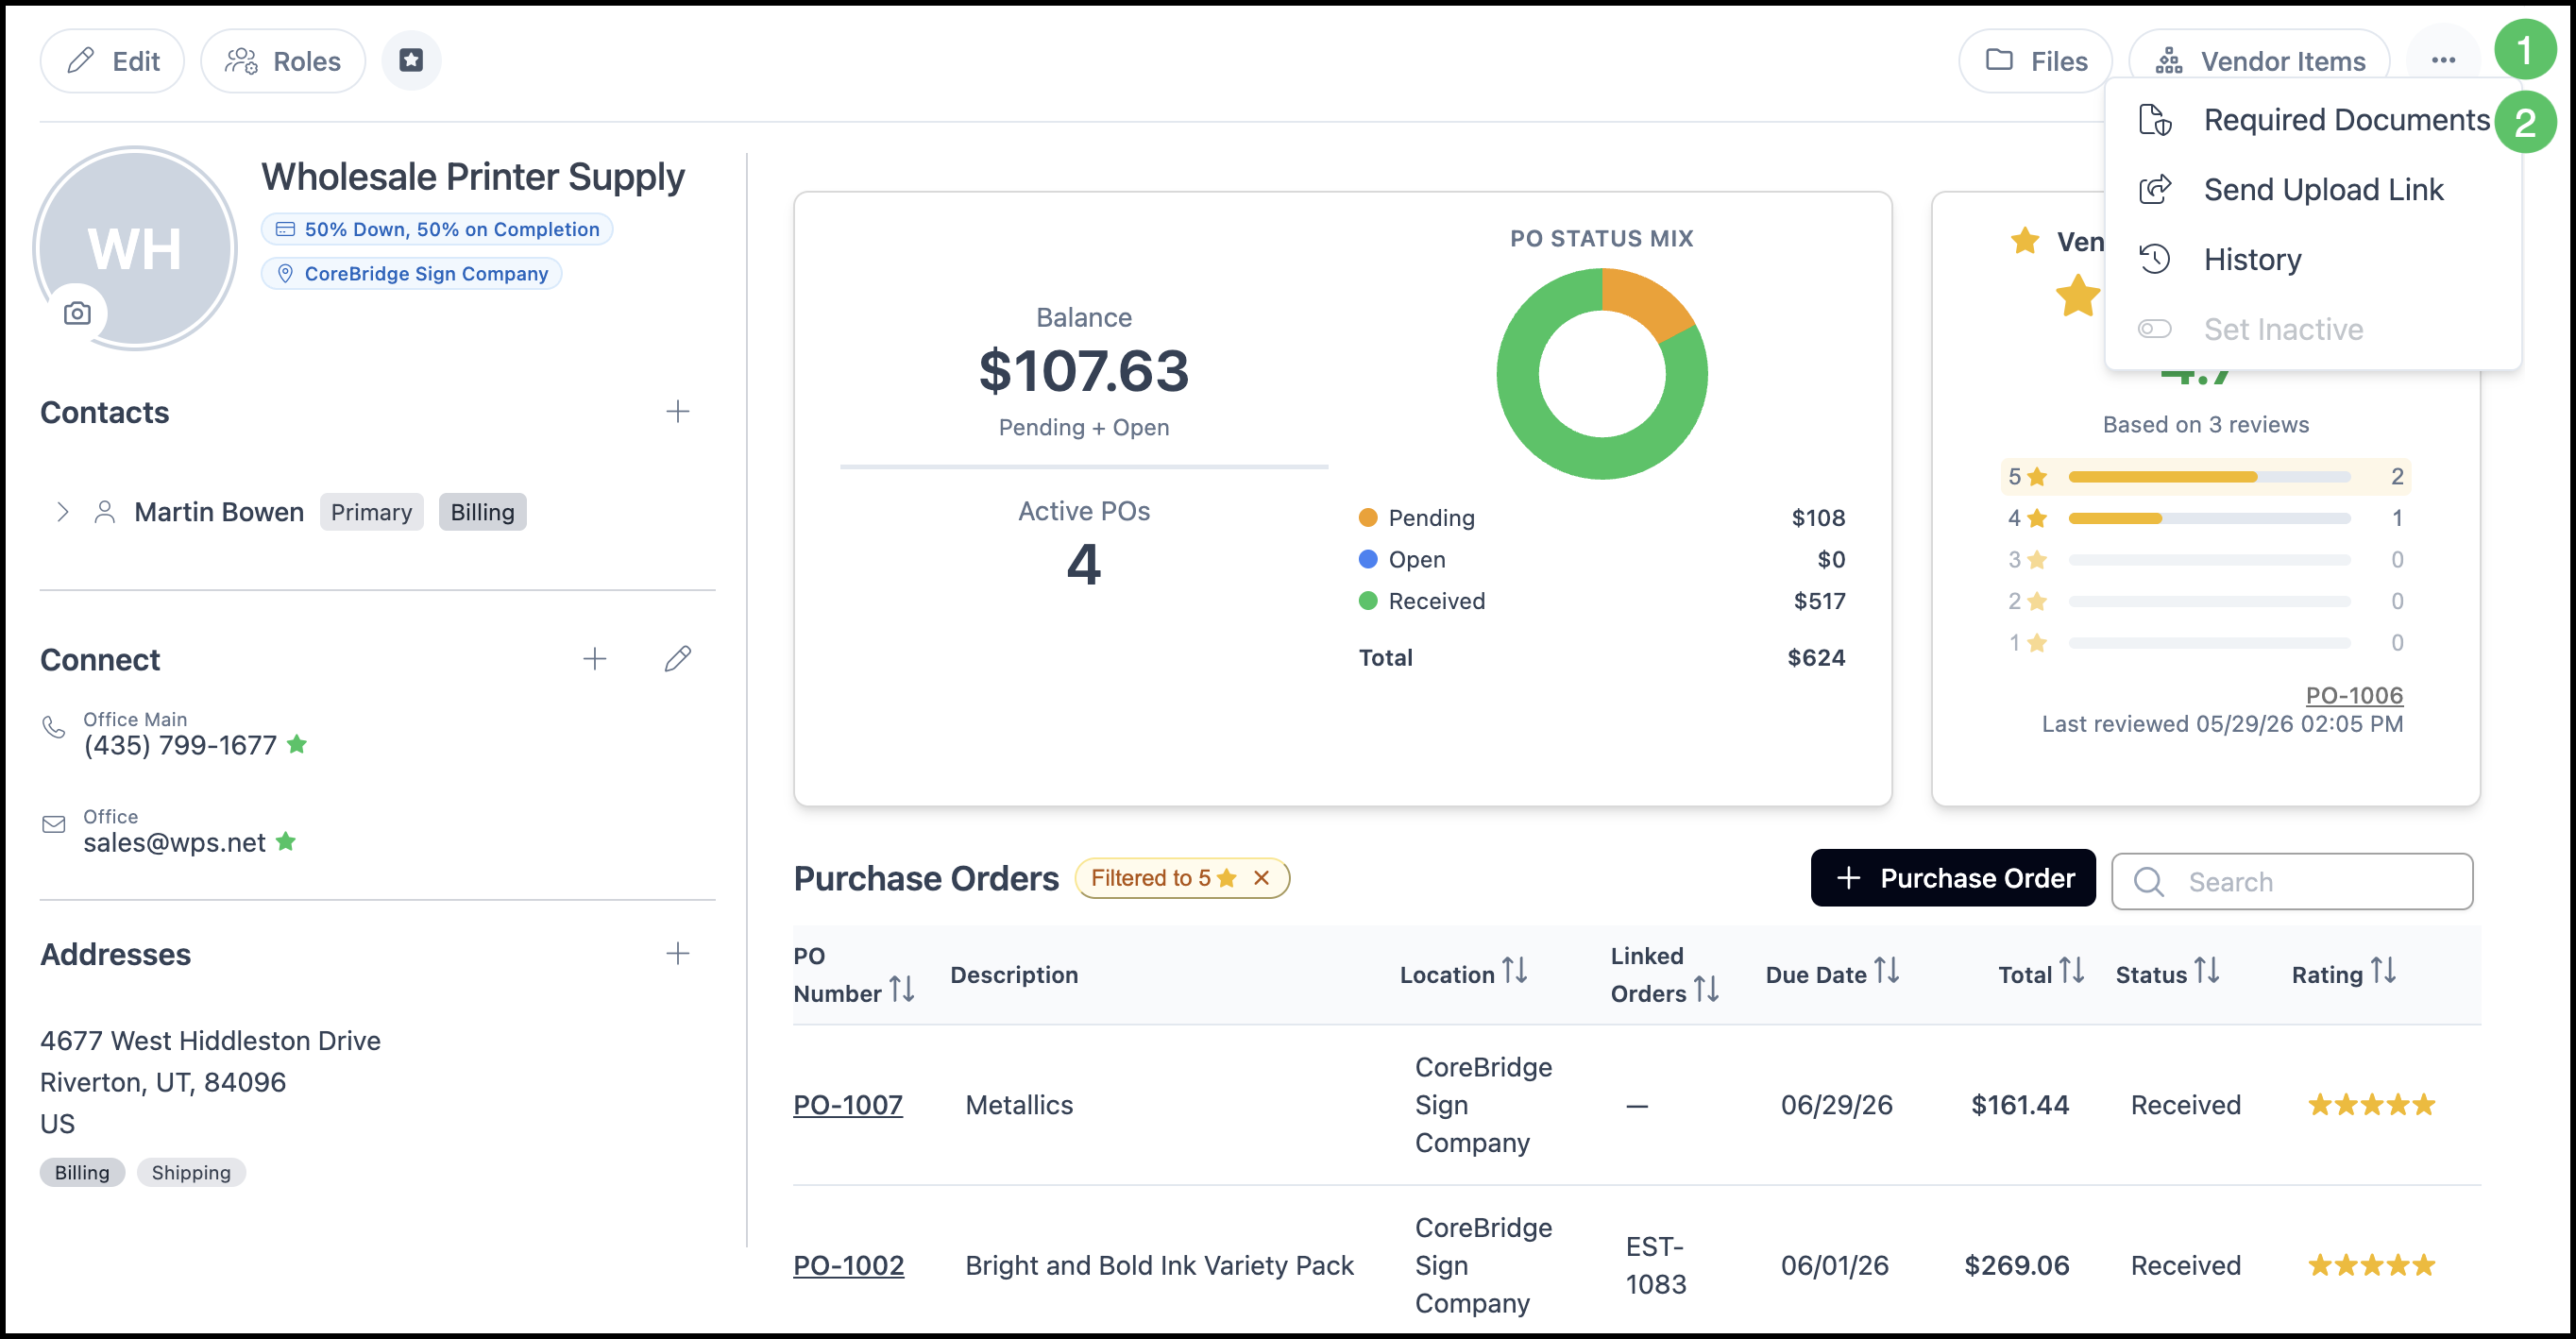
1. Select the Actions Menu from the vendor screen.
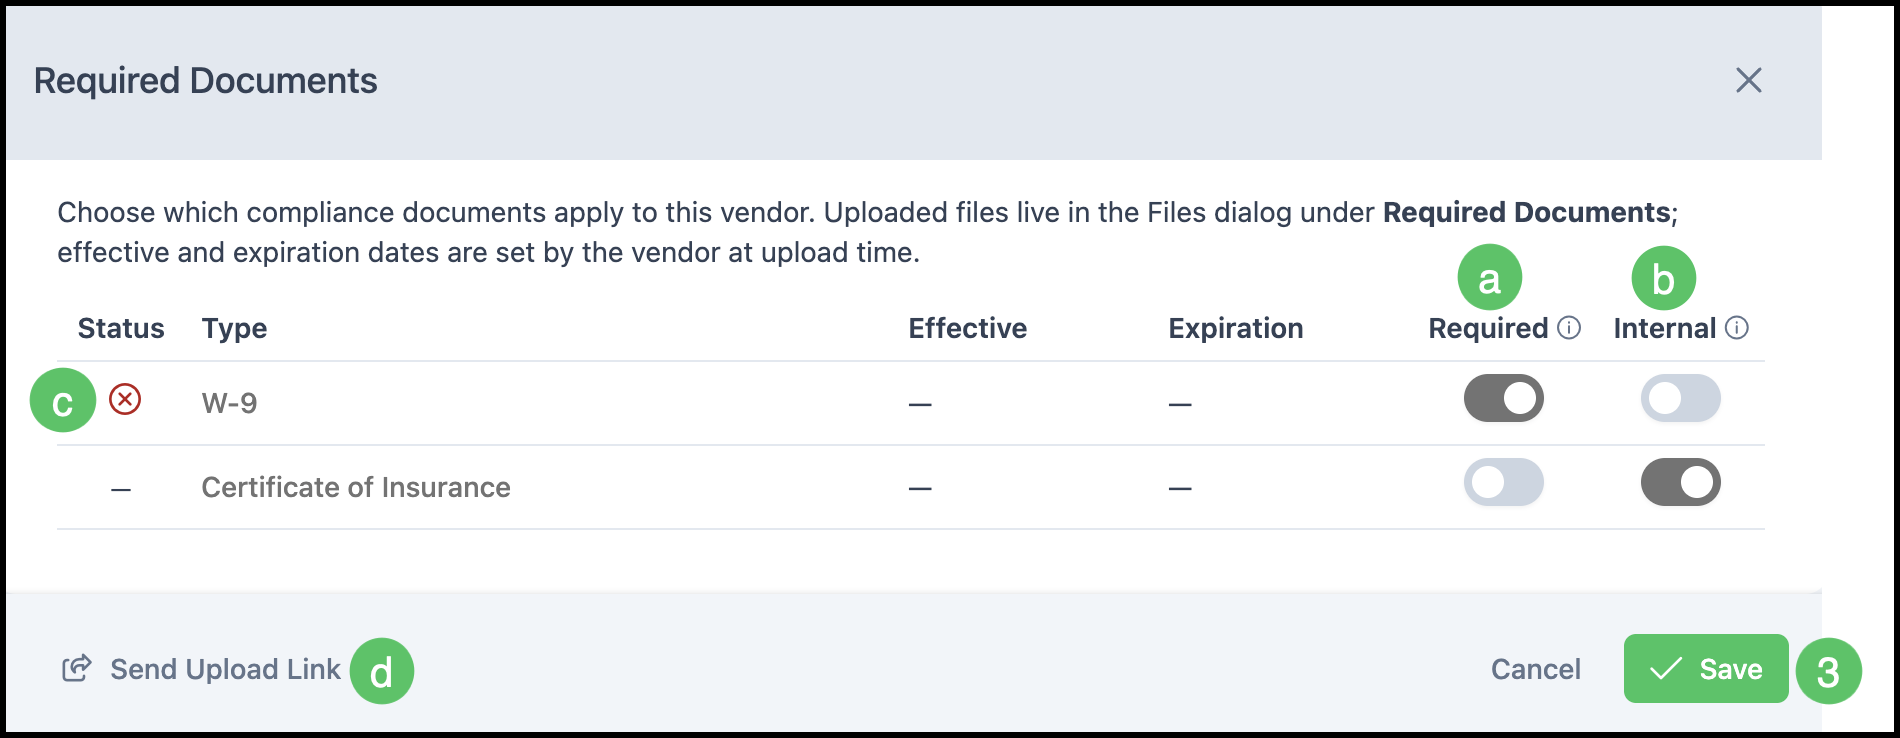
2. Select Required Documents. The Required Documents modal will open, showing all configured document types.
a. Required determines whether the document must be uploaded before Purchase Orders can be created for the vendor.
b. Internal determines whether the document is visible in the Vendor Portal. Internal documents are only visible within CoreBridge.
c. This status indicates that a required document is missing.
d. This option sends the vendor a link to upload any required documents.
3. Select Save to apply your changes.
Uploading Documents
Documents can be uploaded directly on the vendor profile or by sending an upload link to the vendor.
Direct Upload
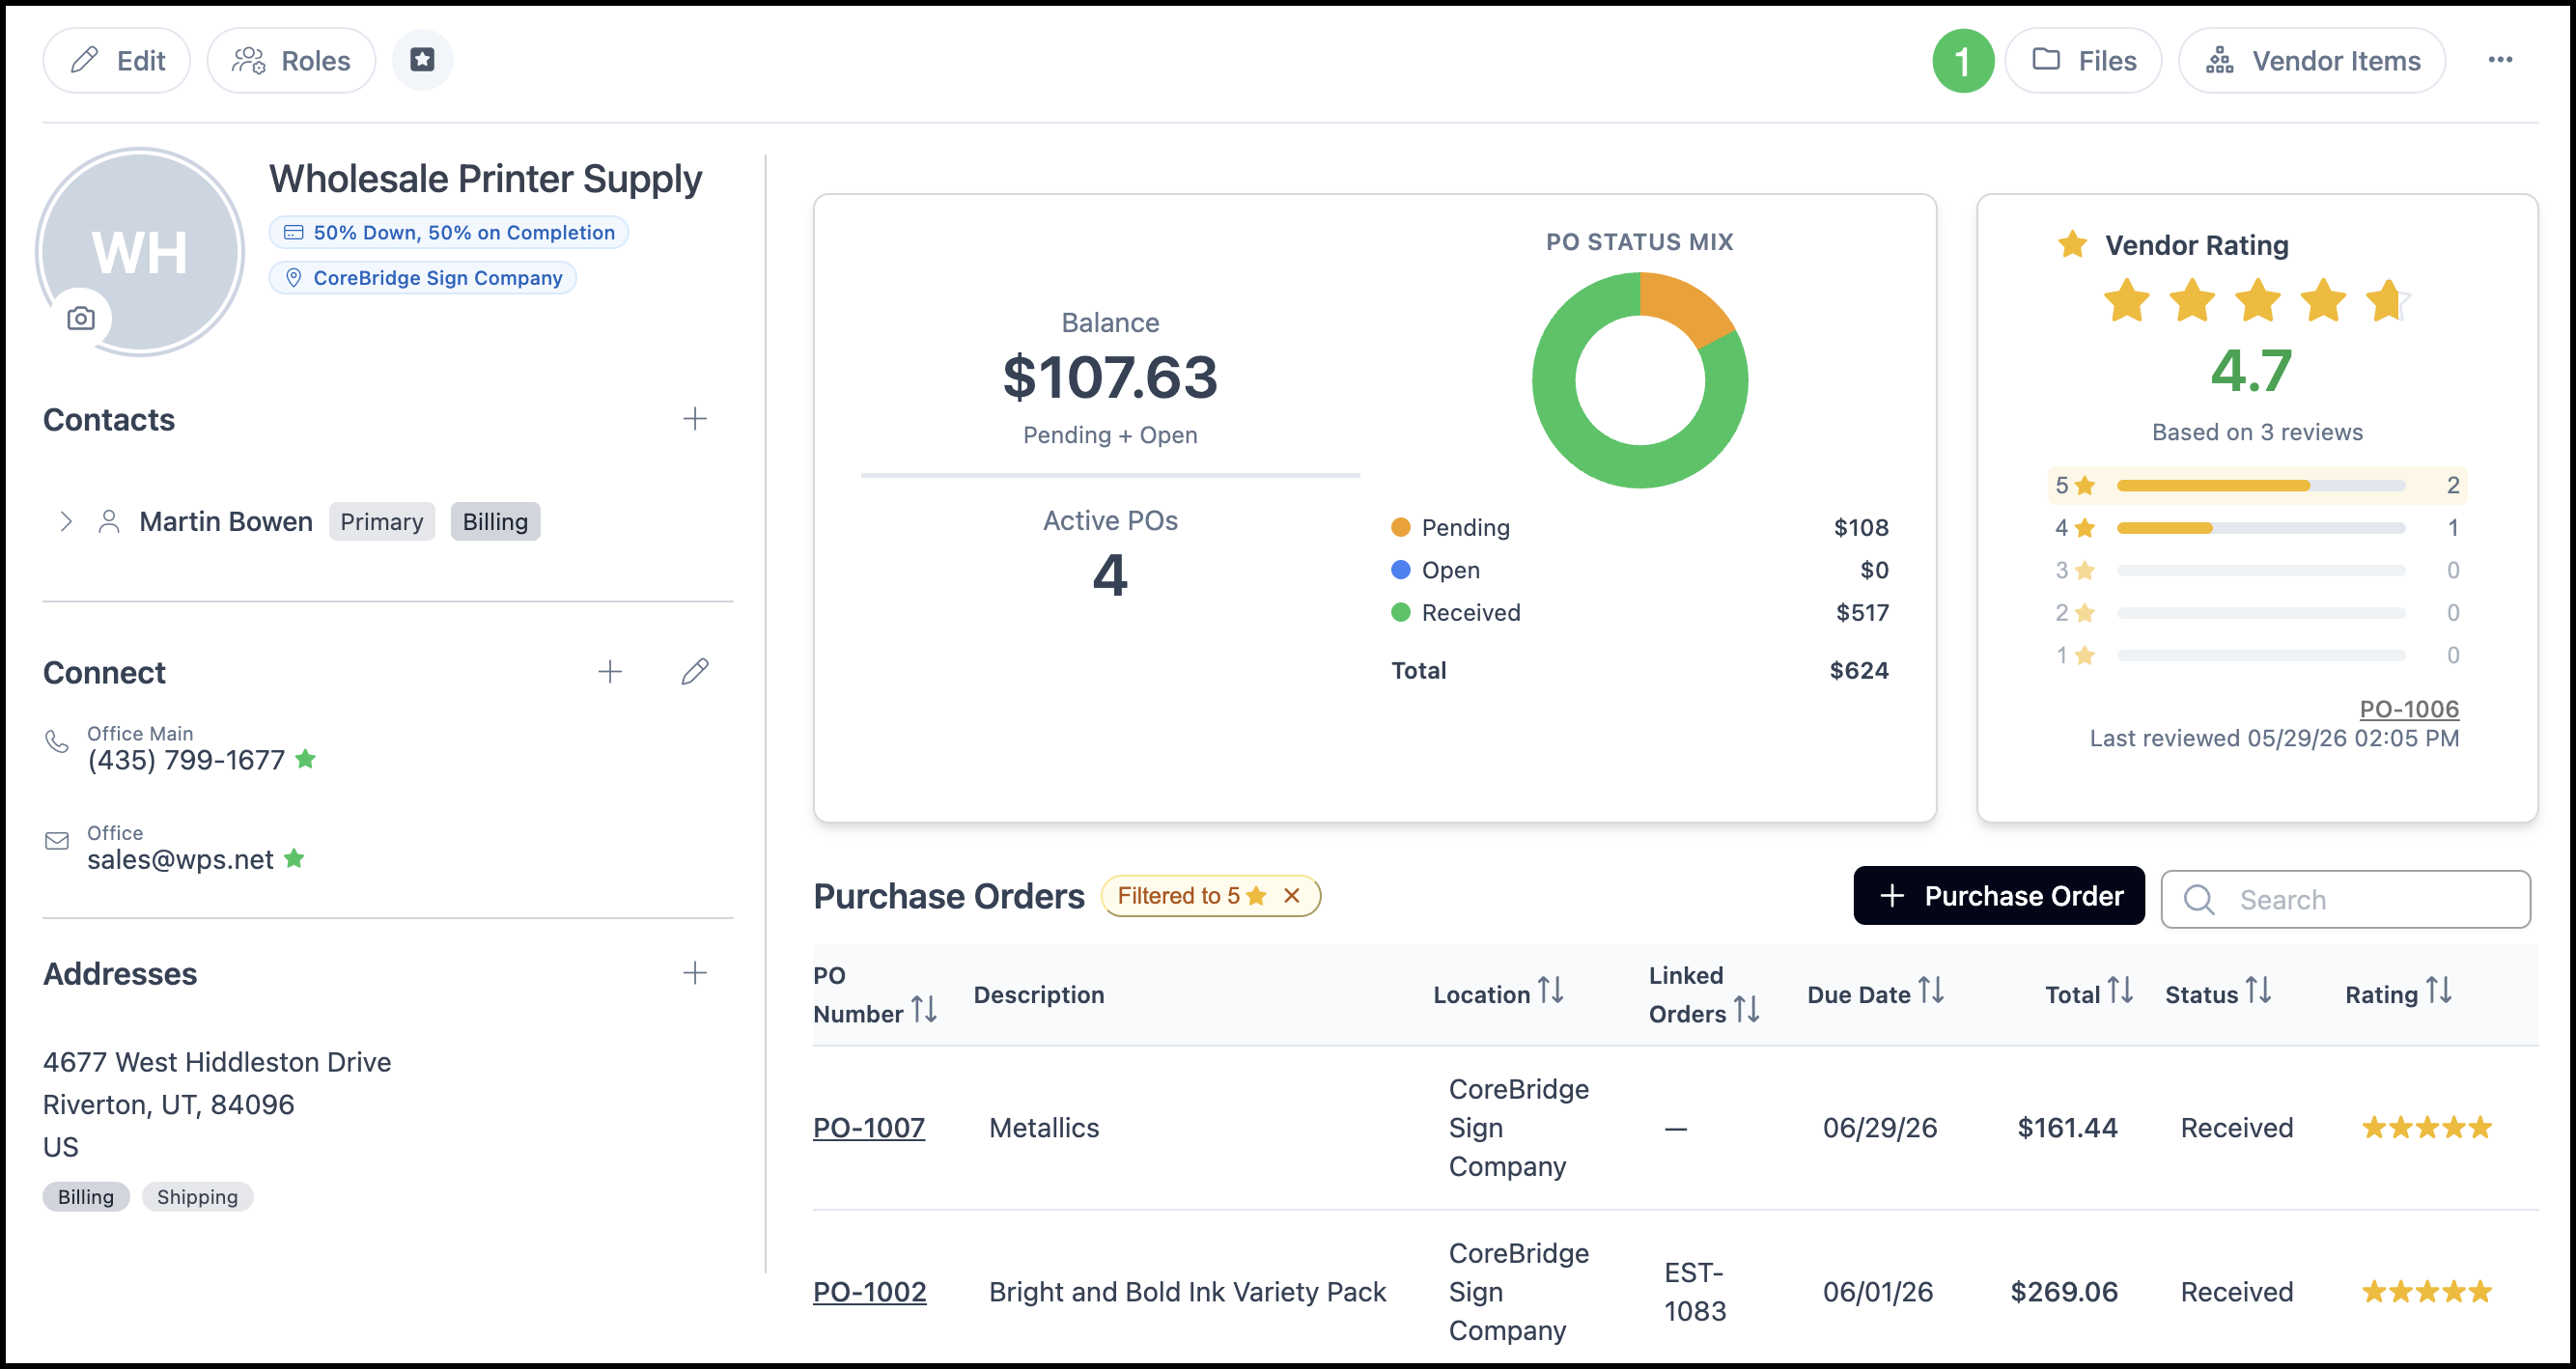
1. Select Files on the vendor profile.
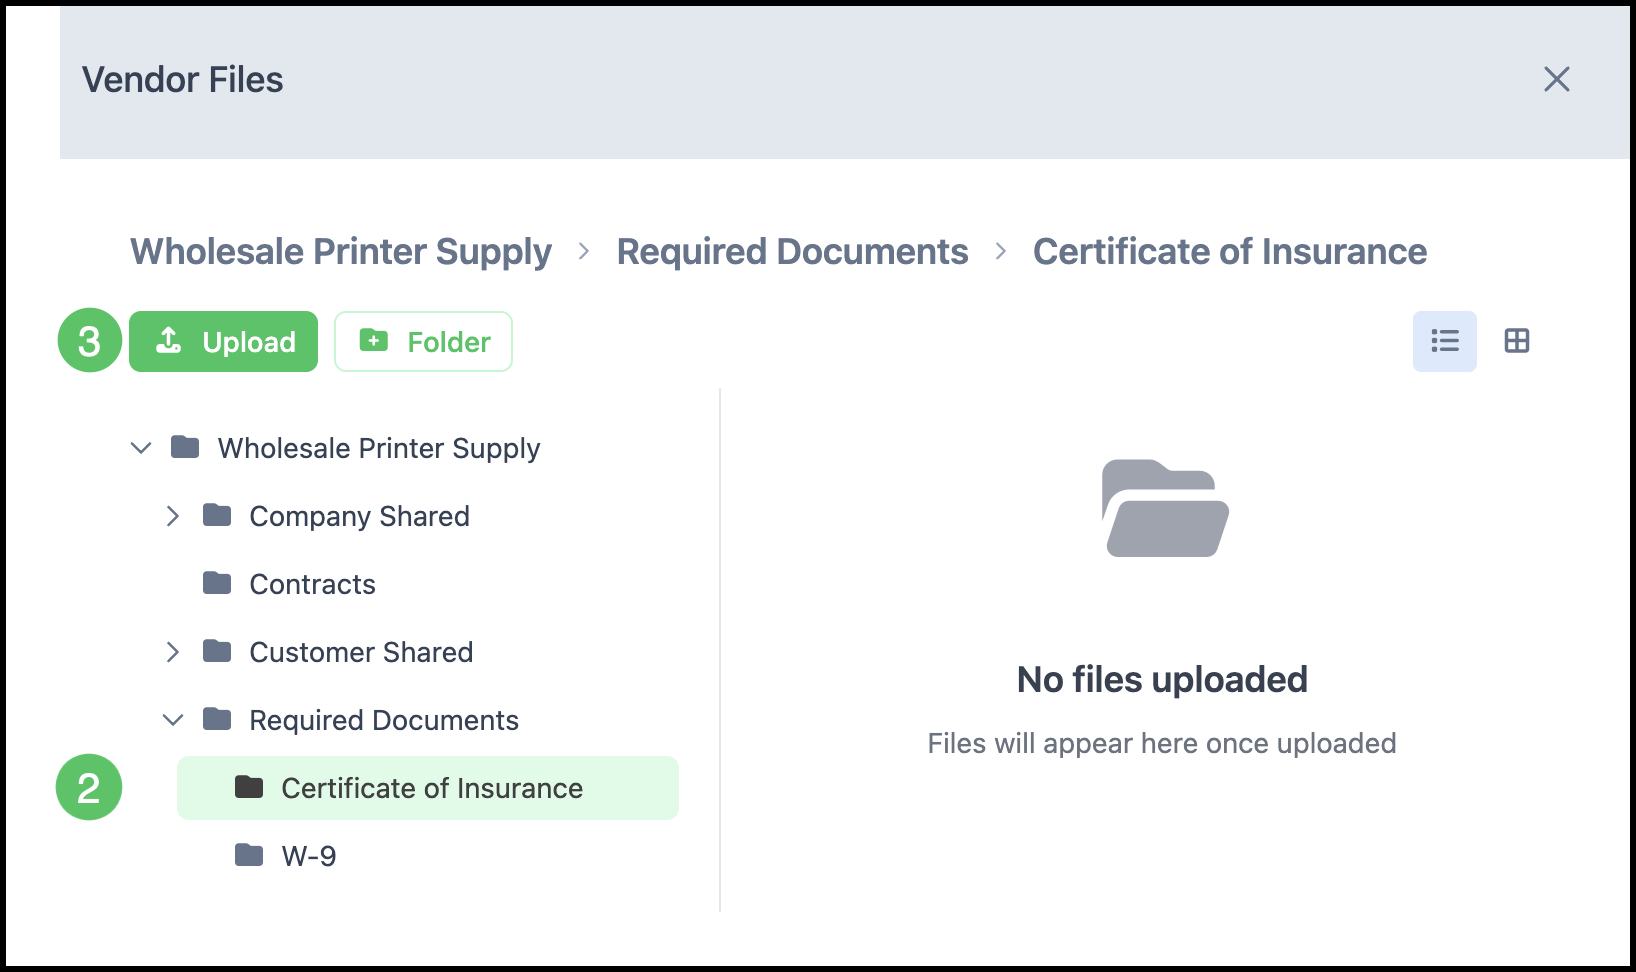
2. Select the correct folder.
Note: When a document is required, a corresponding folder will automatically be created here. If uploading a document that is not required, you may need to use the Add Folder button to create a new folder.
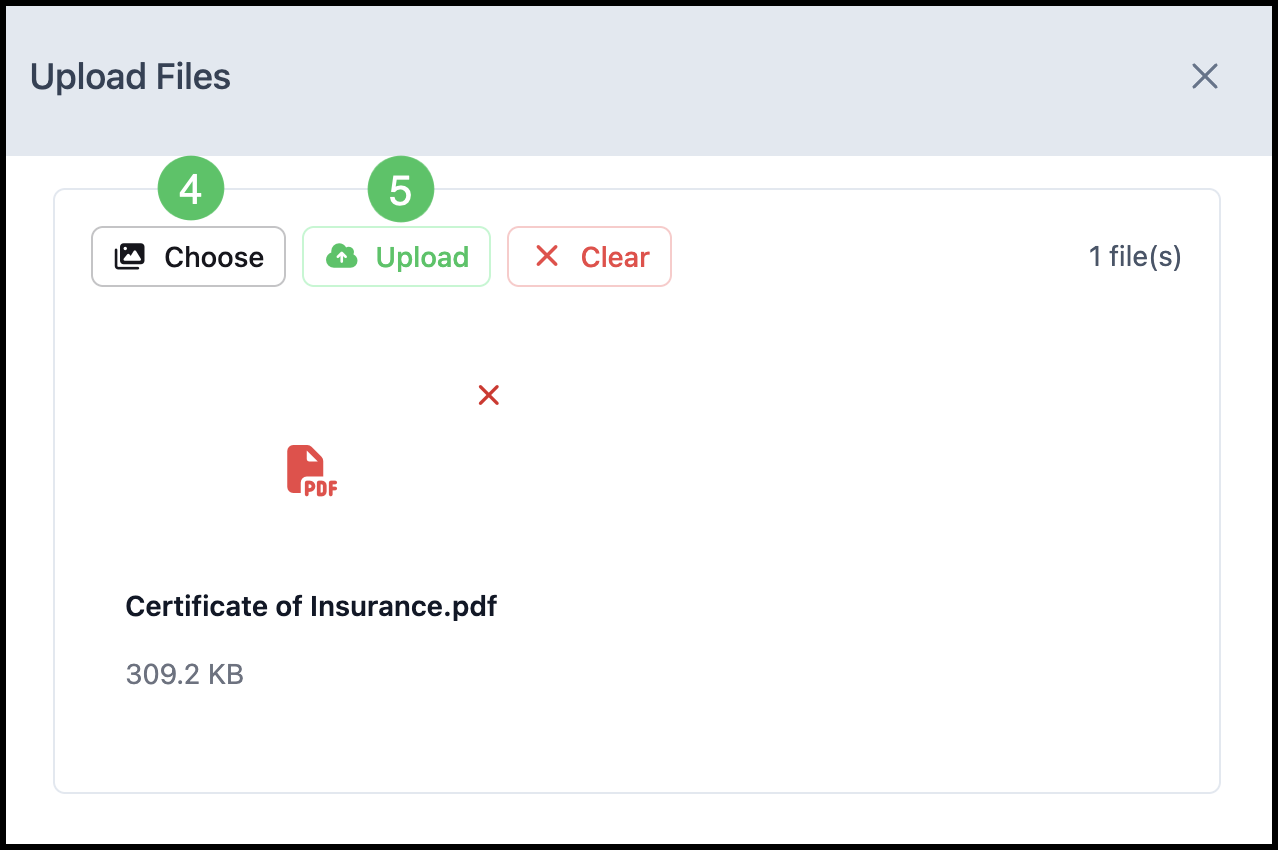
3. Click Upload.
4. Choose files or drag and drop.
5. Click Upload.
Send Upload Link
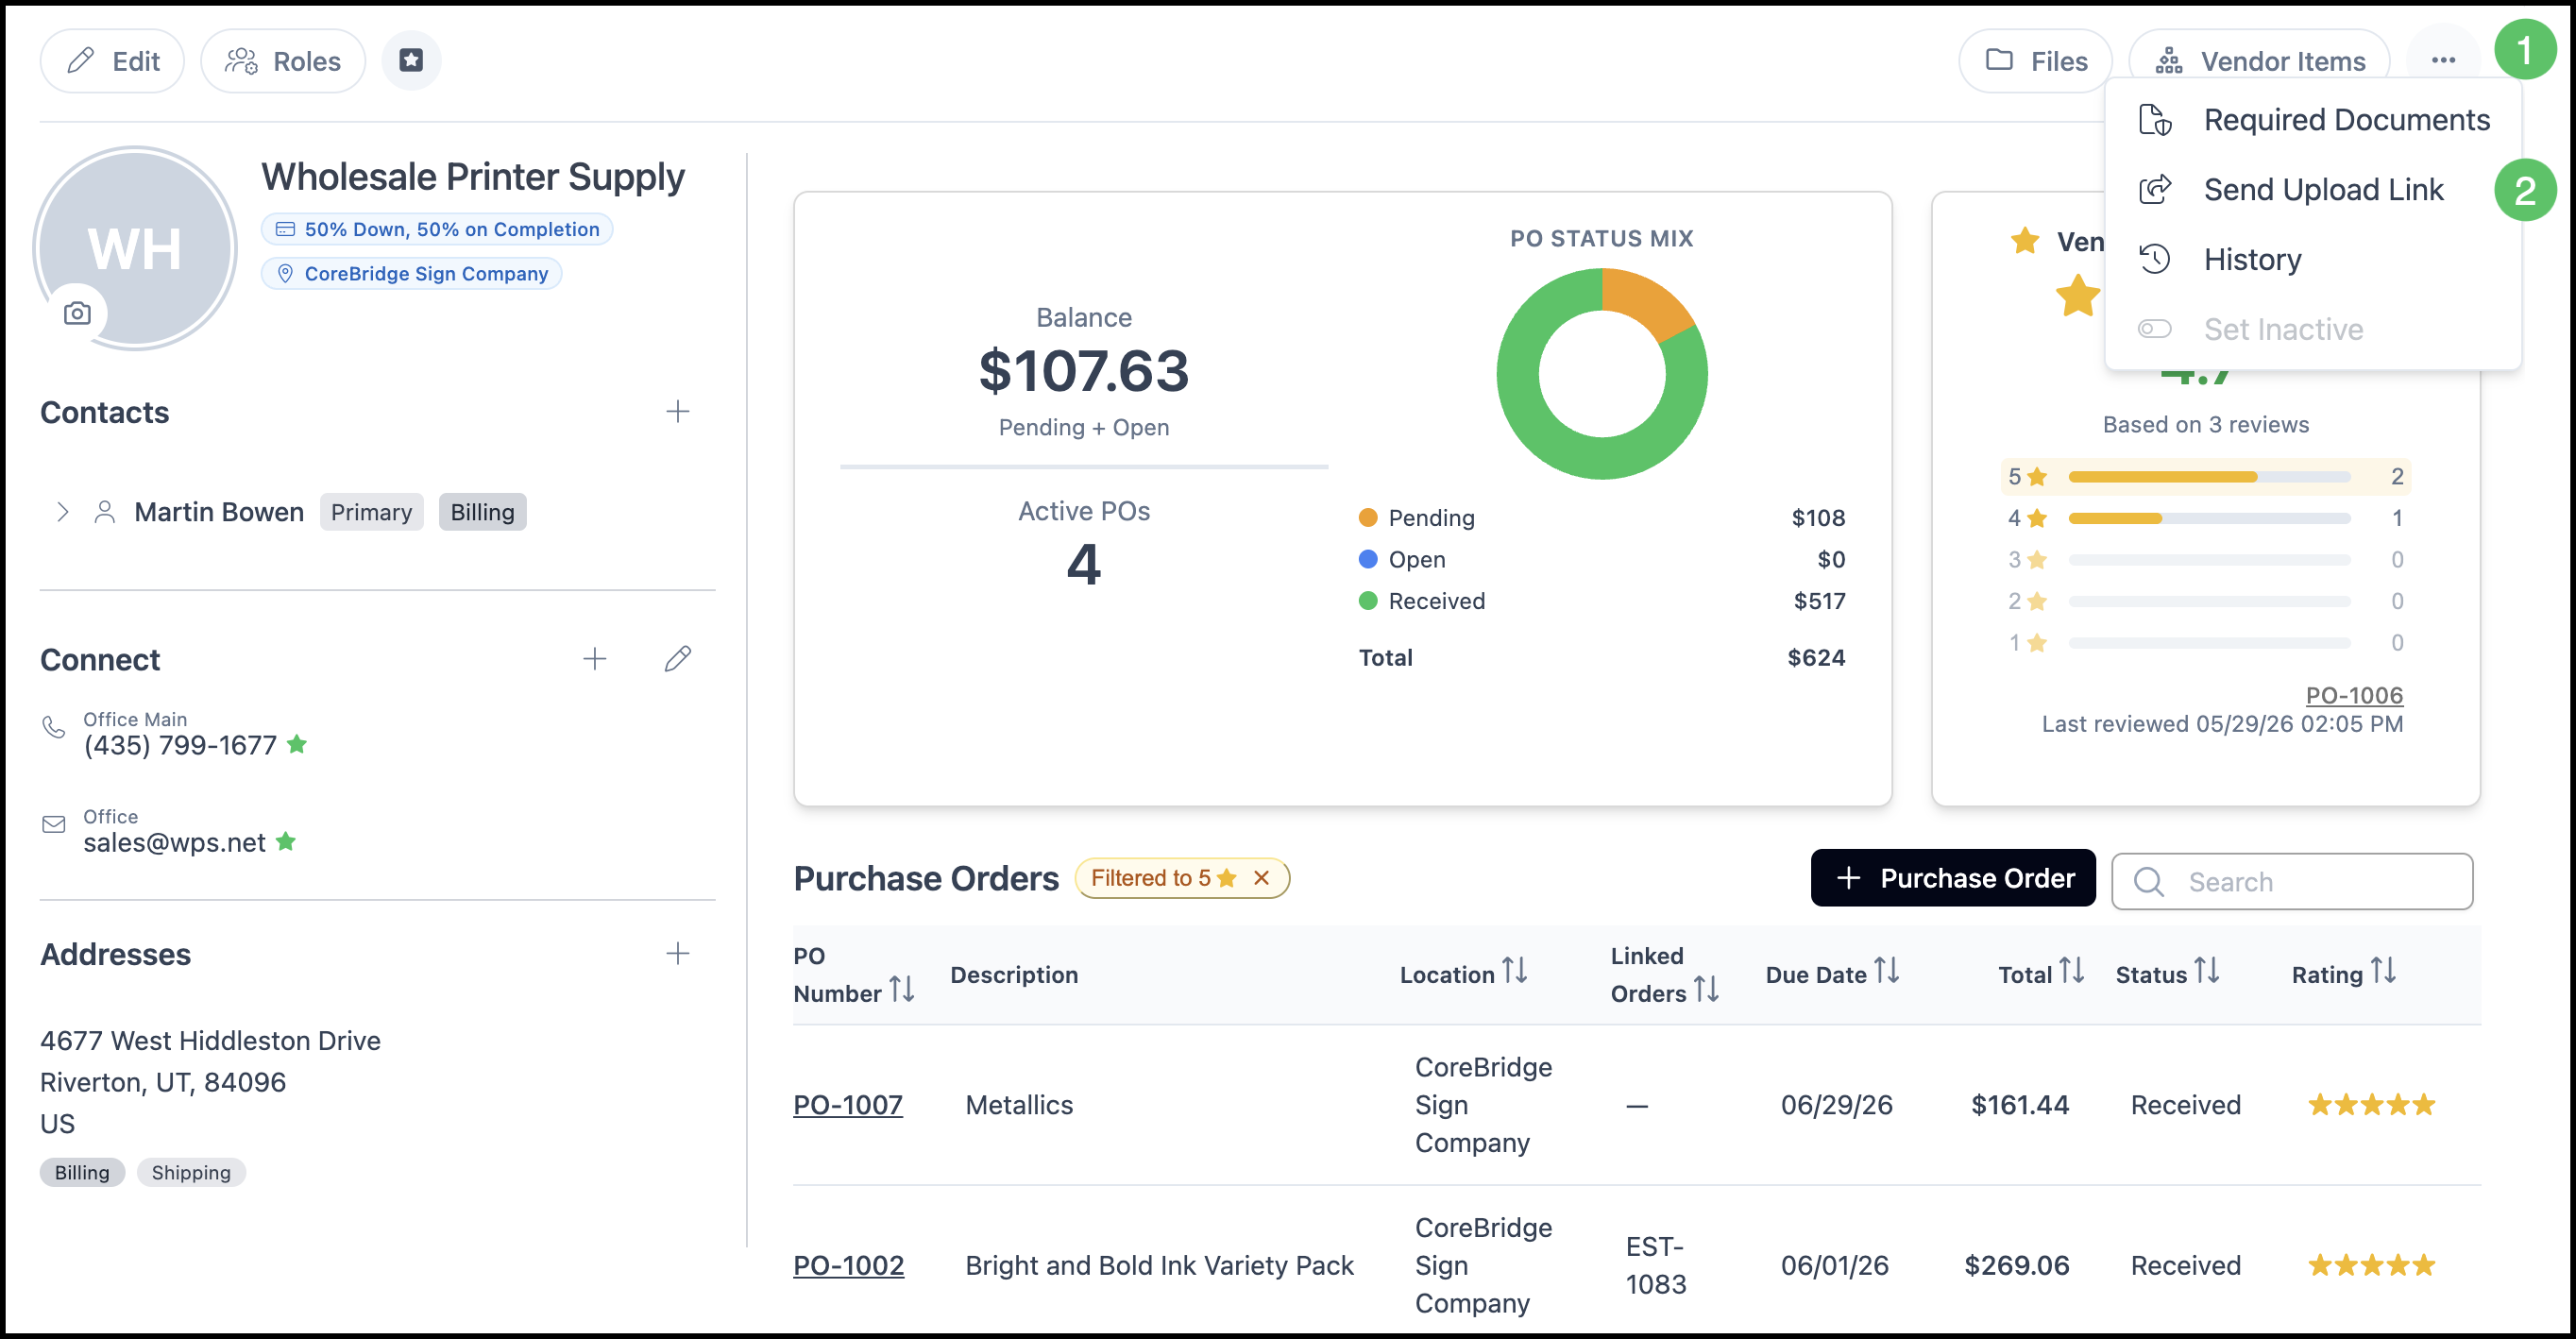
1. Click the Actions Menu on the vendor screen.
2. Select Send Upload Link.
Note: You can also resend the upload link from within the Required Documents modal as shown above.
If a required document is missing or expired, a warning indicator will appear as a banner across the top of the Vendor screen. This banner indicates how many documents are missing and/or expiring soon. The manage link opens up the Required Documents modal.
