
CoreBridge File Management is a Windows desktop app that uploads files from your computer onto CoreBridge records. After you sign in, you choose a record, open its document folders, and add files by dragging them onto the folder panel or by browsing to a file. Those folders are the same documents you see in Files on the record.
Table of Contents
- Important Information
- Benefits of Integrating with CoreBridge File Management
- Finding CoreBridge File Management
- Downloading and Installing
- Signing In
- Browsing and Uploading Files
- Working with File Actions
- Related Records
- Frequently Asked Questions
- Related Articles
Important Information
- CoreBridge File Management is currently in Preview. Preview means the listing is available while Windows certification and broader rollout finish.
- Files on a record is the side panel inside CoreBridge. CoreBridge File Management works with those same folders from a Windows computer. For the browser side panel, see Managing Files.
- The app requires an internet connection. You can open a record here when you can already open that record in CoreBridge.
- Supported records are Company, Contact, Vendor, Estimate, Order, and Purchase Order.
Benefits of Integrating with CoreBridge File Management
- Files uploaded in CoreBridge File Management are the same documents you see in Files on the record.
- You can add one file or many files by dragging them onto the folder panel or by clicking Upload Files.
- Large uploads run in the desktop app, so you can keep working outside that one CoreBridge browser screen.
- A linked record, such as an Order and the Estimate it came from, opens in a second pane so you can use the files on either record.
Finding CoreBridge File Management
Navigate to System Settings / My Business / Integrations Marketplace.
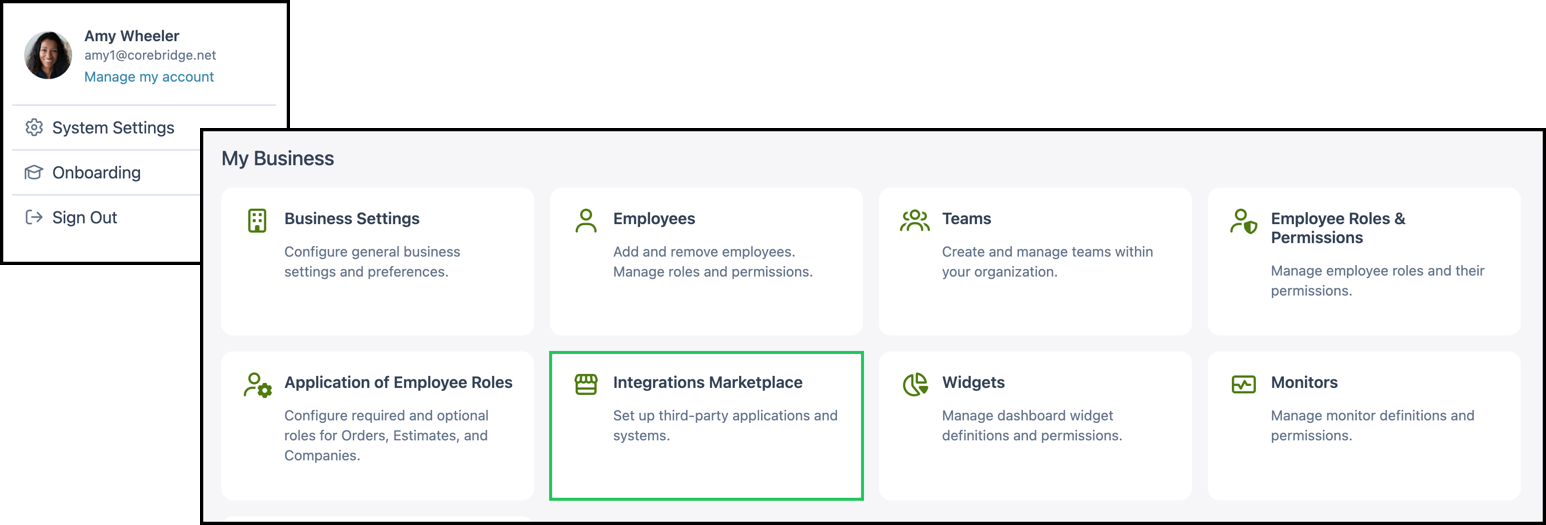
1. Select File Management.
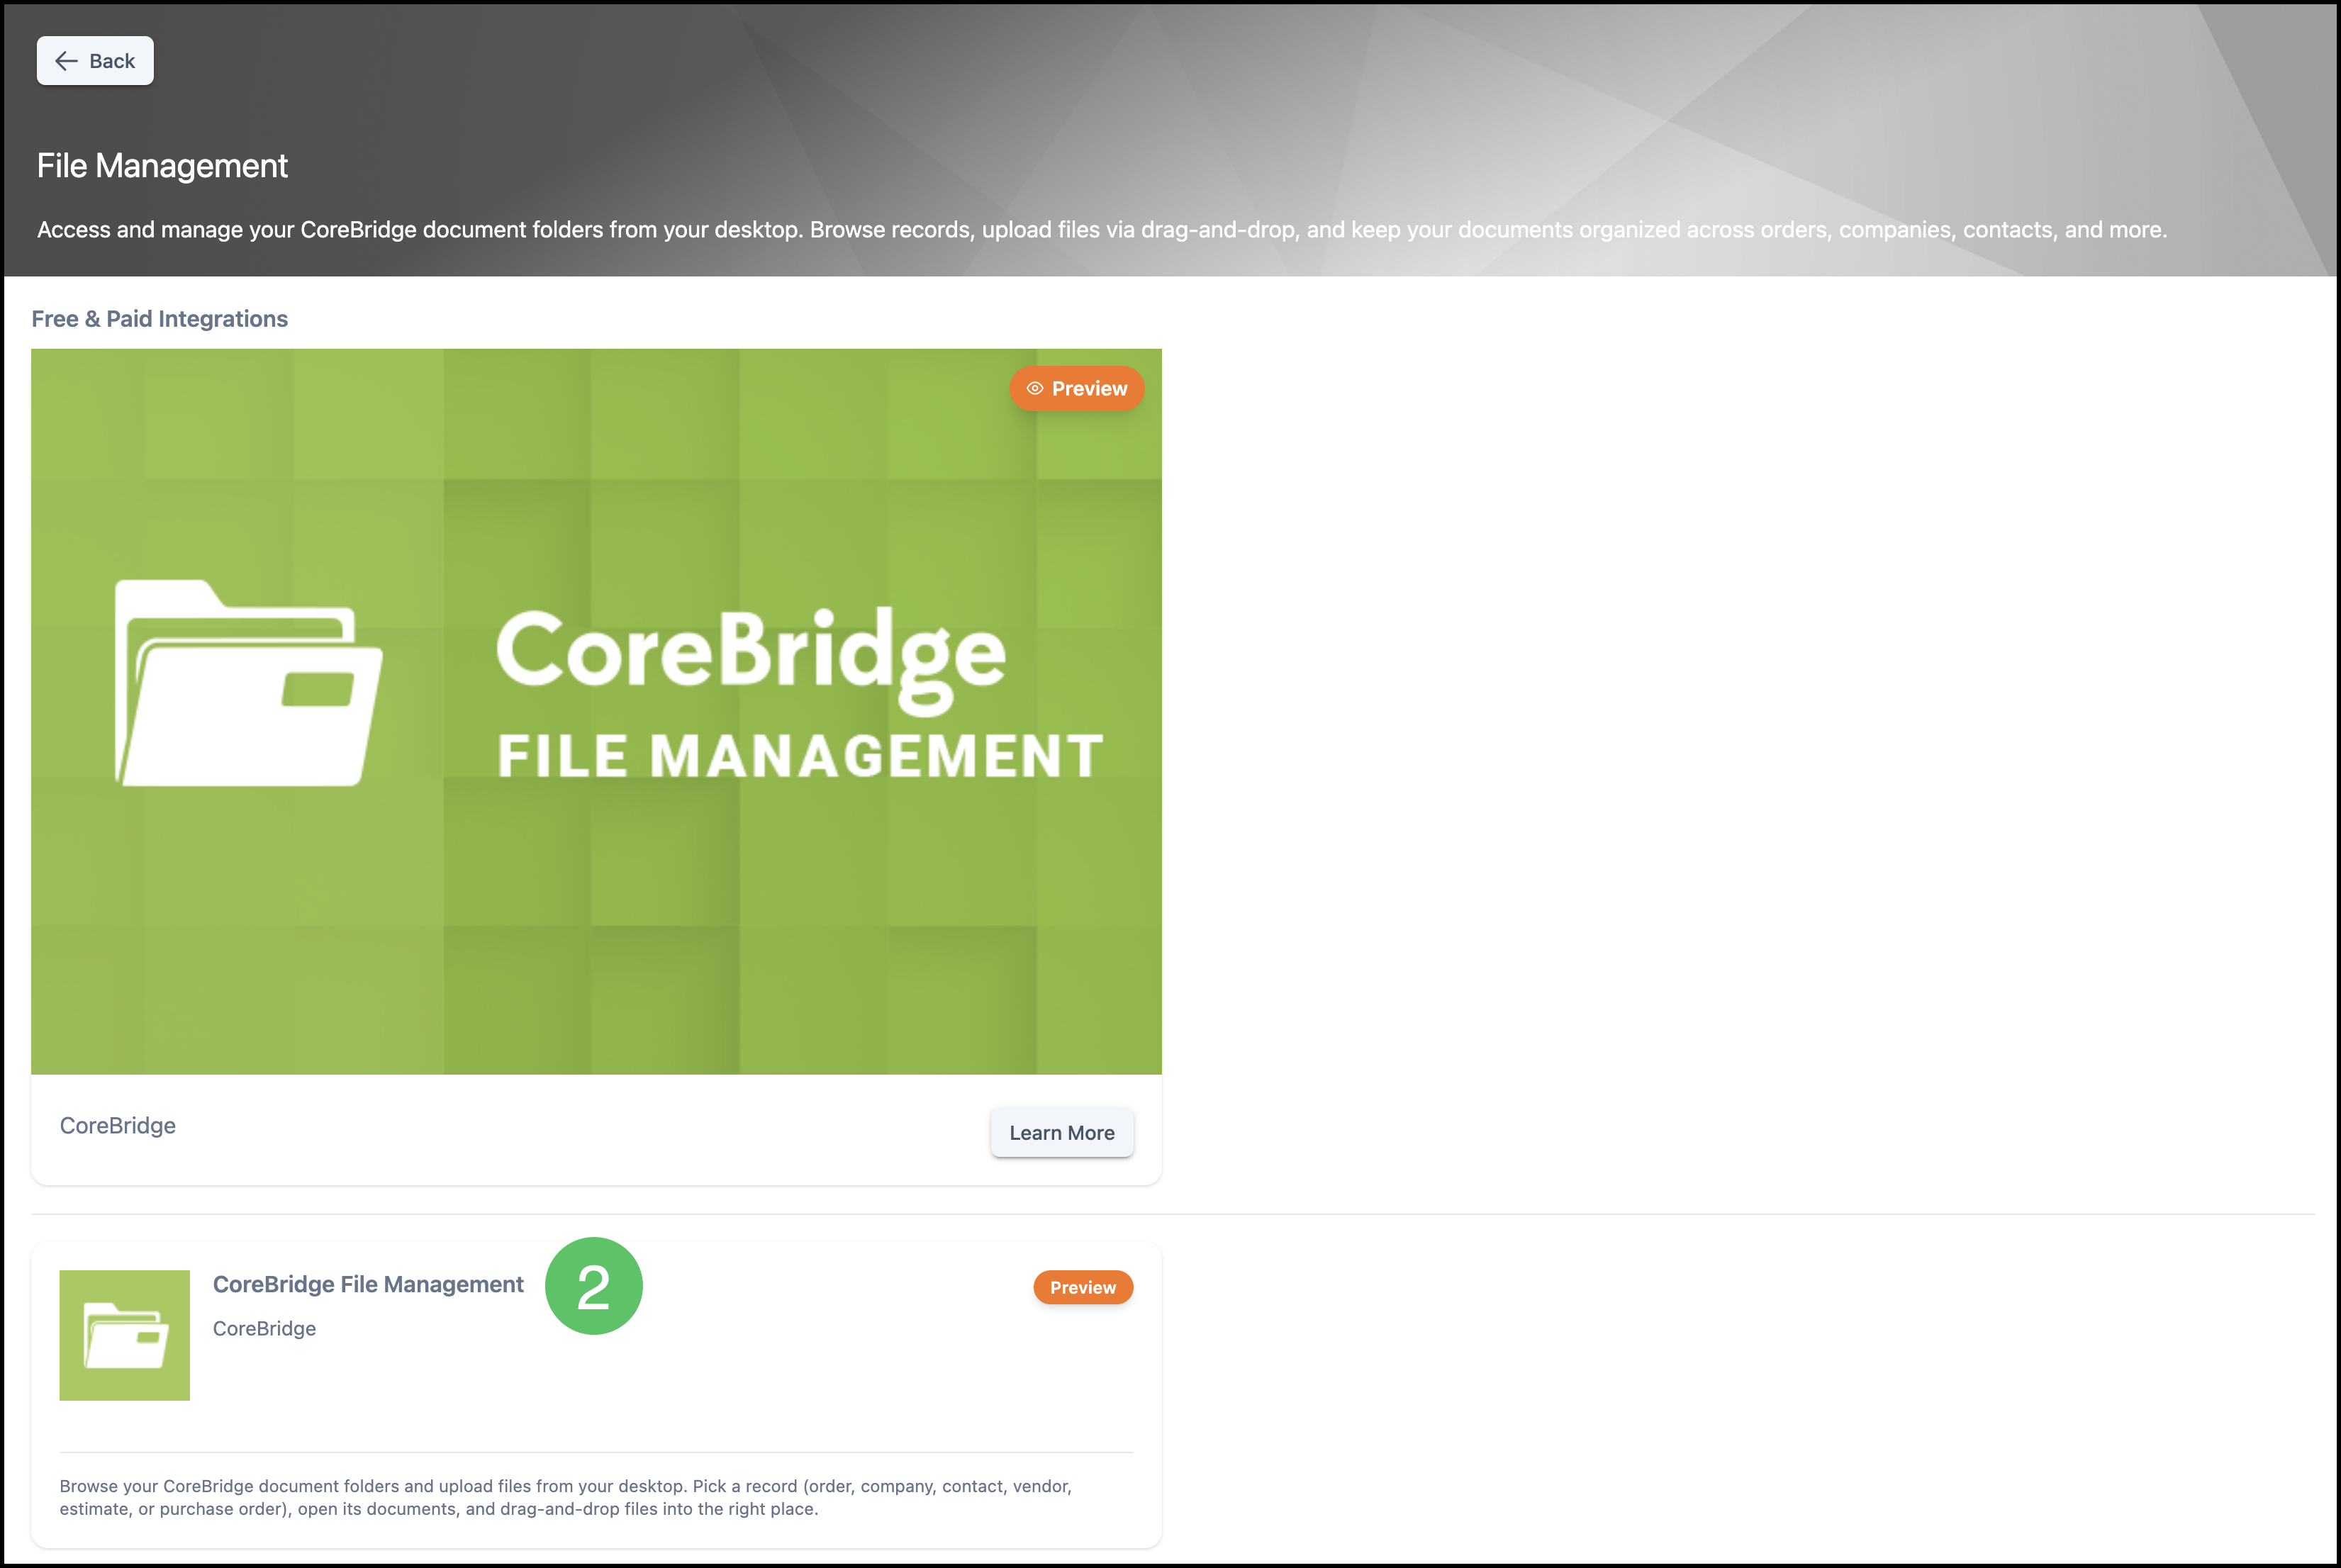
Note: You can also find CoreBridge File Management in All Categories or in Search marketplace.

2. Select the CoreBridge File Management card. The CoreBridge File Management page opens.
- Preview - The listing is available while Windows certification and broader rollout finish.
- CoreBridge app - This listing is the CoreBridge desktop app. It is separate from a third-party storage product such as Google Drive or OneDrive.
Downloading and Installing
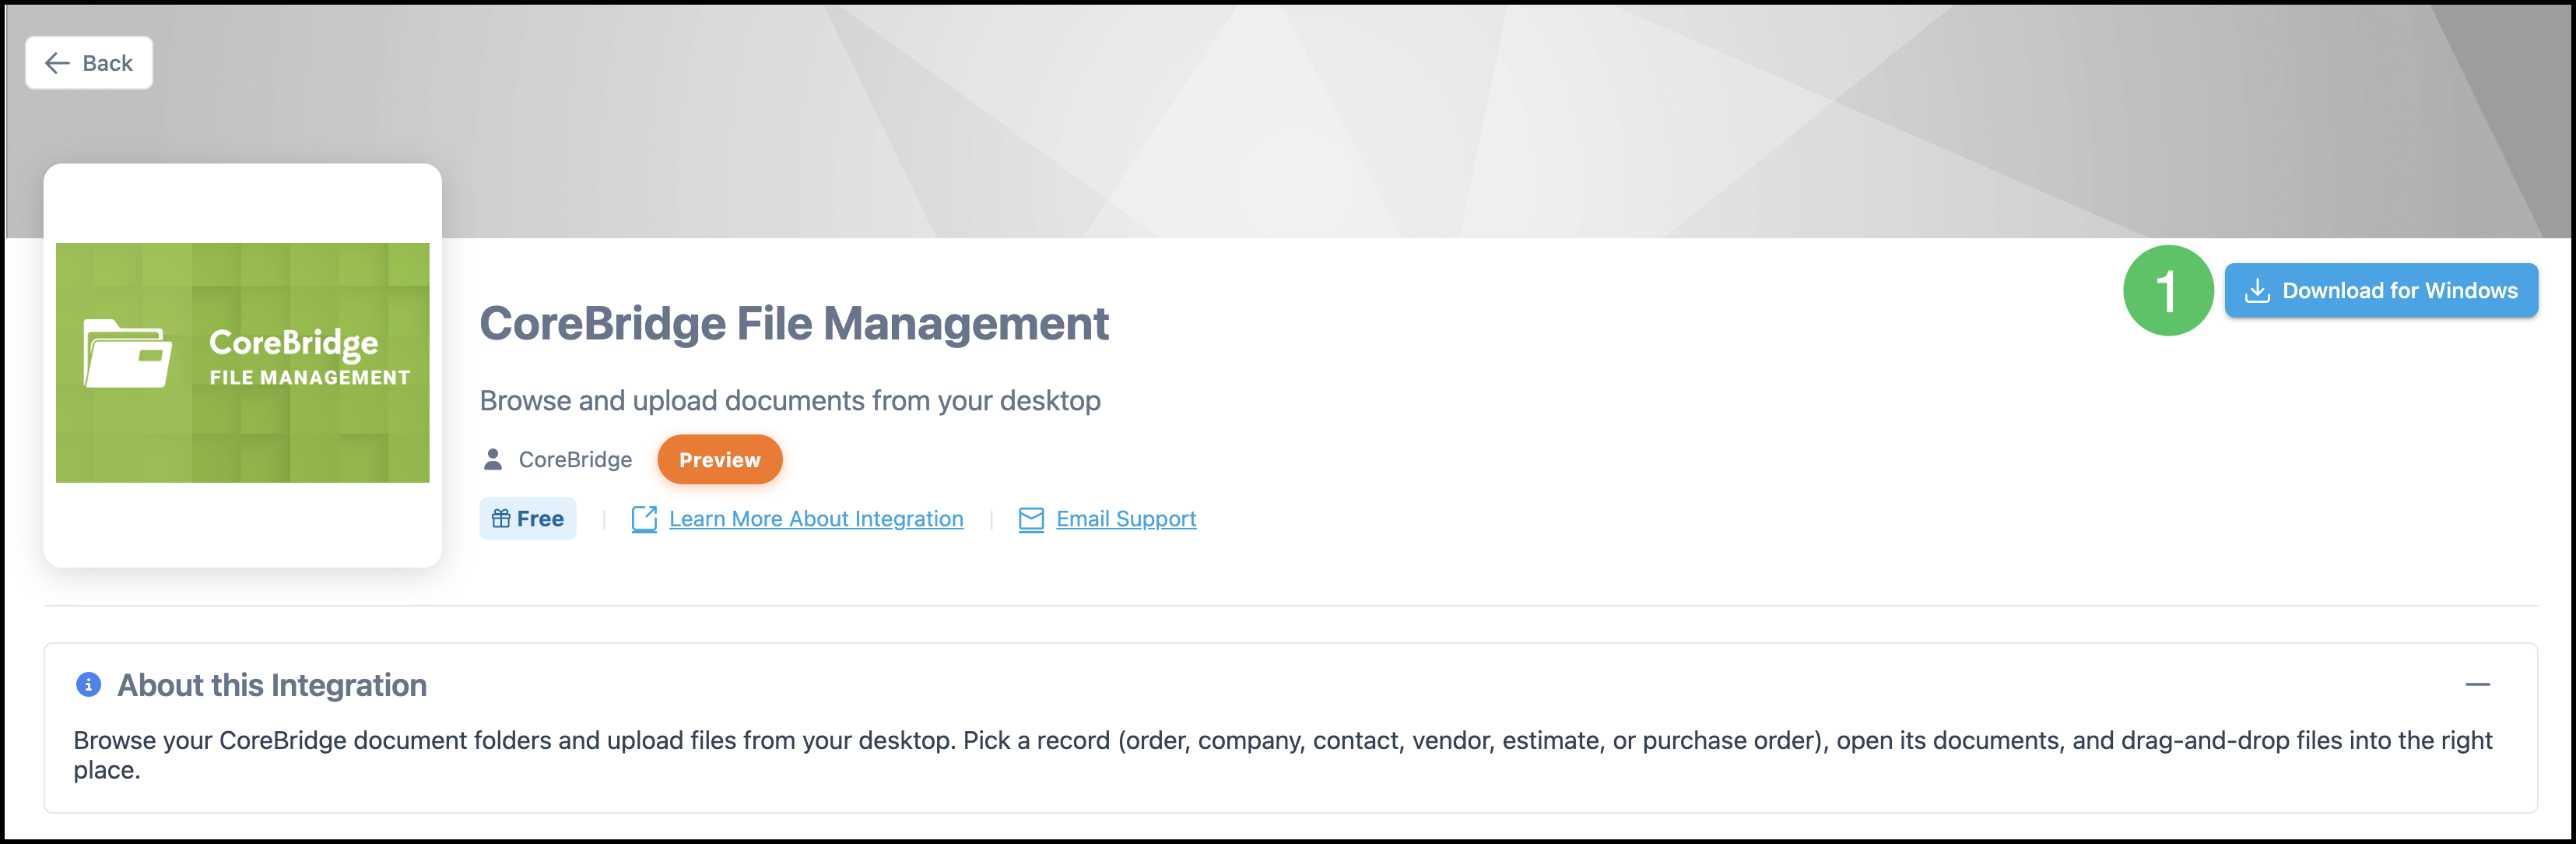
1. On the CoreBridge File Management page, click Download for Windows.
Note: This listing uses Download for Windows. The installer downloads to the computer.
Note: Download and install are for Windows. macOS support is not available yet.
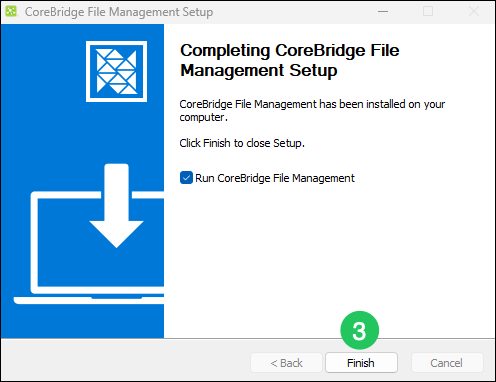
3. Run the installer on the Windows computer. Click Finish.
4. Open CoreBridge File Management from the Start menu or the desktop shortcut.
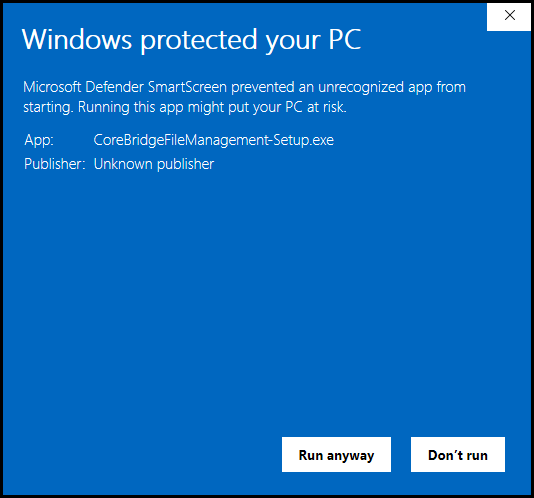
Note: During installation, you may see a security warning indicating that the app is unrecognized. If you downloaded the installer from the official CoreBridge source, select Run anyway to continue installing and using CoreBridge File Management. See the example below.
Signing In
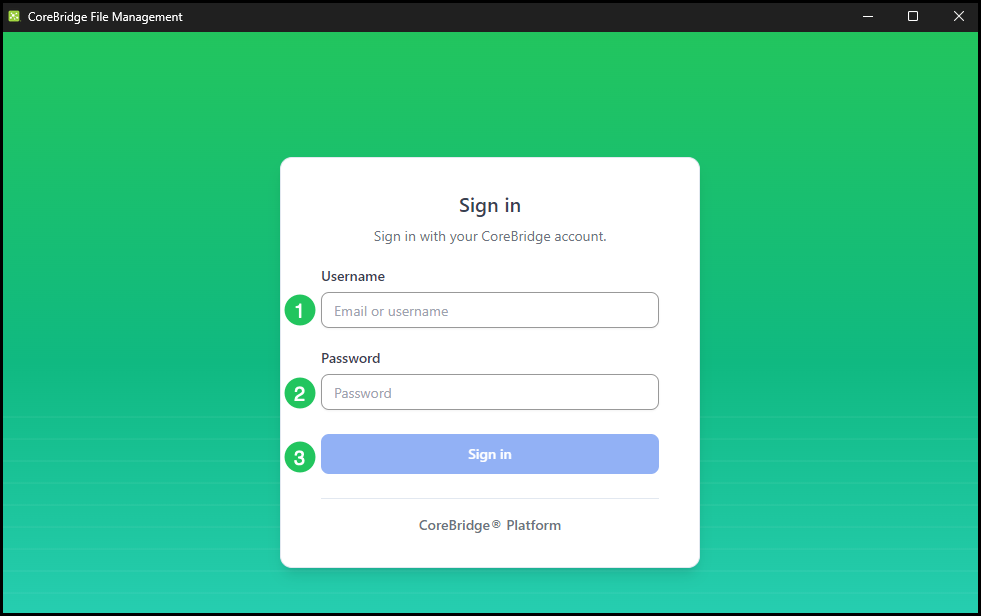
1. Enter your CoreBridge Username.
2. Enter your Password.
3. Click Sign in.
Note: When your account belongs to one business, the app opens after sign-in succeeds.
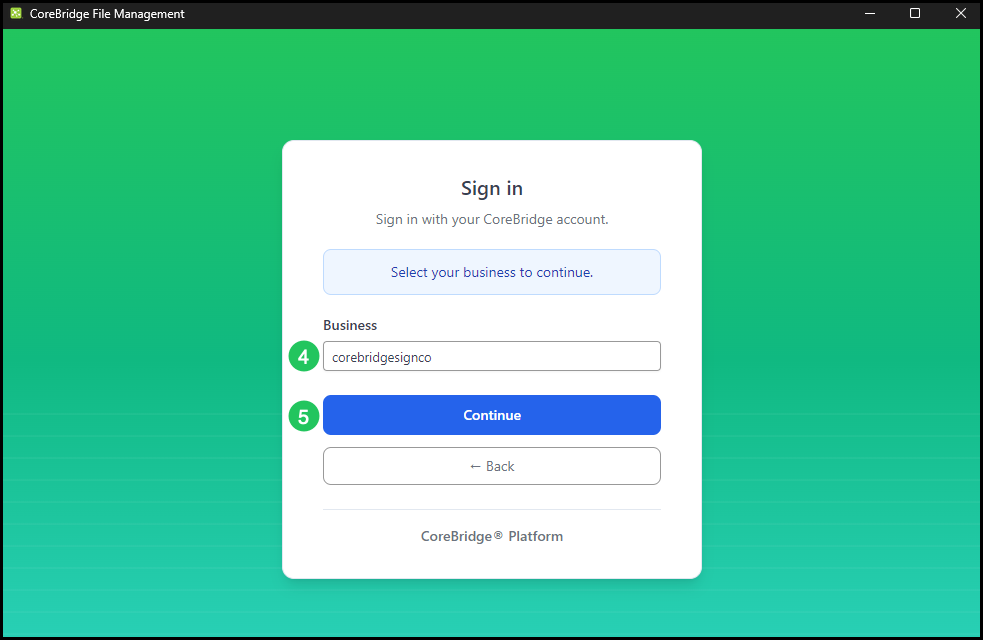
4. When your account belongs to more than one business, select the business you want to use.
5. Click Continue.
The app opens for the business you selected.
Browsing and Uploading Files
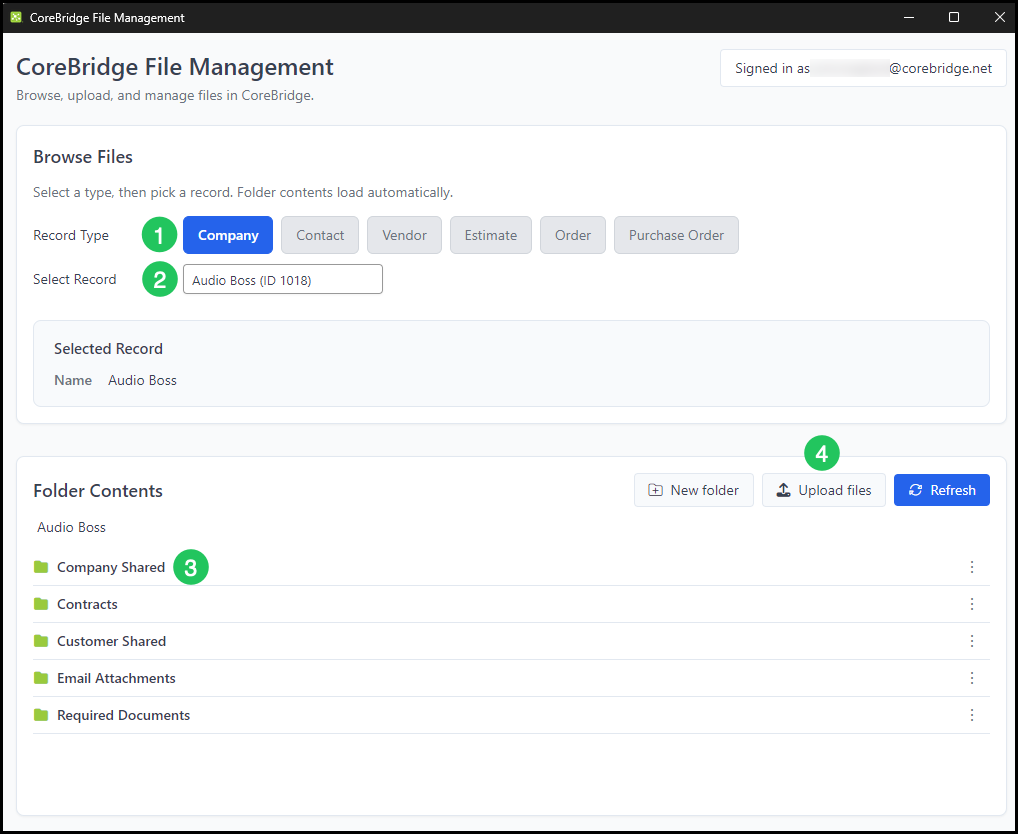
1. Select a record type, such as Order or Company.
2. Select the record from the searchable list.
The selected record summary shows identifying details for that record.
3. Select the folder where the file should go.
Note: The folder list and breadcrumbs move you between folders.
4. Add the files.
Note: You can add files by dragging them into the folder panel or clicking Upload Files to browse and select files from your computer.
Note: You can upload more than one file in one action. Large uploads run in the desktop app, so you can keep working outside that one CoreBridge browser screen.
Working with File Actions
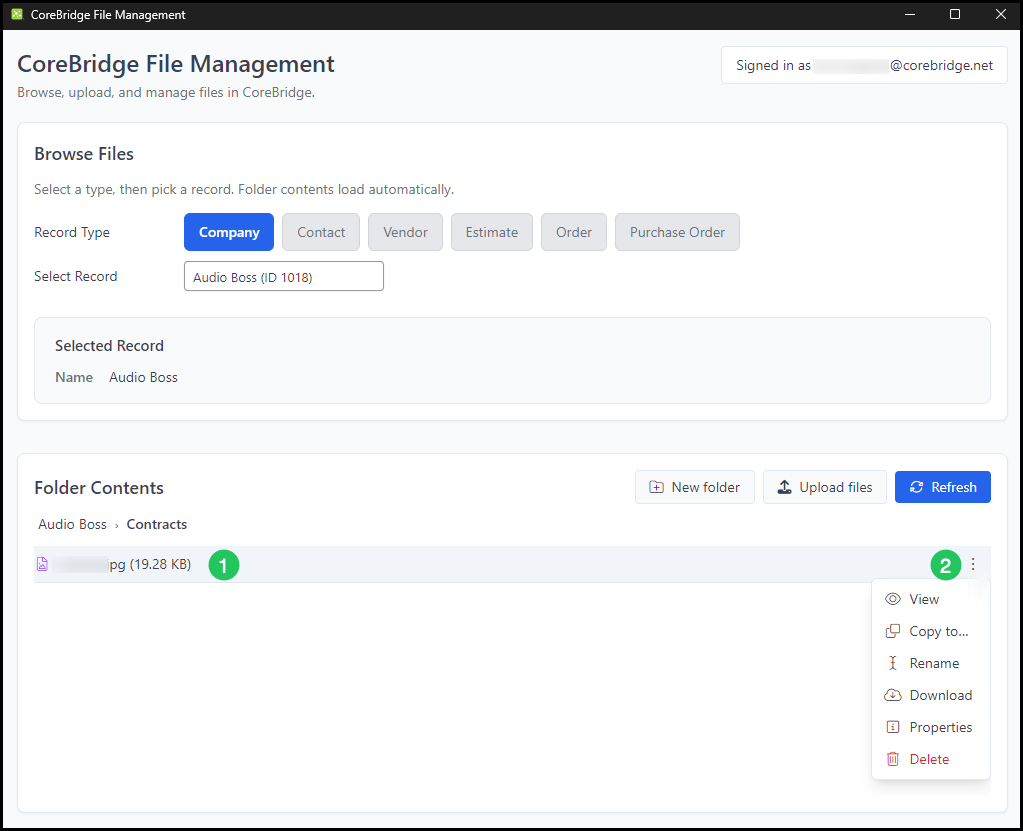
1. Select a File.
2. Open the Action Menu for that file.
a. View - Opens a preview when the file type supports it.
b. Download - Saves the file to the computer.
c. Rename - Changes the file name.
d. Copy to - Copies the file to another record.
e. Delete - Removes the file from that folder.
Note: Folders and files you add here are the same CoreBridge documents you see on the record in Files.
Related Records
When a record is linked to another record, the related records appear below the record details. Clicking a related record opens its folders in a second pane, allowing you to access files stored on either record.
For example, an Order converted from an Estimate may display the original Estimate as a related record, providing access to files associated with both records.
Frequently Asked Questions
1. Is this the same as Files on an Order?
Answer: Files is the side panel on the record in CoreBridge. CoreBridge File Management is a Windows desktop app that works with those same folders from your computer.
2. Why do I see Preview?
Answer: Preview means the app is listed while certification and rollout continue. Windows is the supported platform for this listing.
3. Can I use this on a Mac?
Answer: Download and install are for Windows. A Mac listing is not available yet.
4. Do I click Install in the marketplace?
Answer: Open CoreBridge File Management, then click Download for Windows and run the installer.
5. Which records can I use?
Answer: Company, Contact, Vendor, Estimate, Order, and Purchase Order.
6. Does this sync my whole computer like Google Drive or OneDrive?
Answer: This release is for signing in, opening a record's folders, and uploading while you are online. Offline sync and file versioning are not part of this release.
7. I cannot see CoreBridge File Management in the marketplace.
Answer: The listing appears when CoreBridge File Management is enabled for your business. If it is missing, contact CoreBridge support to confirm it is enabled.