
Royalties in CoreBridge calculate and track royalty-related amounts across one or more Locations. Think of royalties as a period-based calculation (monthly, quarterly, or yearly), not a live order total that updates the moment you invoice.
You set the rules in Royalty Groups. Sales that match those rules are calculated after each period finishes (and can also refresh overnight or after reconciliation). The Accounting ledger, search, and royalty document period lists show closed calculated periods. The open period is a preview only.
Note: Royalty calculations are processed nightly. Completing a reconciliation can also queue a recalculation. Changes to royalty settings are reflected after the next processing cycle.
Table of Contents
- How Royalties Calculate
- Viewing Royalties in Accounting
- Royalty Documents
- Creating a Royalty Group
- Setting Up Plans
- Previewing a Calculation
- Assigning Income Accounts
- Adding a New Leg
- Setting a Company Royalty Override
- Viewing Group History
- Working with Multiple Groups
- Cloning a Group
- Marking a Group Complete
- Frequently Asked Questions
- Related Articles
How Royalties Calculate
For royalties to calculate and appear in Accounting and documents, these conditions must be true:
- The Royalties feature is enabled for your business.
- At least one Royalty Group is Published and Active. Draft groups never calculate. Completed groups stop new calculations.
- The group has a period (Monthly, Quarterly, or Yearly), a basis (such as Invoiced), a start date, Locations (or all Locations), at least one plan, and income accounts mapped (usually Default).
- Sales match the group: correct Location, on or after the start date, and matching the basis (for example, Invoiced orders with income in the general ledger).
- A calculation has run for a closed period (nightly processing, after reconciliation, or another system compute).
Open vs closed periods: While you are still inside a period (for example, during July for a Monthly group), that period stays open. Official ledger rows and document period options are written after the calendar period ends so franchise and royalty numbers do not keep changing every day during the month. The current open period can appear under Current Period (preview) as an estimate, which may show $0.00 even when setup looks correct.
Viewing Royalties in Accounting
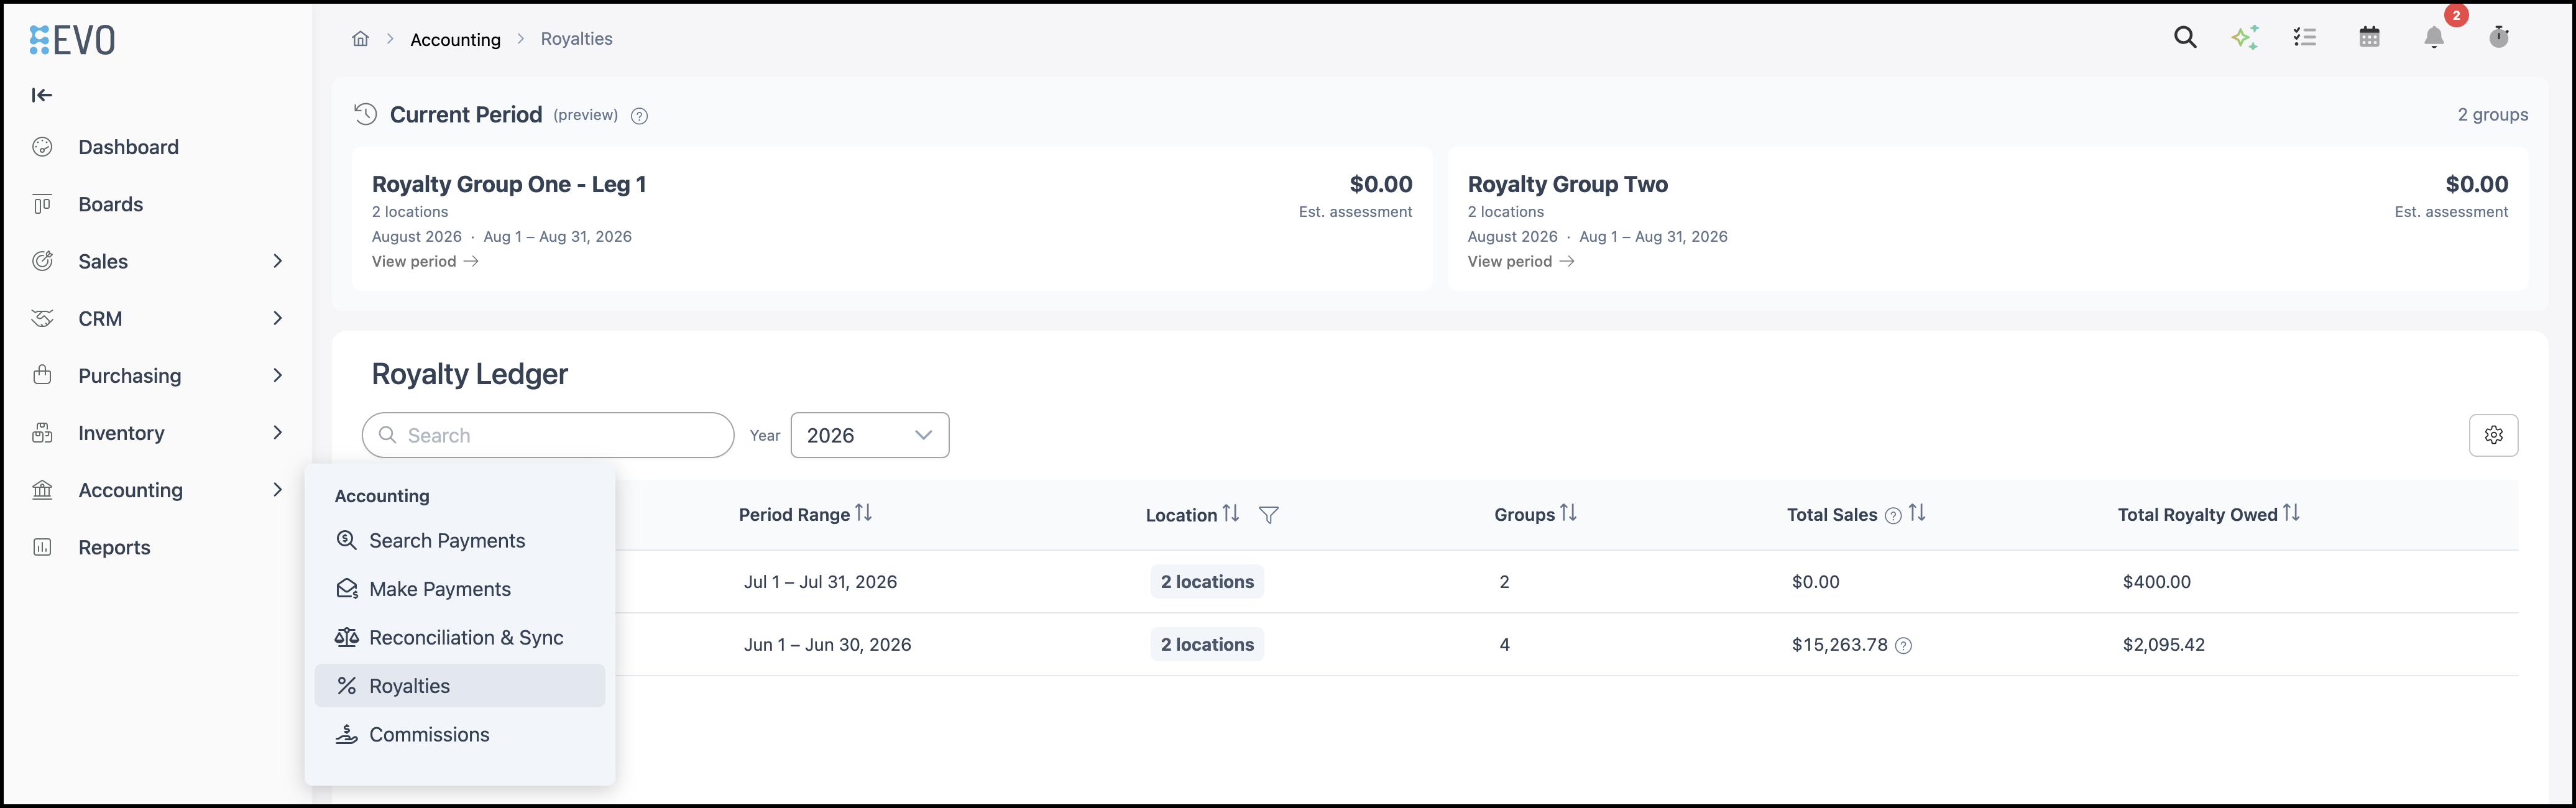
Navigate to Accounting / Royalties.
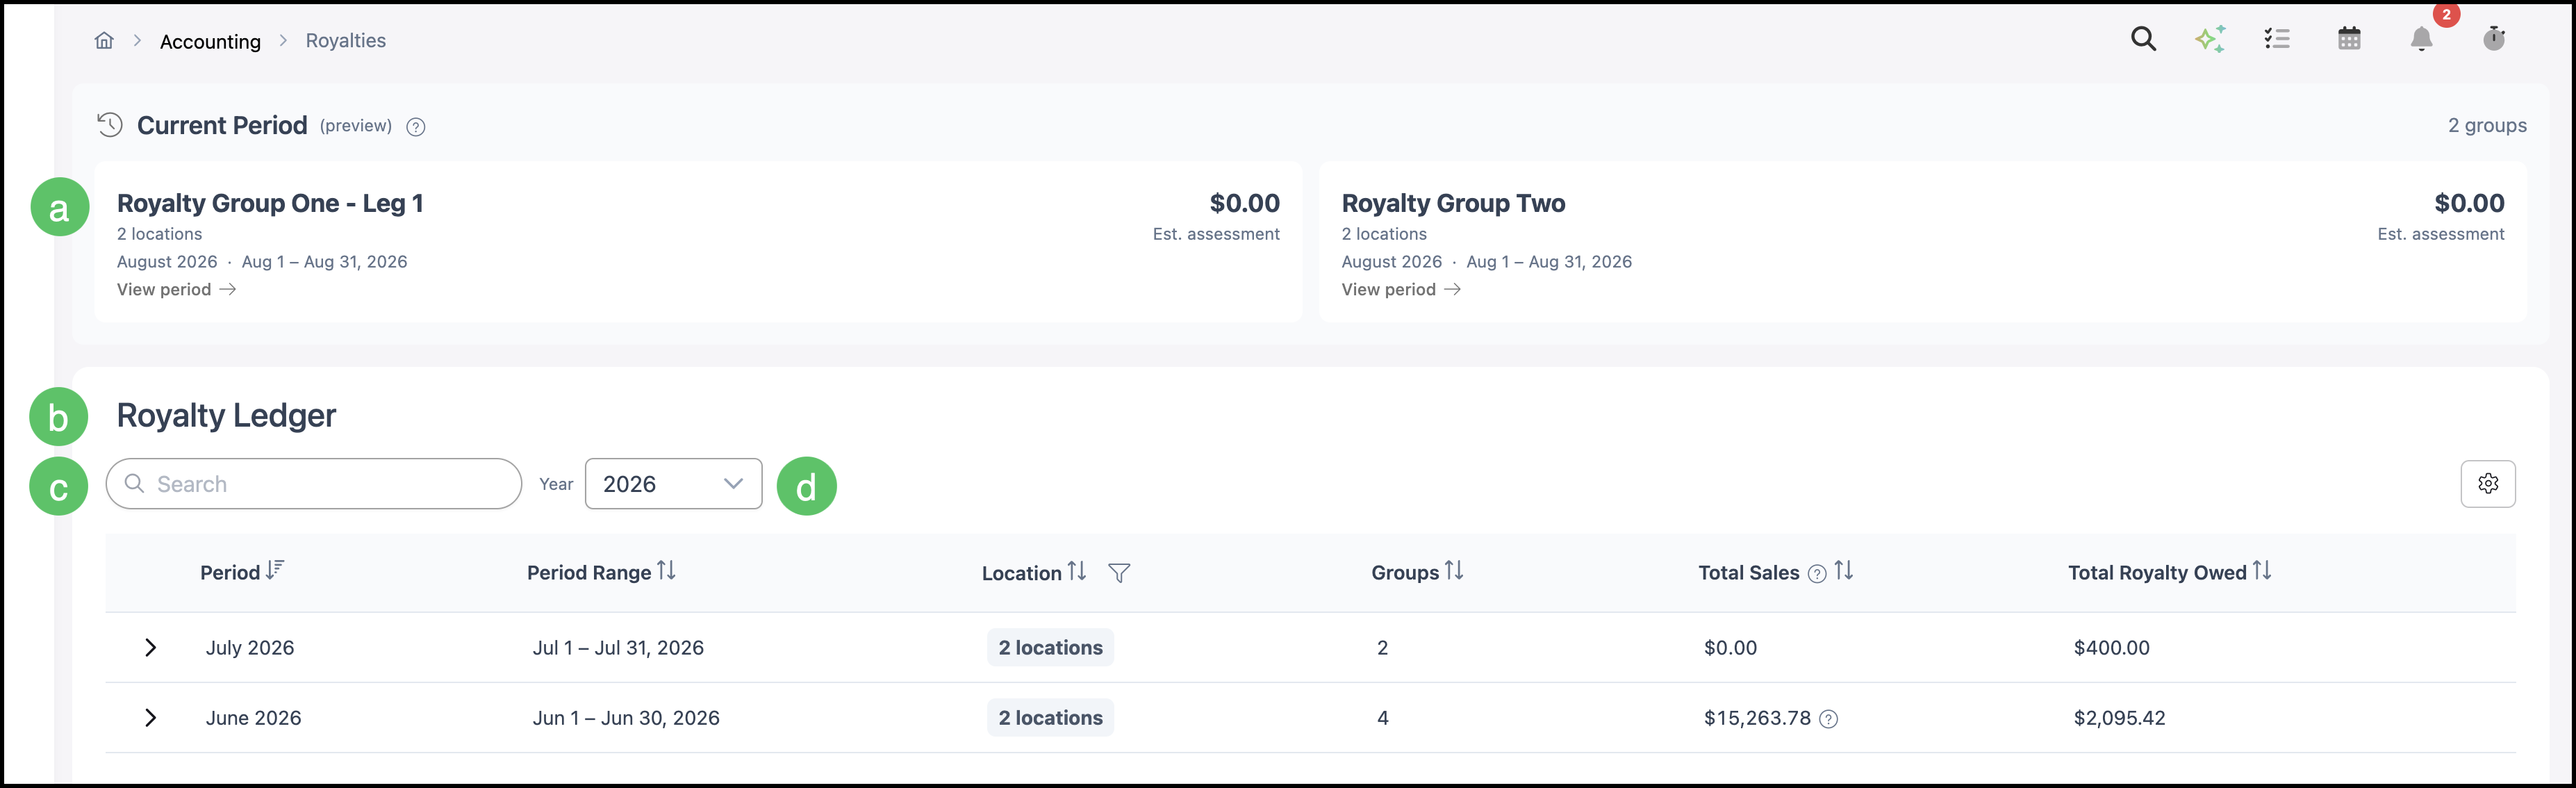
a. Current Period (preview) - Shows the open period for Active groups. Values are estimates only. This preview does not fill the Royalty Ledger or royalty document period lists by itself.
b. Royalty Ledger - Lists closed calculated periods with sales and royalty owed.
c. Search - Filters rows that already exist in the closed ledger.
d. Year - Filters the closed ledger by year. An empty grid usually means no closed assessments are saved yet for that year, not that royalties are broken.
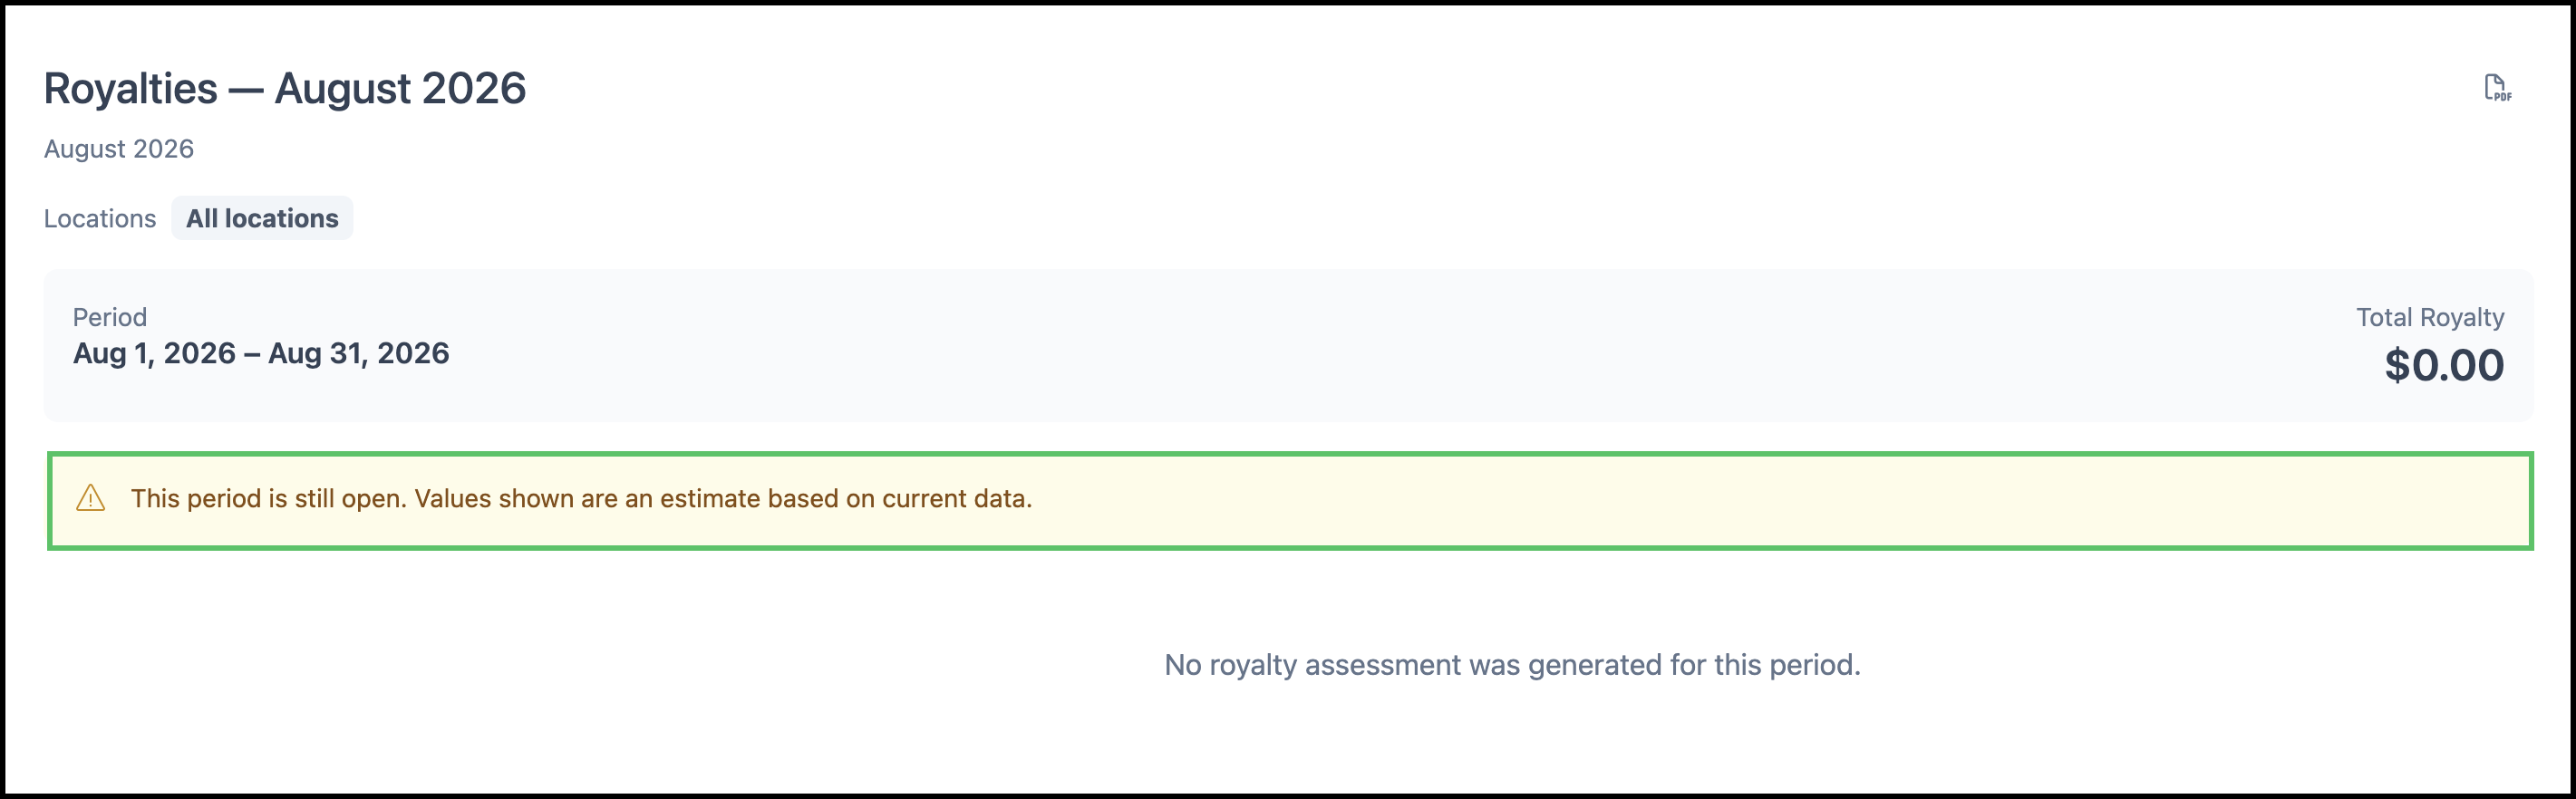
When you open the current period, a banner explains that the period is still open and values are estimates.
Note: Fixed Amount plans can show royalty owed even when Total Sales is $0.00 for a closed period.
Royalty Documents
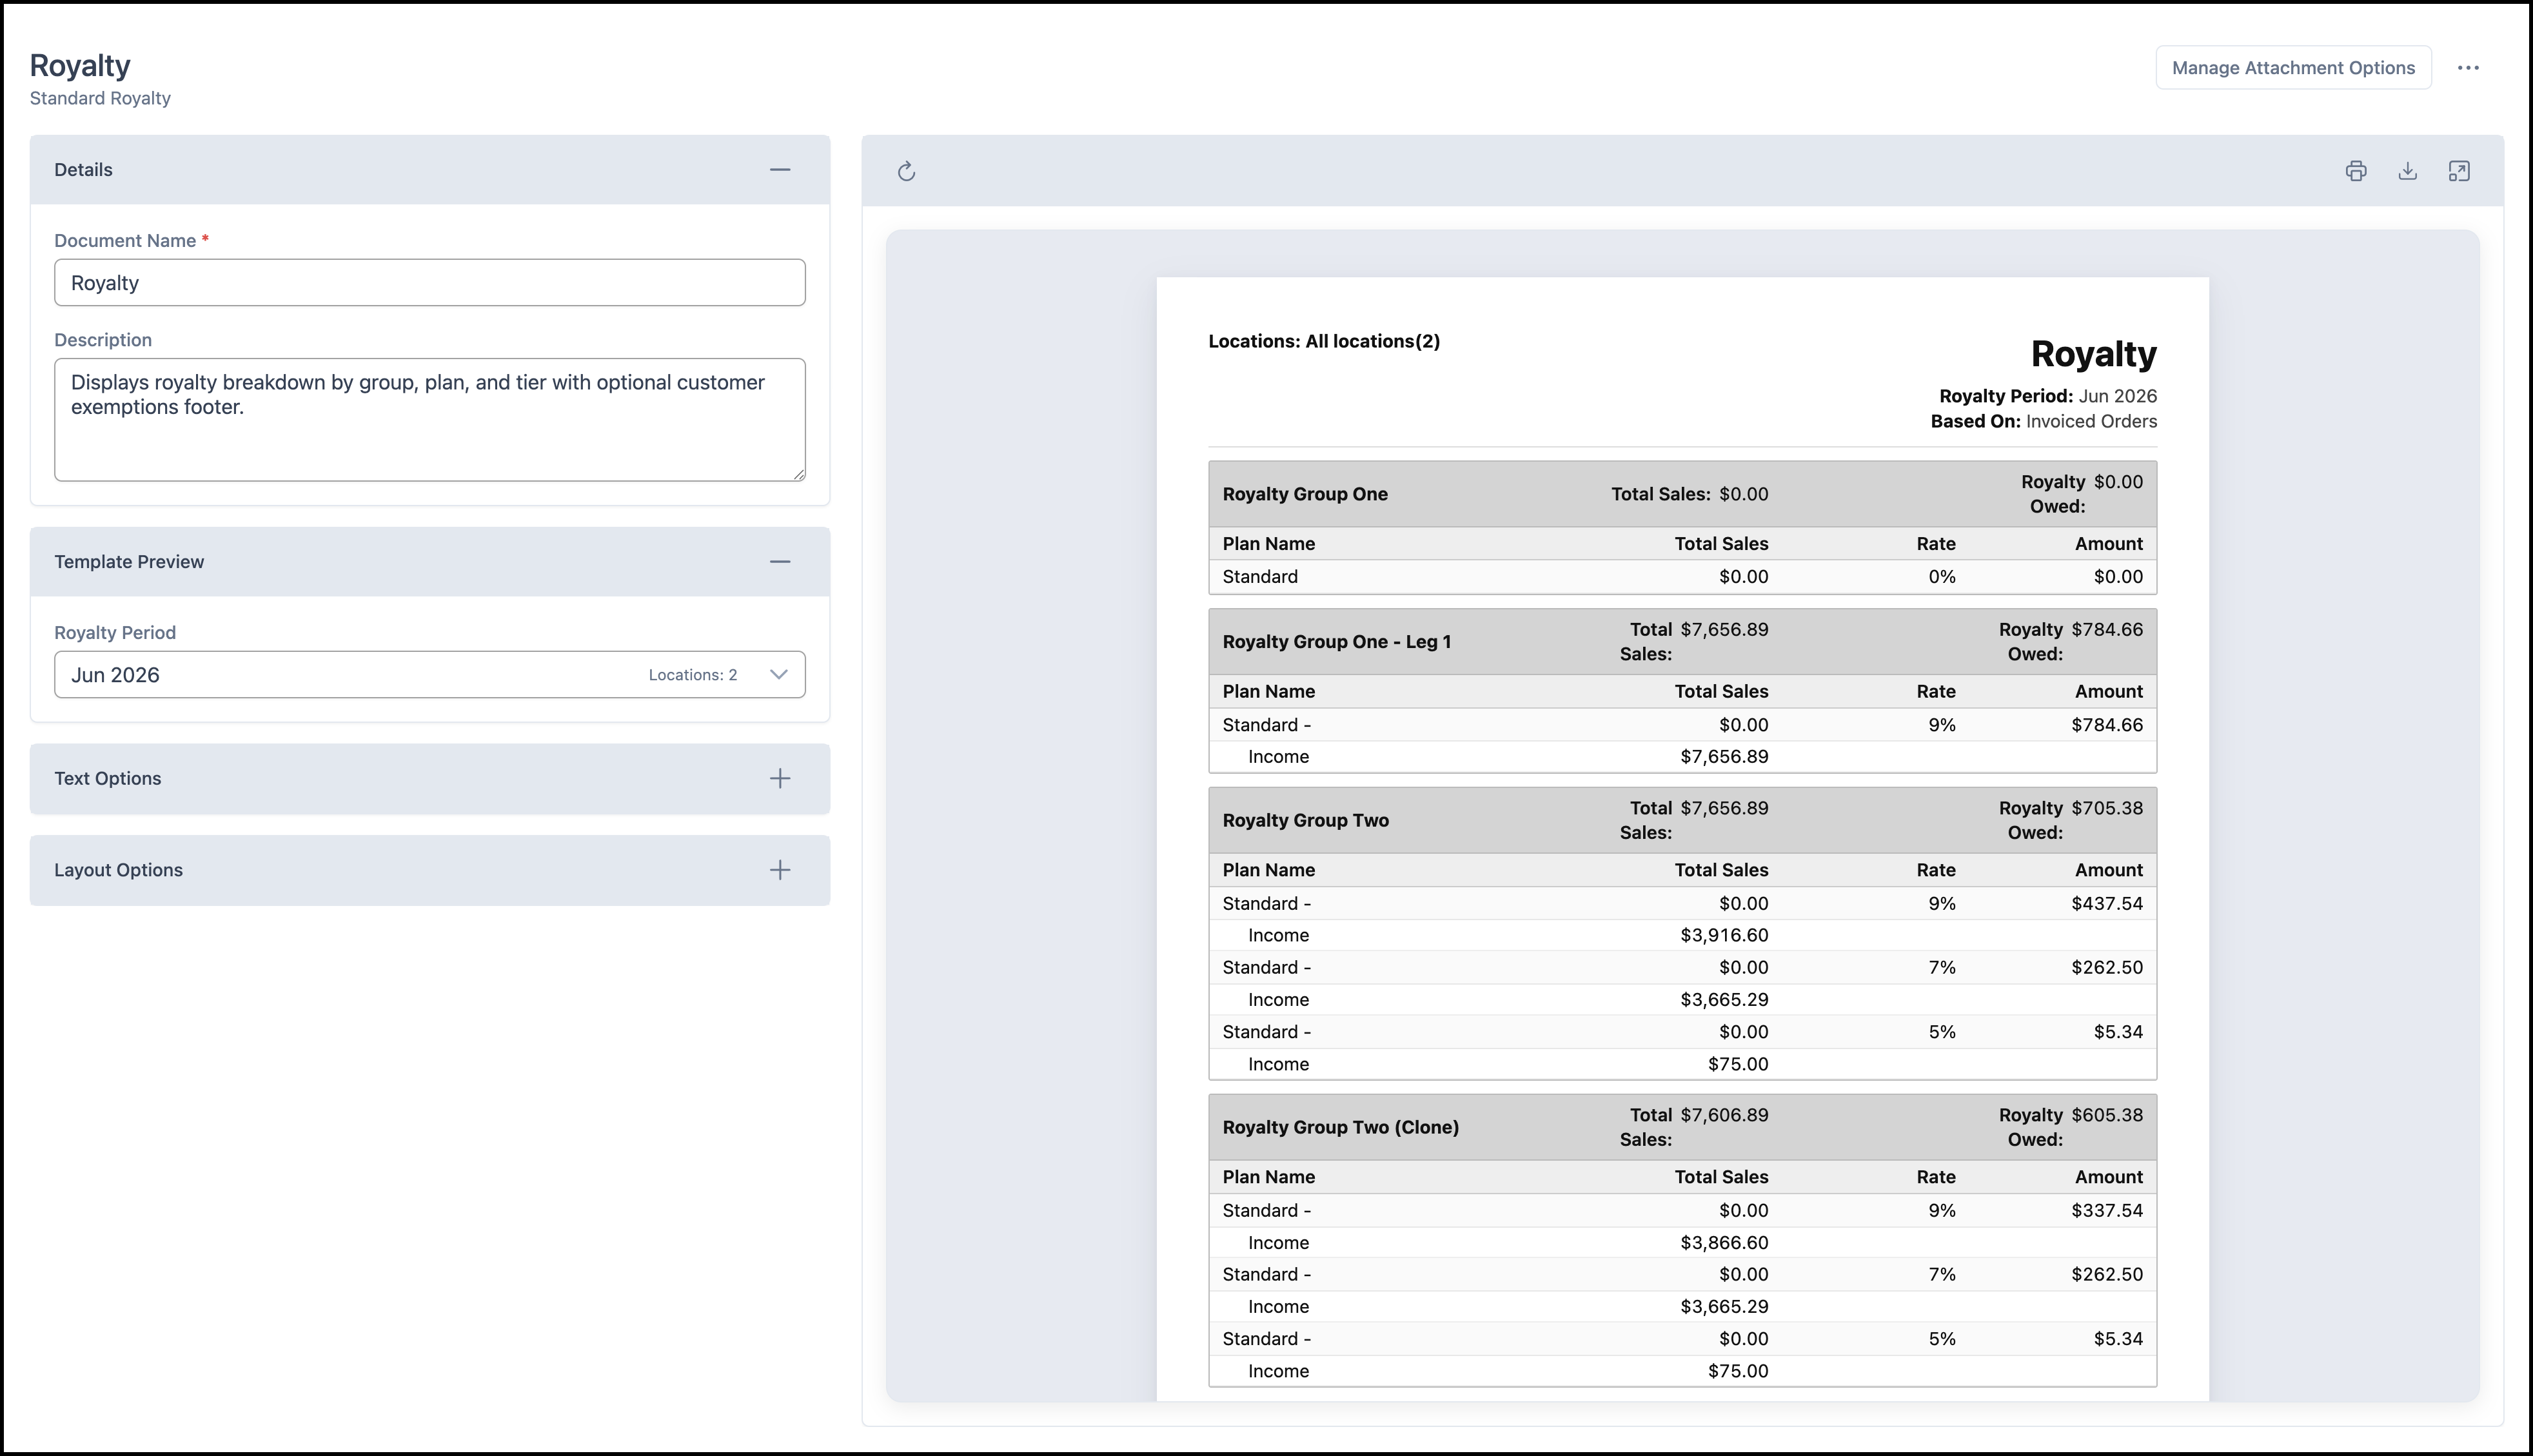
Royalty document templates are managed under System Settings / Documents. The Royalty Period dropdown on those documents is filled from closed Royalty Ledger periods.
Note: If the ledger has no closed periods yet, the Royalty Period list can be blank. That is expected until a closed period has been calculated and saved.
Creating a Royalty Group
Royalty Groups define how royalties are calculated, including the calculation basis, reporting period, applicable Locations, and plans. Groups keep a history of rule changes using effective start and end dates. Multiple Royalty Groups can be active at the same time (for example, franchise royalties and advertising funds).
Note: Royalty Groups are not included by default and must be created before royalties can be calculated. The Royalty Groups page remains empty until the first group is added. After creating an initial group, you can clone it to quickly create additional Royalty Groups with similar settings.
Navigate to System Settings / My Business / Royalty Settings.
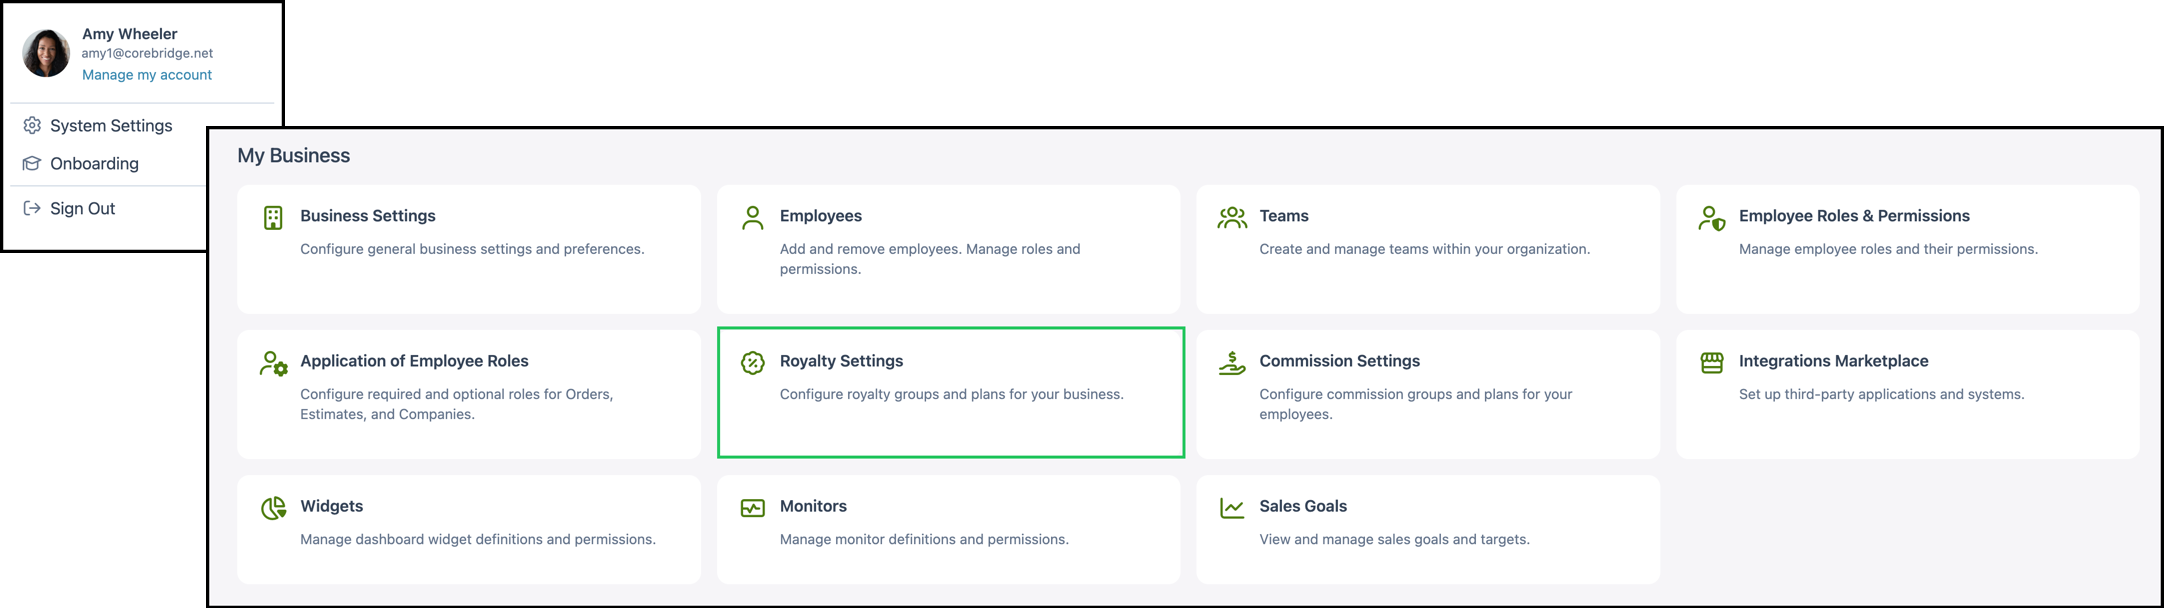
1. Click + Royalty Group.

2. Enter a Group Name.
3. Choose the Royalty Period, for example Monthly, Quarterly, or Annually.
4. Select what the Royalty is Based On. Examples include Placed, Built, or Invoiced Orders.
5. Set a Start Date, if desired.
Note: You can set the start date in the past and royalties can apply retroactively after calculation runs for closed periods.
6. Click Next.

7. Enable Minimums and Maximums, if desired. Fill in the appropriate amounts, if applicable.
8. Click Next.

9. Optionally, select one or more Locations the group applies to.
Note: If no Locations are selected, the group applies to all Locations.
10. Click Save.

11. Add your Royalty Plans (see Setting Up Plans below).

12. Assign Income Accounts to plans (see Assigning Income Accounts below).

13. Click Save to keep your changes.
Note: This saves the group as a Draft. A draft group does not become active and does not calculate until you publish it, even if the start date has passed.
14. Click Publish to activate the group.
Note: After publishing, only group name, plan names, and sort order can be edited.

Note: Publishing is a two-step process. Click Yes, Publish to proceed.

Setting Up Plans
Each Royalty Group contains one or more plans. All revenue within the group runs through one plan at a time. Common configurations include a standard plan and an exempt plan.
Note: Some systems may benefit from having a reduced plan as well.
1. Select the Royalty Plans tab.
2. Enter a Plan Name.
3. Select a Plan Type.
Note: A short description of how that plan calculates royalties appears below the selection.
4. Enter the revenue range and rate for each Tier, if applicable.
Note: Tiers are available on all Plan Types except Exempt, Fixed Rate, and Fixed Amount.
a. To split an existing tier, click the Split icon. You can override the auto-generated split point as needed.
b. Delete any unnecessary Tiers using the Delete icon.
5. Click Add Tier to add a tier at the end of the list.
You can add multiple plans to a group. One plan must be set as the default. You can also mark individual plans as exempt to exclude specific revenue from royalty calculations.
Note: All revenue within a group runs through exactly one plan at a time.

Previewing a Calculation
The Preview Calculation feature on a plan lets you test how that plan calculates royalties for a sales amount you enter. It does not affect actual royalty data, and it is not the same as Current Period (preview) on the Accounting Royalties page.
1. Select the Royalty Plans tab.
2. On the plan, click the Preview Calculation icon.

3. Enter a total sales amount for the period.
4. Review the breakdown to confirm the calculation behaves as expected.

Assigning Income Accounts
The Income Accounts tab controls which plan each income account is assigned to. By default, all income accounts are assigned to the default plan.
1. Open the Income Accounts tab on the Royalty Group.
2. To reassign an account, select it and choose the appropriate plan (for example, Standard, Reduced, or Exempt).
Note: Accounts overridden from the default appear blue.
Note: If you change the default plan later, all accounts set to Default automatically follow the new default. Accounts hard-coded to a specific plan remain on that plan.

Adding a New Leg
When your royalty rules change, you can add a new leg to an existing group instead of creating a new group from scratch. This preserves historical data while applying updated rules going forward.
1. Open the Royalty Group you want to update.

2. Click Create Leg.

3. Set the Start Date for the new leg.
4. Configure the Royalty Plans.
Note: For more information, see Setting Up Plans above.
5. Set Income Account assignments for the new leg.
Note: For more information, see Assigning Income Accounts above.
6. Click Save.
7. Click Publish when ready. The original leg automatically receives an end date the day before the new leg begins.
Note: A new leg saved as a draft does not take effect until you publish it, even if the start date has passed. You can set up legs in advance and publish them once changes are approved.

Setting a Company Royalty Override
You can override the royalty plan for a specific Company. This is useful when a customer qualifies for a different royalty rate than the default, for example exempt or reduced.
Navigate to Sales / Companies and open the Company record.

1. Click the More Actions menu.
2. Select Royalties.

3. Choose the override plan for this Company.
Note: Income accounts that have been explicitly assigned to a specific plan continue to use that assignment. The Company override applies to accounts set to Default.
Viewing Group History
Each Royalty Group keeps a full audit trail of every change made to it. To view the history, open the group and select the History tab.

Working with Multiple Groups
You can have more than one active Royalty Group at a time. All revenue runs through each active group independently, so you can track different royalty types (such as a franchisor royalty and an advertising fund) as separate groups with their own plans and rates.
Cloning a Group
You can clone any Royalty Group, including completed groups, to use its settings as a starting point for a new group.
1. Select the Group you want to clone.

2. Click More Actions.
3. Select Clone.

4. Update the necessary information.
5. Click Save to keep your changes.
Note: This saves the group as a Draft. A draft group does not become active until you publish it, even if the start date has passed.
6. Click Publish to activate the group.
Note: After publishing, only group name, plan names, and sort order can be edited.

Marking a Group Complete
When a Royalty Group is no longer needed, mark it Complete. Completed groups cannot be edited, and they stop new royalty calculations. Clone a completed group to reuse its settings in a new group.
1. Select the appropriate Group.

2. Click Complete.

Note: This is a one-step process and immediately moves the group to Completed.
Frequently Asked Questions
1. Why is Accounting / Royalties empty or showing $0.00?
Answer: Confirm you have an Active published Royalty Group, matching sales for the basis and Locations, and that you are looking at a closed period in the Royalty Ledger. The open month under Current Period (preview) is an estimate and often shows $0.00 until the period closes and calculation runs. Also allow time for nightly processing or a recalculation after reconciliation.
2. Why is the Royalty Period dropdown blank on a royalty document?
Answer: That dropdown is filled from closed Royalty Ledger periods. If the ledger has no closed calculated rows yet (or the wrong year is selected in Accounting), the period list stays blank.
3. Why does Search or Year on the Royalty Ledger show no results?
Answer: Search and Year only filter closed ledger rows that already exist. No closed assessments for that year means no results.
4. Does invoicing an order immediately update the Royalty Ledger?
Answer: No. Matching sales are required, but official ledger and document numbers appear after closed-period calculation (nightly processing and/or after reconciliation), not the instant an order is invoiced.
5. What is the difference between Preview Calculation on a plan and Current Period (preview)?
Answer: Preview Calculation on a plan is a manual sales-amount test while you configure the plan. Current Period (preview) on Accounting / Royalties is the open-period estimate for Active groups.