
Request for Quote (RFQ) lets you collect competitive pricing from multiple vendors before committing to a purchase. Instead of quoting a price to a Customer, you request prices in from your vendors, compare their bids side by side, and award the work to the vendor or vendors you choose.
Request for Quote is available in the Purchasing module and uses the same tools you already use for Line Items, destinations, and email templates on Orders and Estimates, so the workflow should feel familiar.
Note: Request for Quote is an optional feature. If you don't see it available on an Order or in Purchasing, contact your CoreBridge account team to have it added.
Table of Contents
Important Information
- Pricing only comes from vendors. Since the purpose of a Request for Quote is to collect vendor pricing, you won't see fields for your own selling price while building one.
- A vendor portal link is private to that vendor. Treat it the way you would any private link, since anyone who has it can view the Request for Quote and submit a bid.
- A bid of zero is different from no bid. The system distinguishes between a vendor who quoted $0.00 and a vendor who hasn't responded at all.
- Awarding happens automatically. You don't need to manually mark a Request for Quote as Awarded, since it updates on its own once every Line Item has a winning vendor.
Creating a Request for Quote
Request for Quotes can begin either in the Purchasing module or you can start a Request for Quote directly from an existing Order, which carries over the Order's Line Items and location automatically. This article will walk you through both options.
RFQ from Purchasing:
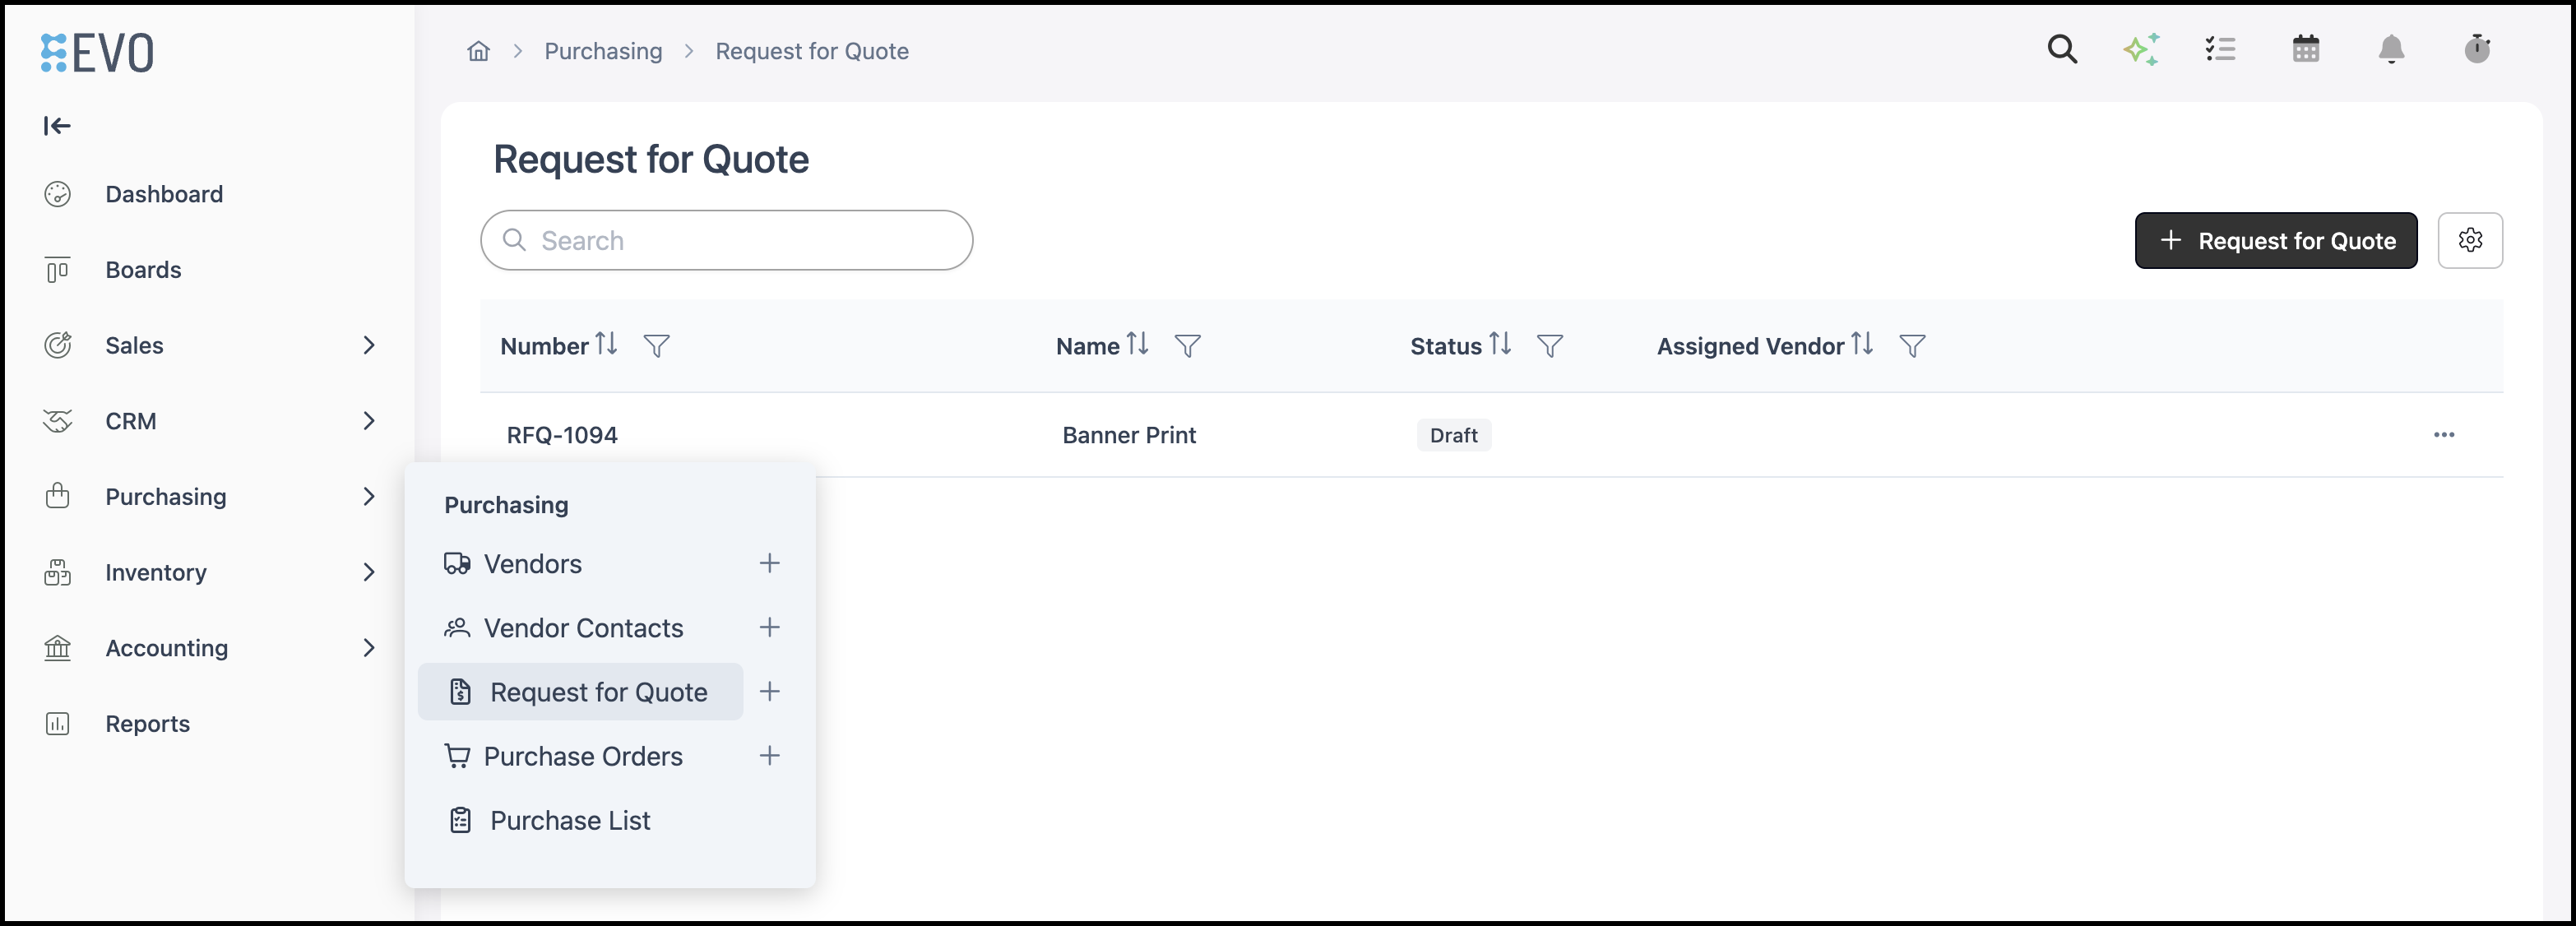
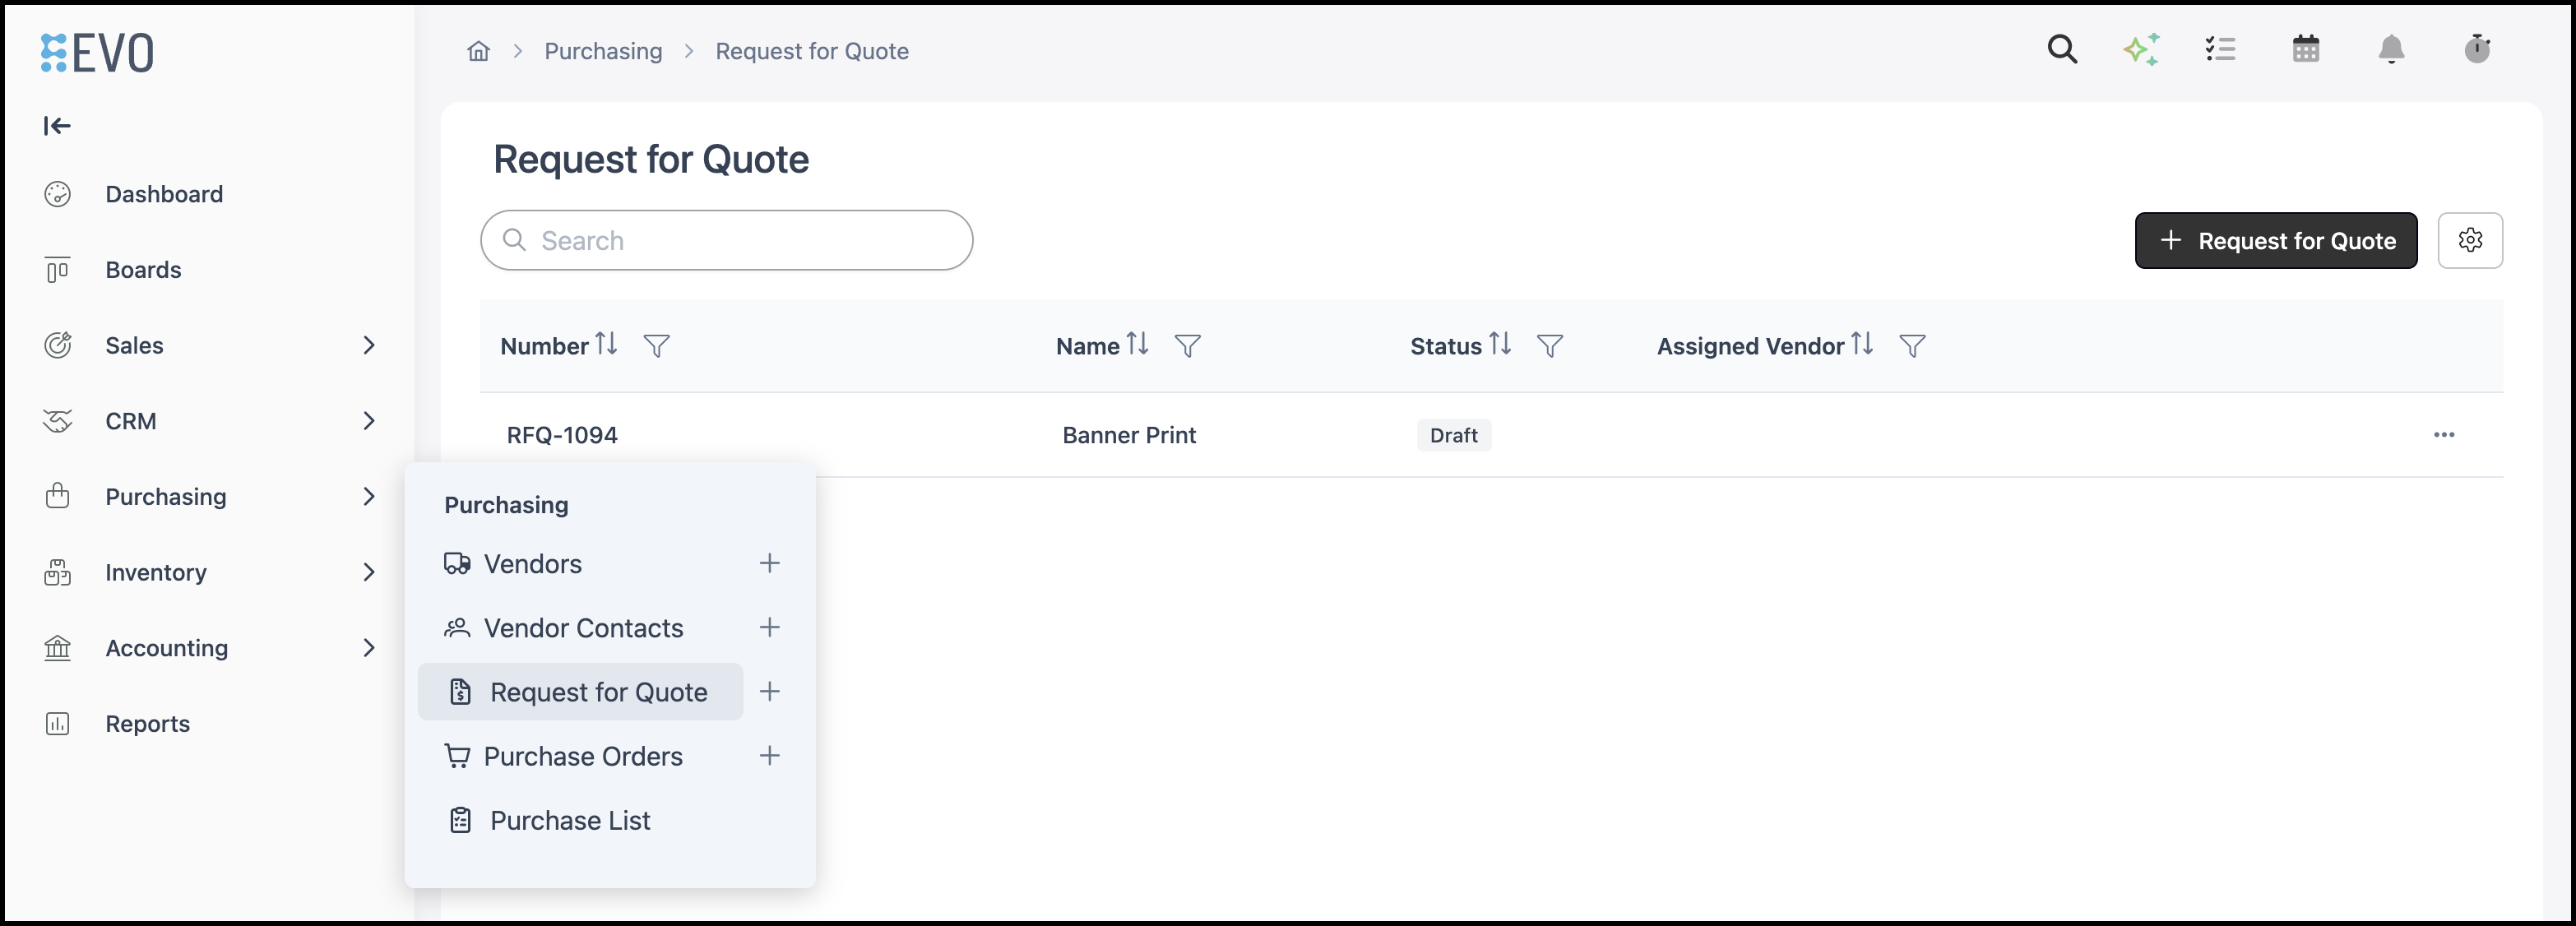
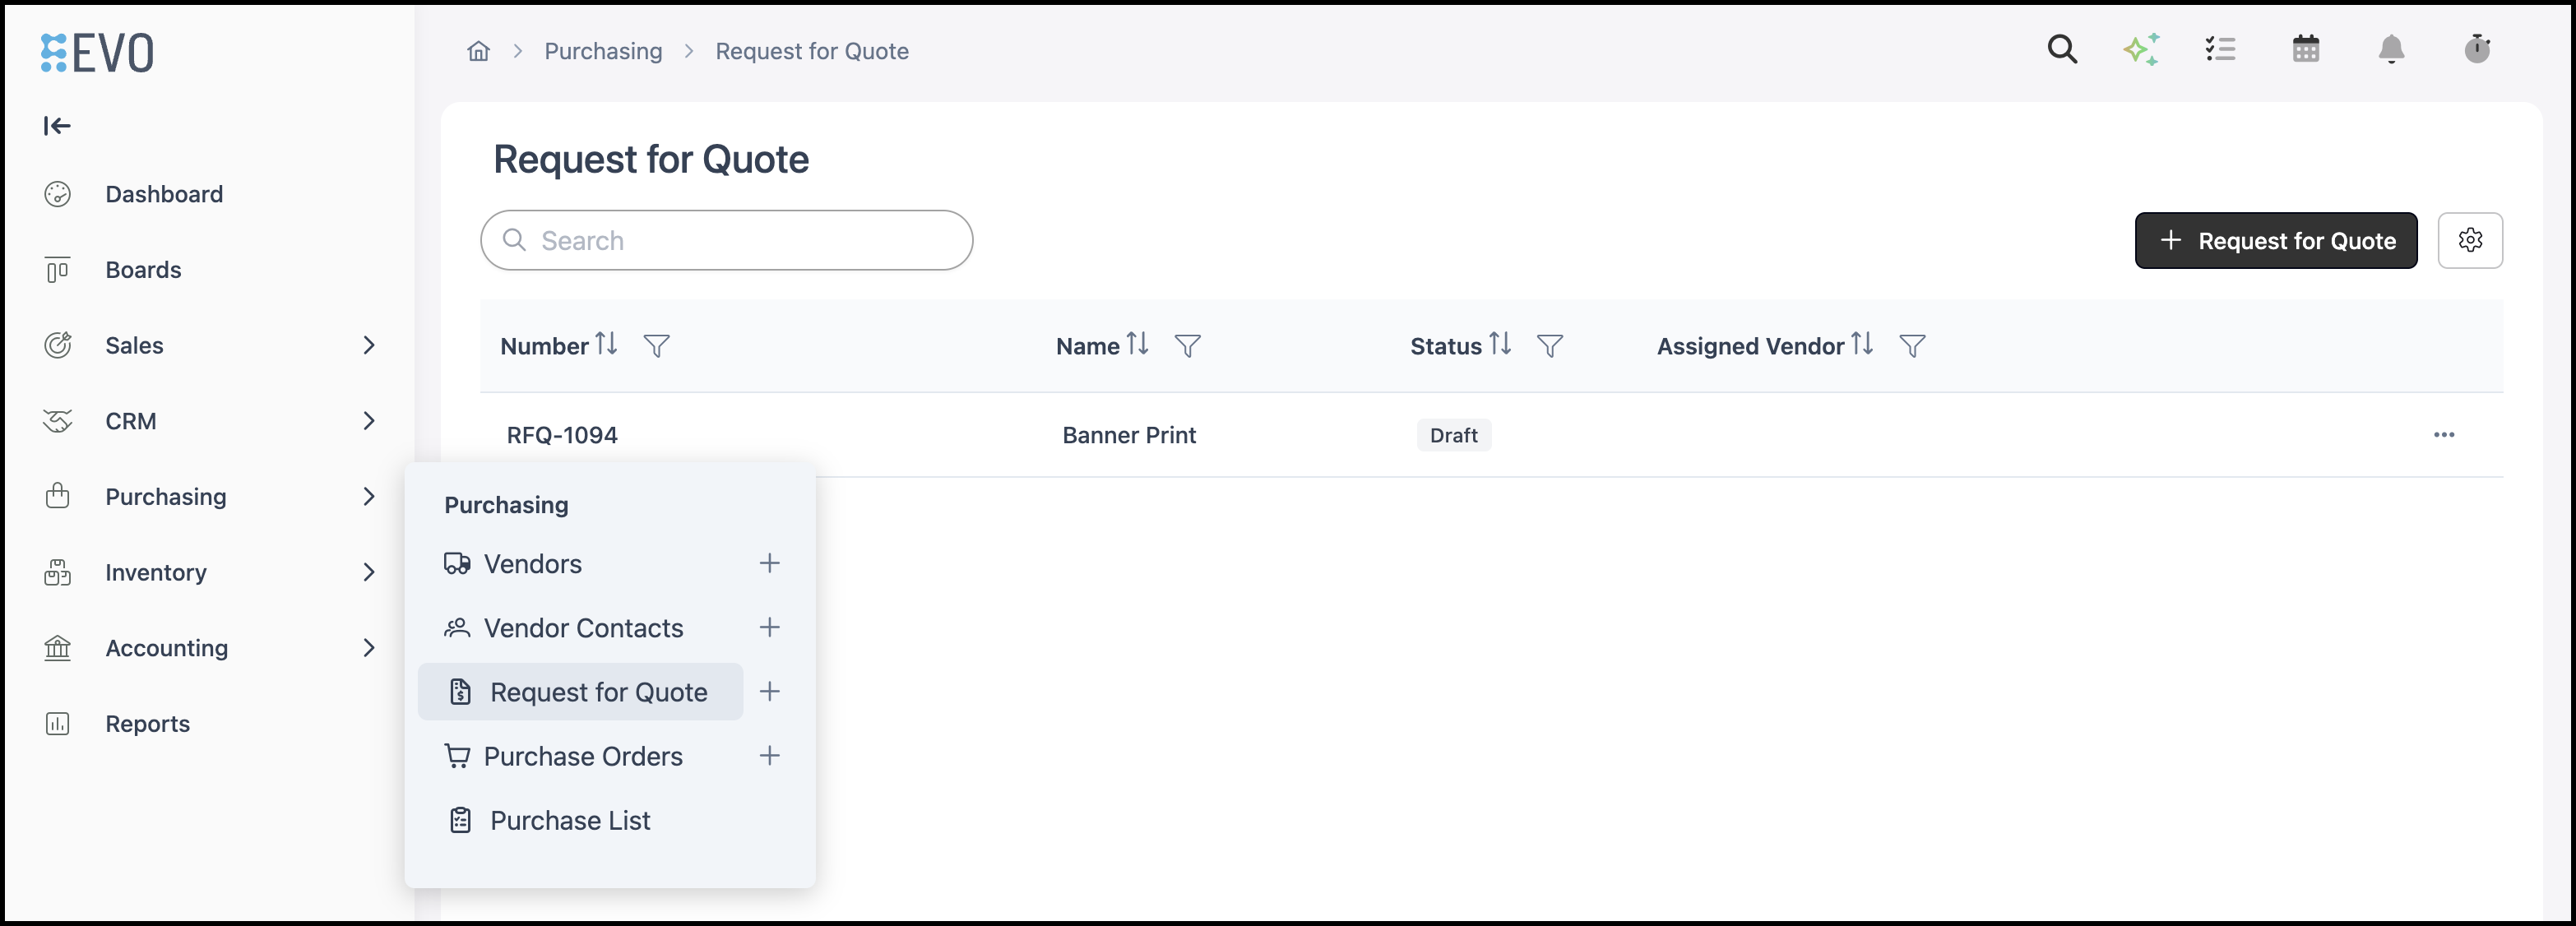
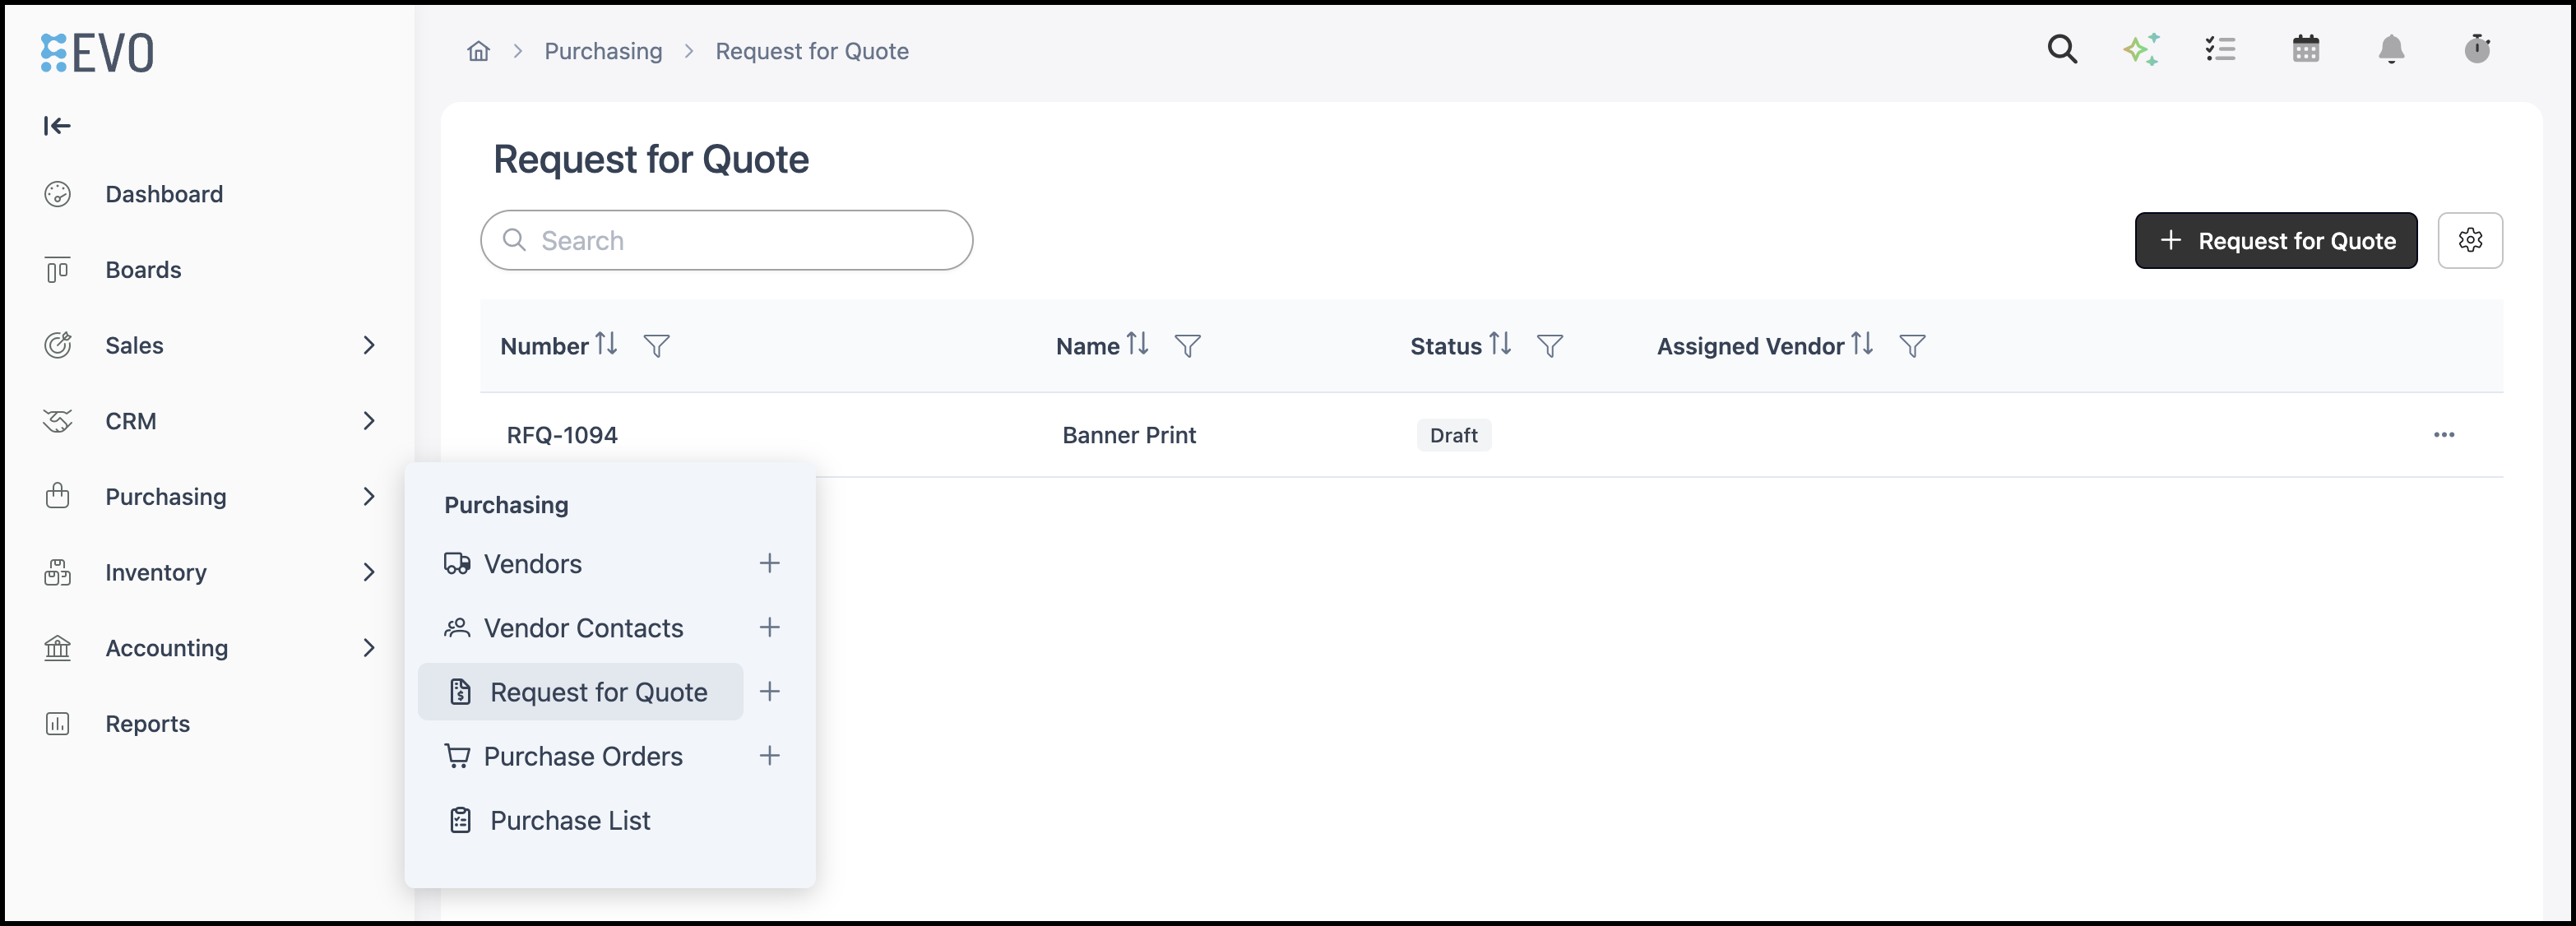
Navigate to Purchasing / Request for Quote.
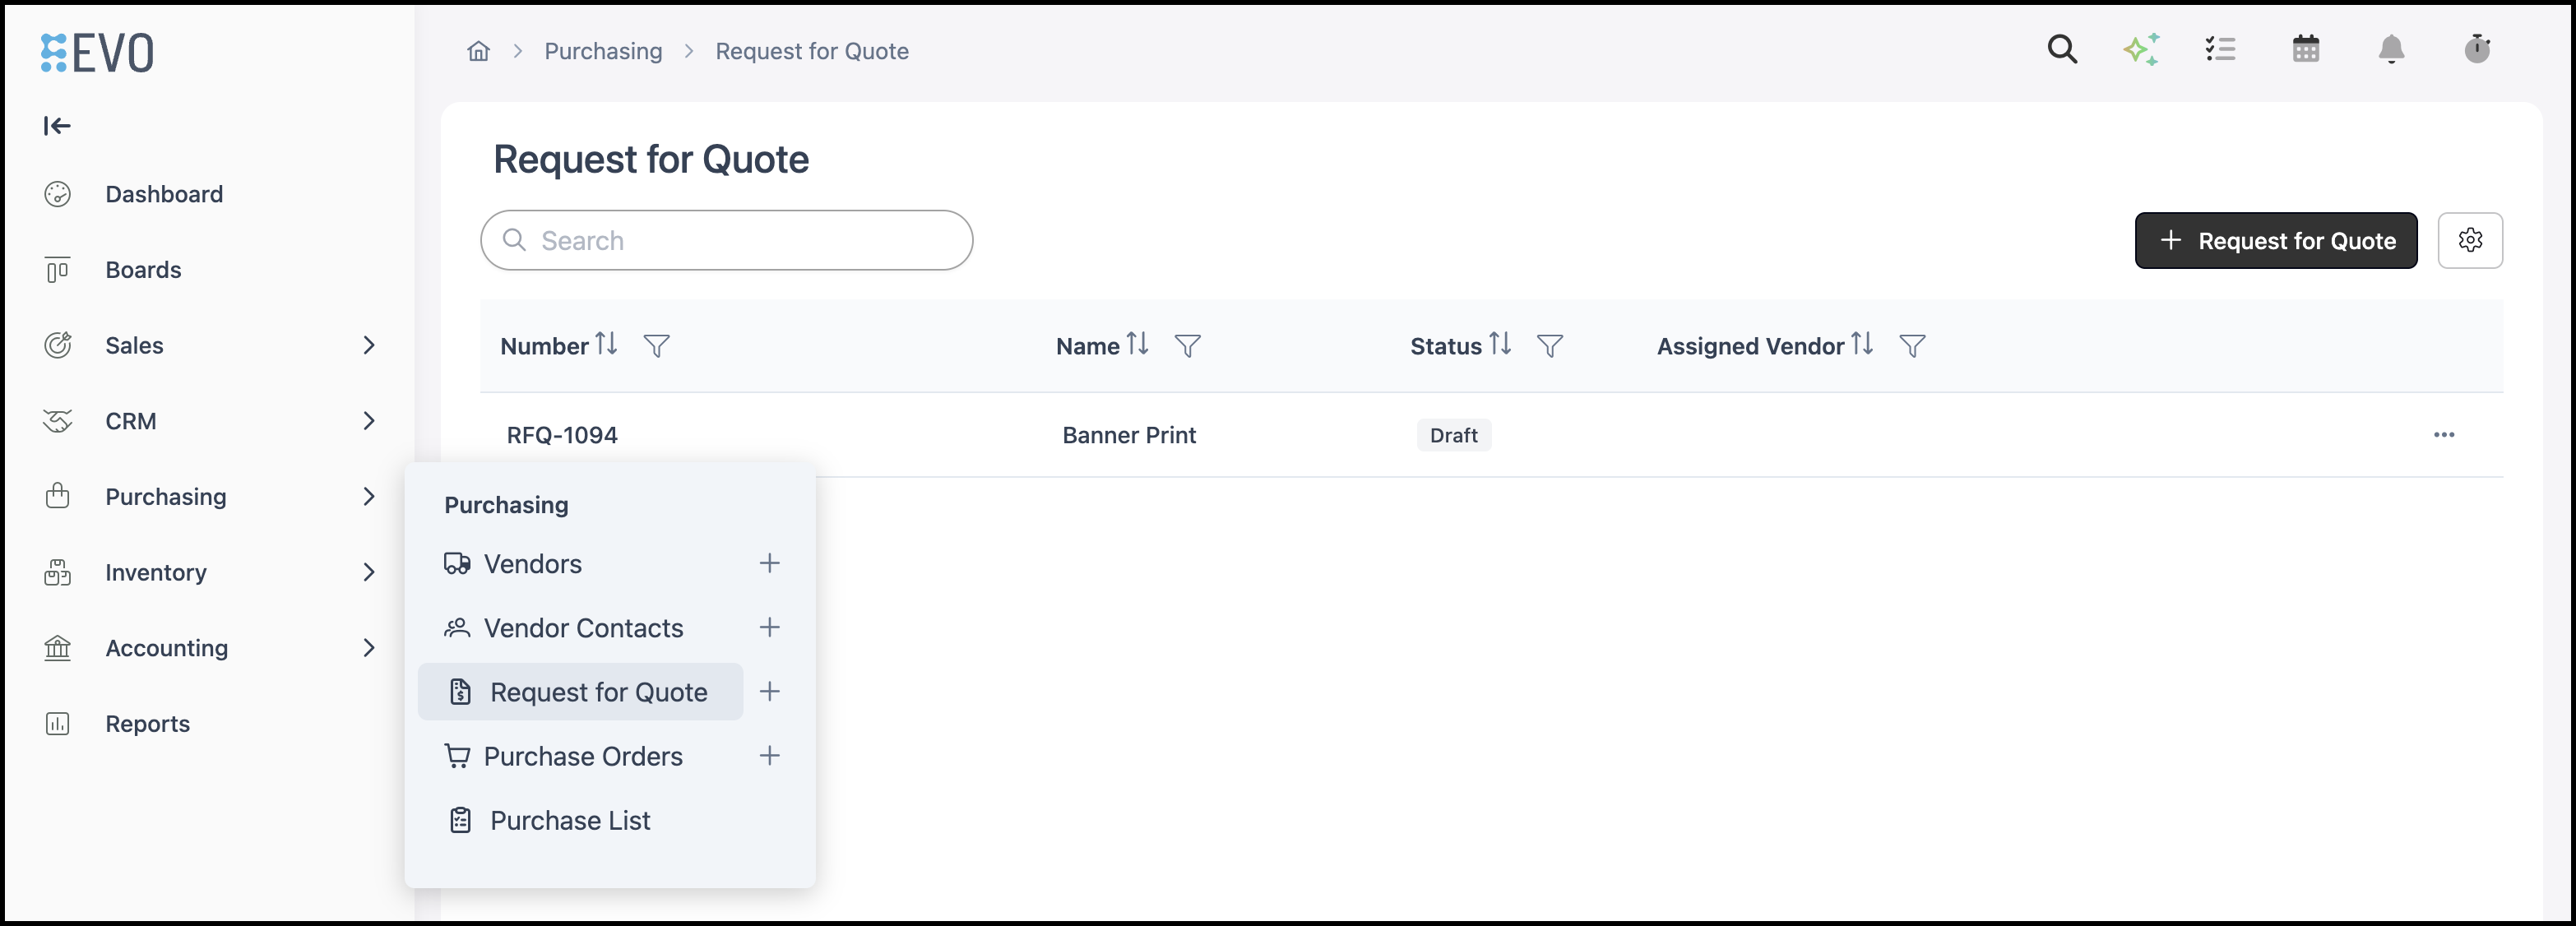
1. Click Request for Quote.

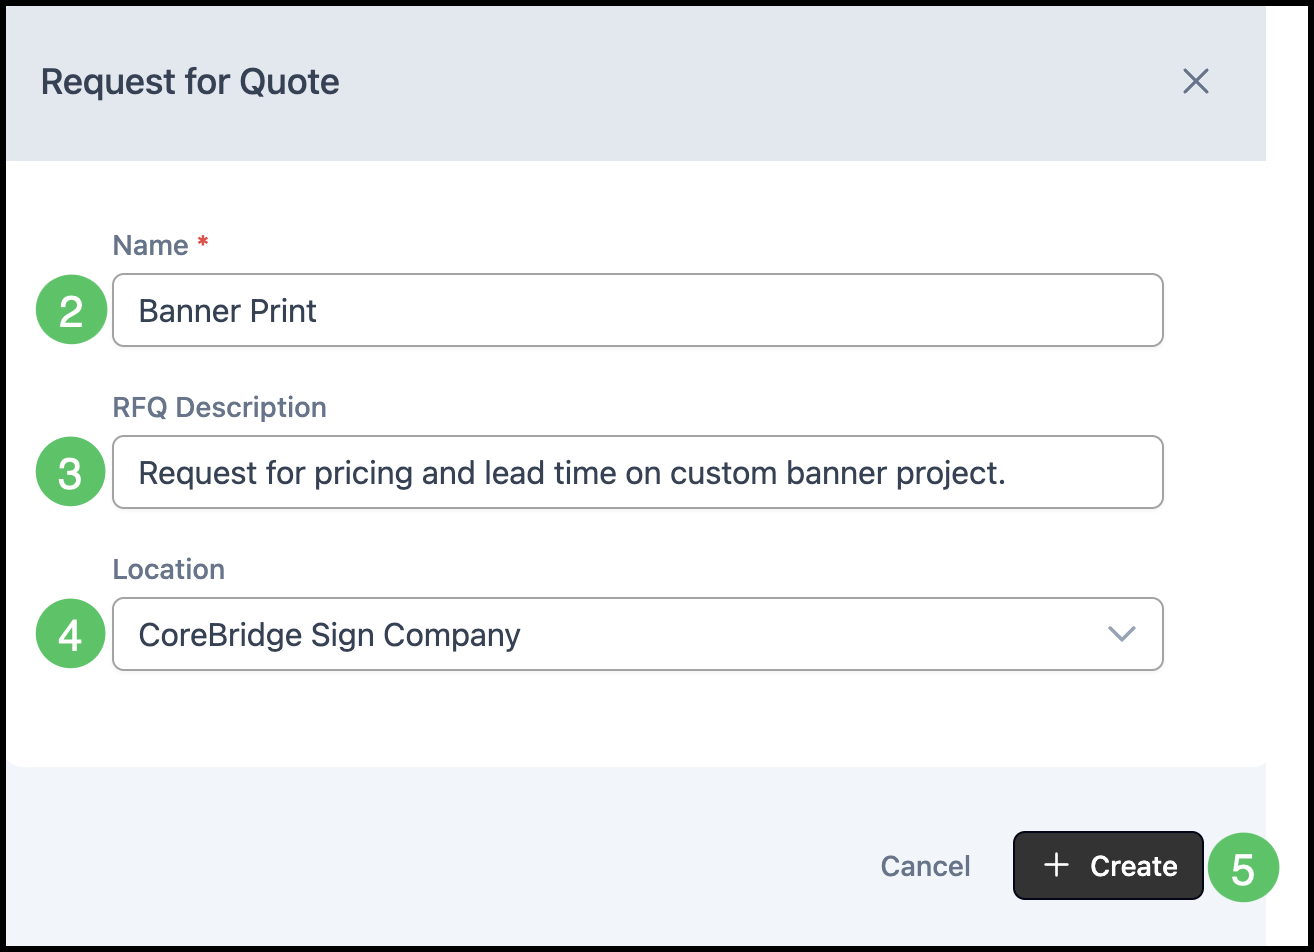
2. Enter a Name for the Request for Quote.
3. Optionally, enter a short Description.
4. Select a Location, if applicable and desired.
5. Click Create.
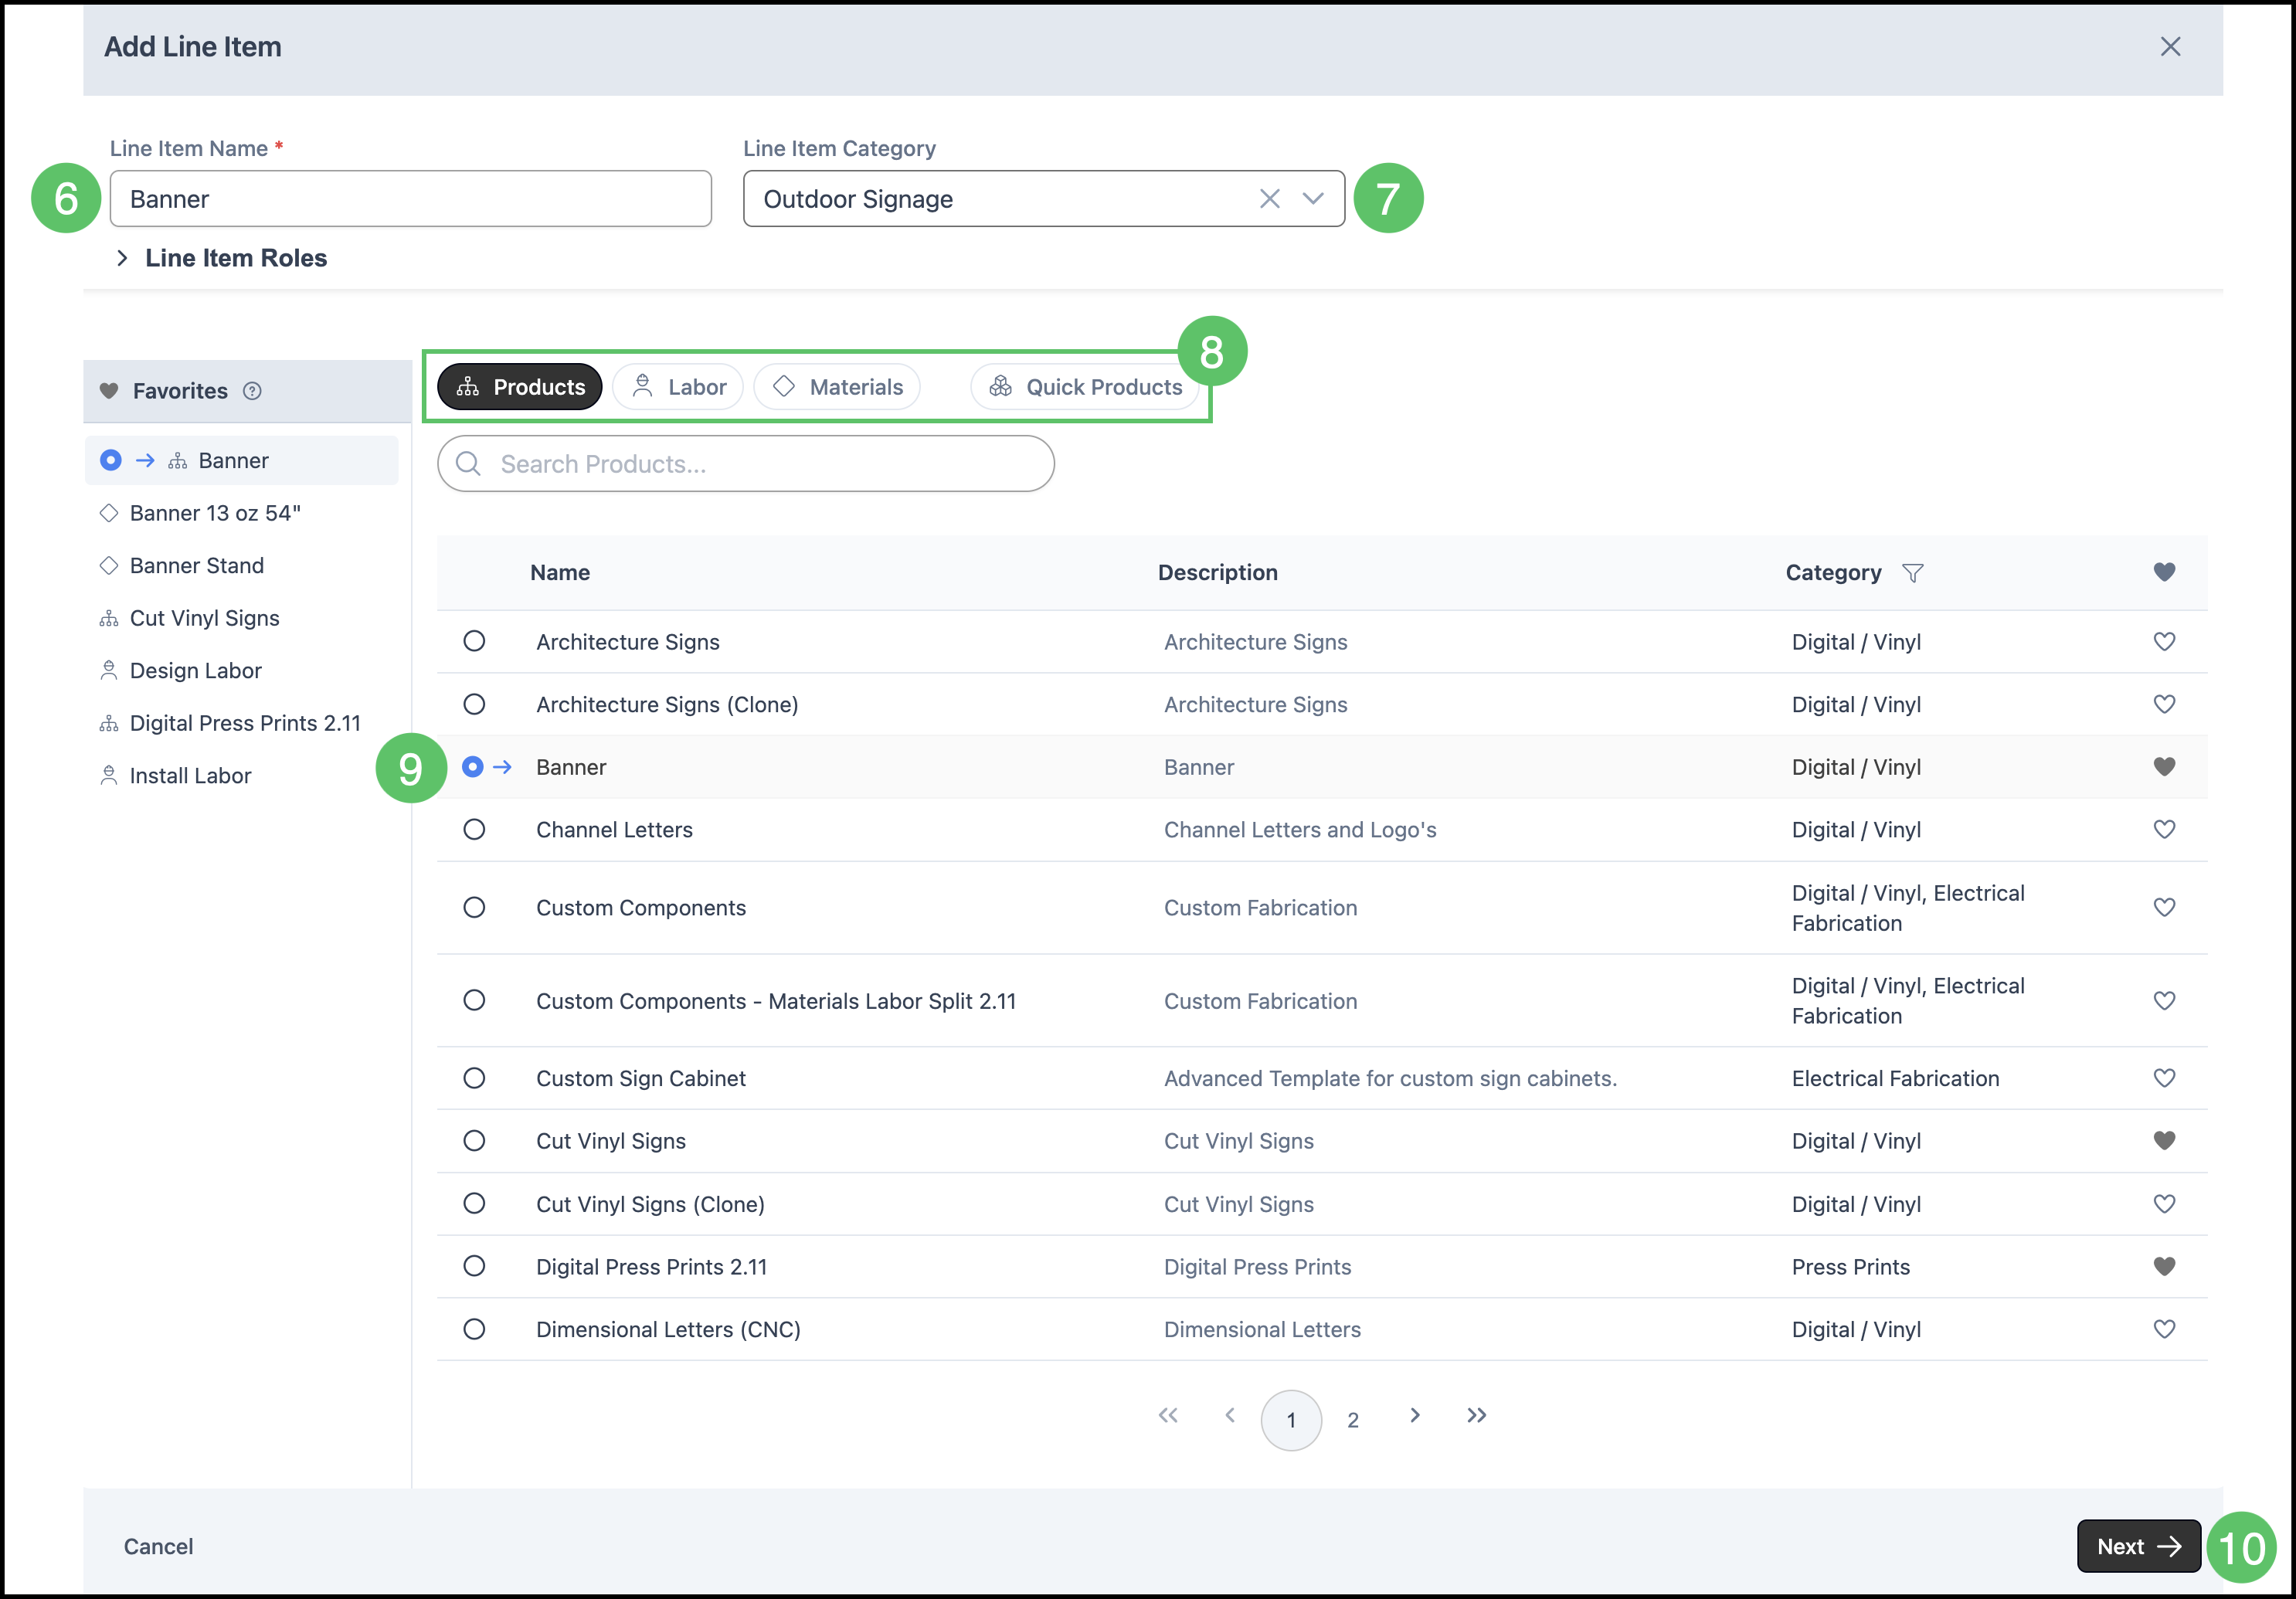
6. Enter a Line Item Name.
7. Enter Line Item Category, if applicable.
8. Select the appropriate Component tab.
9. Select the specific Component or Product.
10. Click Next.
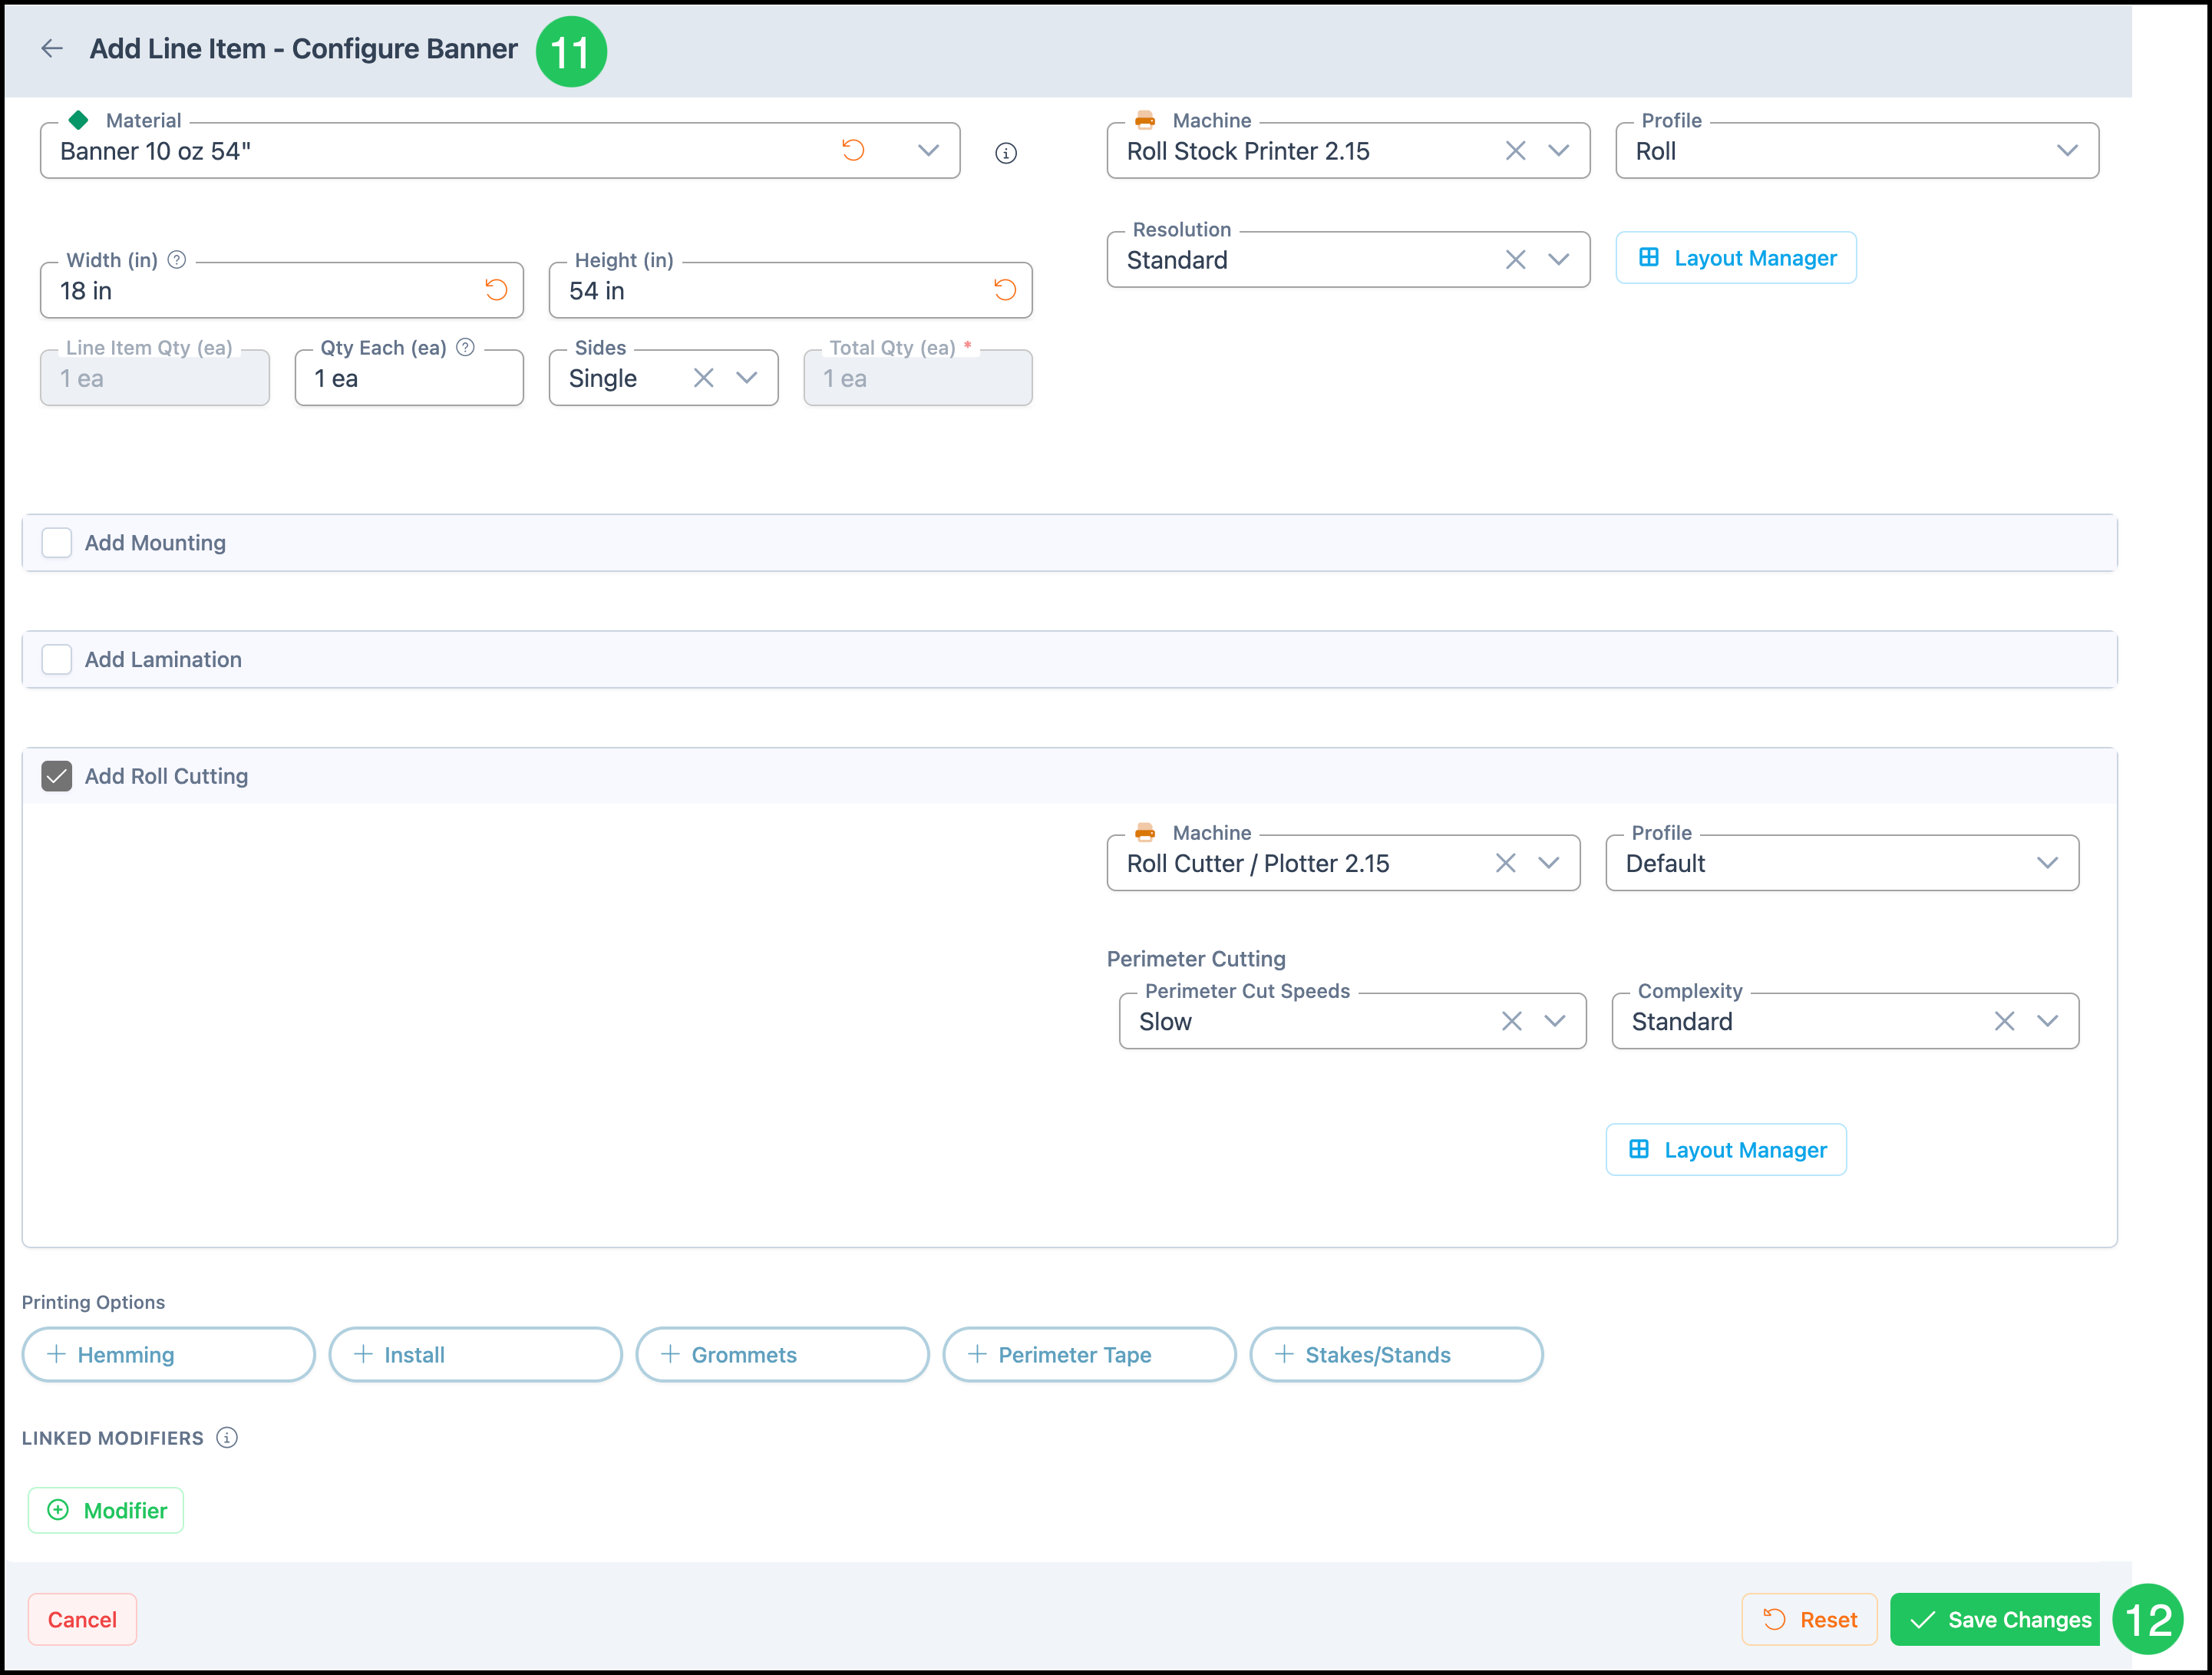
11. Configure details.
Note: These fields will vary depending on the Component or Product selected previously.
12. Click Save Changes.
RFQ from an Order:
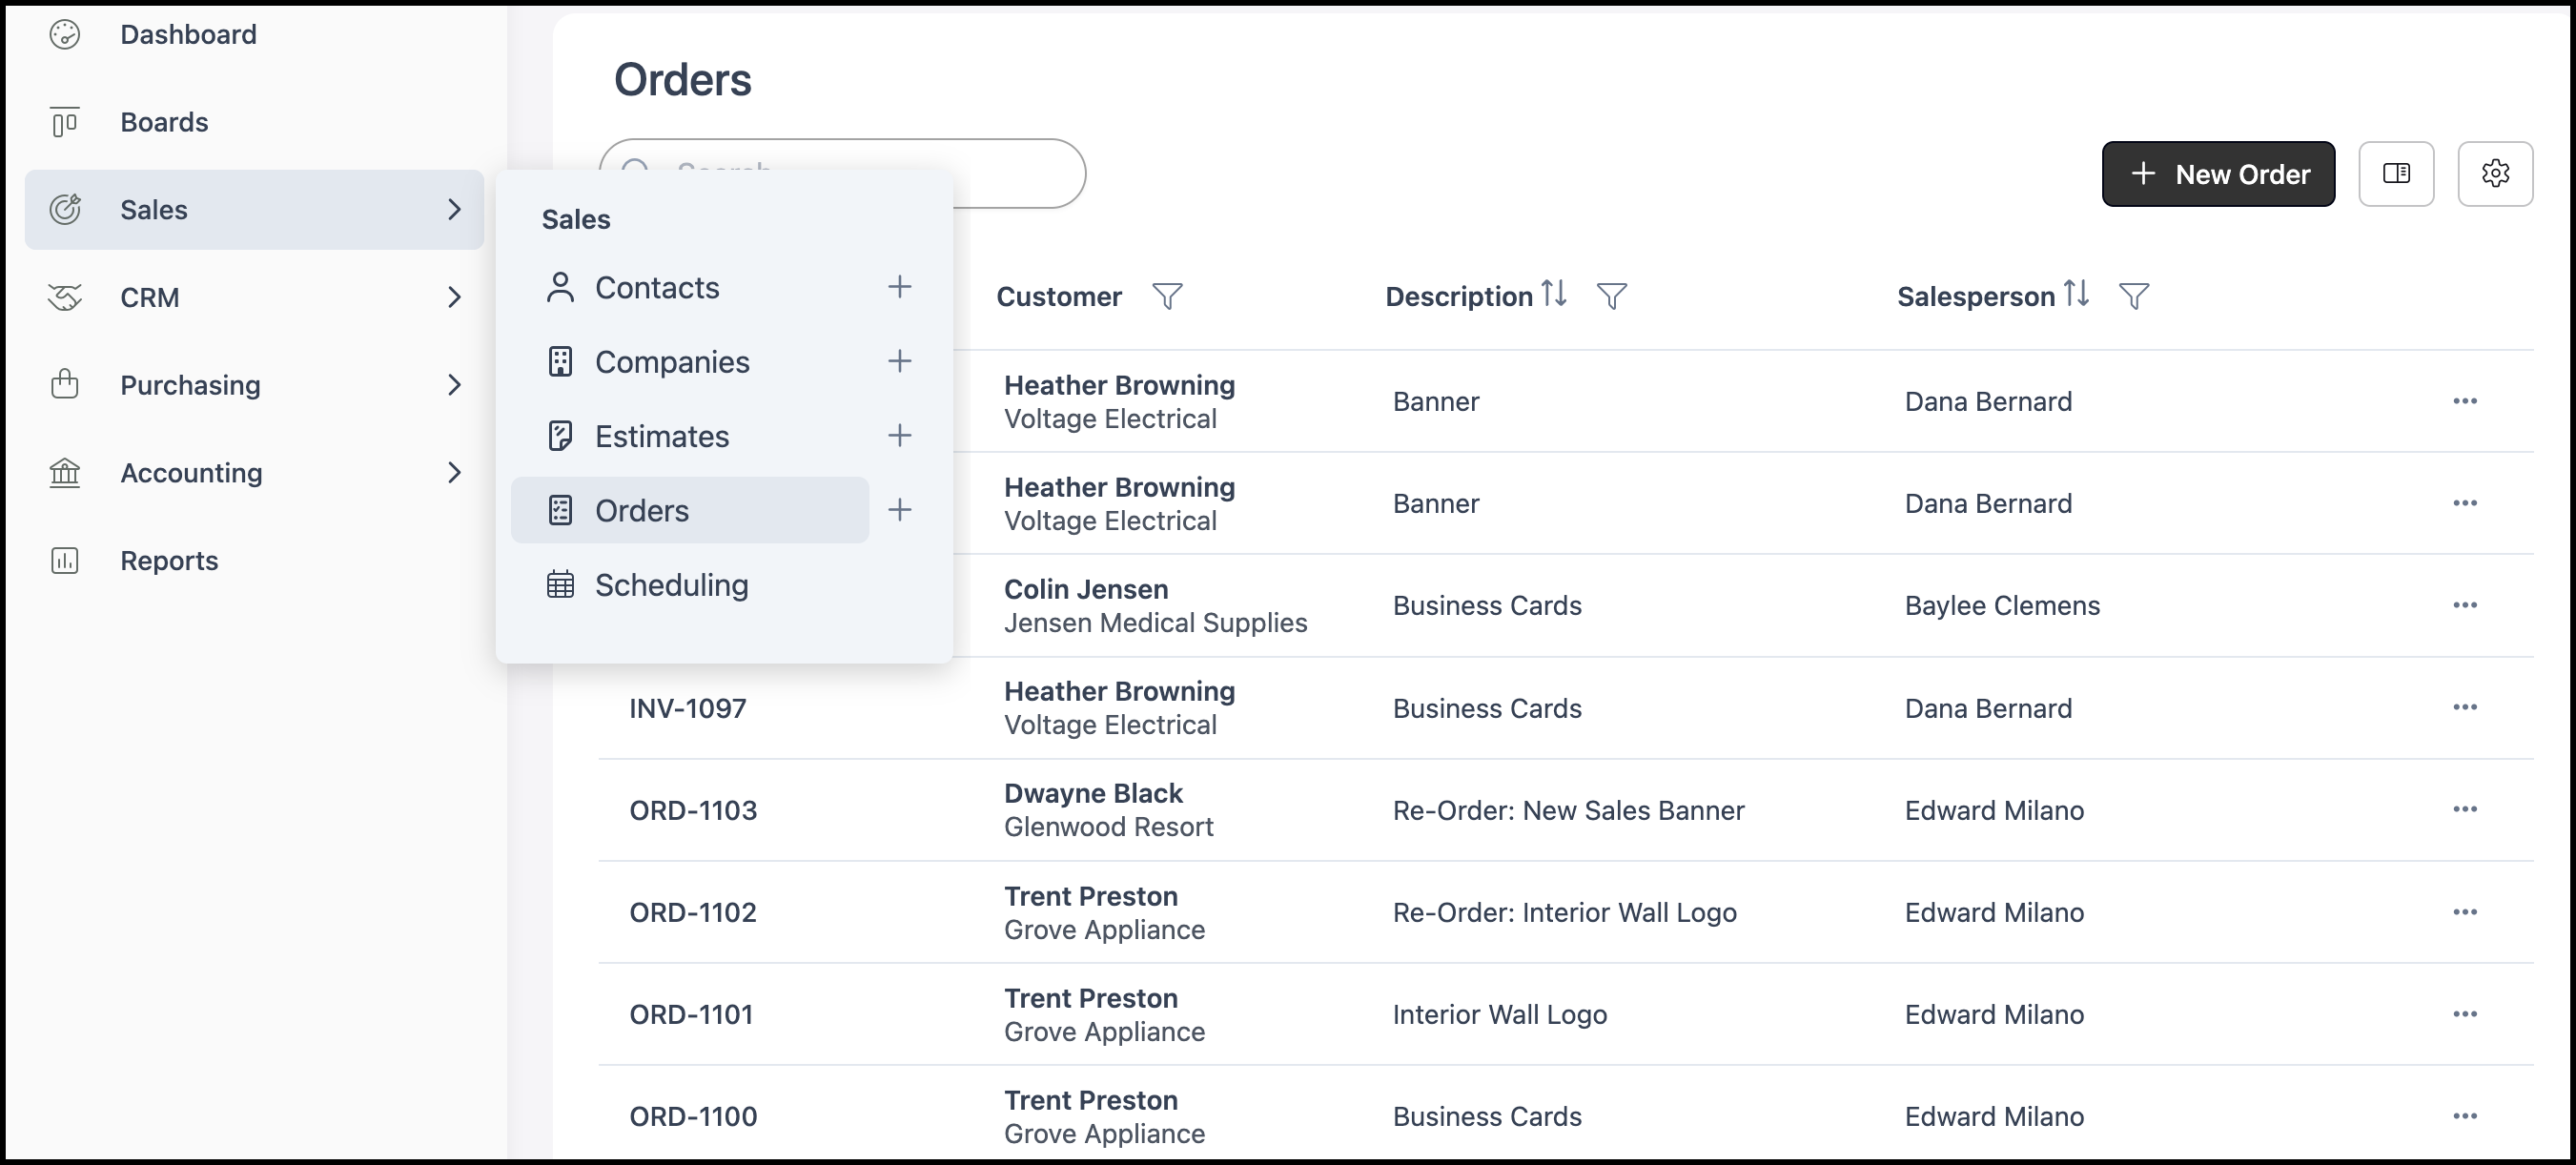
Navigate to Sales / Orders and select the appropriate Order.
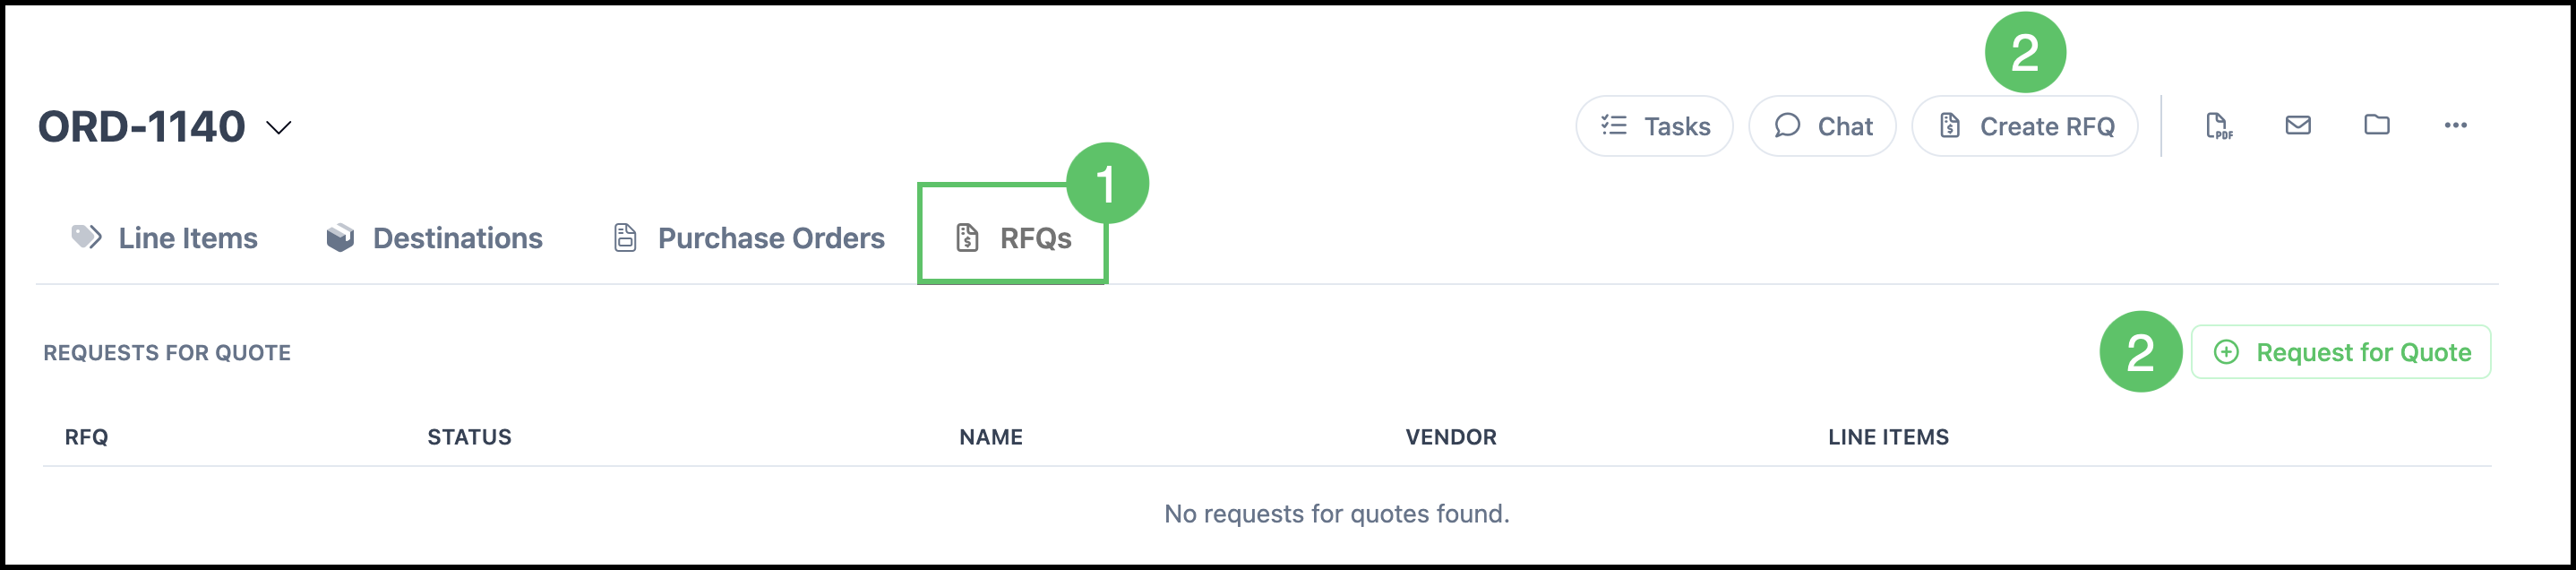
1. Select the RFQs tab.
2. Click Create RFQ or Add Request for Quote.
Note: The Create RFQ button is available on all tabs. Both options open the same RFQ dialog.
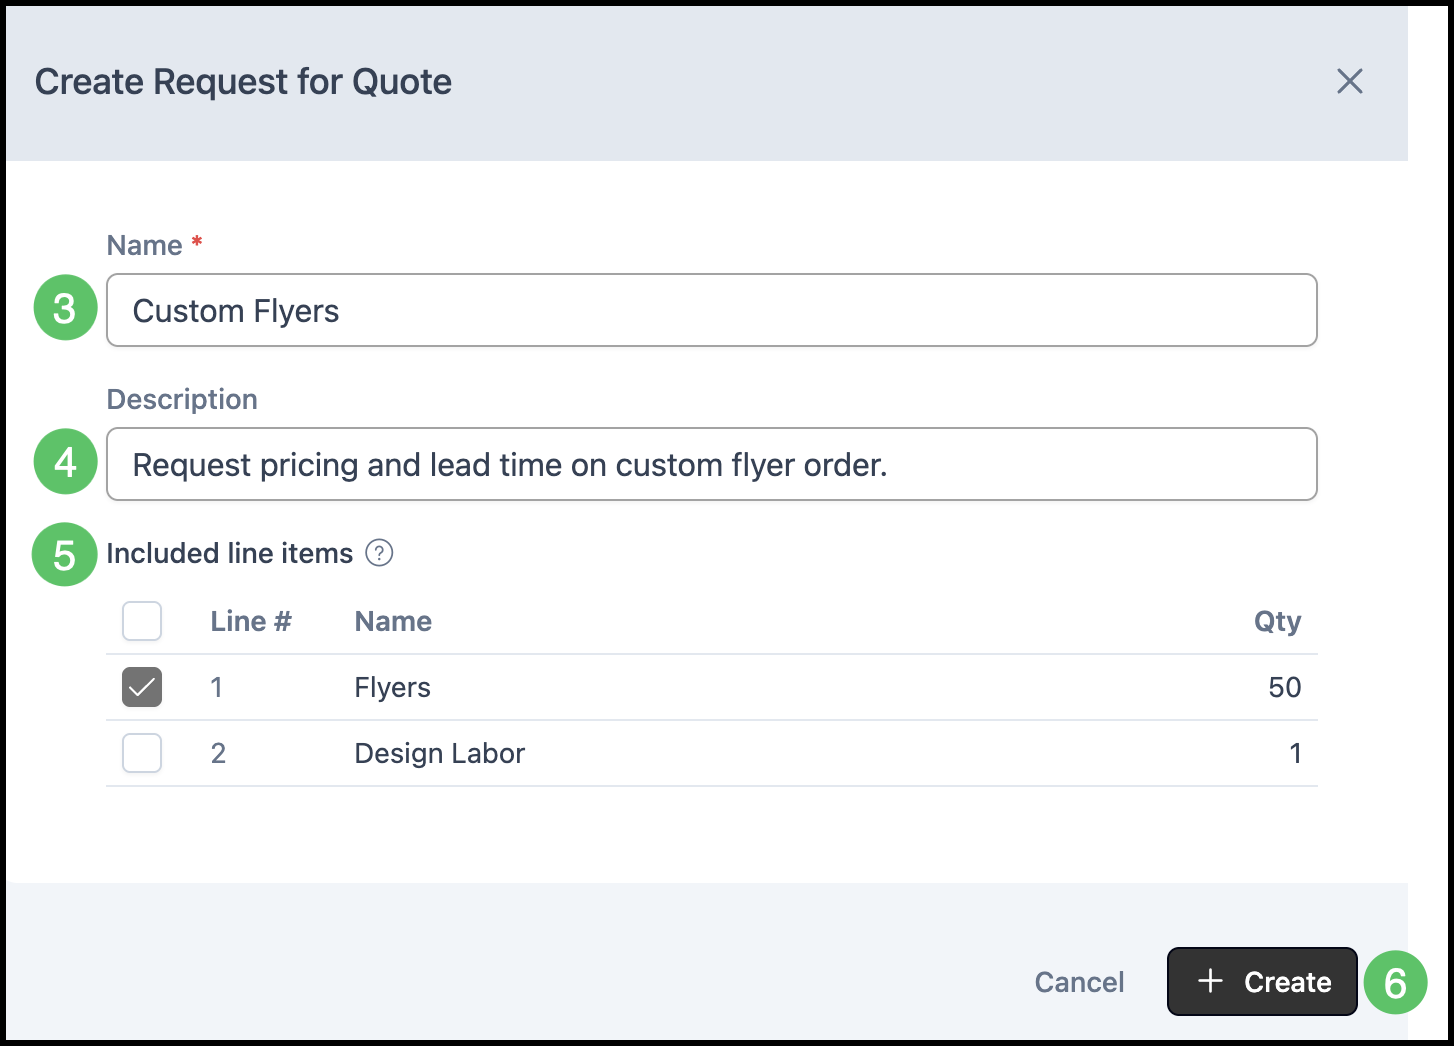
3. Enter a Name for the Request for Quote.
4. Enter an optional Description.
5. Select which Line Items to include. All Line Items are selected by default.
6. Click Create.
Note: The Request for Quote opens to its own record, separate from the Order, with tabs for Line Items, Destinations, and Vendors.
Line Items Tab
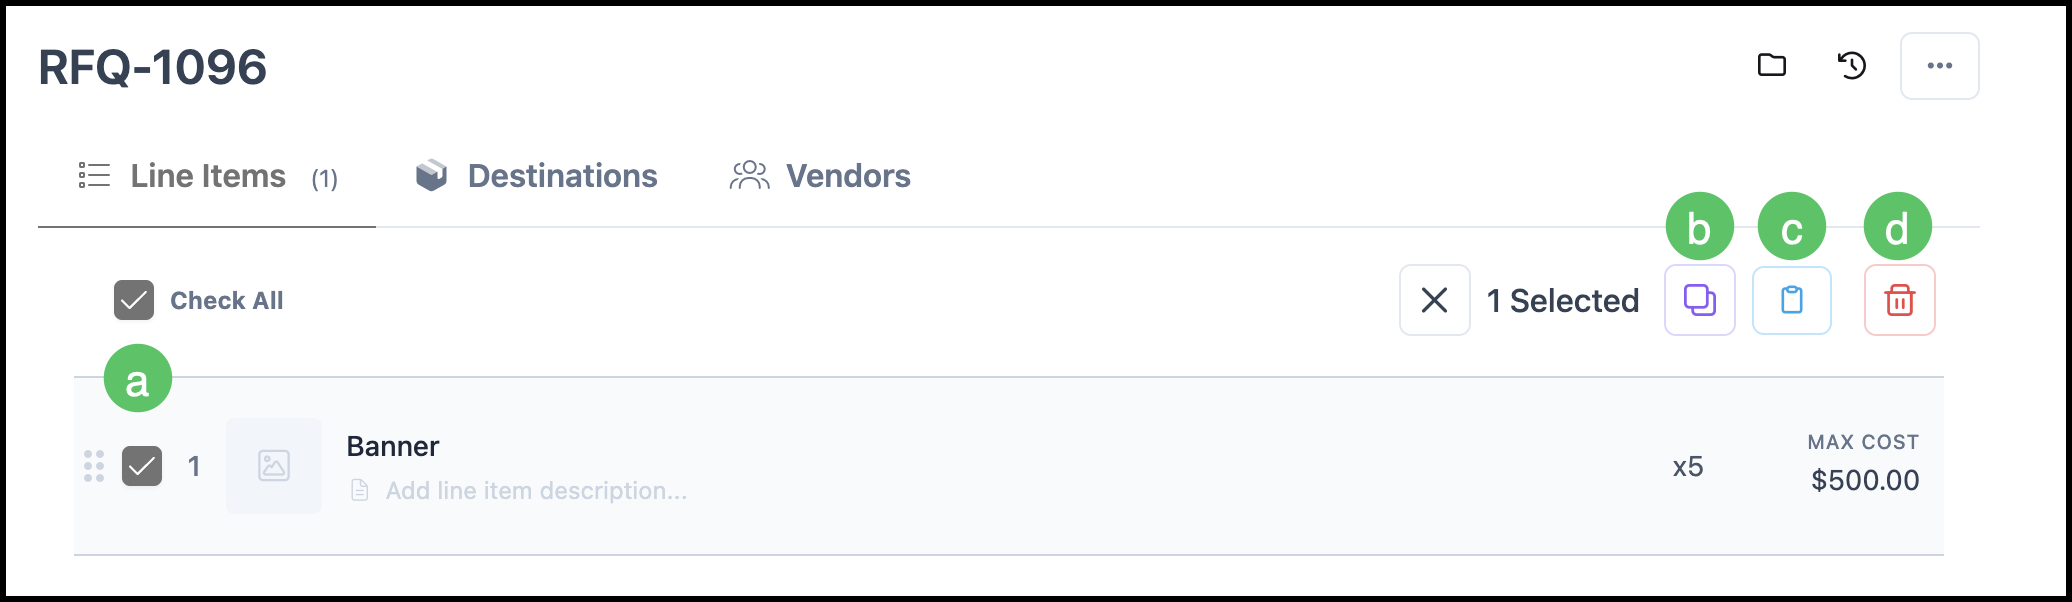
The Line Items tab displays the items included in the Request for Quote and provides options for adjusting quantities, entering a maximum cost, and performing common Line Item actions. These controls are consistent with those available on Orders and Estimates, making the interface familiar to existing CoreBridge users.
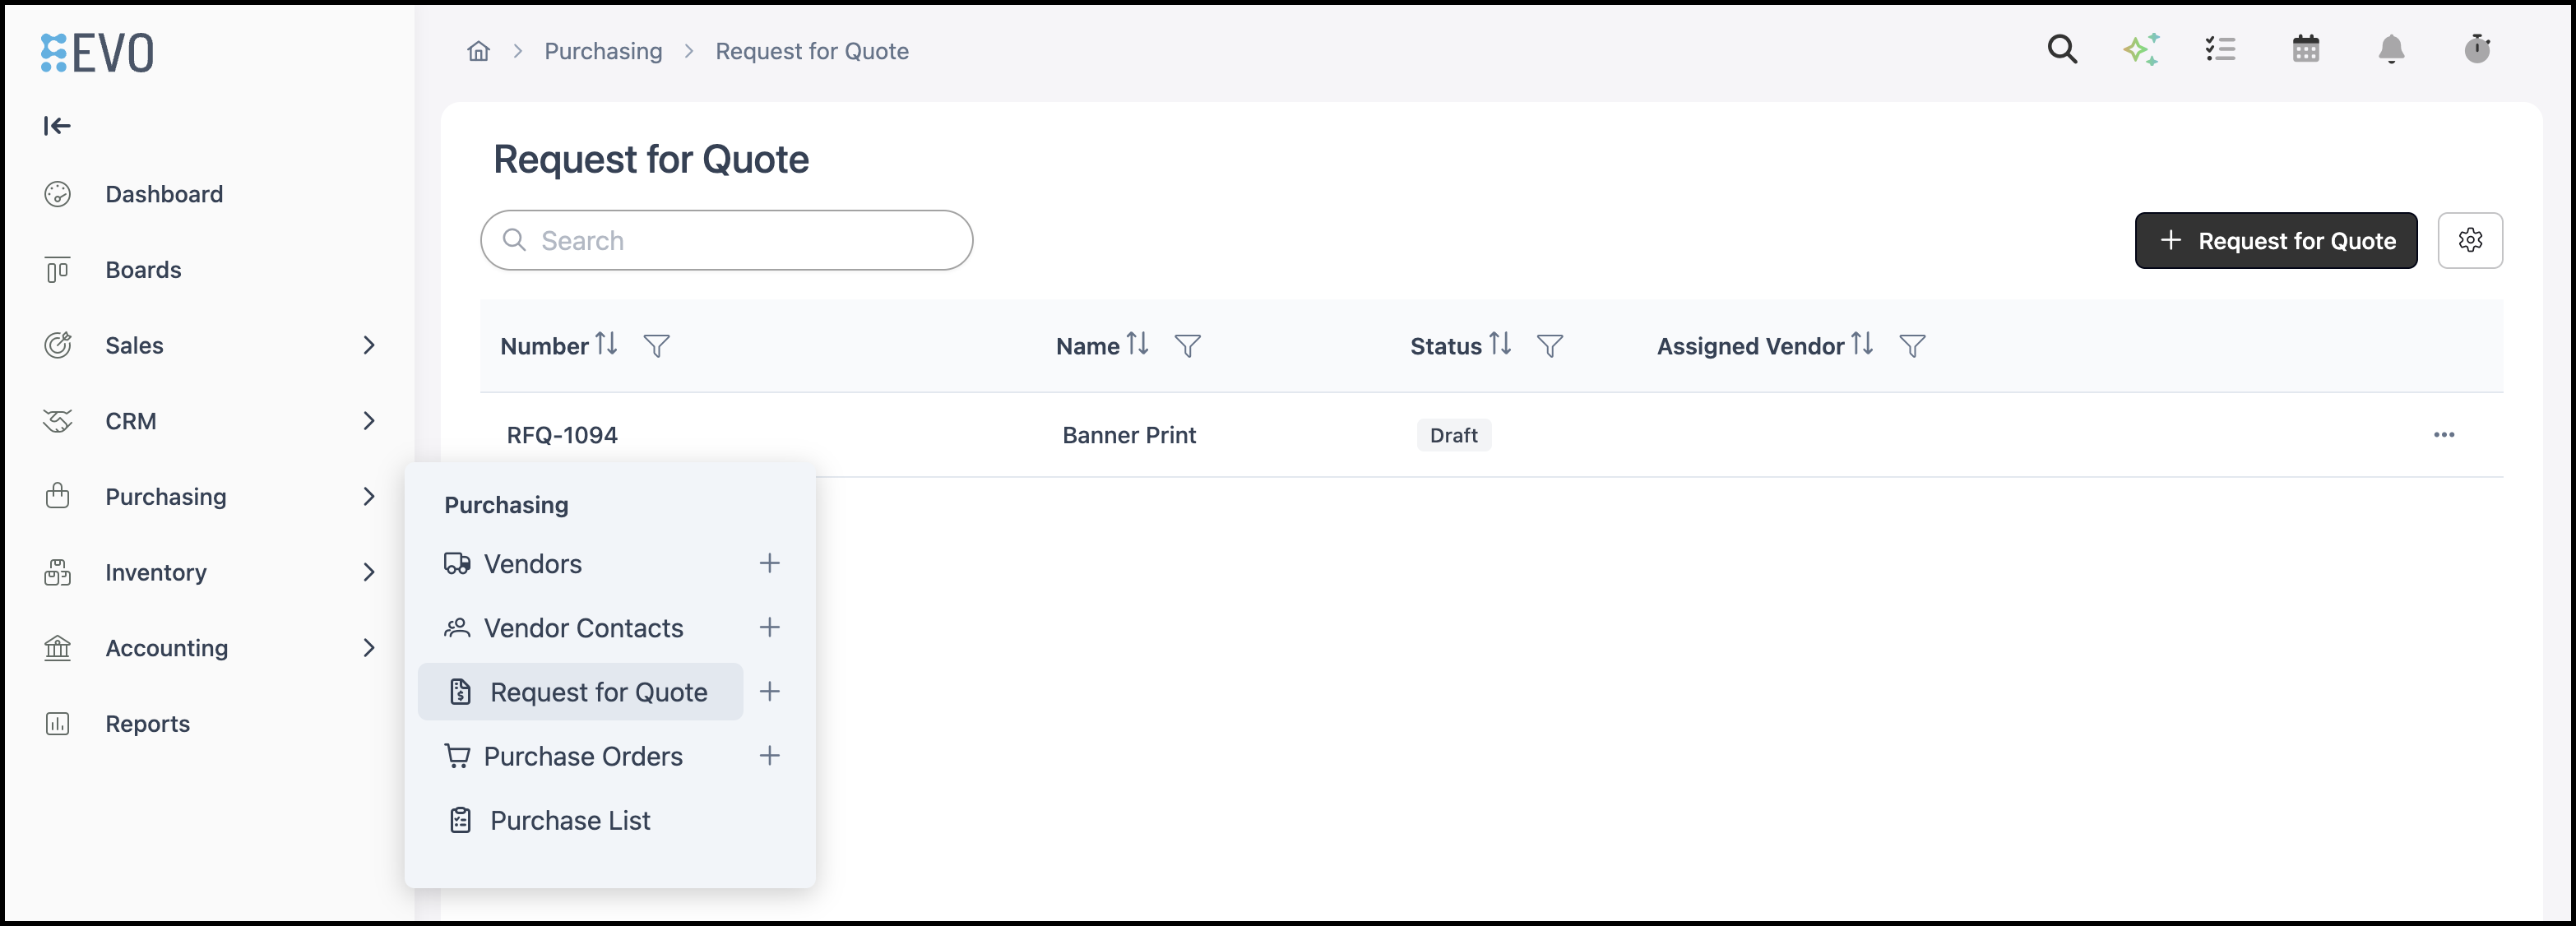
Navigate to Purchasing / Request for Quote and select the appropriate RFQ.
a. Additional Actions - Selecting a Line Item displays additional actions for managing that item.
b. Clone - Creates a duplicate of the selected Line Item, including its current details and settings.
c. Copy to Clipboard - Copies the selected Line Item to the clipboard so it can be pasted into the current or another compatible document. For more information, please see Clipboard Feature.
d. Delete - Permanently removes the selected Line Item from the Request for Quote.
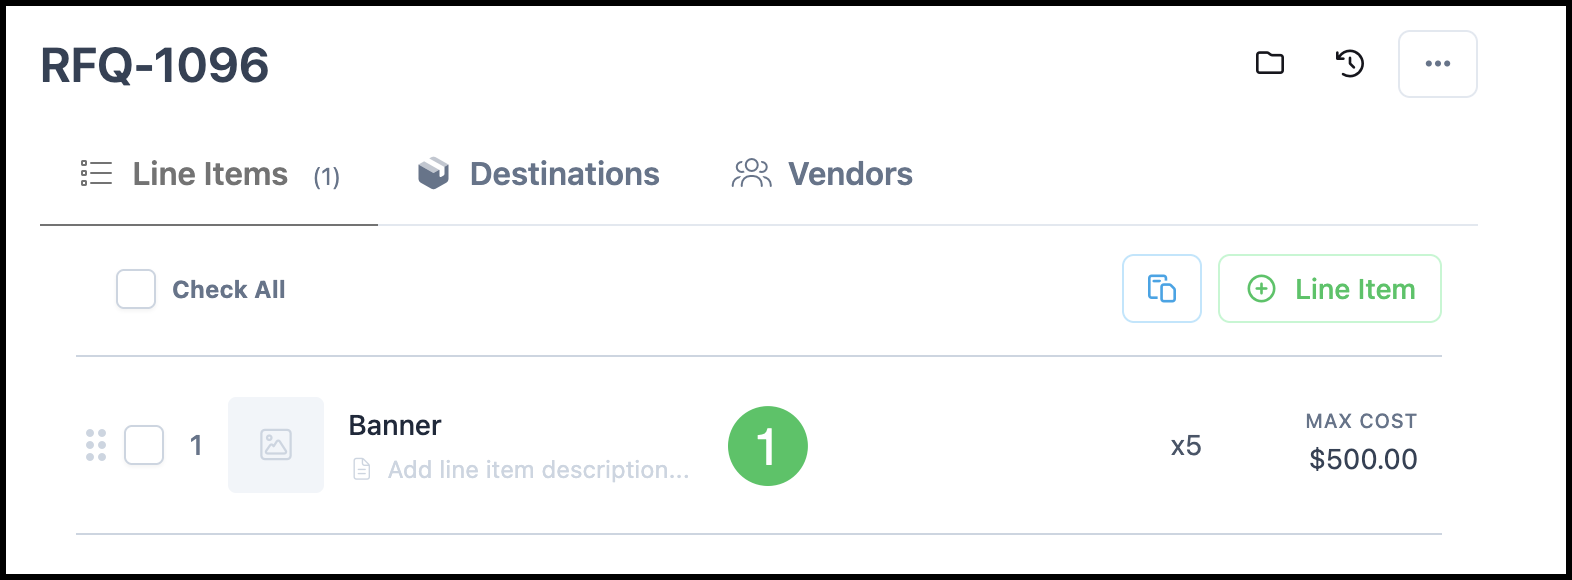
1. Select the Line Item to open the side panel.
Note: Line Items can be edited while the RFQ is in a Draft status.
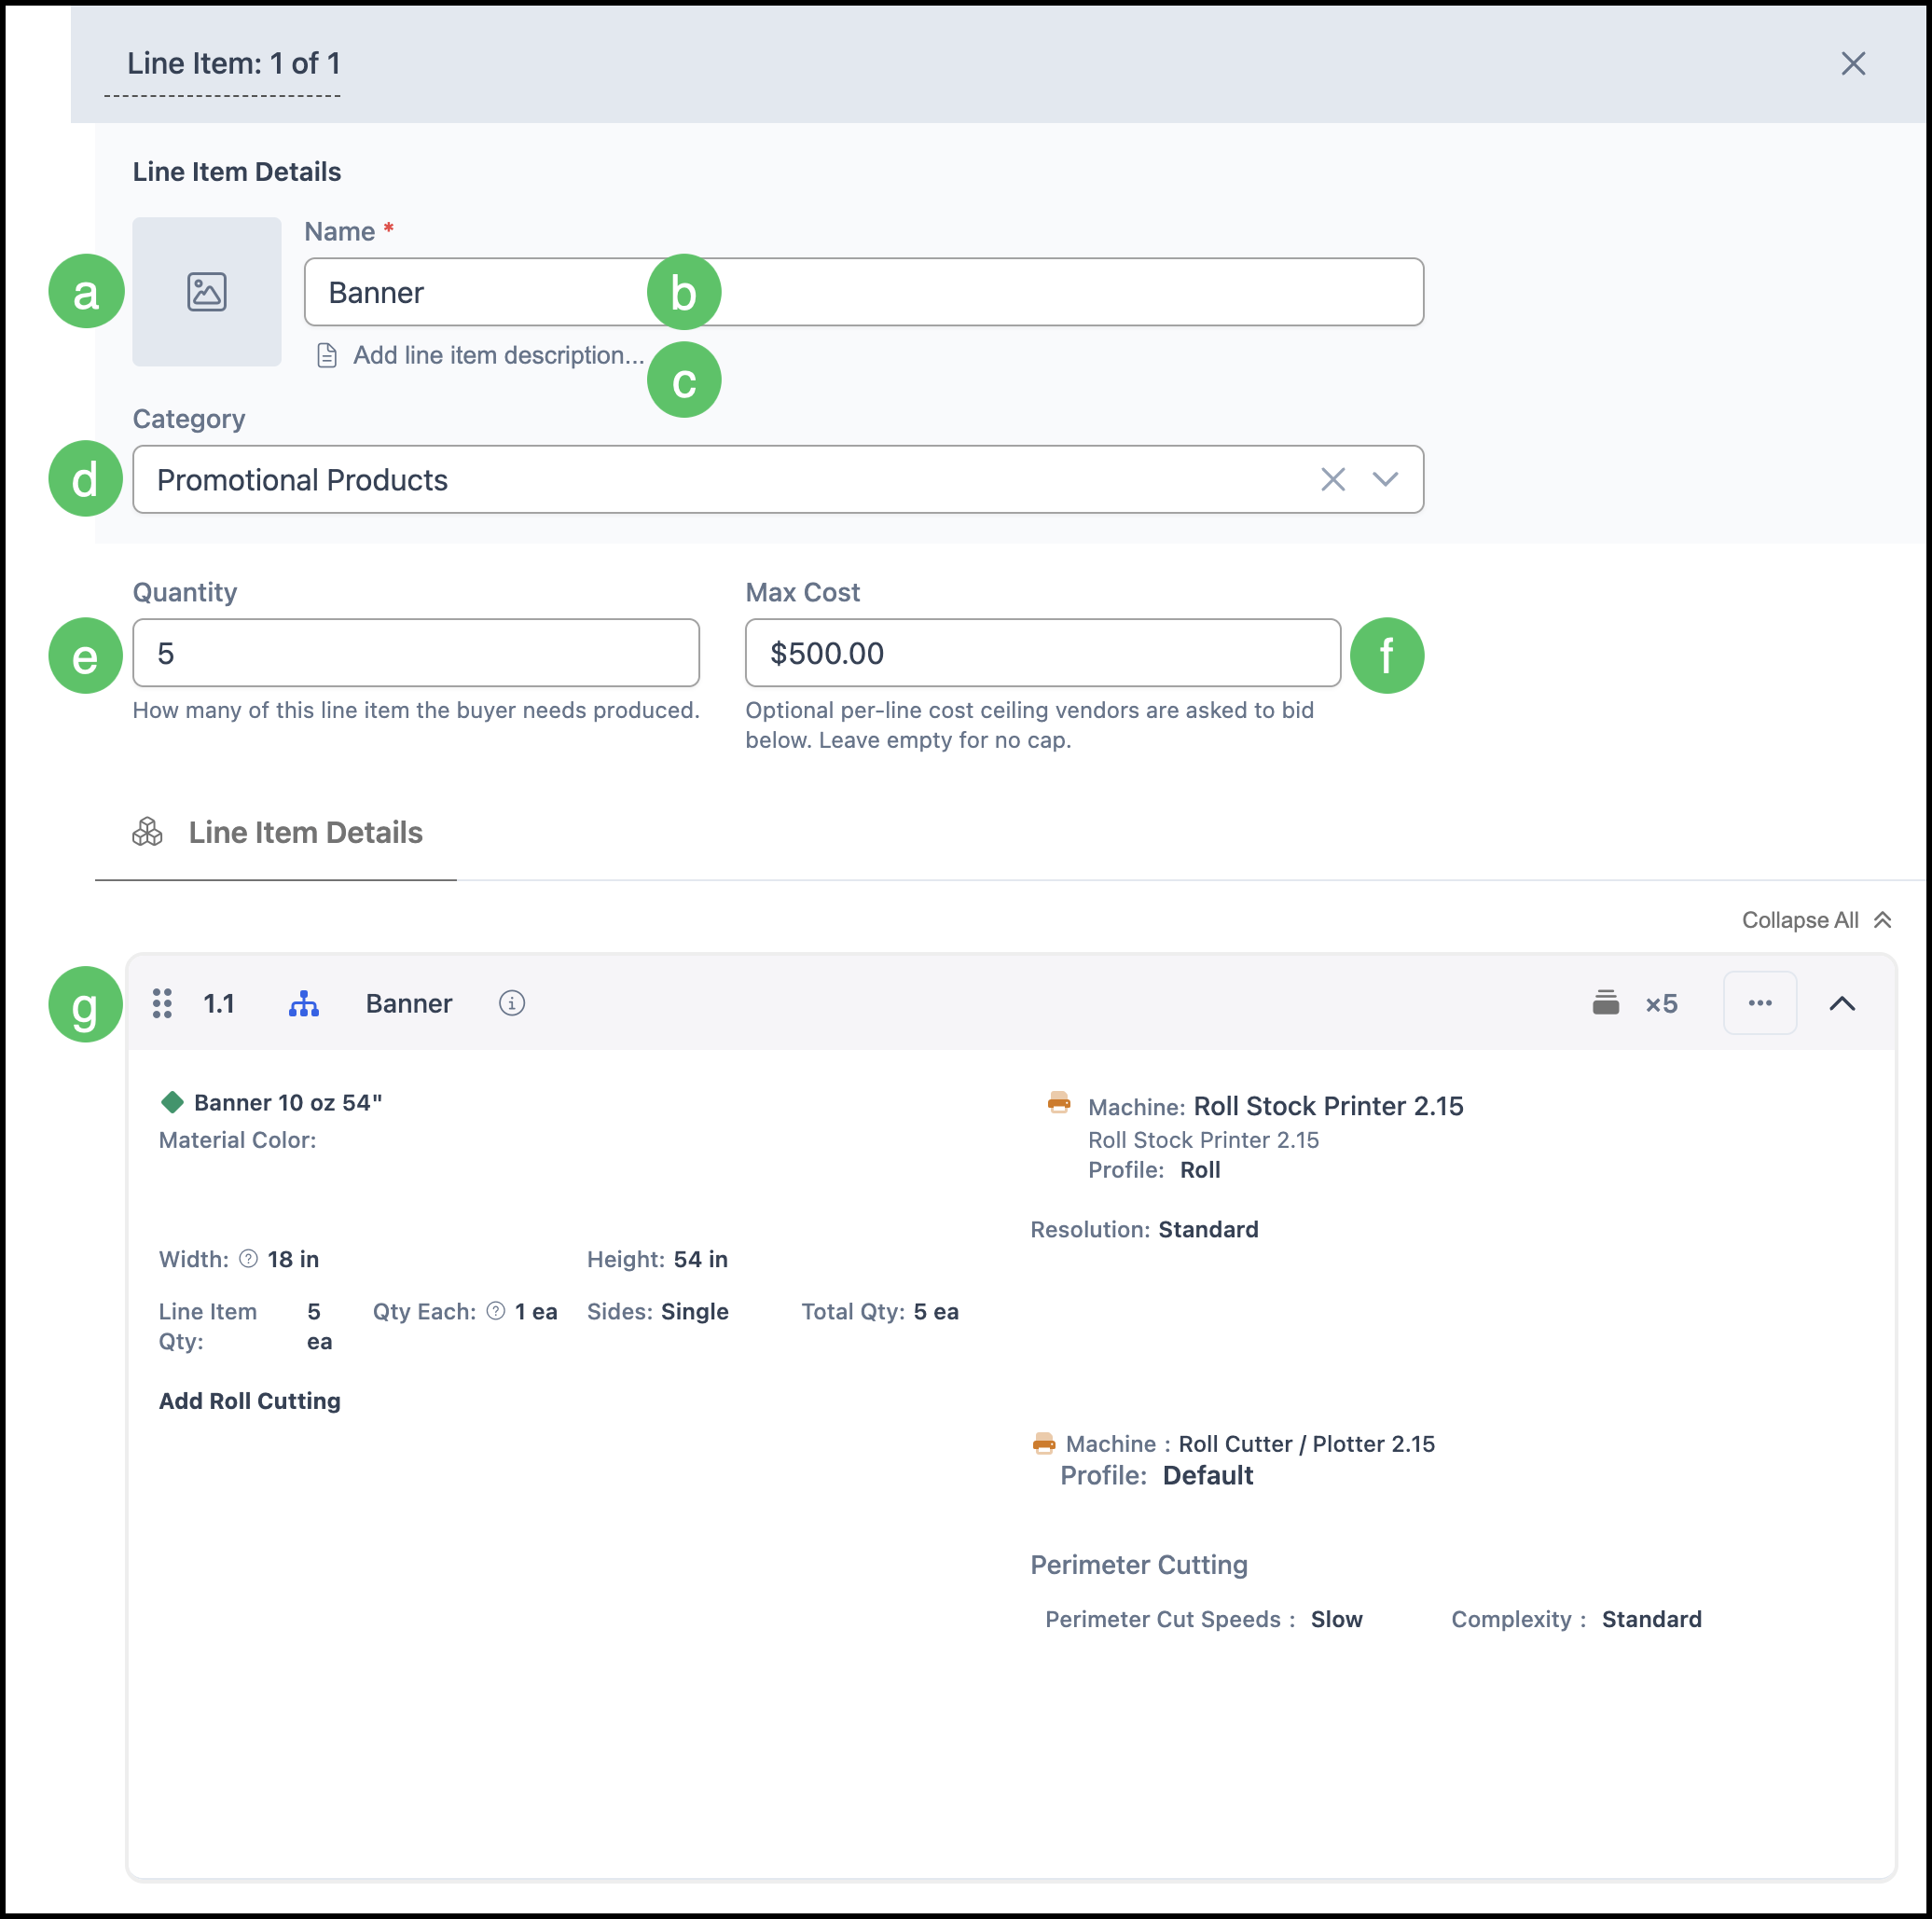
a. Image - Displays the design or proof associated with the Line Item. An image can be uploaded for vendor reference.
b. Name - The name of the Line Item. This field is required and can be edited.
c. Line Item Description - Opens a dialog where additional details or specifications for the Line Item can be entered.
d. Category - Identifies the category assigned to the Line Item. Categories can be selected from the available list.
e. Quantity - Indicates the number of units requested for the Line Item.
f. Max Cost - Specifies the highest acceptable cost for the Line Item. Vendors can use this value as a pricing guideline.
g. Component or Product - Displays the Components or Products included in the Line Item. These details can be reviewed and modified as needed.
Adding Destinations
A Destination tells your vendors where the Order will ship or be picked up, so they can quote shipping accurately. A Request for Quote can include one or more Destinations, and Line Items are allocated across them.
Navigate to Purchasing / Request for Quote and select the appropriate RFQ.
1. Select the Destinations tab.
2. Click Add Destination.
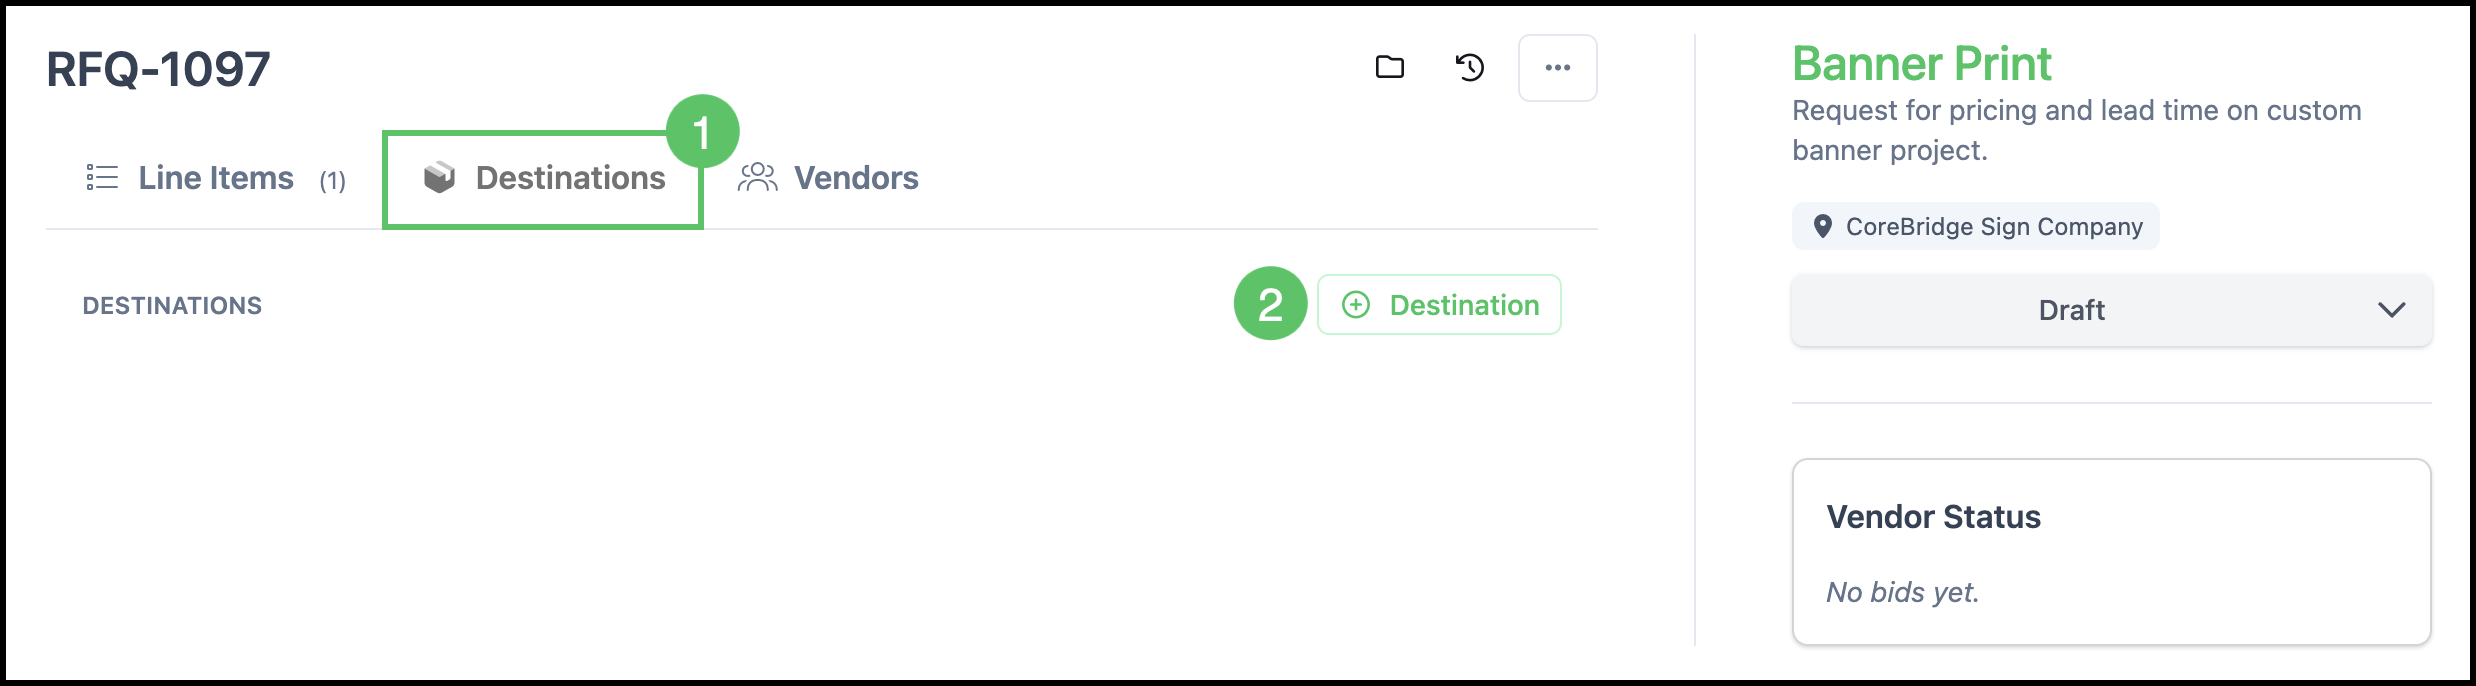
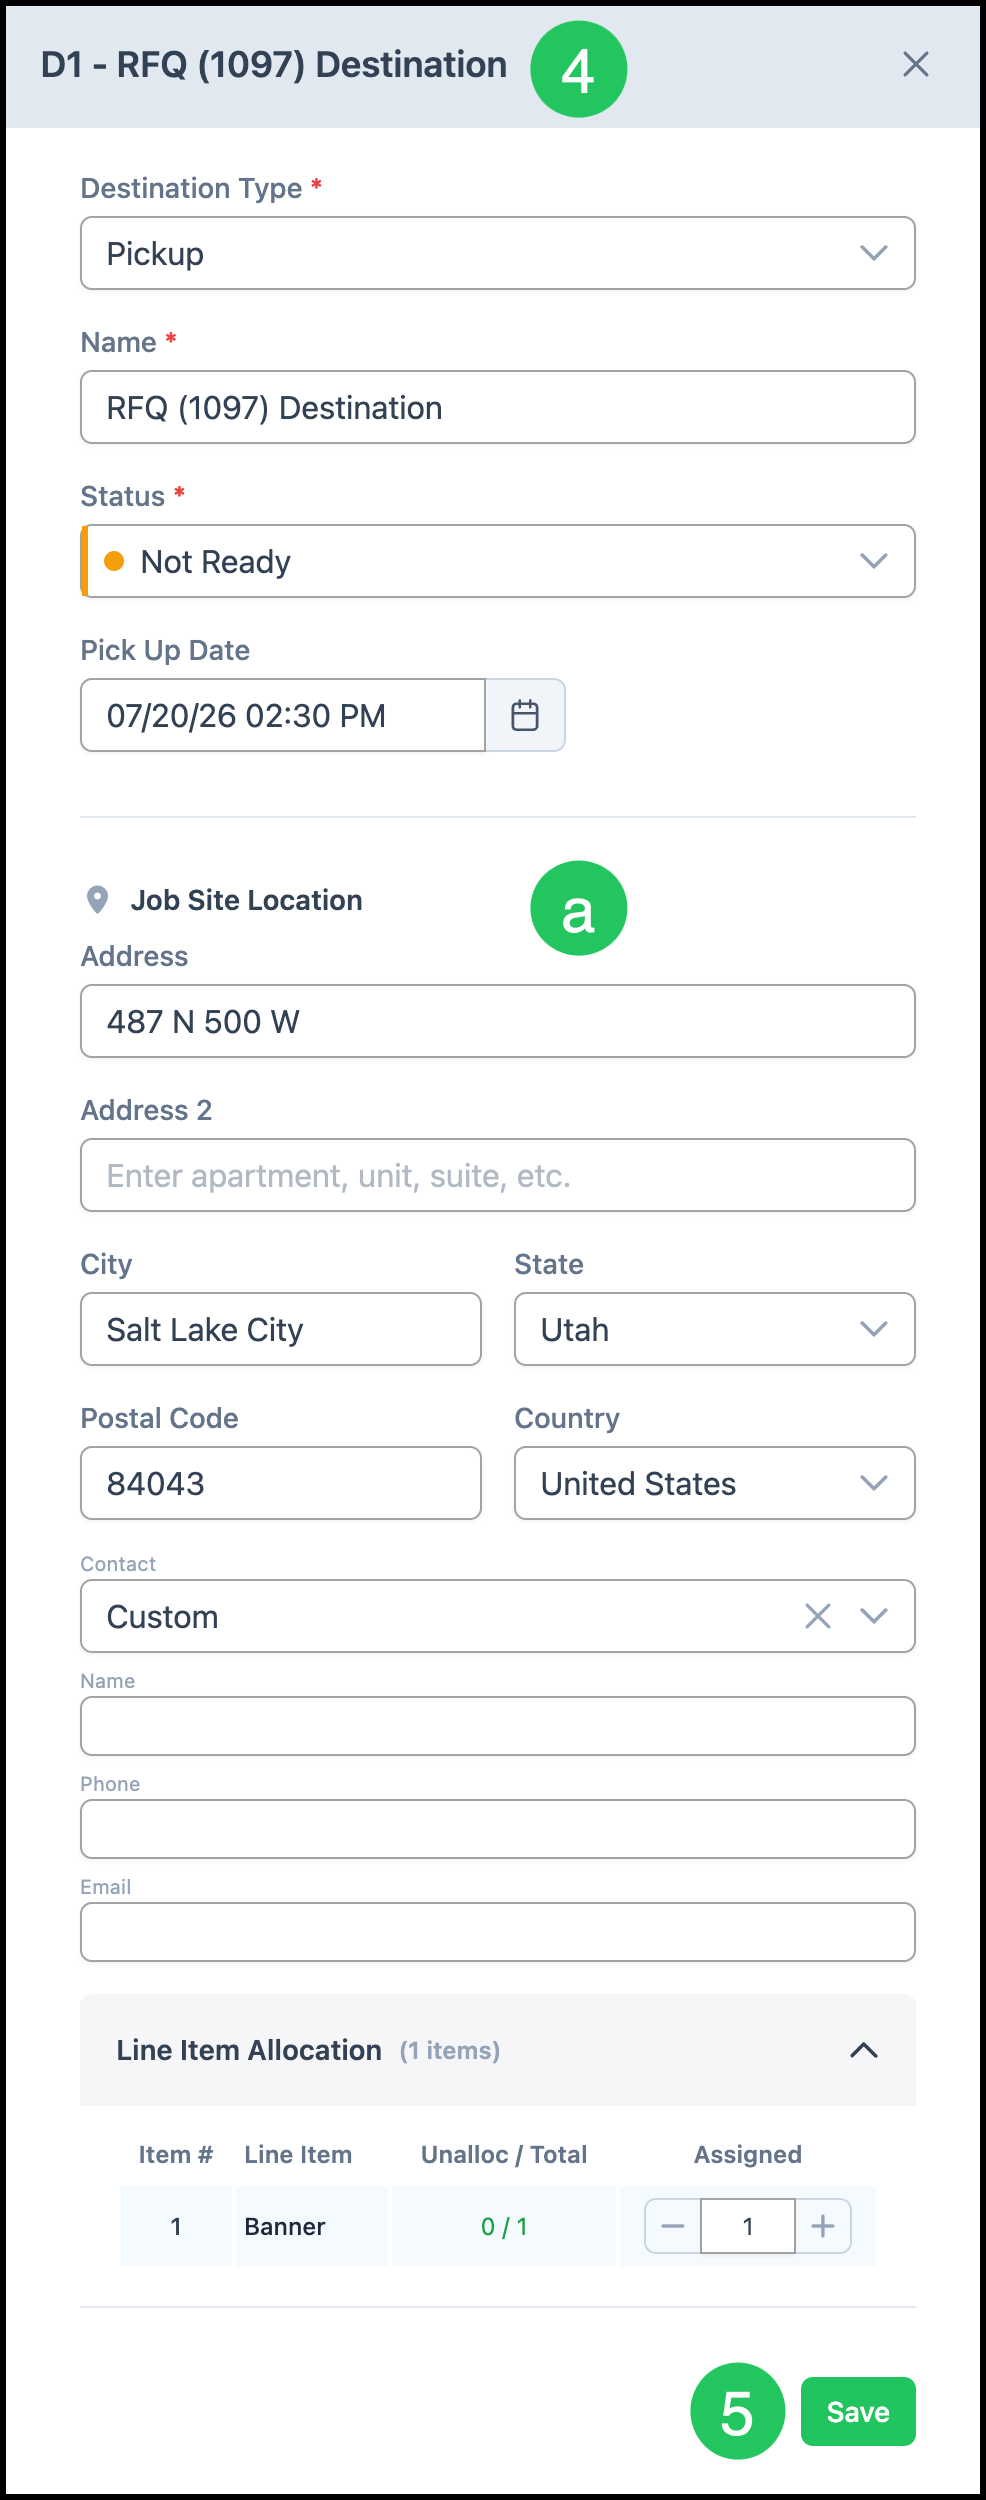
3. Click on the Destination row to open the side panel.

4. Enter the pickup or shipping details.
Note: Required fields are indicated with a red asterisk.
a. Job Site Location - Specifies the location where delivery or installation will take place. Vendors can view this information when preparing a bid, and it can be used to filter vendors by distance from the job site.
5. Click Save.
Adding Vendors
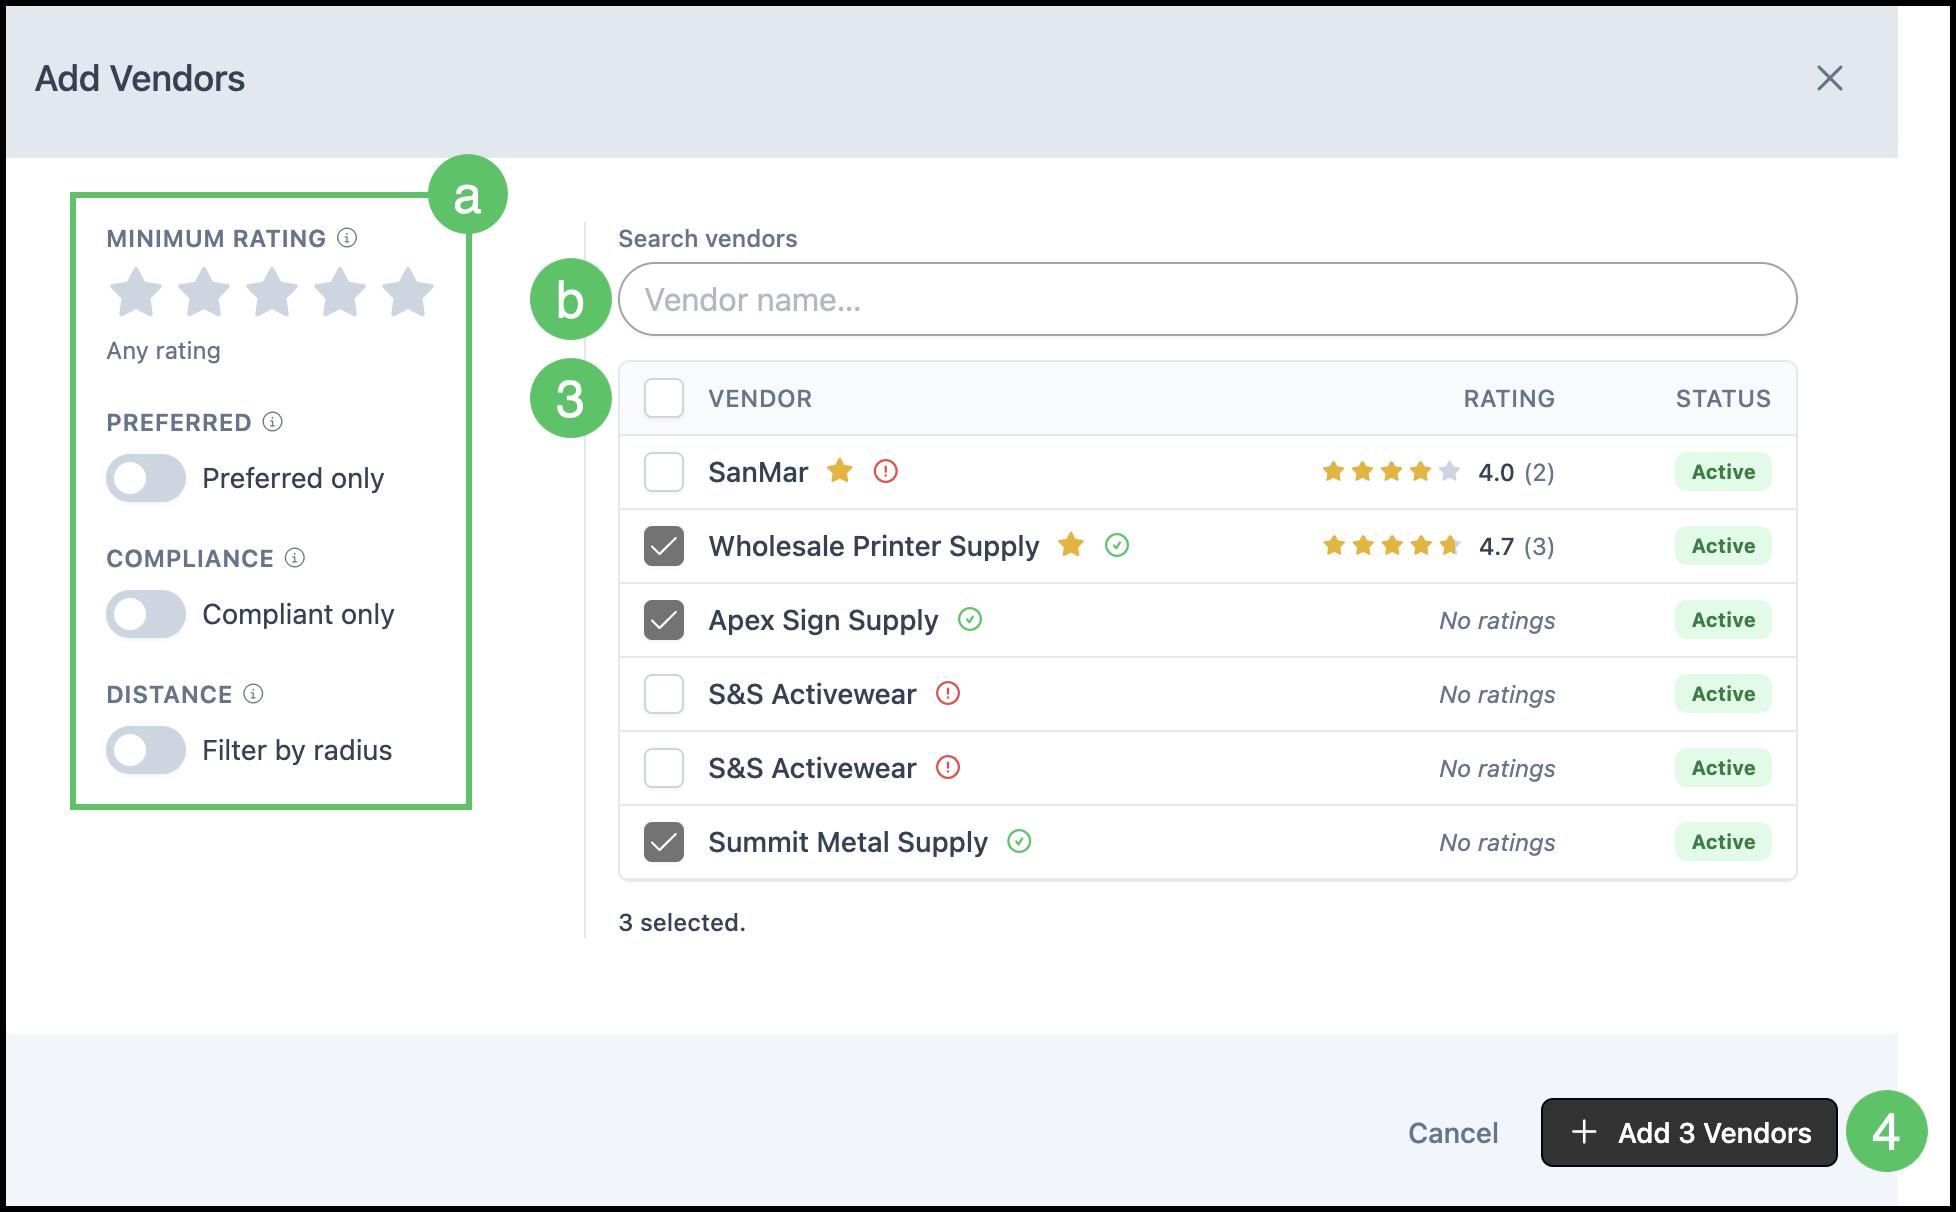
You can invite any number of vendors to bid on a Request for Quote. Each vendor listed shows a preferred-supplier flag, a compliance indicator, and a star rating, so you can quickly judge who to include. For more information on Vendors, please see Creating Vendors.
Navigate to Purchasing / Request for Quote and select the appropriate RFQ.
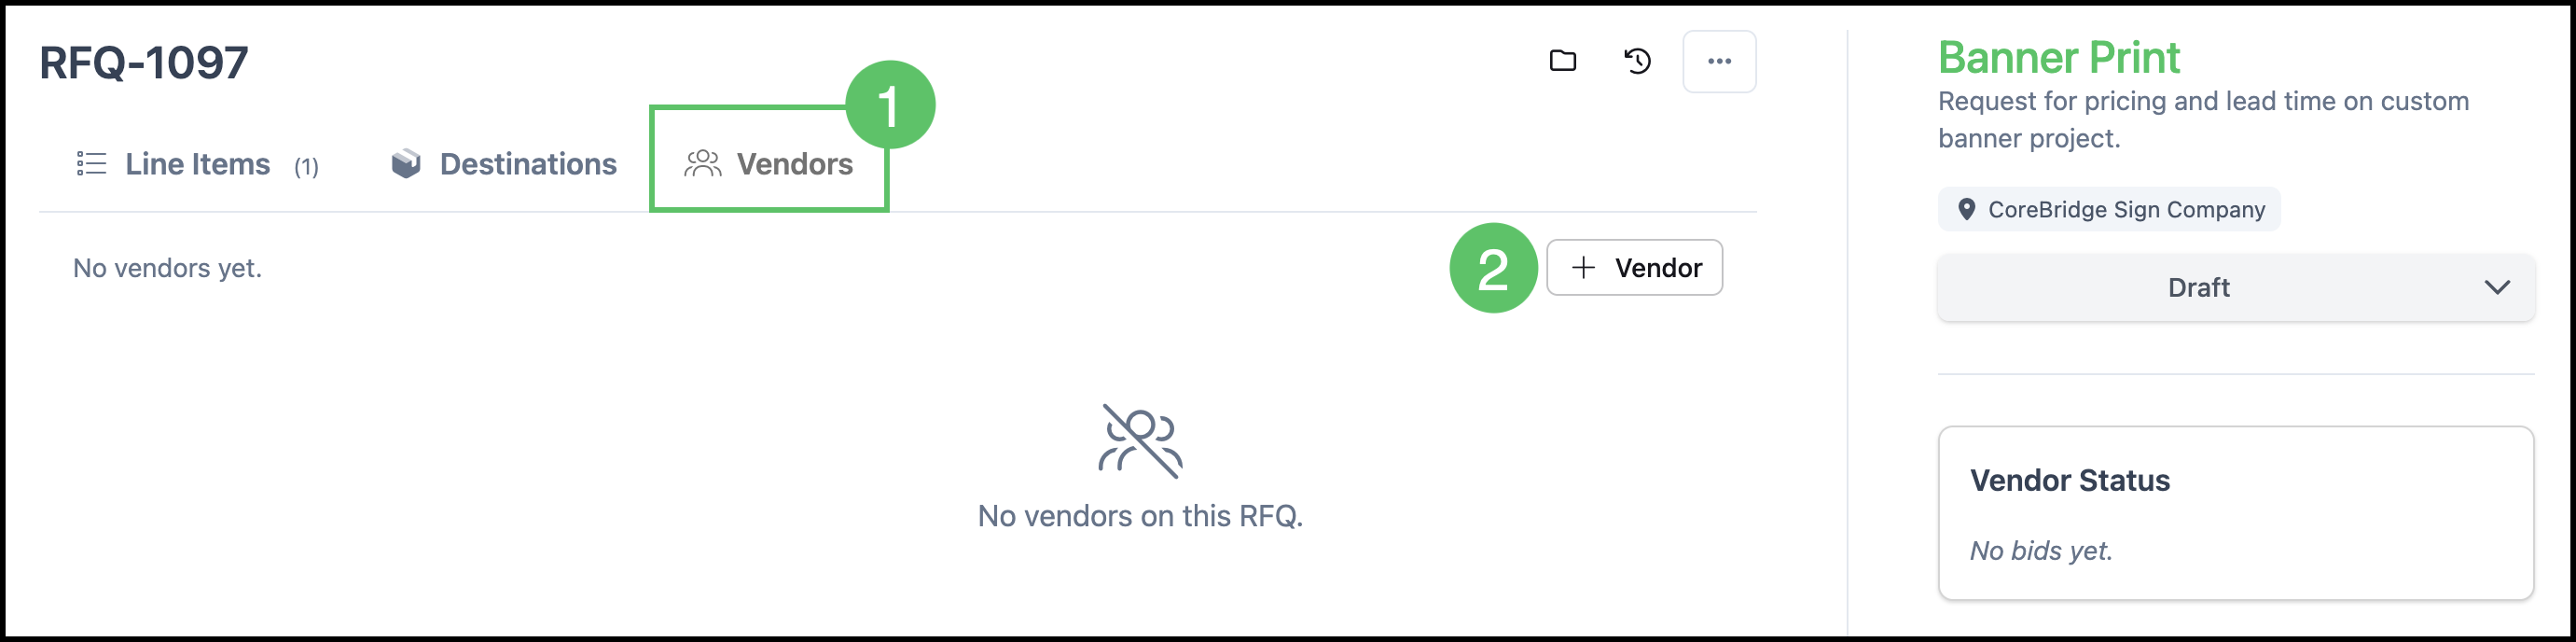
1. Select the Vendors tab.
2. Click Add Vendor.
3. Select the Vendors to add.
a. Optionally, narrow the list using the filters.
b. Search for a vendor by name, or browse the list.
4. Select Add Vendors.
Note: The number on this button changes depending on how many vendors are selected.
Sending the Request for Quote
Sending emails the Request for Quote to each invited vendor with a link to their own vendor portal, where they can submit pricing.
Navigate to Purchasing / Request for Quote and select the appropriate RFQ.
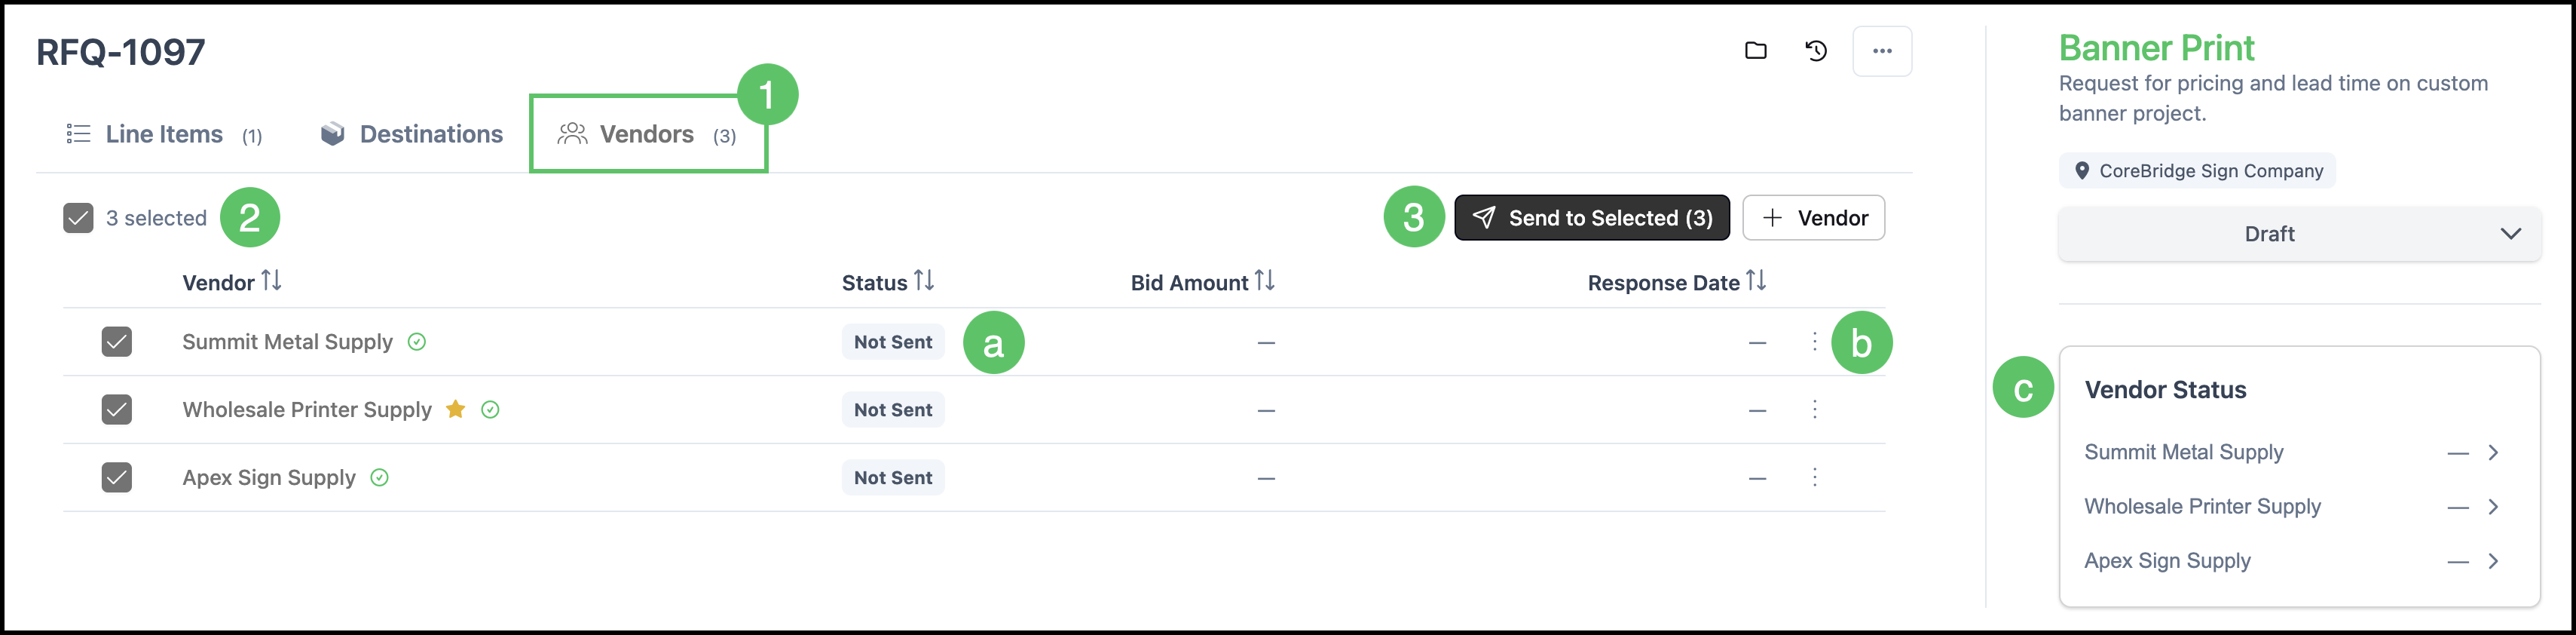
1. Select the Vendors tab.
2. Select the Vendors either by selecting all or selecting individual vendors.
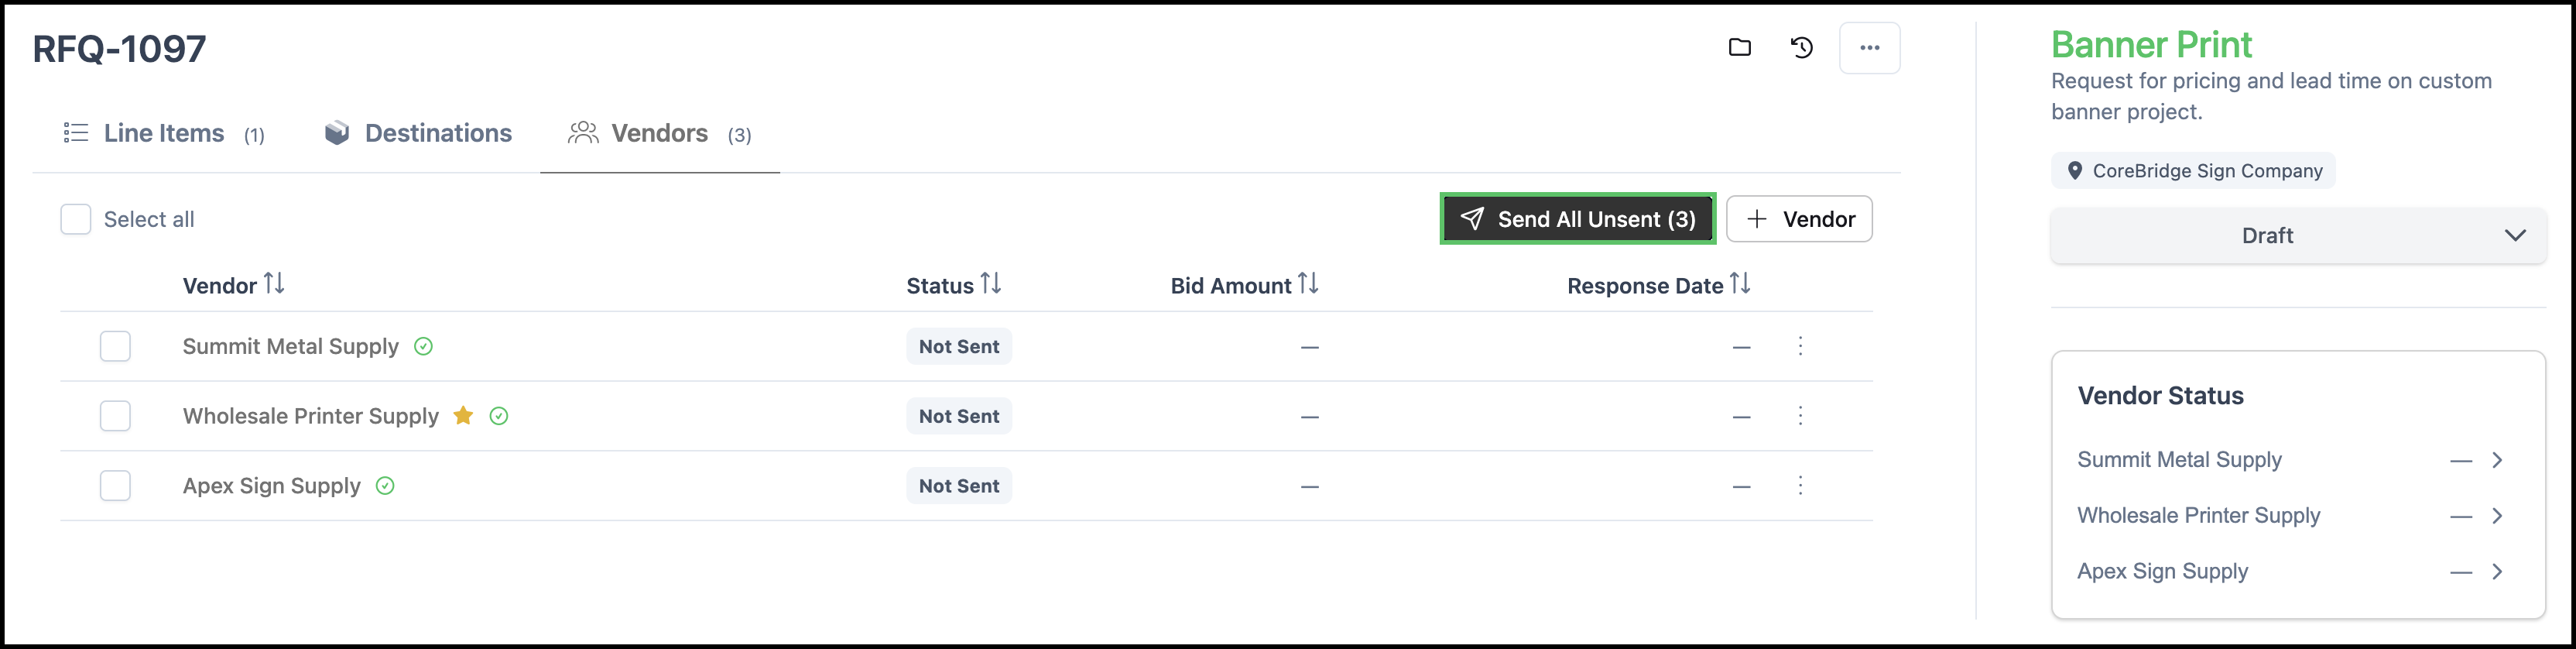
Note: You can optionally click Send All Unsent without selecting any vendors. See the example below.
3. Click Send to Selected.
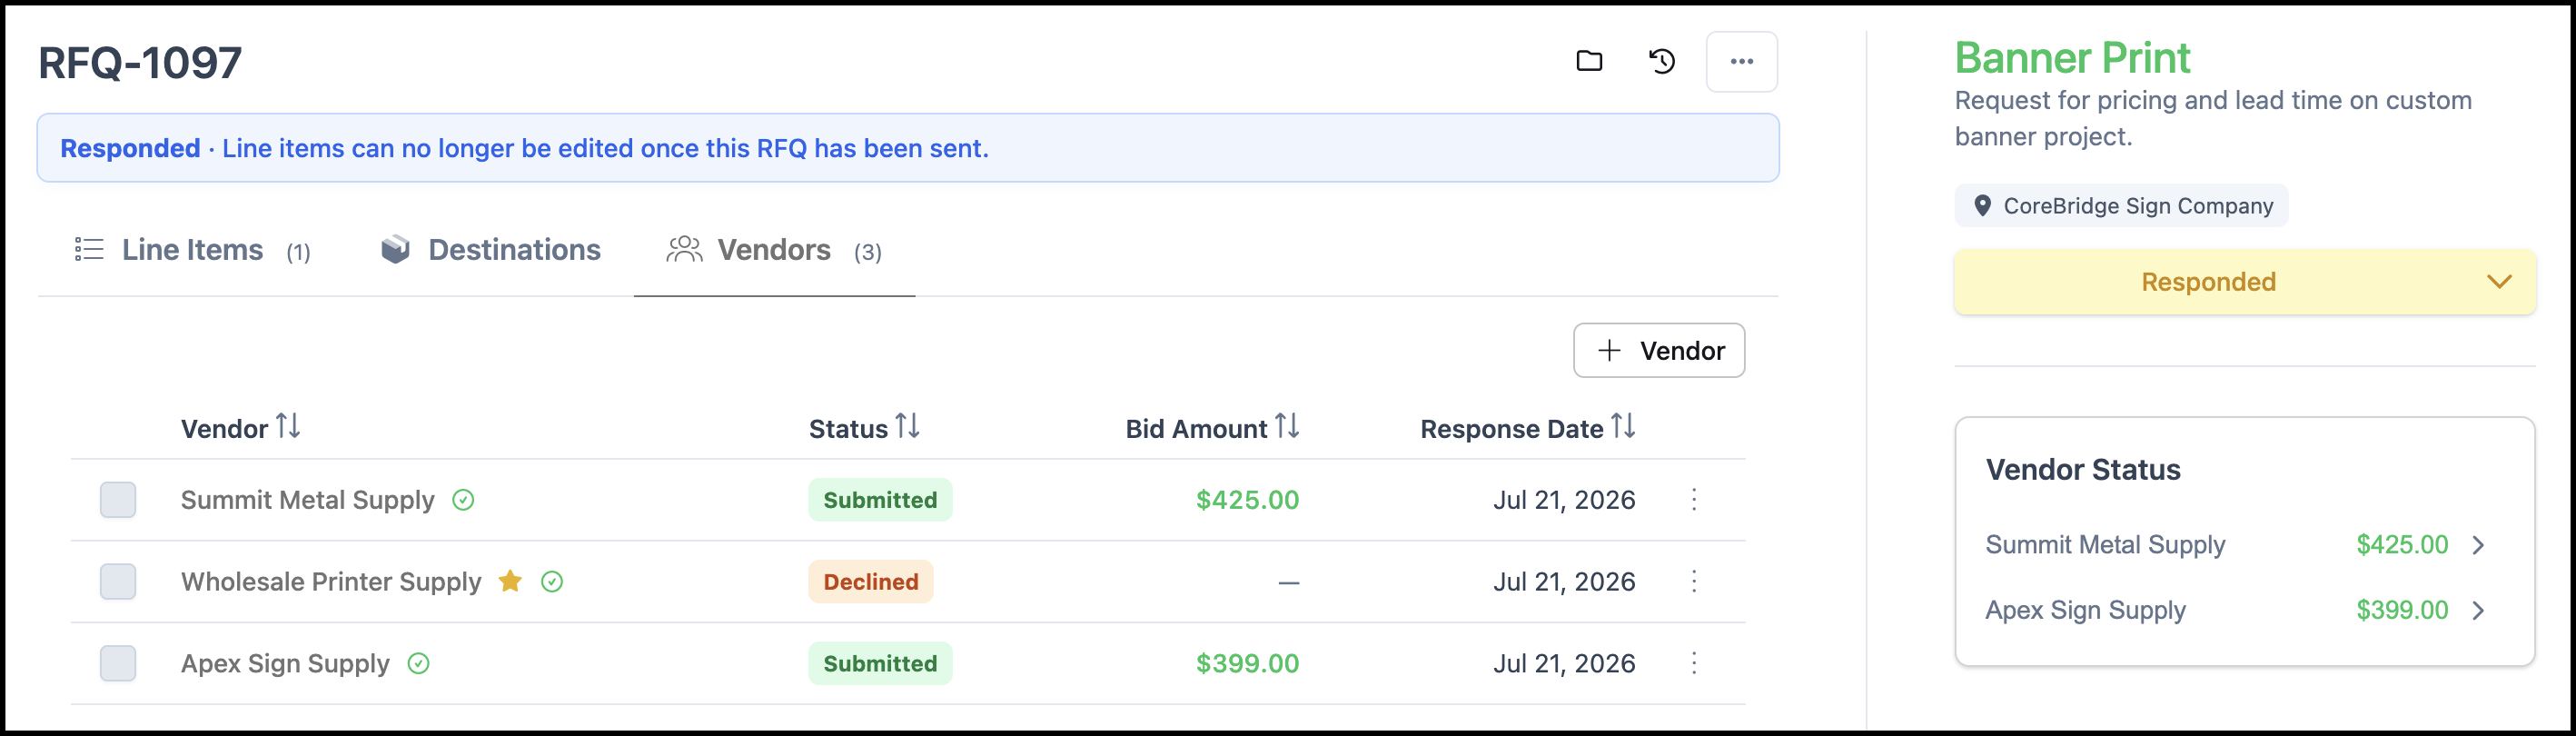
a. Status - Indicates the current stage of the Request for Quote for each vendor. This Status updates automatically as the vendor progresses through the bidding process.
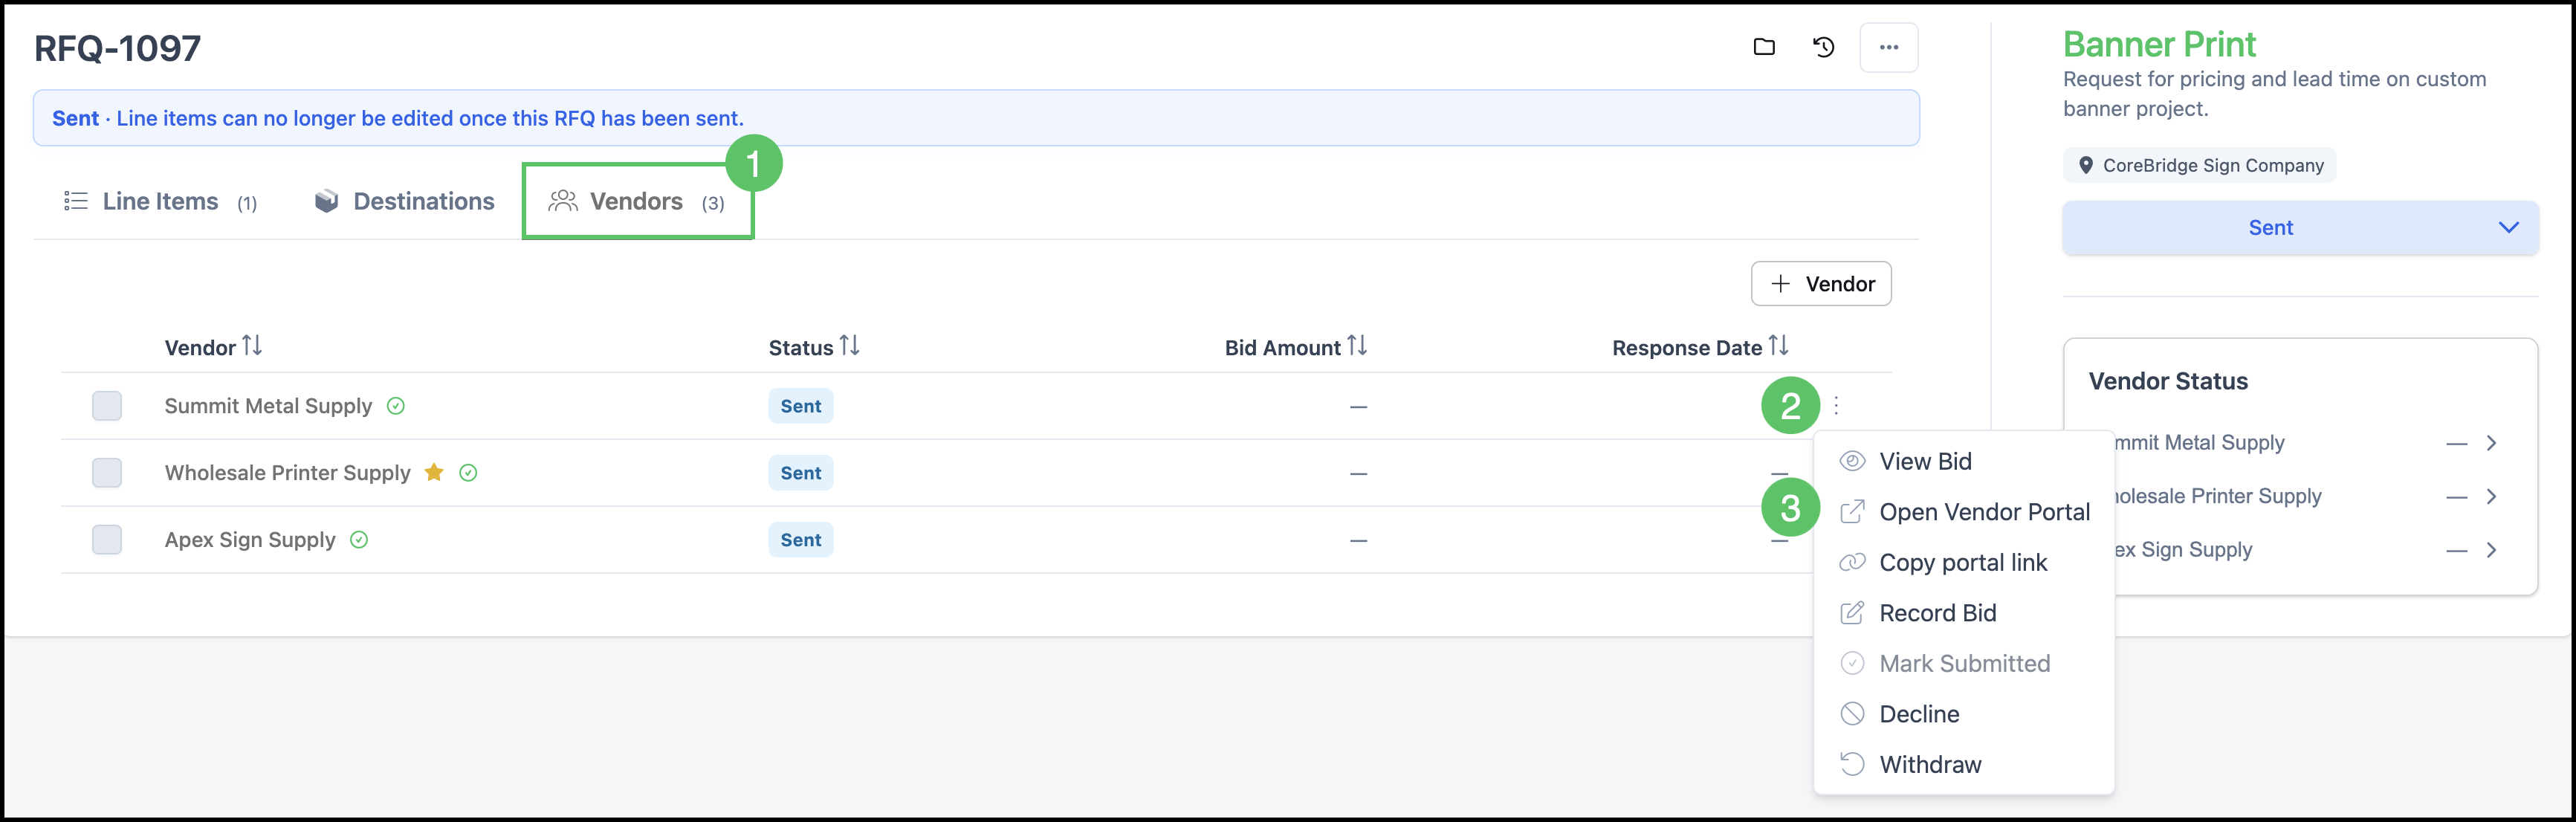
b. More Actions - Provides actions for managing the vendor's Request for Quote, including View Bid, Open Vendor Portal, Copy Portal Link, Record Bid, Mark Submitted, Decline, and Withdraw.
Note: The available actions may change depending on the current Status of the vendor's Request for Quote.
c. Vendor Status - Selecting a vendor's Status opens additional details about that vendor's Request for Quote and bidding activity.
Example:
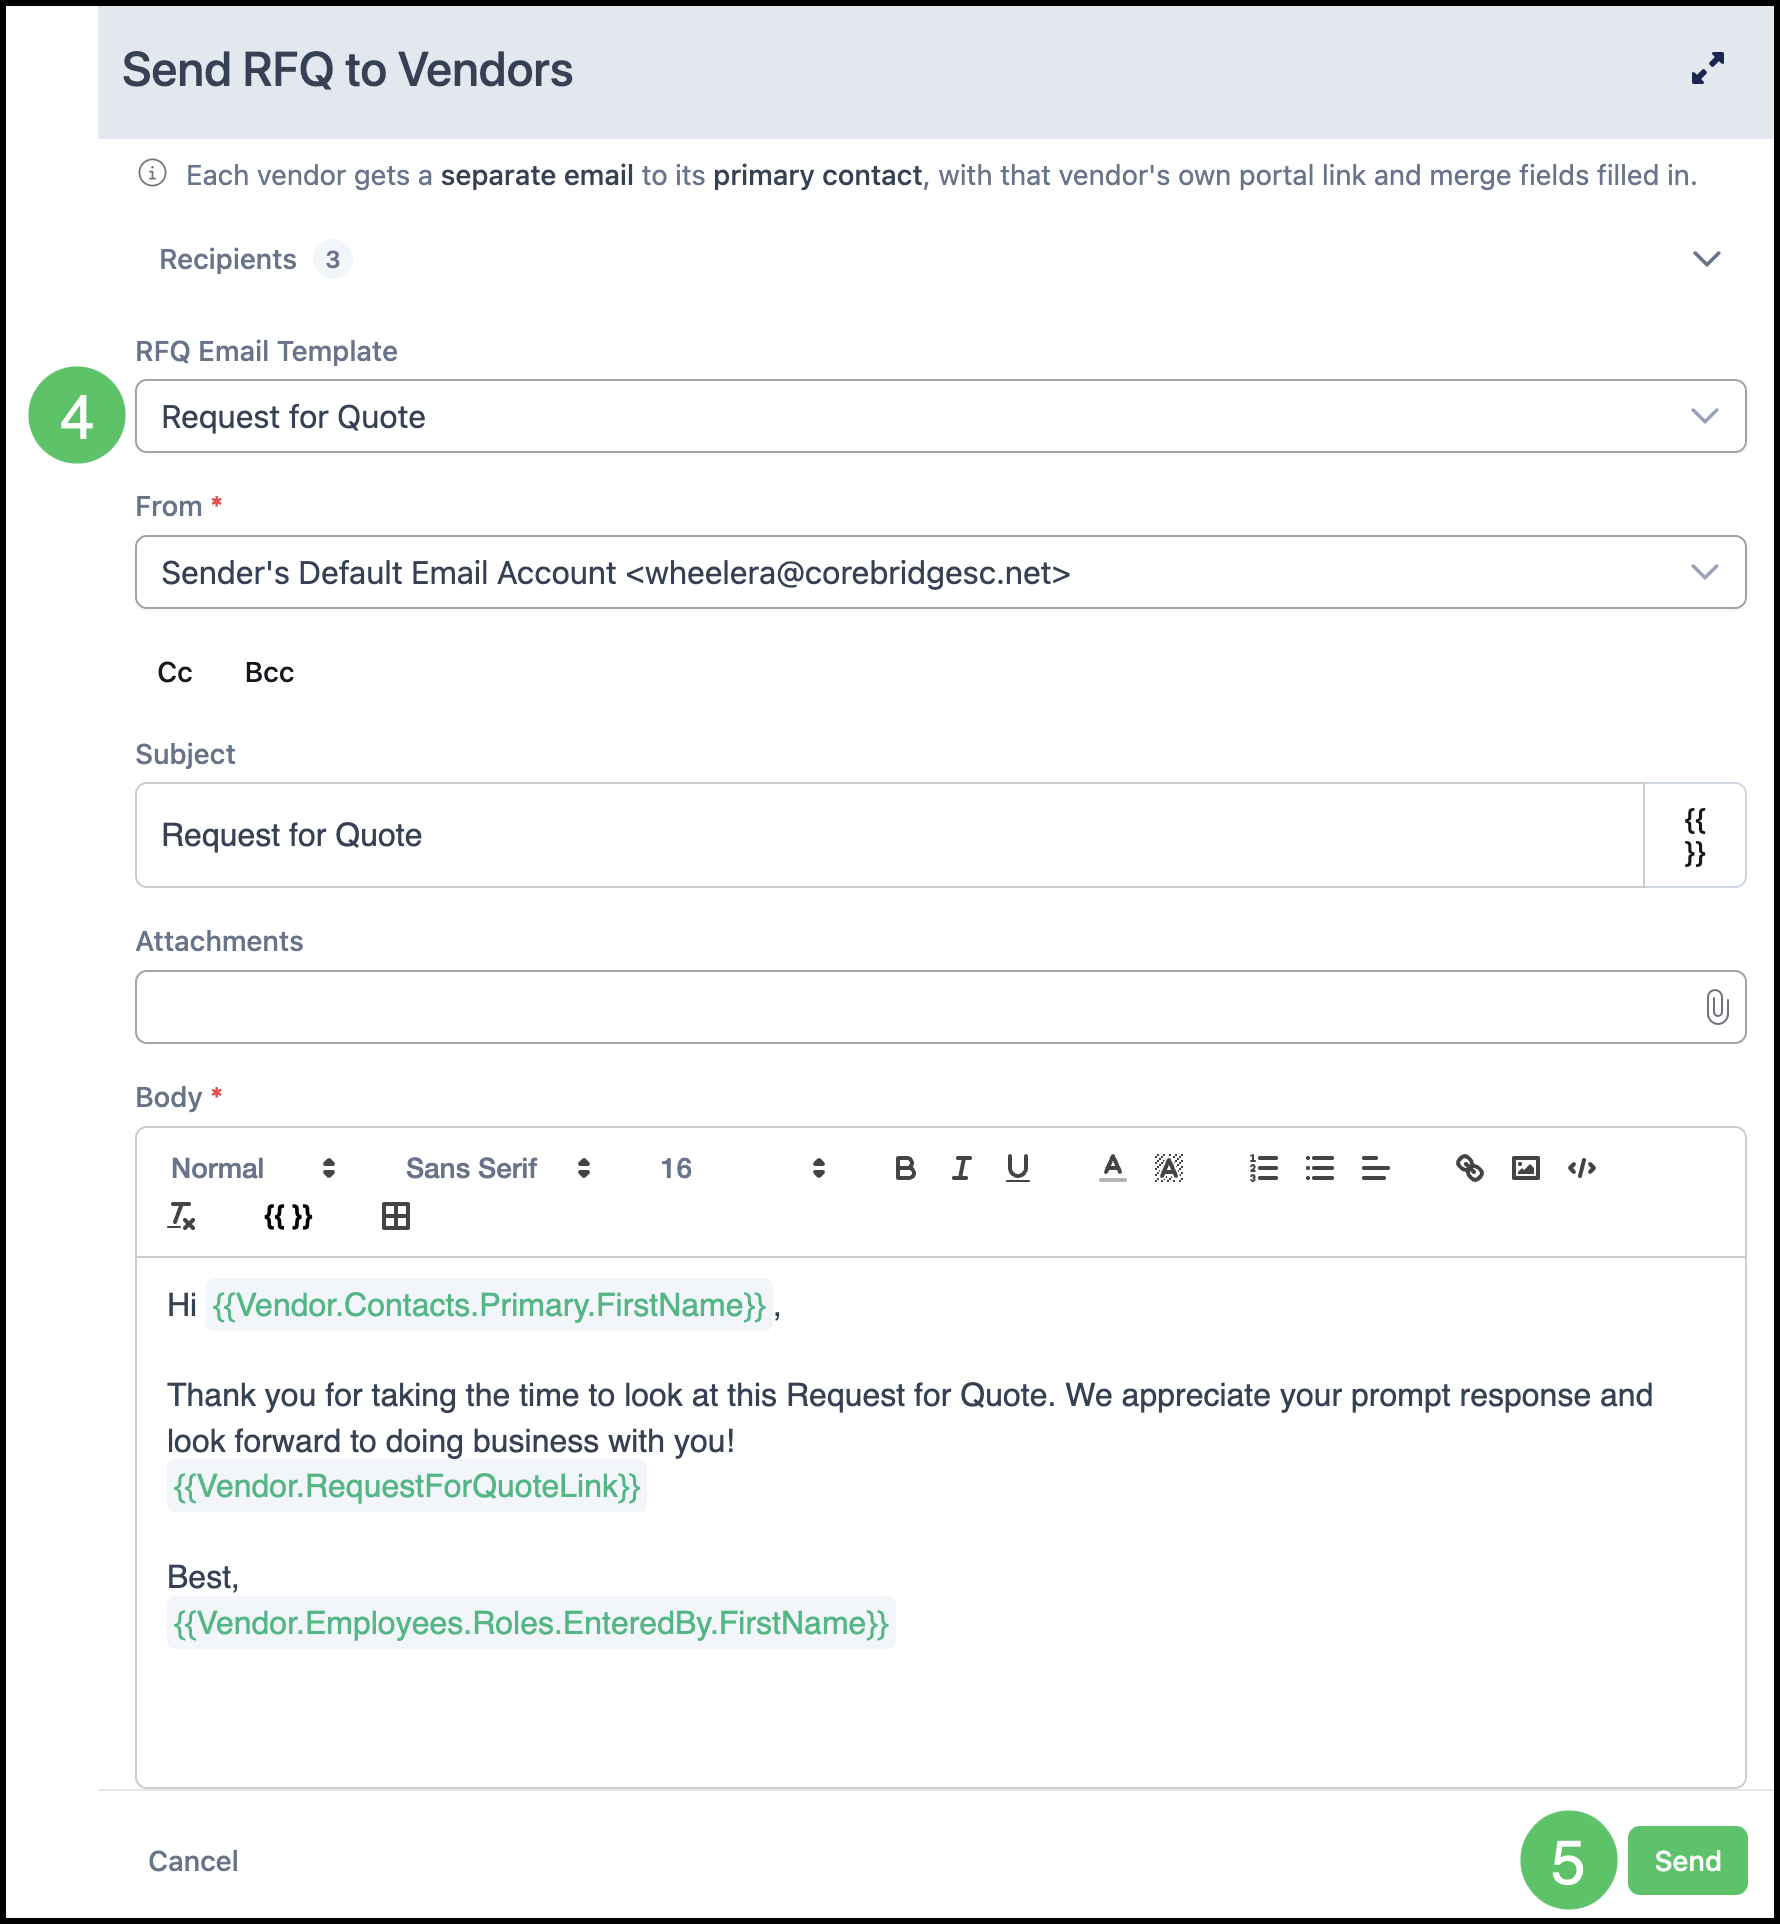
4. Choose an RFQ email template, or enter a subject and message directly. For more information on Email Templates, please see Creating and Editing Email Templates.
Note: Confirm the From address, and add any attachments if needed.
5. Click Send.
Note: A vendor with no email on file is skipped automatically, and this is noted on their status.
How Vendors Respond
Vendors submit pricing through their own vendor portal, reached from the link in their email. From the portal, a vendor can view the Request for Quote and its Line Items, submit pricing and notes for each line, or decline with a reason.
If a vendor provides pricing outside the portal, such as by phone or email, you can enter it for them from the Vendors tab so all bids stay in one place.
Note: Your own pricing and cost information is never visible to vendors. Vendors only see the Line Items, quantities, and Destinations needed to submit a bid.
You can preview the vendor portal exactly as a vendor would, directly from the Vendors tab.
Navigate to Purchasing / Request for Quote and select the appropriate RFQ.
1. Select the Vendors tab.
2. Click the More Actions menu on the appropriate row.
3. Select Open Vendor Portal.
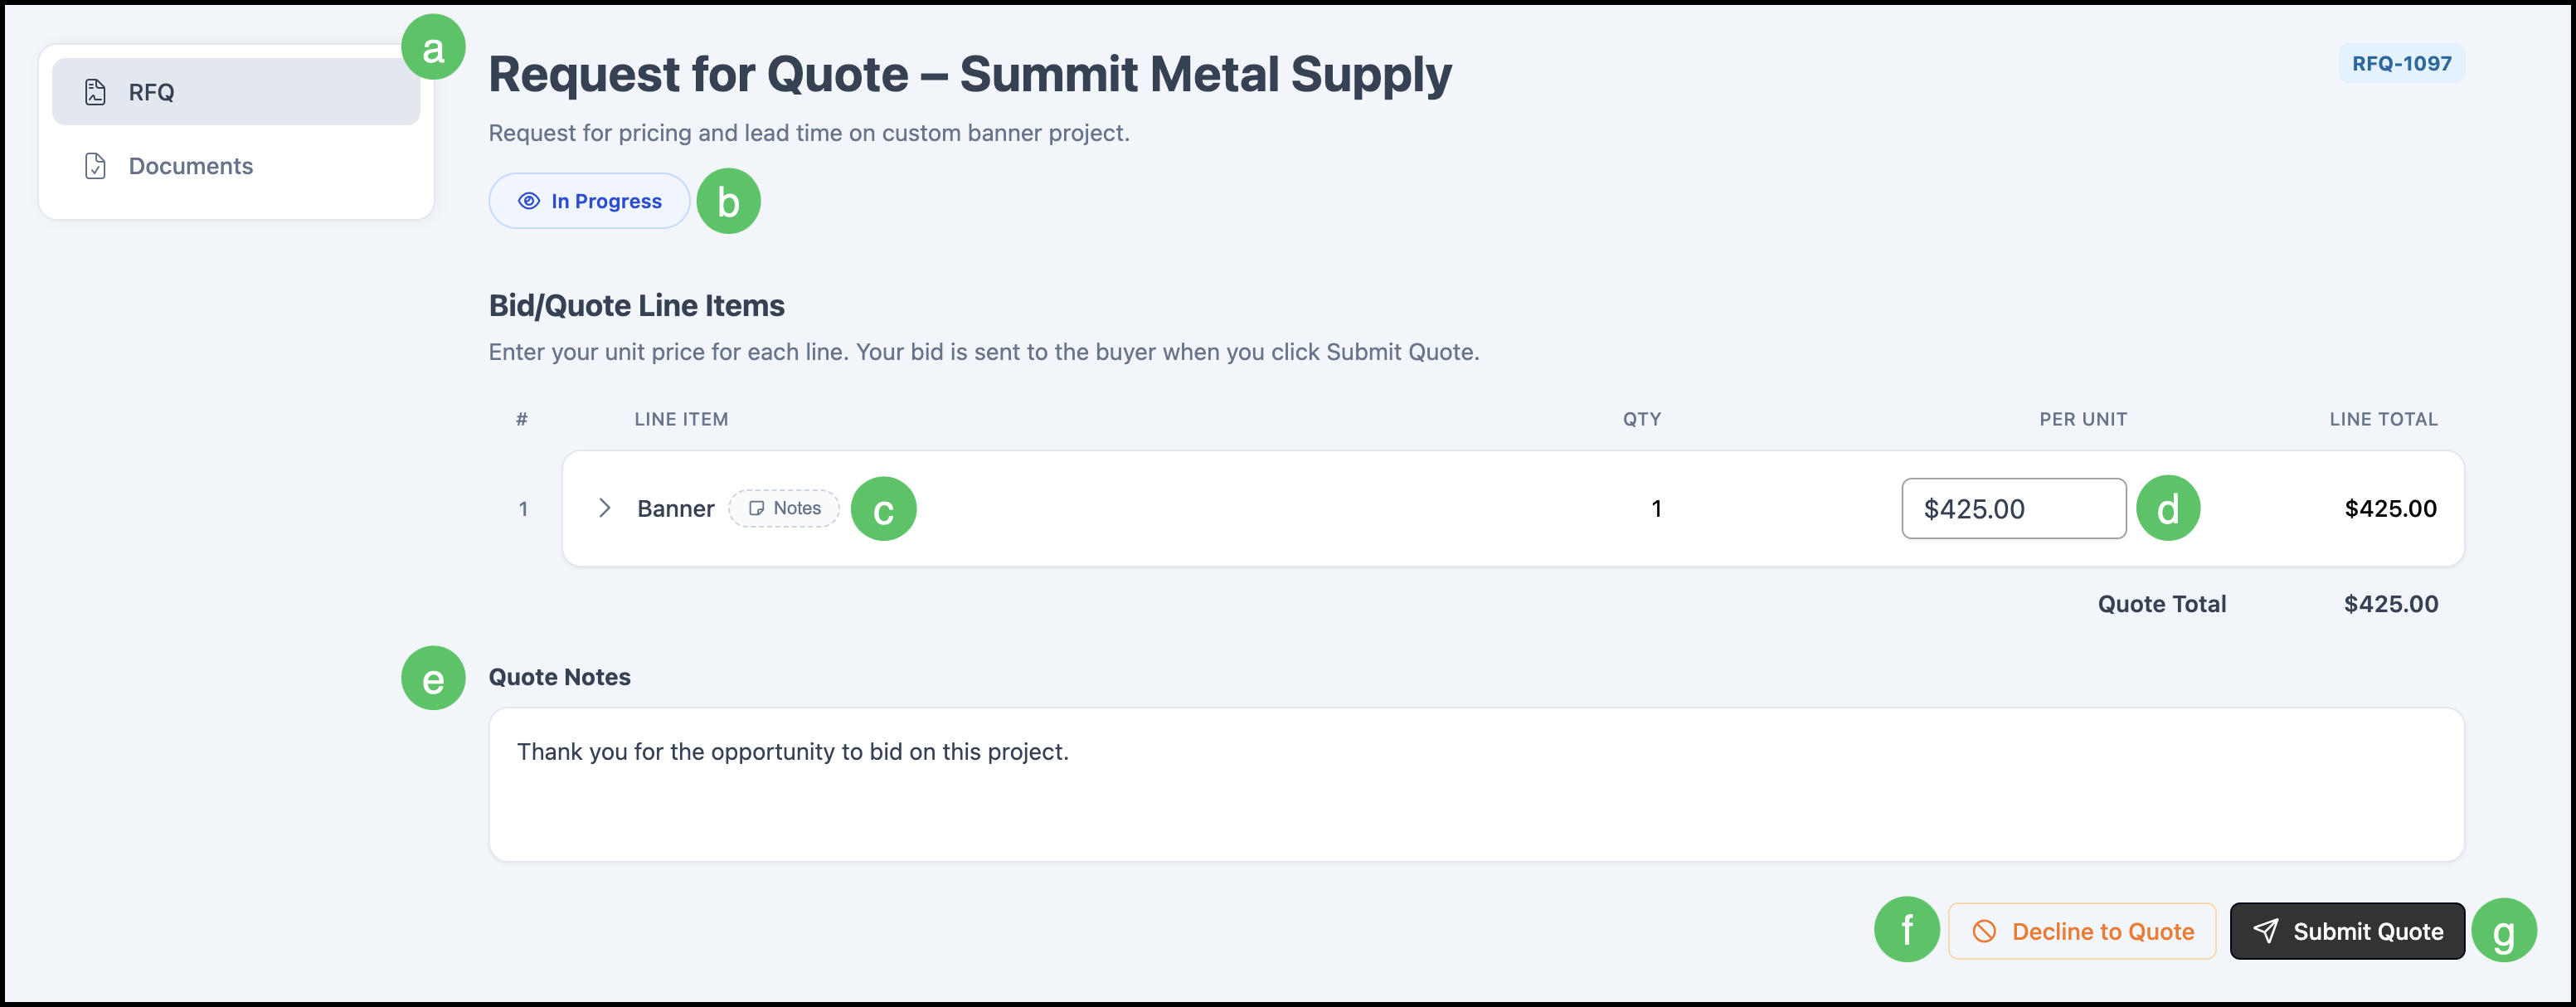
a. RFQs - The RFQs tab displays all Requests for Quote assigned to the vendor.
b. RFQ Status - Indicates whether the Request for Quote is open for bidding or has progressed to another stage of the workflow.
c. Line Item Notes - Opens a dialog where the vendor can enter notes specific to an individual Line Item.
d. Per Unit - Vendors enter the quoted price per unit for each Line Item in this field.
e. Quote Notes - Allows the vendor to enter notes that apply to the Request for Quote as a whole.
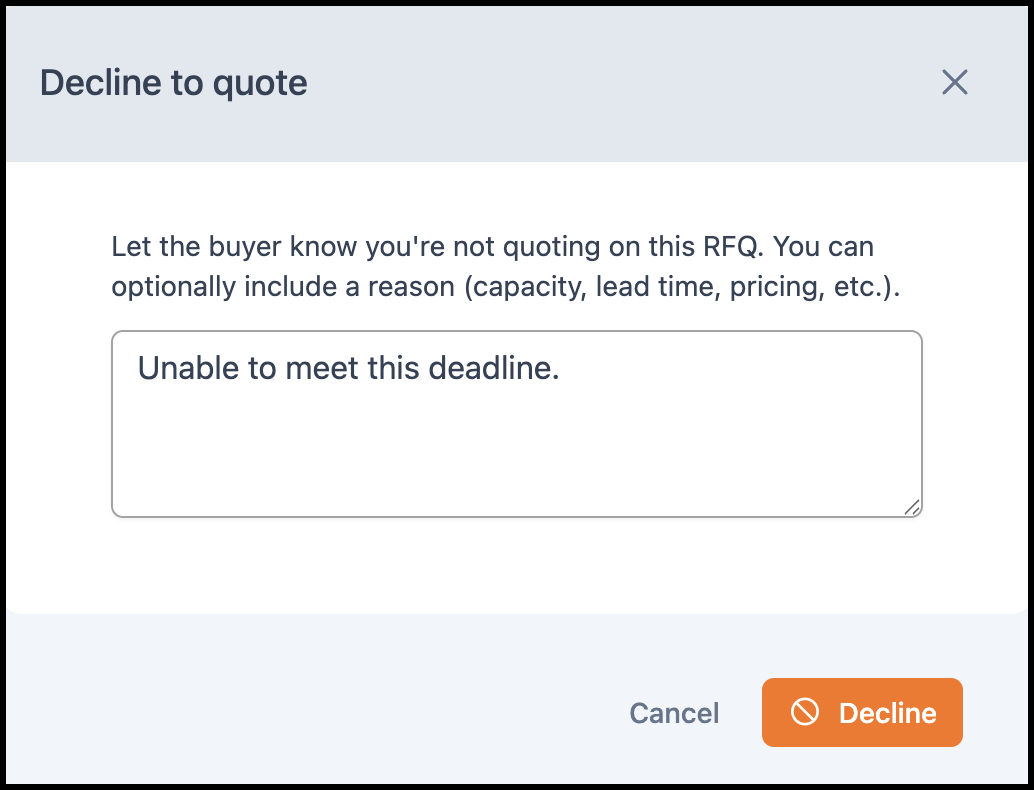
f. Decline to Quote - Allows the vendor to indicate that they are not submitting a bid for the Request for Quote. A dialog will open asking the Vendor to provide a reason. See Decline Example below.
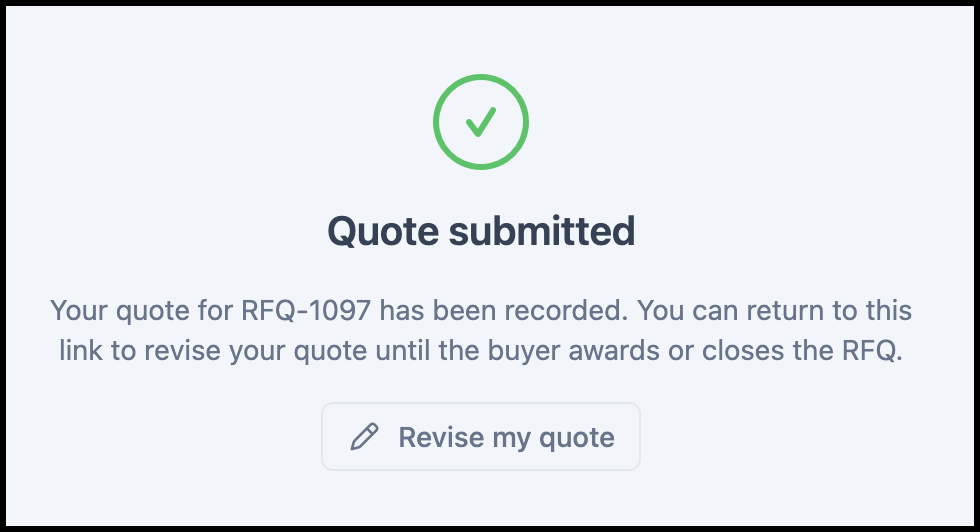
g. Submit Quote - Submits the completed quote for your review. A confirmation will appear with an option to revise the quote if necessary. See Submit Example below.
Decline Example:
Submit Example:
Vendor status updates automatically as they interact with the Request for Quote: Not Sent, Sent, Viewed, and then Submitted, Declined, or Withdrawn. A vendor who never responds is marked No Response after a period of inactivity.
Awarding a Request for Quote
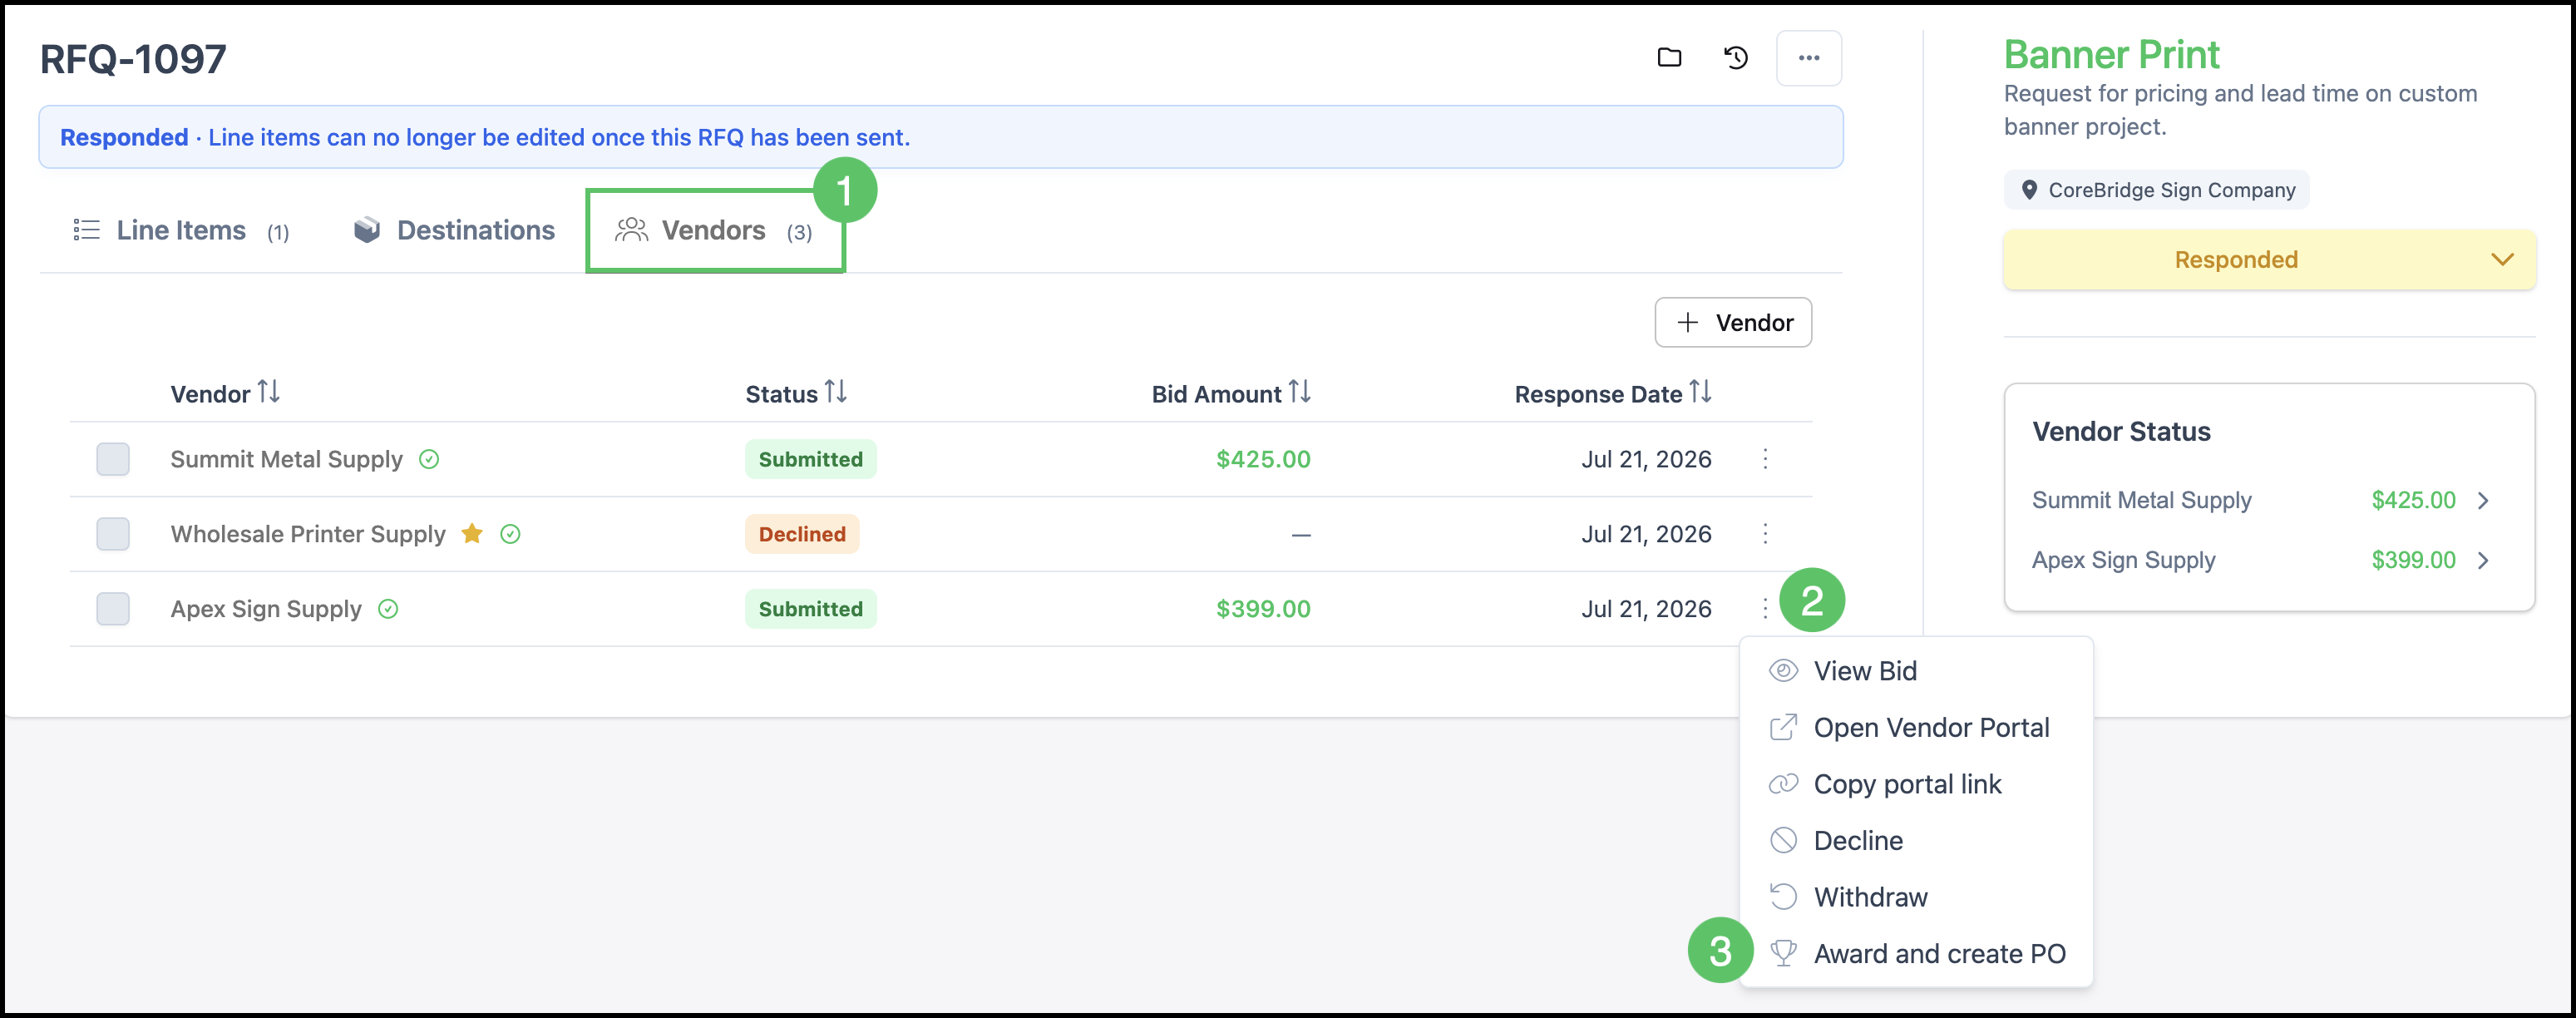
Once you've reviewed vendor bids, you award each Line Item to the vendor who should fulfill it. A single vendor can be awarded some, several, or all of the Line Items, but each Line Item can only go to one vendor.
Navigate to Purchasing / Request for Quote and select the appropriate RFQ.
1. Select the Vendors tab.
2. Click the More Actions menu on the appropriate row.
3. Select Award and create PO.
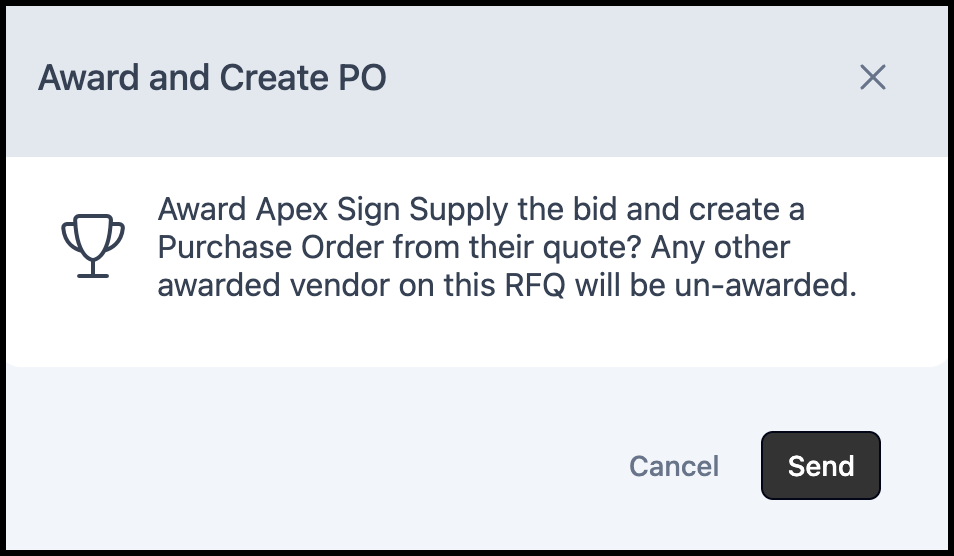
Note: A confirmation dialog appears before awarding the vendor and creating a Purchase Order from the selected quote. See the Award Example below.
Award Example:
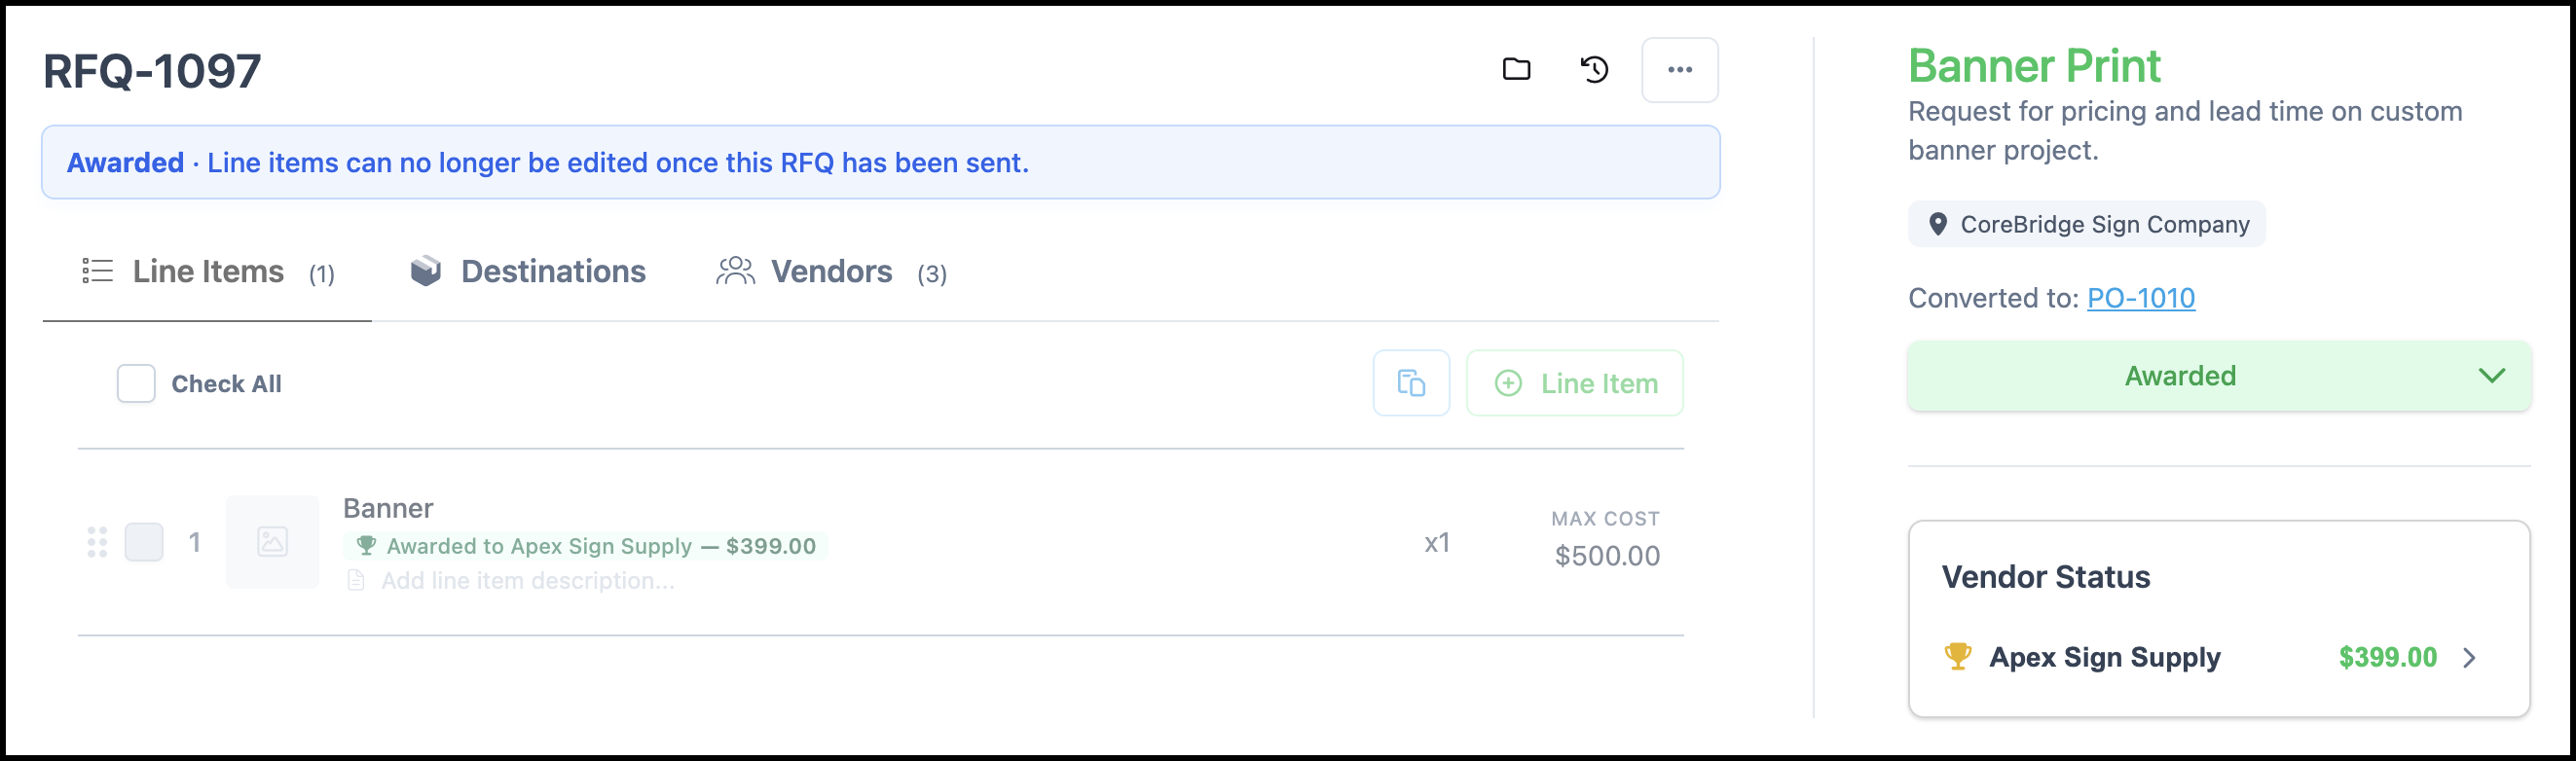
The Request for Quote moves to Awarded automatically once every Line Item has been assigned.
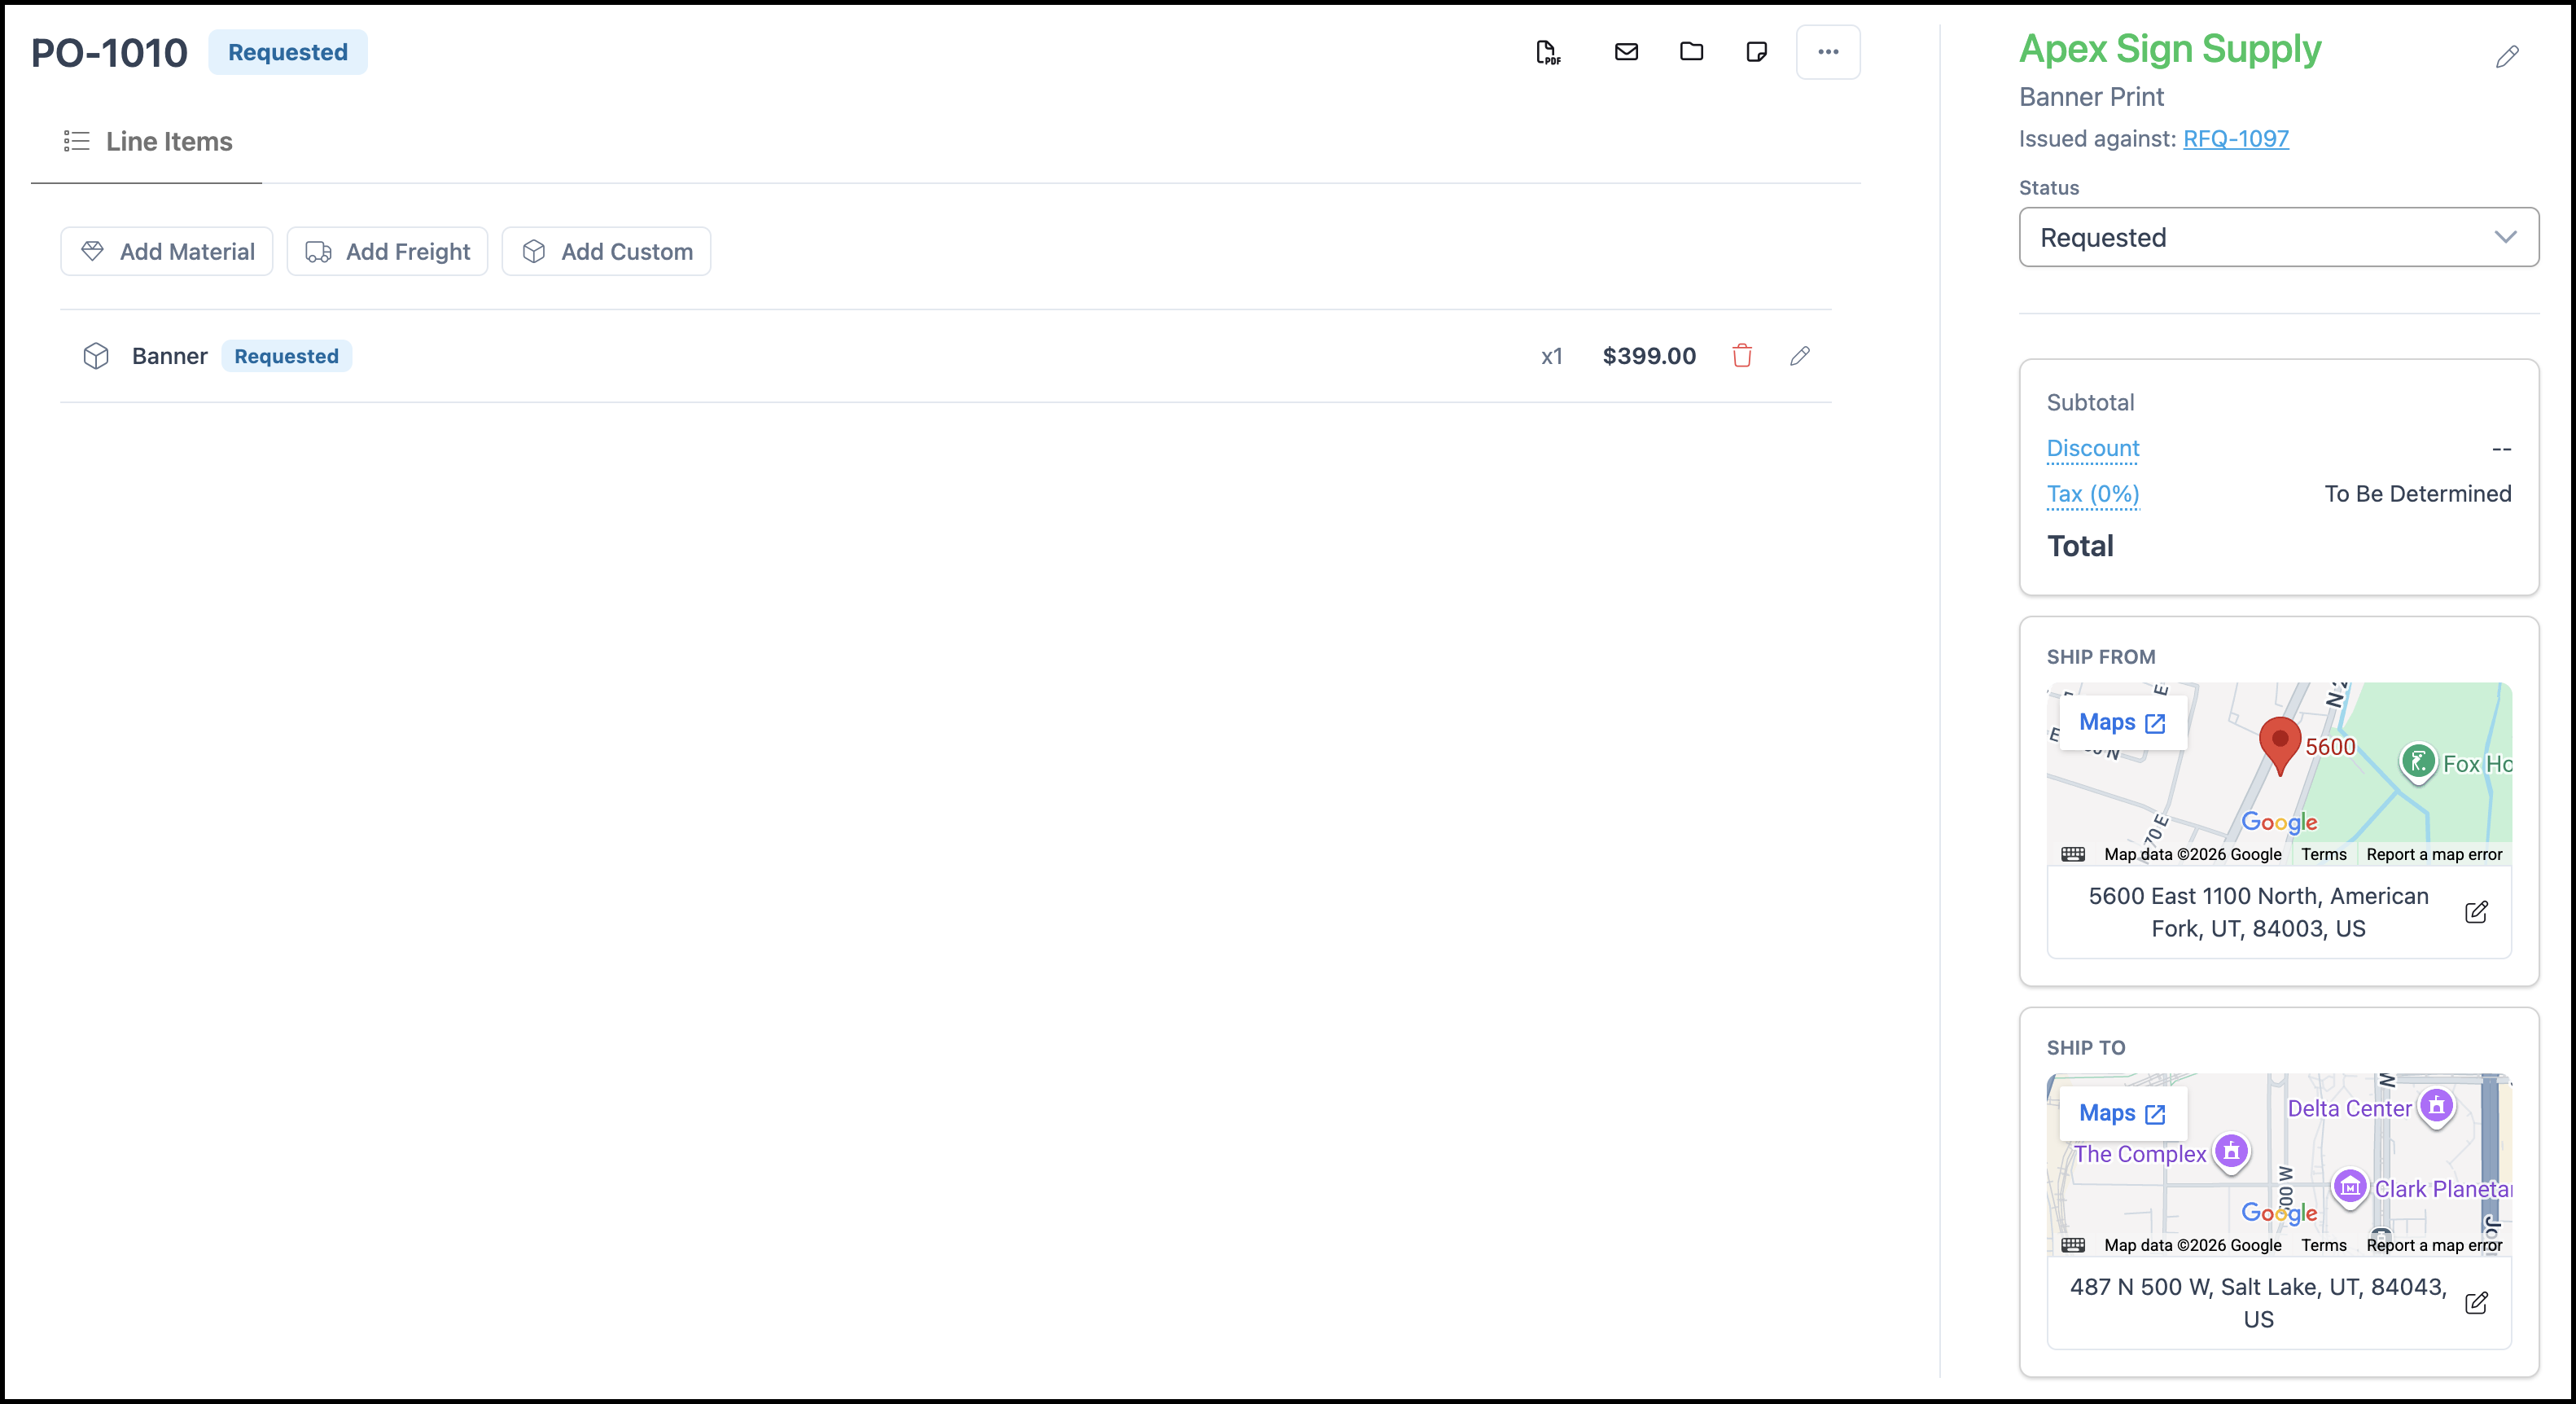
A Purchase Order is automatically created and can be found under Purchasing / Purchase Orders.
Request for Quote Statuses
Each Request for Quote moves through a series of Statuses that reflect its progress, from initial creation through vendor responses and final award. Statuses automatically update as the RFQ moves through the workflow.
| Status | What it means |
|---|---|
| Draft | Being built. Line Items, Destinations, and vendors can still be edited. |
| Sent | Sent to vendors. Line Items and Destinations are locked. |
| Responded | At least one vendor has submitted a bid or declined. |
| Awarded | Every Line Item has been assigned to a winning vendor. |
| Voided | The Request for Quote has been cancelled. |