Payment Methods are the types of transactions that customers will use to make a payment. Selecting which methods you would like to be active, as well as adding custom methods, allows you to have full control over the type of payments you take. CoreBridge also offers integrated payment options, allowing you to use an outside processor to capture payments. Integrating with one of our supported merchant service providers also allows your customers to make payments directly through the customer portal.
Table of Contents
- Accessing Payment Settings
- System Payment Methods
- Custom Payment Methods
- Payment Integrations
- Payment Integration Settings
- Related Articles
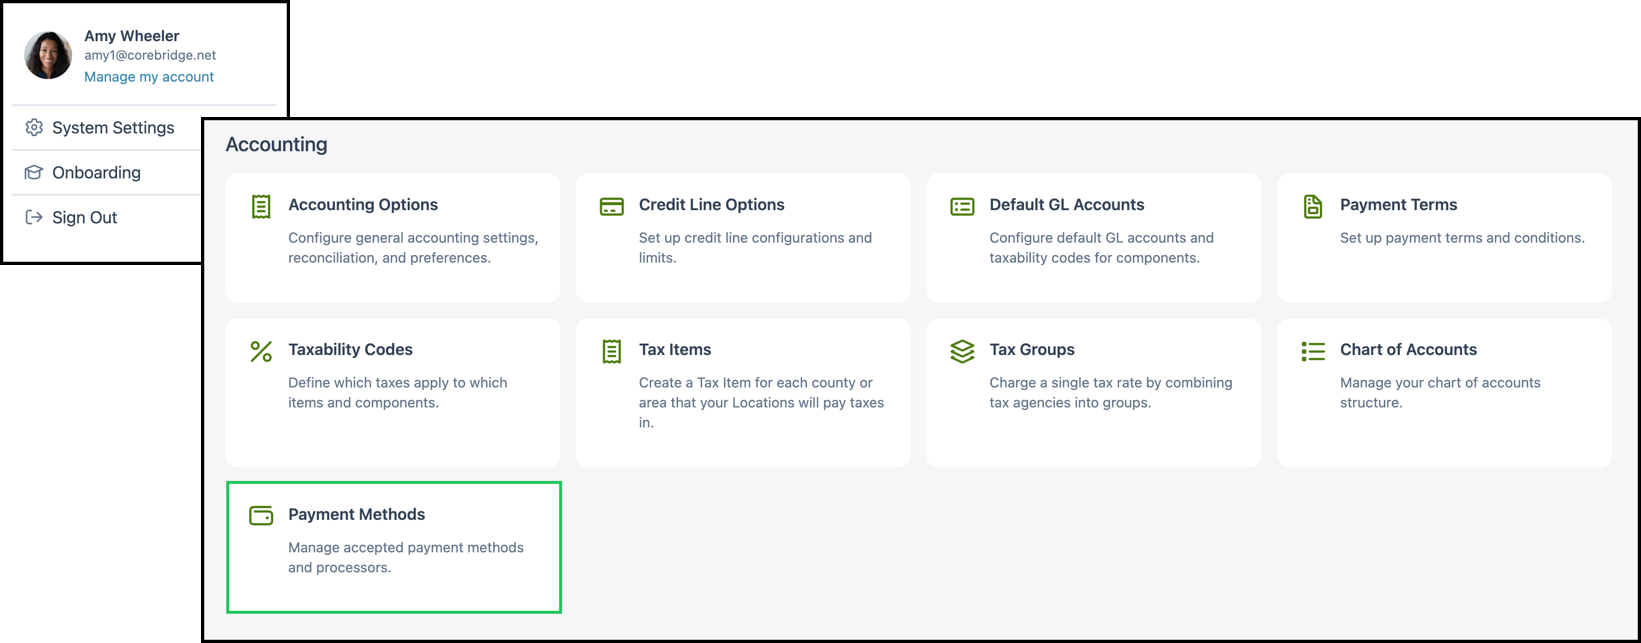
Accessing Payment Settings
Navigate to System Settings / Accounting / Payment Methods.
Note: After making changes on the Payment Methods page, click Save at the bottom to apply your settings.
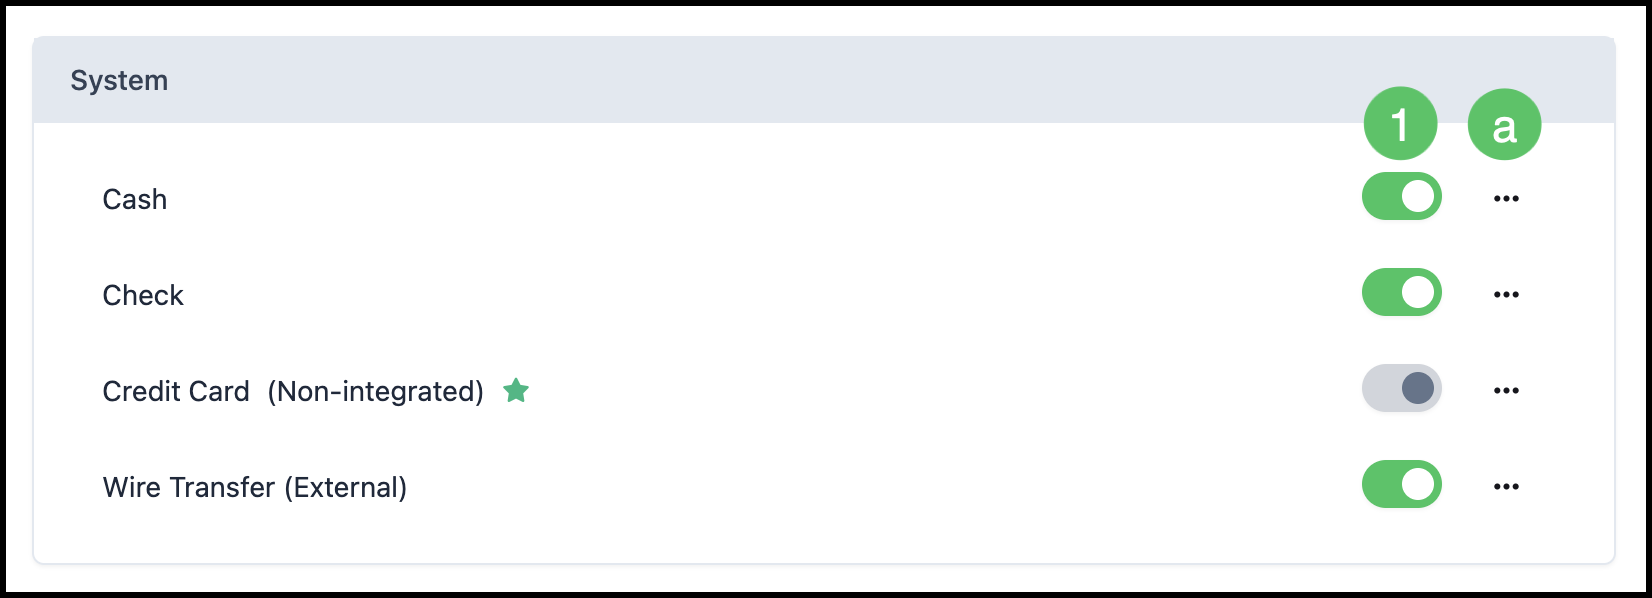
System Payment Methods
The System section lists built-in payment methods such as Cash, Check, Credit Card (Non-integrated), and Wire Transfer (External).
1. Use the toggle switch next to each method to enable or disable it. When enabled, that payment type is available for use on orders and when taking payments.
a. The Actions menu gives you the options to Edit or Set as Default.
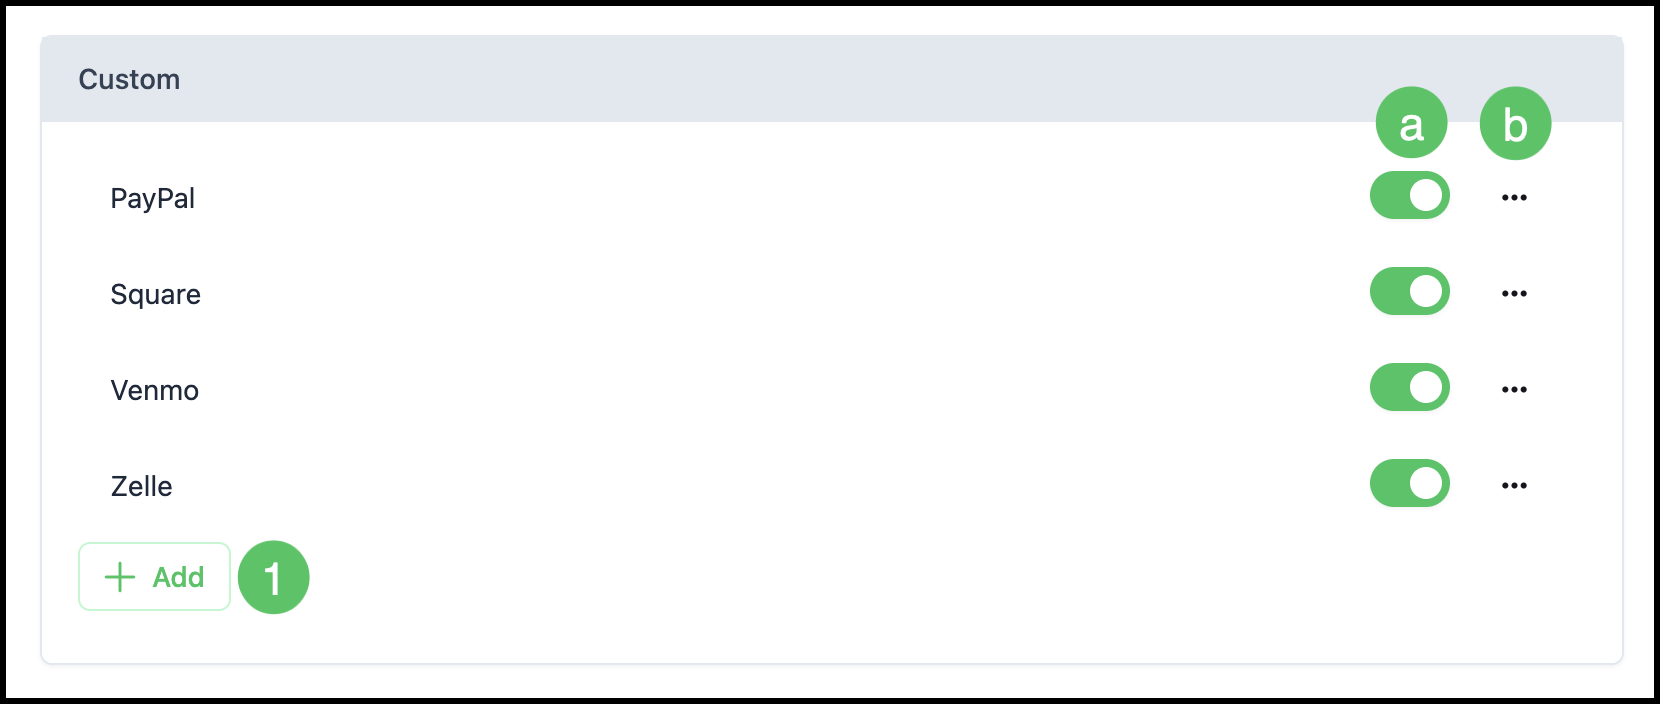
Custom Payment Methods
The Custom section allows you to add and manage your own payment methods.
1. Click the Add button to create a new Custom Payment Method.
a. For existing custom methods, use the toggle to enable or disable the method and the menu button.
b. The Actions menu allows you to Edit, Set as Default, or Delete the method.
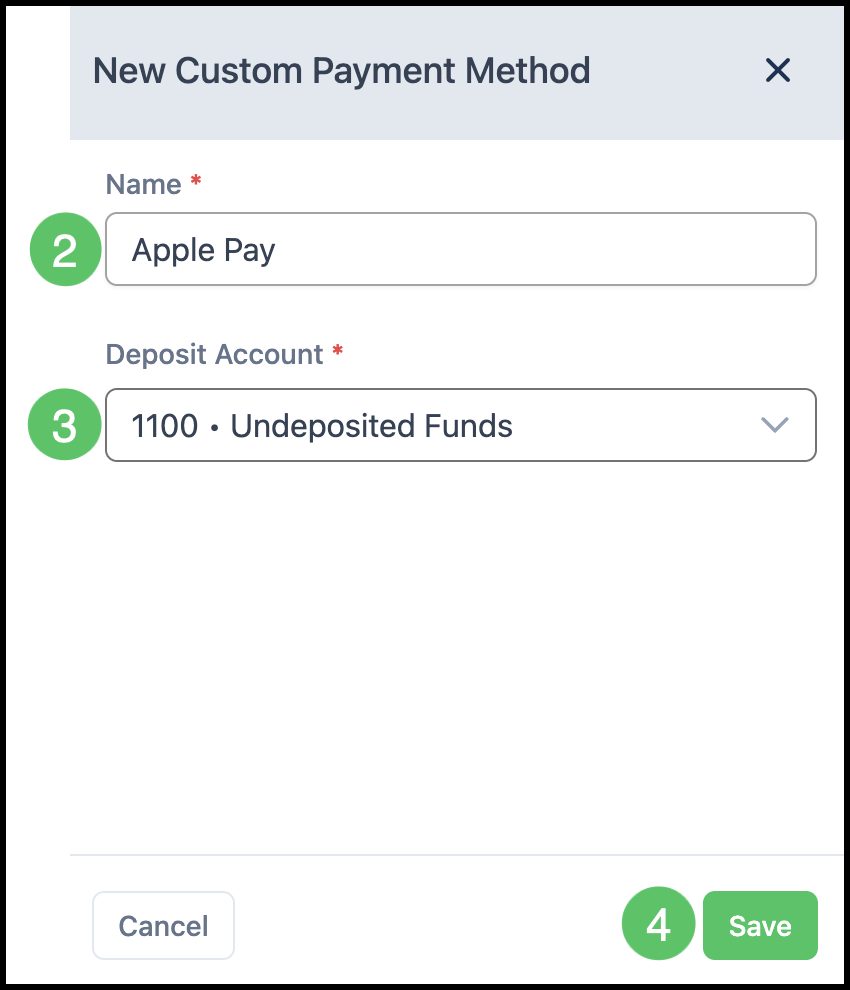
2. Enter the Name of the Custom Payment Method. Fields marked with a red asterisk are required.
3. Select the Deposit Account from the dropdown list where payments using this method will be stored.
4. Click Save to add the Custom Payment Method.
Payment Integrations
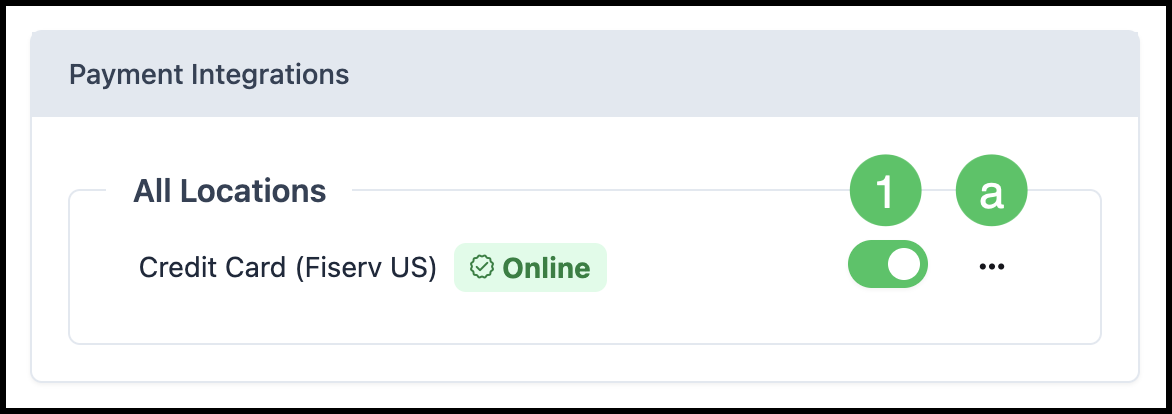
The Payment Integrations section shows integrated payment processors (e.g., merchant service providers) that allow you to process credit card payments within the system. When enabled, customers can also submit payments directly through the Customer Portal using the Pay Now button for a quick check-out process. When disabled, the Pay Now button does not appear and customers need assistance to pay for their Orders.
1. Use the toggle to enable or disable that integration.
a. The Actions menu allows you to Edit or Set as Default.
Payment Integration Settings
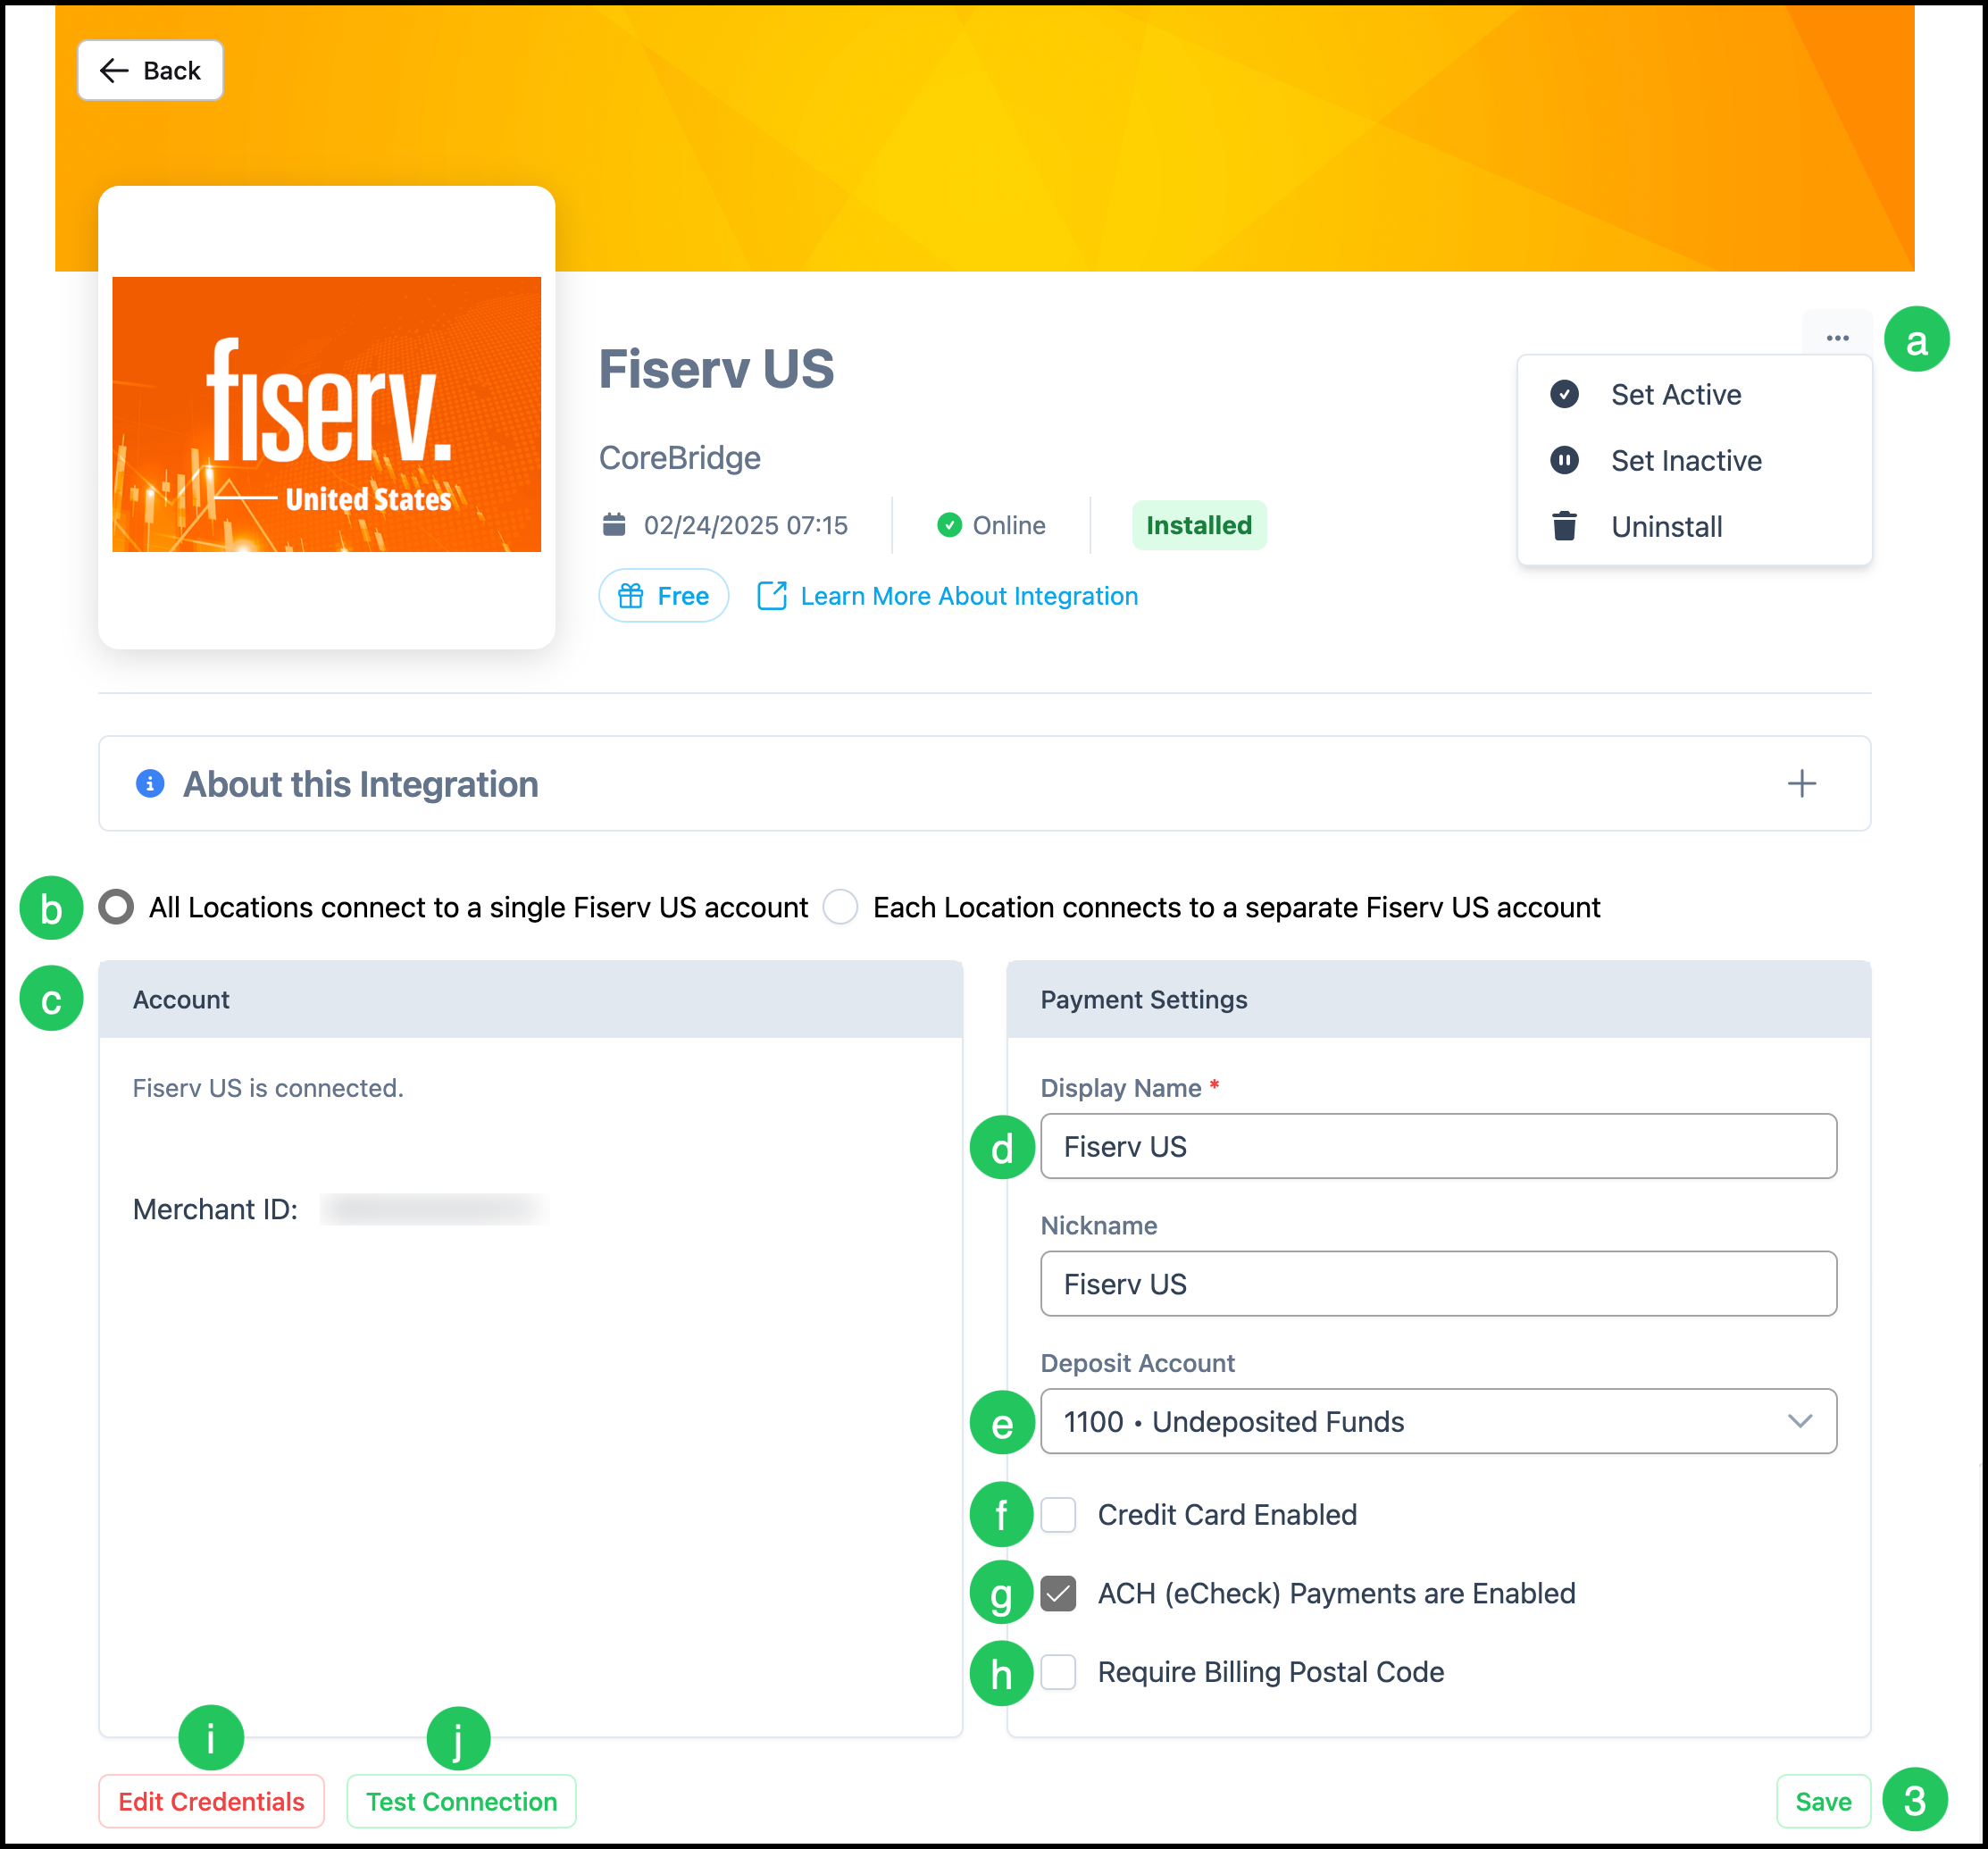
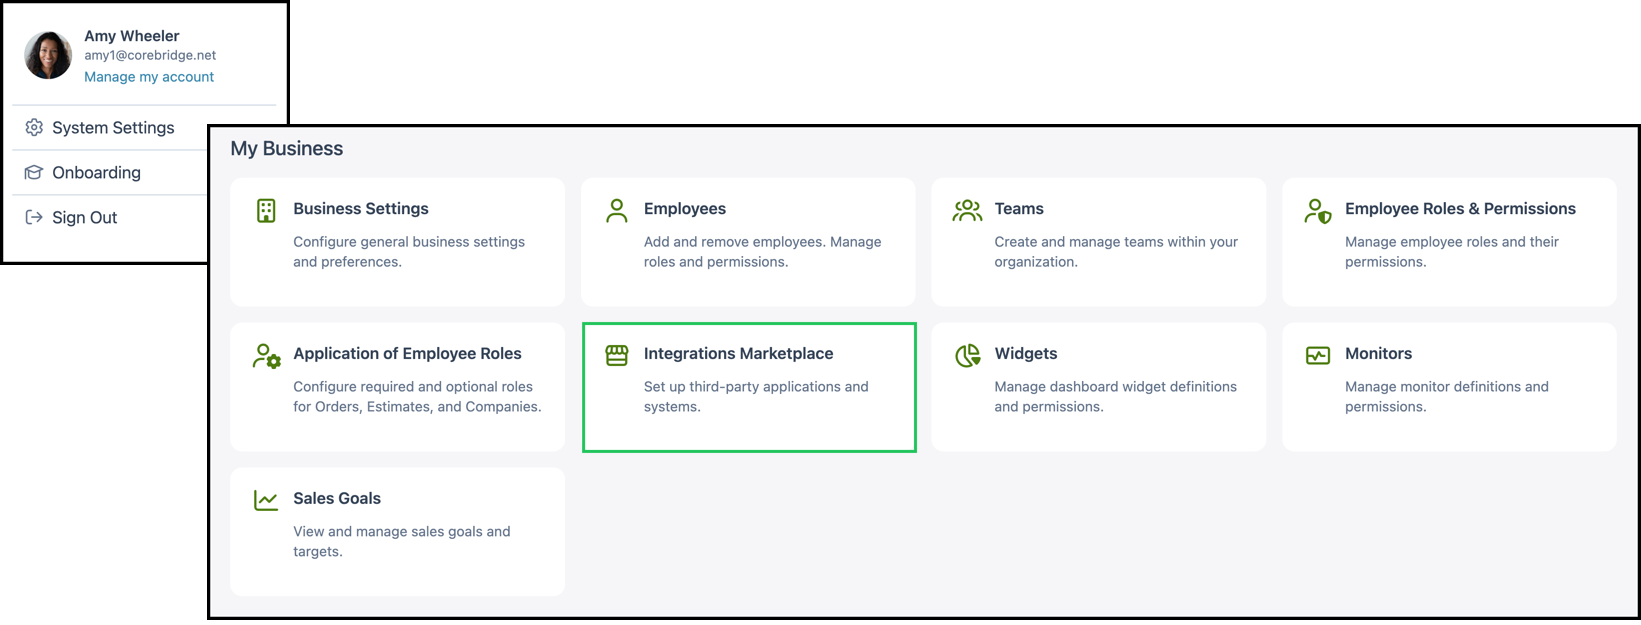
Navigate to System Settings / My Business / Integrations Marketplace / Payment and select the appropriate payment integration.
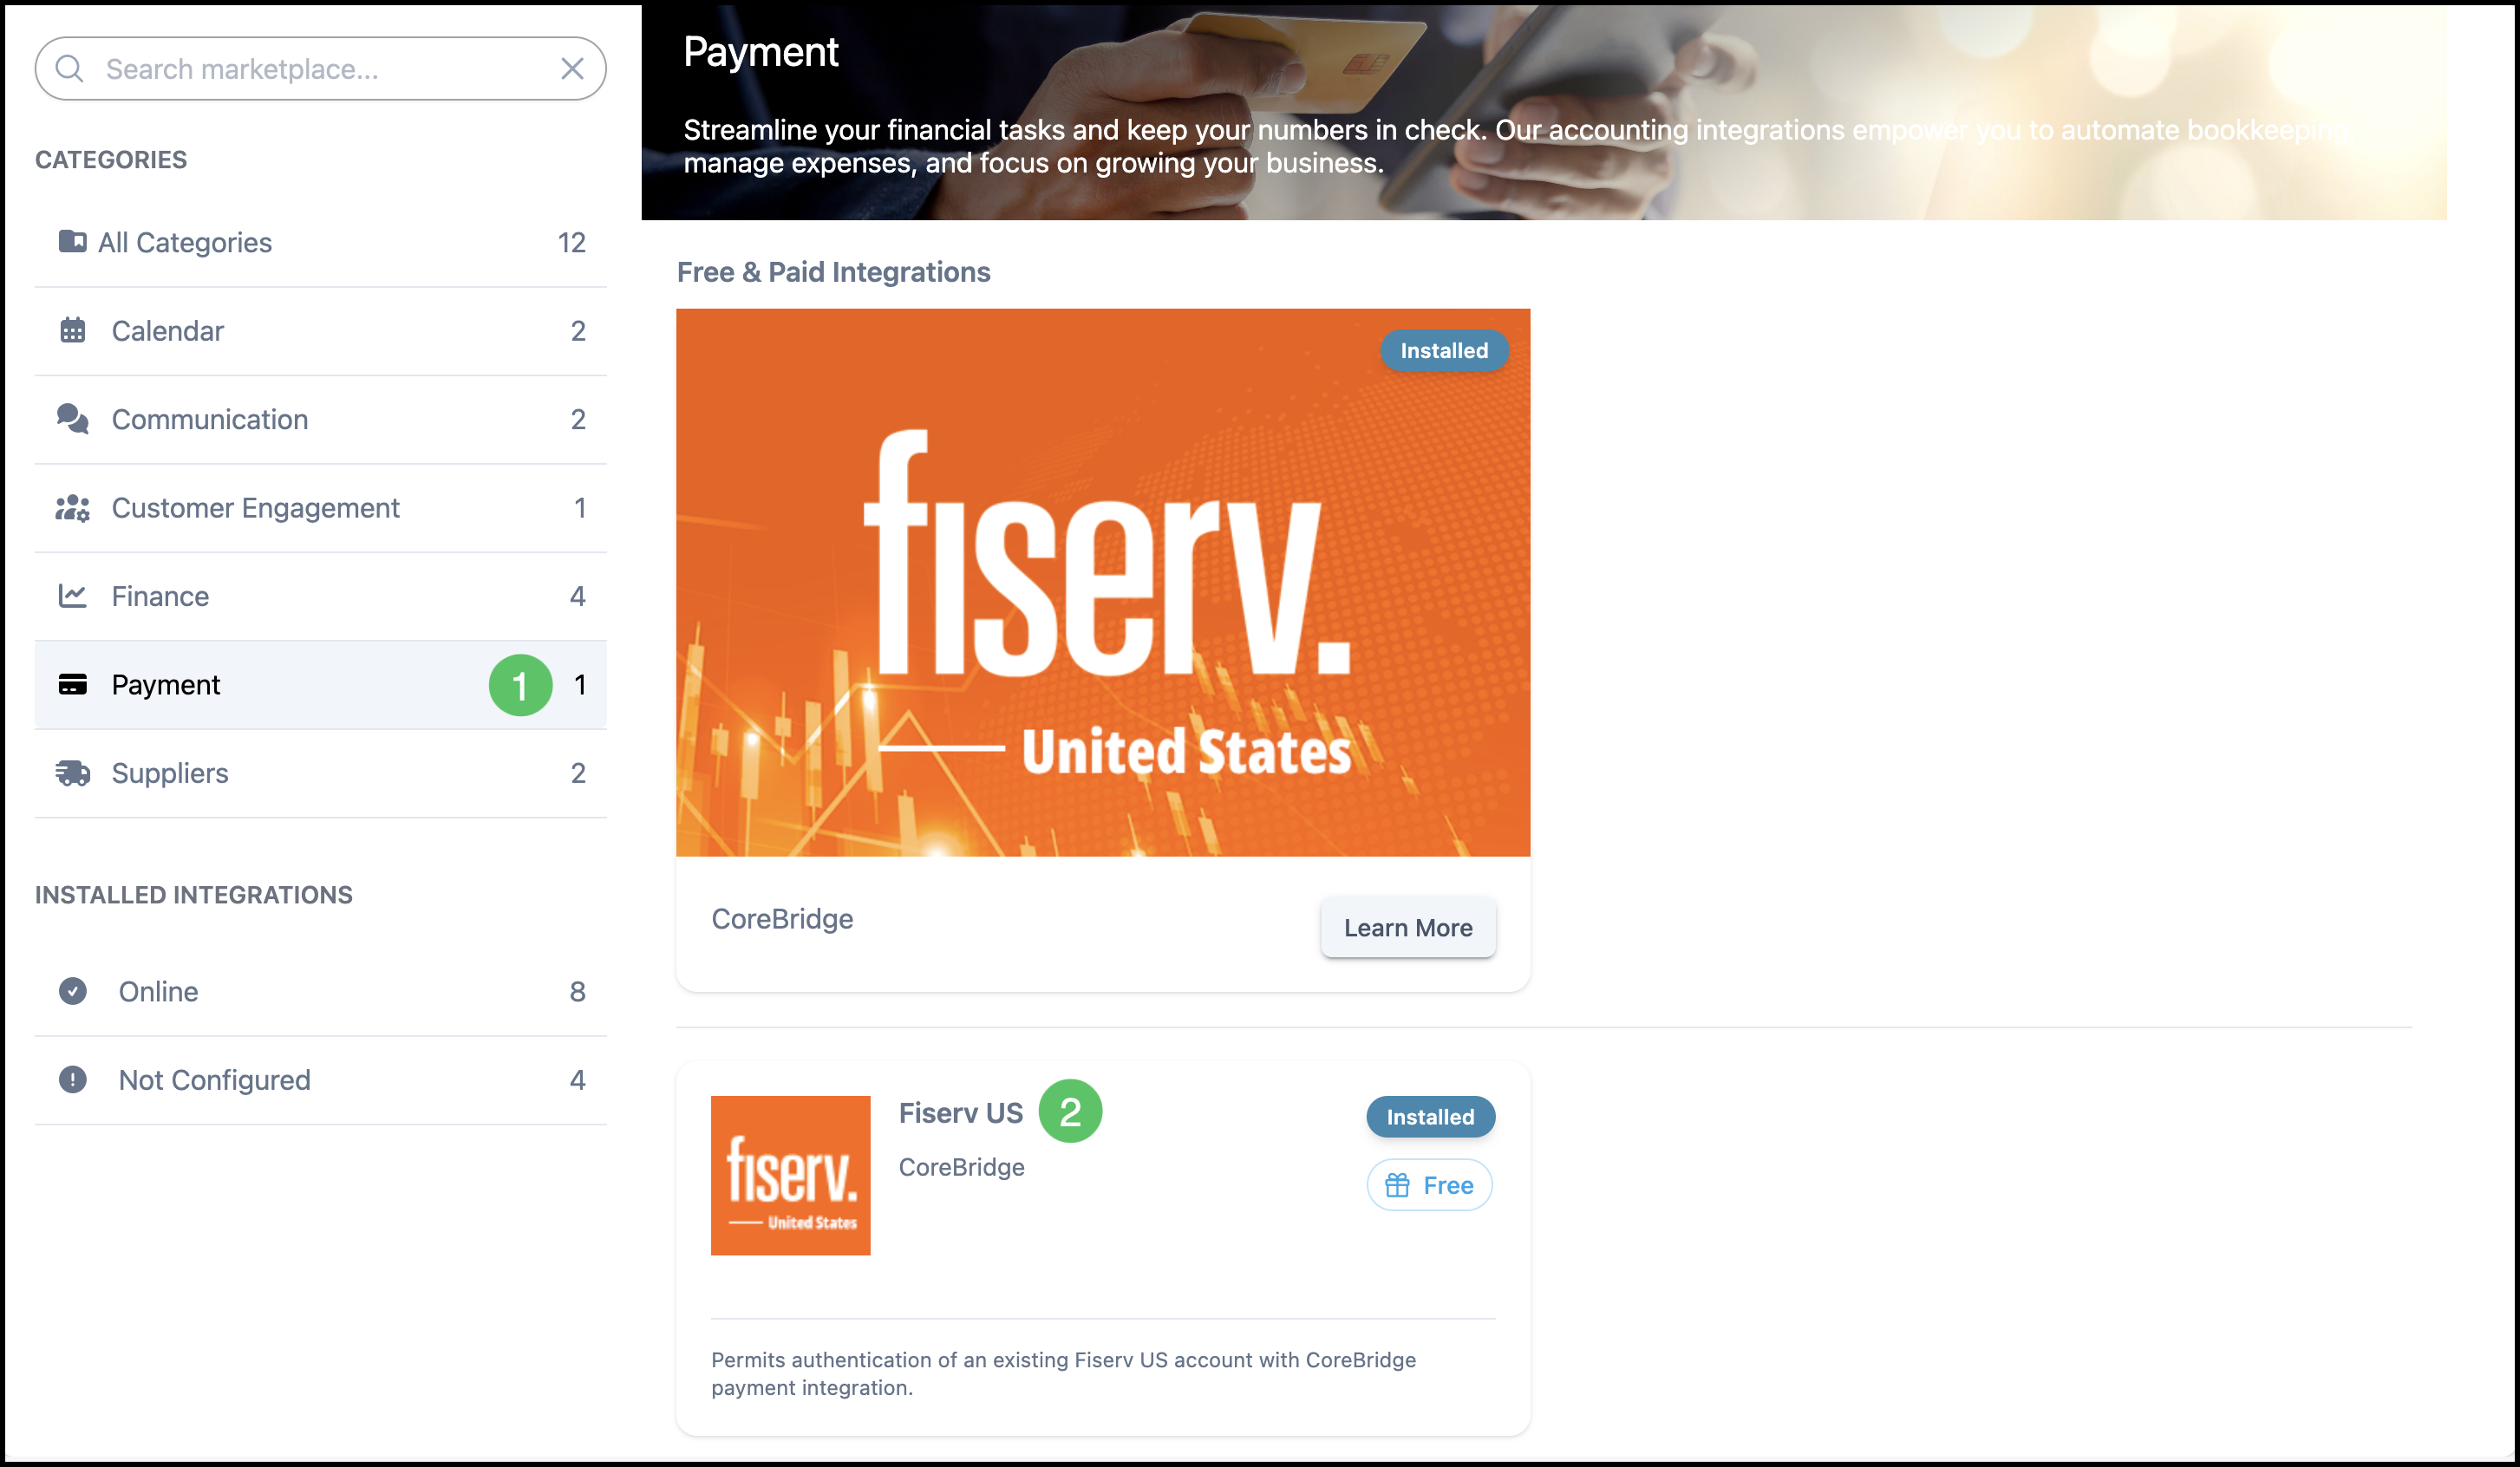
1. Click Payment.
2. Select the Payment Integration.
a. The Actions menu includes options to Set Active, Set Inactive, or Uninstall.
b. Systems with multiple Locations can be configured to either share a single account or maintain separate accounts for each Location.
c. Account information includes details such as the Merchant ID.
d. The Display Name field is required.
e. The Deposit Account identifies where credit card payments are stored.
f. The Credit Card Enabled setting indicates whether credit card payments can be accepted.
g. The ACH (eCheck) Payments Enabled setting indicates whether electronic check payments can be accepted.
h. The Billing Postal Code requirement setting determines whether a postal code must be entered when processing a payment.
i. Integration credentials can be updated at any time.
j. A Test Connection option is available to verify the connection, with a successful test displaying a confirmation message.
3. Click Save.
Note: Fields may vary depending on which processor or integration is selected. Required fields are marked with a red asterisk.