Destinations define how products are delivered to a Customer. Common Destination options include Delivery, Electronic Delivery, Installation, and Pickup.
This article explains how to apply Destinations to an Estimate or Order, including how to assign multiple Destinations to separate Line Items when products are delivered in different ways.
For more information on Destinations, please see Destination Types and Options.
Table of Contents
Adding Destinations to an Order or Estimate
Destinations can be added directly to an Order, and each Order can include one or more Destinations as needed. Destinations function the same way on Orders, Estimates, and Credit Memos; this article uses Orders as the example.
Note: Destinations can not be added on a Closed Order.
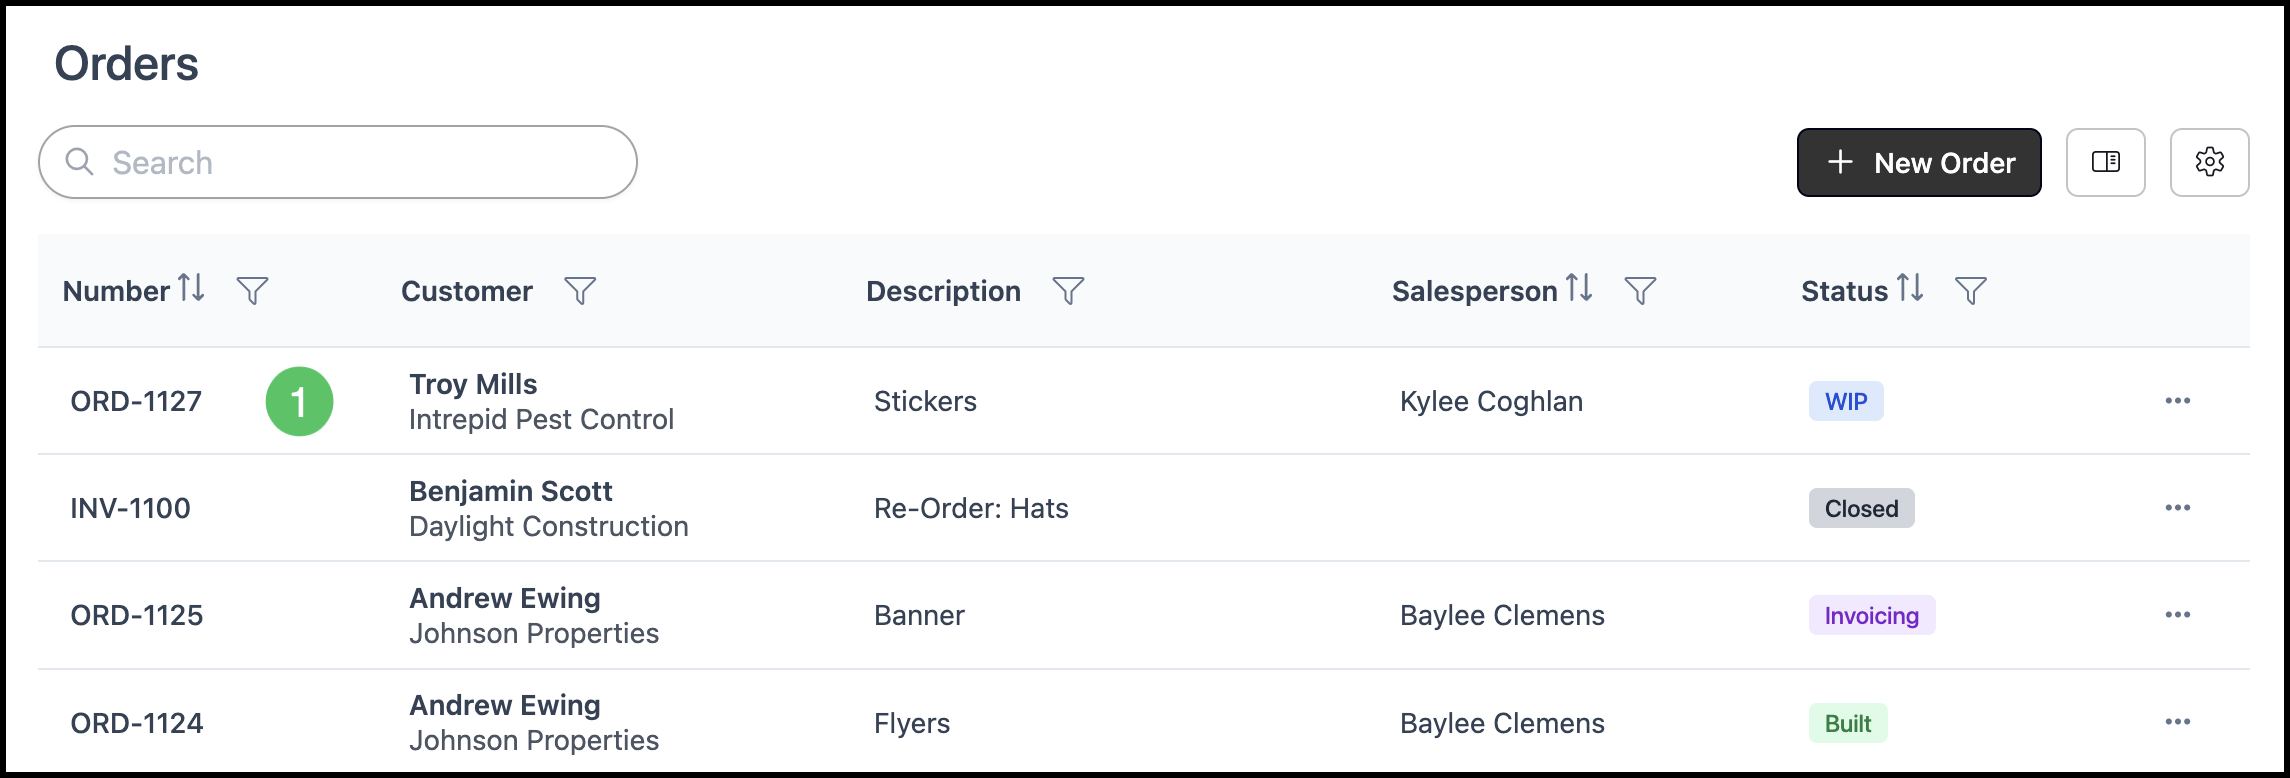
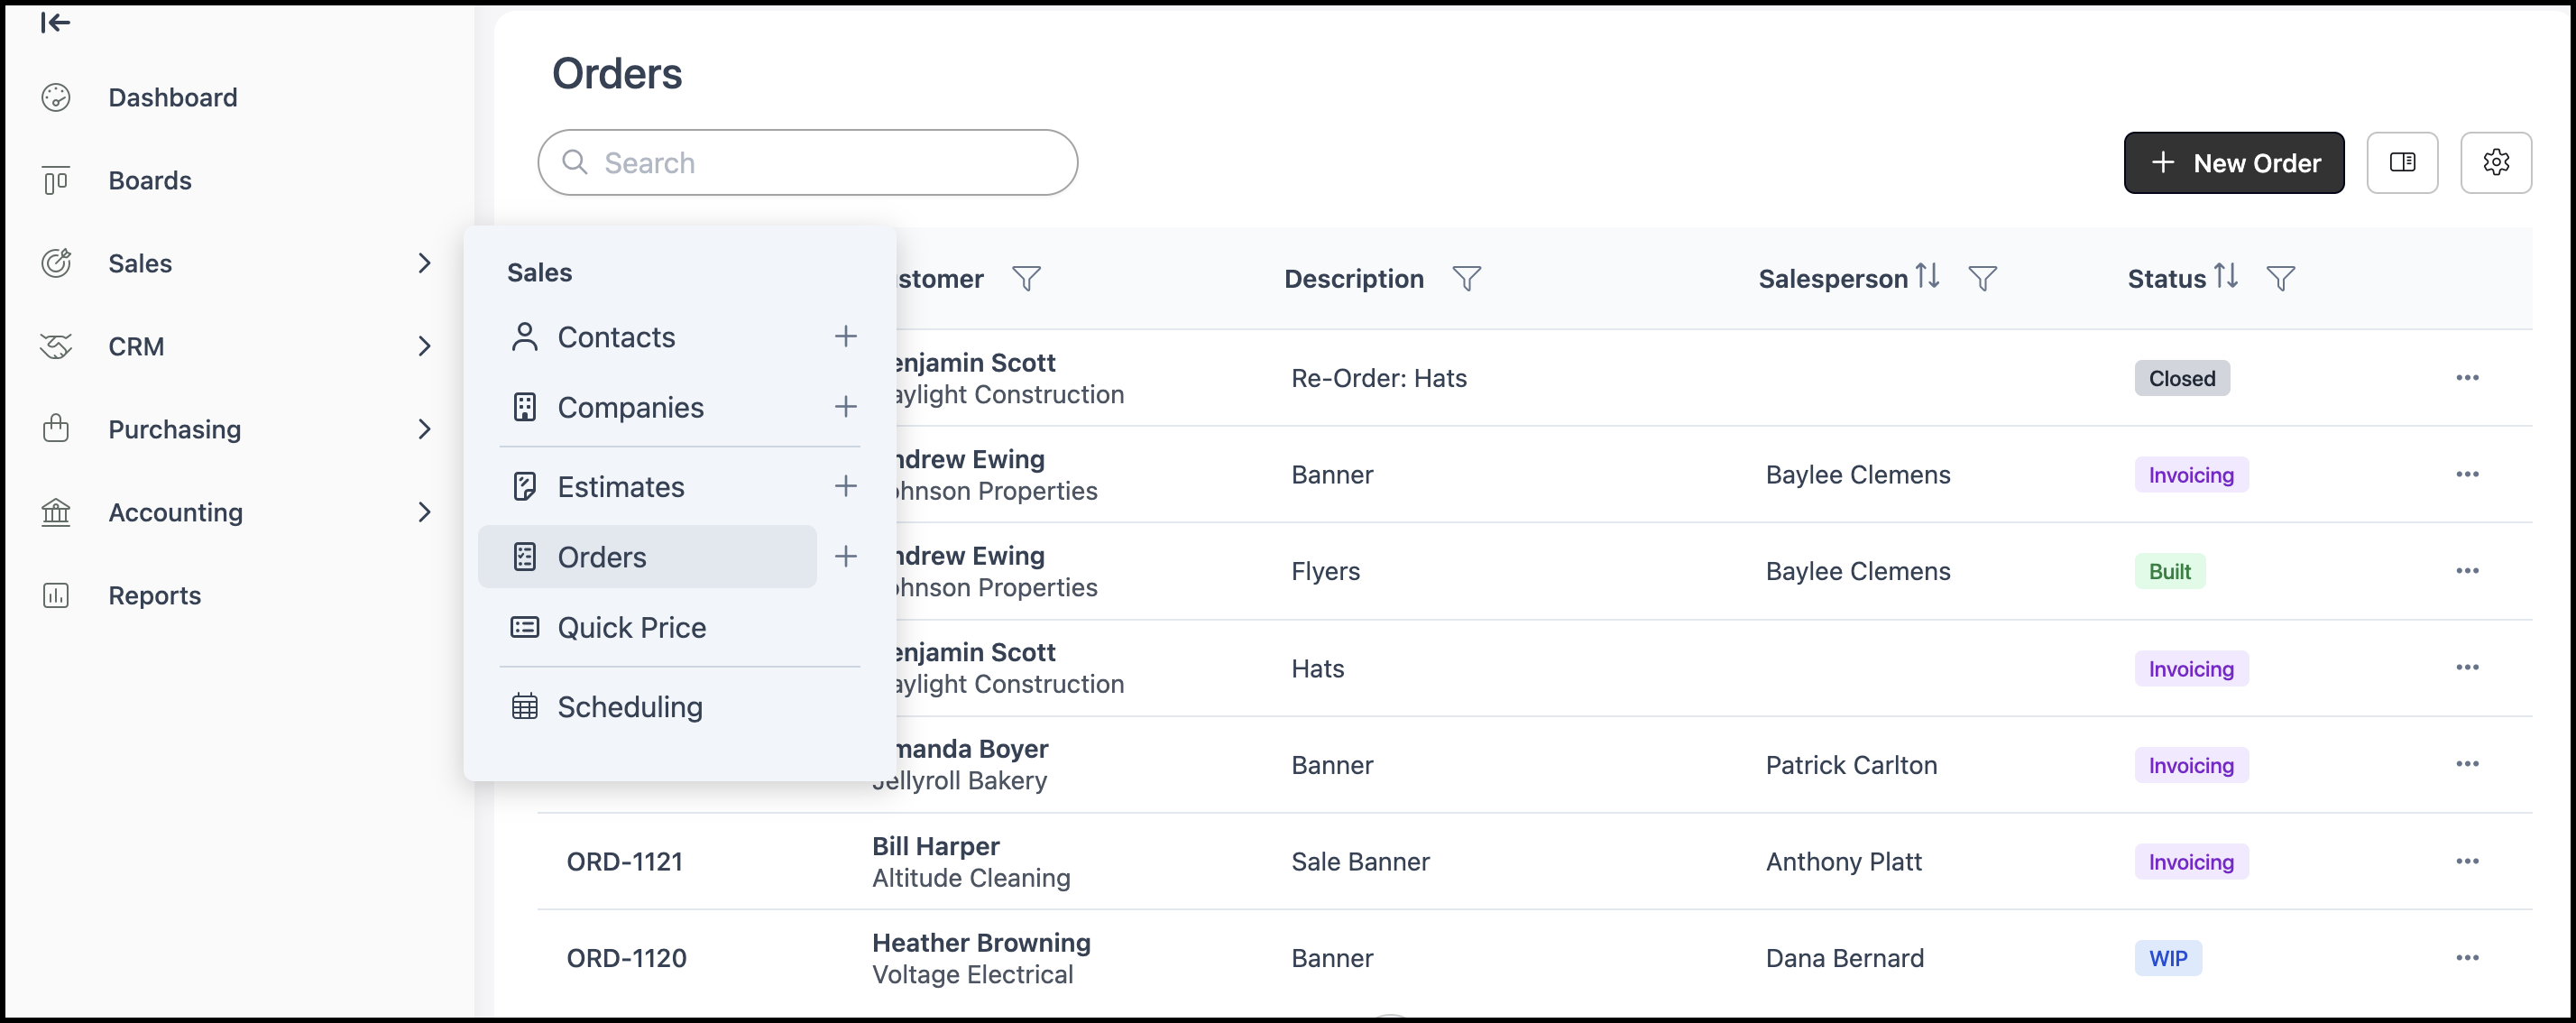
Navigate to Sales / Orders.

1. Open the appropriate Order.
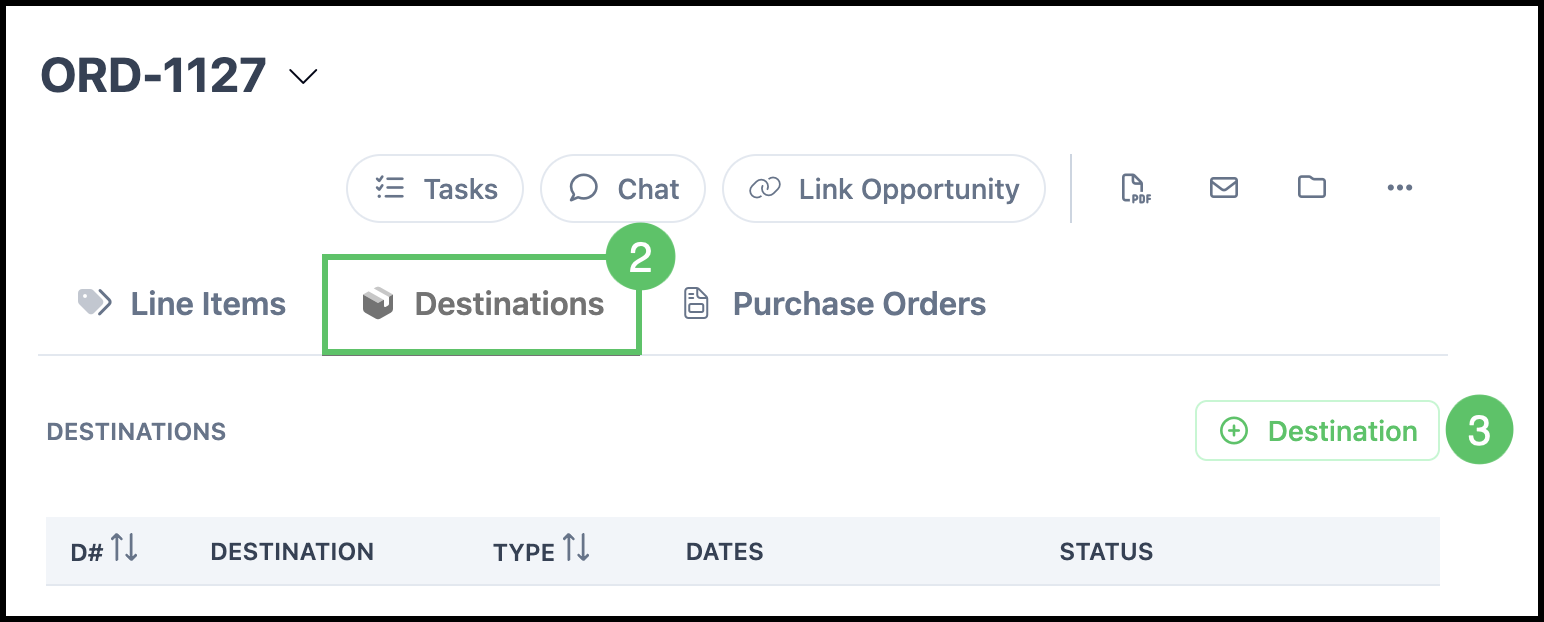
2. Select the Destinations tab.
3. Click Add Destination.
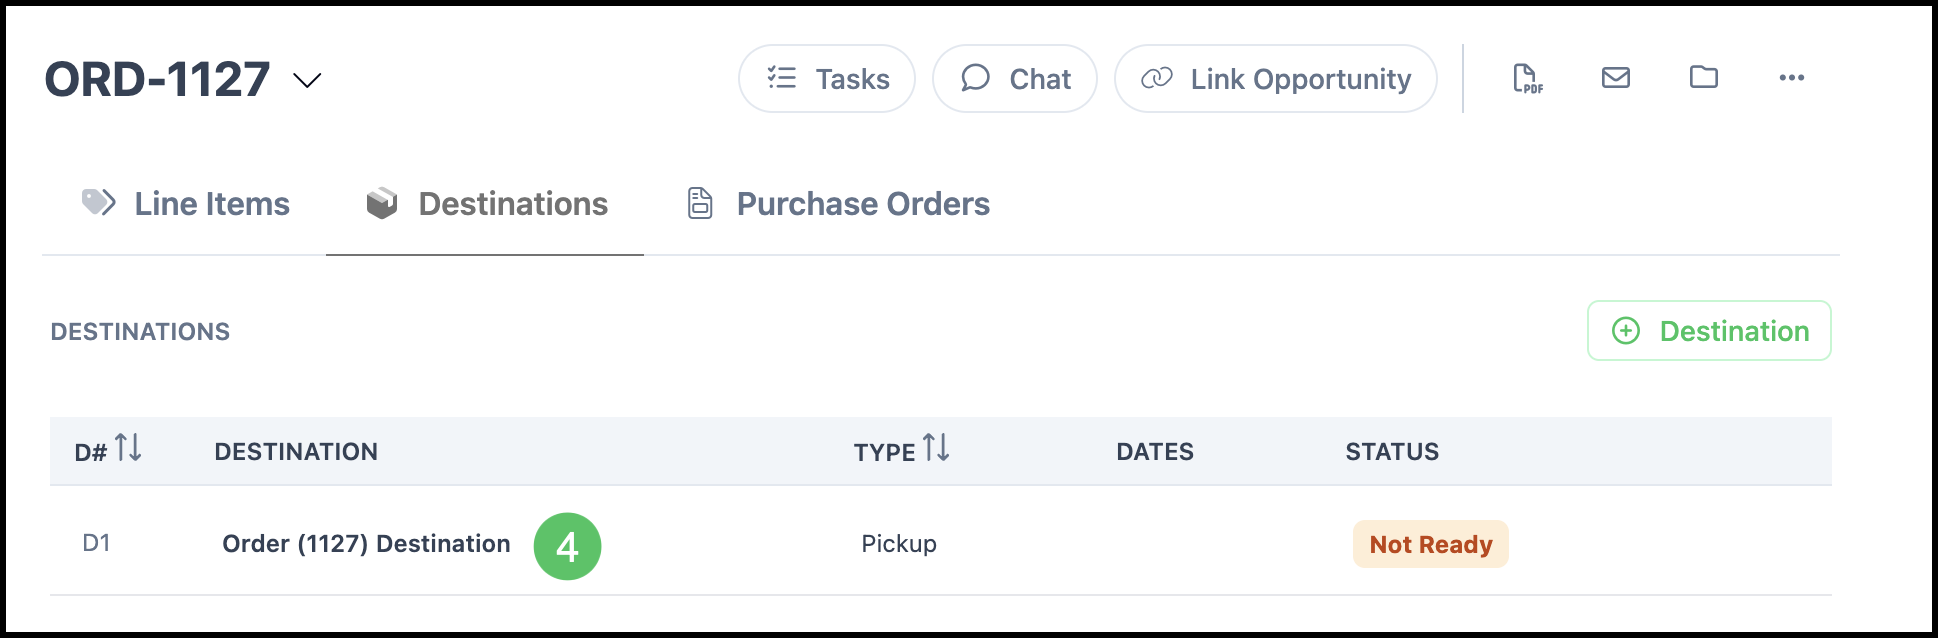
4. Click on the new Destination.
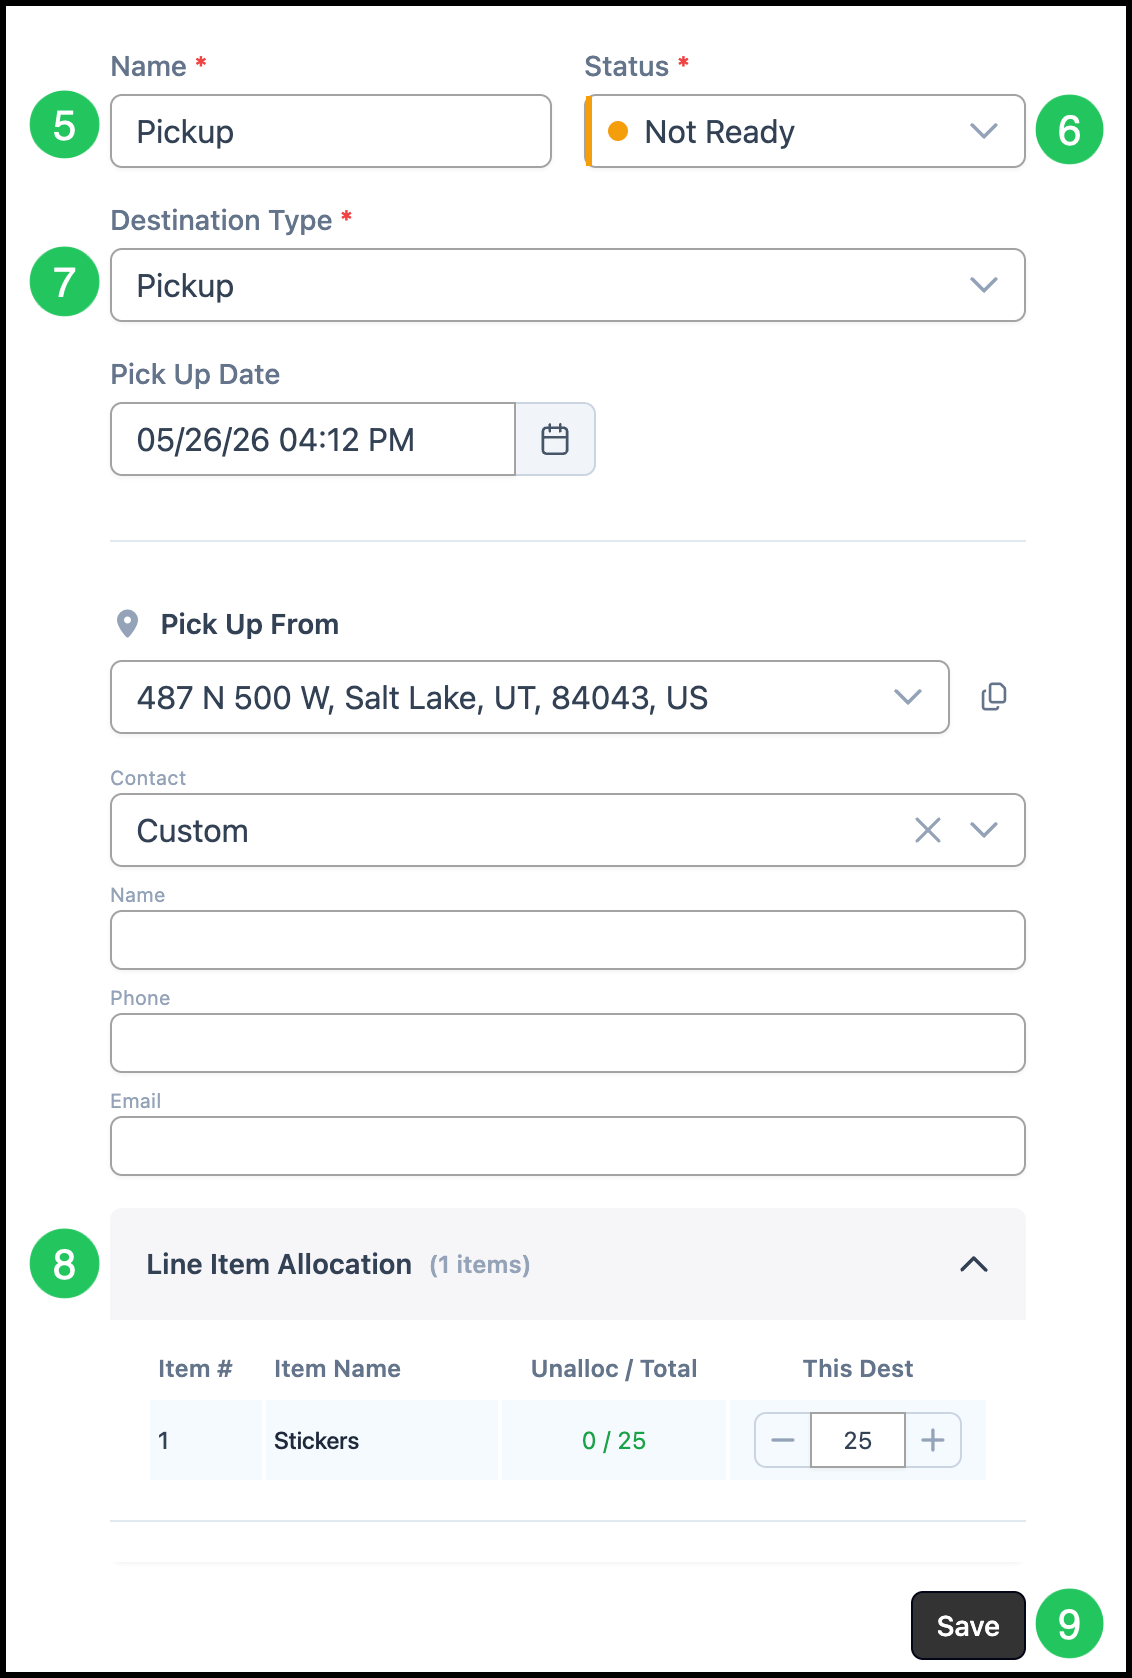
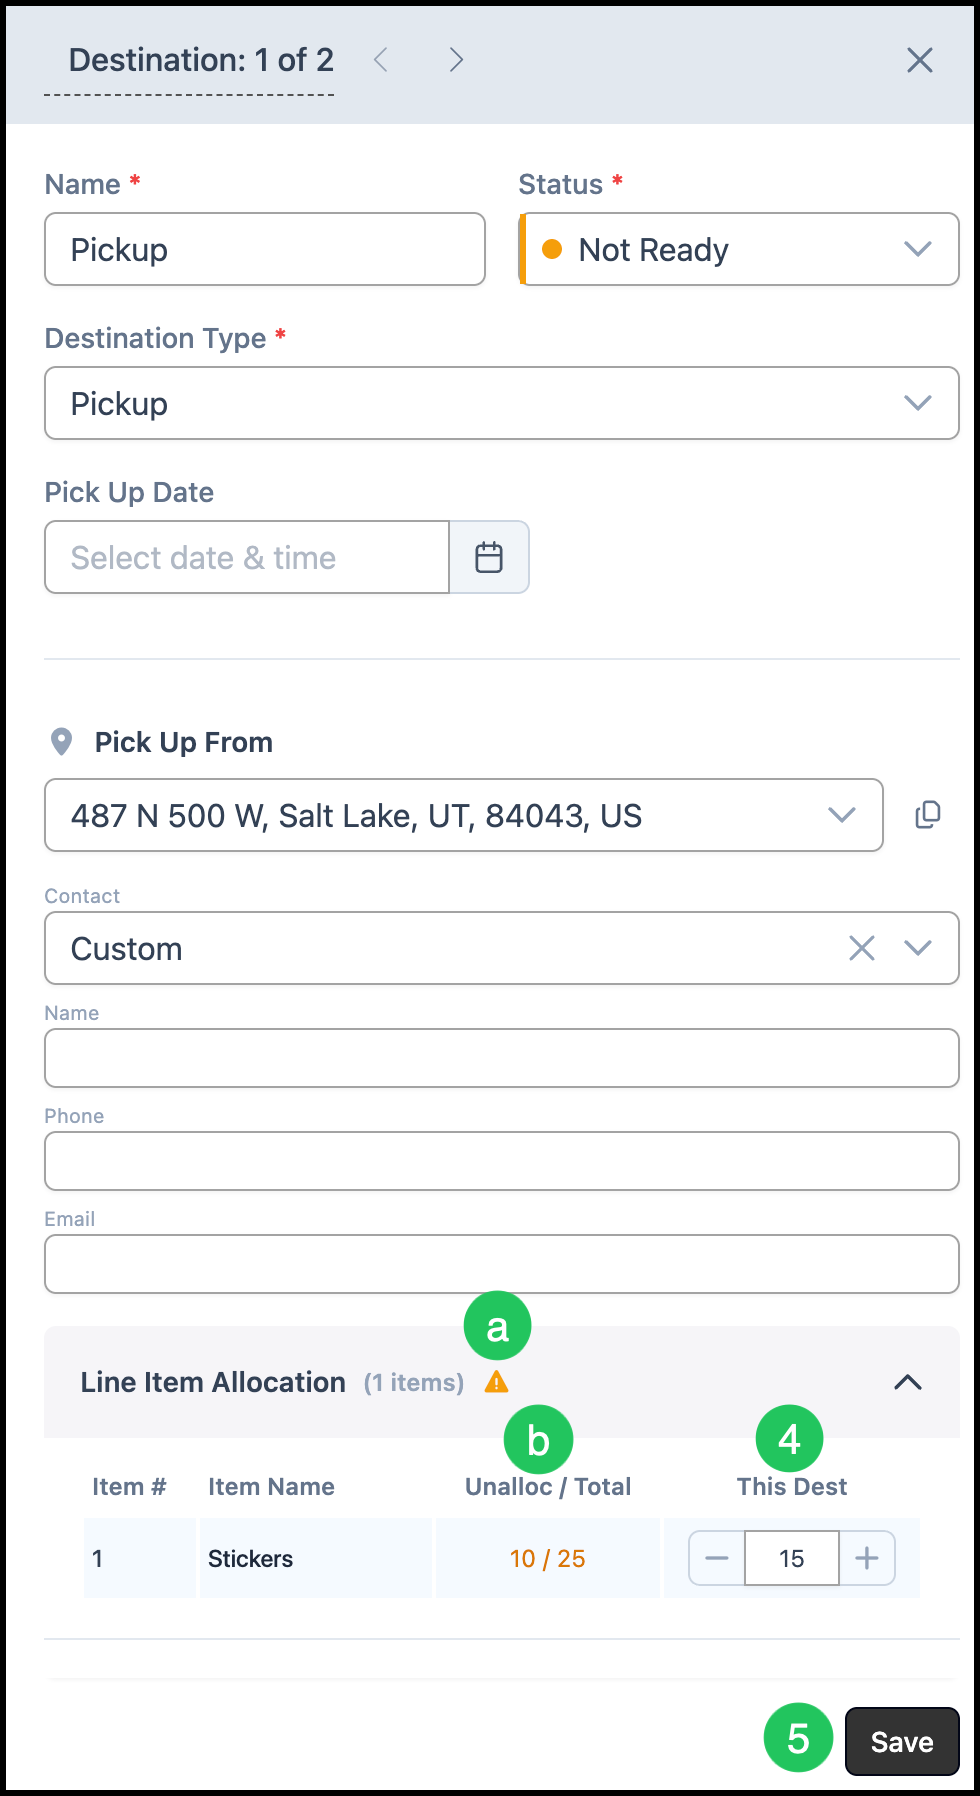
5. Fill in a Name for the Destination.
6. Select a Status.
7. Select a Destination Type (for example pickup, delivery, or a carrier-specific type when enabled).
Note: The remainder of the fields will vary depending on the Type selected. Fill in the fields as desired.
8. Allocate the items as needed to this Destination.
Note: When there is only one Destination, the number allocated should be the same as the Total. Splitting quantities to different Destinations will be covered below.
9. Click Save.
Allocating Quantities to Different Destinations
When an Order or Estimate has more than one Destination, you can split line quantities so each unit follows the correct fulfillment path.
Navigate to Sales / Orders.
1. Open the appropriate Order.

2. Select the Destinations tab.
3. Select the Destination you would like to allocate to first.

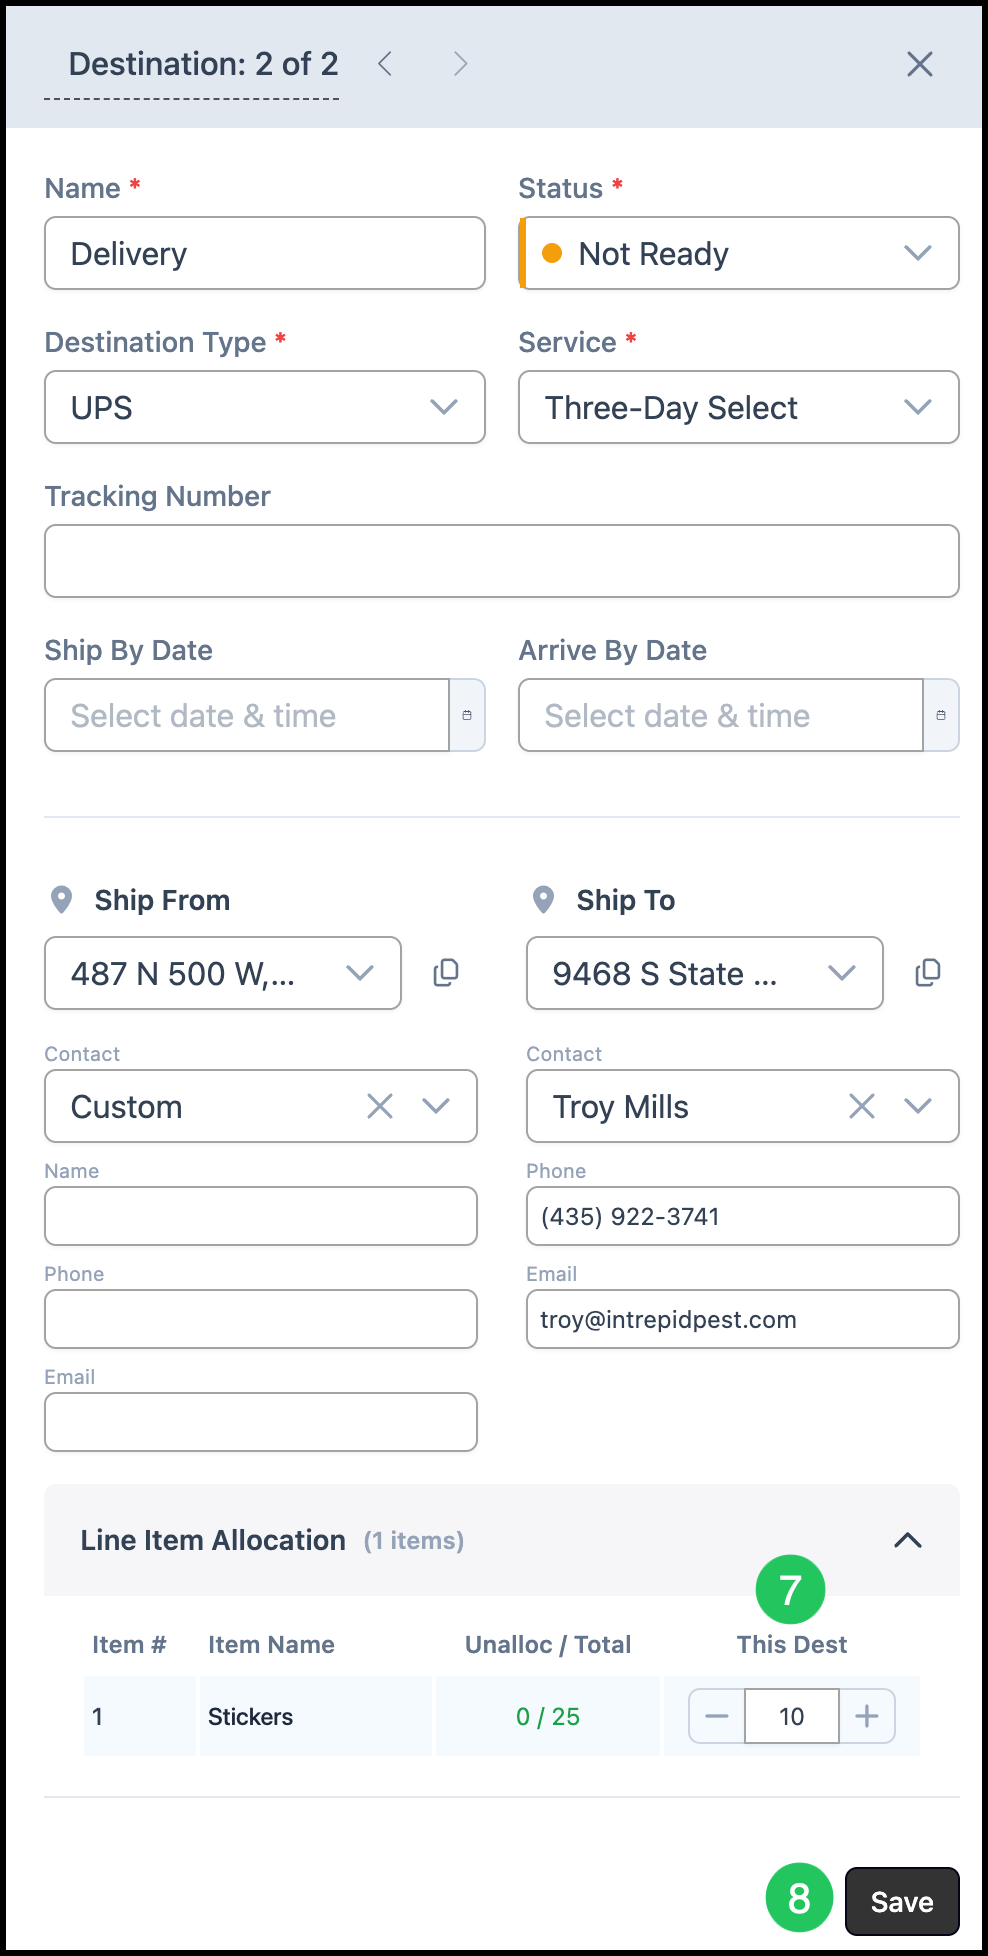
4. Enter the quantities that should ship or deliver on this Destination.
a. This warning indicates there are some items yet to be allocated.
b. The Unallocated / Total count updates as you work.
5. Click Save.
6. Select another Destination.
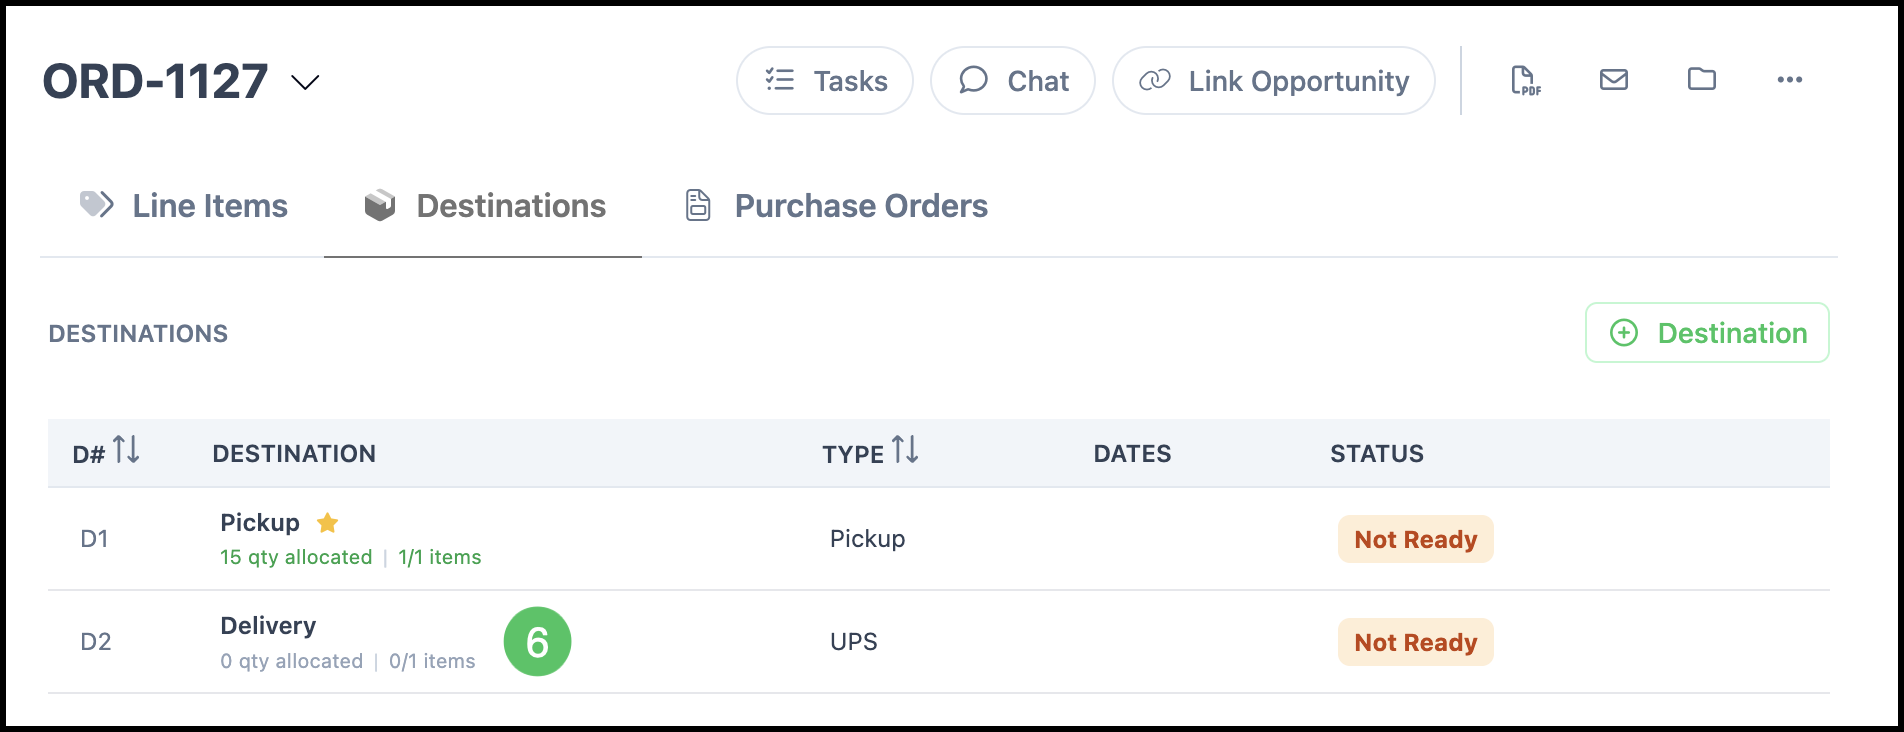
7. Allocate the remaining quantity.
8. Click Save.
Note: When you lower a line quantity, reduce the quantity allocated to Destinations first, then adjust the Line Item so totals stay in sync.
Note: Turning on Auto allocate unused quantities in Destination Options can assign remaining units to your default Destination automatically when that matches your policy.