
The Fiserv US integration connects CoreBridge to Fiserv for integrated credit card and ACH (eCheck) payments on orders, invoices, and statements for US businesses.
Note: CoreBridge can help with integration setup and how the integration works within the system. Questions related to Fiserv merchant accounts, rates, or banking should be directed to Fiserv or your payment provider.
Table of Contents
- Before You Begin
- Benefits of Integrating with Fiserv US
- How to Integrate CoreBridge with Fiserv US
- Configure Fiserv US
- Enable Fiserv US in Payment Methods
- Related Articles
Before You Begin
Fiserv US is available in the Integrations Marketplace for US CoreBridge businesses. Your business must have the Fiserv US integration enabled before the card appears or can be installed.
You need access to Settings and permission to install and configure integrations. You also need an active Fiserv merchant ID before you can connect the integration.
Benefits of Integrating with Fiserv US
Connecting Fiserv US lets your team accept integrated card and ACH payments without leaving CoreBridge.
- Integrated card capture. Apply payments on orders and invoices using Fiserv-hosted card entry.
- ACH (eCheck) support. Accept bank payments when ACH is enabled for your merchant account.
- Location flexibility. Connect one Fiserv account for all locations, or separate accounts per location.
How to Integrate CoreBridge with Fiserv US
This section explains how to install the Fiserv US integration from the Integrations Marketplace.
Navigate to Settings / My Business / Integrations Marketplace.
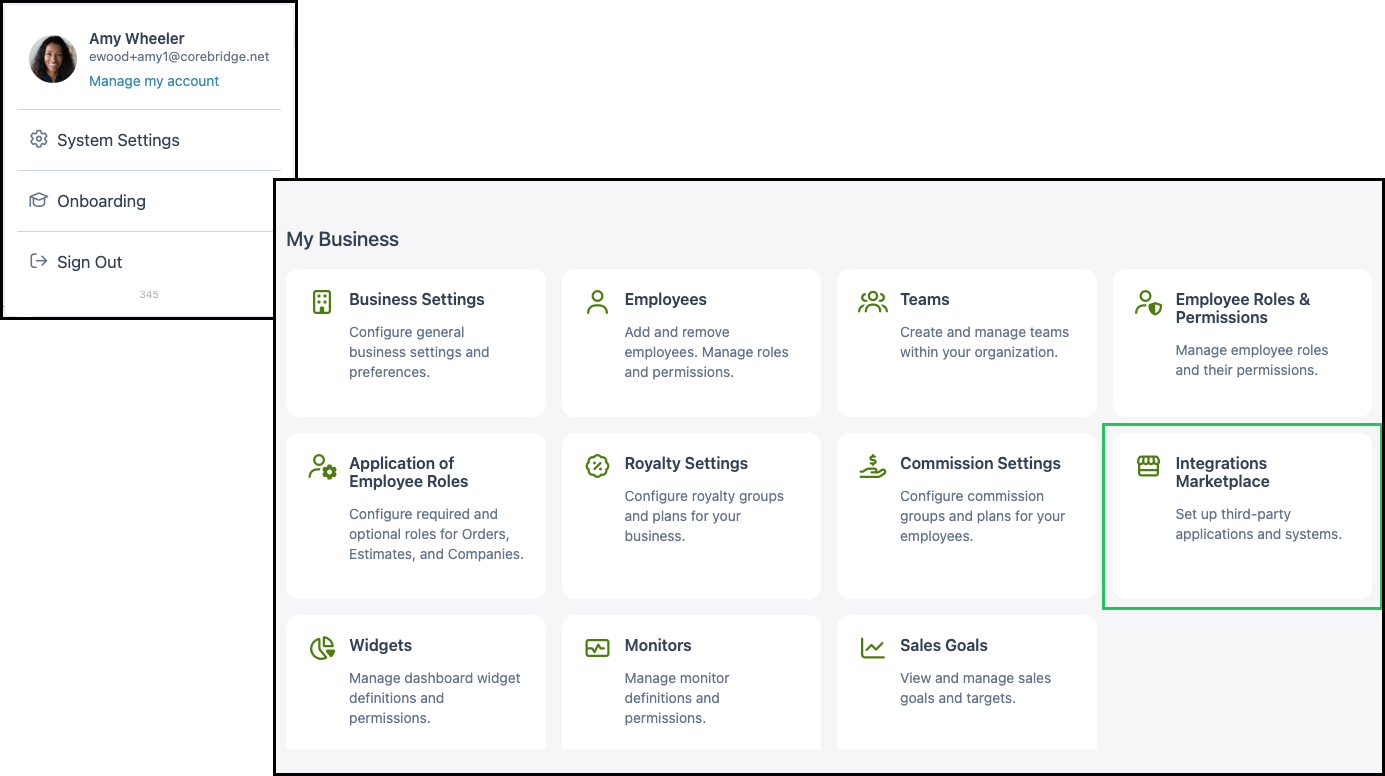
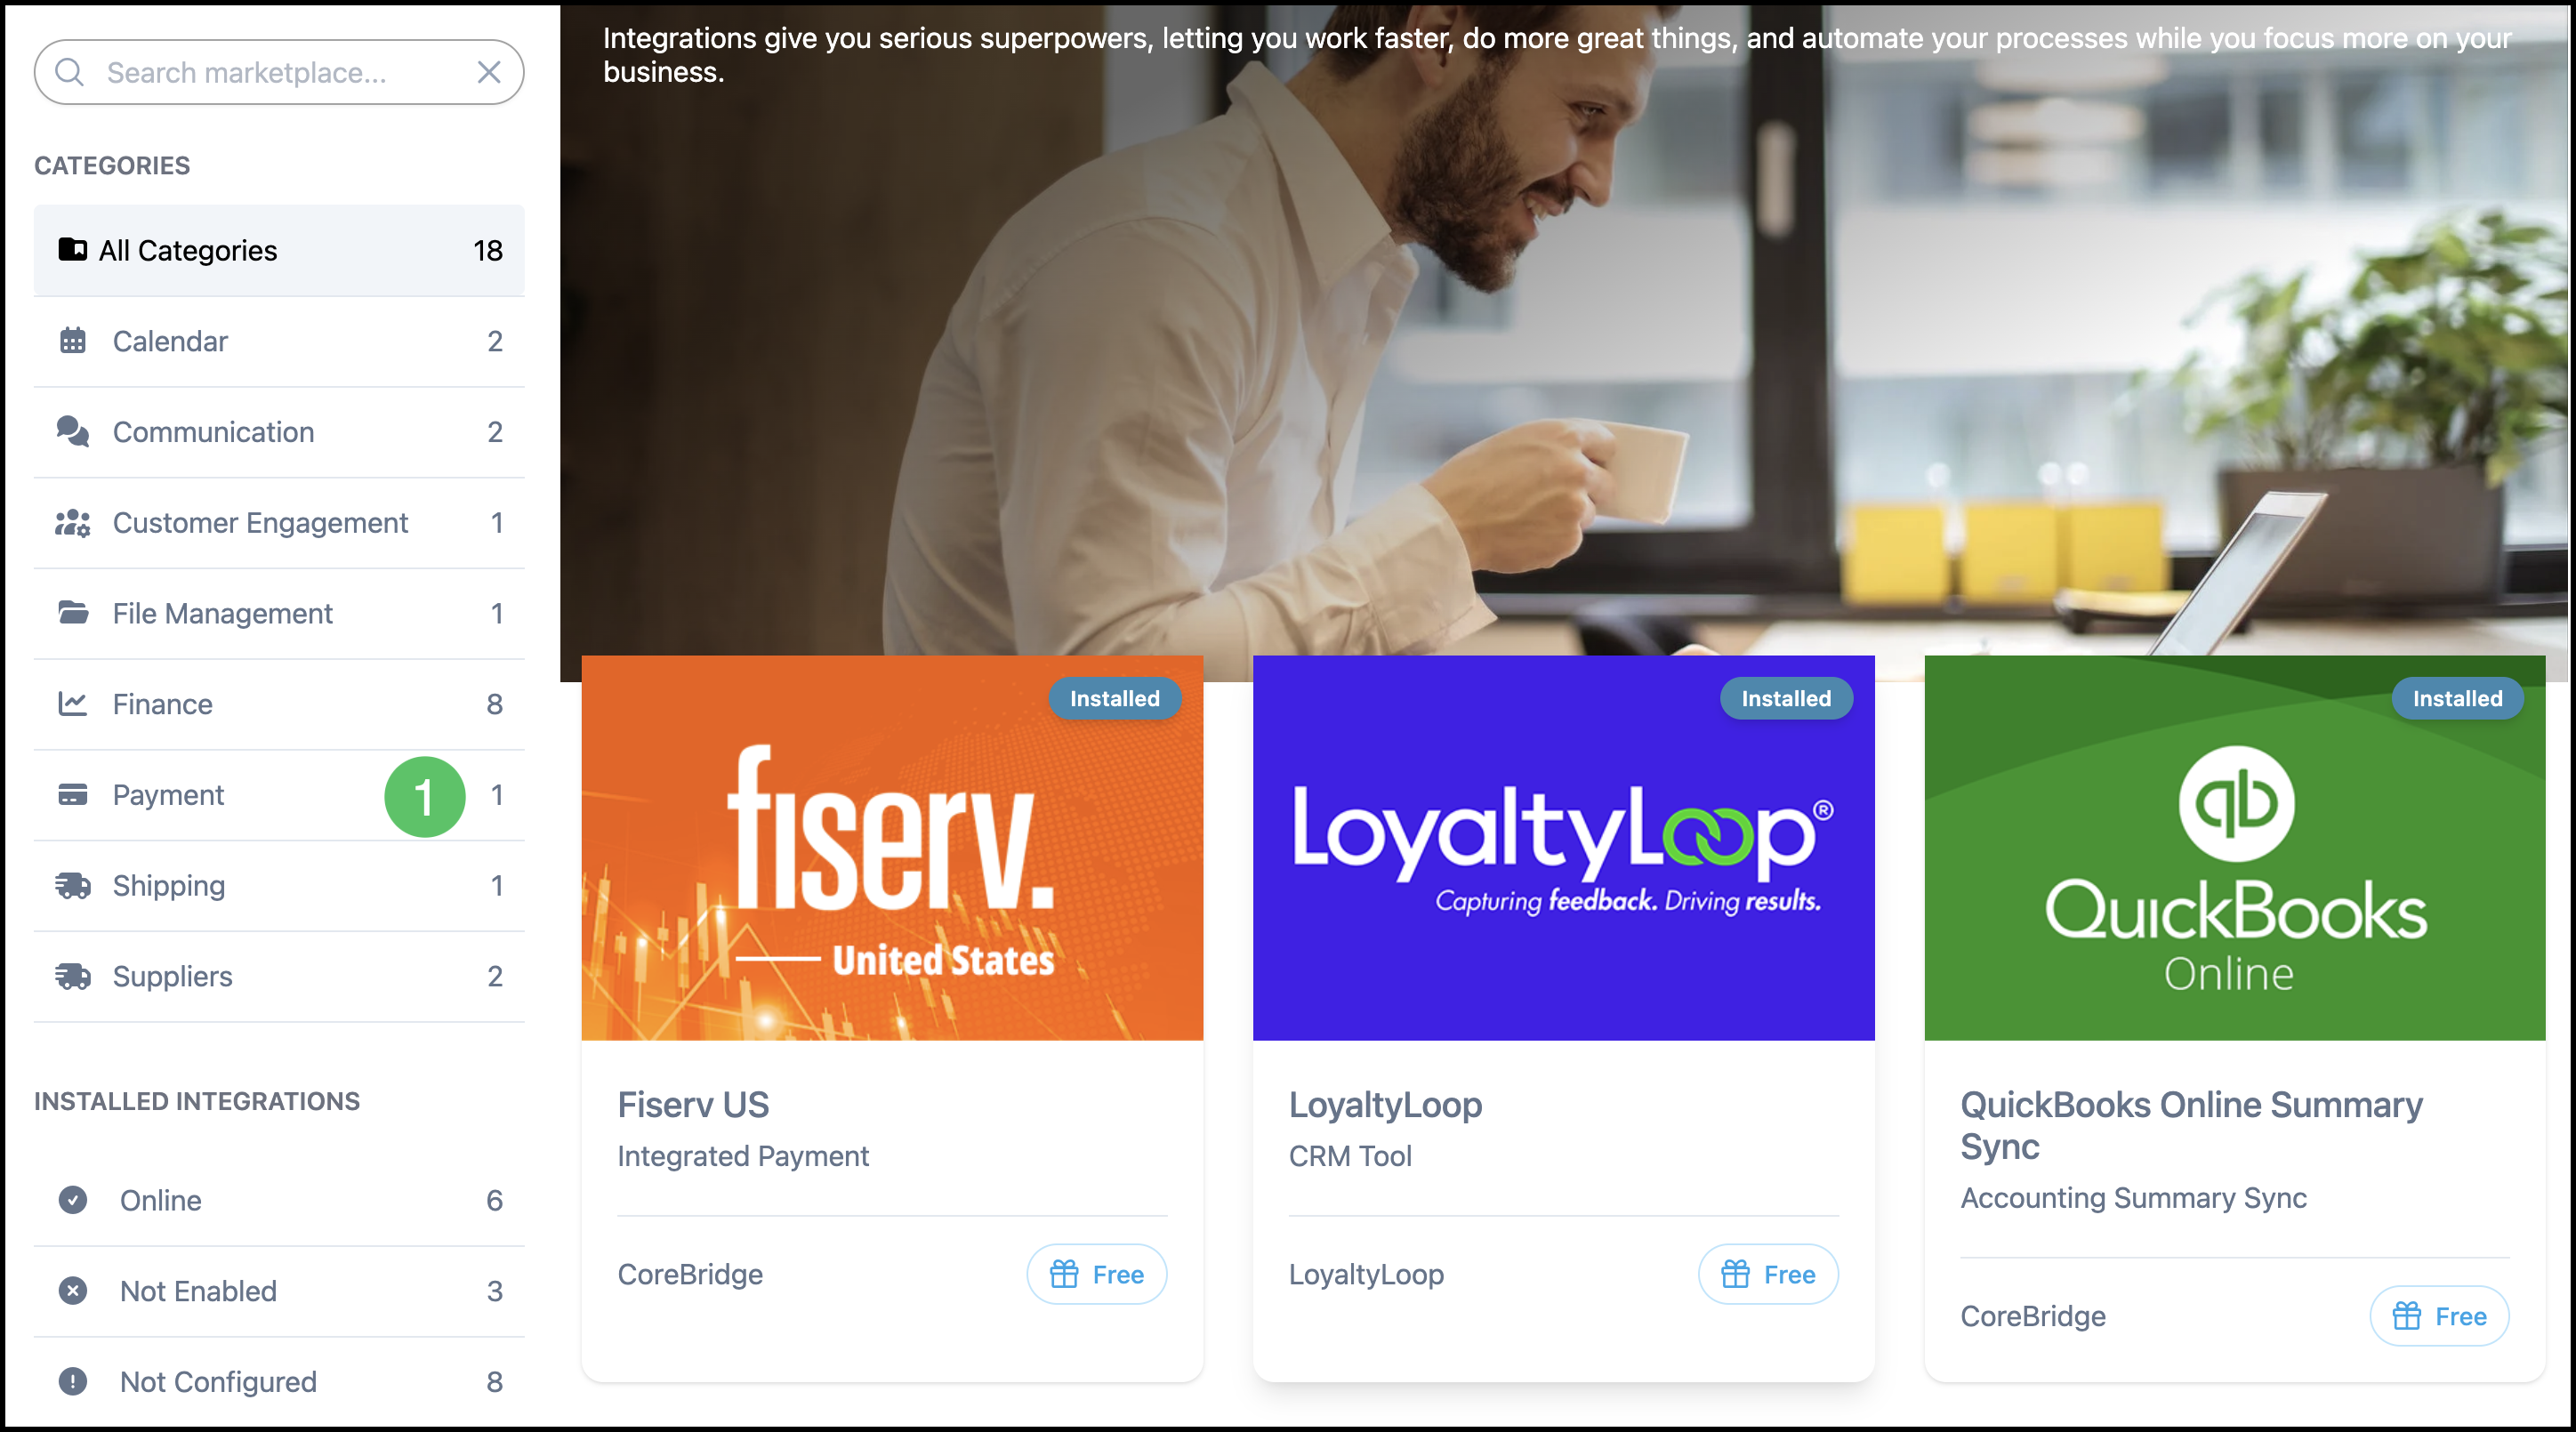
1. Click the Payment category, or type Fiserv US in Search marketplace.
Note: You can also find Fiserv US using Search marketplace or by browsing All Categories.
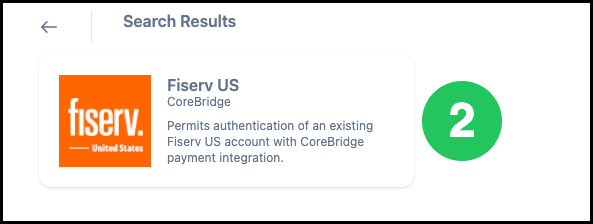
2. Click the Fiserv US card.
3. Click Install.
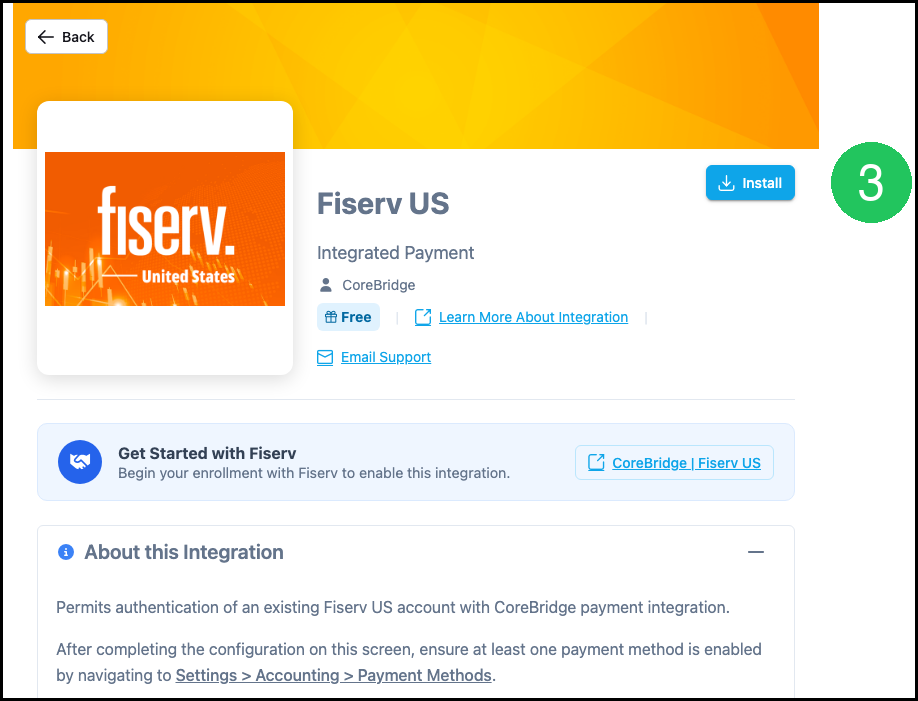
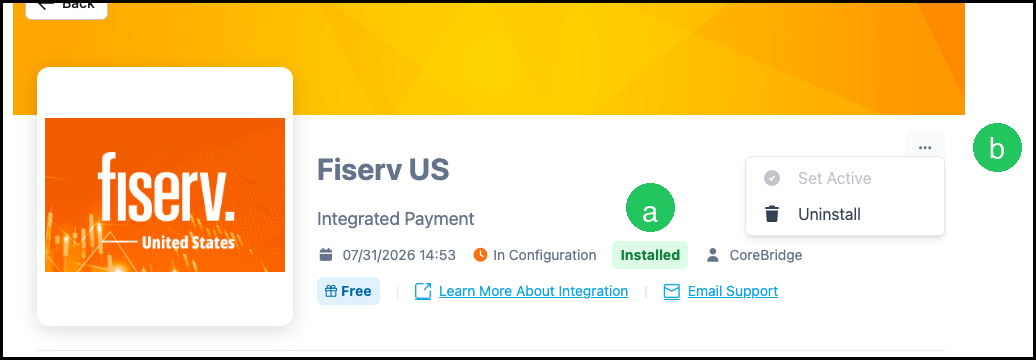
a. After installation, the integration detail screen shows Installed when setup is complete.
b. The More Actions menu includes options such as Set Active, Set Inactive, or Uninstall, depending on the integration state.
Configure Fiserv US
After installation, connect your Fiserv merchant account on the integration detail screen.
1. Choose whether All Locations connect to a single Fiserv US account, or Each Location connects to a separate account.
2. Enter your Merchant ID.
3. Click Connect and complete any Fiserv prompts in the browser window.
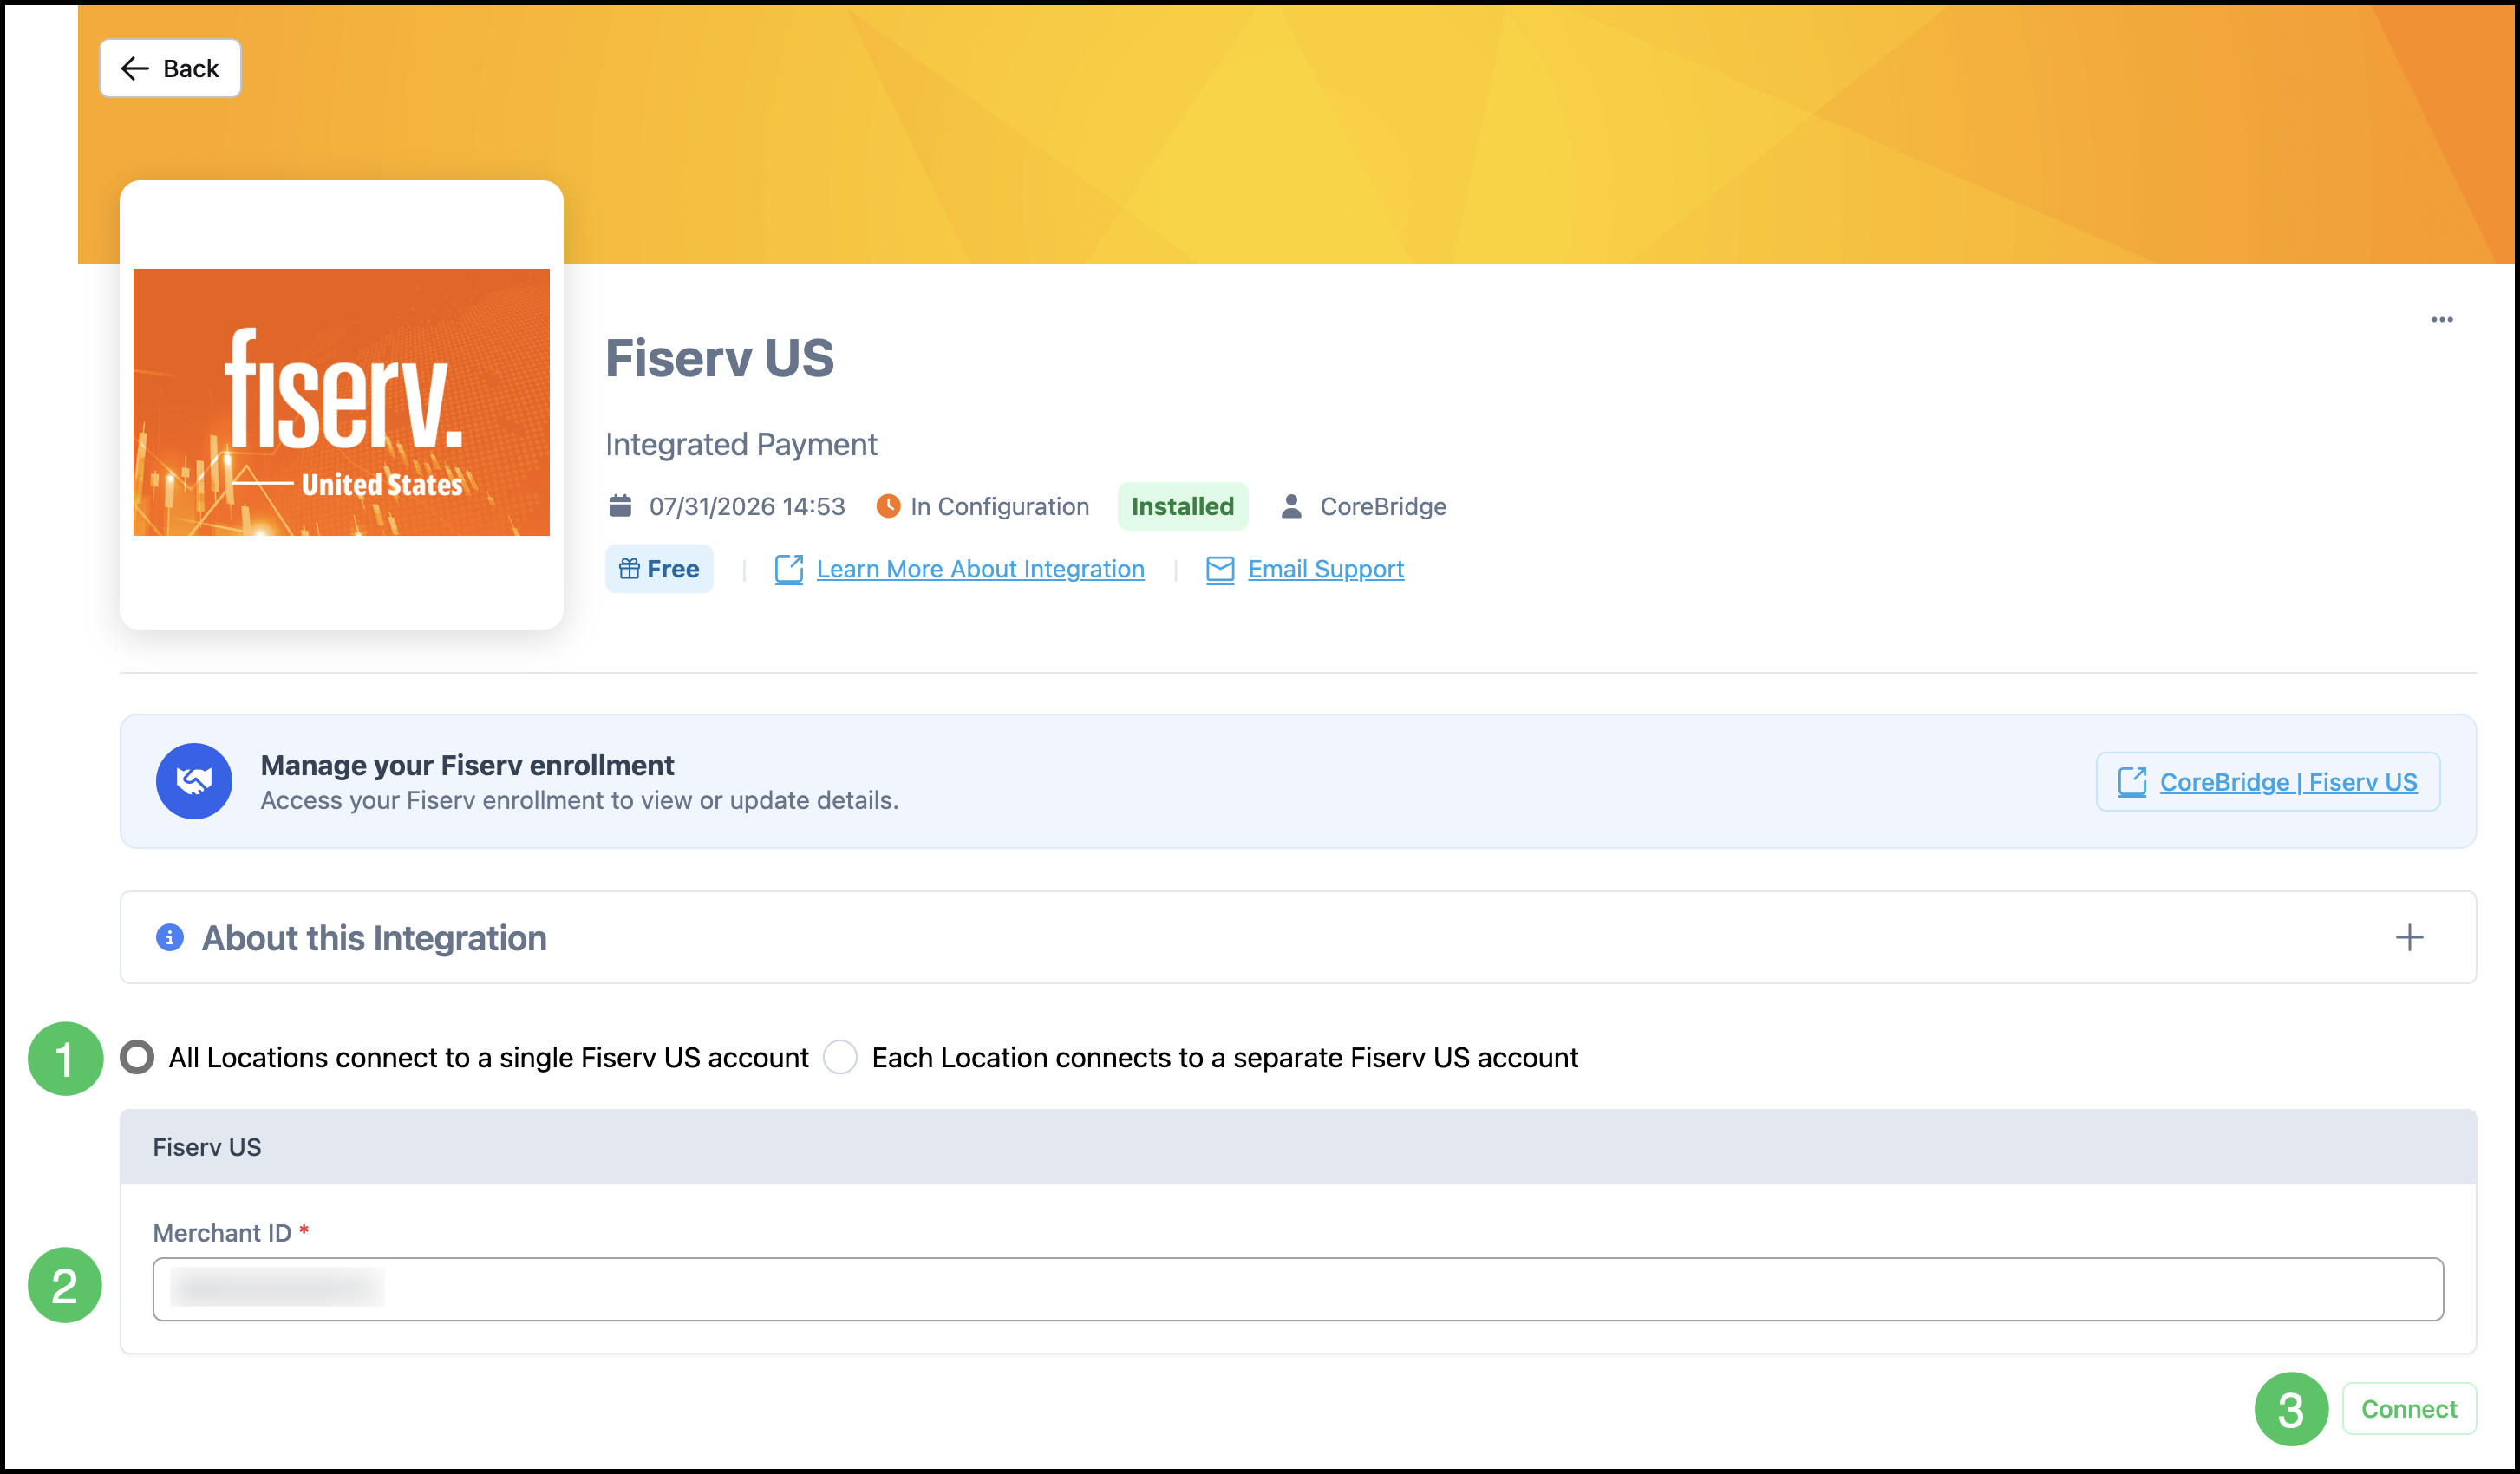
Note: After the merchant account is connected and the integration is active, additional settings such as deposit accounts and payment toggles may appear on this screen.
Enable Fiserv US in Payment Methods
After Fiserv US is installed and connected, enable the processor in Payment Methods so it is available when applying payments.
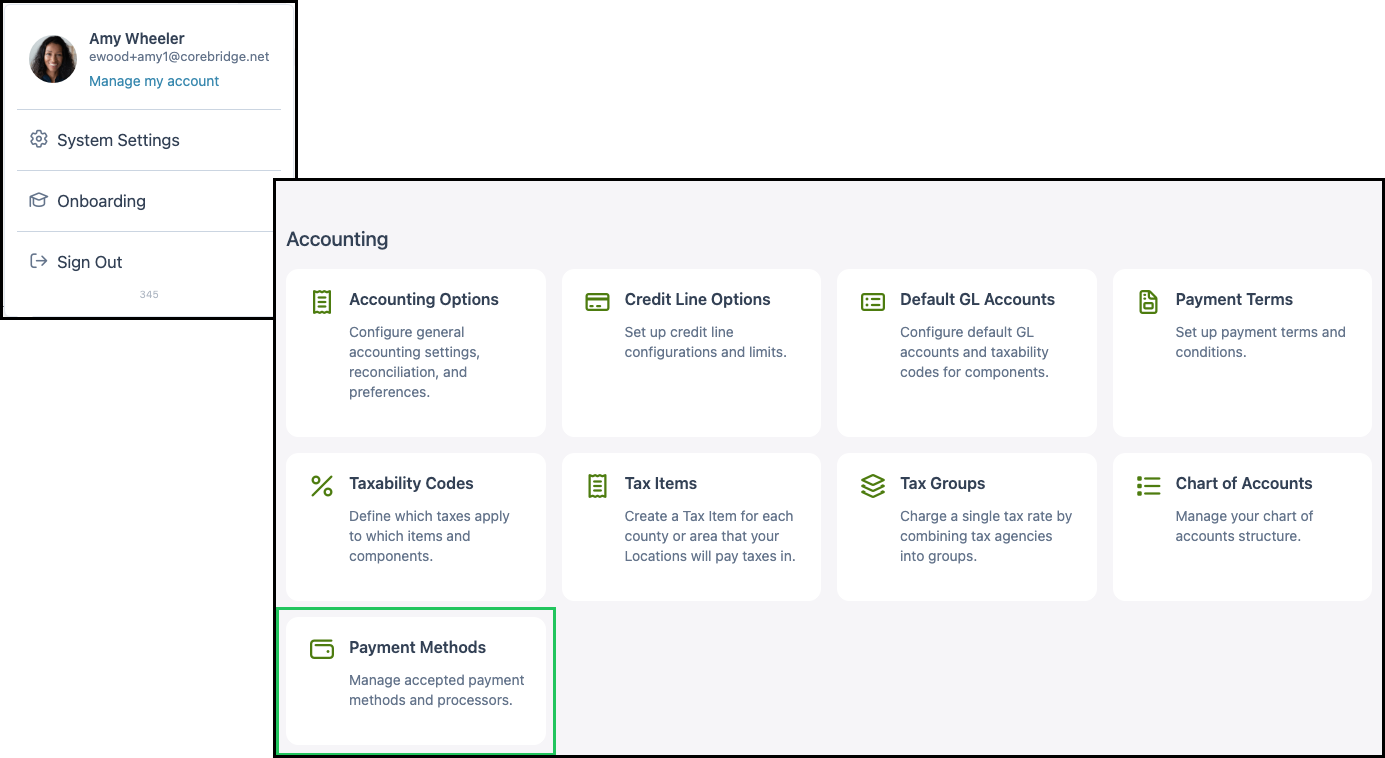
Navigate to System Settings / Accounting / Payment Methods.
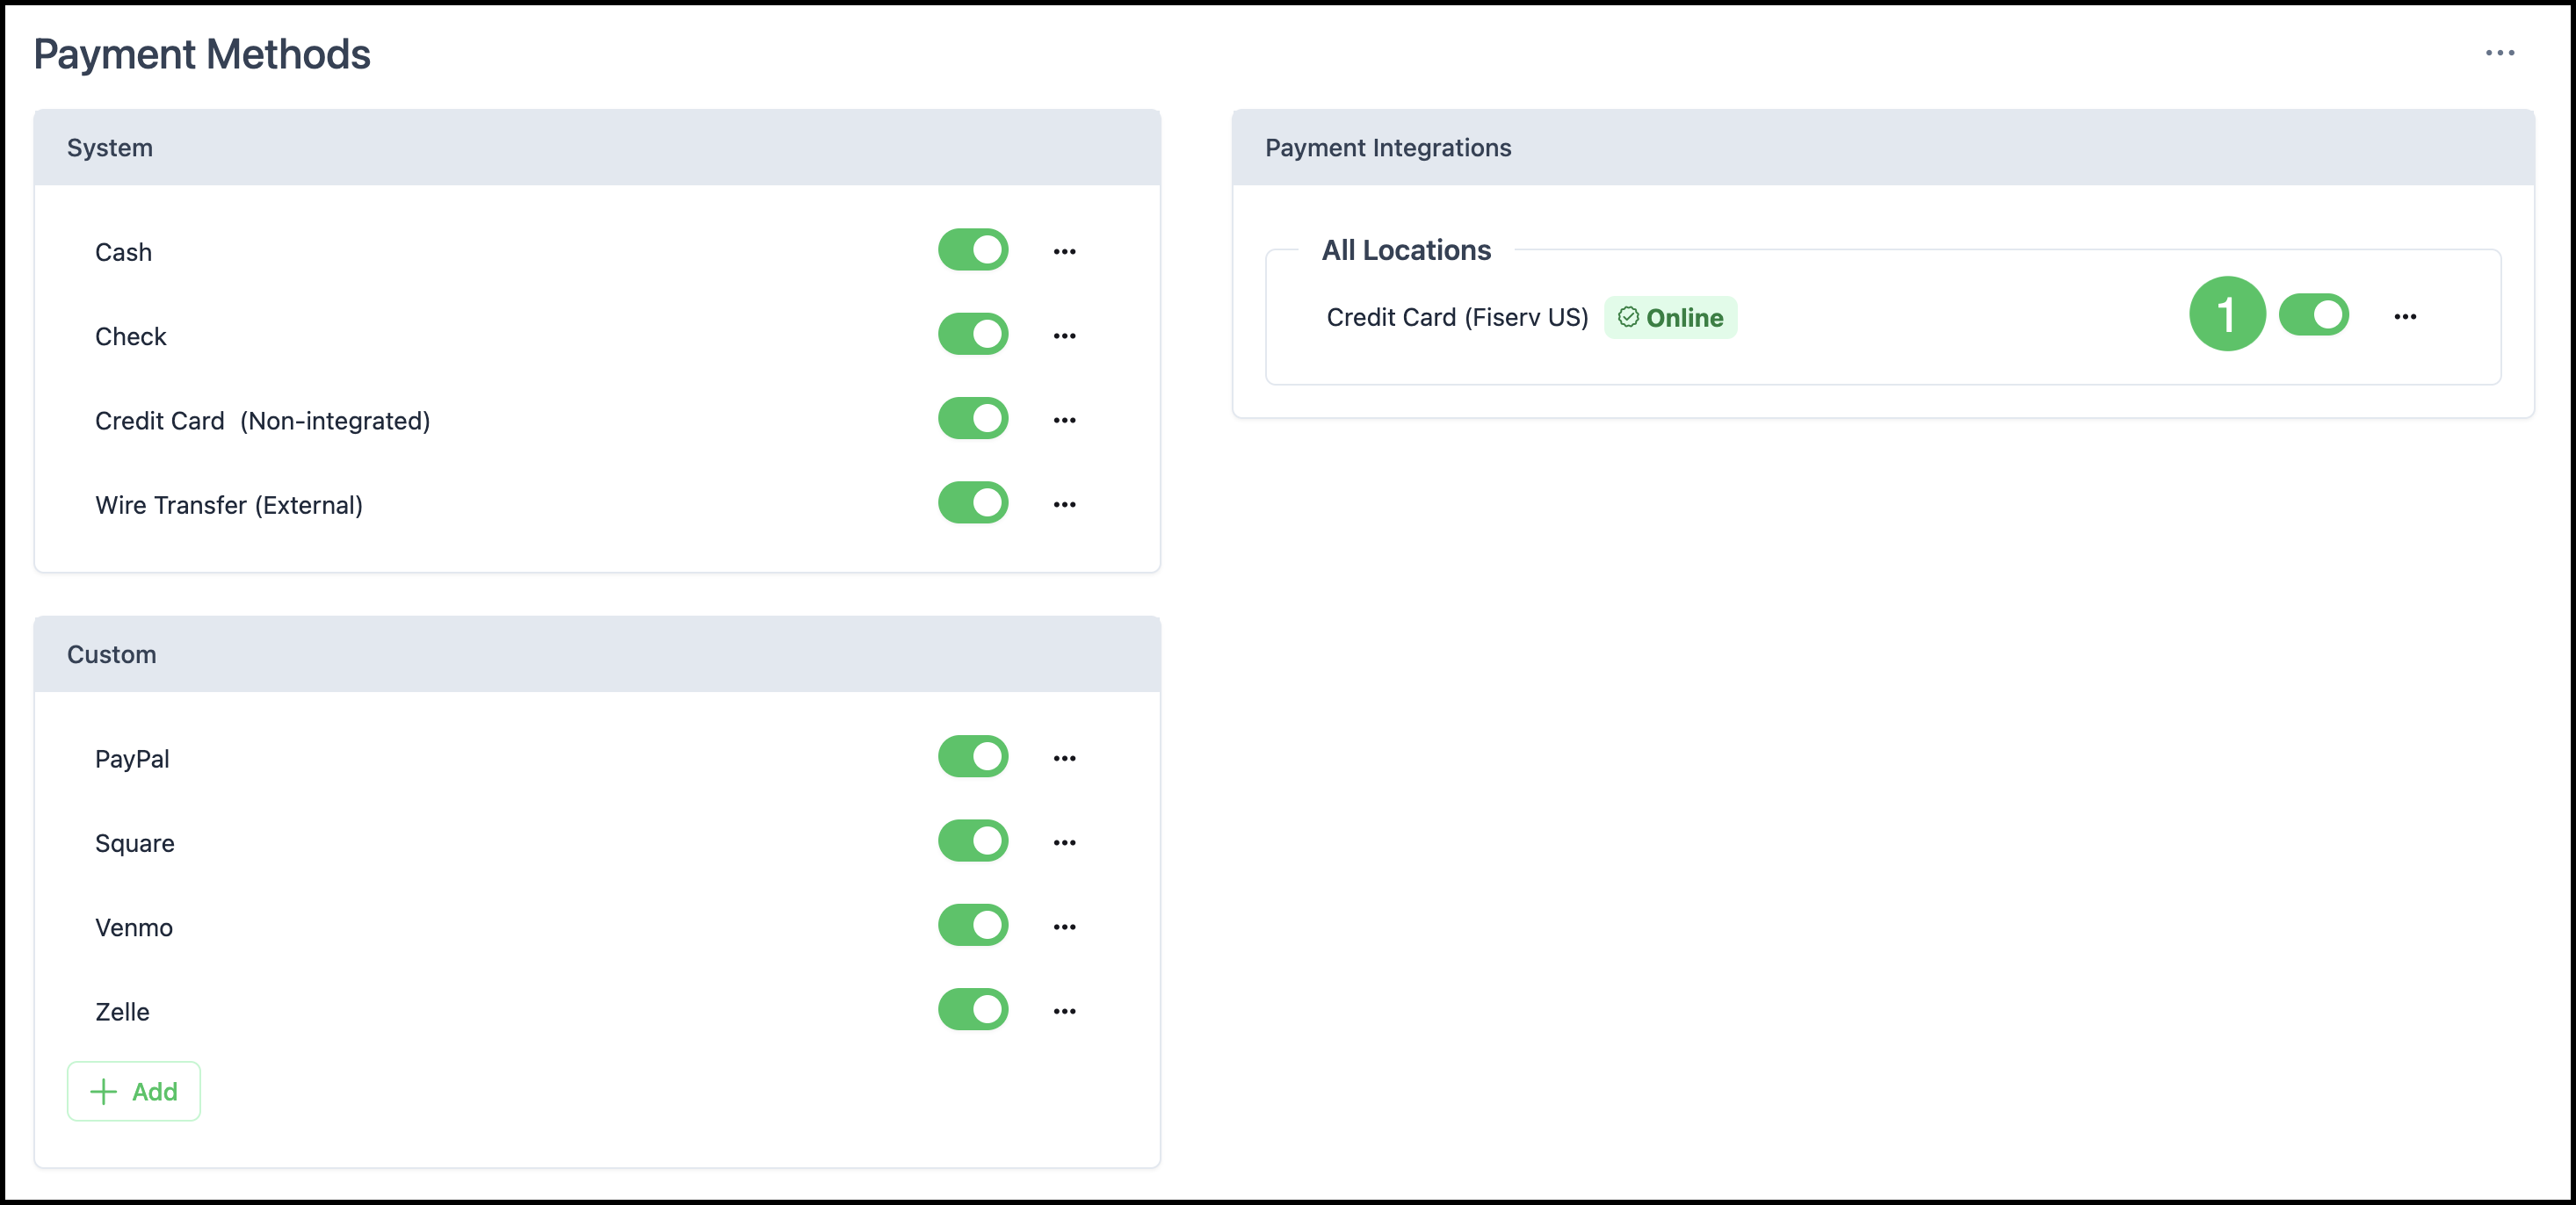
1. In the Payment Integrations section, confirm Credit Card (Fiserv US) appears when the integration is online.
2. If no integrations are online yet, complete Fiserv US configuration first—the section displays No Payment Integrations are currently Online. until a connected integration is active.
Note: When Fiserv US is online, select Credit Card (Fiserv US) on the Apply Payment screen to process an integrated card payment. Integrated Apply Payment was not available on the preview tenant used for this article.
Related Articles
CoreBridge's Integrated Merchant Service Providers